fog light KIA Optima Hybrid 2014 3.G Owner's Manual
[x] Cancel search | Manufacturer: KIA, Model Year: 2014, Model line: Optima Hybrid, Model: KIA Optima Hybrid 2014 3.GPages: 474, PDF Size: 12.73 MB
Page 177 of 474
487
Features of your vehicle
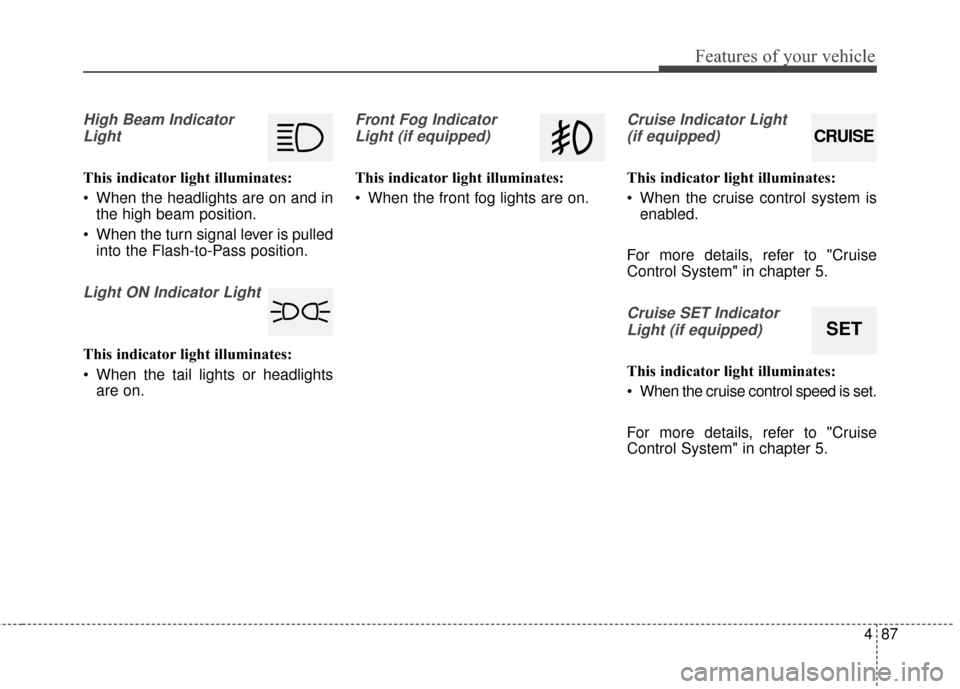
High Beam IndicatorLight
This indicator light illuminates:
When the headlights are on and in the high beam position.
When the turn signal lever is pulled into the Flash-to-Pass position.
Light ON Indicator Light
This indicator light illuminates:
When the tail lights or headlightsare on.
Front Fog Indicator
Light (if equipped)
This indicator light illuminates:
When the front fog lights are on.
Cruise Indicator Light (if equipped)
This indicator light illuminates:
When the cruise control system is enabled.
For more details, refer to "Cruise
Control System" in chapter 5.
Cruise SET Indicator Light (if equipped)
This indicator light illuminates:
When the cruise control speed is set.
For more details, refer to "Cruise
Control System" in chapter 5.
CRUISE
SET
Page 184 of 474
Features of your vehicle
94
4
Daytime running light
Daytime Running Lights (DRL) can
make it easier for others to see the
front of your vehicle during the day.
DRL can be helpful in many different
driving conditions, and it is especial-
ly helpful after dawn and before sun-
set.
The DRL system turns OFF when:
1. The headlights are ON.
2. The parking brake is applied.
3. Engine stops.
4. The front fog light is ON.
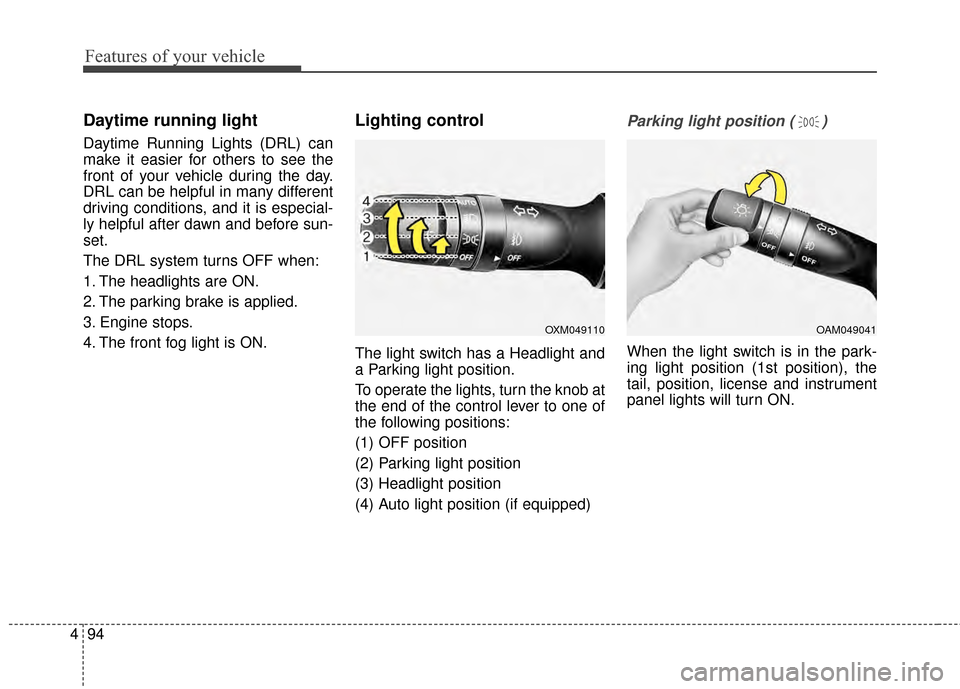
Lighting control
The light switch has a Headlight and
a Parking light position.
To operate the lights, turn the knob at
the end of the control lever to one of
the following positions:
(1) OFF position
(2) Parking light position
(3) Headlight position
(4) Auto light position (if equipped)
Parking light position ( )
When the light switch is in the park-
ing light position (1st position), the
tail, position, license and instrument
panel lights will turn ON.
OAM049041OXM049110
Page 188 of 474
Features of your vehicle
98
4
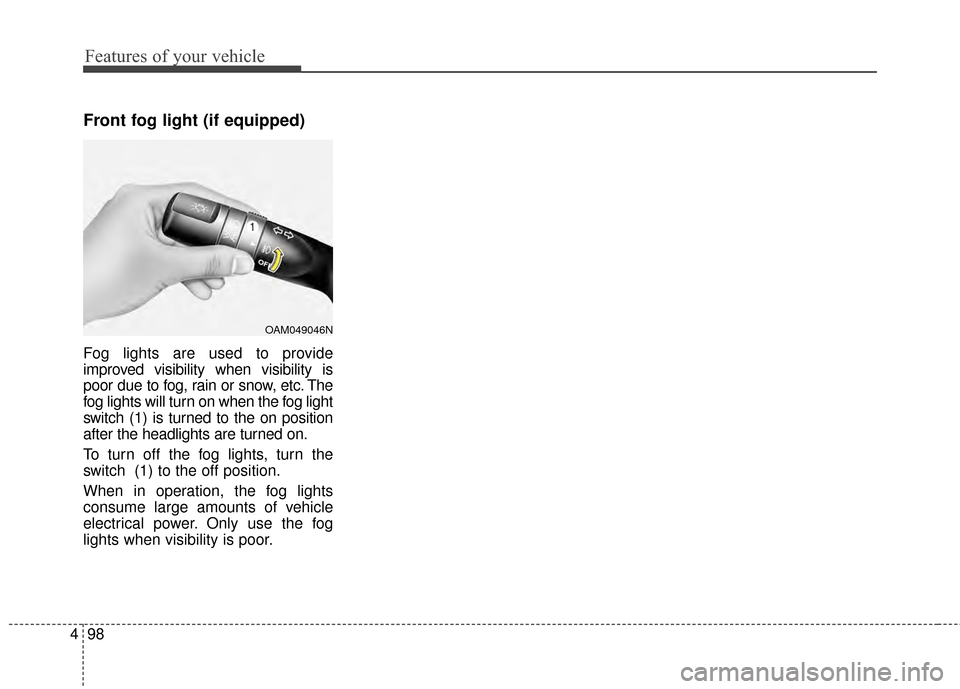
Front fog light (if equipped)
Fog lights are used to provide
improved visibility when visibility is
poor due to fog, rain or snow, etc. The
fog lights will turn on when the fog light
switch (1) is turned to the on position
after the headlights are turned on.
To turn off the fog lights, turn the
switch (1) to the off position.
When in operation, the fog lights
consume large amounts of vehicle
electrical power. Only use the fog
lights when visibility is poor.
OAM049046N
Page 207 of 474
4117
Features of your vehicle
Air conditioning system operation tips
If the vehicle has been parked indirect sunlight during hot weather,
open the windows for a short time
to let the hot air inside the vehicle
escape.
To help reduce moisture inside of the windows on rainy or humid
days, decrease the humidity inside
the vehicle by operating the air
conditioning system.
During air conditioning system operation, you may occasionally
notice a slight change in engine
speed as the air conditioning com-
pressor cycles. This is a normal
system operation characteristic.
Use the air conditioning system every month only for a few minutes
to ensure maximum system per-
formance. When using the air conditioning
system, you may notice clear water
dripping (or even puddling) on the
ground under the passenger side
of the vehicle. This is a normal sys-
tem operation characteristic.
Operating the air conditioning sys- tem in the recirculated air position
provides maximum cooling, how-
ever, continual operation in this
mode may cause the air inside the
vehicle to become stale.
During cooling operation, you may occasionally notice a misty air flow
because of rapid cooling and
humid air intake. This is a normal
system operation characteristic.
If you operate air conditioner excessively, the difference between
the temperature of the outside air
and that of the windshield could
cause the outer surface of the
windshield to fog up, causing loss
of visibility. In this case, set the
mode selection knob or button to
the position and fan speed
control to the lower speed.Climate control air filter
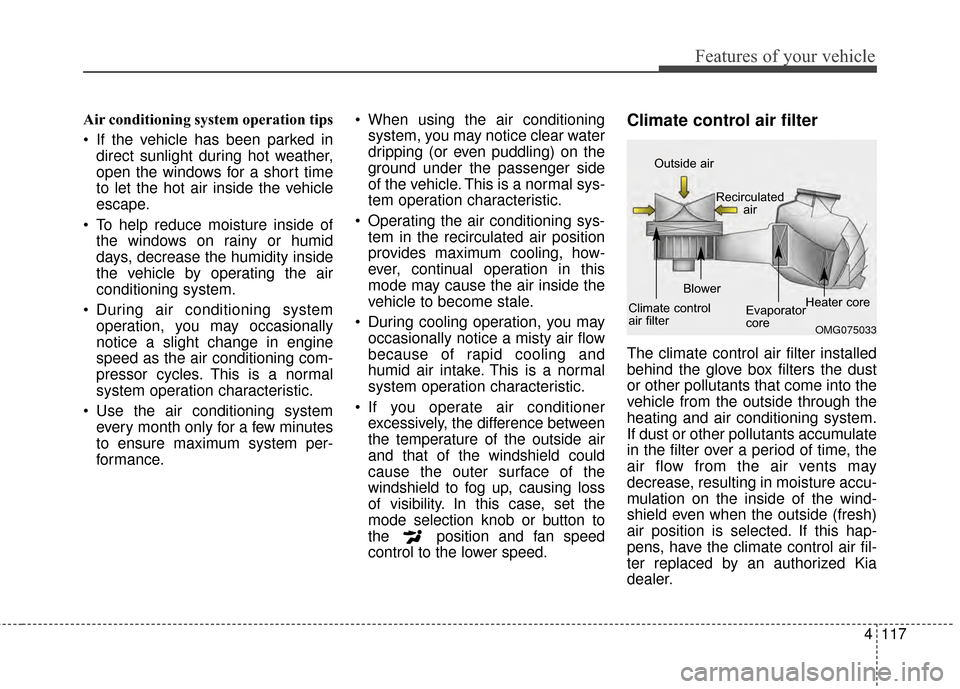
The climate control air filter installed
behind the glove box filters the dust
or other pollutants that come into the
vehicle from the outside through the
heating and air conditioning system.
If dust or other pollutants accumulate
in the filter over a period of time, the
air flow from the air vents may
decrease, resulting in moisture accu-
mulation on the inside of the wind-
shield even when the outside (fresh)
air position is selected. If this hap-
pens, have the climate control air fil-
ter replaced by an authorized Kia
dealer.
OMG075033
Outside air
Recirculatedair
Climate control
air filter Blower
Evaporator
coreHeater core
Page 211 of 474
4121
Features of your vehicle
The indicator light in the air intake
control button will blink 3 times with
0.5 second of interval. It indicates that
the defogging logic is canceled or
returned to the programmed status.
If the battery has been discharged or
disconnected, it resets to the defog
logic status.Auto defogging system (if equipped)
Auto defogging reduces the probabil-
ity of fogging up the inside of the
windshield by automatically sensing
the moisture inside the windshield.
The auto defogging system operates
when the heater or air conditioning is
on. This indicator illuminates
when the auto defogging
system senses the mois-
ture inside the windshield
and operates.
If more moisture is in the vehicle,
higher steps operate as follows. For
example, if auto defogging does not
defog inside the
windshield at step 1 Outside air posi-
tion, it tries to defog again at step 2
Blowing air toward the windshield.
Step 1 : Operating the air conditioning
Step 2 : Outside air position
Step 3 :Blowing air toward the wind-
shield
Step 4 : Increasing air flow toward the windshield
OTF044178N
Page 435 of 474
Maintenance
72
7
LIGHT BULBS
Use only the bulbs of the specified
wattage.
If you don’t have necessary tools, the
correct bulbs and the expertise, con-
sult an authorized Kia dealer. In
many cases, it is difficult to replace
vehicle light bulbs because other
parts of the vehicle must be removed
before you can get to the bulb. This is
especially true if you have to remove
the headlight assembly to get to the
bulb(s). Removing/installing the
headlight assembly can result in
damage to the vehicle.Headlight, position light, turn
signal light, side marker light,
and front fog light bulb
replacementWARNING - Lights
Prior to working on the light,
firmly apply the parking brake,
ensure that the ignition switch
is turned to the “LOCK” position
and turn off the lights to avoid
burning your fingers or receiv-
ing an electric shock.
CAUTION - Light replacement
Be sure to replace the burned-out bulb with one of the samewattage rating. Otherwise, itmay cause damage to the fuseor electric wiring system.
OTFH074027N
OTFH074090N
Page 436 of 474
773
Maintenance
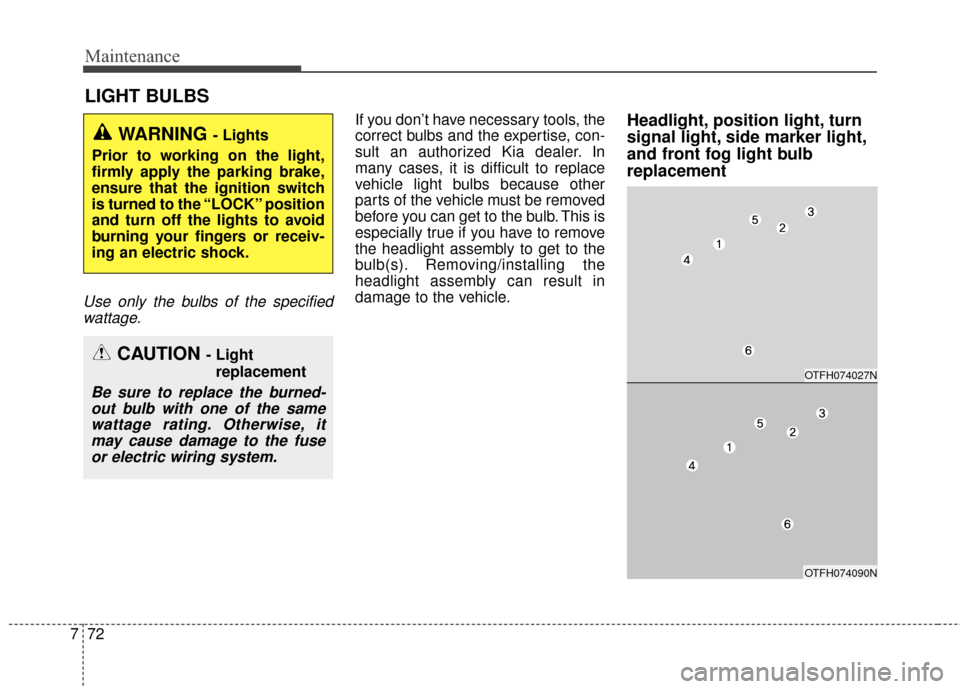
(1) Headlight (High)
(2) Headlight (Low)
(3) Side marker
(4) Front turn signal light (and Front position light*)
(5) Front position light*
(6) Front fog light*
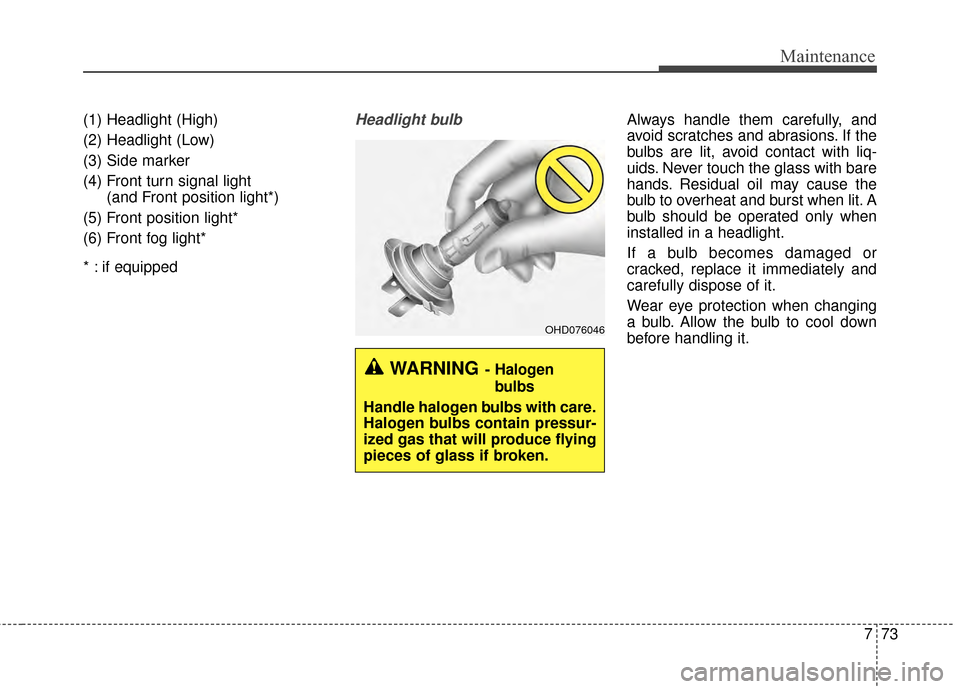
* : if equippedHeadlight bulbAlways handle them carefully, and
avoid scratches and abrasions. If the
bulbs are lit, avoid contact with liq-
uids. Never touch the glass with bare
hands. Residual oil may cause the
bulb to overheat and burst when lit. A
bulb should be operated only when
installed in a headlight.
If a bulb becomes damaged or
cracked, replace it immediately and
carefully dispose of it.
Wear eye protection when changing
a bulb. Allow the bulb to cool down
before handling it.
OHD076046
WARNING- Halogen
bulbs
Handle halogen bulbs with care.
Halogen bulbs contain pressur-
ized gas that will produce flying
pieces of glass if broken.
Page 440 of 474
777
Maintenance
Front fog light
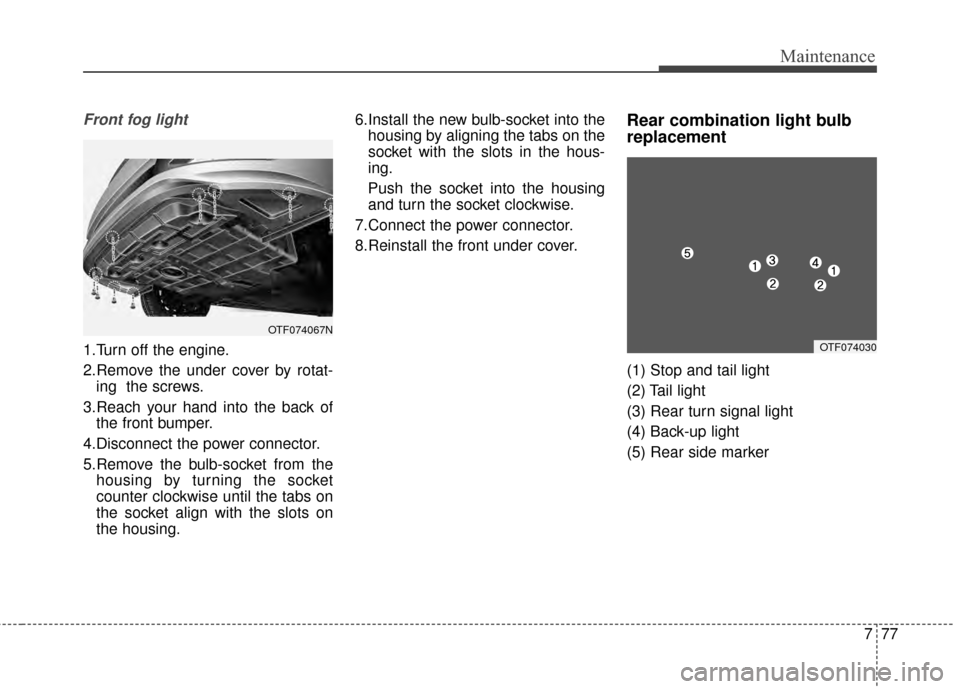
1.Turn off the engine.
2.Remove the under cover by rotat-ing the screws.
3.Reach your hand into the back of the front bumper.
4.Disconnect the power connector.
5.Remove the bulb-socket from the housing by turning the socket
counter clockwise until the tabs on
the socket align with the slots on
the housing. 6.Install the new bulb-socket into the
housing by aligning the tabs on the
socket with the slots in the hous-
ing.
Push the socket into the housing
and turn the socket clockwise.
7.Connect the power connector.
8.Reinstall the front under cover.
Rear combination light bulb
replacement
(1) Stop and tail light
(2) Tail light
(3) Rear turn signal light
(4) Back-up light
(5) Rear side marker
OTF074067N
OTF074030
Page 460 of 474
48
Specifications & Consumer information
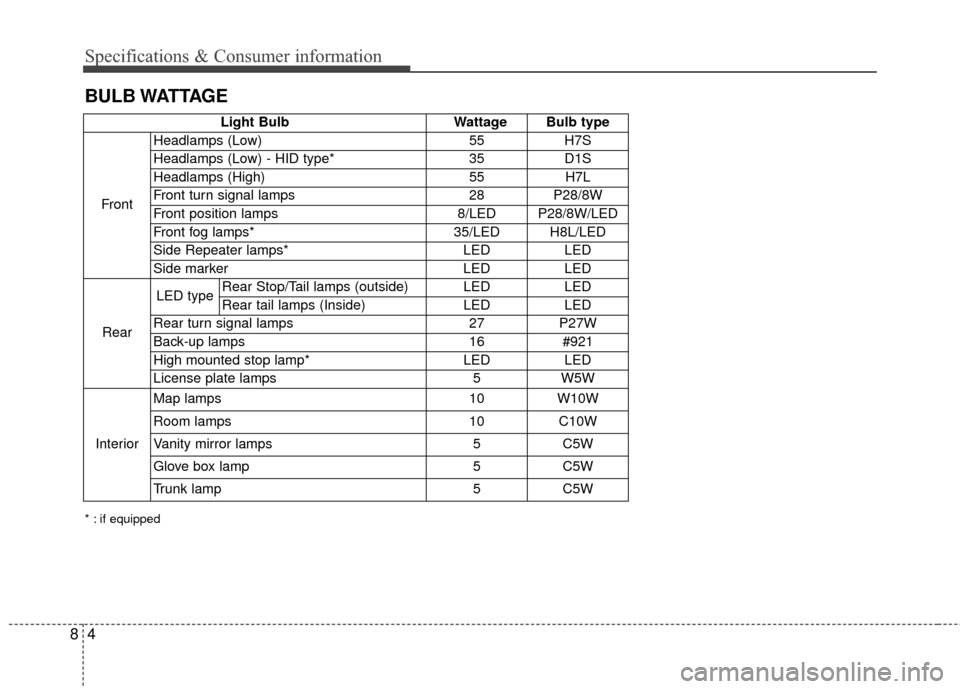
BULB WATTAGE
* : if equipped
Light BulbWattage Bulb type
Front Headlamps (Low)
55H7S
Headlamps (Low) - HID type* 35D1S
Headlamps (High) 55H7L
Front turn signal lamps 28 P28/8W
Front position lamps 8/LED P28/8W/LED
Front fog lamps* 35/LED H8L/LED
Side Repeater lamps* LEDLED
Side marker LEDLED
Rear LED type
Rear Stop/Tail lamps (outside) LED
LED
Rear tail lamps (Inside) LEDLED
Rear turn signal lamps 27P27W
Back-up lamps 16#921
High mounted stop lamp* LEDLED
License plate lamps 5W5W
Interior Map lamps
10W10W
Room lamps 10C10W
Vanity mirror lamps5C5W
Glove box lamp5C5W
Trunk lamp 5C5W
Page 471 of 474
Index
6I
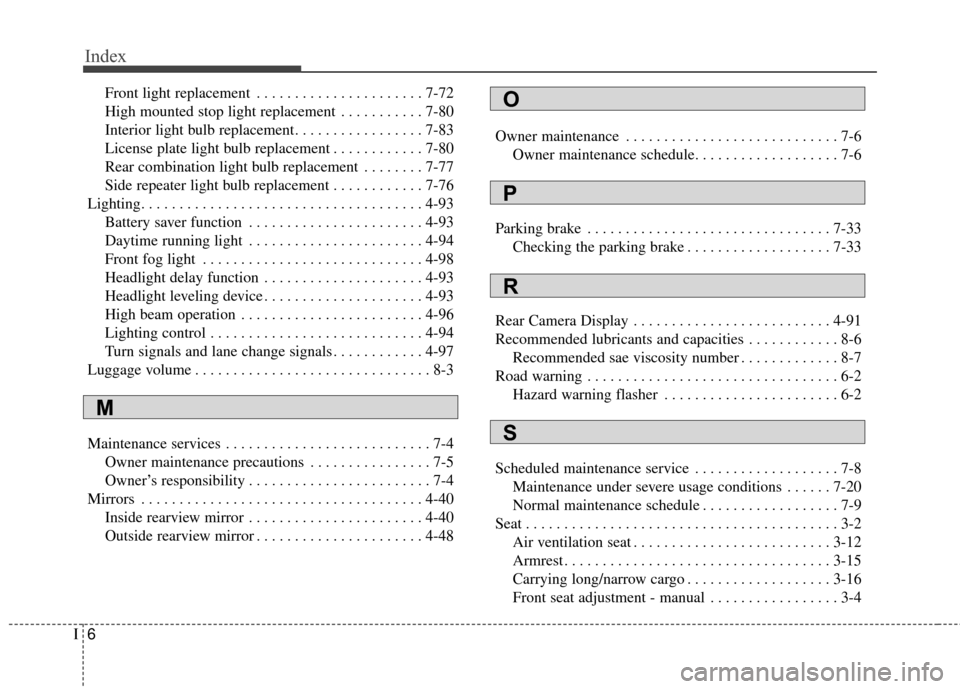
Front light replacement . . . . . . . . . . . . . . . . . . . . . . 7-72
High mounted stop light replacement . . . . . . . . . . . 7-80
Interior light bulb replacement. . . . . . . . . . . . . . . . . 7-83
License plate light bulb replacement . . . . . . . . . . . . 7-80
Rear combination light bulb replacement . . . . . . . . 7-77
Side repeater light bulb replacement . . . . . . . . . . . . 7-76
Lighting. . . . . . . . . . . . . . . . . . . . . . . . . . . . . . . . . . . . \
. 4-93 Battery saver function . . . . . . . . . . . . . . . . . . . . . . . 4-93
Daytime running light . . . . . . . . . . . . . . . . . . . . . . . 4-94
Front fog light . . . . . . . . . . . . . . . . . . . . . . . . . . . . . 4-98
Headlight delay function . . . . . . . . . . . . . . . . . . . . . 4-93
Headlight leveling device . . . . . . . . . . . . . . . . . . . . . 4-93
High beam operation . . . . . . . . . . . . . . . . . . . . . . . . 4-96
Lighting control . . . . . . . . . . . . . . . . . . . . . . . . . . . . 4-94
Turn signals and lane change signals . . . . . . . . . . . . 4-97
Luggage volume . . . . . . . . . . . . . . . . . . . . . . . . . . . . . . . 8-3
Maintenance services . . . . . . . . . . . . . . . . . . . . . . . . . . . 7-4 Owner maintenance precautions . . . . . . . . . . . . . . . . 7-5
Owner’s responsibility . . . . . . . . . . . . . . . . . . . . . . . . 7-4
Mirrors . . . . . . . . . . . . . . . . . . . . . . . . . . . . . . . . . . . . \
. 4-40 Inside rearview mirror . . . . . . . . . . . . . . . . . . . . . . . 4-40
Outside rearview mirror . . . . . . . . . . . . . . . . . . . . . . 4-48 Owner maintenance . . . . . . . . . . . . . . . . . . . . . . . . . . . . 7-6
Owner maintenance schedule. . . . . . . . . . . . . . . . . . . 7-6
Parking brake . . . . . . . . . . . . . . . . . . . . . . . . . . . . . . . . 7-33 Checking the parking brake . . . . . . . . . . . . . . . . . . . 7-33
Rear Camera Display . . . . . . . . . . . . . . . . . . . . . . . . . . 4-91
Recommended lubricants and capacities . . . . . . . . . . . . 8-6 Recommended sae viscosity number . . . . . . . . . . . . . 8-7
Road warning . . . . . . . . . . . . . . . . . . . . . . . . . . . . . . . . . 6-2 Hazard warning flasher . . . . . . . . . . . . . . . . . . . . . . . 6-2
Scheduled maintenance service . . . . . . . . . . . . . . . . . . . 7-8 Maintenance under severe usage conditions . . . . . . 7-20
Normal maintenance schedule . . . . . . . . . . . . . . . . . . 7-9
Seat . . . . . . . . . . . . . . . . . . . . . . . . . . . . . . . . . . . . \
. . . . . 3-2 Air ventilation seat . . . . . . . . . . . . . . . . . . . . . . . . . . 3-12
Armrest . . . . . . . . . . . . . . . . . . . . . . . . . . . . . . . . . . . 3-\
15
Carrying long/narrow cargo . . . . . . . . . . . . . . . . . . . 3-16
Front seat adjustment - manual . . . . . . . . . . . . . . . . . 3-4O
P
S
M
R