lock KIA OPTIMA HYBRID 2015 Owners Manual
[x] Cancel search | Manufacturer: KIA, Model Year: 2015, Model line: OPTIMA HYBRID, Model: KIA OPTIMA HYBRID 2015Pages: 495, PDF Size: 13.38 MB
Page 6 of 495
1
2
3
4
5
6
7
8I
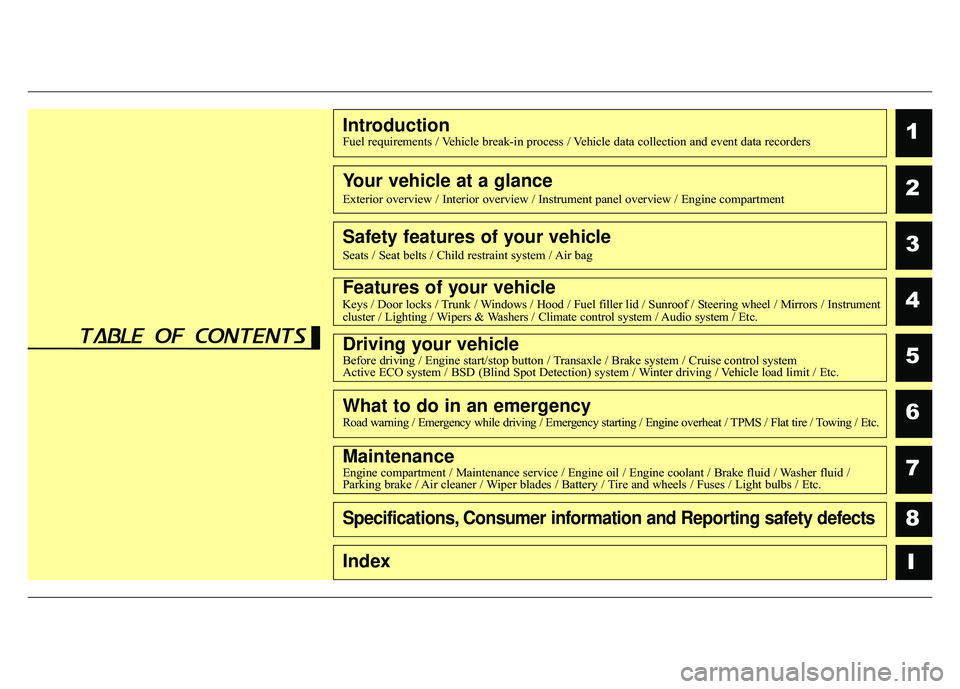
IntroductionFuel requirements / Vehicle break-in process / Vehicle data collection and event data recorders
Your vehicle at a glance
Exterior overview / Interior overview / Instrument panel overview / Engi\
ne compartment
Safety features of your vehicle
Seats / Seat belts / Child restraint system / Air bag
Features of your vehicleKeys / Door locks / Trunk / Windows / Hood / Fuel filler lid / Sunroof / Steering wheel / Mirrors / Instrumentcluster / Lighting / Wipers & Washers / Climate control system / Audio system / Etc.
Driving your vehicleBefore driving / Engine start/stop button / Transaxle / Brake system / Cruise control system
Active ECO system / BSD (Blind Spot Detection) system / Winter driving / Vehicle load limit / Etc.
What to do in an emergencyRoad warning / Emergency while driving / Emergency starting / Engine overheat / TPMS / Flat tire / Towing / Etc.
MaintenanceEngine compartment / Maintenance service / Engine oil / Engine coolant /\
Brake fluid / Washer fluid /
Parking brake / Air cleaner / Wiper blades / Battery / Tire and wheels / Fuses / Light bulbs / Etc.
Specifications, Consumer information and Reporting safety defects
Index
table of contents
Page 21 of 495
H15
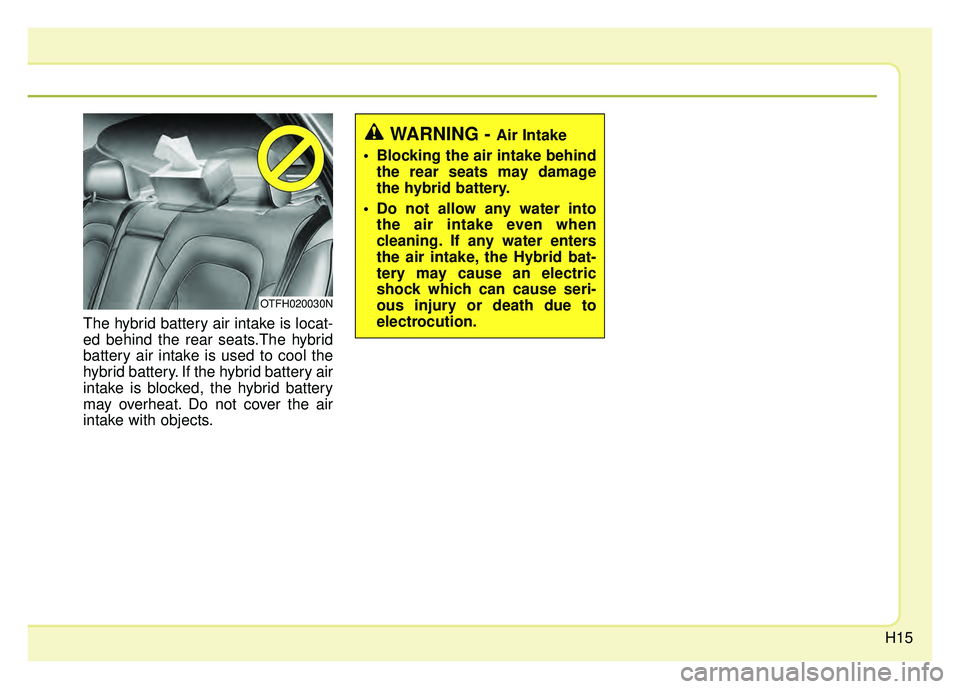
The hybrid battery air intake is locat-
ed behind the rear seats.The hybrid
battery air intake is used to cool the
hybrid battery. If the hybrid battery air
intake is blocked, the hybrid battery
may overheat. Do not cover the air
intake with objects.
WARNING - Air Intake
Blocking the air intake behind the rear seats may damage
the hybrid battery.
Do not allow any water into the air intake even when
cleaning. If any water enters
the air intake, the Hybrid bat-
tery may cause an electric
shock which can cause seri-
ous injury or death due to
electrocution.
OTFH020030N
Page 31 of 495
23
Your vehicle at a glance
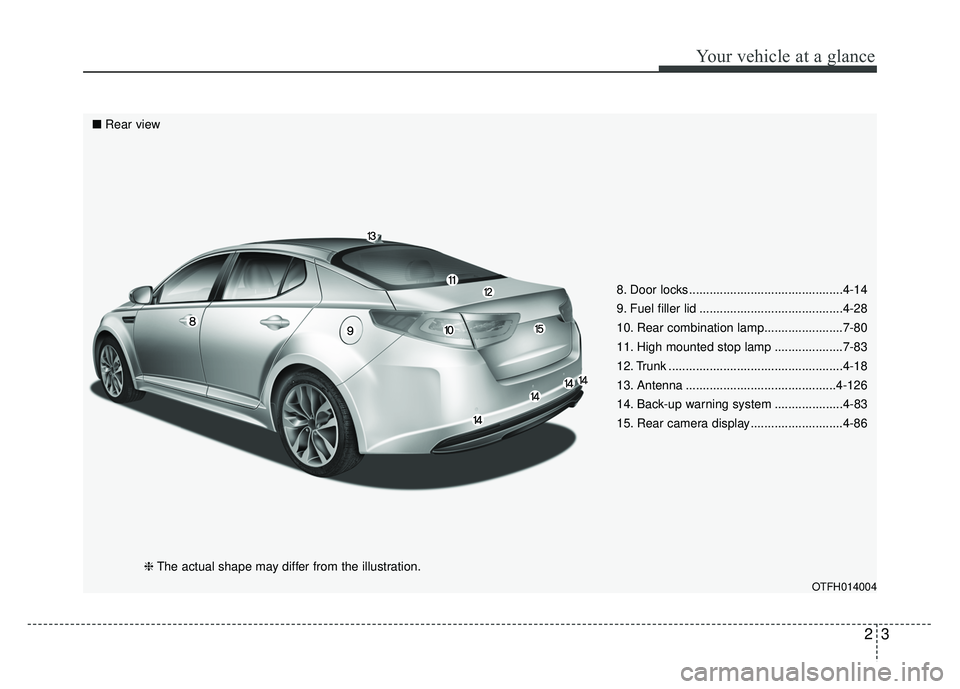
8. Door locks .............................................4-14
9. Fuel filler lid ..........................................4-28
10. Rear combination lamp.......................7-80
11. High mounted stop lamp ....................7-83
12. Trunk ...................................................4-18
13. Antenna ............................................4-126
14. Back-up warning system ....................4-83
15. Rear camera display ...........................4-86
OTFH014004
■Rear view
❈The actual shape may differ from the illustration.
Page 32 of 495
Your vehicle at a glance
42
INTERIOR OVERVIEW
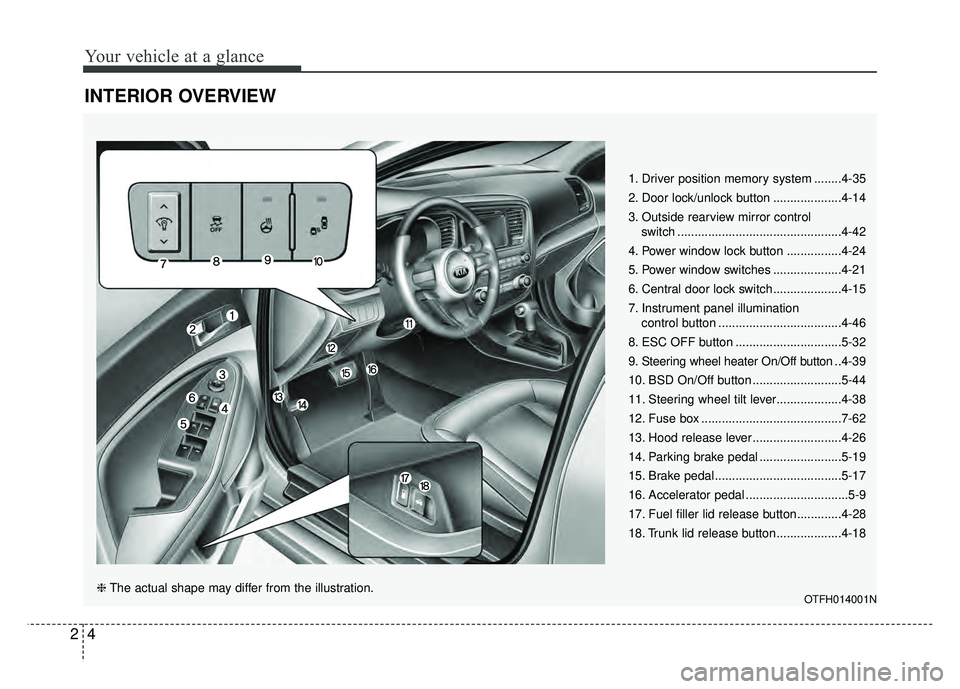
1. Driver position memory system ........4-35
2. Door lock/unlock button ....................4-14
3. Outside rearview mirror control switch ................................................4-42
4. Power window lock button ................4-24
5. Power window switches ....................4-21
6. Central door lock switch....................4-15
7. Instrument panel illumination control button ....................................4-46
8. ESC OFF button ...............................5-32
9. Steering wheel heater On/Off button .. 4-39
10. BSD On/Off button ..........................5-44
11. Steering wheel tilt lever...................4-38
12. Fuse box .........................................7-62
13. Hood release lever ..........................4-26
14. Parking brake pedal ........................5-19
15. Brake pedal .....................................5-17
16. Accelerator pedal ..............................5-9
17. Fuel filler lid release button.............4-28
18. Trunk lid release button...................4-18
OTFH014001N❈ The actual shape may differ from the illustration.
Page 38 of 495
33
Safety features of your vehicle
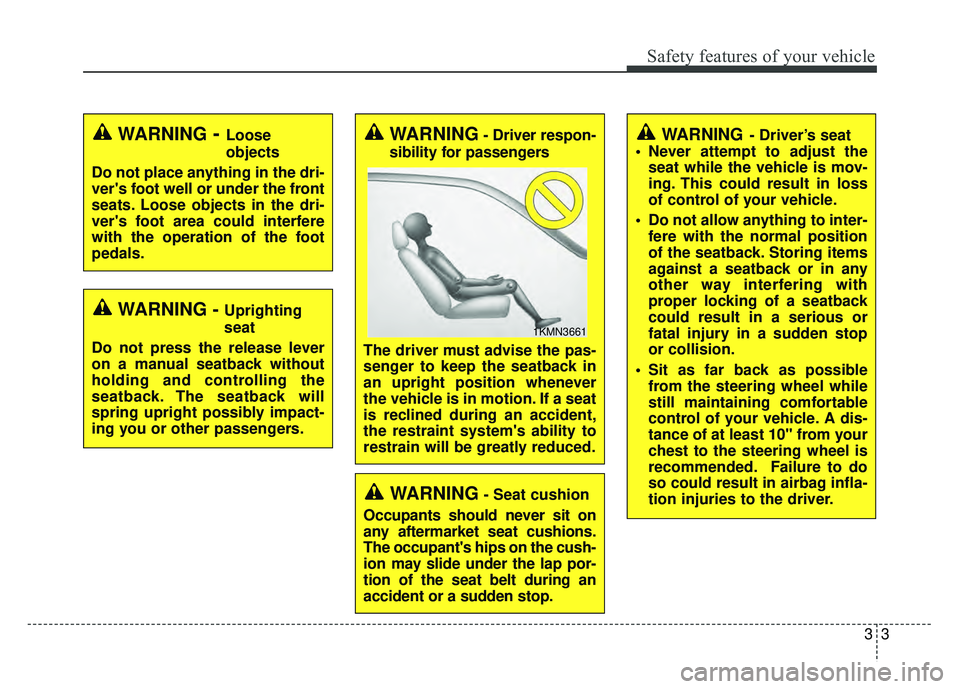
WARNING- Driver’s seat
Never attempt to adjust the seat while the vehicle is mov-
ing. This could result in loss
of control of your vehicle.
Do not allow anything to inter- fere with the normal position
of the seatback. Storing items
against a seatback or in any
other way interfering with
proper locking of a seatback
could result in a serious or
fatal injury in a sudden stop
or collision.
Sit as far back as possible from the steering wheel while
still maintaining comfortable
control of your vehicle. A dis-
tance of at least 10" from your
chest to the steering wheel is
recommended. Failure to do
so could result in airbag infla-
tion injuries to the driver.
WARNING - Uprighting
seat
Do not press the release lever
on a manual seatback without
holding and controlling the
seatback. The seatback will
spring upright possibly impact-
ing you or other passengers.
WARNING- Loose
objects
Do not place anything in the dri-
ver's foot well or under the front
seats. Loose objects in the dri-
ver's foot area could interfere
with the operation of the foot
pedals.
WARNING- Seat cushion
Occupants should never sit on
any aftermarket seat cushions.
The occupant's hips on the cush-
ion may slide under the lap por-
tion of the seat belt during an
accident or a sudden stop.
WARNING- Driver respon-
sibility for passengers
The driver must advise the pas-
senger to keep the seatback in
an upright position whenever
the vehicle is in motion. If a seat
is reclined during an accident,
the restraint system's ability to
restrain will be greatly reduced.
1KMN3661
Page 39 of 495
Safety features of your vehicle
43
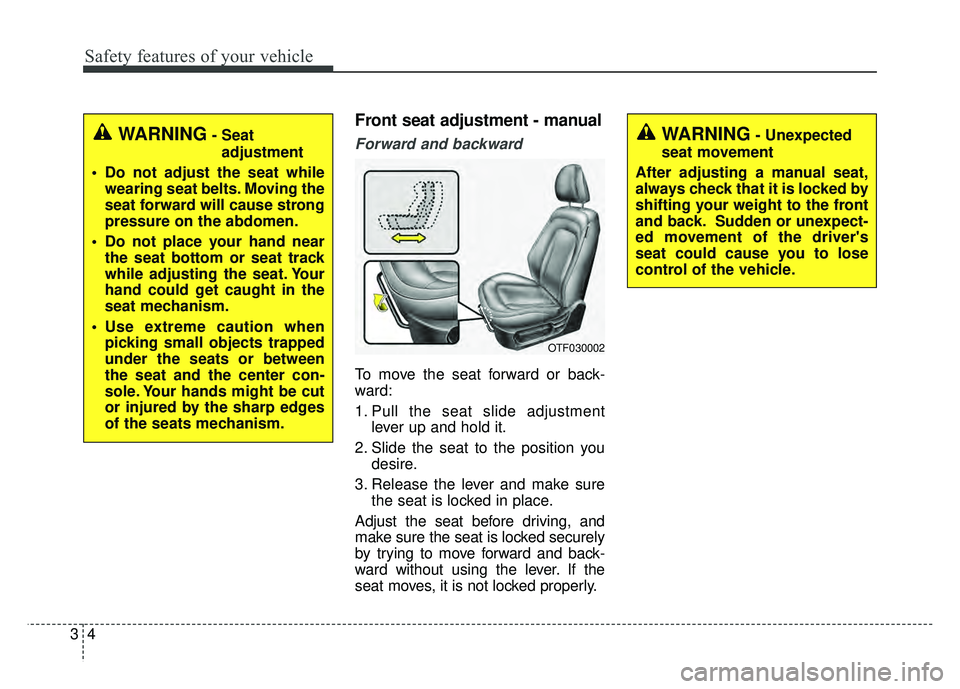
Front seat adjustment - manual
Forward and backward
To move the seat forward or back-
ward:
1. Pull the seat slide adjustmentlever up and hold it.
2. Slide the seat to the position you desire.
3. Release the lever and make sure the seat is locked in place.
Adjust the seat before driving, and
make sure the seat is locked securely
by trying to move forward and back-
ward without using the lever. If the
seat moves, it is not locked properly.
WARNING- Seat adjustment
Do not adjust the seat while wearing seat belts. Moving the
seat forward will cause strong
pressure on the abdomen.
Do not place your hand near the seat bottom or seat track
while adjusting the seat. Your
hand could get caught in the
seat mechanism.
Use extreme caution when picking small objects trapped
under the seats or between
the seat and the center con-
sole. Your hands might be cut
or injured by the sharp edges
of the seats mechanism.WARNING- Unexpected
seat movement
After adjusting a manual seat,
always check that it is locked by
shifting your weight to the front
and back. Sudden or unexpect-
ed movement of the driver's
seat could cause you to lose
control of the vehicle.
OTF030002
Page 40 of 495
35
Safety features of your vehicle
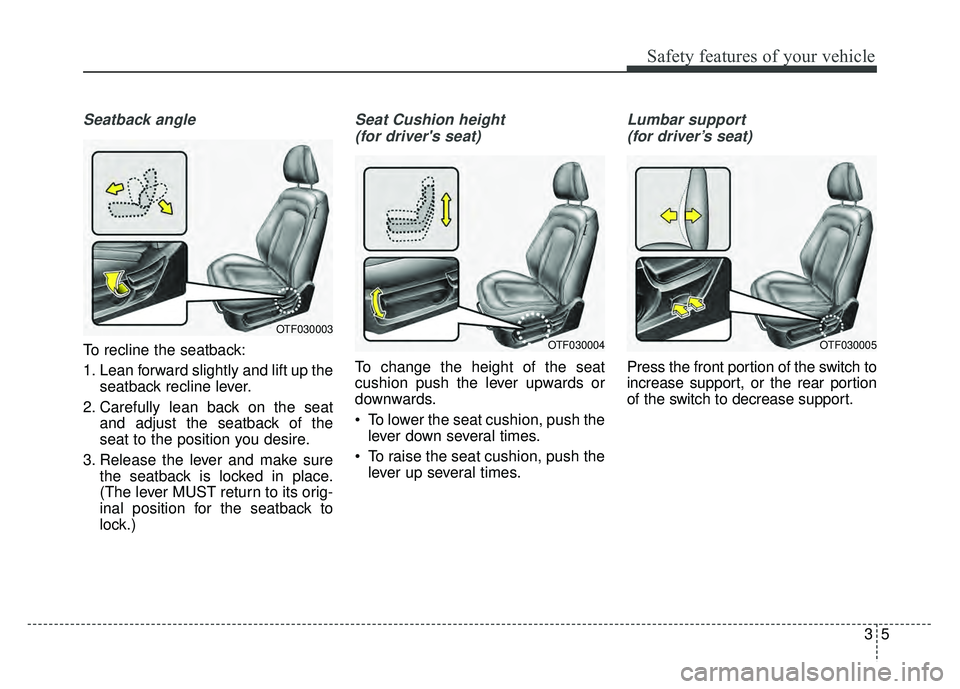
Seatback angle
To recline the seatback:
1. Lean forward slightly and lift up theseatback recline lever.
2. Carefully lean back on the seat and adjust the seatback of the
seat to the position you desire.
3. Release the lever and make sure the seatback is locked in place.
(The lever MUST return to its orig-
inal position for the seatback to
lock.)
Seat Cushion height
(for driver's seat)
To change the height of the seat
cushion push the lever upwards or
downwards.
• To lower the seat cushion, push the lever down several times.
To raise the seat cushion, push the lever up several times.
Lumbar support
(for driver’s seat)
Press the front portion of the switch to
increase support, or the rear portion
of the switch to decrease support.
OTF030003
OTF030004OTF030005
Page 45 of 495
Safety features of your vehicle
10
3
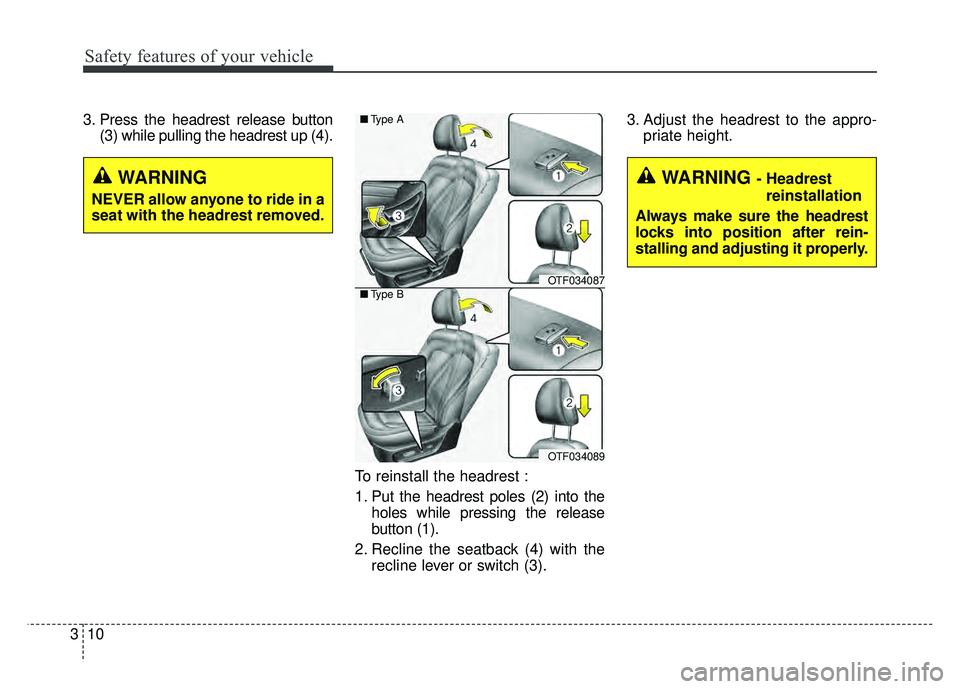
3. Press the headrest release button
(3) while pulling the headrest up (4).
To reinstall the headrest :
1. Put the headrest poles (2) into theholes while pressing the release
button (1).
2. Recline the seatback (4) with the recline lever or switch (3). 3. Adjust the headrest to the appro-
priate height.
OTF034087
OTF034089
■
Type A
■ Type B
WARNING - Headrest
reinstallation
Always make sure the headrest
locks into position after rein-
stalling and adjusting it properly.WARNING
NEVER allow anyone to ride in a
seat with the headrest removed.
Page 48 of 495
313
Safety features of your vehicle
When the air vent does not operate,
restart the vehicle. If there is no
change, have your vehicle inspected
by an authorized Kia dealer.
Seatback pocket
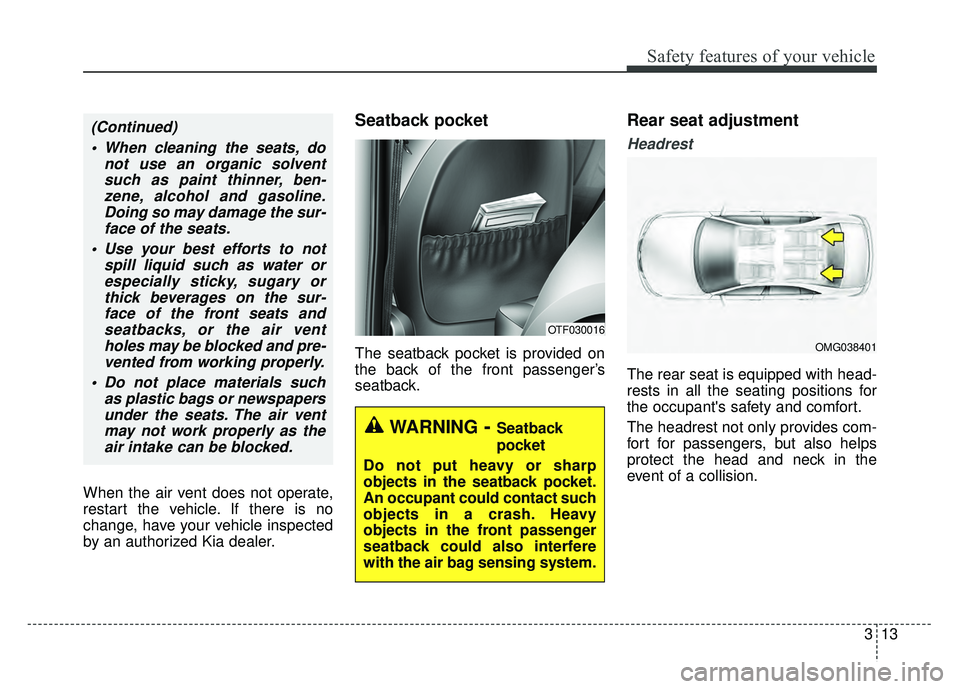
The seatback pocket is provided on
the back of the front passenger’s
seatback.
Rear seat adjustment
Headrest
The rear seat is equipped with head-
rests in all the seating positions for
the occupant's safety and comfort.
The headrest not only provides com-
fort for passengers, but also helps
protect the head and neck in the
event of a collision.
OTF030016
WARNING- Seatback
pocket
Do not put heavy or sharp
objects in the seatback pocket.
An occupant could contact such
objects in a crash. Heavy
objects in the front passenger
seatback could also interfere
with the air bag sensing system.
(Continued) When cleaning the seats, do not use an organic solventsuch as paint thinner, ben-zene, alcohol and gasoline.Doing so may damage the sur-face of the seats.
Use your best efforts to not spill liquid such as water orespecially sticky, sugary orthick beverages on the sur-face of the front seats andseatbacks, or the air ventholes may be blocked and pre-vented from working properly.
Do not place materials such as plastic bags or newspapersunder the seats. The air ventmay not work properly as theair intake can be blocked.
OMG038401
Page 49 of 495
Safety features of your vehicle
14
3
For maximum effectiveness in case
of an accident, the headrest should
be adjusted so the middle of the
headrest is at the same height of the
center of gravity of an occupant's
head. Generally, the center of gravity
of most people's head is similar with
the height as the top of their eyes.
Also adjust the headrest as close to
your head as possible. For this rea-
son, the use of a cushion that holds
the body away from the seatback is
not recommended.
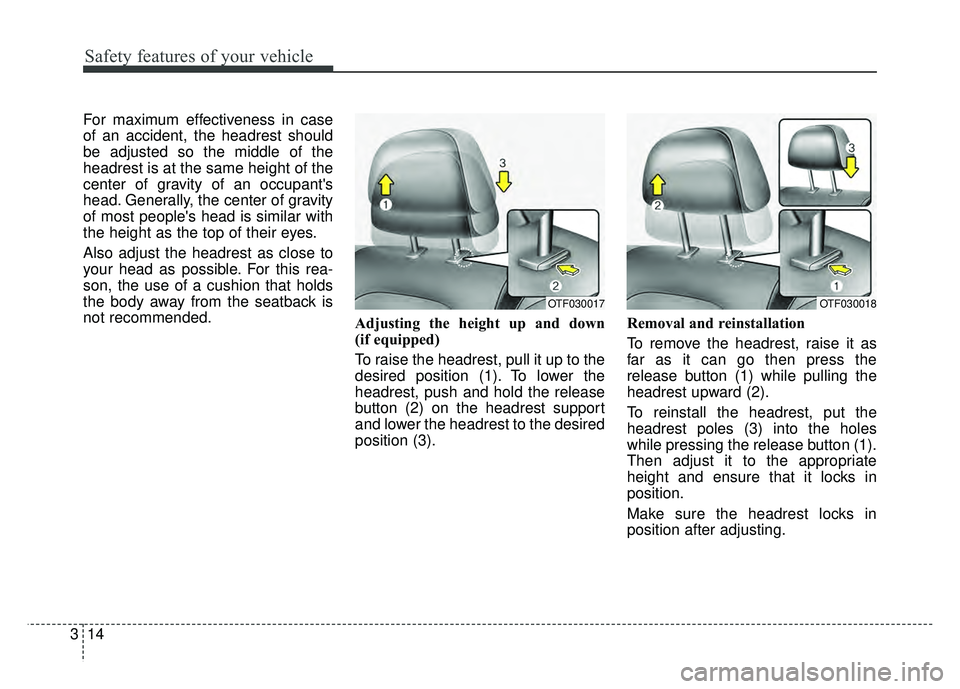
Adjusting the height up and down
(if equipped)
To raise the headrest, pull it up to the
desired position (1). To lower the
headrest, push and hold the release
button (2) on the headrest support
and lower the headrest to the desired
position (3).Removal and reinstallation
To remove the headrest, raise it as
far as it can go then press the
release button (1) while pulling the
headrest upward (2).
To reinstall the headrest, put the
headrest poles (3) into the holes
while pressing the release button (1).
Then adjust it to the appropriate
height and ensure that it locks in
position.
Make sure the headrest locks in
position after adjusting.
OTF030017OTF030018