KIA PICANTO 2006 Owners Manual
Manufacturer: KIA, Model Year: 2006, Model line: PICANTO, Model: KIA PICANTO 2006Pages: 281, PDF Size: 9.89 MB
Page 231 of 281
Maintenance
18
7
1 23456789
Check the condition and connections of all cooling system hoses and
heater hoses. Replace any swollen
or deteriorated hoses.
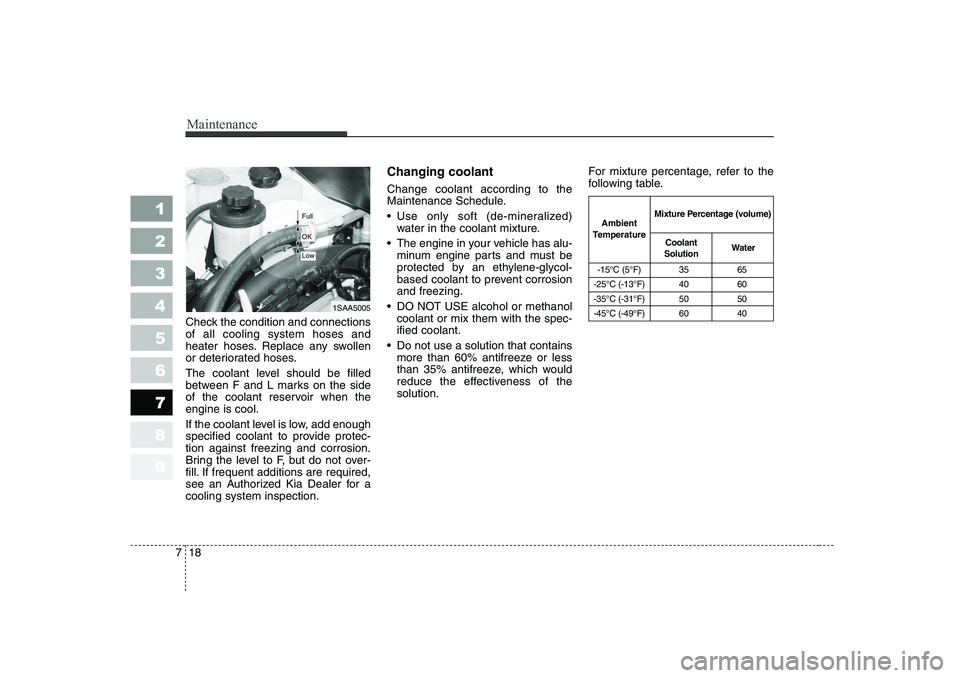
The coolant level should be filled
between F and L marks on the side
of the coolant reservoir when theengine is cool.
If the coolant level is low, add enough
specified coolant to provide protec-tion against freezing and corrosion.
Bring the level to F, but do not over-
fill. If frequent additions are required,
see an Authorized Kia Dealer for acooling system inspection. Changing coolant Change coolant according to the
Maintenance Schedule.
Use only soft (de-mineralized)
water in the coolant mixture.
The engine in your vehicle has alu- minum engine parts and must be
protected by an ethylene-glycol-
based coolant to prevent corrosionand freezing.
DO NOT USE alcohol or methanol coolant or mix them with the spec-ified coolant.
Do not use a solution that contains more than 60% antifreeze or less
than 35% antifreeze, which would
reduce the effectiveness of thesolution. For mixture percentage, refer to the
following table.
1SAA5005
-15°C (5°F) 35 65
-25°C (-13°F) 40 60
-35°C (-31°F) 50 50
-45°C (-49°F) 60 40
Ambient
Temperature Mixture Percentage (volume)
Coolant
Solution WaterFull
OK
Low
Page 232 of 281
719
Maintenance
1 23456789
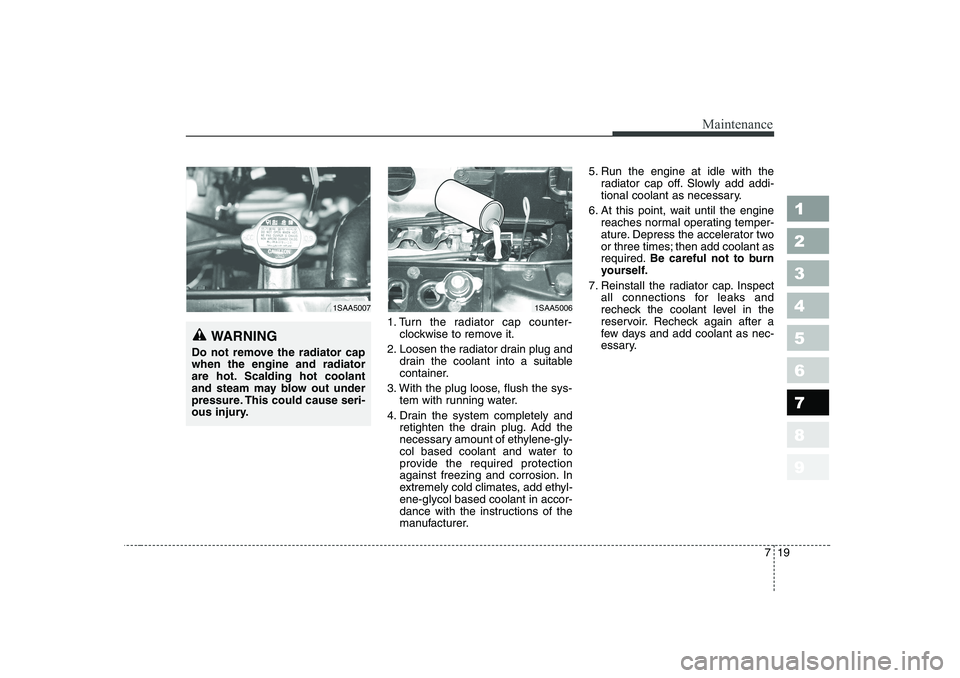
1. Turn the radiator cap counter-clockwise to remove it.
2. Loosen the radiator drain plug and drain the coolant into a suitable
container.
3. With the plug loose, flush the sys- tem with running water.
4. Drain the system completely and retighten the drain plug. Add the
necessary amount of ethylene-gly-
col based coolant and water to
provide the required protection
against freezing and corrosion. In
extremely cold climates, add ethyl-ene-glycol based coolant in accor-
dance with the instructions of the
manufacturer. 5. Run the engine at idle with the
radiator cap off. Slowly add addi-
tional coolant as necessary.
6. At this point, wait until the engine reaches normal operating temper-
ature. Depress the accelerator two
or three times; then add coolant asrequired. Be careful not to burn
yourself.
7. Reinstall the radiator cap. Inspect all connections for leaks and
recheck the coolant level in the
reservoir. Recheck again after a
few days and add coolant as nec-
essary.
1SAA50061SAA5007
WARNING
Do not remove the radiator cap when the engine and radiator
are hot. Scalding hot coolant
and steam may blow out under
pressure. This could cause seri-
ous injury.
Page 233 of 281
Maintenance
20
7
1 23456789
BRAKES AND CLUTCH (IF EQUIPPED)
Checking brake/clutch fluid
level
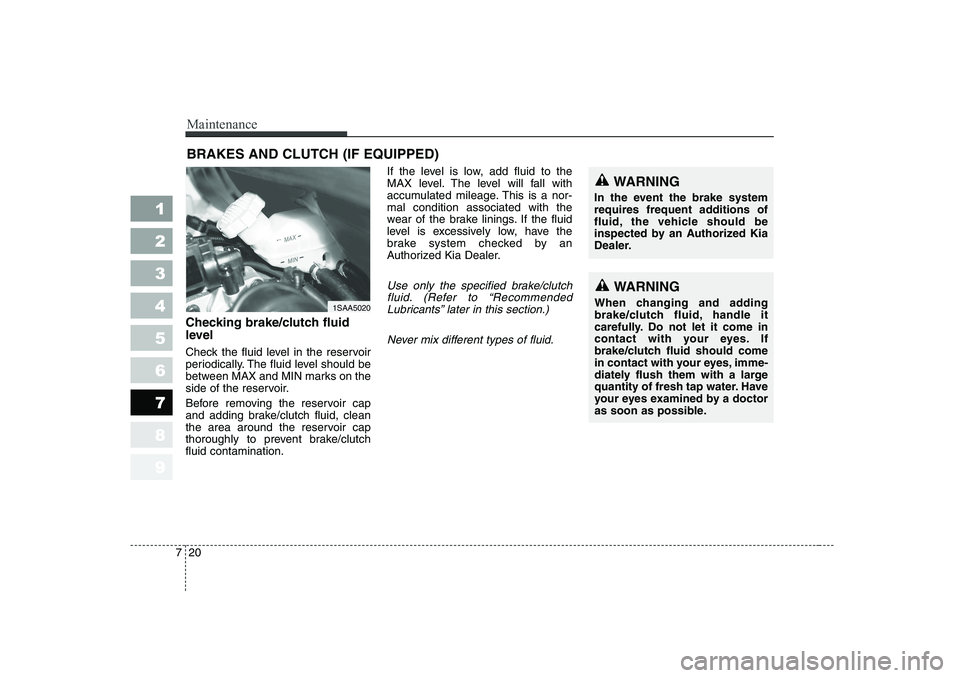
Check the fluid level in the reservoir
periodically. The fluid level should be
between MAX and MIN marks on the
side of the reservoir.
Before removing the reservoir cap
and adding brake/clutch fluid, clean
the area around the reservoir cap
thoroughly to prevent brake/clutchfluid contamination. If the level is low, add fluid to the
MAX level. The level will fall with
accumulated mileage. This is a nor-mal condition associated with the
wear of the brake linings. If the fluid
level is excessively low, have the
brake system checked by an
Authorized Kia Dealer.
Use only the specified brake/clutch
fluid. (Refer to “RecommendedLubricants” later in this section.)
Never mix different types of fluid.WARNING
When changing and adding
brake/clutch fluid, handle it
carefully. Do not let it come in
contact with your eyes. If
brake/clutch fluid should come
in contact with your eyes, imme-
diately flush them with a large
quantity of fresh tap water. Have
your eyes examined by a doctor
as soon as possible.
WARNING
In the event the brake system
requires frequent additions of
fluid, the vehicle should be
inspected by an Authorized Kia
Dealer.
1SAA5020
Page 234 of 281
721
Maintenance
1 23456789
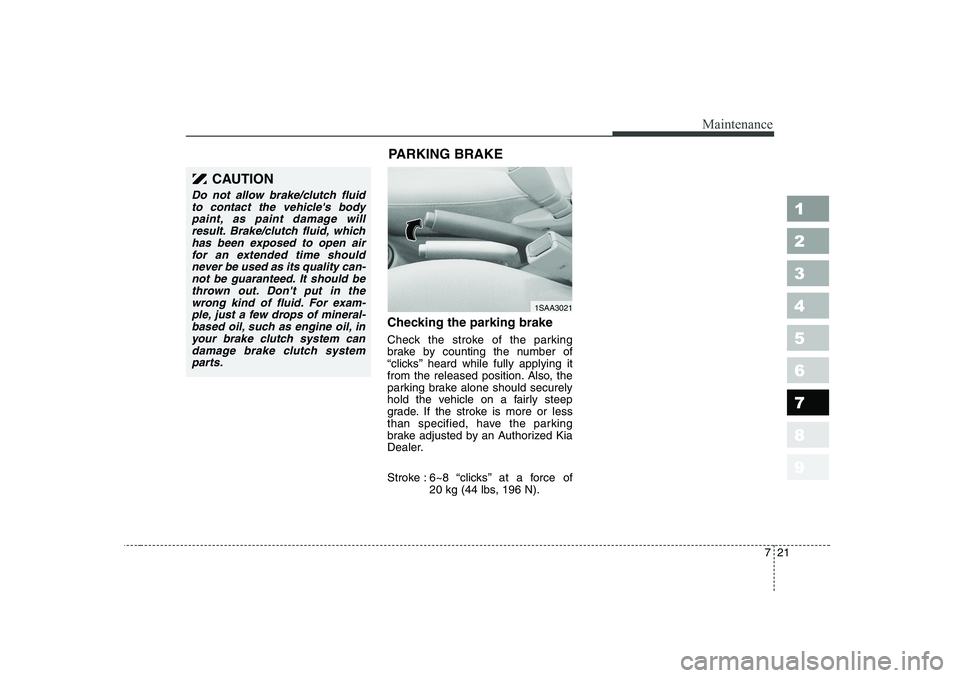
Checking the parking brake
Check the stroke of the parking
brake by counting the number of
“clicks’’ heard while fully applying it
from the released position. Also, the
parking brake alone should securely
hold the vehicle on a fairly steep
grade. If the stroke is more or less
than specified, have the parking
brake adjusted by an Authorized Kia
Dealer.
Stroke : 6~8 “clicks’’ at a force of 20 kg (44 lbs, 196 N).
1SAA3021
PARKING BRAKE
CAUTION
Do not allow brake/clutch fluid
to contact the vehicle's body paint, as paint damage willresult. Brake/clutch fluid, whichhas been exposed to open air for an extended time shouldnever be used as its quality can-not be guaranteed. It should be thrown out. Don't put in thewrong kind of fluid. For exam-ple, just a few drops of mineral- based oil, such as engine oil, inyour brake clutch system candamage brake clutch systemparts.
Page 235 of 281
Maintenance
22
7
1 23456789
DRIVE BELTS
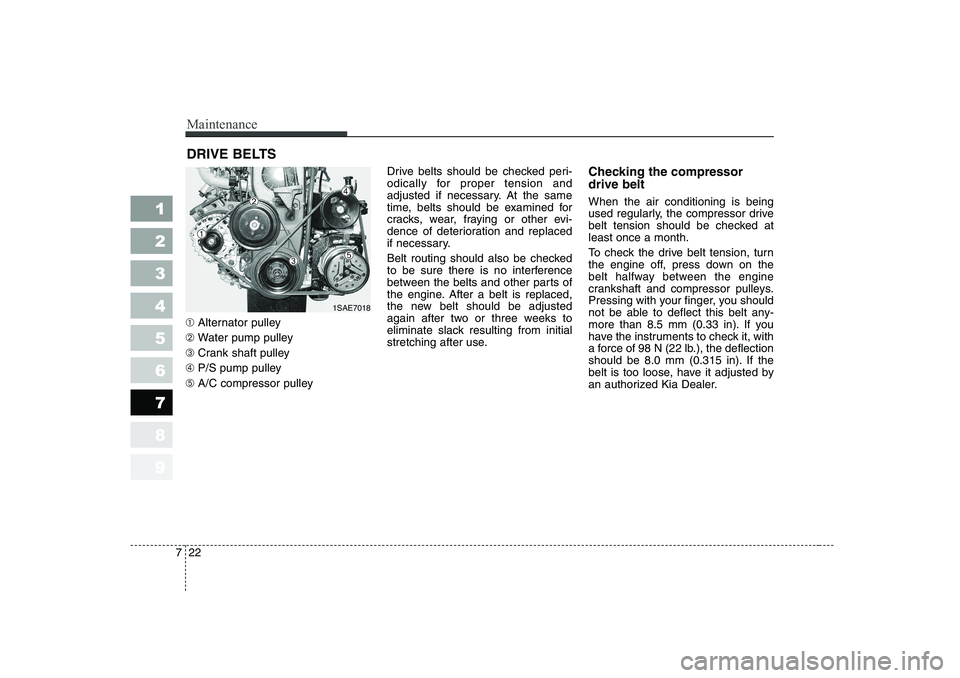
➀ Alternator pulley
➁ Water pump pulley
➂ Crank shaft pulley
➃ P/S pump pulley
➄ A/C compressor pulley Drive belts should be checked peri-
odically for proper tension and
adjusted if necessary. At the same
time, belts should be examined for
cracks, wear, fraying or other evi-
dence of deterioration and replaced
if necessary.
Belt routing should also be checked
to be sure there is no interference
between the belts and other parts of
the engine. After a belt is replaced,
the new belt should be adjusted
again after two or three weeks to
eliminate slack resulting from initial
stretching after use.
Checking the compressor drive belt When the air conditioning is being
used regularly, the compressor drive
belt tension should be checked atleast once a month.
To check the drive belt tension, turn
the engine off, press down on the
belt halfway between the engine
crankshaft and compressor pulleys.
Pressing with your finger, you should
not be able to deflect this belt any-
more than 8.5 mm (0.33 in). If you
have the instruments to check it, with
a force of 98 N (22 lb.), the deflection
should be 8.0 mm (0.315 in). If the
belt is too loose, have it adjusted by
an authorized Kia Dealer.
1SAE7018
➀
➁
➂
➃
➄
Page 236 of 281
723
Maintenance
1 23456789
POWER STEERING
Checking the power steering
fluid level
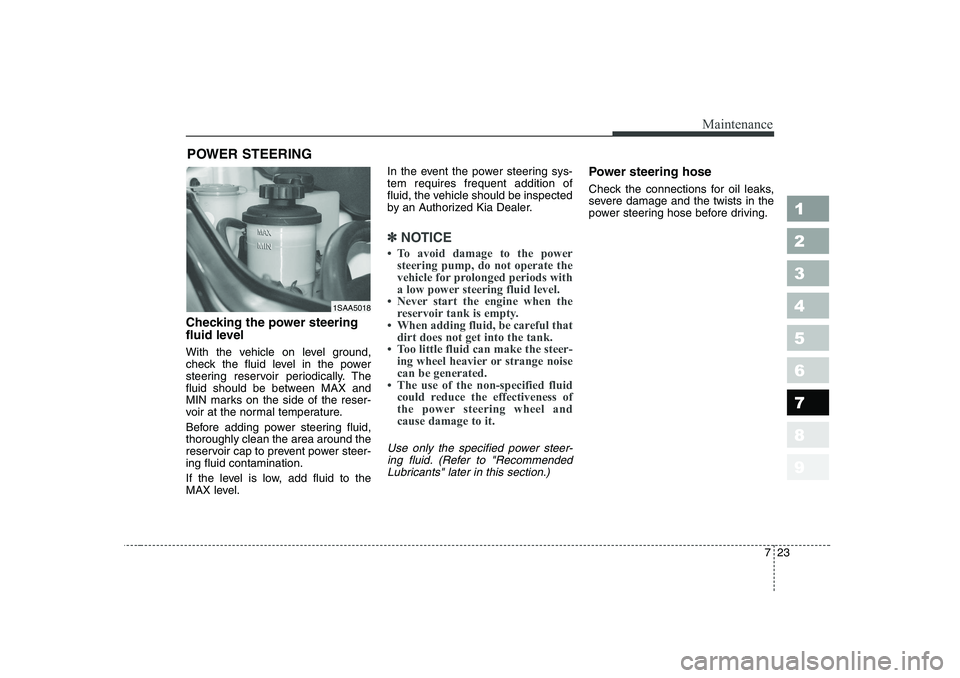
With the vehicle on level ground,
check the fluid level in the power
steering reservoir periodically. The
fluid should be between MAX and
MIN marks on the side of the reser-
voir at the normal temperature.
Before adding power steering fluid, thoroughly clean the area around the
reservoir cap to prevent power steer-ing fluid contamination.
If the level is low, add fluid to the
MAX level. In the event the power steering sys-tem requires frequent addition of
fluid, the vehicle should be inspected
by an Authorized Kia Dealer.
✽✽
NOTICE
Page 237 of 281
Maintenance
24
7
1 23456789
STEERING WHEEL
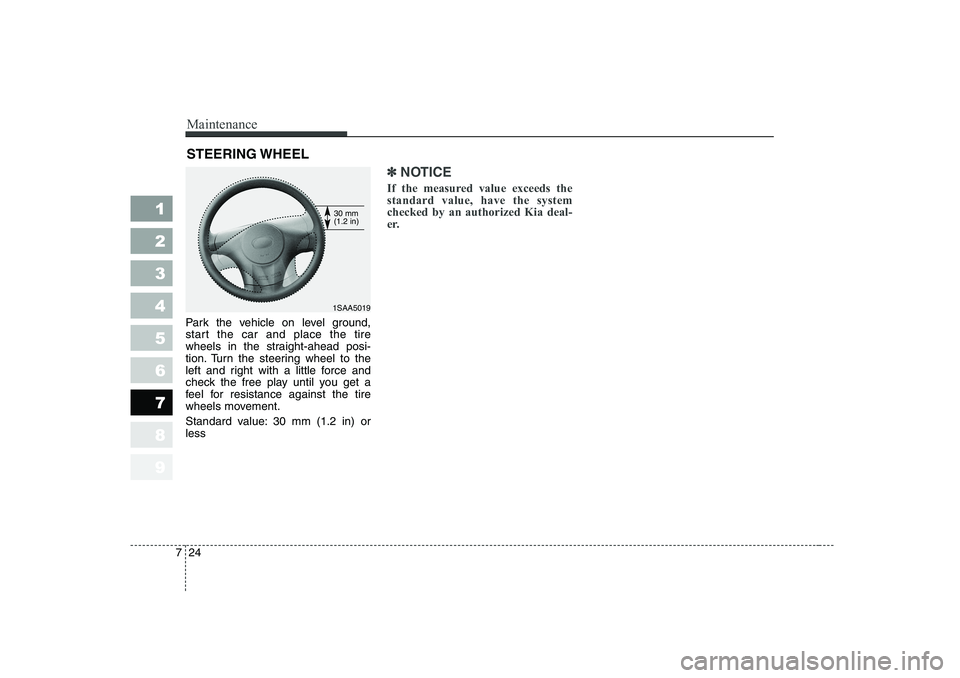
Park the vehicle on level ground,
start the car and place the tire
wheels in the straight-ahead posi-
tion. Turn the steering wheel to the
left and right with a little force and
check the free play until you get a
feel for resistance against the tire
wheels movement.
Standard value: 30 mm (1.2 in) or less
✽✽ NOTICE
If the measured value exceeds the standard value, have the systemchecked by an authorized Kia deal-
er.
1SAA5019
30 mm (1.2 in)
Page 238 of 281
725
Maintenance
MANUAL TRANSAXLE (IF EQUIPPED)
Checking the manual
transaxle oil level
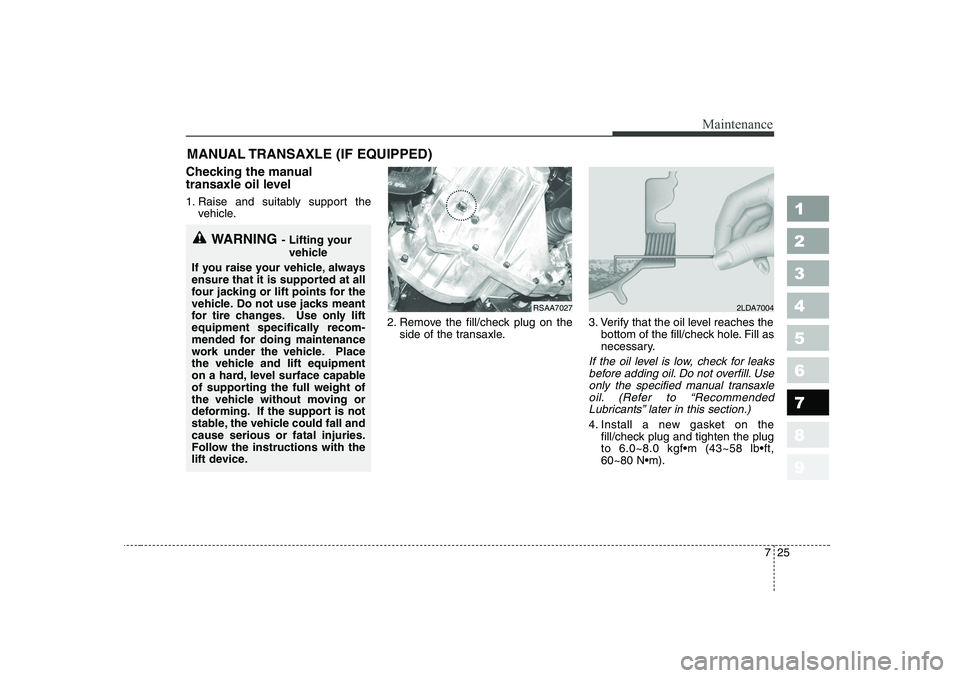
1. Raise and suitably support the vehicle.
2. Remove the fill/check plug on theside of the transaxle. 3. Verify that the oil level reaches the
bottom of the fill/check hole. Fill as
necessary.
If the oil level is low, check for leaks
before adding oil. Do not overfill. Useonly the specified manual transaxle oil. (Refer to “RecommendedLubricants” later in this section.)
4. Install a new gasket on the fill/check plug and tighten the plugto 6.0~8.0 kgfm (43~58 lbft,60~80 Nm).
1 23456789
WARNING - Lifting your
vehicle
If you raise your vehicle, always
ensure that it is supported at all
four jacking or lift points for the
vehicle. Do not use jacks meant
for tire changes. Use only lift
equipment specifically recom-
mended for doing maintenance
work under the vehicle. Place
the vehicle and lift equipment
on a hard, level surface capable
of supporting the full weight of
the vehicle without moving or
deforming. If the support is not
stable, the vehicle could fall andcause serious or fatal injuries.
Follow the instructions with the
lift device.
RSAA70272LDA7004
Page 239 of 281
Maintenance
26
7
1 23456789
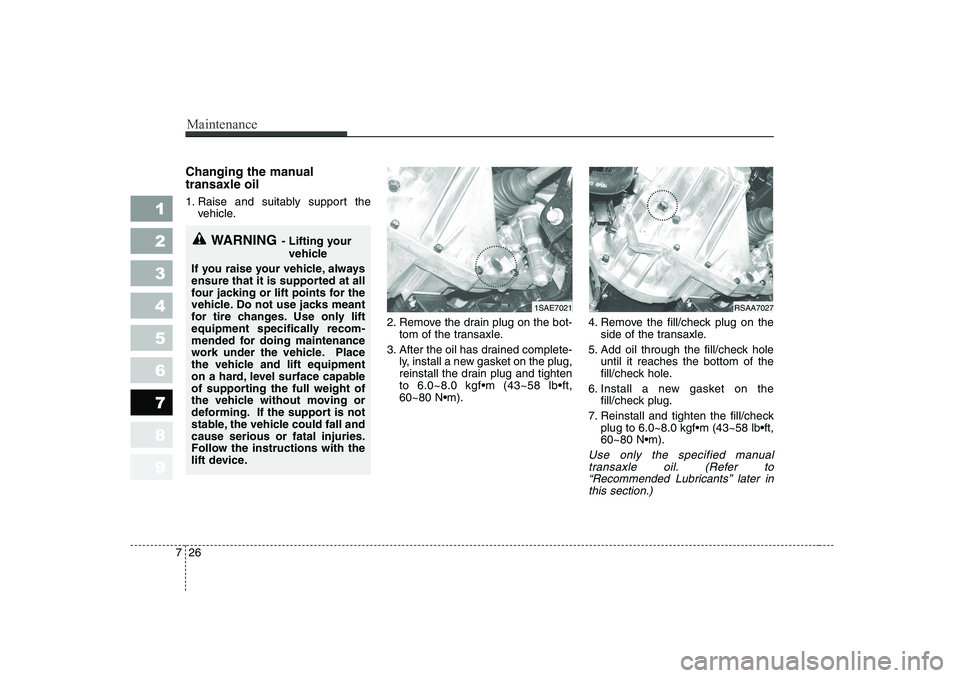
Changing the manual transaxle oil
1. Raise and suitably support the
vehicle.
2. Remove the drain plug on the bot-tom of the transaxle.
3. After the oil has drained complete- ly, install a new gasket on the plug,
reinstall the drain plug and tightento 6.0~8.0 kgfm (43~58 lbft,60~80 Nm). 4. Remove the fill/check plug on the
side of the transaxle.
5. Add oil through the fill/check hole until it reaches the bottom of the
fill/check hole.
6. Install a new gasket on the fill/check plug.
7. Reinstall and tighten the fill/check plug to 6.0~8.0 kgfm (43~58 lbft,60~80 Nm).
Use only the specified manual
transaxle oil. (Refer to“Recommended Lubricants’’ later inthis section.)
1SAE7021
WARNING - Lifting your
vehicle
If you raise your vehicle, always
ensure that it is supported at all
four jacking or lift points for the
vehicle. Do not use jacks meant
for tire changes. Use only lift
equipment specifically recom-
mended for doing maintenance
work under the vehicle. Place
the vehicle and lift equipment
on a hard, level surface capable
of supporting the full weight of
the vehicle without moving or
deforming. If the support is not
stable, the vehicle could fall andcause serious or fatal injuries.
Follow the instructions with the
lift device.
RSAA7027
Page 240 of 281
727
Maintenance
1 23456789
AUTOMATIC TRANSAXLE (IF EQUIPPED)
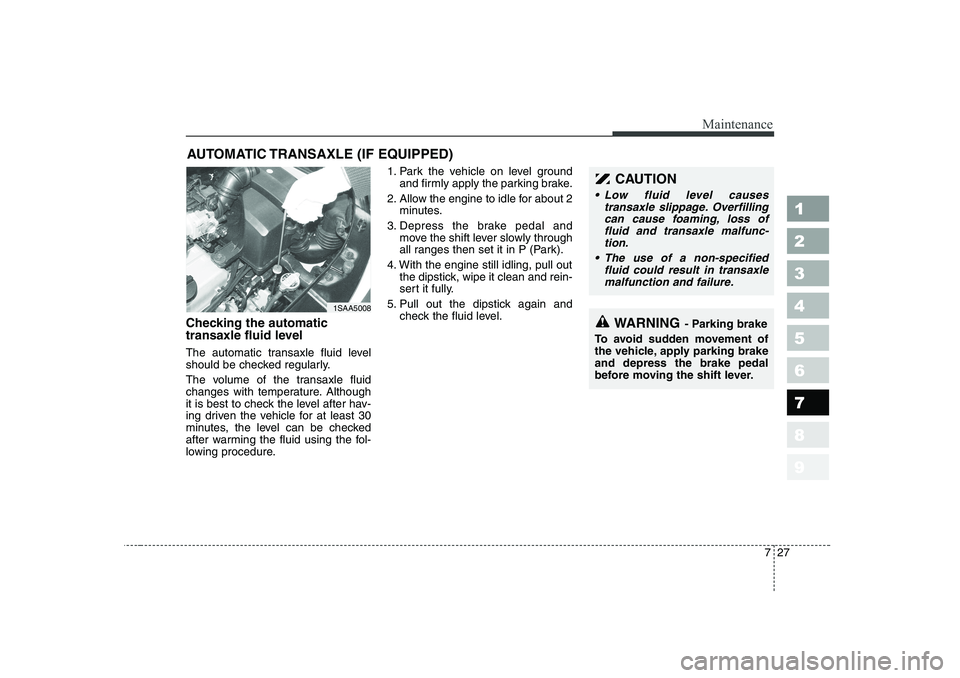
Checking the automatic
transaxle fluid level
The automatic transaxle fluid level
should be checked regularly.
The volume of the transaxle fluid
changes with temperature. Although
it is best to check the level after hav-
ing driven the vehicle for at least 30
minutes, the level can be checked
after warming the fluid using the fol-
lowing procedure. 1. Park the vehicle on level ground
and firmly apply the parking brake.
2. Allow the engine to idle for about 2 minutes.
3. Depress the brake pedal and move the shift lever slowly through
all ranges then set it in P (Park).
4. With the engine still idling, pull out the dipstick, wipe it clean and rein-
sert it fully.
5. Pull out the dipstick again and check the fluid level.
1SAA5008
CAUTION
Low fluid level causes
transaxle slippage. Overfillingcan cause foaming, loss offluid and transaxle malfunc-tion.
The use of a non-specified fluid could result in transaxlemalfunction and failure.
WARNING - Parking brake
To avoid sudden movement of
the vehicle, apply parking brakeand depress the brake pedal
before moving the shift lever.