lock KIA PICANTO 2006 Repair Manual
[x] Cancel search | Manufacturer: KIA, Model Year: 2006, Model line: PICANTO, Model: KIA PICANTO 2006Pages: 281, PDF Size: 9.89 MB
Page 261 of 281
Maintenance
48
7
1 23456789
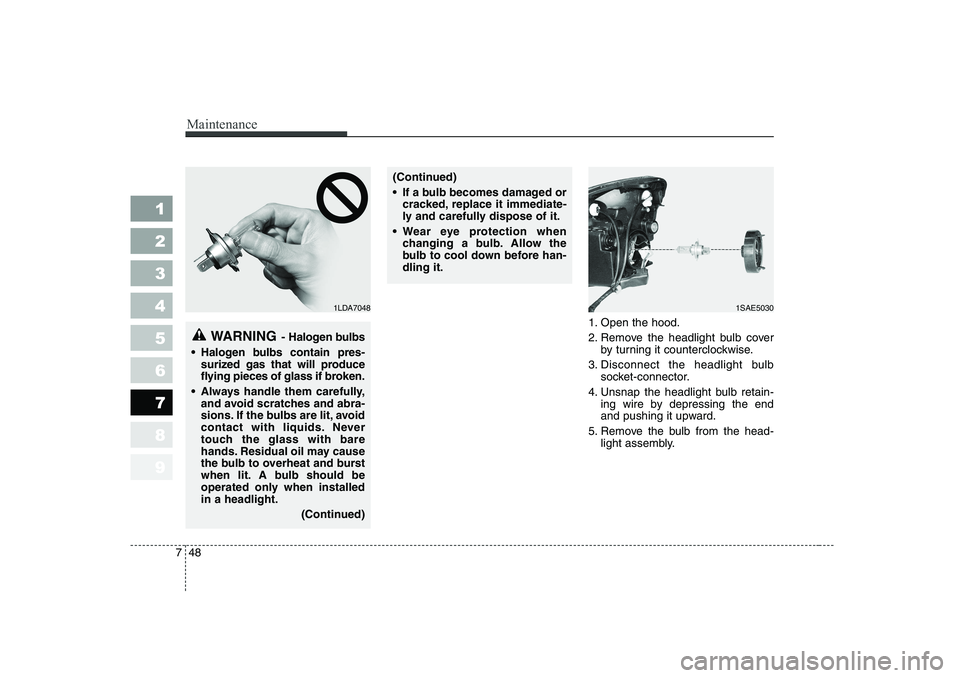
1. Open the hood.
2. Remove the headlight bulb cover
by turning it counterclockwise.
3. Disconnect the headlight bulb socket-connector.
4. Unsnap the headlight bulb retain- ing wire by depressing the end
and pushing it upward.
5. Remove the bulb from the head- light assembly.
WARNING - Halogen bulbs
Halogen bulbs contain pres-
surized gas that will produce
flying pieces of glass if broken.
Always handle them carefully, and avoid scratches and abra-
sions. If the bulbs are lit, avoid
contact with liquids. Never
touch the glass with bare
hands. Residual oil may cause
the bulb to overheat and burst
when lit. A bulb should be
operated only when installedin a headlight.
(Continued)
(Continued)
If a bulb becomes damaged orcracked, replace it immediate-
ly and carefully dispose of it.
Wear eye protection when changing a bulb. Allow the
bulb to cool down before han-dling it.
1SAE50301LDA7048
Page 262 of 281
749
Maintenance
1 23456789
6. Install a new headlight bulb andsnap the headlight bulb retaining
wire into position by aligning the
wire with the groove on the bulb.
7. Connect the headlight bulb socket- connector.
8. Install the headlight bulb cover by turning it clockwise.
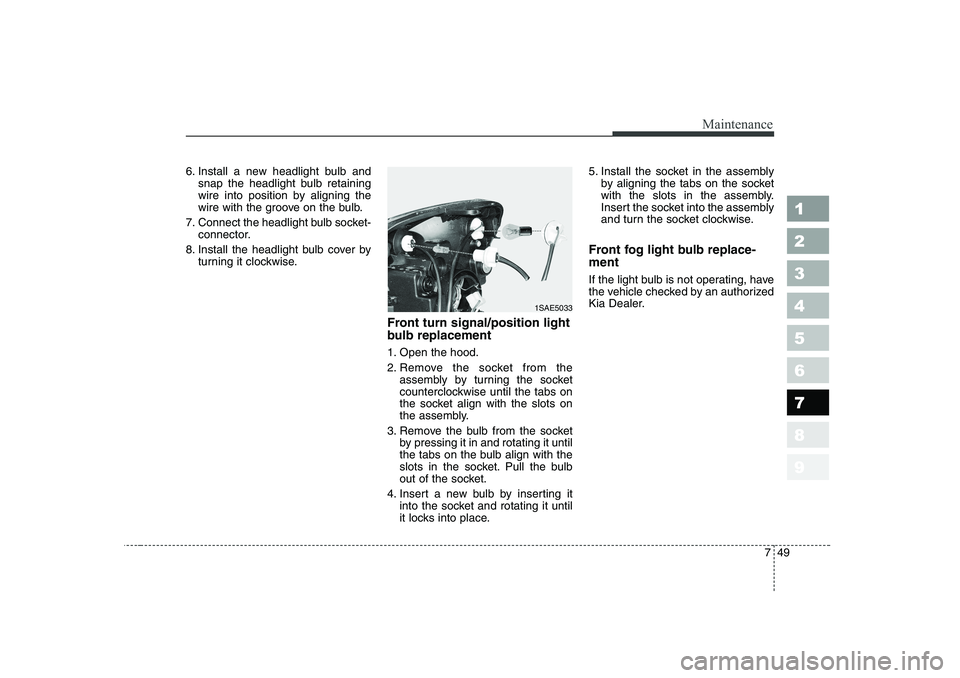
Front turn signal/position light
bulb replacement
1. Open the hood.
2. Remove the socket from theassembly by turning the socket
counterclockwise until the tabs on
the socket align with the slots on
the assembly.
3. Remove the bulb from the socket by pressing it in and rotating it until
the tabs on the bulb align with the
slots in the socket. Pull the bulb
out of the socket.
4. Insert a new bulb by inserting it into the socket and rotating it until
it locks into place. 5. Install the socket in the assembly
by aligning the tabs on the socket
with the slots in the assembly.
Insert the socket into the assembly
and turn the socket clockwise.
Front fog light bulb replace- ment
If the light bulb is not operating, have
the vehicle checked by an authorized
Kia Dealer.
1SAE5033
Page 263 of 281
Maintenance
50
7
1 23456789
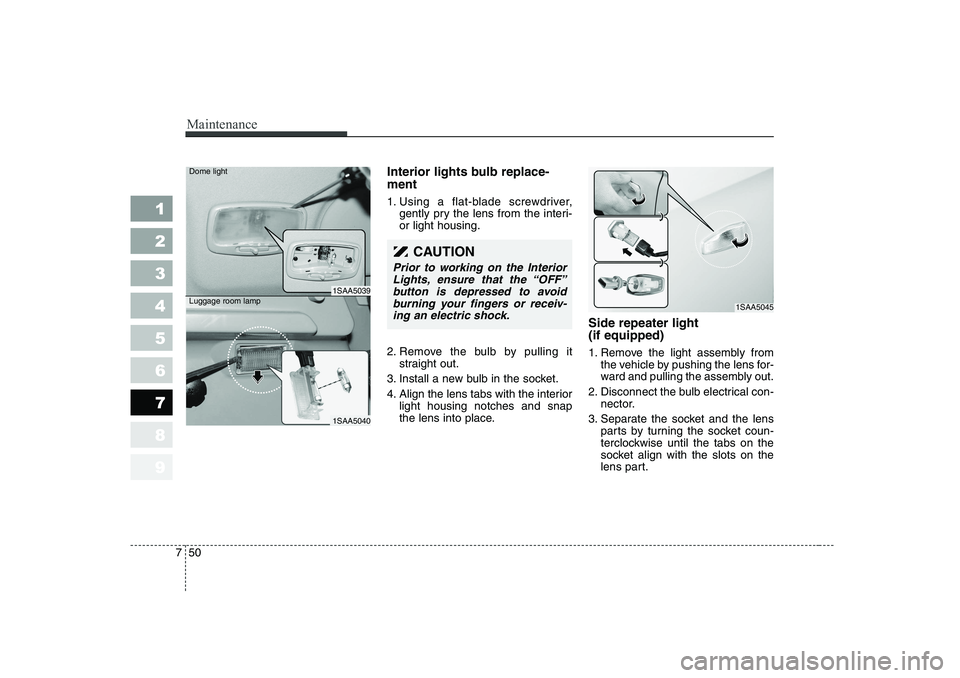
Interior lights bulb replace- ment
1. Using a flat-blade screwdriver,
gently pry the lens from the interi- or light housing.
2. Remove the bulb by pulling it straight out.
3. Install a new bulb in the socket.
4. Align the lens tabs with the interior light housing notches and snap
the lens into place. Side repeater light (if equipped)
1. Remove the light assembly from
the vehicle by pushing the lens for-
ward and pulling the assembly out.
2. Disconnect the bulb electrical con- nector.
3. Separate the socket and the lens parts by turning the socket coun-
terclockwise until the tabs on the
socket align with the slots on the
lens part.
CAUTION
Prior to working on the Interior
Lights, ensure that the “OFF”button is depressed to avoidburning your fingers or receiv- ing an electric shock.
1SAA5039
1SAA5040
Dome light Luggage room lamp
1SAA5045
Page 264 of 281
751
Maintenance
1 23456789
4. Remove the bulb by pulling itstraight out.
5. Insert a new bulb in the socket.
6. Reassemble the socket and the lens part.
7. Connect the bulb electrical con- nector.
8. Reinstall the light assembly to the body of the vehicle.
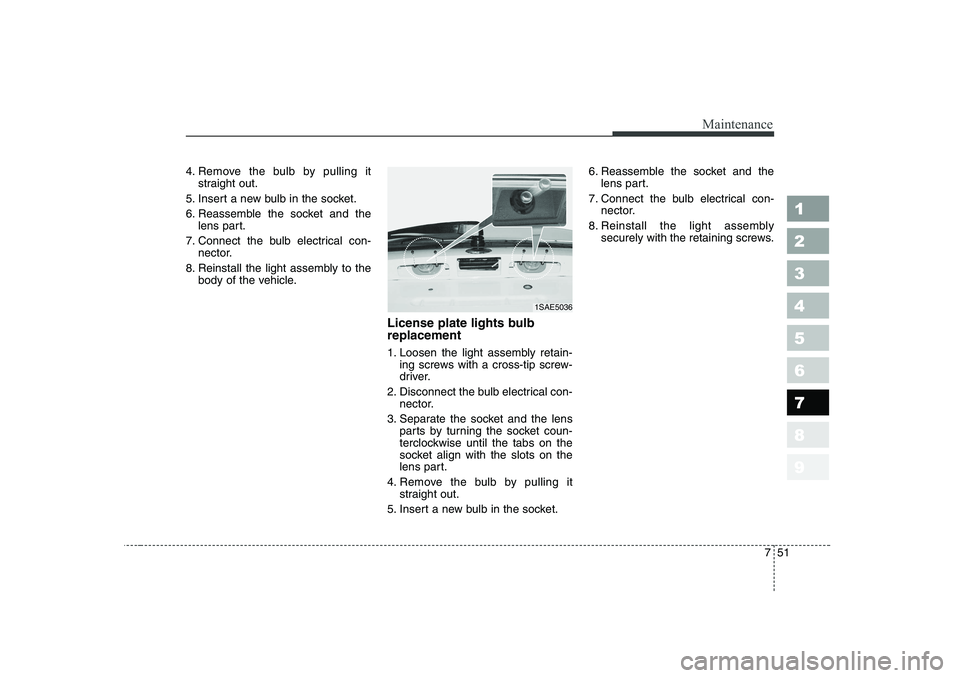
License plate lights bulb replacement
1. Loosen the light assembly retain-ing screws with a cross-tip screw-
driver.
2. Disconnect the bulb electrical con- nector.
3. Separate the socket and the lens parts by turning the socket coun-
terclockwise until the tabs on the
socket align with the slots on the
lens part.
4. Remove the bulb by pulling it straight out.
5. Insert a new bulb in the socket. 6. Reassemble the socket and the
lens part.
7. Connect the bulb electrical con- nector.
8. Reinstall the light assembly securely with the retaining screws.
1SAE5036
Page 265 of 281
Maintenance
52
7
1 23456789
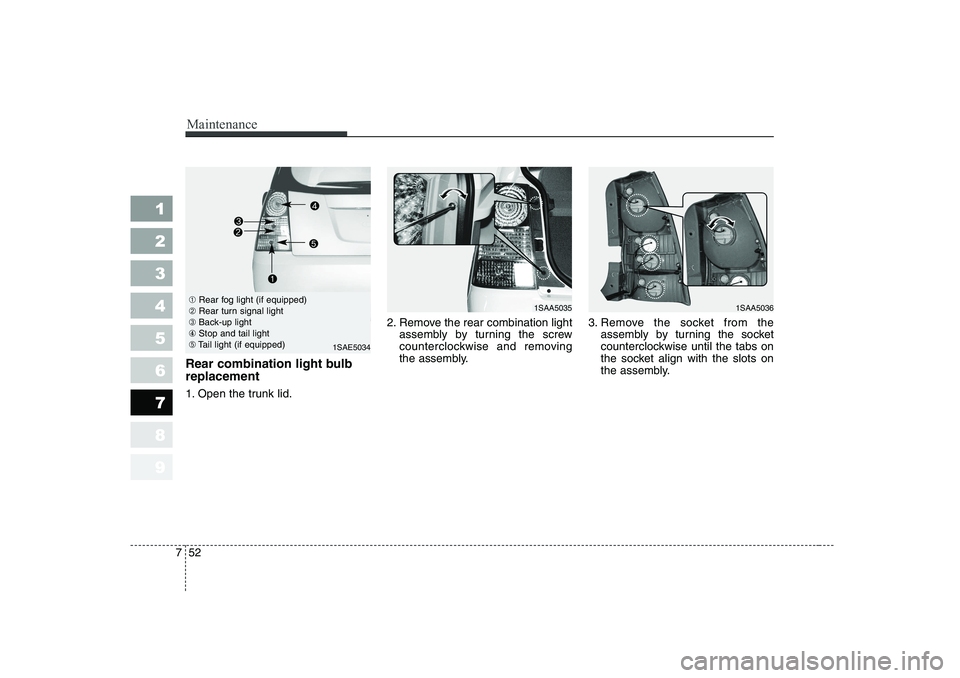
Rear combination light bulb replacement
1. Open the trunk lid. 2. Remove the rear combination light
assembly by turning the screw
counterclockwise and removing
the assembly. 3. Remove the socket from the
assembly by turning the socket
counterclockwise until the tabs on
the socket align with the slots on
the assembly.
➀Rear fog light (if equipped)
➁ Rear turn signal light
➂ Back-up light
④ Stop and tail light
➄ Tail light (if equipped)
1SAE5034
1SAA50361SAA5035
Page 266 of 281
753
Maintenance
1 23456789
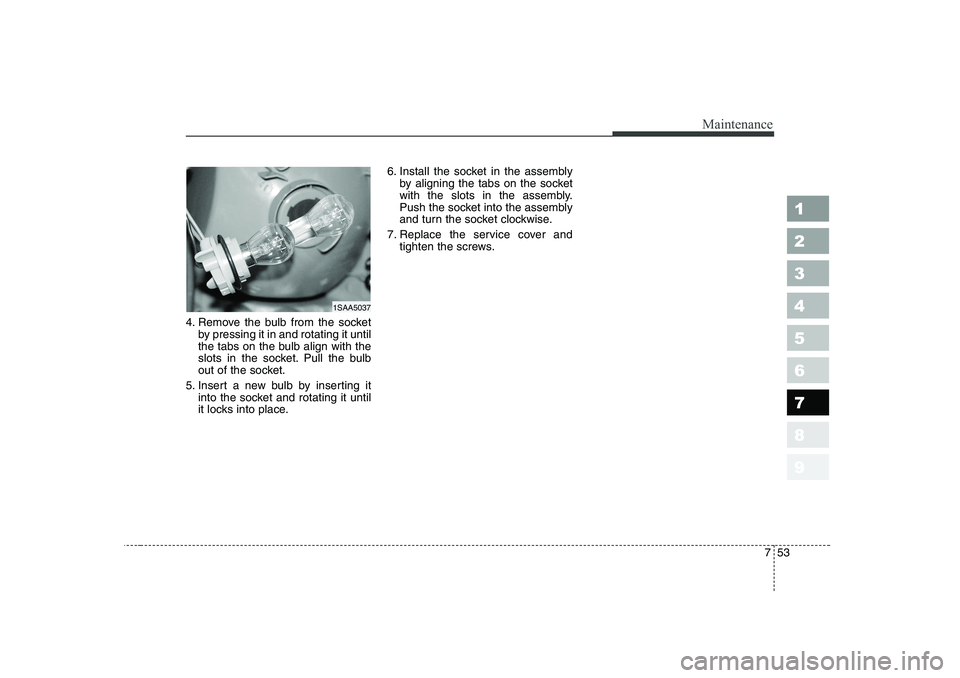
4. Remove the bulb from the socketby pressing it in and rotating it until
the tabs on the bulb align with the
slots in the socket. Pull the bulb
out of the socket.
5. Insert a new bulb by inserting it into the socket and rotating it until
it locks into place. 6. Install the socket in the assembly
by aligning the tabs on the socket
with the slots in the assembly.
Push the socket into the assembly
and turn the socket clockwise.
7. Replace the service cover and tighten the screws.
1SAA5037
Page 279 of 281
Index
2
9
1 23456789
Air cleaner ·································································· 7-31
Airbags-supplemental restraint system ··················· 3-56
Antenna ······································································· 3-91
Automatic transaxle ··········································· 4-7, 7-27
Battery ········································································ 7-37
Before driving ······························································ 5-5
Brake system ······························································ 4-13
Brakes and clutch ······················································ 7-20
Bulb replacement ······················································· 7-47
Climate control air filter ············································ 7-33
Defroster ····································································· 4-41
Door locks ····································································· 3-8
Drive belts ··································································· 7-22
Electrical circuit protection ········································ 6-7
Emergency commodity ·············································· 6-34
Emergency starting ····················································· 6-4
Emission control system ·············································· 5-3 Engine compartment ················································· 7-12
Engine cooling system ··············································· 7-17
Engine oil and oil filter ·············································· 7-14
Exterior care ······························································ 7-56
Exterior overview ························································ 2-2
Fuel filler lid ······························································· 3-76
Fuel filter ······································································7-31
Fuel requirements ························································ 5-2
Gauges ········································································· 4-25
Hazard warning flasher ············································ 4-42
Hood ············································································ 3-75
How to use this manual ··············································· 1-2
If you have a flat tire
(If the vehicle is equipped with spare tire) ··········· 6-19
If you have a flat tire (If the vehicle is
equipped with TireMobilityKit) ······························ 6-25
Ignition switch ······························································ 4-2
Immobilizer system ······················································ 3-7
Instrument cluster ····················································· 4-23
Instrument panel overview ········································· 2-5
A
B
C
D
E
F
G
H
I