stop start KIA QUORIS 2016 Owner's Manual
[x] Cancel search | Manufacturer: KIA, Model Year: 2016, Model line: QUORIS, Model: KIA QUORIS 2016Pages: 513, PDF Size: 30.14 MB
Page 111 of 513
Features of your vehicle
24
4
Closing the trunk
To close the power trunk, do one of
the following:
Push the close button of the power
trunk main switch until the power
trunk is closed securely (Type A).
The chime will sound twice.
Push the power trunk main switch until the power trunk is closed
securely (Type B). The chime will
sound twice.
Push the power trunk close button.
Push the power trunk lock button when all doors and engine hood
are closed with the smart key in
your possession. After closing, all
doors and trunk lock automatically.
✽✽ NOTICE
The chime sound will operate if you
push the power trunk lock button
when:
- Any door is open.
- The engine start/stop button is not in the OFF position.
- The smart key is in the vehicle.
Power trunk non-opening condi-
tions
The power trunk will not open or
close automatically, when the vehicle
is moving more than 3 km/h (2 mph).
✽✽ NOTICE
If there are obstacles such as snow
on the power trunk, it may not open
automatically. After remove the
obstacle, try to open it again. ✽
✽
NOTICE
The power trunk can be operated when the engine is not running.
However the power trunk opera-
tion consumes large amounts of
vehicle electric power. To prevent
the battery from being discharged,
do not operate it excessively e.g.:
more than approximately 10 times
repeatedly.
To prevent the battery from being discharged, do not leave the power
trunk in the open position for a
long lime.
Do not apply excessive force while operating the power trunk. This
could cause damage to the power
trunk.
Do not modify or repair any part of the power trunk by yourself. We
recommend that the system be
serviced by an authorized Kia
dealer.
When jacking up the vehicle to change a tire or repair the vehicle,
do not operate the power trunk.
This could cause the power trunk
to operate improperly.
CAUTION
The chime will sound 10 times if
you drive over 3km/h(2mph)with the trunk opened. Stop your vehicle immediately at asafe place and check if yourtrunk is opened.
Page 120 of 513
433
Features of your vehicle
Power windows
The engine start/stop button must be
in the ON position for power windows
to operate.
Each door has a power window
switch that controls the door's win-
dow. The driver has a power window
lock switch which can block the oper-
ation of rear passenger windows.
The power windows can be operated
for approximately 30 seconds after
engine is turned off. However, if the
front doors open, the power windows
cannot be operated within the 30
second period.✽✽NOTICE
While driving with the rear windows
down or with the sunroof (if
equipped) in an open (or partially
open position), your vehicle may
demonstrate a wind buffeting or
pulsation noise. This noise is a nor-
mal occurrence and can be reduced
or eliminated by taking the follow-
ing actions. If the noise occurs with
one or both of the rear windows
down, partially lower both front
windows approximately one inch. If
you experience the noise with the
sunroof open, slightly reduce the
size of the sunroof opening.Window opening and closing
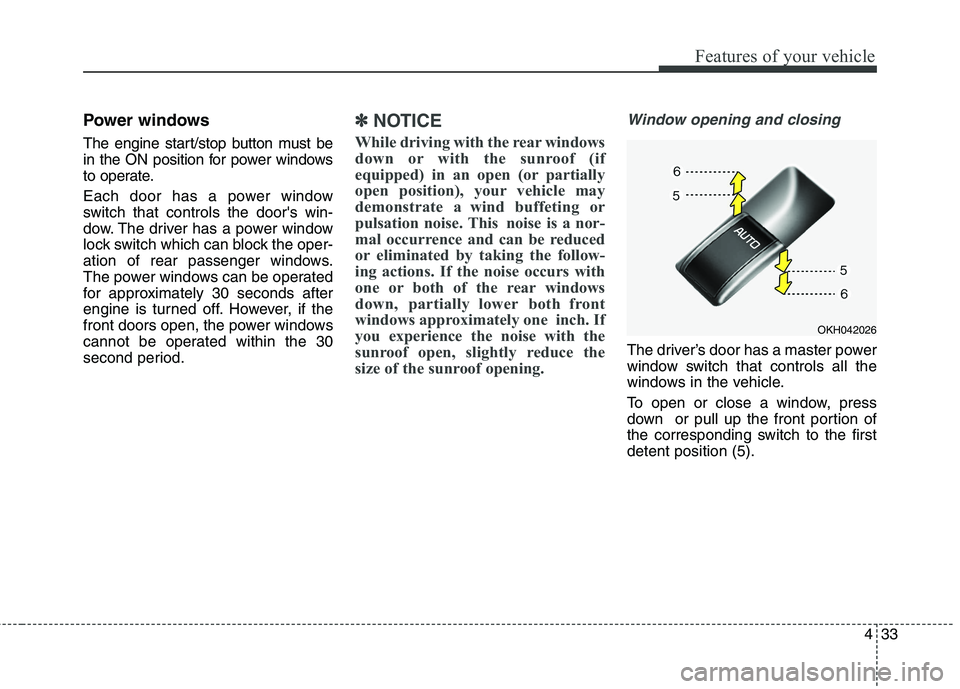
The driver’s door has a master power
window switch that controls all the
windows in the vehicle.
To open or close a window, press
down or pull up the front portion of
the corresponding switch to the firstdetent position (5).
OKH042026
Page 121 of 513
Features of your vehicle
34
4
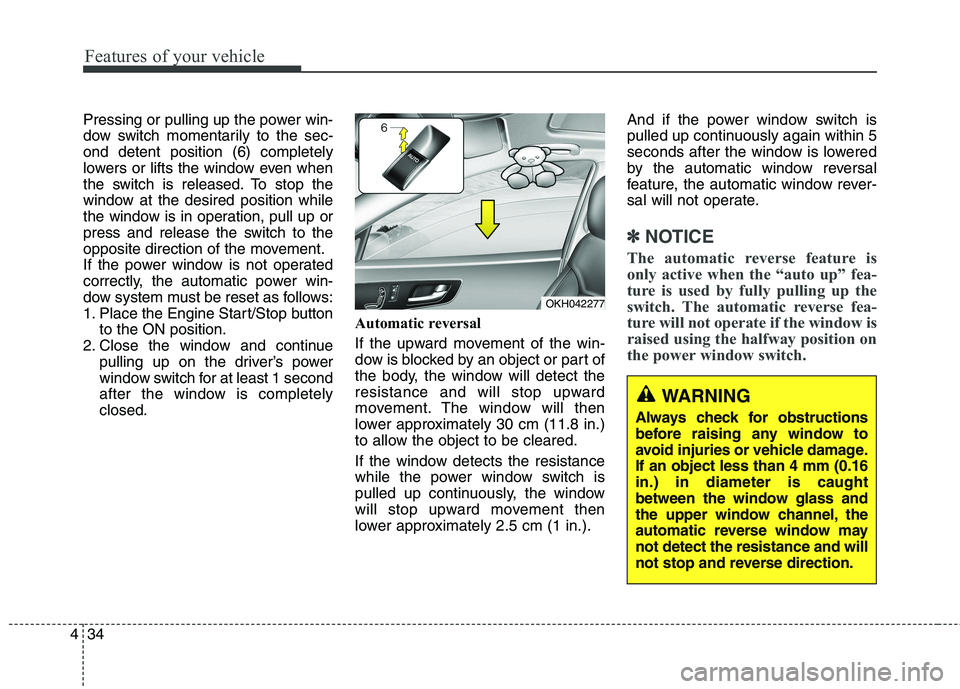
Pressing or pulling up the power win-
dow switch momentarily to the sec-ond detent position (6) completely
lowers or lifts the window even when
the switch is released. To stop the
window at the desired position while
the window is in operation, pull up or
press and release the switch to the
opposite direction of the movement.
If the power window is not operated
correctly, the automatic power win-
dow system must be reset as follows:
1. Place the Engine Start/Stop button
to the ON position.
2. Close the window and continue pulling up on the driver’s power
window switch for at least 1 second
after the window is completelyclosed. Automatic reversal
If the upward movement of the win-
dow is blocked by an object or part of
the body, the window will detect the
resistance and will stop upward
movement. The window will then
lower approximately 30 cm (11.8 in.)
to allow the object to be cleared.
If the window detects the resistance
while the power window switch is
pulled up continuously, the window
will stop upward movement then
lower approximately 2.5 cm (1 in.). And if the power window switch is
pulled up continuously again within 5
seconds after the window is lowered
by the automatic window reversal
feature, the automatic window rever-
sal will not operate.
✽✽
NOTICE
The automatic reverse feature is
only active when the “auto up” fea-
ture is used by fully pulling up the
switch. The automatic reverse fea-
ture will not operate if the window is
raised using the halfway position on
the power window switch.
WARNING
Always check for obstructions
before raising any window to
avoid injuries or vehicle damage.If an object less than 4 mm (0.16in.) in diameter is caught
between the window glass and
the upper window channel, the
automatic reverse window maynot detect the resistance and will
not stop and reverse direction.
OKH042277
Page 128 of 513
441
Features of your vehicle
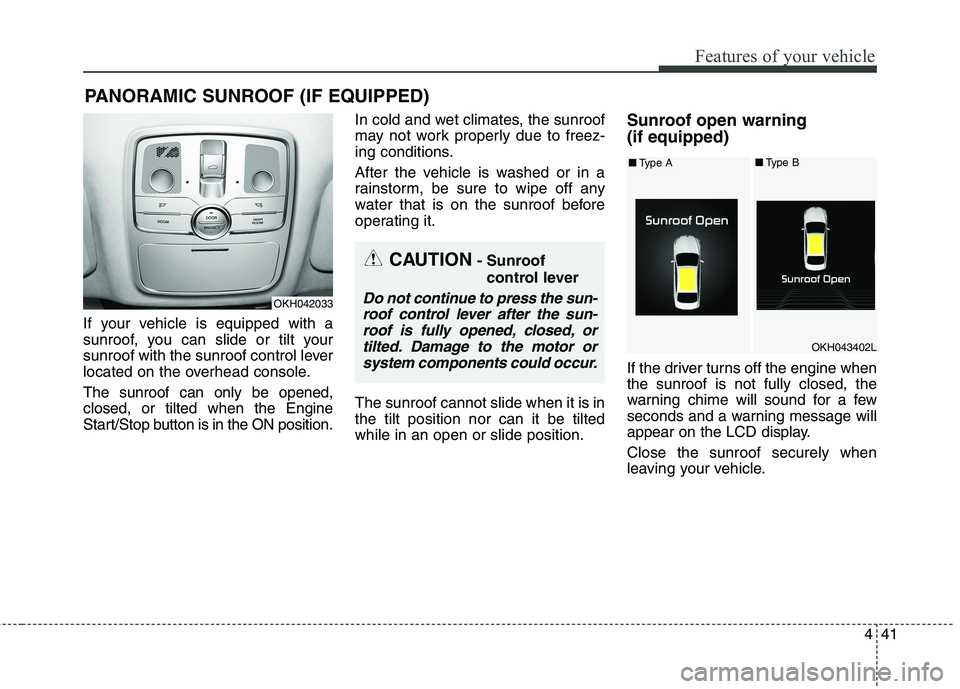
If your vehicle is equipped with a
sunroof, you can slide or tilt your
sunroof with the sunroof control lever
located on the overhead console. The sunroof can only be opened, closed, or tilted when the Engine
Start/Stop button is in the ON position.In cold and wet climates, the sunroof
may not work properly due to freez-
ing conditions.
After the vehicle is washed or in a
rainstorm, be sure to wipe off any
water that is on the sunroof before
operating it. The sunroof cannot slide when it is in the tilt position nor can it be tiltedwhile in an open or slide position.Sunroof open warning (if equipped)
If the driver turns off the engine when the sunroof is not fully closed, the
warning chime will sound for a few
seconds and a warning message will
appear on the LCD display. Close the sunroof securely when
leaving your vehicle.
PANORAMIC SUNROOF (IF EQUIPPED)
CAUTION
- Sunroof
control lever
Do not continue to press the sun-roof control lever after the sun-roof is fully opened, closed, or tilted. Damage to the motor orsystem components could occur.OKH042033
OKH043402L
■ Type A■Type B
Page 132 of 513
445
Features of your vehicle
Resetting the sunroof
Whenever the vehicle battery is dis- connected or discharged, or related
fuse is blown, you must reset your
sunroof system as follows:
1. The Engine Start/Stop Button mustbe in the ON position.
2. Release the control lever.
3. Push and hold the control lever for- ward (for more than 10 seconds) until the sunroof tilts and slightly
moves. Then, release the lever.
4. Push the sunroof control lever for- ward in the direction of close until
the sunroof operates as follows:
Sunroof glass and sunshade open �
Sunroof glass and sunshade close
Then, release the control lever.
When this is complete, the sunroof system is reset.
❈ For more detailed information,
contact an authorized Kia dealer.✽✽
NOTICE
If the sunroof is not reset when the
vehicle battery is disconnected or
discharged, or related fuse is blown,
the sunroof may operate improperly.
Page 133 of 513
Features of your vehicle
46
4
Electronic Hydraulic Power Steering (EHPS) EHPS uses an electromotor to assist
you in steering the vehicle. It senses
the vehicle speed and road condition.
If the engine is off or if the power
steering system becomes inoperative,
the vehicle may still be steered, but it
will require increased steering effort.
Should you notice any change in the
effort required to steer during normal
vehicle operation, we recommend
that the system be checked by an
authorized Kia dealer.✽✽
NOTICE
If the power steering drive belt
breaks or if the power steering
pump malfunctions, the steering
effort will greatly increase.
✽
✽ NOTICE
If the vehicle is parked for extended
periods outside in cold weather
(below -10°C/14°F), the power steer-
ing may require increased effort
when the engine is first started. This
is caused by increased fluid viscosity
due to the cold weather and does not
indicate a malfunction.
When this happens, increase the
engine RPM by depressing accelera-
tor until the RPM reaches 1,500 rpm
then release or let the engine idle for
two or three minutes to warm up the
fluid.
Tilt steering
Tilt steering allows you to adjust the
steering wheel before you drive. You
can also raise it to give your legs
more room when you exit and enter
the vehicle.
The steering wheel should be posi-
tioned so that it is comfortable for
you to drive, while permitting you to
see the instrument panel warning
lights and gauges.
STEERING WHEEL
WARNING
Never adjust the angle of the steering wheel while driving.
You may lose steering control
and cause severe personal
injury, death or accidents.
After adjusting, push the steering wheel both up and
down to be certain it is lockedin position.
CAUTION
Never hold the steering wheel
against a stop (extreme right orleft turn) for more than 5 sec- onds with the engine running.Holding the steering wheel formore than 5 seconds in either position may cause damage tothe power steering pump.
Page 134 of 513
447
Features of your vehicle
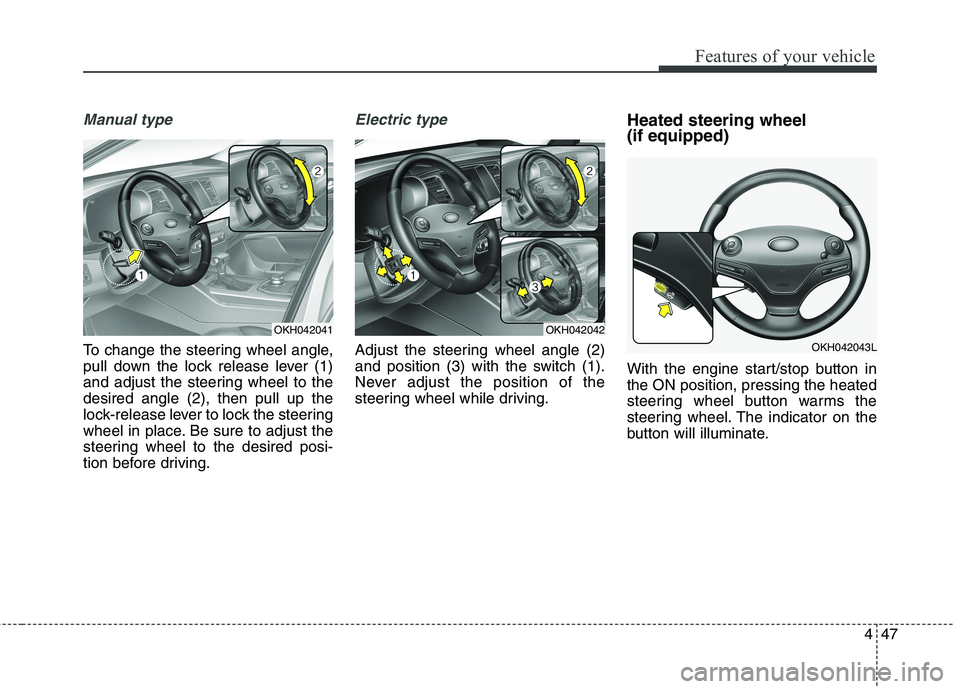
Manual type
To change the steering wheel angle,
pull down the lock release lever (1)
and adjust the steering wheel to thedesired angle (2), then pull up the
lock-release lever to lock the steering
wheel in place. Be sure to adjust the
steering wheel to the desired posi-
tion before driving.
Electric type
Adjust the steering wheel angle (2)
and position (3) with the switch (1).
Never adjust the position of the
steering wheel while driving.Heated steering wheel (if equipped)
With the engine start/stop button in the ON position, pressing the heated
steering wheel button warms the
steering wheel. The indicator on the
button will illuminate.
OKH042041OKH042042
OKH042043L
Page 139 of 513
Features of your vehicle
52
4
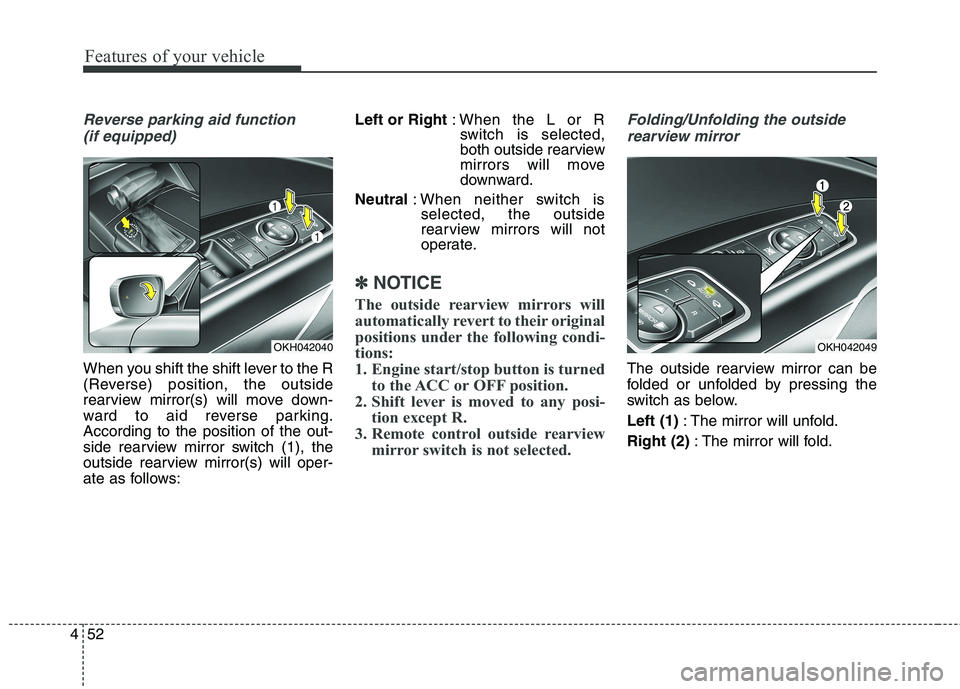
Reverse parking aid function
(if equipped)
When you shift the shift lever to the R
(Reverse) position, the outside
rearview mirror(s) will move down-
ward to aid reverse parking.According to the position of the out-
side rearview mirror switch (1), the
outside rearview mirror(s) will oper-
ate as follows: Left or Right
: When the L or R
switch is selected,
both outside rearview
mirrors will move
downward.
Neutral : When neither switch is
selected, the outside
rearview mirrors will not
operate.
✽✽ NOTICE
The outside rearview mirrors will
automatically revert to their original
positions under the following condi-
tions:
1. Engine start/stop button is turned to the ACC or OFF position.
2. Shift lever is moved to any posi- tion except R.
3. Remote control outside rearview mirror switch is not selected.
Folding/Unfolding the outside
rearview mirror
The outside rearview mirror can be
folded or unfolded by pressing the
switch as below. Left (1) : The mirror will unfold.
Right (2) : The mirror will fold.
OKH042040OKH042049
Page 140 of 513
453
Features of your vehicle
Center (AUTO):
The mirror will fold or unfold auto-
matically as follows:
- The mirror will fold or unfold when the door is locked or unlocked by
the smart key.
- The mirror will fold or unfold when the door is locked or unlocked by
the button on the outside door han-
dle.
- The mirror will unfold when you approach the vehicle (all doors
closed and locked) with a smart
key in possession.
CAUTION
In case it is an electric type out-
side rearview mirror, don’t fold itby hand. It could cause motor failure.
CAUTION
The electric type outsiderearview mirror operates eventhough the Engine Start/Stop button is in the OFF position.However, to prevent unneces-sary battery discharge, do notadjust the mirrors longer than necessary while the engine isnot running.
Page 142 of 513
455
Features of your vehicle
Instrument Cluster ControlAdjusting Instrument ClusterIllumination
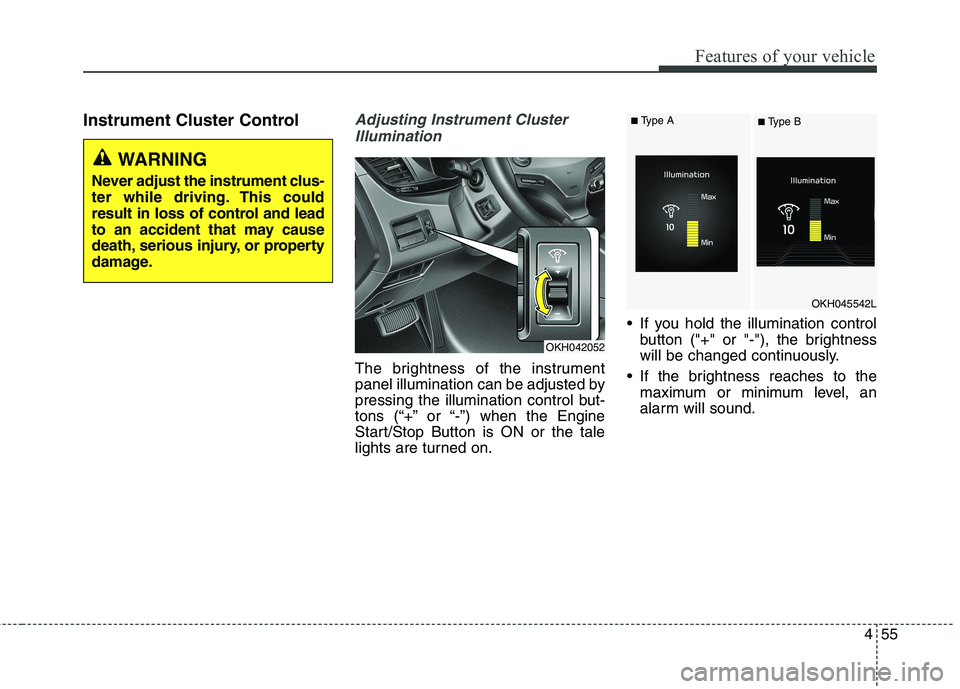
The brightness of the instrument
panel illumination can be adjusted by
pressing the illumination control but-
tons (“+” or “-”) when the Engine
Start/Stop Button is ON or the tale
lights are turned on. If you hold the illumination control
button ("+" or "-"), the brightness
will be changed continuously.
If the brightness reaches to the maximum or minimum level, an
alarm will sound.
OKH042052
OKH045542L
WARNING
Never adjust the instrument clus-
ter while driving. This could
result in loss of control and lead
to an accident that may cause
death, serious injury, or property
damage.
■ Type A
■ Type B