KIA RIO HATCHBACK 2008 Owners Manual
Manufacturer: KIA, Model Year: 2008, Model line: RIO HATCHBACK, Model: KIA RIO HATCHBACK 2008Pages: 219, PDF Size: 5.17 MB
Page 101 of 219
Knowing your vehicle
92 3
7. AUDIO CONTROL / TUNE Select
Button
7-1. AUDIO
Pressing the AUDIO button changes the
BASS, MID-RANGE, TREBLE, FADER
and BALANCE TUNE mode.
The mode selected is shown on the dis-
play.
After selecting each mode, rotate the
Audio control knob clockwise or counter-
clockwise.
BASS Control
To increase the BASS, rotate the knob
clockwise, while to decrease the BASS,
rotate the knob counterclockwise.
MID-RANGE Control
To increase the MID-RANGE, rotate the
knob clockwise, while to decrease the
MID-RANGE, rotate the knob counter-
clockwise.
TREBLE Control
To increase the TREBLE, rotate the knob
clockwise, while to decrease the TRE-
BLE, rotate the knob counterclockwise.
FADER Control
Turn the control knob clockwise to
emphasize rear speaker sound (front
speaker sound will be attenuated). When
the control knob is turned counterclock-
wise, front speaker sound will be empha-
sized (rear speaker sound will be attenu-
ated).
BALANCE Control
Rotate the knob clockwise to emphasize
right speaker sound (left speaker sound
will be attenuated). When the control
knob is turned counter clockwise, left
speaker sound will be emphasized (right
speaker sound will be attenuated).
7-2. TUNE Select Knob
Rotate the knob clockwise to increase
the frequency and turn the knob counter-
clockwise to reduce the frequency.
✽
NOTICE
• Do not place beverages close to the
audio system. The playback mecha-
nism may be damaged if you spill
them.
• Do not strike or allow anything to
impact the audio system, damage to
the system mechanisms could occur.
Page 102 of 219
393
Knowing your vehicle
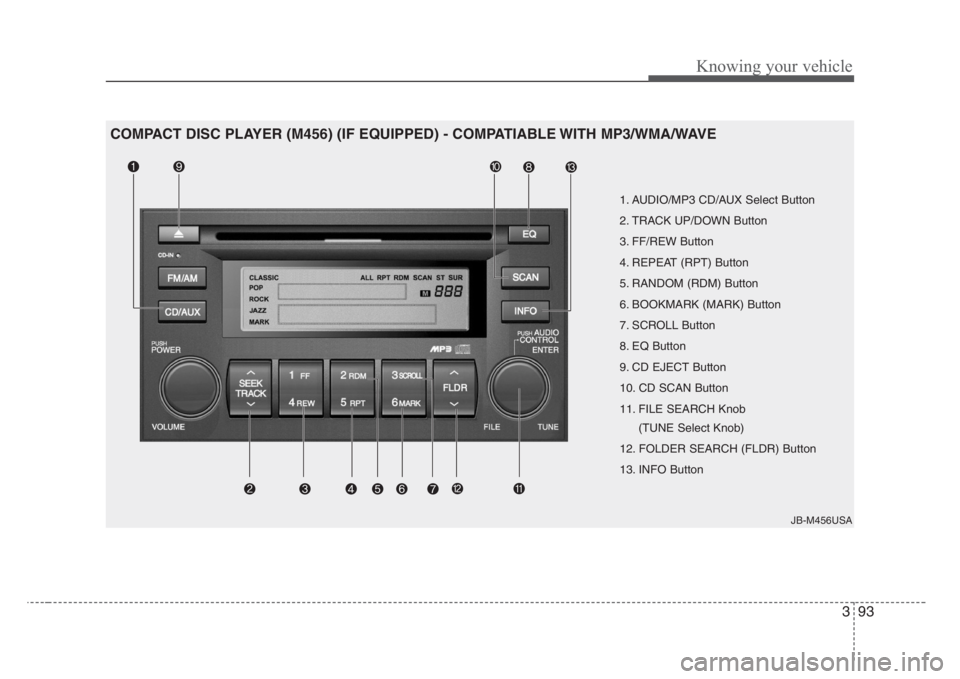
1. AUDIO/MP3 CD/AUX Select Button
2. TRACK UP/DOWN Button
3. FF/REW Button
4. REPEAT (RPT) Button
5. RANDOM (RDM) Button
6. BOOKMARK (MARK) Button
7. SCROLL Button
8. EQ Button
9. CD EJECT Button
10. CD SCAN Button
11. FILE SEARCH Knob
(TUNE Select Knob)
12. FOLDER SEARCH (FLDR) Button
13. INFO Button
JB-M456USA
COMPACT DISC PLAYER (M456) (IF EQUIPPED) - COMPATIABLE WITH MP3/WMA/WAVE
Page 103 of 219
Knowing your vehicle
94 3
1.AUDIO/MP3 CD/AUX Select
Button
AUDIO/MP3 CD Select
• Insert the CD with the label facing
upward.
• Insert the CD to start CD playback,
during radio operation.
• If you press the CD/AUX button while a
disc is in the CD deck, the CD player
will begin playing even if the radio or
cassette player is being used.
• The CD/AUX player can be used when
the ignition switch is in either the “ON”
or “ACC” position.
• Push the CD/AUX button to turn on
that function without pushing the
Power ON-OFF control knob.
✽
NOTICE
• Do not stick paper or tape etc., on the
label side or the recording side of any
discs, as it may cause a malfunction.
• The unit can play a multi-session CD-
R (recordable CD) and CD-RW
(rewritable CD) that consists of more
than two sessions.
Please refer to the manual of CD-
R/CD-RW recoder or CD-R/CD-RW
software for more information on
finalization process.
• Depending on the recording status,
some CD-Rs/CD-RWs may not be
played on this unit.
✽
NOTICE
Playback of MP3 and WMA file formats
are supported. Load to play time for
these formats may be longer due to the
compressed nature of these discs.
AUX-IN Select
• When the AUX device (such as
portable MP3 players) is connected to
vehicle's AUX-IN terminal, you can
switch to AUX-IN mode by pressing
CD/AUX button.
• With a CD loaded and AUX device
connected at the same time, this but-
ton switches between AUX-IN mode
and CD mode.
✽
NOTICE
• If the AUX device is not connected, you
cannot switch to AUX-IN mode.
• When the AUX device is disconnected
while in AUX-IN mode, the unit auto-
matically switches its mode to last
selected mode (CD mode or RADIO
mode).
• The quality of sound may be defected
or distorted when the unit's EQ
(BASS/MID/TREBLE) control and
AUX device's EQ control are both
enabled (not flat). When you want to
use the unit's EQ control feature, dis-
able the AUX device's EQ control fea-
ture, and vice versa.
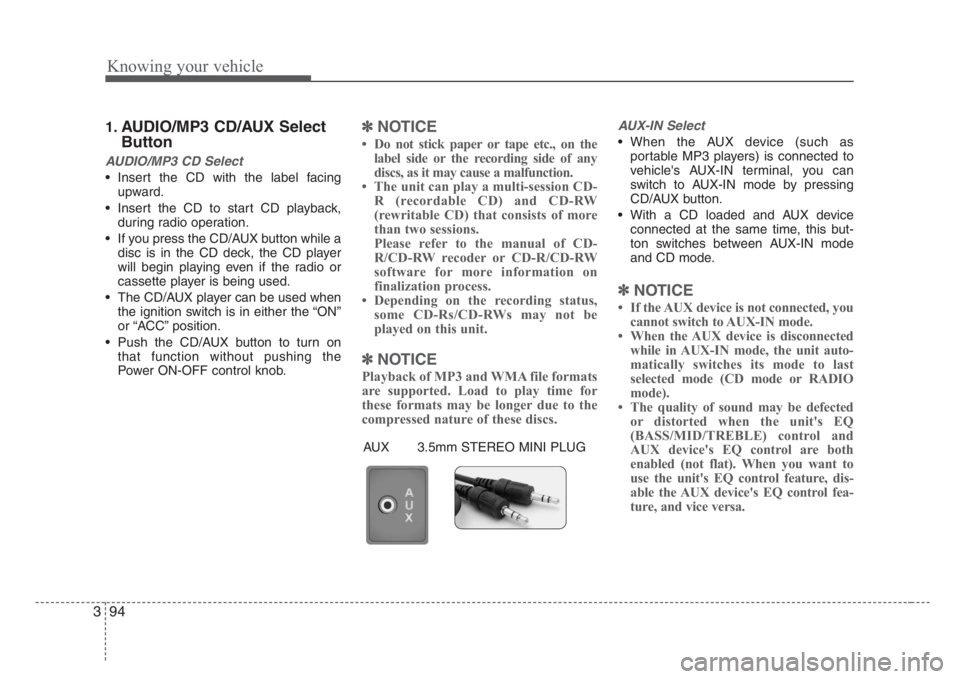
AUX 3.5mm STEREO MINI PLUG
Page 104 of 219
395
Knowing your vehicle
2. TRACK UP/DOWN Button
• The desired track on the disc currently
being played can be selected using the
track number.
• Press button once to skip forward
to the beginning of the next track.
Press within a second after play-
back begins to quickly move backward
through a CD.
If you press after more than a sec-
ond, it will take you to the beginning of
the file you are now listening to.
3. FF/REW Button
If you want to fast forward or reverse
through the compact disc track, push and
hold the FF or REW button.
When you release the button, the compact
disc player will resume playing.
4. REPEAT (RPT) Button
• To repeat the track you are currently
listening to, press the RPT button. To
cancel, press it again.
• To repeat the music within selected
folder, press the RPT button for more
than 0.8 seconds. To cancel, press it
again. (MP3 CD only)
• If you do not release RPT operation
when the track ends, it will automati-
cally be replayed.
This process will be continued until you
push the button again or turn the power
OFF then ON.
5. RANDOM (RDM) Button
With random, you can listen to the tracks
in random, rather than sequential order.
To use random, do the following:
• Press the RDM button to listen to
recorded tracks in random sequence.
Press RDM again to cancel or turn the
power OFF then ON.
The unit defaults to playing tracks in
sequential order.
• To listen to the music within the select-
ed folder in random order, press the
RDM button within a second. To can-
cel, press it again or turn the power
OFF then ON . (MP3 CD only)
6. BOOKMARK (MARK) Button
When the CD player unit is operating, the
desired track on the disc can be book-
marked by using the MARK button.(MP3
CD only)
• Press the MARK button for more than
0.8 seconds to bookmark the desired
track.
“M” will be displayed on the LCD and
“MEMORY(1~50)” will display for
approximately five seconds with beep
sound.
To play a bookmarked track, press the
MARK button within 0.8 seconds and
select the bookmarked track to play.
• To erase a bookmarked track, press
the MARK button for more than 0.8
seconds. The unit will beep once when
the bookmark is erased.
Page 105 of 219
Knowing your vehicle
96 3
✽
NOTICE
Tracks stored using the Bookmark func-
tion will be automatically erased after
you eject CDs that contain those tracks.
7. SCROLL Button
Press the button, and you can check the
file names with more than 16 characters
on MP3 CD(max 34 characters.).
The button doesn’t work on file names
with less than 16 characters.
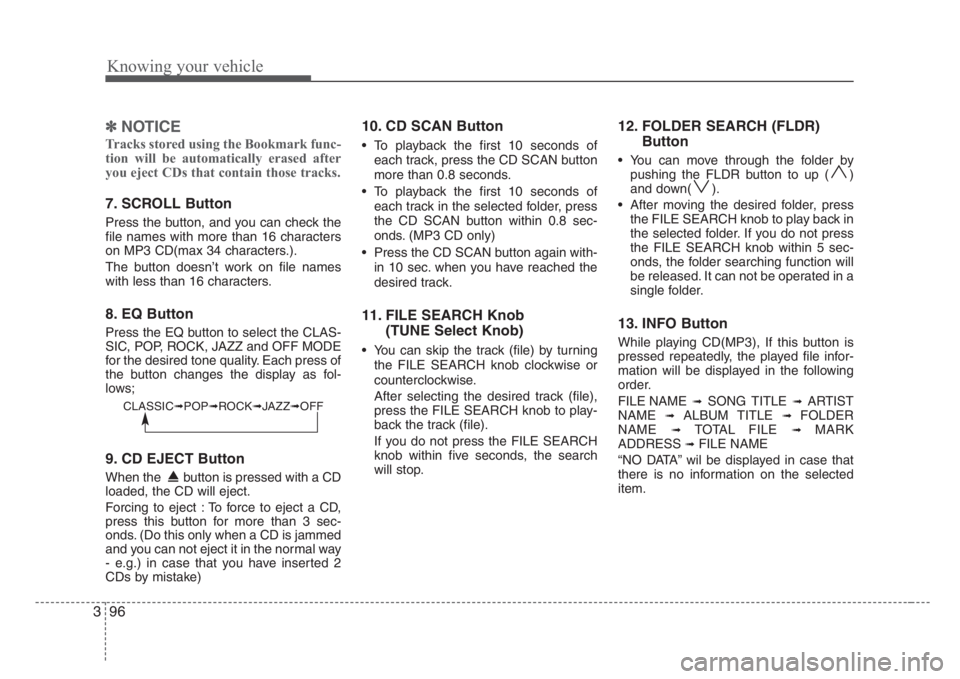
8. EQ Button
Press the EQ button to select the CLAS-
SIC, POP, ROCK, JAZZ and OFF MODE
for the desired tone quality. Each press of
the button changes the display as fol-
lows;
9. CD EJECT Button
When the button is pressed with a CD
loaded, the CD will eject.
Forcing to eject : To force to eject a CD,
press this button for more than 3 sec-
onds. (Do this only when a CD is jammed
and you can not eject it in the normal way
- e.g.) in case that you have inserted 2
CDs by mistake)
10. CD SCAN Button
• To playback the first 10 seconds of
each track, press the CD SCAN button
more than 0.8 seconds.
• To playback the first 10 seconds of
each track in the selected folder, press
the CD SCAN button within 0.8 sec-
onds. (MP3 CD only)
• Press the CD SCAN button again with-
in 10 sec. when you have reached the
desired track.
11. FILE SEARCH Knob
(TUNE Select Knob)
• You can skip the track (file) by turning
the FILE SEARCH knob clockwise or
counterclockwise.
After selecting the desired track (file),
press the FILE SEARCH knob to play-
back the track (file).
If you do not press the FILE SEARCH
knob within five seconds, the search
will stop.
12. FOLDER SEARCH (FLDR)
Button
• You can move through the folder by
pushing the FLDR button to up ( )
and down( ).
• After moving the desired folder, press
the FILE SEARCH knob to play back in
the selected folder. If you do not press
the FILE SEARCH knob within 5 sec-
onds, the folder searching function will
be released. It can not be operated in a
single folder.
13. INFO Button
While playing CD(MP3), If this button is
pressed repeatedly, the played file infor-
mation will be displayed in the following
order.
FILE NAME
➟ SONG TITLE ➟ ARTIST
NAME
➟ ALBUM TITLE ➟ FOLDER
NAME
➟ TOTAL FILE ➟ MARK
ADDRESS
➟ FILE NAME
“NO DATA” wil be displayed in case that
there is no information on the selected
item.
CLASSIC➟POP➟ROCK➟JAZZ➟OFF
Page 106 of 219
397
Knowing your vehicle
✽
NOTICE
• To assure proper operation of the unit,
keep the vehicle interior temperature
within a normal range by using the
vehicle's air conditioning or heating
system.
• When replacing the fuse, replace it
with a fuse having the correct capacity.
• All stored bookmarks are all erased
when the car battery is disconnected
or power to the vehicle is lost. If this
occurs, the bookmarks will have to be
reset.
• This equipment is designed to be used
only in a 12 volt DC battery system
with negative ground.
• This unit is made of precision parts.
Do not attempt to disassemble or
adjust any parts.
• When driving your vehicle, be sure to
keep the volume of the unit set low
enough to allow you to hear sounds
coming from the outside.
• Do not expose this equipment (includ-
ing the speakers and tape) to water or
excessive moisture.
✽
NOTICE
• Do not insert warped or poor quality
discs into the CD player as damage to
the unit may occur.
• Do not insert anything like coins into
the player slot as damage to the unit
may occur.
• Do not place beverages close to the
audio system. The playback mecha-
nism may be damaged if you spill
them.
• Do not strike or allow anything to
impact the audio system, damage to
the system mechanisms could occur.
• Off-road or rough surface driving
may cause the compact disc to skip.
Do not use the compact disc when
driving in such conditions as damage
to the compact disc face could occur.
• Do not attempt to grab or pull the
compact disc out while the disc is
being pulled into the audio unit by the
self-loading mechanism. Damage to
the audio unit and compact disc could
occur.
• Avoid using recorded compact discs in
your audio unit. Original compact
discs are recommended.
Page 107 of 219
4
Ignition switch / 4-2
Starting the engine / 4-3
Manual transaxle / 4-4
Automatic transaxle / 4-6
Brake system / 4-9
Steering wheel / 4-14
Instrument cluster / 4-16
Gauges / 4-17
Warnings and indicators / 4-19
Lighting / 4-23
Wipers and washers / 4-26
Defroster / 4-29
Hazard warning flasher / 4-29
Climate control system / 4-30
Windshield defrosting and defogging / 4-37
Driving your vehicle
Page 108 of 219
Driving your vehicle
2 4
Ignition switch and anti-theft
steering column lock
Ignition switch position
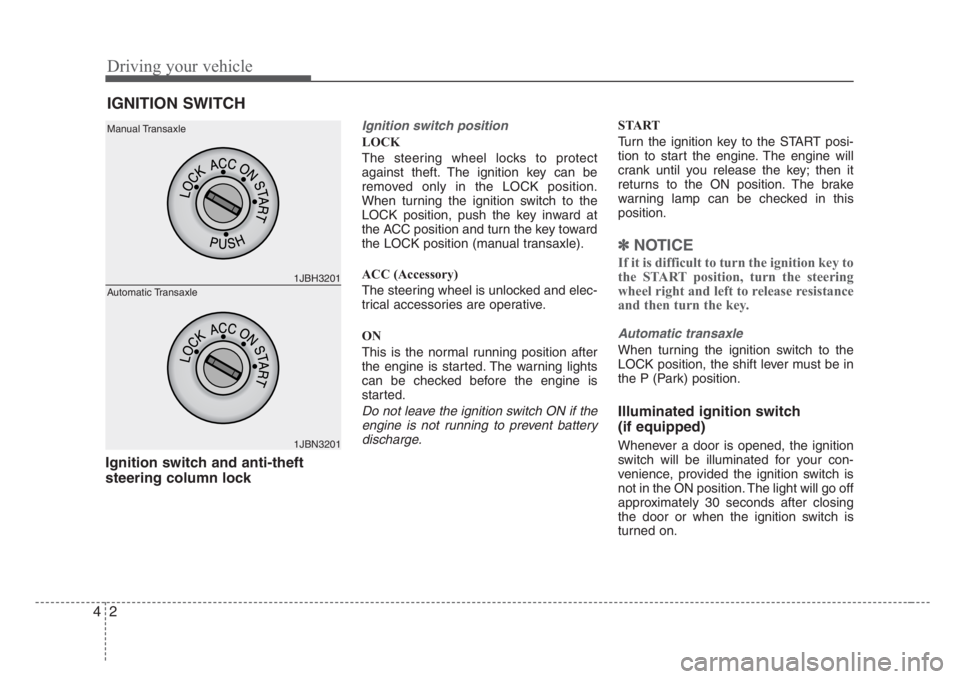
LOCK
The steering wheel locks to protect
against theft. The ignition key can be
removed only in the LOCK position.
When turning the ignition switch to the
LOCK position, push the key inward at
the ACC position and turn the key toward
the LOCK position (manual transaxle).
ACC (Accessory)
The steering wheel is unlocked and elec-
trical accessories are operative.
ON
This is the normal running position after
the engine is started. The warning lights
can be checked before the engine is
started.
Do not leave the ignition switch ON if the
engine is not running to prevent battery
discharge.
START
Turn the ignition key to the START posi-
tion to start the engine. The engine will
crank until you release the key; then it
returns to the ON position. The brake
warning lamp can be checked in this
position.
✽
NOTICE
If it is difficult to turn the ignition key to
the START position, turn the steering
wheel right and left to release resistance
and then turn the key.
Automatic transaxle
When turning the ignition switch to the
LOCK position, the shift lever must be in
the P (Park) position.
Illuminated ignition switch
(if equipped)
Whenever a door is opened, the ignition
switch will be illuminated for your con-
venience, provided the ignition switch is
not in the ON position. The light will go off
approximately 30 seconds after closing
the door or when the ignition switch is
turned on.
IGNITION SWITCH
1JBH3201
1JBN3201 Manual Transaxle
Automatic Transaxle
Page 109 of 219
43
Driving your vehicle
1. Make sure the parking brake is
applied.
2.Manual Transaxle- Depress the
clutch pedal fully and shift the
transaxle into Neutral. Keep the clutch
pedal depressed while turning the
ignition switch to the start position.
The starter will not operate if the
clutch pedal is not fully depressed.
Automatic Transaxle- Place the
transaxle shift lever in P (Park).
Depress the brake pedal fully.
You can also start the engine when
the shift lever is in the N (Neutral)
position.
3. Turn the ignition switch to START and
hold it there until the engine starts (a
maximum of 10 seconds), then
release the key.
4. In extremely cold weather (below
-18°C / 0°F) or after the vehicle has
not been operated for several days, let
the engine warm up without depress-
ing the accelerator.
Whether the engine is cold or warm, it
should be started without depressing
the accelerator.
✽
NOTICE
Do not engage the starter for more than
10 seconds. If the engine stalls or fails to
start, wait 5 to 10 seconds before re-
engaging the starter. Excessive or
improper use of the starter may damage
it.
The starter will not operate if:
•Manual Transaxle- the clutch pedal is
not fully depressed.
•Automatic Transaxle- the shift lever
is NOT in the P (Park) or N (Neutral)
position.
WARNING - Ignition key
• Never turn the ignition switch to
LOCK or ACC while the vehicle is
moving. This would result in loss
of directional control and braking
function, which could cause an
accident or collision.
• Before leaving the driver’s seat,
always make sure the shift lever
is engaged in 1
stgear for manual
transaxle or P (Park) for automat-
ic transaxle. Then,set the parking
brake fully and shut the engine
off. Unexpected and sudden vehi-
cle movement may occur if these
precautions are not taken.
• Never reach for the ignition
switch, or any other controls
through the steering wheel while
the vehicle is in motion. The pres-
ence of your hand or arm in this
area could cause a loss of vehicle
control, an accident and serious
bodily injury or death.
• Do not place any movable objects
around the driver’s seat as they
may move while driving, interfere
with the driver and lead to an
accident.
CAUTION - Stall
If the engine stalls while you are in
motion, do not attempt to move the
shift lever to the P (Park) position. If
traffic and road conditions permit,
you may put the shift lever in the N
(Neutral) position while the vehicle
is still moving and turn the ignition
switch to the START position in an
attempt to restart the engine.
STARTING THE ENGINE
CAUTION
Always wear appropriate shoes when
operating your vehicle. Unsuitable
shoes (high heels,ski boots,etc.) may
interfere with your ability to use the
brake and accelerator pedal, and the
clutch (if equipped).
Page 110 of 219
Driving your vehicle
4 4
Manual transaxle operation
The manual transaxle has five forward
gears.
Press the clutch pedal down fully while
shifting, then release it slowly.
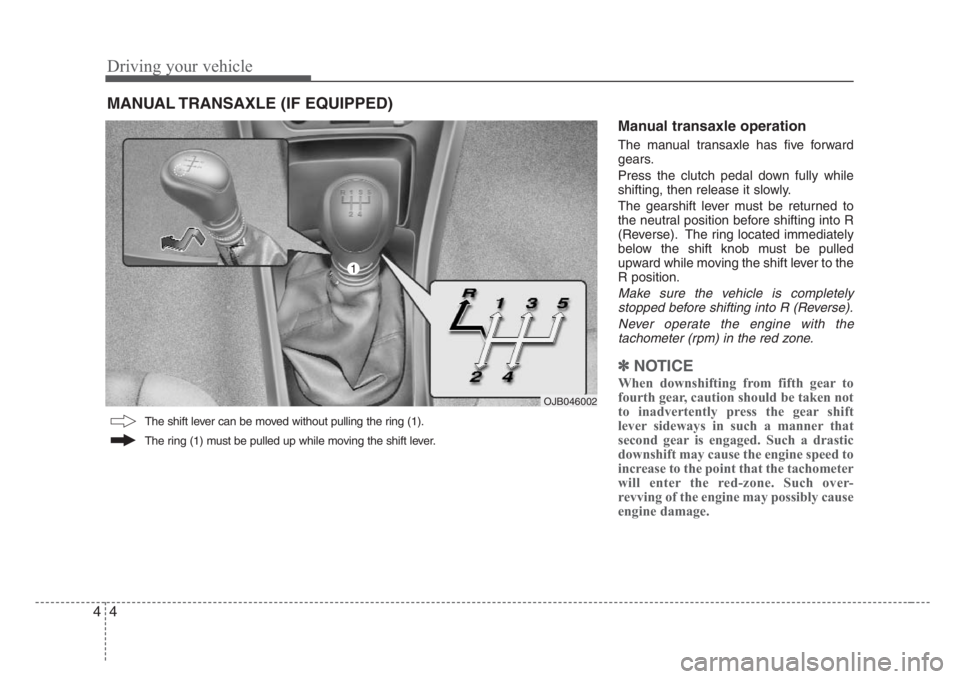
The gearshift lever must be returned to
the neutral position before shifting into R
(Reverse). The ring located immediately
below the shift knob must be pulled
upward while moving the shift lever to the
R position.
Make sure the vehicle is completely
stopped before shifting into R (Reverse).
Never operate the engine with the
tachometer (rpm) in the red zone.
✽
NOTICE
When downshifting from fifth gear to
fourth gear, caution should be taken not
to inadvertently press the gear shift
lever sideways in such a manner that
second gear is engaged. Such a drastic
downshift may cause the engine speed to
increase to the point that the tachometer
will enter the red-zone. Such over-
revving of the engine may possibly cause
engine damage.
MANUAL TRANSAXLE (IF EQUIPPED)
The ring (1) must be pulled up while moving the shift lever.
OJB046002
The shift lever can be moved without pulling the ring (1).
1