KIA RIO HATCHBACK 2008 Owners Manual
Manufacturer: KIA, Model Year: 2008, Model line: RIO HATCHBACK, Model: KIA RIO HATCHBACK 2008Pages: 219, PDF Size: 5.17 MB
Page 121 of 219
415
Driving your vehicle
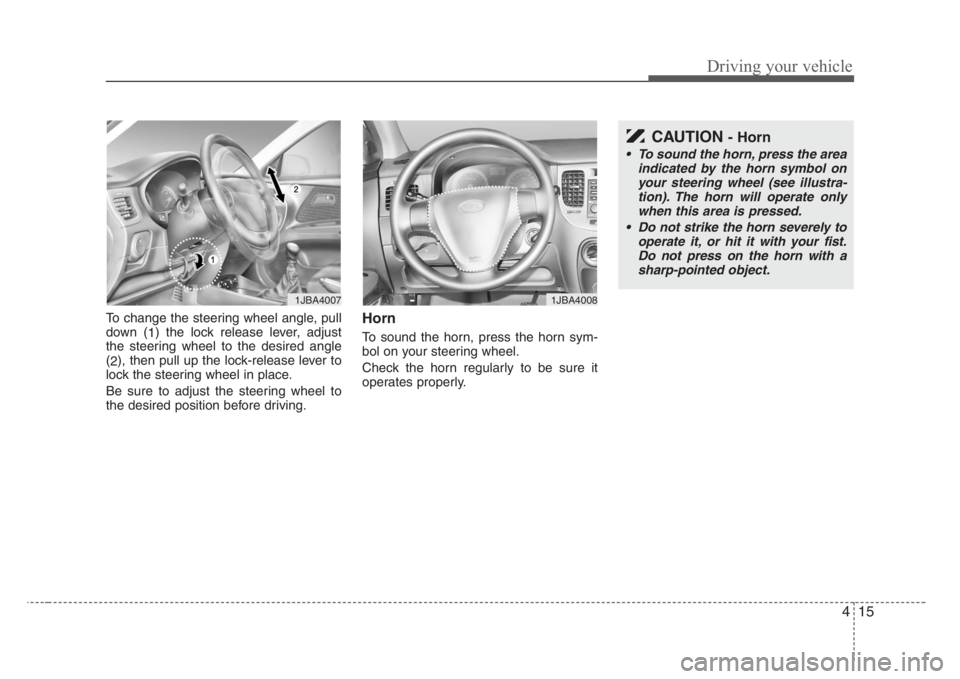
To change the steering wheel angle, pull
down (
1) the lock release lever, adjust
the steering wheel to the desired angle
(
2), then pull up the lock-release lever to
lock the steering wheel in place.
Be sure to adjust the steering wheel to
the desired position before driving.Horn
To sound the horn, press the horn sym-
bol on your steering wheel.
Check the horn regularly to be sure it
operates properly.
1JBA4007
CAUTION- Horn
•To sound the horn, press the area
indicated by the horn symbol on
your steering wheel (see illustra-
tion). The horn will operate only
when this area is pressed.
• Do not strike the horn severely to
operate it, or hit it with your fist.
Do not press on the horn with a
sharp-pointed object.
1JBA4008
Page 122 of 219

Driving your vehicle
16 4
INSTRUMENT CLUSTER
OJB048030C
➀
➁➁
➂
➃
➄➄
➅
➇
➆
➄
1. Tachometer
2. Turn signal indicators
3. Speedometer
4. Engine temperature gauge
5. Warning and indicator lights
6. Odometer / Tripmeter
7. Shift position indicator
(Automatic transaxle only)
8. Fuel gauge
Page 123 of 219
417
Driving your vehicle
Speedometer
The speedometer indicates the forward
speed of the vehicle.
Odometer
The odometer indicates the total dis-
tance the vehicle has been driven.
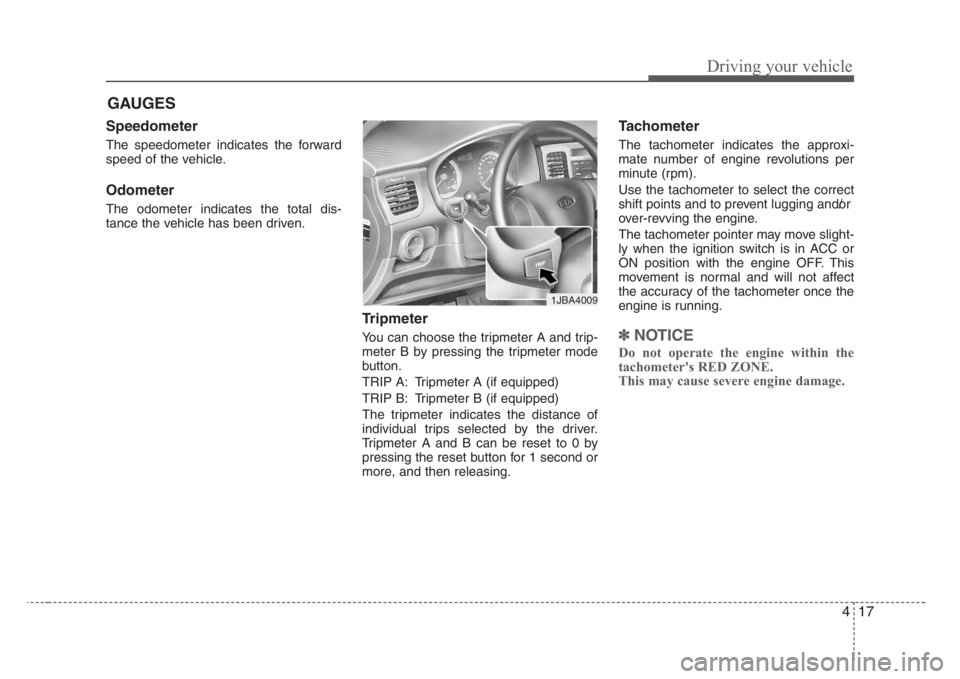
Tripmeter
You can choose the tripmeter A and trip-
meter B by pressing the tripmeter mode
button.
TRIP A: Tripmeter A (if equipped)
TRIP B: Tripmeter B (if equipped)
The tripmeter indicates the distance of
individual trips selected by the driver.
Tripmeter A and B can be reset to 0 by
pressing the reset button for 1 second or
more, and then releasing.
Tachometer
The tachometer indicates the approxi-
mate number of engine revolutions per
minute (rpm).
Use the tachometer to select the correct
shift points and to prevent lugging and/or
over-revving the engine.
The tachometer pointer may move slight-
ly when the ignition switch is in ACC or
ON position with the engine OFF. This
movement is normal and will not affect
the accuracy of the tachometer once the
engine is running.
✽
NOTICE
Do not operate the engine within the
tachometer's RED ZONE.
This may cause severe engine damage.
GAUGES
1JBA4009
Page 124 of 219
Driving your vehicle
18 4
Fuel gauge
The fuel gauge indicates the approxi-
mate amount of fuel remaining in the fuel
tank.
Fuel tank capacity - 45 liters
(11.9 gallons)
The fuel gauge is supplemented by a low
fuel warning light, which will illuminate
when the fuel level has dropped to about
5.5~6.5 liters (1.5~1.7 gallons).
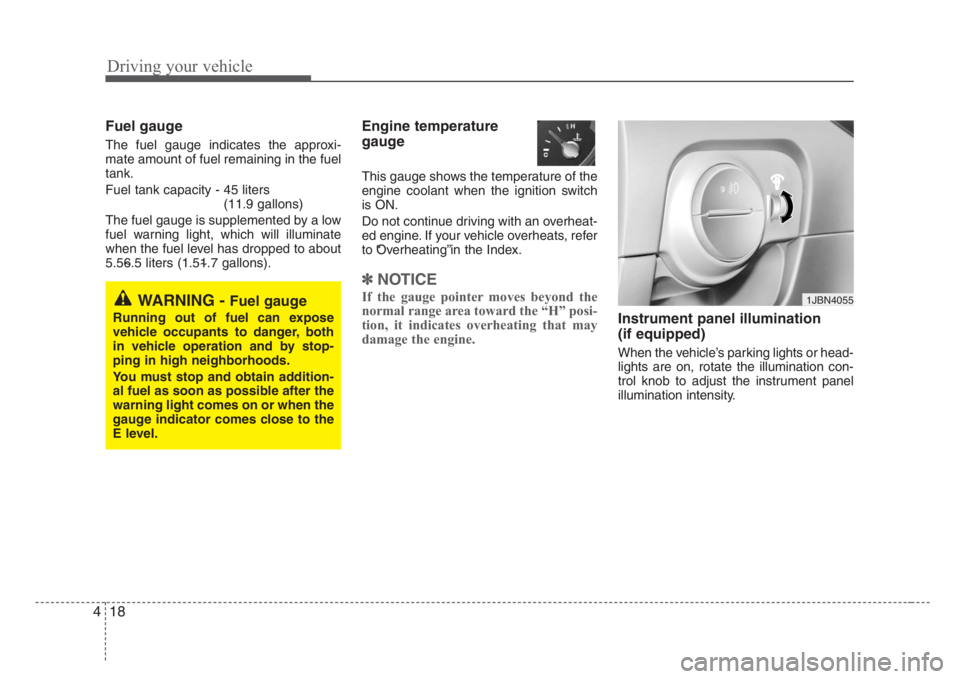
Engine temperature
gauge
This gauge shows the temperature of the
engine coolant when the ignition switch
is ON.
Do not continue driving with an overheat-
ed engine. If your vehicle overheats, refer
to “Overheating”in the Index.
✽
NOTICE
If the gauge pointer moves beyond the
normal range area toward the “H” posi-
tion, it indicates overheating that may
damage the engine.
Instrument panel illumination
(if equipped)
When the vehicle’s parking lights or head-
lights are on, rotate the illumination con-
trol knob to adjust the instrument panel
illumination intensity.
1JBN4055WARNING - Fuel gauge
Running out of fuel can expose
vehicle occupants to danger, both
in vehicle operation and by stop-
ping in high neighborhoods.
You must stop and obtain addition-
al fuel as soon as possible after the
warning light comes on or when the
gauge indicator comes close to the
E level.
Page 125 of 219
419
Driving your vehicle
Warning lights / audible indicators
Checking operation
All warning lights are checked by turning
the ignition switch ON (do not start the
engine). Any light that does not illuminate
should be checked by an authorized Kia
dealer.
After starting the engine, check to make
sure that all warning lights are off. If any
are still on, this indicates a situation that
needs attention. When releasing the
parking brake, the brake system warning
light should go off. The fuel warning light
will stay on if the fuel level is low.
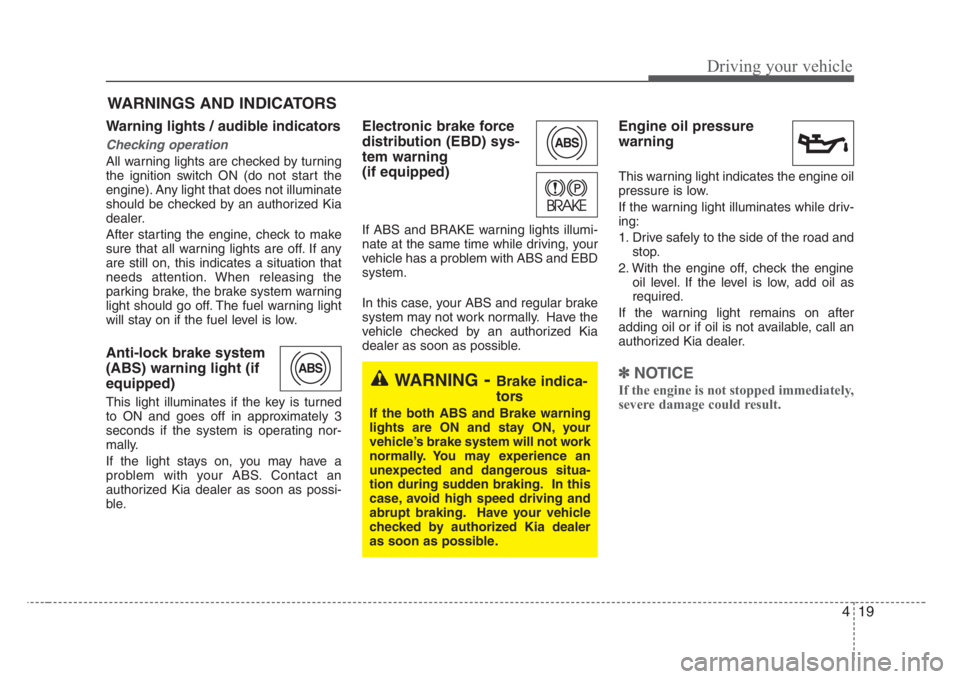
Anti-lock brake system
(ABS) warning light (if
equipped)
This light illuminates if the key is turned
to ON and goes off in approximately 3
seconds if the system is operating nor-
mally.
If the light stays on, you may have a
problem with your ABS. Contact an
authorized Kia dealer as soon as possi-
ble.
Electronic brake force
distribution (EBD) sys-
tem warning
(if equipped)
If ABS and BRAKE warning lights illumi-
nate at the same time while driving, your
vehicle has a problem with ABS and EBD
system.
In this case, your ABS and regular brake
system may not work normally. Have the
vehicle checked by an authorized Kia
dealer as soon as possible.
Engine oil pressure
warning
This warning light indicates the engine oil
pressure is low.
If the warning light illuminates while driv-
ing:
1. Drive safely to the side of the road and
stop.
2. With the engine off, check the engine
oil level. If the level is low, add oil as
required.
If the warning light remains on after
adding oil or if oil is not available, call an
authorized Kia dealer.
✽
NOTICE
If the engine is not stopped immediately,
severe damage could result.
WARNINGS AND INDICATORS
ABS
ABS
WARNING-Brake indica-
tors
If the both ABS and Brake warning
lights are ON and stay ON, your
vehicle’s brake system will not work
normally. You may experience an
unexpected and dangerous situa-
tion during sudden braking. In this
case, avoid high speed driving and
abrupt braking. Have your vehicle
checked by authorized Kia dealer
as soon as possible.
Page 126 of 219
Driving your vehicle
20 4
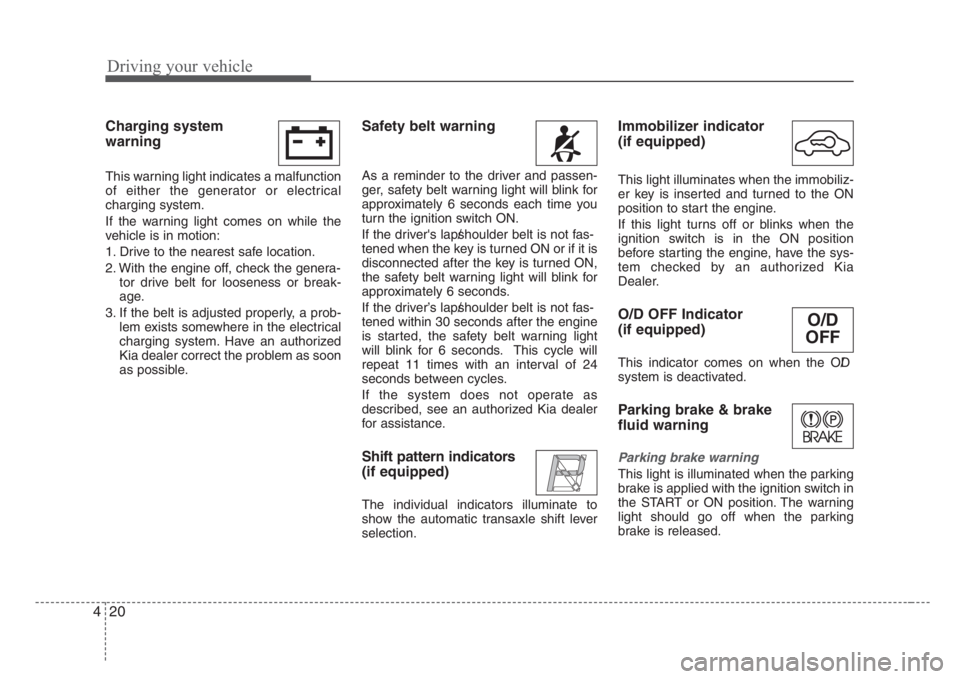
Charging system
warning
This warning light indicates a malfunction
of either the generator or electrical
charging system.
If the warning light comes on while the
vehicle is in motion:
1. Drive to the nearest safe location.
2. With the engine off, check the genera-
tor drive belt for looseness or break-
age.
3. If the belt is adjusted properly, a prob-
lem exists somewhere in the electrical
charging system. Have an authorized
Kia dealer correct the problem as soon
as possible.
Safety belt warning
As a reminder to the driver and passen-
ger, safety belt warning light will blink for
approximately 6 seconds each time you
turn the ignition switch ON.
If the driver's lap/shoulder belt is not fas-
tened when the key is turned ON or if it is
disconnected after the key is turned ON,
the safety belt warning light will blink for
approximately 6 seconds.
If the driver’s lap/shoulder belt is not fas-
tened within 30 seconds after the engine
is started, the safety belt warning light
will blink for 6 seconds. This cycle will
repeat 11 times with an interval of 24
seconds between cycles.
If the system does not operate as
described, see an authorized Kia dealer
for assistance.
Shift pattern indicators
(if equipped)
The individual indicators illuminate to
show the automatic transaxle shift lever
selection.
Immobilizer indicator
(if equipped)
This light illuminates when the immobiliz-
er key is inserted and turned to the ON
position to start the engine.
If this light turns off or blinks when the
ignition switch is in the ON position
before starting the engine, have the sys-
tem checked by an authorized Kia
Dealer.
O/D OFF Indicator
(if equipped)
This indicator comes on when the O/D
system is deactivated.
Parking brake & brake
fluid warning
Parking brake warning
This light is illuminated when the parking
brake is applied with the ignition switch in
the START or ON position. The warning
light should go off when the parking
brake is released.
O/D
OFF
Page 127 of 219
421
Driving your vehicle
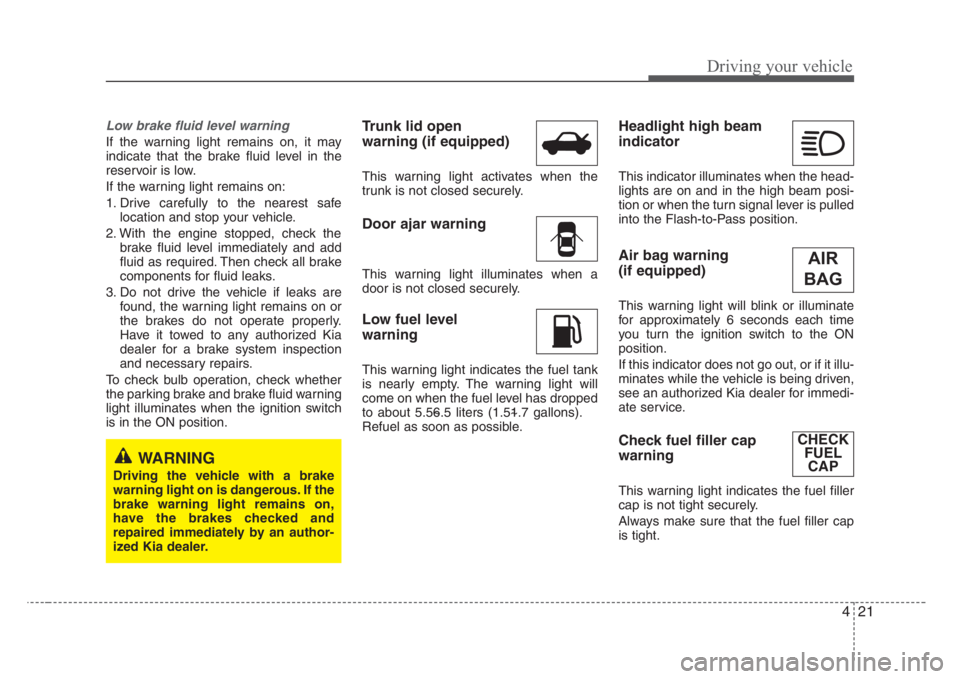
Low brake fluid level warning
If the warning light remains on, it may
indicate that the brake fluid level in the
reservoir is low.
If the warning light remains on:
1. Drive carefully to the nearest safe
location and stop your vehicle.
2. With the engine stopped, check the
brake fluid level immediately and add
fluid as required. Then check all brake
components for fluid leaks.
3. Do not drive the vehicle if leaks are
found, the warning light remains on or
the brakes do not operate properly.
Have it towed to any authorized Kia
dealer for a brake system inspection
and necessary repairs.
To check bulb operation, check whether
the parking brake and brake fluid warning
light illuminates when the ignition switch
is in the ON position.
Trunk lid open
warning (if equipped)
This warning light activates when the
trunk is not closed securely.
Door ajar warning
This warning light illuminates when a
door is not closed securely.
Low fuel level
warning
This warning light indicates the fuel tank
is nearly empty. The warning light will
come on when the fuel level has dropped
to about 5.5~6.5 liters (1.5~1.7 gallons).
Refuel as soon as possible.
Headlight high beam
indicator
This indicator illuminates when the head-
lights are on and in the high beam posi-
tion or when the turn signal lever is pulled
into the Flash-to-Pass position.
Air bag warning
(if equipped)
This warning light will blink or illuminate
for approximately 6 seconds each time
you turn the ignition switch to the ON
position.
If this indicator does not go out, or if it illu-
minates while the vehicle is being driven,
see an authorized Kia dealer for immedi-
ate service.
Check fuel filler cap
warning
This warning light indicates the fuel filler
cap is not tight securely.
Always make sure that the fuel filler cap
is tight.
WARNING
Driving the vehicle with a brake
warning light on is dangerous. If the
brake warning light remains on,
have the brakes checked and
repaired immediately by an author-
ized Kia dealer.
AIR
BAG
CHECK
FUEL
CAP
Page 128 of 219
Driving your vehicle
22 4
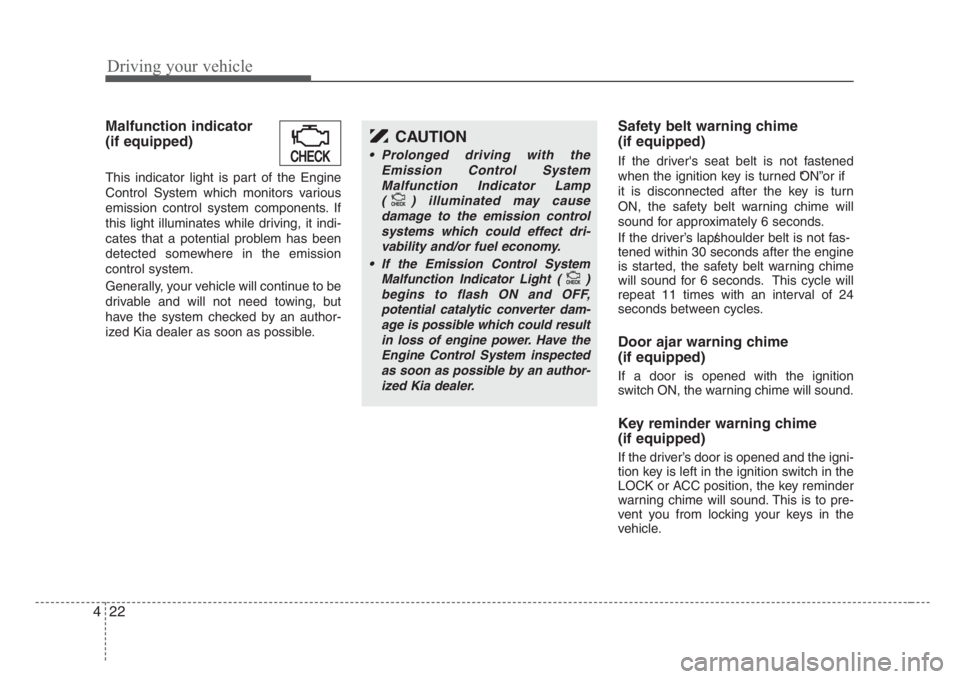
Malfunction indicator
(if equipped)
This indicator light is part of the Engine
Control System which monitors various
emission control system components. If
this light illuminates while driving, it indi-
cates that a potential problem has been
detected somewhere in the emission
control system.
Generally, your vehicle will continue to be
drivable and will not need towing, but
have the system checked by an author-
ized Kia dealer as soon as possible.
Safety belt warning chime
(if equipped)
If the driver's seat belt is not fastened
when the ignition key is turned “ON”or if
it is disconnected after the key is turn
ON, the safety belt warning chime will
sound for approximately 6 seconds.
If the driver’s lap/shoulder belt is not fas-
tened within 30 seconds after the engine
is started, the safety belt warning chime
will sound for 6 seconds. This cycle will
repeat 11 times with an interval of 24
seconds between cycles.
Door ajar warning chime
(if equipped)
If a door is opened with the ignition
switch ON, the warning chime will sound.
Key reminder warning chime
(if equipped)
If the driver’s door is opened and the igni-
tion key is left in the ignition switch in the
LOCK or ACC position, the key reminder
warning chime will sound. This is to pre-
vent you from locking your keys in the
vehicle.
CHECK
CAUTION
• Prolonged driving with the
Emission Control System
Malfunction Indicator Lamp
( ) illuminated may cause
damage to the emission control
systems which could effect dri-
vability and/or fuel economy.
•
If the EmissionControl System
Malfunction Indicator Light ( )
begins to flash ON and OFF,
potential catalytic converter dam-
age is possible which could result
in loss of engine power. Have the
Engine Control System inspected
as soon as possible by an author-
ized Kia dealer.
CHECKCHECK
CHECKCHECK
Page 129 of 219
423
Driving your vehicle
Battery saver function
(if equipped)
• The purpose of this feature is to pre-
vent the battery from being dis-
charged. The system automatically
turns off the headlights and parking
lights when the driver removes the igni-
tion key and opens the driver- side
door.
• With this feature, the parklight will be
turned off automatically if the driver
parks on the side of road at night.
If necessary, to keep the lights on when
the ignition key is removed, perform the
following :
1) Open the driver-side door.
2) Turn the parking lights OFF and ON
again using the light switch on the
steering column.
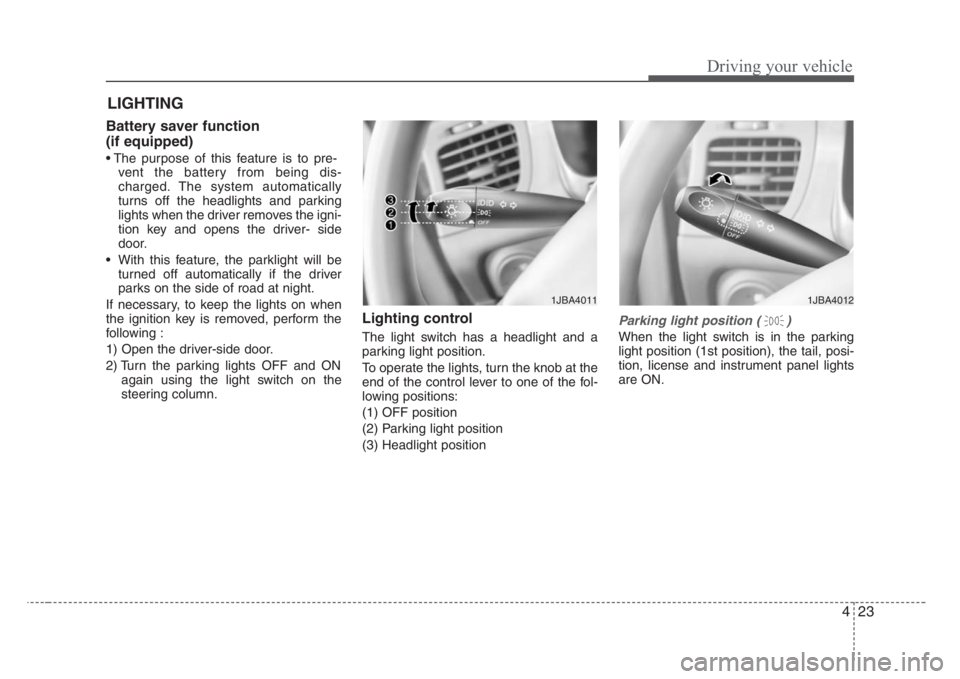
Lighting control
The light switch has a headlight and a
parking light position.
To operate the lights, turn the knob at the
end of the control lever to one of the fol-
lowing positions:
(1) OFF position
(2) Parking light position
(3) Headlight position
Parking light position ( )
When the light switch is in the parking
light position (1st position), the tail, posi-
tion, license and instrument panel lights
are ON.
LIGHTING
1JBA40121JBA4011
Page 130 of 219
Driving your vehicle
24 4
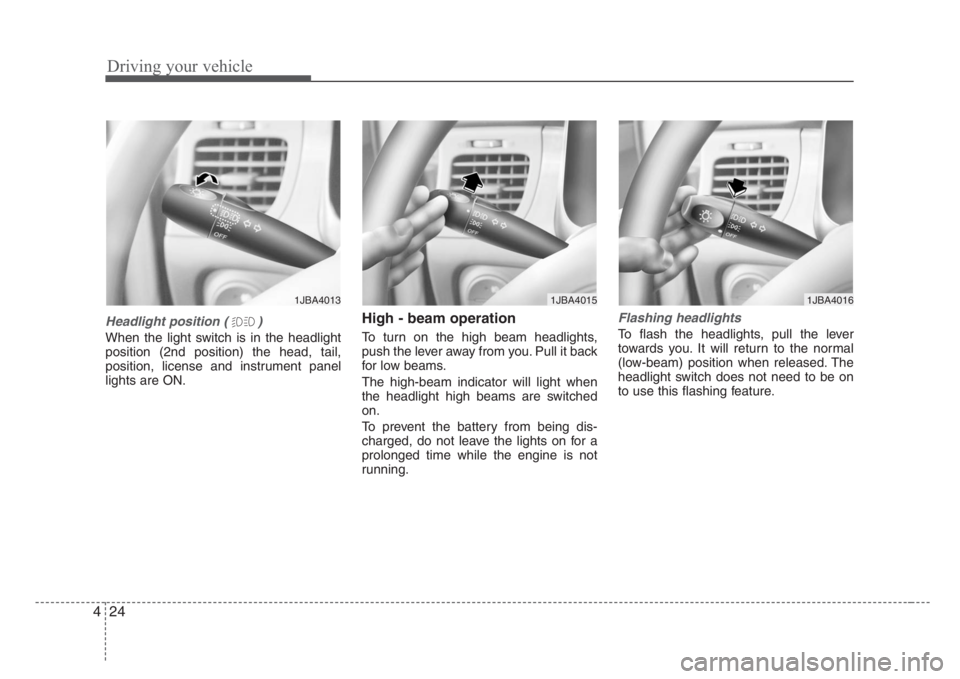
Headlight position ( )
When the light switch is in the headlight
position (2nd position) the head, tail,
position, license and instrument panel
lights are ON.
High - beam operation
To turn on the high beam headlights,
push the lever away from you. Pull it back
for low beams.
The high-beam indicator will light when
the headlight high beams are switched
on.
To prevent the battery from being dis-
charged, do not leave the lights on for a
prolonged time while the engine is not
running.
Flashing headlights
To flash the headlights, pull the lever
towards you. It will return to the normal
(low-beam) position when released. The
headlight switch does not need to be on
to use this flashing feature.
1JBA40161JBA40131JBA4015