engine KIA RIO HATCHBACK 2014 Owner's Manual
[x] Cancel search | Manufacturer: KIA, Model Year: 2014, Model line: RIO HATCHBACK, Model: KIA RIO HATCHBACK 2014Pages: 446, PDF Size: 12.98 MB
Page 102 of 446
431
Features of your vehicle
Closing the hood
1.Before closing the hood, check thefollowing:
partment must be correctly
installed.
bustible material must be
removed from the engine com-
partment.
2.Return the support rod to its clip to prevent it from rattling.
3.Lower the hood until it is about 1 ft. (30 cm) above the closed position
and let it drop. Make sure that it
locks into place. The support rod must be inserted
completely into the hole whenever
you inspect the engine compartment.
This will prevent the hood from falling
and possibly injuring you.
WARNING- Fire risk
Do not leave gloves, rags or any
other combustible material in
the engine compartment. Doing
so may cause a heat-induced
fire.
WARNING - Unsecured
engine Hood
If the engine hood is not
secured properly, it is likely to
fly up blocking your vision and
causing a crash.
Page 103 of 446

Features of your vehicle
32
4
Opening the fuel filler lid
The fuel filler lid must be opened
from inside the vehicle by pulling up
the fuel filler lid opener.
If the fuel filler lid does not open
because ice has formed around it,
tap lightly or push on the lid to break
the ice and release the lid. Do not pry
on the lid. If necessary, spray around
the lid with an approved de-icer fluid
(do not use radiator anti-freeze) or
move the vehicle to a warm place
and allow the ice to melt. 1.Stop the engine.
2.To open the fuel filler lid, pull the
fuel filler lid opener up.
3.Pull open the fuel filler lid (1).
4.To remove the cap (2), turn the fuel filler cap counterclockwise.
5.Refuel as needed.
Closing the fuel filler lid
1.To install the cap, turn it clockwise until it “clicks” one time. This indi-
cates that the cap is securely one
time tightened.
2.Close the fuel filler lid and push it in lightly and make sure that it is
securely closed.
✽ ✽
NOTICE
Tighten the cap until it clicks one
time, otherwise the fuel cap open
warning indicator light will illu-
minate.
FUEL FILLER LID
WARNING - Refueling
Always remove the fuel cap
carefully and slowly. If the cap
is venting fuel or if you hear a
hissing sound, wait until the
condition stops before com-
pletely removing the cap.
If pressurized fuel sprays out, it
can cover your clothes or skin
and subject you to the risk of
fire and burns.OUB041024OUB041025
Page 105 of 446
Features of your vehicle
34
4
Make sure to refuel your vehicle
according to the "Fuel requirements"
suggested in section 1.
If the fuel filler cap requires replace-
ment, use only a genuine Kia cap or
the equivalent specified for your vehi-
cle. An incorrect fuel filler cap can
result in a serious malfunction of the
fuel system or emission control sys-
tem.
CAUTION- Exterior
paint
Do not spill fuel on the exterior
surfaces of the vehicle. Anytype of fuel spilled on paintedsurfaces may damage the paint.
WARNING - Refueling& Vehicle fires
When refueling, always shut the
engine off. Sparks produced by
electrical components related
to the engine can ignite fuel
vapors causing a fire. Once
refueling is complete, check to
make sure the filler cap and
filler door are securely closed,
before starting the engine.
WARNING- Smoking
DO NOT use matches or a
lighter and DO NOT SMOKE or
leave a lit cigarette in your vehi-
cle while at a gas station espe-
cially during refueling.
Automotive fuel is highly flam-
mable and can, when ignited,
result in fire.
Page 110 of 446
439
Features of your vehicle
Electric power steering
Power steering uses a motor to
assist you in steering the vehicle. If
the engine is off or if the power steer-
ing system becomes inoperative, the
vehicle may still be steered, but it will
require increased steering effort.
The motor driven power steering is
controlled by the power steering con-
trol unit which senses the steering
wheel torque and vehicle speed to
command the motor.
The steering wheel becomes heavier
as the vehicle’s speed increases and
becomes lighter as the vehicle’s
speed decreases for better control of
the steering wheel.
Should you notice any change in the
effort required to steer during normal
vehicle operation, have the power
steering checked by an authorized
Kia dealer.
✽ ✽
NOTICE
The following symptoms may occur
during normal vehicle operation:
• The steering effort is high immedi-
ately after turning the ignition
switch on. This happens as the sys-
tem performs the EPS system
diagnostics. When the diagnostics
is completed, the steering wheel
will return to its normal condition.
• A click noise may be heard from the EPS relay after the ignition
switch is turned to the ON or
LOCK position.
• Motor noise may be heard when the vehicle is at a stop or at a low
driving speed.
• The steering effort increases if the steering wheel is rotated continu-
ously when the vehicle is not in
motion. However, after a few min-
utes, it will return to its normal
conditions.
• When you operate the steering wheel in low temperature, abnor-
mal noise could occur. If tempera-
ture rises, the noise will disappear.
This is a normal condition.
If the Electric Power Steering System
does not operate normally, the warn-
ing light will illuminate on the instru-
ment cluster. The steering wheel may
become difficult to control or operate
abnormally. Take your vehicle to an
authorized Kia dealer and have the
vehicle checked as soon as possible.
STEERING WHEEL
Page 115 of 446
Features of your vehicle
44
4
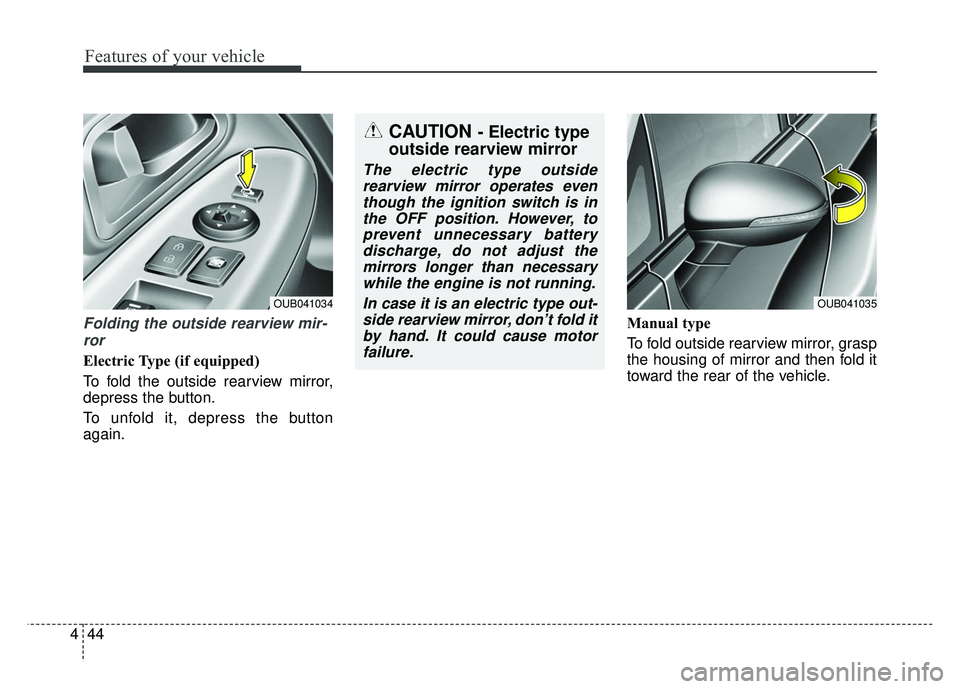
Folding the outside rearview mir-
ror
Electric Type (if equipped)
To fold the outside rearview mirror,
depress the button.
To unfold it, depress the button
again. Manual type
To fold outside rearview mirror, grasp
the housing of mirror and then fold it
toward the rear of the vehicle.
CAUTION - Electric type
outside rearview mirror
The electric type outside
rearview mirror operates eventhough the ignition switch is inthe OFF position. However, toprevent unnecessary batterydischarge, do not adjust themirrors longer than necessarywhile the engine is not running.
In case it is an electric type out-side rearview mirror, don’t fold itby hand. It could cause motorfailure.
OUB041035OUB041034
Page 116 of 446
445
Features of your vehicle
INSTRUMENT CLUSTER
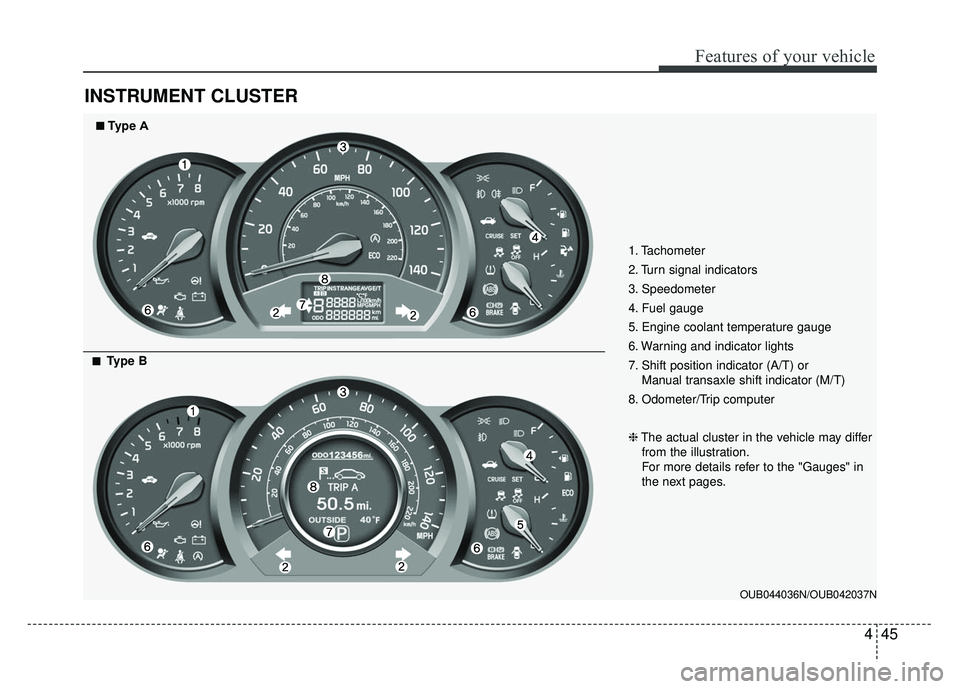
1. Tachometer
2. Turn signal indicators
3. Speedometer
4. Fuel gauge
5. Engine coolant temperature gauge
6. Warning and indicator lights
7. Shift position indicator (A/T) or Manual transaxle shift indicator (M/T)
8. Odometer/Trip computer
❈ The actual cluster in the vehicle may differ
from the illustration.
For more details refer to the "Gauges" in
the next pages.
OUB044036N/OUB042037N
■
■Type A
■
■Type B
Page 117 of 446
Features of your vehicle
46
4
Instrument panel illumination
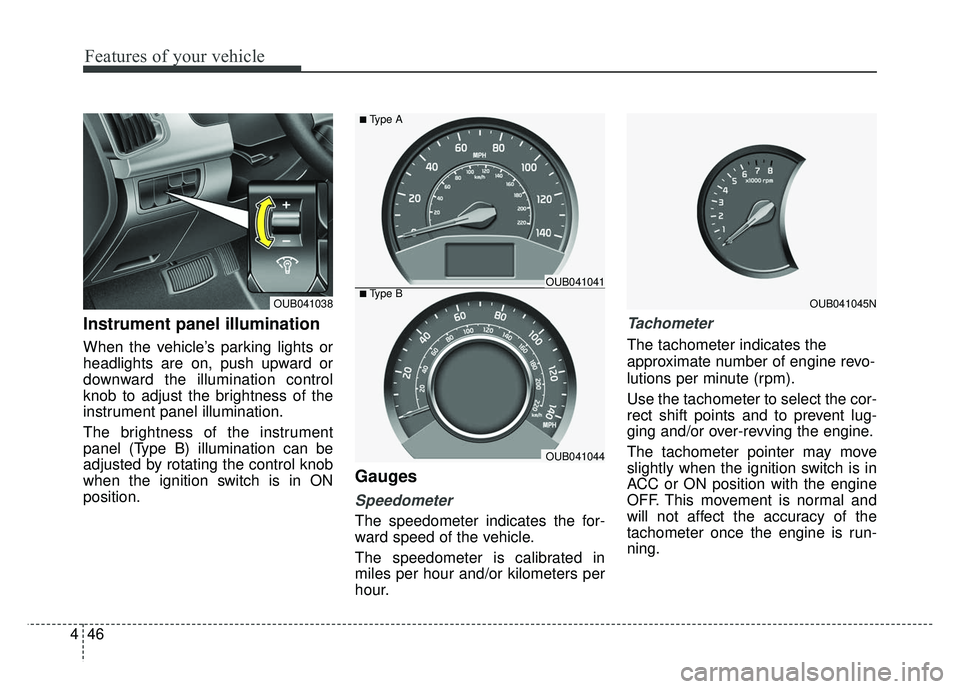
When the vehicle’s parking lights or
headlights are on, push upward or
downward the illumination control
knob to adjust the brightness of the
instrument panel illumination.
The brightness of the instrument
panel (Type B) illumination can be
adjusted by rotating the control knob
when the ignition switch is in ON
position.
Gauges
Speedometer
The speedometer indicates the for-
ward speed of the vehicle.
The speedometer is calibrated in
miles per hour and/or kilometers per
hour.
Tachometer
The tachometer indicates the
approximate number of engine revo-
lutions per minute (rpm).
Use the tachometer to select the cor-
rect shift points and to prevent lug-
ging and/or over-revving the engine.
The tachometer pointer may move
slightly when the ignition switch is in
ACC or ON position with the engine
OFF. This movement is normal and
will not affect the accuracy of the
tachometer once the engine is run-
ning.
OUB041045NOUB041038■Type BOUB041041
OUB041044
■Type A
Page 118 of 446
447
Features of your vehicle
Engine coolant temperature gauge
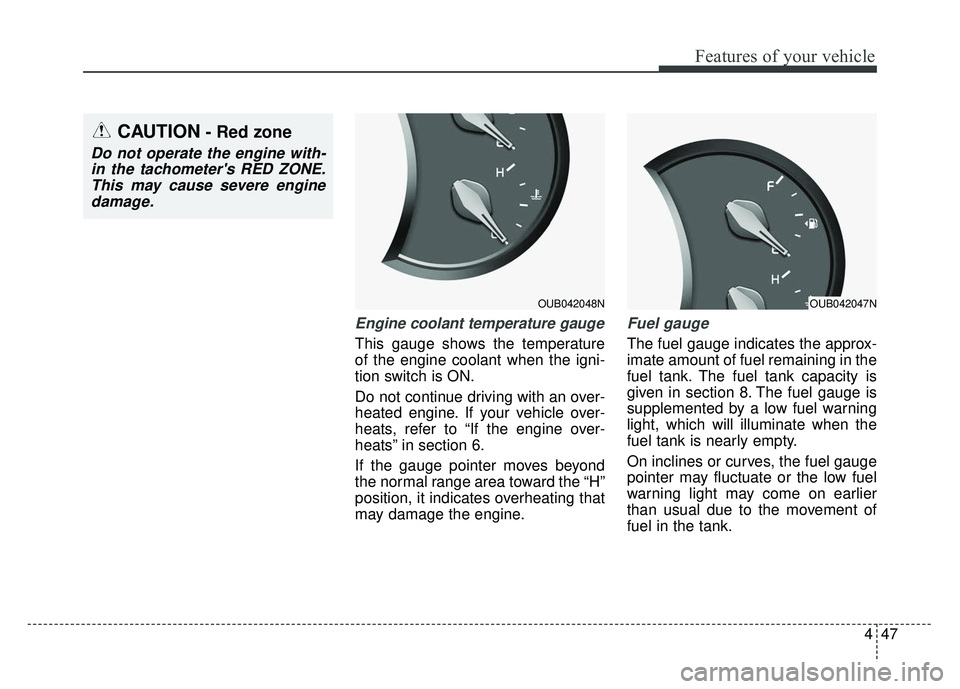
This gauge shows the temperature
of the engine coolant when the igni-
tion switch is ON.
Do not continue driving with an over-
heated engine. If your vehicle over-
heats, refer to “If the engine over-
heats” in section 6.
If the gauge pointer moves beyond
the normal range area toward the “H”
position, it indicates overheating that
may damage the engine.
Fuel gauge
The fuel gauge indicates the approx-
imate amount of fuel remaining in the
fuel tank. The fuel tank capacity is
given in section 8. The fuel gauge is
supplemented by a low fuel warning
light, which will illuminate when the
fuel tank is nearly empty.
On inclines or curves, the fuel gauge
pointer may fluctuate or the low fuel
warning light may come on earlier
than usual due to the movement of
fuel in the tank.
OUB042048N
CAUTION- Red zone
Do not operate the engine with-in the tachometer's RED ZONE.This may cause severe enginedamage.
OUB042047N
Page 119 of 446
Features of your vehicle
48
4
Odometer
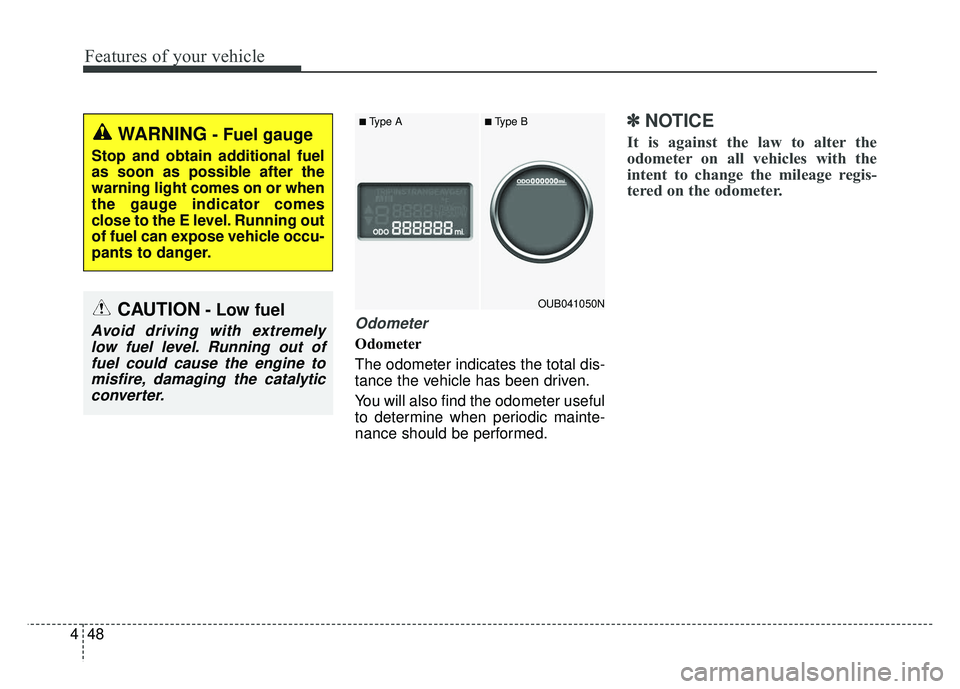
Odometer
The odometer indicates the total dis-
tance the vehicle has been driven.
You will also find the odometer useful
to determine when periodic mainte-
nance should be performed.
✽ ✽
NOTICE
It is against the law to alter the
odometer on all vehicles with the
intent to change the mileage regis-
tered on the odometer.WARNING- Fuel gauge
Stop and obtain additional fuel
as soon as possible after the
warning light comes on or when
the gauge indicator comes
close to the E level. Running out
of fuel can expose vehicle occu-
pants to danger.
CAUTION- Low fuel
Avoid driving with extremely
low fuel level. Running out offuel could cause the engine tomisfire, damaging the catalyticconverter.
OUB041050N
■Type A■Type B
Page 121 of 446
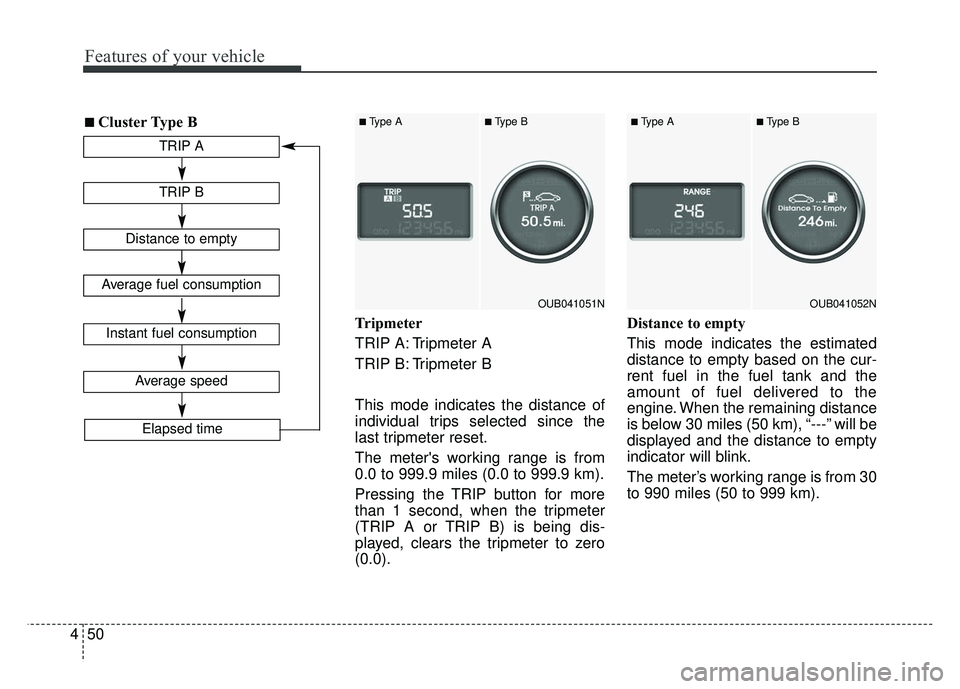
Features of your vehicle
50
4
Tripmeter
TRIP A: Tripmeter A
TRIP B: Tripmeter B
This mode indicates the distance of
individual trips selected since the
last tripmeter reset.
The meter's working range is from
0.0 to 999.9 miles (0.0 to 999.9 km).
Pressing the TRIP button for more
than 1 second, when the tripmeter
(TRIP A or TRIP B) is being dis-
played, clears the tripmeter to zero
(0.0). Distance to empty
This mode indicates the estimated
distance to empty based on the cur-
rent fuel in the fuel tank and the
amount of fuel delivered to the
engine. When the remaining distance
is below 30 miles (50 km), “---” will be
displayed and the distance to empty
indicator will blink.
The meter’s working range is from 30
to 990 miles (50 to 999 km).
TRIP A
TRIP B
Average speed
Elapsed time
Distance to empty
Average fuel consumption
Instant fuel consumption
■ ■Cluster Type B
OUB041051N
■Type A■Type B
OUB041052N
■Type A■Type B