KIA Sedona 2014 3.G Owner's Manual
Manufacturer: KIA, Model Year: 2014, Model line: Sedona, Model: KIA Sedona 2014 3.GPages: 382, PDF Size: 4.67 MB
Page 121 of 382
Features of your vehicle
112
3
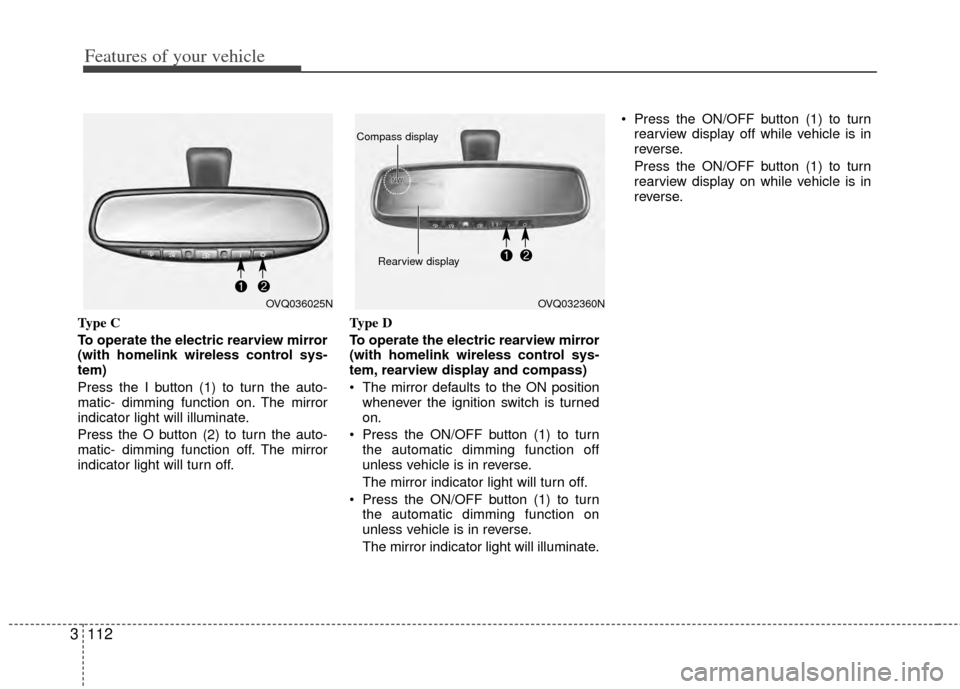
Type C
To operate the electric rearview mirror
(with homelink wireless control sys-
tem)
Press the I button (1) to turn the auto-
matic- dimming function on. The mirror
indicator light will illuminate.
Press the O button (2) to turn the auto-
matic- dimming function off. The mirror
indicator light will turn off. Type D
To operate the electric rearview mirror
(with homelink wireless control sys-
tem, rearview display and compass)
The mirror defaults to the ON position
whenever the ignition switch is turned
on.
Press the ON/OFF button (1) to turn the automatic dimming function off
unless vehicle is in reverse.
The mirror indicator light will turn off.
Press the ON/OFF button (1) to turn the automatic dimming function on
unless vehicle is in reverse.
The mirror indicator light will illuminate. Press the ON/OFF button (1) to turn
rearview display off while vehicle is in
reverse.
Press the ON/OFF button (1) to turn
rearview display on while vehicle is in
reverse.
OVQ036025NOVQ032360N
Rearview display
Compass display
Page 122 of 382
3113
Features of your vehicle
Compass (if equipped)
To operate Compass feature
Press and release the button (2), then
the vehicle's directional heading will be
displayed.
Pressing and releasing the button again
will turn off the display.
Heading display
- E : East
- W : West
- S : South
- N : North
ex) NE : North East
Calibration procedure
Press and hold the button (2) between 9
and 12 seconds. Release the button
when a "C" appears in the display, which
indicates the compass needs calibration.
1. Driving the vehicle in a circle at lessthan 8km/h 2 times or until the com-
pass heading appears.
2. Driving in a circle in right-handed direction and opposite direction are
possible, and if the calibration is com-
pleted, the compass heading will
appear.
3. Keep driving in a circle until a compass heading appears.
Setting the compass zone
1. Determine the desired Zone Numberbased upon your current location on
the Zone Maps below.
2. Press and hold the button (2) for more than 6 but less than 9 seconds, the
current Zone Number will appear on
the display.
3. Pressing and holding the button (2) again will cause the numbers to incre-
ment (Note: they will repeat …13, 14,
15, 1, 2, …). Releasing the button
when the desired Zone Number
appears on the display will set the new
Zone.
4. Within about 5 seconds the compass will start displaying a compass heading
again.
Page 123 of 382
Features of your vehicle
114
3
Re-calibrating the Compass.
There are some conditions that can
cause changes to the vehicle's magnetic
field. Items such as installing a ski rack or
a CB antenna or even some body repair
work on the vehicle can cause changes
to the vehicle's magnetic field. In these
situations, the compass will need to be
re-calibrated to quickly correct for these
changes. To re-calibrate the compass:
1. Press and hold the button (2) between
9 and 12 seconds. Release the button
when a "C" appears in the display,
which indicates the compass needs
calibration.
2. To re-calibrate the compass, drive the vehicle is 2 complete circles at less
than 5 MPH.
B520C05NF
Page 124 of 382
3115
Features of your vehicle
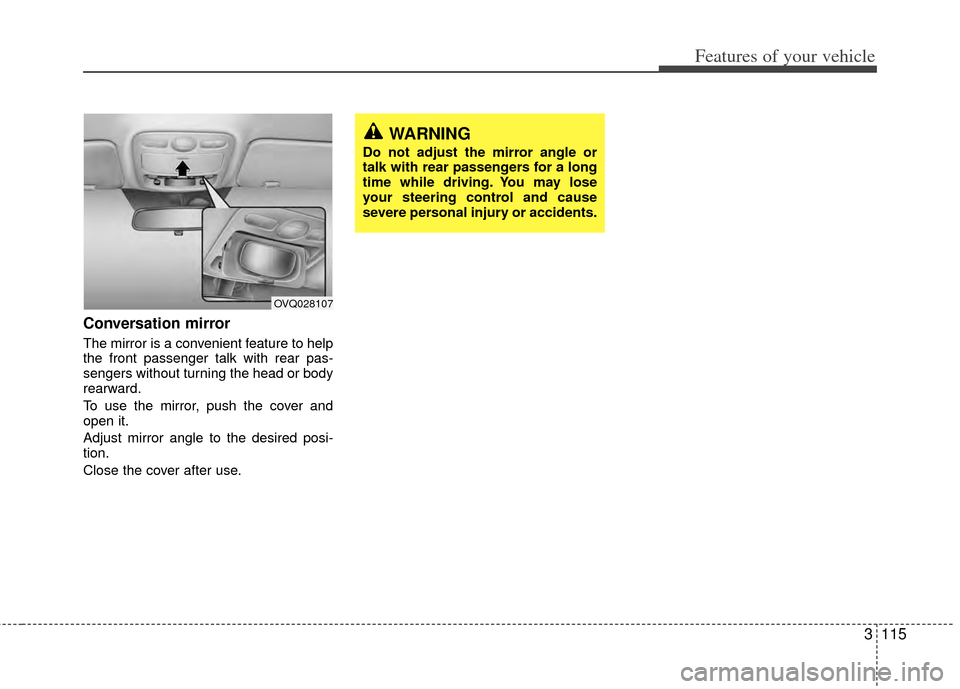
Conversation mirror
The mirror is a convenient feature to help
the front passenger talk with rear pas-
sengers without turning the head or body
rearward.
To use the mirror, push the cover and
open it.
Adjust mirror angle to the desired posi-
tion.
Close the cover after use.
WARNING
Do not adjust the mirror angle or
talk with rear passengers for a long
time while driving. You may lose
your steering control and cause
severe personal injury or accidents.
OVQ028107
Page 125 of 382
Features of your vehicle
116
3
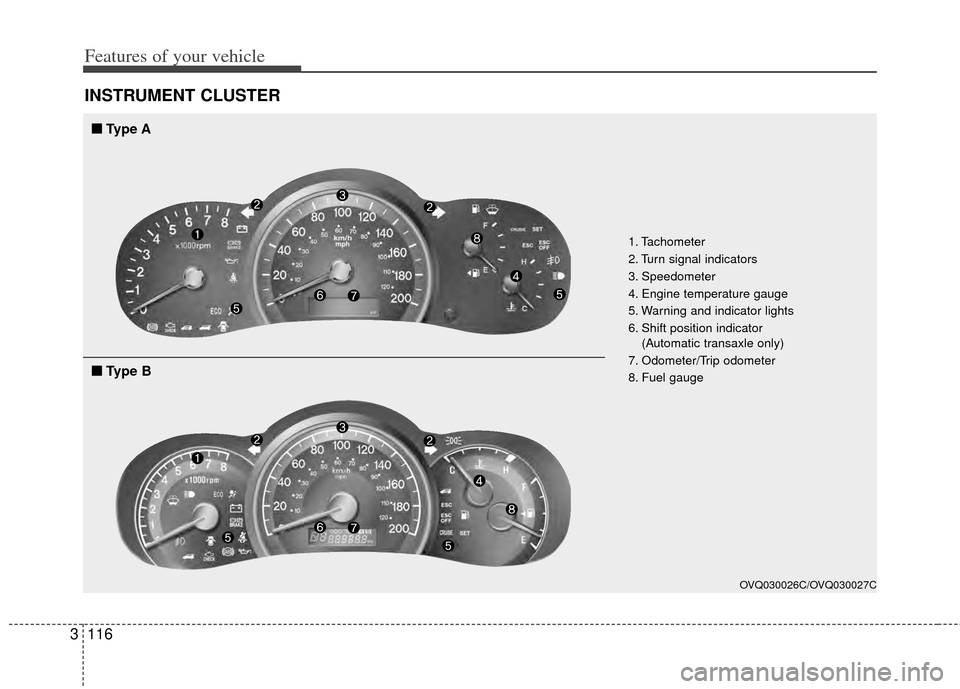
INSTRUMENT CLUSTER
1. Tachometer
2. Turn signal indicators
3. Speedometer
4. Engine temperature gauge
5. Warning and indicator lights
6. Shift position indicator
(Automatic transaxle only)
7. Odometer/Trip odometer
8. Fuel gauge
OVQ030026C/OVQ030027C
■ ■ Type A
■
■Type B
Page 126 of 382
3117
Features of your vehicle
Speedometer
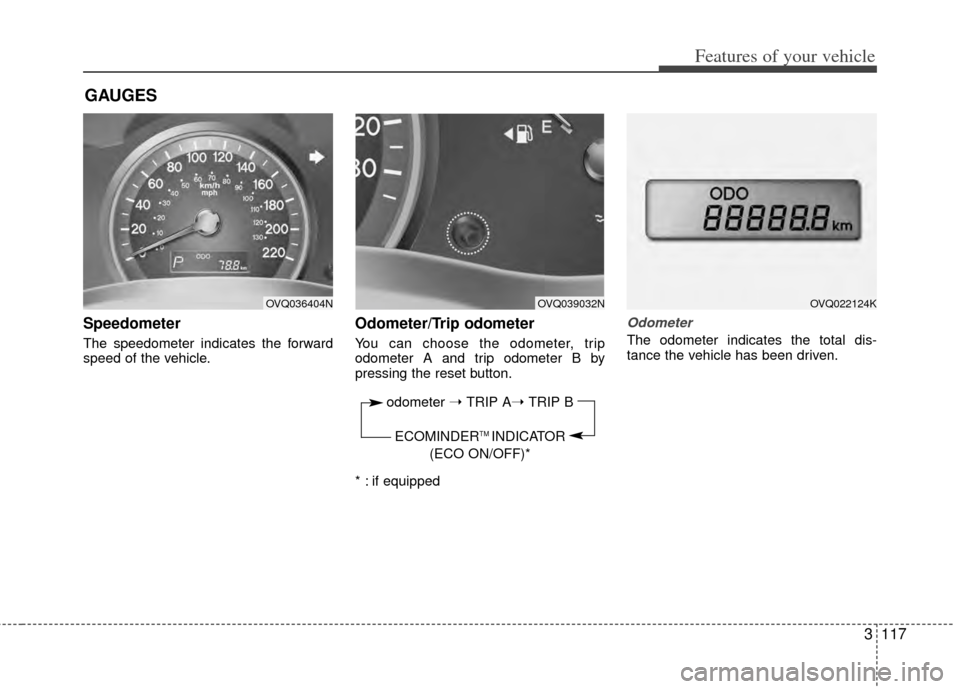
The speedometer indicates the forward
speed of the vehicle.
Odometer/Trip odometer
You can choose the odometer, trip
odometer A and trip odometer B by
pressing the reset button.
* : if equipped
Odometer
The odometer indicates the total dis-
tance the vehicle has been driven.
GAUGES
OVQ036404NOVQ039032N
odometer ➝ TRIP A➝ TRIP B
ECOMINDER
TM INDICATOR
(ECO ON/OFF)*
OVQ022124K
Page 127 of 382
Features of your vehicle
118
3
Trip odometer
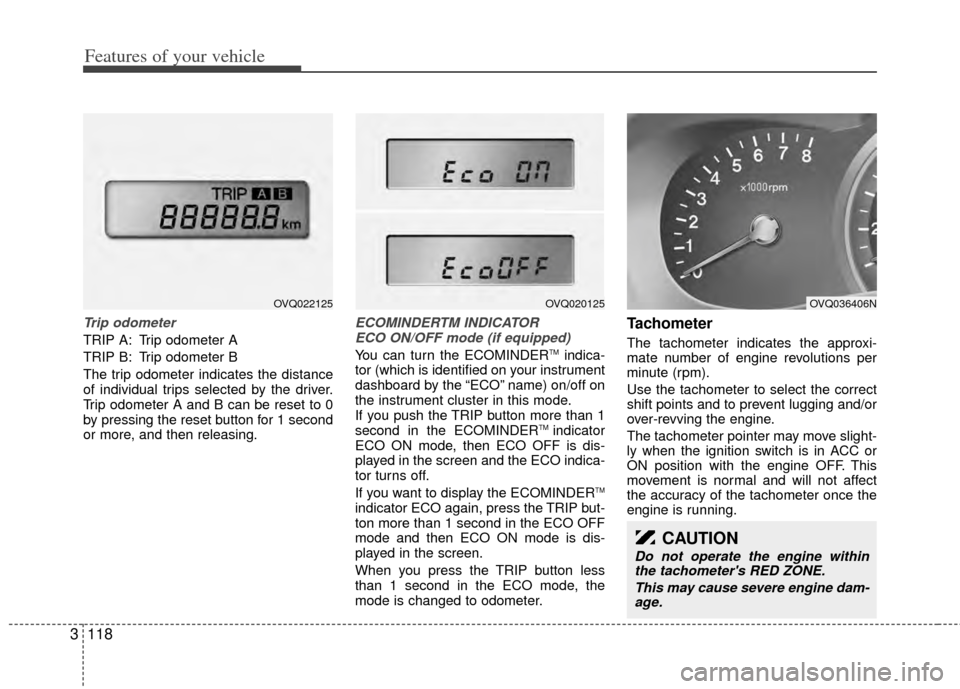
TRIP A: Trip odometer A
TRIP B: Trip odometer B
The trip odometer indicates the distance
of individual trips selected by the driver.
Trip odometer A and B can be reset to 0
by pressing the reset button for 1 second
or more, and then releasing.
ECOMINDERTM INDICATOR
ECO ON/OFF mode (if equipped)
You can turn the ECOMINDERTMindica-
tor (which is identified on your instrument
dashboard by the “ECO” name) on/off on
the instrument cluster in this mode.
If you push the TRIP button more than 1
second in the ECOMINDER
TM indicator
ECO ON mode, then ECO OFF is dis-
played in the screen and the ECO indica-
tor turns off.
If you want to display the ECOMINDER
TM
indicator ECO again, press the TRIP but-
ton more than 1 second in the ECO OFF
mode and then ECO ON mode is dis-
played in the screen.
When you press the TRIP button less
than 1 second in the ECO mode, the
mode is changed to odometer.
Tachometer
The tachometer indicates the approxi-
mate number of engine revolutions per
minute (rpm).
Use the tachometer to select the correct
shift points and to prevent lugging and/or
over-revving the engine.
The tachometer pointer may move slight-
ly when the ignition switch is in ACC or
ON position with the engine OFF. This
movement is normal and will not affect
the accuracy of the tachometer once the
engine is running.
CAUTION
Do not operate the engine within the tachometer's RED ZONE.
This may cause severe engine dam-age.
OVQ036406NOVQ020125OVQ022125
Page 128 of 382
3119
Features of your vehicle
Engine temperature gauge
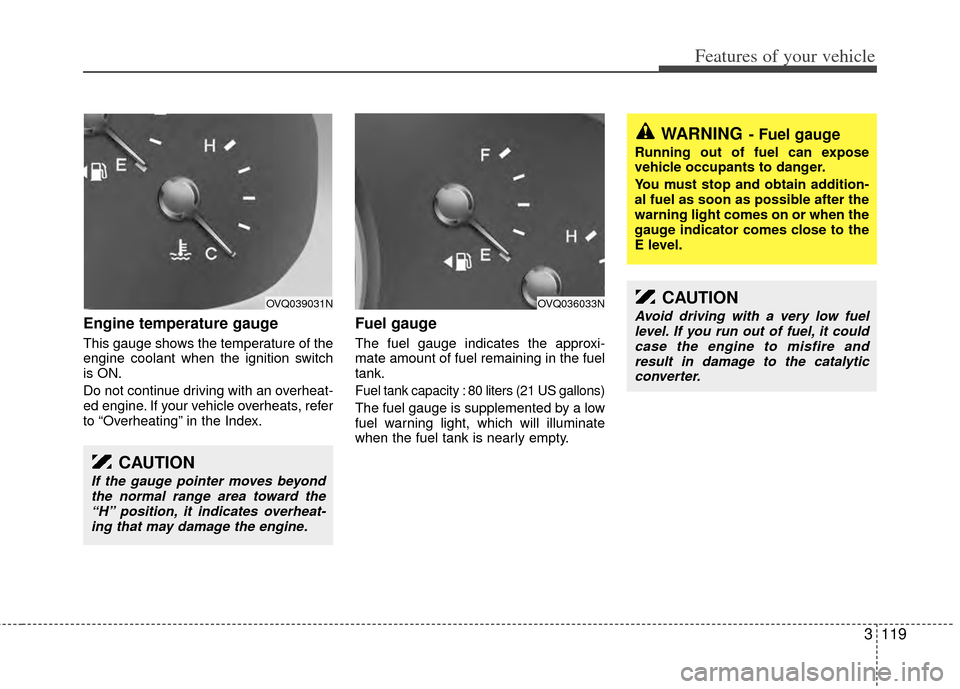
This gauge shows the temperature of the
engine coolant when the ignition switch
is ON.
Do not continue driving with an overheat-
ed engine. If your vehicle overheats, refer
to “Overheating” in the Index.
Fuel gauge
The fuel gauge indicates the approxi-
mate amount of fuel remaining in the fuel
tank.
Fuel tank capacity : 80 liters (21 US gallons)
The fuel gauge is supplemented by a low
fuel warning light, which will illuminate
when the fuel tank is nearly empty.
OVQ036033N
WARNING- Fuel gauge
Running out of fuel can expose
vehicle occupants to danger.
You must stop and obtain addition-
al fuel as soon as possible after the
warning light comes on or when the
gauge indicator comes close to the
E level.
CAUTION
Avoid driving with a very low fuellevel. If you run out of fuel, it couldcase the engine to misfire and result in damage to the catalyticconverter.
CAUTION
If the gauge pointer moves beyond the normal range area toward the“H” position, it indicates overheat- ing that may damage the engine.
OVQ039031N
Page 129 of 382
Features of your vehicle
120
3
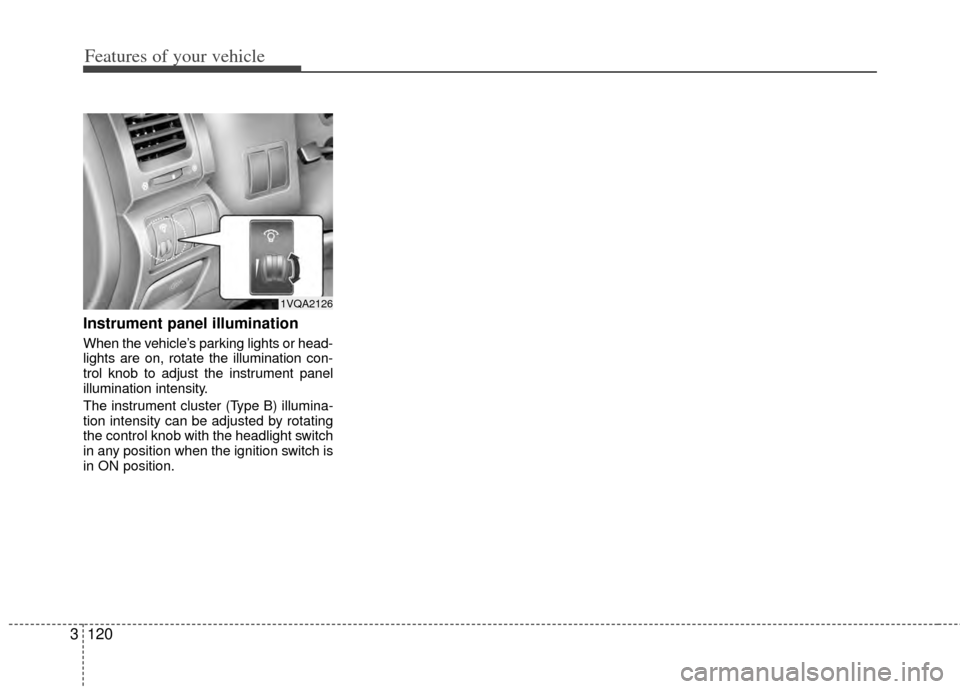
Instrument panel illumination
When the vehicle’s parking lights or head-
lights are on, rotate the illumination con-
trol knob to adjust the instrument panel
illumination intensity.
The instrument cluster (Type B) illumina-
tion intensity can be adjusted by rotating
the control knob with the headlight switch
in any position when the ignition switch is
in ON position.
1VQA2126
Page 130 of 382
3121
Features of your vehicle
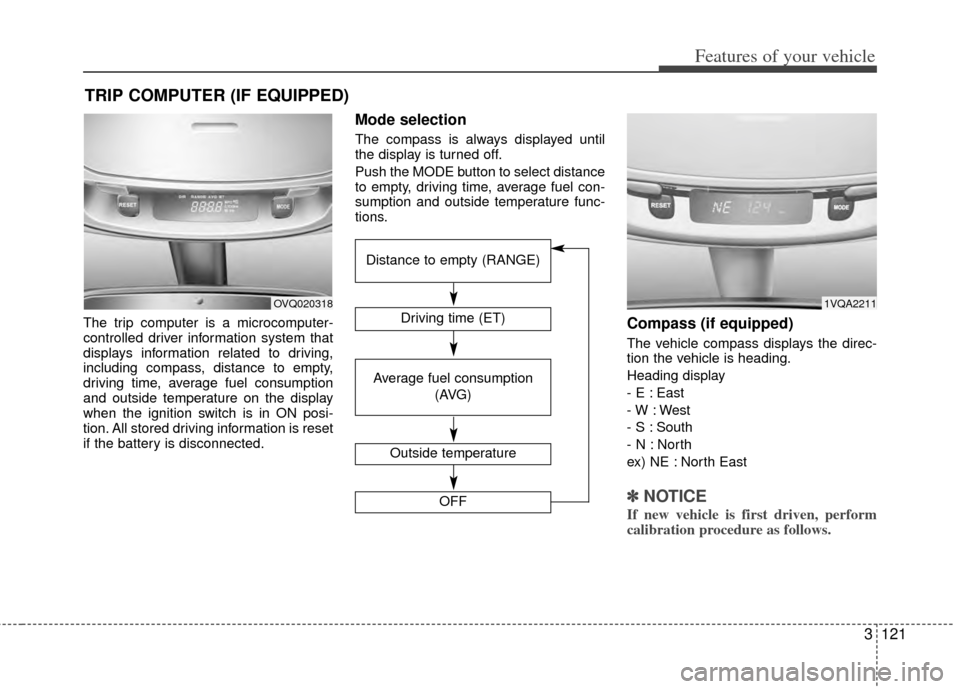
The trip computer is a microcomputer-
controlled driver information system that
displays information related to driving,
including compass, distance to empty,
driving time, average fuel consumption
and outside temperature on the display
when the ignition switch is in ON posi-
tion. All stored driving information is reset
if the battery is disconnected.
Mode selection
The compass is always displayed until
the display is turned off.
Push the MODE button to select distance
to empty, driving time, average fuel con-
sumption and outside temperature func-
tions.
Compass (if equipped)
The vehicle compass displays the direc-
tion the vehicle is heading.
Heading display
- E : East
- W : West
- S : South
- N : North
ex) NE : North East
✽ ✽NOTICE
If new vehicle is first driven, perform
calibration procedure as follows.
TRIP COMPUTER (IF EQUIPPED)
OVQ020318Driving time (ET)
Average fuel consumption
(AVG)
Outside temperature
OFF
Distance to empty (RANGE)
1VQA2211