belt KIA SEDONA 2017 Features and Functions Guide
[x] Cancel search | Manufacturer: KIA, Model Year: 2017, Model line: SEDONA, Model: KIA SEDONA 2017Pages: 54, PDF Size: 4.91 MB
Page 3 of 54

ESSENTIAL FEATURES
SEDONA FE ATURES & FUNCTIONS GUIDE*IF EQUIPPED
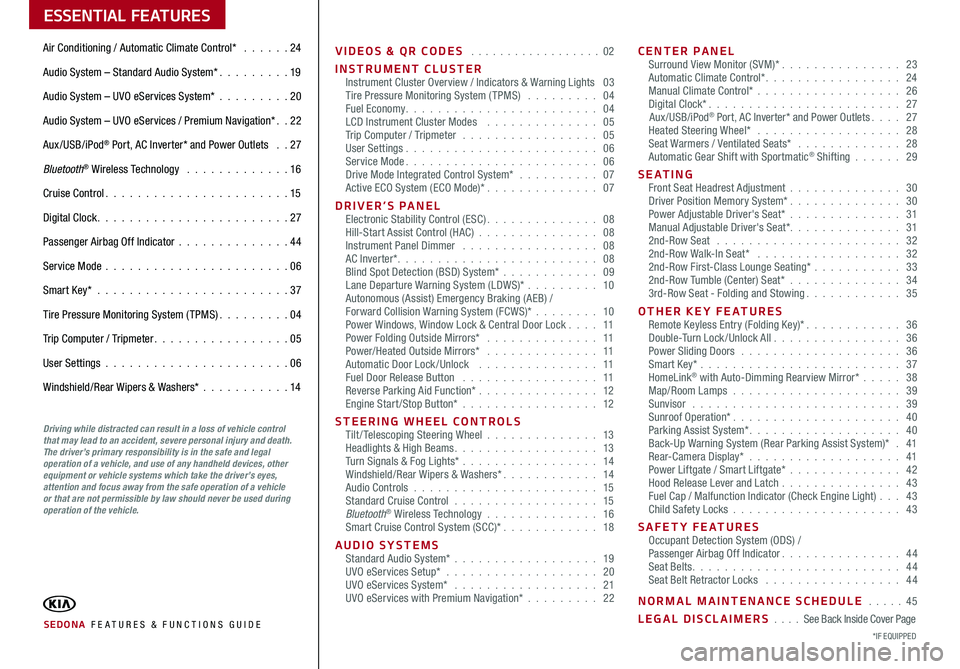
Air Conditioning / Automatic Climate Control* 24
Audio System – Standard Audio System* 19
Audio System – UVO eServices System* 20
Audio System – UVO eServices / Premium Navigation* 22
Aux/USB/iPod® Port, AC Inverter* and Power Outlets 27
Bluetooth® Wireless Technology 16
Cruise Control 15
Digital Clock 27
Passenger Airbag Off Indicator 44
Service Mode 06
Smart Key* 37
Tire Pressure Monitoring System (TPMS) 04
Trip Computer / Tripmeter 05
User Settings 06
Windshield/Rear Wipers & Washers* 14
VIDEOS & QR CODES 02
INSTRUMENT CLUSTERInstrument Cluster Overview / Indicators & Warning Lights 03Tire Pressure Monitoring System (TPMS) 04Fuel Economy 04LCD Instrument Cluster Modes 05Trip Computer / Tripmeter 05User Settings 06Service Mode 06Drive Mode Integrated Control System* 07Active ECO System (ECO Mode)* 07
DRIVER’S PANELElectronic Stability Control (ESC) 08Hill-Start Assist Control (HAC) 08Instrument Panel Dimmer 08AC Inverter* 08Blind Spot Detection (BSD) System* 09Lane Departure Warning System (LDWS)* 10Autonomous (Assist) Emergency Braking (AEB) /Forward Collision Warning System (FCWS)* 10Power Windows, Window Lock & Central Door Lock 11Power Folding Outside Mirrors* 11Power/Heated Outside Mirrors* 11Automatic Door Lock /Unlock 11Fuel Door Release Button 11Reverse Parking Aid Function* 12Engine Start/Stop Button* 12
STEERING WHEEL CONTROLSTilt/ Telescoping Steering Wheel 13Headlights & High Beams 13Turn Signals & Fog Lights* 14Windshield/Rear Wipers & Washers* 14Audio Controls 15Standard Cruise Control 15Bluetooth® Wireless Technology 16Smart Cruise Control System (SCC)* 18
AUDIO SYSTEMSStandard Audio System* 19UVO eServices Setup* 20UVO eServices System* 21UVO eServices with Premium Navigation* 22
CENTER PANELSurround View Monitor (SVM)* 23Automatic Climate Control* 24Manual Climate Control* 26Digital Clock* 27Aux/USB/iPod® Port, AC Inverter* and Power Outlets 27Heated Steering Wheel* 28Seat Warmers / Ventilated Seats* 28Automatic Gear Shift with Sportmatic® Shifting 29
S E AT I N GFront Seat Headrest Adjustment 30Driver Position Memory System* 30Power Adjustable Driver's Seat* 31Manual Adjustable Driver's Seat* 312nd-Row Seat 322nd-Row Walk-In Seat* 322nd-Row First-Class Lounge Seating* 332nd-Row Tumble (Center) Seat* 343rd-Row Seat - Folding and Stowing 35
OTHER KEY FEATURESRemote Keyless Entry (Folding Key)* 36Double-Turn Lock /Unlock All 36Power Sliding Doors 36Smart Key* 37HomeLink® with Auto-Dimming Rearview Mirror* 38Map/Room Lamps 39Sunvisor 39Sunroof Operation* 40Parking Assist System* 40Back-Up Warning System (Rear Parking Assist System)* 41Rear-Camera Display* 41Power Liftgate / Smart Liftgate* 42Hood Release Lever and Latch 43 Fuel Cap / Malfunction Indicator (Check Engine Light) 43Child Safety Locks 43
SAFETY FEATURESOccupant Detection System (ODS) /Passenger Airbag Off Indicator 44Seat Belts 44Seat Belt Retractor Locks 44
NORMAL MAINTENANCE SCHEDULE 45
LEGAL DISCLAIMERS See Back Inside Cover Page
Driving while distracted can result in a loss of vehicle control that may lead to an accident, severe personal injury and death. The driver’s primary responsibility is in the safe and legal operation of a vehicle, and use of any handheld devices, other equipment or vehicle systems which take the driver’s eyes, attention and focus away from the safe operation of a vehicle or that are not permissible by law should never be used during operation of the vehicle.
Page 5 of 54

3ALWAYS CHECK THE OWNER’S MANUAL FOR COMPLETE OPER ATING INFORMATION AND SAFET Y WARNINGS *IF EQUIPPED
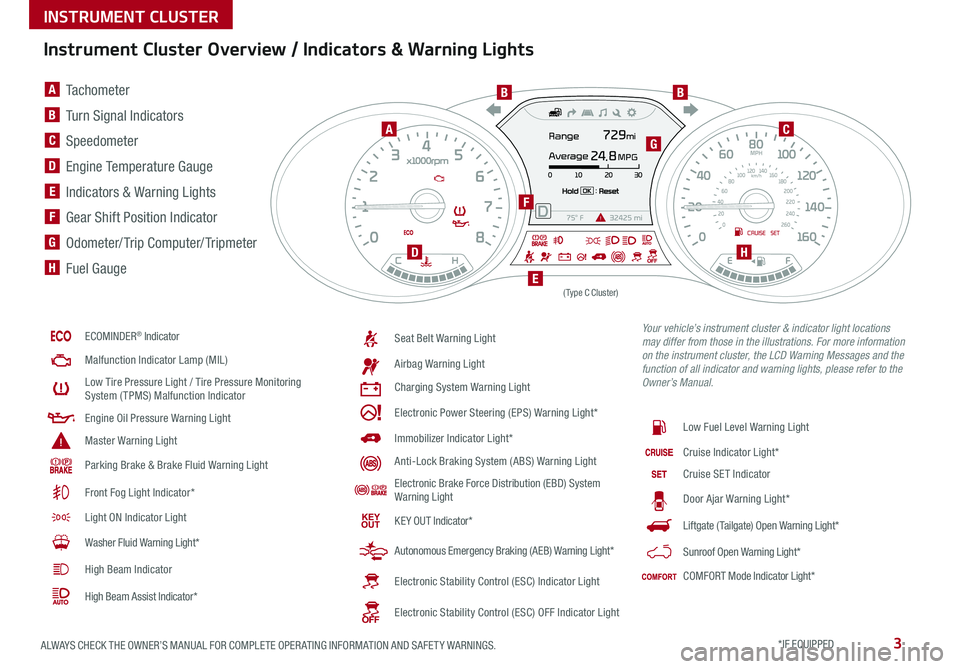
Instrument Cluster Overview / Indicators & Warning Lights
ECOMINDER® Indicator
Malfunction Indicator Lamp (MIL)
Low Tire Pressure Light / Tire Pressure Monitoring System (TPMS) Malfunction Indicator
Engine Oil Pressure Warning Light
Master Warning Light
Parking Brake & Brake Fluid Warning Light
Front Fog Light Indicator*
Light ON Indicator Light
Washer Fluid Warning Light*
High Beam Indicator
High Beam Assist Indicator*
Seat Belt Warning Light
Airbag Warning Light
Charging System Warning Light
Electronic Power Steering (EPS) Warning Light*
Immobilizer Indicator Light*
Anti-Lock Braking System (ABS) Warning Light
Electronic Brake Force Distribution (EBD) System Warning Light
KE Y OUT Indicator*
Autonomous Emergency Braking (AEB) Warning Light*
Electronic Stability Control (ESC) Indicator Light
Electronic Stability Control (ESC) OFF Indicator Light
Low Fuel Level Warning Light
Cruise Indicator Light*
Cruise SET Indicator
Door Ajar Warning Light*
Liftgate (Tailgate) Open Warning Light*
Sunroof Open Warning Light*
COMFORT Mode Indicator Light*
(Type C Cluster)
Your vehicle’s instrument cluster & indicator light locations may differ from those in the illustrations. For more information on the instrument cluster, the LCD Warning Messages and the function of all indicator and warning lights, please refer to the Owner’s Manual.
A Tachometer
B Turn Signal Indicators
C Speedometer
D Engine Temperature Gauge
E Indicators & Warning Lights
F Gear Shift Position Indicator
G Odometer/ Trip Computer/ Tripmeter
H Fuel Gauge
A
BB
C
D
E
F
G
H
INSTRUMENT CLUSTER
Page 34 of 54

SEATING
SEDONA FEATURES & FUNCTIONS GUIDE32*IF EQUIPPED
2nd-Row Seat
Folding 2nd-Row Seat
1 Lower the 2nd-Row Seat Headrest to the lowest position
2 Pull up on the Seatback folding lever or strap and fold the
Seatback down
Unfolding 2nd-Row Seat
1 Lift the folding Seatback lever and move the Seatback backward
2 Then lift the lever again or return it to an upright usable position
2nd-Row Walk-In Seat*
To get in and out of the 3rd-Row Seat, adjust the 2nd-Row Walk-In Seat as
follows:
1 Lift the 2nd-Row Seat armrest
2 Adjust headrest to the lowest position
3 Accessing from outside of the vehicle: Pull up the Walk-In Lever A –
the seat will stand up and headrest will fold automatically C
4 Accessing from the 3rd-Row seat: Pull the release strap B – the seat
will stand up and headrest will fold automatically C
5 Return the 2nd-Row Seat to its original position and push until it locks
(clicks) into place and the headrest unfolds
•When you return Seatback to its original position, ensure it locks (clicks) into place •It may be necessary to slide the front Seat forward and adjust the front Seatbacks to fully lower rear seats •Lower Rear Headrests to the lowest position
QUICK TIPS
•For specific information on how to use the 2nd- and 3rd-Row Center Seat Belts, please refer to your Owner's Manual
QUICK TIP
B
A
For more information on 2nd-Row Walk-In Seat operation, refer to the Owner's Manual.
For more information on 2nd-Row Seat operation, refer to the Owner's Manual.
C
Page 36 of 54

SEATING
SEDONA FEATURES & FUNCTIONS GUIDE34*IF EQUIPPED
Installing Tumble Seat
1 Place and align the Tumble Seat properly E
2 Lower Tumble Seat and push down firmly until
it clicks into place
3 Ensure the Tumble Seat is latched securely by
the green indicator
4 Pull up the Tumble Seatback recline strap F,
lift Seatback backward until it locks (clicks)
into place
5 Return the Seat Belt to its proper position
Unfastening the Center
Shoulder Seat Belt from
Buckle
1 If Seat Belt is buckled,
press the release button
on the buckle
2 To retract the center seatbelt
webbing G in 2nd and/or
3rd rows, use the lap belt
tongue plate H to push
the “release button” in the
small slot on the center
belt buckle J
2nd-Row Tumble (Center) Seat*
Removing the Tumble Seat
1 Insert the seat belt into the belt assembly cover, and the
seat belt buckle into the seat cushion pocket
2 Lower the headrest A to the lowest position
3 Slide the Seat backward to the farthest position
4 Pull up the recline strap B and fold the Seatback forward
5
Pull the removal strap C and lift the back of the Tumble
Seat forward
6
Pull up the catch release lever D under the Tumble Seat
cushion and lift out of the anchorsREMINDERS:
•
Never install or remove the Tumble Seat while there are occupants in the 3rd-Row Seat
•
Ensure to raise up both the left and right side seatbacks before installing tumble seat
For more information on the Tumble Seat, refer to the Owner's Manual.
For more information on removing the Tumble Seat, refer to the Owner's Manual.
A
B
C
E
F
D
•For specific information on how to use the 2nd- and 3rd-Row Center Seat Belts, please refer to your Owner's Manual
QUICK TIP
H
HG
G
J
J
Page 37 of 54

SEATING
35ALWAYS CHECK THE OWNER’S MANUAL FOR COMPLETE OPER ATING INFORMATION AND SAFET Y WARNINGS *IF EQUIPPED
3rd-Row Seat - Folding and Stowing
Folding 3rd-Row Seat
1 Fully lower headrest A
2 Pull Seat folding strap located in the back of the Seatback B
3 Fold Seat down C
Stowing 3rd-Row Seats*
The rear seats can be folded and stowed in the
luggage compartment for additional cargo space
1 Fully lower headrests D
2 Pull release lever E and push Seat firmly in place
REMINDER: The seat straps on the front and back of the 3rd-Row Seat are for folding only
D
E
B
A
C
For more information on 3rd-Row Seat operation, refer to the Owner's Manual.
Sedona 2nd and 3rd Row Seat Video
To view a video on your mobile device, snap this QR Code or visit the listed website
Refer to page 2 for more information
QR CODE
www.KuTechVideos.com/yp13/2017
•For specific information on how to use the 2nd- and 3rd-Row Center Seat Belts, please refer to your Owner's Manual
QUICK TIP
Page 46 of 54

SAFETY FEATURES
SEDONA FEATURES & FUNCTIONS GUIDE44*IF EQUIPPED
Occupant Detection System (ODS) / Passenger
Airbag Off Indicator
ODS detects the presence and position of the front passenger and adjusts
or turns off airbag deployment accordingly
Depending on the situation and type of accident, the system may:
•Deploy airbag (Adult)
•Not deploy the airbag (Unoccupied)
If the system determines that the airbag should not be deployed, the
“PASSENGER AIRBAG OFF” light will illuminate
Seat Belts
To properly fasten your seat belts:
1
Insert the belt tongue plate A into the buckle B until it clicks
2
Position the lap portion of the belt
across your lap as LOW ON THE
HIPS as possible C Adjust the belt
to a SNUG FIT by pulling up on the
shoulder portion D
REMINDER: For maximum protection, always wear your seat belt
Seat Belt Retractor Locks
Retractor locks allow lap/shoulder seat belts to remain unlocked during
normal vehicle operation for freedom of movement and increased comfort
During a STRONG STOP, SUDDEN TURN OR CERTAIN COLLISIONS, seat
belt retractors will automatically lock the belts to reduce the risk of injury
The seat belt warning chime operates for driver’s seat only
QUICK TIP
PRESS
A
B
D
C
(Type A shown)
Page 47 of 54

45ALWAYS CHECK THE OWNER’S MANUAL FOR COMPLETE OPER ATING INFORMATION AND SAFET Y WARNINGS
MAINTENANCE
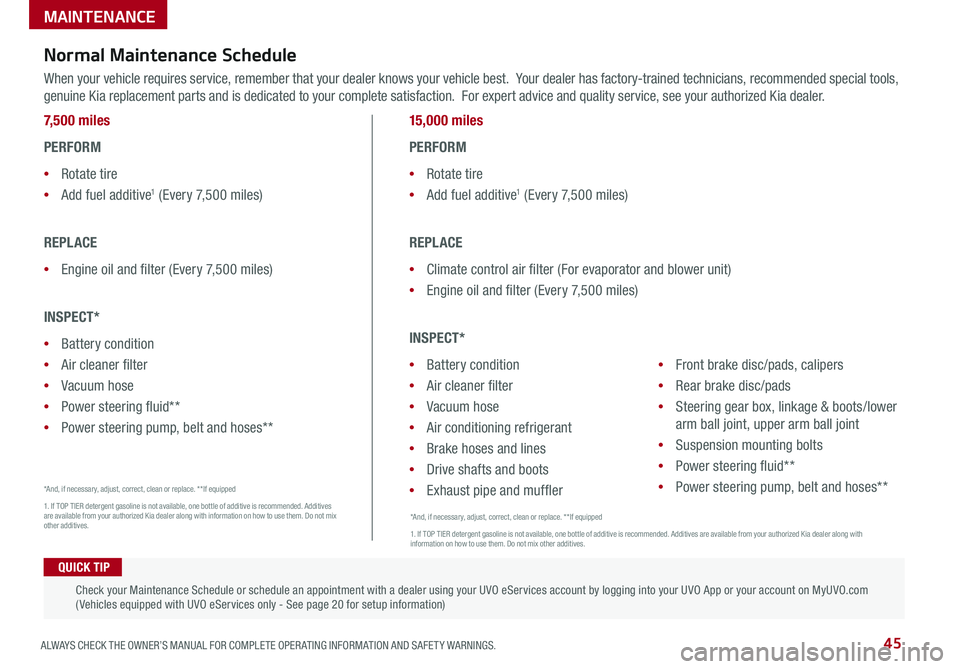
Normal Maintenance Schedule
When your vehicle requires service, remember that your dealer knows your vehicle best Your dealer has factory-trained technicians, recommended special tools,
genuine Kia replacement parts and is dedicated to your complete satisfaction For expert advice and quality service, see your authorized Kia dealer
7,500 miles
PERFORM
•Rotate tire
•Add fuel additive1 (Every 7,500 miles)
REPLACE
•Engine oil and filter (Every 7,500 miles)
INSPECT*
•Battery condition
•Air cleaner filter
•Vacuum hose
•Power steering fluid**
•Power steering pump, belt and hoses**
15,000 miles
PERFORM
•Rotate tire
•Add fuel additive1 (Every 7,500 miles)
REPLACE
•Climate control air filter (For evaporator and blower unit)
•Engine oil and filter (Every 7,500 miles)
INSPECT*
•Battery condition
•Air cleaner filter
•Vacuum hose
•Air conditioning refrigerant
•Brake hoses and lines
•Drive shafts and boots
•Exhaust pipe and muffler
•Front brake disc/pads, calipers
•Rear brake disc/pads
•Steering gear box, linkage & boots/lower
arm ball joint, upper arm ball joint
•Suspension mounting bolts
•Power steering fluid**
•Power steering pump, belt and hoses**
*And, if necessary, adjust, correct, clean or replace * *If equipped
1 If TOP TIER detergent gasoline is not available, one bottle of additive is recommended Additives are available from your authorized Kia dealer along with information on how to use them Do not mix other additives
QUICK TIP
Check your Maintenance Schedule or schedule an appointment with a dealer using your UVO eServices account by logging into your UVO App or your account on MyUVO com ( Vehicles equipped with UVO eServices only - See page 20 for setup information)
*And, if necessary, adjust, correct, clean or replace * *If equipped
1 If TOP TIER detergent gasoline is not available, one bottle of additive is recommended Additives are available from your authorized Kia dealer along with information on how to use them Do not mix other additives
Page 48 of 54

SEDONA FEATURES & FUNCTIONS GUIDE46
MAINTENANCE
Normal Maintenance Schedule (Continued)
22,500 miles
PERFORM
•Rotate tire
•Add fuel additive1 (Every 7,500 miles)
REPLACE
•Engine oil and filter (Every 7,500 miles)
INSPECT*
•Battery condition
•Air cleaner filter
•Vacuum hose
•Power steering fluid**
•Power steering pump, belt and hoses**
30,000 miles
PERFORM
•Rotate tire
•Add fuel additive1 (Every 7,500 miles)
REPLACE
•Climate control air filter (For evaporator and blower unit)
•Air cleaner filter
•Engine oil and filter (Every 7,500 miles)
INSPECT*
•Battery condition
•Vacuum hose
•Air conditioning refrigerant
•Brake hoses and lines
•Drive shafts and boots
•Exhaust system
•Front brake disc/pads, calipers
•Rear brake disc/pads
•Steering gear box, linkage & boots/
lower arm ball joint, upper arm ball joint
•Suspension mounting bolts
•Brake fluid
•Fuel filter2
•Fuel lines, fuel hoses and connections
•Fuel tank air filter2
•Parking brake
•Vapor hose and fuel filler cap
•Power steering fluid**
•Power steering pump, belt and hoses**
*And, if necessary, adjust, correct, clean or replace **If equipped
1 If TOP TIER Detergent Gasoline is not available, one bottle of additive is recommended Additives are available from your authorized Kia dealer along with information on how to use them Do not mix other additives
*And, if necessary, adjust, correct, clean or replace * *If equipped
1 If TOP TIER Detergent Gasoline is not available, one bottle of additive is recommended Additives are available from your authorized Kia dealer along with information on how to use them Do not mix other additives 2 Fuel filter & Fuel tank air filter are considered to be maintenance free but periodic inspection is recommended for this maintenance schedule depends on fuel quality If there are some important safety matters like fuel flow restriction, surging, loss of power, hard starting problem etc, replace the fuel filter immediately regardless of maintenance schedule and consult an authorized Kia dealer for details
Page 49 of 54

47ALWAYS CHECK THE OWNER’S MANUAL FOR COMPLETE OPER ATING INFORMATION AND SAFET Y WARNINGS
Normal Maintenance Schedule (Continued)
37,500 miles
PERFORM
•Rotate tire
•Add fuel additive1 (Every 7,500 miles)
REPLACE
•Engine oil and filter (Every 7,500 miles)
INSPECT*
•Battery condition
•Air cleaner filter
•Vacuum hose
•Power steering fluid**
•Power steering pump, belt and hoses**
45,000 miles
PERFORM
•Rotate tire
•Fuel additive1 (Every 7,500 miles)
REPLACE
•Climate control air filter (For evaporator and blower unit)
•Engine oil and filter (Every 7,500 miles)
INSPECT*
•Battery condition
•Air cleaner filter
•Vacuum hose
•Air conditioning refrigerant
•Brake hoses and lines
•Drive shafts and boots
•Exhaust system
•Front brake disc/pads, calipers
•Rear brake disc/pads
•Steering gear box, linkage &
boots/lower arm ball joint, upper
arm ball joint
•Suspension mounting bolts
•Power steering fluid**
•Power steering pump,
belt and hoses**
*And, if necessary, adjust, correct, clean or replace * *If equipped
1 If TOP TIER Detergent Gasoline is not available, one bottle of additive is recommended Additives are available from your authorized Kia dealer along with information on how to use them Do not mix other additives
*And, if necessary, adjust, correct, clean or replace * *If equipped
1 If TOP TIER Detergent Gasoline is not available, one bottle of additive is recommended Additives are available from your authorized Kia dealer along with information on how to use them Do not mix other additives
MAINTENANCE
Page 50 of 54

SEDONA FEATURES & FUNCTIONS GUIDE48
52,500 miles
PERFORM
•Rotate tire
•Add fuel additive1 (Every 7,500 miles)
REPLACE
•Engine oil and filter (Every 7,500 miles)
INSPECT*
•Battery condition
•Air cleaner filter
•Vacuum hose
•Power steering fluid**
•Power steering pump, belt and hoses**
60,000 miles
PERFORM
•Rotate tire
•Add fuel additive1 (Every 7,500 miles)
REPLACE
•Climate control air filter (For evaporator and blower unit)
•Air cleaner filter
•Engine oil and filter (Every 7,500 miles)
INSPECT*
•Battery condition
•Vacuum hose
•Air conditioning refrigerant
•Brake hoses and lines
•Drive shafts and boots
•Exhaust system
•Front brake disc/pads, calipers
•Rear brake disc/pads
•Steering gear box, linkage & boots/lower arm
ball joint, upper arm ball joint
•Suspension mounting bolts
•Brake fluid
•Fuel filter3
•Fuel lines, fuel hoses and connections
•Fuel tank air filter2
•Parking brake
•Valve clearance3
•Vapor hose and fuel filler cap
•Drive belts4 (First, 60,000 miles after that,
every 15,000 miles)
•Power steering fluid**
•Power steering pump, belt and hoses**
Normal Maintenance Schedule (Continued)
*And, if necessary, adjust, correct, clean or replace * *If equipped 1 If TOP TIER Detergent Gasoline is not available, one bottle of additive is recommended Additives are available from your authorized Kia dealer along with information on how to use them Do not mix other additives 2 Fuel filter & Fuel tank air filter are considered to be maintenance free but periodic inspection is recommended for this maintenance schedule depends on fuel quality If there are some important safety matters like fuel flow restriction, surging, loss of power, hard starting problem etc, replace the fuel filter immediately regardless of maintenance schedule and consult an authorized Kia dealer for details 3 Inspect for excessive tappet noise and/or engine vibration and adjust if necessary 4 The drive belt should be replaced when cracks occur or tension is reduced excessively
*And, if necessary, adjust, correct, clean or replace **If equipped
1 If TOP TIER Detergent Gasoline is not available, one bottle of additive is recommended Additives are available from your authorized Kia dealer along with information on how to use them Do not mix other additives
MAINTENANCE