change time KIA Sorento 2007 1.G Owner's Manual
[x] Cancel search | Manufacturer: KIA, Model Year: 2007, Model line: Sorento, Model: KIA Sorento 2007 1.GPages: 325, PDF Size: 5.01 MB
Page 2 of 325
i
Thank you for choosing a Kia vehicle.
When you require service, remember that your dealer knows
your vehicle best. Your dealer has factory-trained technicians,
recommended special tools, genuine Kia replacement parts and
is dedicated to your complete satisfaction.
Because subsequent owners require this important information
as well, this publication should remain with the vehicle if it is
sold.
This manual will familiarize you with operational, mainte-
nance and safety information about your new vehicle. It is sup-
plemented by a Warranty and Consumer Information manual
that provides important information on all warranties regarding
your vehicle.
We urge you to read these publications carefully and follow the
recommendations to help assure enjoyable and safe operation
of your new vehicle.
Kia offers a great variety of options, components and features
for its various models.
Therefore, the equipment described in this manual, along with
the various illustrations, may not all be applicable to your par-
ticular vehicle.
The information and specifications provided in this manual
were accurate at the time of printing. Kia reserves the right to
discontinue or change specifications or design at any time
without notice and without incurring any obligation. If you
have questions, always check with your Kia Dealer.
We assure you of our continuing interest in your motoring
pleasure and satisfaction in your Kia vehicle.
© 2006 Kia Motors Corp.
All rights reserved. Reproduction by any means, electronic or
mechanical, including photocopying, recording, or by any
information storage and retrieval system or translation in
whole or part is not permitted without written authorization
from Kia Motors Corporation.
Printed in KoreaForeword
Page 27 of 325
Knowing your vehicle18
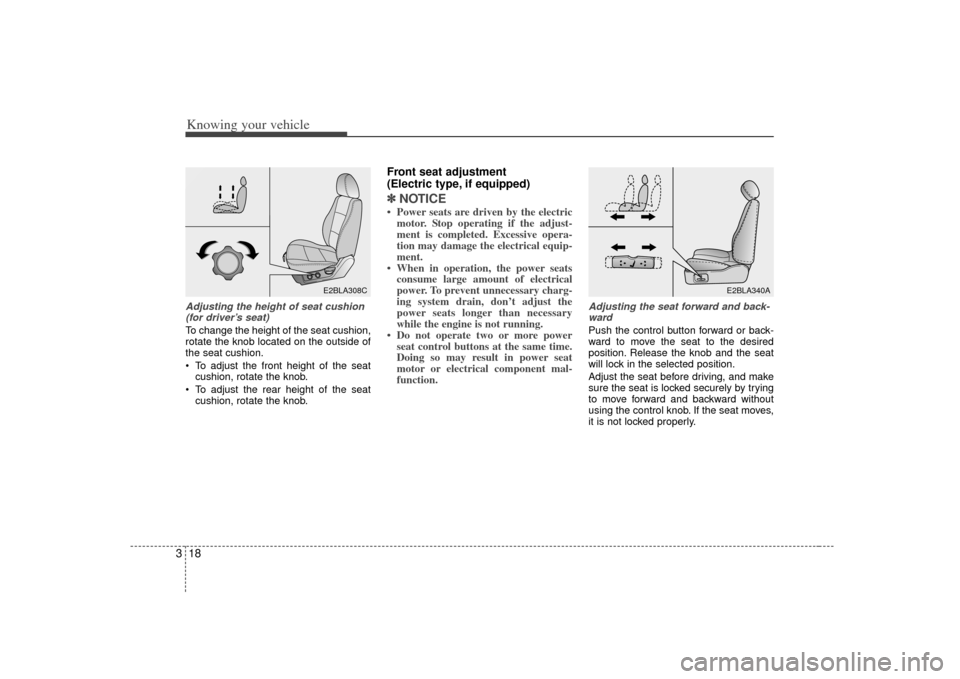
3Adjusting the height of seat cushion
(for driver’s seat)To change the height of the seat cushion,
rotate the knob located on the outside of
the seat cushion.
To adjust the front height of the seat cushion, rotate the knob.
To adjust the rear height of the seat cushion, rotate the knob.
Front seat adjustment
(Electric type, if equipped)✽ ✽ NOTICE• Power seats are driven by the electric
motor. Stop operating if the adjust-
ment is completed. Excessive opera-
tion may damage the electrical equip-
ment.
• When in operation, the power seats consume large amount of electrical
power. To prevent unnecessary charg-
ing system drain, don’t adjust the
power seats longer than necessary
while the engine is not running.
• Do not operate two or more power seat control buttons at the same time.
Doing so may result in power seat
motor or electrical component mal-
function.
Adjusting the seat forward and back-
wardPush the control button forward or back-
ward to move the seat to the desired
position. Release the knob and the seat
will lock in the selected position.
Adjust the seat before driving, and make
sure the seat is locked securely by trying
to move forward and backward without
using the control knob. If the seat moves,
it is not locked properly.
E2BLA308C
E2BLA340A
Page 36 of 325
327
Knowing your vehicle
Safety belt restraint system
We strongly recommend that the driver
and all passengers be properly restrained
at all times by using the safety belts pro-
vided with the vehicle. Proper use of the
safety belts decreases the risk of severe
injury or death in accidents or sudden
stops. In most states, and in Canada, the
law requires their use.
All seats have lap/shoulder belts. Inertial
locks in the safety belt retractors allow all
of the lap/shoulder safety belts to remain
unlocked during normal vehicle opera-
tion. This allows the occupants some
freedom of movement and increased
comfort while using the safety belts. If a
force is applied to the vehicle, such as a
strong stop, a sharp turn, or a collision,
the safety belt retractors will automatical-
ly lock the safety belts.
Since the inertial locks do not require a
collision in order to lock up, you may
become aware of the safety belts locking
while braking or going around sharp cor-
ners.
Always use the rear seat position(s) to
install your child restraint(s).
WARNING
- Replacing
used pre-tensioners
Pre-tensioners are designed to
operate once. After activation,
pre-tensioner seat belts must be
replaced. All seat belts, of any
type, should always be replaced
after they have been worn during
a collision.
Do not attempt to replace the pre- tensioners yourself. This must be
done by an authorized Kia dealer.
WARNING
- Damaging the
pre-tensioners
Do not hit or strike the pre-ten-
sioner assemblies, especially
with a tool or heavy object.
Do not attempt to service or repair the pre-tensioners.
WARNING
- Safety belts
To minimize the risk of serious or
fatal injury in an accident, the driv-
er and all passengers should use
the appropriate safety restraints for
their age and size. The presence of
air bags does not change the need
to be properly restrained by a safe-
ty belt or size-appropriate child
restraint. In fact, air bags are
designed to work the best when
passengers are correctly restrained
in the vehicle.
Be sure you are familiar with theinformation in this section,
including the information on
infant and child restraints.
Read the safety warnings on the sunvisors of your vehicle also.
Page 121 of 325
Knowing your vehicle112
31. SCAN buttonDisc Scan function
Model D446:
During CD playback, press the SCAN
button to play the first 10 seconds (pre-
view) of all tracks on the current CD.
Model D465:
To preview the first track of all the CDs in
the CD changer, press and hold the
SCAN button for more than 2 seconds.
Once you hear a track you want, press
the SCAN button again to resume nor-
mal playback.2. Track UP and DOWN but- tons During CD playback, press the and buttons to select and play the
next or previous track on the current disc.
The LCD screen displays the track num-
ber as you press the buttons. You can
press the button several times to select
the track you want.
3. CD selector buttons (1~6) Model D446:
The CDselector buttons are not used
with Model D446.
Model D465:
Press the CD selector button correspon-
ding to the CD you want. The CD player
automatically interrupts playback and
loads the selected CD.✽ ✽ NOTICEIf no CD is loaded in the selected posi-
tion, the LCD screen displays the No
Disc indicator.4. Rewind REW and Fast Forward FF
buttonsDuring CD playback, press and hold the
REW or FF buttons to rewind or fast-for-
ward playback of the current track. The
LCD screen displays the elapsed time of
the track you are rewinding or fast-for-
warding.
Release the REW or FF button when you
have reached the point you want.
Playback resumes automatically at the
selected point.
5. Dir and buttons (MP3 and WMA discs)During MP3/WMA CD playback, press
the DIR or buttons to switch to the
next or previous directory on the CD. The
LCD screen displays the name of the
directory you have switched to. You can
press the button several times to search
for the directory you want. The directories
are displayed in sequence (i.e. ascend-
ing or descending alphabetical order).
To access the directory displayed, press
the File Search knob to ENTER your
selection.✽ ✽ NOTICEThe Directory UP and DOWN buttons
can only be used when you are playing a
CD which has organized its tracks in the
form of directories. Normally, only MP3
or WMA CDs will contain a directory
tree which you can navigate using these
buttons.
Page 127 of 325
Knowing your vehicle118
3Using External Controls1. The Dimmer control
The Dimmer control setting determines
the brightness of the entire vehicle's dis-
plays.
Turn the scroll wheel up or down to
increase or decrease the brightness of
the vehicle's instrument panels, backlit
displays and the audio system's LCD
screen and backlit controls.
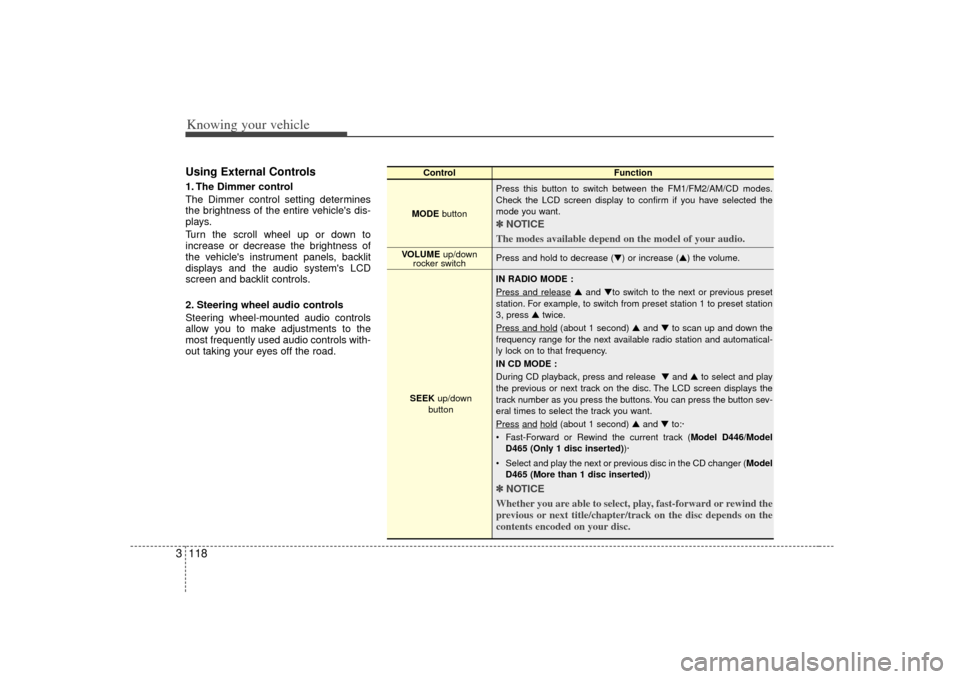
2. Steering wheel audio controls
Steering wheel-mounted audio controls
allow you to make adjustments to the
most frequently used audio controls with-
out taking your eyes off the road.
Control Function
MODE button Press this button to switch between the FM1/FM2/AM/CD modes.
Check the LCD screen display to confirm if you have selected the
mode you want.
✽ ✽
NOTICE
The modes available depend on the model of your audio. Press and hold to decrease (▼) or increase (▲) the volume.
IN RADIO MODE :
Press and release
▲ and ▼to switch to the next or previous preset
station. For example, to switch from preset station 1 to preset station
3, press ▲ twice.
Press and hold
(about 1 second) ▲ and ▼to scan up and down the
frequency range for the next available radio station and automatical-
ly lock on to that frequency.
IN CD MODE :
During CD playback, press and release ▼ and ▲to select and play
the previous or next track on the disc. The LCD screen displays the
track number as you press the buttons. You can press the button sev-
eral times to select the track you want.
Press
and
hold
(about 1 second) ▲ and ▼to:·
Fast-Forward or Rewind the current track ( Model D446/Model
D465 (Only 1 disc inserted) )·
Select and play the next or previous disc in the CD changer (Model D465 (More than 1 disc inserted) )
✽ ✽
NOTICE
Whether you are able to select, play, fast-forward or rewind the
previous or next title/chapter/track on the disc depends on the
contents encoded on your disc.
VOLUME up/down
rocker switch
SEEK up/down
button
Page 140 of 325
Driving your vehicle10
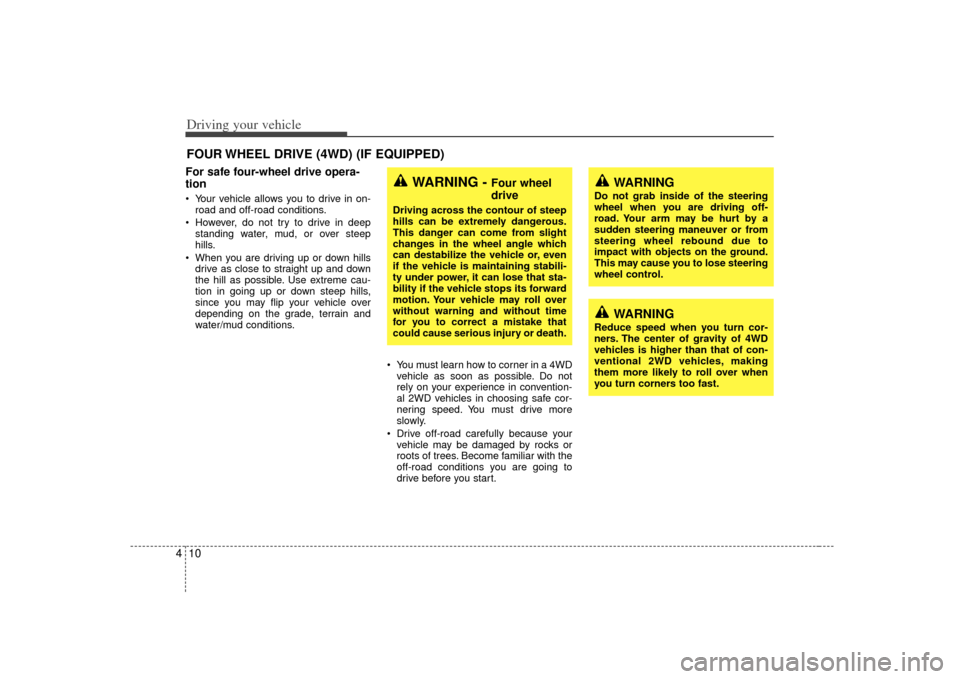
4For safe four-wheel drive opera-
tion Your vehicle allows you to drive in on-
road and off-road conditions.
However, do not try to drive in deep standing water, mud, or over steep
hills.
When you are driving up or down hills drive as close to straight up and down
the hill as possible. Use extreme cau-
tion in going up or down steep hills,
since you may flip your vehicle over
depending on the grade, terrain and
water/mud conditions.
You must learn how to corner in a 4WDvehicle as soon as possible. Do not
rely on your experience in convention-
al 2WD vehicles in choosing safe cor-
nering speed. You must drive more
slowly.
Drive off-road carefully because your vehicle may be damaged by rocks or
roots of trees. Become familiar with the
off-road conditions you are going to
drive before you start.FOUR WHEEL DRIVE (4WD) (IF EQUIPPED)
WARNING -
Four wheel
drive
Driving across the contour of steep
hills can be extremely dangerous.
This danger can come from slight
changes in the wheel angle which
can destabilize the vehicle or, even
if the vehicle is maintaining stabili-
ty under power, it can lose that sta-
bility if the vehicle stops its forward
motion. Your vehicle may roll over
without warning and without time
for you to correct a mistake that
could cause serious injury or death.
WARNING
Reduce speed when you turn cor-
ners. The center of gravity of 4WD
vehicles is higher than that of con-
ventional 2WD vehicles, making
them more likely to roll over when
you turn corners too fast.
WARNING
Do not grab inside of the steering
wheel when you are driving off-
road. Your arm may be hurt by a
sudden steering maneuver or from
steering wheel rebound due to
impact with objects on the ground.
This may cause you to lose steering
wheel control.
Page 146 of 325
Driving your vehicle16
4 You must learn how to corner in a 4WD
vehicle as soon as possible. Do not rely
on your experience in conventional
2WD vehicles in choosing a safe cor-
nering speed. You must drive more
slowly.
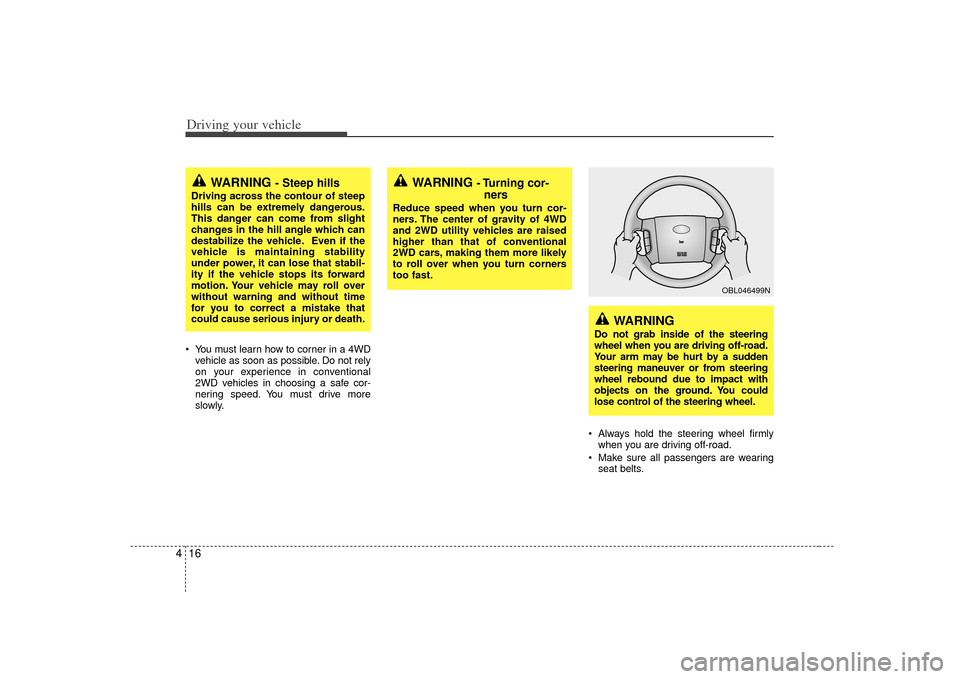
Always hold the steering wheel firmlywhen you are driving off-road.
Make sure all passengers are wearing seat belts.
WARNING
- Steep hills
Driving across the contour of steep
hills can be extremely dangerous.
This danger can come from slight
changes in the hill angle which can
destabilize the vehicle. Even if the
vehicle is maintaining stability
under power, it can lose that stabil-
ity if the vehicle stops its forward
motion. Your vehicle may roll over
without warning and without time
for you to correct a mistake that
could cause serious injury or death.
WARNING
- Turning cor-ners
Reduce speed when you turn cor-
ners. The center of gravity of 4WD
and 2WD utility vehicles are raised
higher than that of conventional
2WD cars, making them more likely
to roll over when you turn corners
too fast.
WARNING
Do not grab inside of the steering
wheel when you are driving off-road.
Your arm may be hurt by a sudden
steering maneuver or from steering
wheel rebound due to impact with
objects on the ground. You could
lose control of the steering wheel.
OBL046499N
Page 159 of 325
429
Driving your vehicle
To temporarily accelerate with the
cruise control onIf you want to speed up temporarily when
the cruise control is on, depress the
accelerator pedal. Increased speed will
not interfere with cruise control operation
or change the set speed.
To return to the set speed, take your foot
off the accelerator.
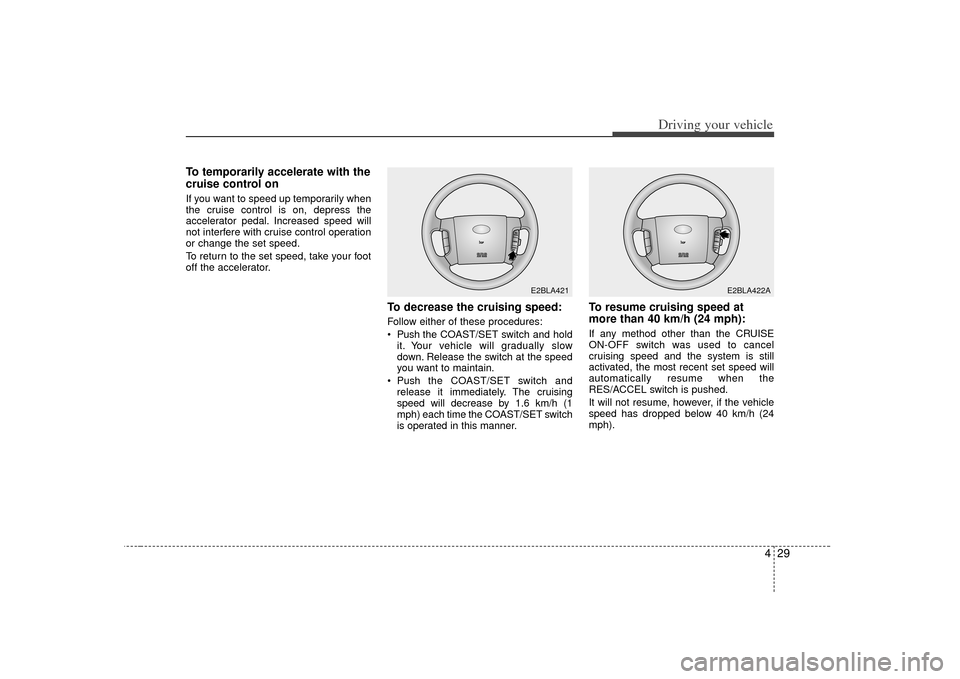
To decrease the cruising speed:Follow either of these procedures:
Push the COAST/SET switch and hold
it. Your vehicle will gradually slow
down. Release the switch at the speed
you want to maintain.
Push the COAST/SET switch and
release it immediately. The cruising
speed will decrease by 1.6 km/h (1
mph) each time the COAST/SET switch
is operated in this manner.
To resume cruising speed at
more than 40 km/h (24 mph):If any method other than the CRUISE
ON-OFF switch was used to cancel
cruising speed and the system is still
activated, the most recent set speed will
automatically resume when the
RES/ACCEL switch is pushed.
It will not resume, however, if the vehicle
speed has dropped below 40 km/h (24
mph).
E2BLA421
E2BLA422A
Page 179 of 325
449
Driving your vehicle
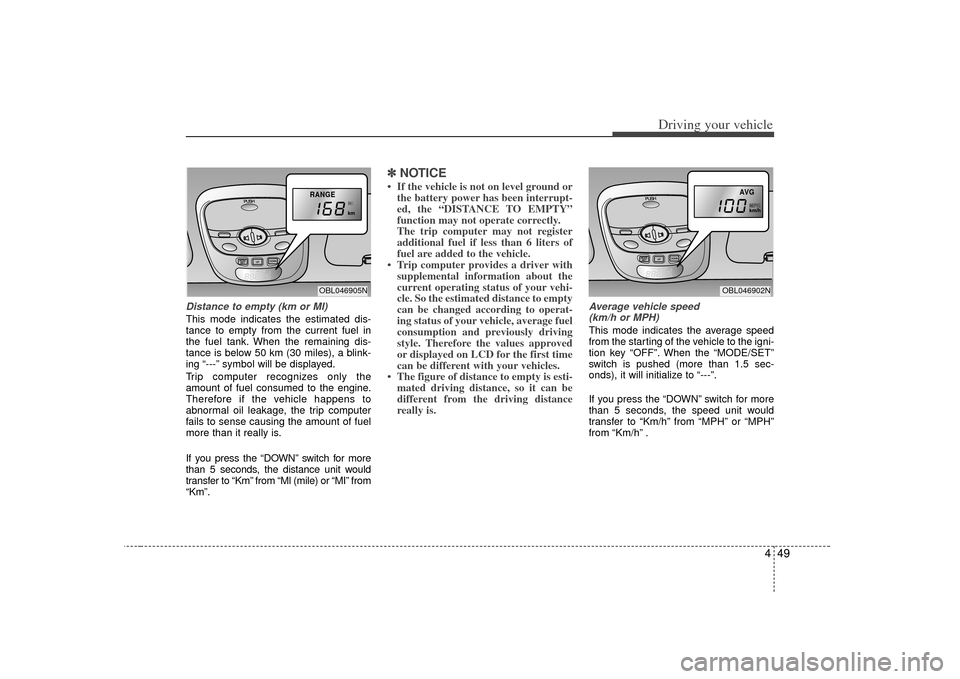
Distance to empty (km or MI)This mode indicates the estimated dis-
tance to empty from the current fuel in
the fuel tank. When the remaining dis-
tance is below 50 km (30 miles), a blink-
ing “---” symbol will be displayed.
Trip computer recognizes only the
amount of fuel consumed to the engine.
Therefore if the vehicle happens to
abnormal oil leakage, the trip computer
fails to sense causing the amount of fuel
more than it really is.
If you press the “DOWN” switch for more
than 5 seconds, the distance unit would
transfer to “Km” from “Ml (mile) or “MI” from
“Km”.
✽ ✽NOTICE• If the vehicle is not on level ground or
the battery power has been interrupt-
ed, the “DISTANCE TO EMPTY”
function may not operate correctly.
The trip computer may not register
additional fuel if less than 6 liters of
fuel are added to the vehicle.
• Trip computer provides a driver with supplemental information about the
current operating status of your vehi-
cle. So the estimated distance to empty
can be changed according to operat-
ing status of your vehicle, average fuel
consumption and previously driving
style. Therefore the values approved
or displayed on LCD for the first time
can be different with your vehicles.
• The figure of distance to empty is esti- mated driving distance, so it can be
different from the driving distance
really is.
Average vehicle speed
(km/h or MPH)This mode indicates the average speed
from the starting of the vehicle to the igni-
tion key “OFF”. When the “MODE/SET”
switch is pushed (more than 1.5 sec-
onds), it will initialize to “---”.
If you press the “DOWN” switch for more
than 5 seconds, the speed unit would
transfer to “Km/h” from “MPH” or “MPH”
from “Km/h” .
RANGEOBL046905N
AVG
OBL046902N
Page 183 of 325
453
Driving your vehicle
Lane change signals (B)To signal a lane change, move the turn
signal lever slightly and hold it in position.
The lever will return to the OFF position
when released.
If an indicator stays on and does not
flash or if it flashes abnormally, one of the
turn signal bulbs may be burned out and
will require replacement.✽ ✽
NOTICEIf an indicator flash is abnormally quick
or slow, bulb may be burned out or have
a poor electrical connection in the cir-
cuit.
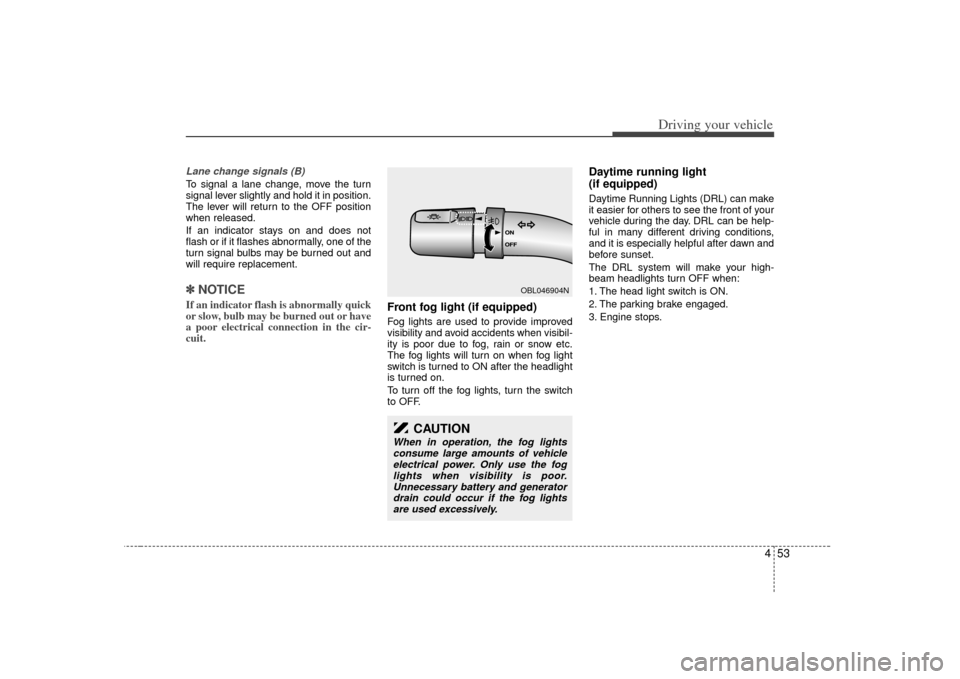
Front fog light (if equipped) Fog lights are used to provide improved
visibility and avoid accidents when visibil-
ity is poor due to fog, rain or snow etc.
The fog lights will turn on when fog light
switch is turned to ON after the headlight
is turned on.
To turn off the fog lights, turn the switch
to OFF.
Daytime running light
(if equipped)Daytime Running Lights (DRL) can make
it easier for others to see the front of your
vehicle during the day. DRL can be help-
ful in many different driving conditions,
and it is especially helpful after dawn and
before sunset.
The DRL system will make your high-
beam headlights turn OFF when:
1. The head light switch is ON.
2. The parking brake engaged.
3. Engine stops.
OBL046904N
CAUTION
When in operation, the fog lights
consume large amounts of vehicle electrical power. Only use the foglights when visibility is poor.Unnecessary battery and generator drain could occur if the fog lightsare used excessively.