clock KIA Sorento 2009 2.G User Guide
[x] Cancel search | Manufacturer: KIA, Model Year: 2009, Model line: Sorento, Model: KIA Sorento 2009 2.GPages: 327, PDF Size: 5.03 MB
Page 266 of 327
In case of an emergency20
6
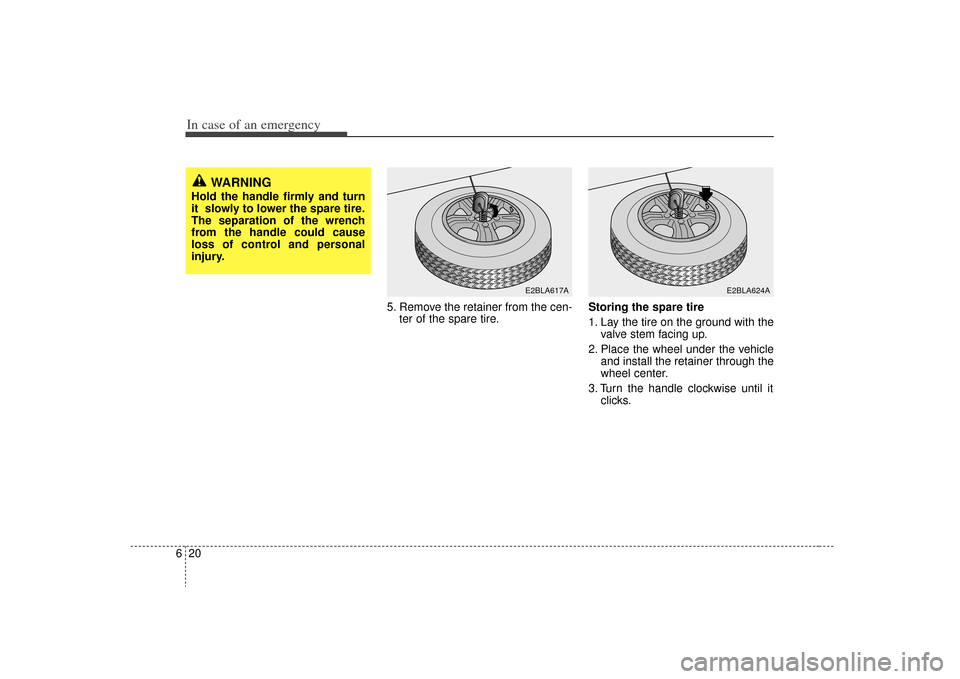
5. Remove the retainer from the cen-
ter of the spare tire. Storing the spare tire
1. Lay the tire on the ground with the
valve stem facing up.
2. Place the wheel under the vehicle and install the retainer through the
wheel center.
3. Turn the handle clockwise until it clicks.
WARNING
Hold the handle firmly and turn
it slowly to lower the spare tire.
The separation of the wrench
from the handle could cause
loss of control and personal
injury.
E2BLA617A
E2BLA624A
Page 269 of 327
623
In case of an emergency
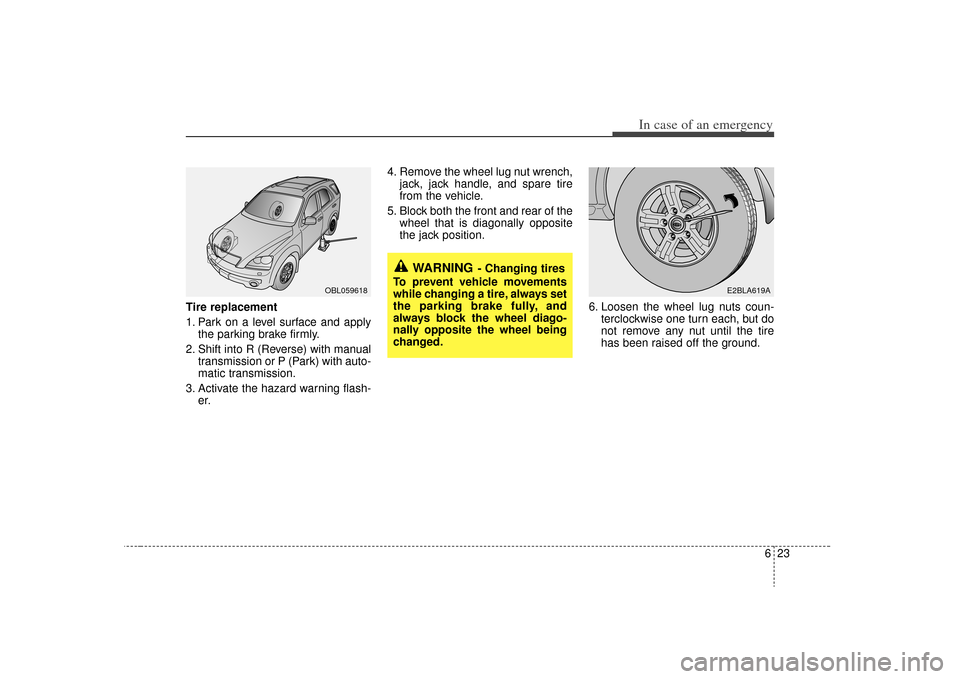
Tire replacement
1. Park on a level surface and applythe parking brake firmly.
2. Shift into R (Reverse) with manual transmission or P (Park) with auto-
matic transmission.
3. Activate the hazard warning flash- er. 4. Remove the wheel lug nut wrench,
jack, jack handle, and spare tire
from the vehicle.
5. Block both the front and rear of the wheel that is diagonally opposite
the jack position.
6. Loosen the wheel lug nuts coun-terclockwise one turn each, but do
not remove any nut until the tire
has been raised off the ground.
OBL059618
E2BLA619A
WARNING
- Changing tires
To prevent vehicle movements
while changing a tire, always set
the parking brake fully, and
always block the wheel diago-
nally opposite the wheel being
changed.
Page 270 of 327
In case of an emergency24
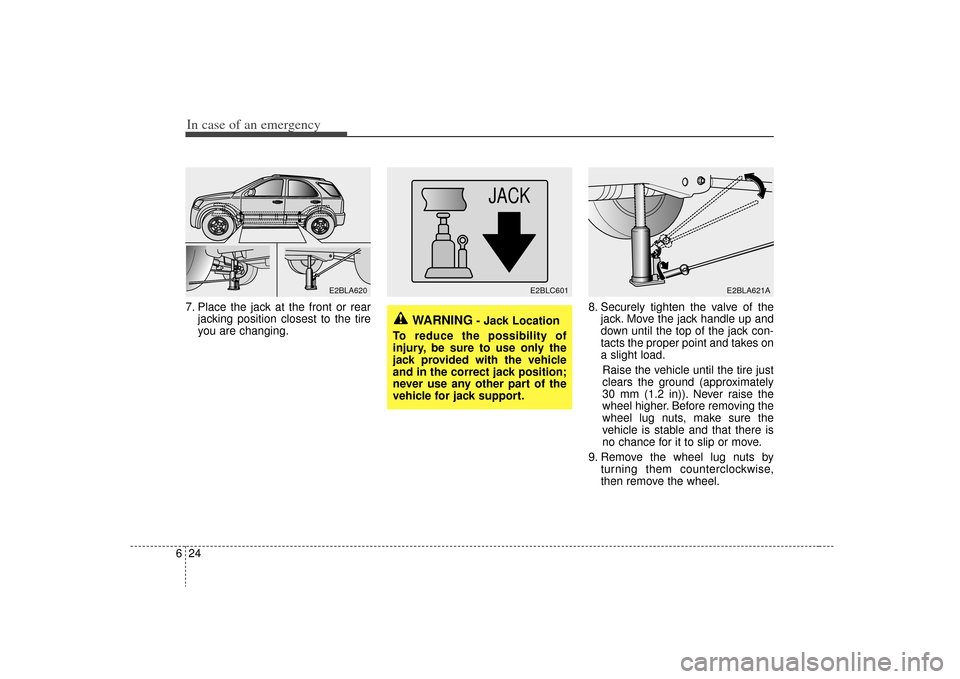
67. Place the jack at the front or rear
jacking position closest to the tire
you are changing. 8. Securely tighten the valve of the
jack. Move the jack handle up and
down until the top of the jack con-
tacts the proper point and takes on
a slight load.
Raise the vehicle until the tire just
clears the ground (approximately
30 mm (1.2 in)). Never raise the
wheel higher. Before removing the
wheel lug nuts, make sure the
vehicle is stable and that there is
no chance for it to slip or move.
9. Remove the wheel lug nuts by turning them counterclockwise,
then remove the wheel.
E2BLA620
JACK
E2BLC601
E2BLA621A
WARNING
- Jack Location
To reduce the possibility of
injury, be sure to use only the
jack provided with the vehicle
and in the correct jack position;
never use any other part of the
vehicle for jack support.
Page 287 of 327
715
Maintenance
ENGINE COOLING SYSTEMThe high-pressure cooling system has a
reservoir filled with a mixture of
antifreeze and water. The reservoir is
filled at the factory.
Check the antifreeze protection and
coolant level at least once a year, at the
beginning of the winter season, and
before traveling to a colder climate.Checking the coolant level
Check the condition and connections of
all cooling system hoses and heater
hoses. Replace any swollen or deterio-
rated hoses.
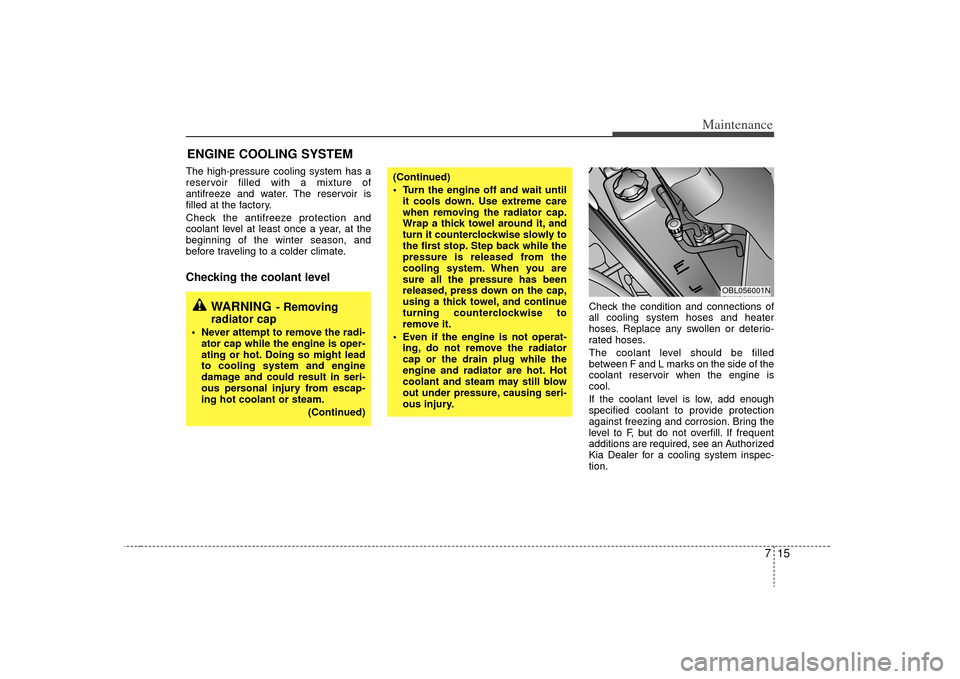
The coolant level should be filled
between F and L marks on the side of the
coolant reservoir when the engine is
cool.
If the coolant level is low, add enough
specified coolant to provide protection
against freezing and corrosion. Bring the
level to F, but do not overfill. If frequent
additions are required, see an Authorized
Kia Dealer for a cooling system inspec-
tion.
WARNING
- Removing
radiator cap
Never attempt to remove the radi-
ator cap while the engine is oper-
ating or hot. Doing so might lead
to cooling system and engine
damage and could result in seri-
ous personal injury from escap-
ing hot coolant or steam.
(Continued)
(Continued)
Turn the engine off and wait untilit cools down. Use extreme care
when removing the radiator cap.
Wrap a thick towel around it, and
turn it counterclockwise slowly to
the first stop. Step back while the
pressure is released from the
cooling system. When you are
sure all the pressure has been
released, press down on the cap,
using a thick towel, and continue
turning counterclockwise to
remove it.
Even if the engine is not operat- ing, do not remove the radiator
cap or the drain plug while the
engine and radiator are hot. Hot
coolant and steam may still blow
out under pressure, causing seri-
ous injury.
OBL056001N
Page 299 of 327
727
Maintenance
Battery recharging Your vehicle has a maintenance-free,
calcium-based battery.
If the battery becomes discharged in ashort time (because, for example, the
headlights or interior lights were left on
while the vehicle was not in use),
recharge it by slow charging (trickle)
for 10 hours.
If the battery gradually discharges because of high electric load while the
vehicle is being used, recharge it at 20-
30A for two hours.Items to be reset after the battery hasbeen discharged or the battery has been disconnected. Clock (See Chapter 3)
Trip computer (See Chapter 4)
Compass (See Chapter 4)
Climate control system (See Chapter 4)
Audio (See Chapter 3)
WARNING
- Recharging battery
When recharging the battery,
observe the following precautions:
The battery must be removed
from the vehicle and placed in an
area with good ventilation.
Do not allow cigarettes, sparks, or flame near the battery.
Watch the battery during charg- ing, and stop or reduce the charg-
ing rate if the battery cells begin
gassing (boiling) violently or if
the temperature of the electrolyte
of any cell exceeds 49°C (120°F).
Wear eye protection when check- ing the battery during charging.
Disconnect the battery charger in the following order.
1. Turn off the battery charger main switch.
2. Unhook the negative clamp from the negative battery terminal.
3. Unhook the positive clamp from the positive battery terminal.
CAUTION
Before performing maintenance or recharging the battery, turn offall accessories and stop the engine.
The negative battery cable must be removed first and installed lastwhen the battery is disconnected.