light KIA Sorento 2012 2.G Service Manual
[x] Cancel search | Manufacturer: KIA, Model Year: 2012, Model line: Sorento, Model: KIA Sorento 2012 2.GPages: 388, PDF Size: 7.56 MB
Page 131 of 388
441
Features of your vehicle
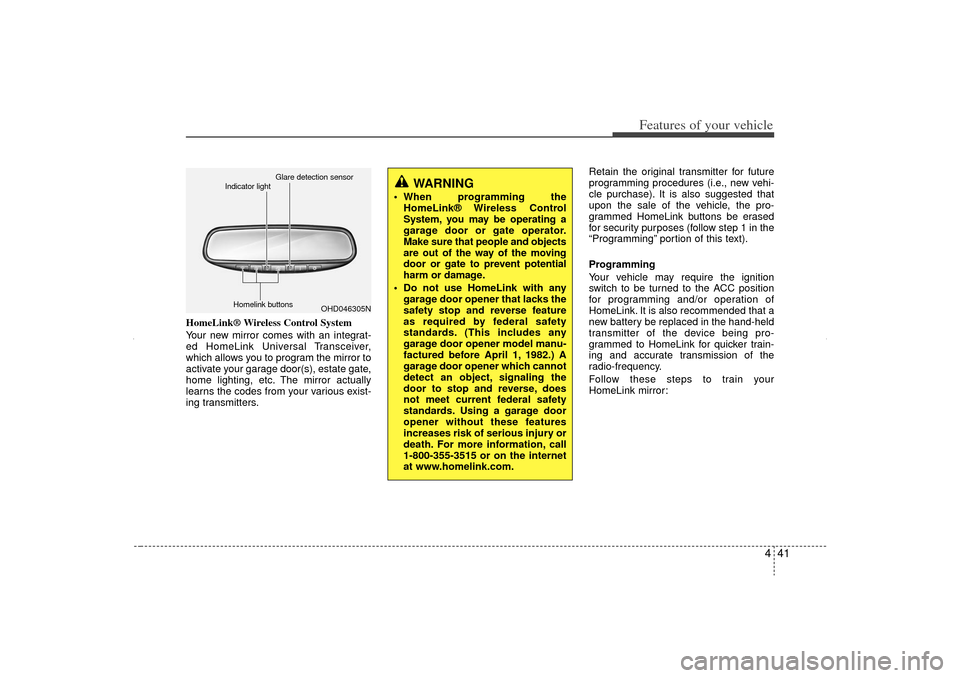
HomeLink® Wireless Control System
Your new mirror comes with an integrat-
ed HomeLink Universal Transceiver,
which allows you to program the mirror to
activate your garage door(s), estate gate,
home lighting, etc. The mirror actually
learns the codes from your various exist-
ing transmitters.Retain the original transmitter for future
programming procedures (i.e., new vehi-
cle purchase). It is also suggested that
upon the sale of the vehicle, the pro-
grammed HomeLink buttons be erased
for security purposes (follow step 1 in the
“Programming” portion of this text).
Programming
Your vehicle may require the ignition
switch to be turned to the ACC position
for programming and/or operation of
HomeLink. It is also recommended that a
new battery be replaced in the hand-held
transmitter of the device being pro-
grammed to HomeLink for quicker train-
ing and accurate transmission of the
radio-frequency.
Follow these steps to train your
HomeLink mirror:
WARNING
When programming the
HomeLink® Wireless Control
System, you may be operating a
garage door or gate operator.
Make sure that people and objects
are out of the way of the moving
door or gate to prevent potential
harm or damage.
Do not use HomeLink with any garage door opener that lacks the
safety stop and reverse feature
as required by federal safety
standards. (This includes any
garage door opener model manu-
factured before April 1, 1982.) A
garage door opener which cannot
detect an object, signaling the
door to stop and reverse, does
not meet current federal safety
standards. Using a garage door
opener without these features
increases risk of serious injury or
death. For more information, call
1-800-355-3515 or on the internet
at www.homelink.com.
OHD046305N
Glare detection sensor
Indicator light
Homelink buttons
XM CAN (ENG) 4(~105).QXP 4/19/2011 10:37 AM Page 41
Page 132 of 388
Features of your vehicle42
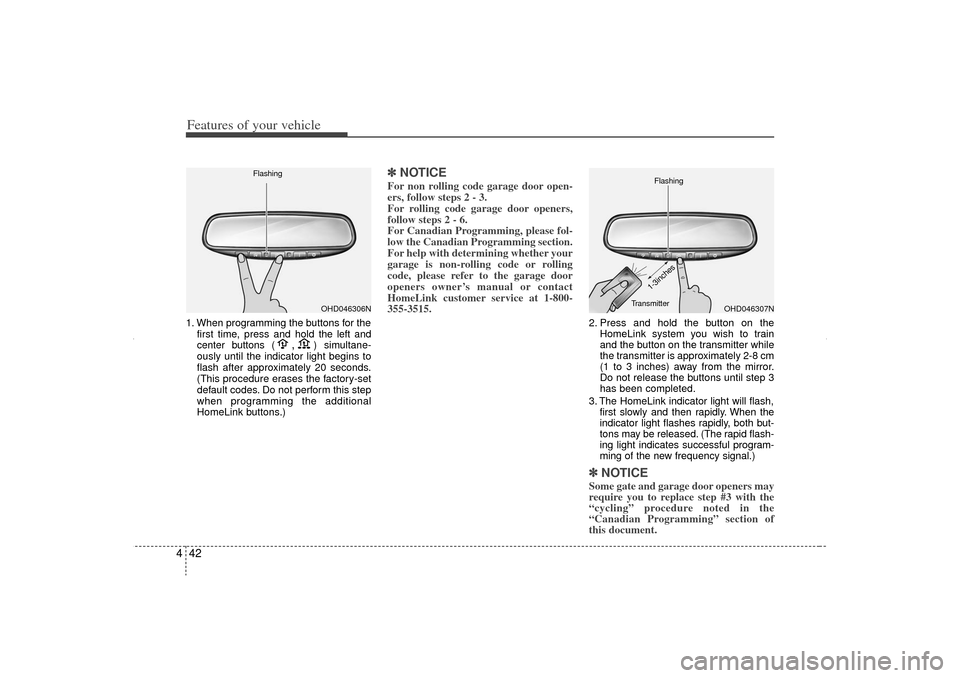
41. When programming the buttons for the
first time, press and hold
the left and
center buttons (
,
)simultane-
ously until the indicator light begins to
flash after approximately 20 seconds.
(This procedure erases the factory-set
default codes. Do not perform this step
when programming the additional
HomeLink buttons.)
✽ ✽ NOTICEFor non rolling code garage door open-
ers, follow steps 2 - 3.
For rolling code garage door openers,
follow steps 2 - 6.
For Canadian Programming, please fol-
low the Canadian Programming section.
For help with determining whether your
garage is non-rolling code or rolling
code, please refer to the garage door
openers owner’s manual or contact
HomeLink customer service at 1-800-
355-3515.
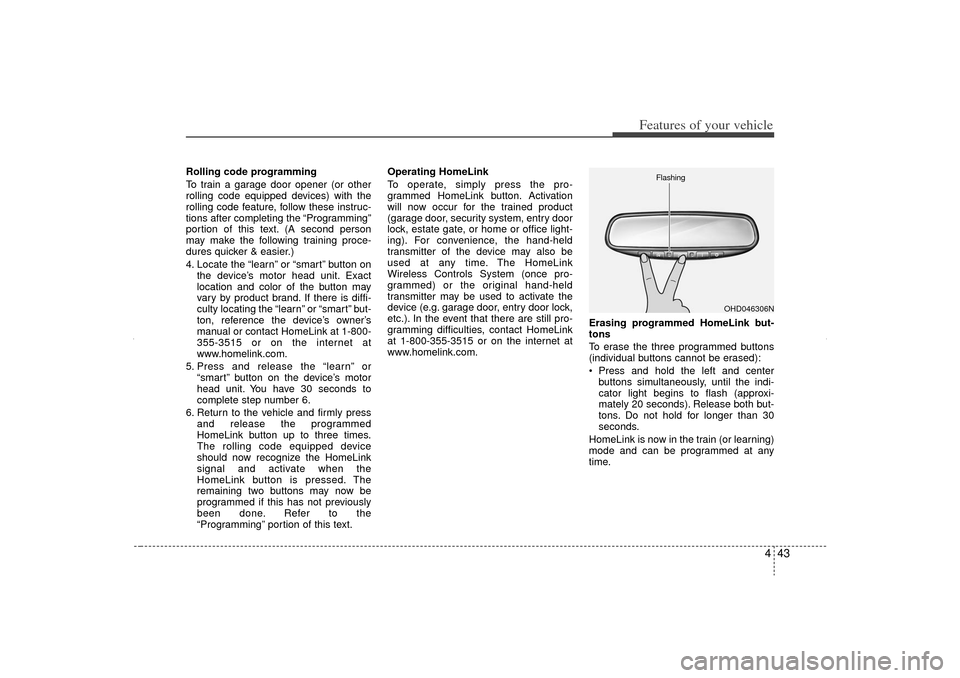
2. Press and hold the button on the
HomeLink system you wish to train
and the button on the transmitter while
the transmitter is approximately 2-8 cm
(1 to 3 inches) away from the mirror.
Do not release the buttons until step 3
has been completed.
3. The HomeLink indicator light will flash, first slowly and then rapidly. When the
indicator light flashes rapidly, both but-
tons may be released. (The rapid flash-
ing light indicates successful program-
ming of the new frequency signal.)✽ ✽NOTICESome gate and garage door openers may
require you to replace step #3 with the
“cycling” procedure noted in the
“Canadian Programming” section of
this document.
OHD046306N
Flashing
OHD046307N
Flashing
1-3inches
Transmitter
XM CAN (ENG) 4(~105).QXP 4/19/2011 10:37 AM Page 42
Page 133 of 388
443
Features of your vehicle
Rolling code programming
To train a garage door opener (or other
rolling code equipped devices) with the
rolling code feature, follow these instruc-
tions after completing the “Programming”
portion of this text. (A second person
may make the following training proce-
dures quicker & easier.)
4. Locate the “learn” or “smart” button onthe device’s motor head unit. Exact
location and color of the button may
vary by product brand. If there is diffi-
culty locating the “learn” or “smart” but-
ton, reference the device’s owner’s
manual or contact HomeLink at 1-800-
355-3515 or on the internet at
www.homelink.com.
5. Press and release the “learn” or “smart” button on the device’s motor
head unit. You have 30 seconds to
complete step number 6.
6. Return to the vehicle and firmly press and release the programmed
HomeLink button up to three times.
The rolling code equipped device
should now recognize the HomeLink
signal and activate when the
HomeLink button is pressed. The
remaining two buttons may now be
programmed if this has not previously
been done. Refer to the
“Programming” portion of this text. Operating HomeLink
To operate, simply press the pro-
grammed HomeLink button. Activation
will now occur for the trained product
(garage door, security system, entry door
lock, estate gate, or home or office light-
ing). For convenience, the hand-held
transmitter of the device may also be
used at any time. The HomeLink
Wireless Controls System (once pro-
grammed) or the original hand-held
transmitter may be used to activate the
device (e.g. garage door, entry door lock,
etc.). In the event that there are still pro-
gramming difficulties, contact HomeLink
at 1-800-355-3515 or on the internet at
www.homelink.com.
Erasing programmed HomeLink but-
tons
To erase the three programmed buttons
(individual buttons cannot be erased):
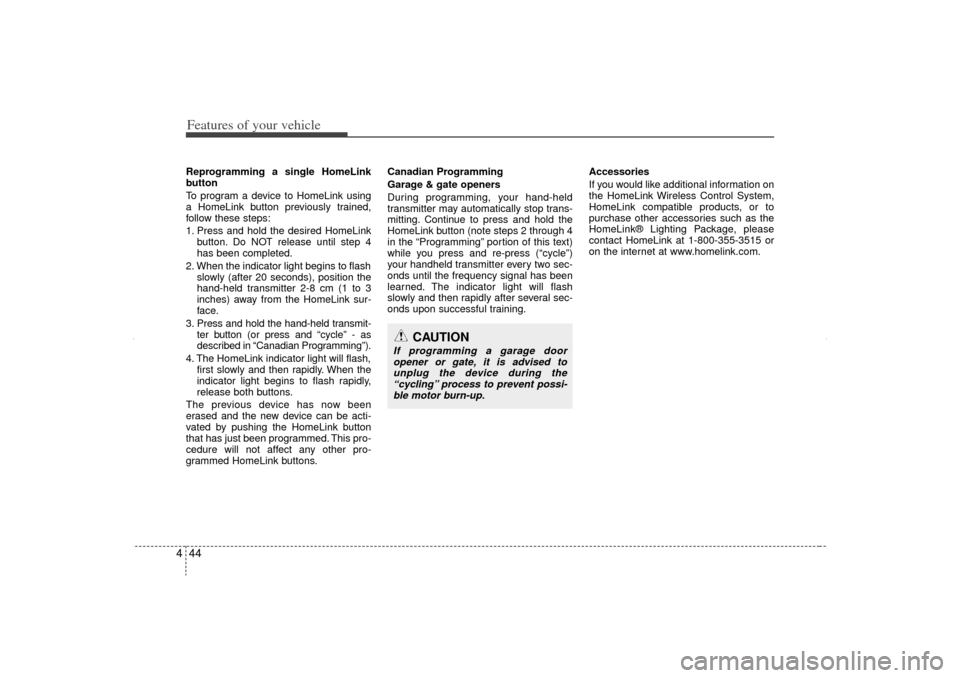
Press and hold the left and center
buttons simultaneously, until the indi-
cator light begins to flash (approxi-
mately 20 seconds). Release both but-
tons. Do not hold for longer than 30
seconds.
HomeLink is now in the train (or learning)
mode and can be programmed at any
time.
OHD046306N
Flashing
XM CAN (ENG) 4(~105).QXP 4/19/2011 10:37 AM Page 43
Page 134 of 388
Features of your vehicle44
4Reprogramming a single HomeLink
button
To program a device to HomeLink using
a HomeLink button previously trained,
follow these steps:
1. Press and hold the desired HomeLink
button. Do NOT release until step 4
has been completed.
2. When the indicator light begins to flash slowly (after 20 seconds), position the
hand-held transmitter 2-8 cm (1 to 3
inches) away from the HomeLink sur-
face.
3. Press and hold the hand-held transmit- ter button (or press and “cycle” - as
described in “Canadian Programming”).
4. The HomeLink indicator light will flash, first slowly and then rapidly. When the
indicator light begins to flash rapidly,
release both buttons.
The previous device has now been
erased and the new device can be acti-
vated by pushing the HomeLink button
that has just been programmed. This pro-
cedure will not affect any other pro-
grammed HomeLink buttons. Canadian Programming
Garage & gate openers
During programming, your hand-held
transmitter may automatically stop trans-
mitting. Continue to press and hold the
HomeLink button (note steps 2 through 4
in the “Programming” portion of this text)
while you press and re-press (“cycle”)
your handheld transmitter every two sec-
onds until the frequency signal has been
learned. The indicator light will flash
slowly and then rapidly after several sec-
onds upon successful training.
Accessories
If you would like additional information on
the HomeLink Wireless Control System,
HomeLink compatible products, or to
purchase other accessories such as the
HomeLink® Lighting Package, please
contact HomeLink at 1-800-355-3515 or
on the internet at www.homelink.com.
CAUTION
If programming a garage door
opener or gate, it is advised to unplug the device during the“cycling” process to prevent possi- ble motor burn-up.
XM CAN (ENG) 4(~105).QXP 4/19/2011 10:37 AM Page 44
Page 138 of 388
Features of your vehicle48
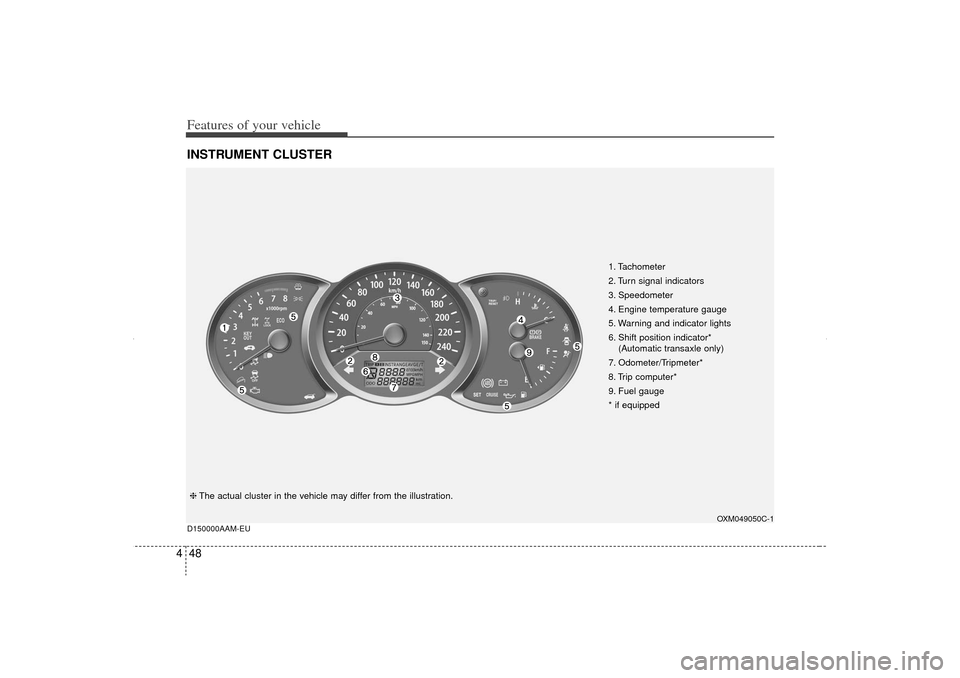
4INSTRUMENT CLUSTER
1. Tachometer
2. Turn signal indicators
3. Speedometer
4. Engine temperature gauge
5. Warning and indicator lights
6. Shift position indicator*
(Automatic transaxle only)
7. Odometer/Tripmeter*
8. Trip computer*
9. Fuel gauge
* if equipped
OXM049050C-1
D150000AAM-EU
❈ The actual cluster in the vehicle may differ from the illustration.
XM CAN (ENG) 4(~105).QXP 4/19/2011 10:38 AM Page 48
Page 140 of 388
Features of your vehicle50
4When the door is opened, or if the engine
is not started within 1 minute, the
tachometer pointer may move slightly in
the ON position with the engine OFF.
This movement is normal and will not
affect the accuracy of the tachometer
once the engine is running.
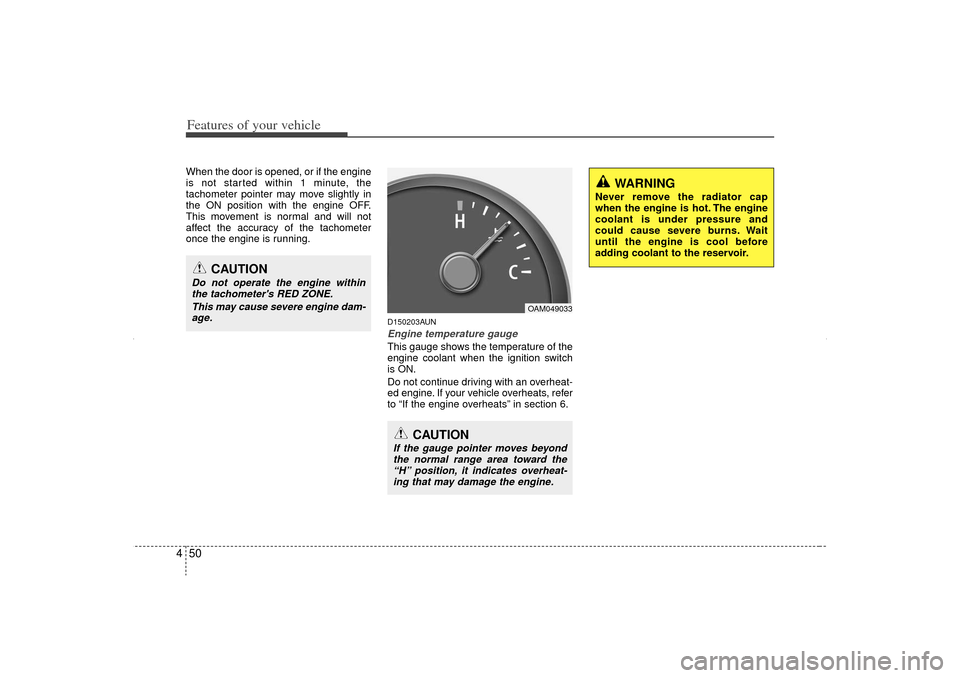
D150203AUNEngine temperature gauge This gauge shows the temperature of the
engine coolant when the ignition switch
is ON.
Do not continue driving with an overheat-
ed engine. If your vehicle overheats, refer
to “If the engine overheats” in section 6.
OAM049033
CAUTION
If the gauge pointer moves beyond
the normal range area toward the“H” position, it indicates overheat- ing that may damage the engine.
CAUTION
Do not operate the engine withinthe tachometer's RED ZONE.
This may cause severe engine dam-age.
WARNING
Never remove the radiator cap
when the engine is hot. The engine
coolant is under pressure and
could cause severe burns. Wait
until the engine is cool before
adding coolant to the reservoir.
XM CAN (ENG) 4(~105).QXP 4/19/2011 10:38 AM Page 50
Page 141 of 388
451
Features of your vehicle
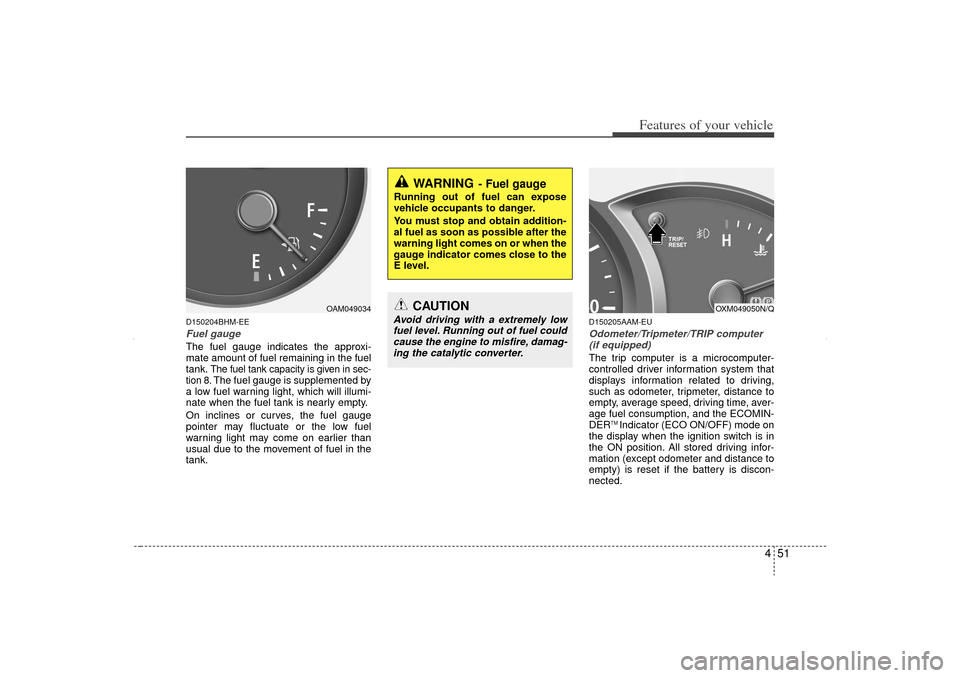
D150204BHM-EEFuel gaugeThe fuel gauge indicates the approxi-
mate amount of fuel remaining in the fuel
tank.
The fuel tank capacity is given in sec-
tion 8.The fuel gauge is supplemented by
a low fuel warning light, which will illumi-
nate when the fuel tank is nearly empty.
On inclines or curves, the fuel gauge
pointer may fluctuate or the low fuel
warning light may come on earlier than
usual due to the movement of fuel in the
tank.
D150205AAM-EUOdometer/Tripmeter/TRIP computer (if equipped)The trip computer is a microcomputer-
controlled driver information system that
displays information related to driving,
such as odometer, tripmeter, distance to
empty, average speed, driving time, aver-
age fuel consumption, and the ECOMIN-
DER
TM Indicator (ECO ON/OFF) mode on
the display when the ignition switch is in
the ON position. All stored driving infor-
mation (except odometer and distance to
empty) is reset if the battery is discon-
nected.
OAM049034
WARNING
- Fuel gauge
Running out of fuel can expose
vehicle occupants to danger.
You must stop and obtain addition-
al fuel as soon as possible after the
warning light comes on or when the
gauge indicator comes close to the
E level.
CAUTION
Avoid driving with a extremely low fuel level. Running out of fuel could cause the engine to misfire, damag-ing the catalytic converter.
OXM049050N/Q
XM CAN (ENG) 4(~105).QXP 4/19/2011 10:38 AM Page 51
Page 145 of 388
455
Features of your vehicle
D150300AAMWarnings and indicatorsAll warning lights are checked by turning
the ignition switch ON (do not start the
engine). Any light that does not illuminate
should be checked by an authorized KIA
dealer.
After starting the engine, check to make
sure that all warning lights are off. If any
warning lights are still on, this indicates a
situation that needs attention. When
releasing the parking brake, the brake
system warning light should go off. The
fuel warning light will stay on if the fuel
level is low.
D150301AXM-EUECOMINDER
TMindicator
(if equipped)
The ECOMINDER
TMindicator is a system
that illuminates "ECO" when the driver
has reached optimum fuel efficiency.
The ECOMINDERTM
indicator will turn
the ECO light green on the instrument
panel when you are driving fuel effi-
ciently in the ECO ON mode.
If you don't want the indicator dis-
played, you can turn the ECO ON
mode to OFF mode by pressing the
TRIP button.
For ECO ON/OFF Mode operation,
please refer to the previous page.
Fuel efficient driving can be influenced by driving habits and road conditions.
The indicator will not display while in P (Park), N (Neutral) or R (Reverse).
ECO
ECOMINDER
TMWARNING
Don't keep watching the “ECO”
ECOMINDER
TM indicator while driv-
ing. It may distract you while driv-
ing and cause an accident that
could result in severe personal
injury.
XM CAN (ENG) 4(~105).QXP 4/19/2011 10:38 AM Page 55
Page 146 of 388
Features of your vehicle56
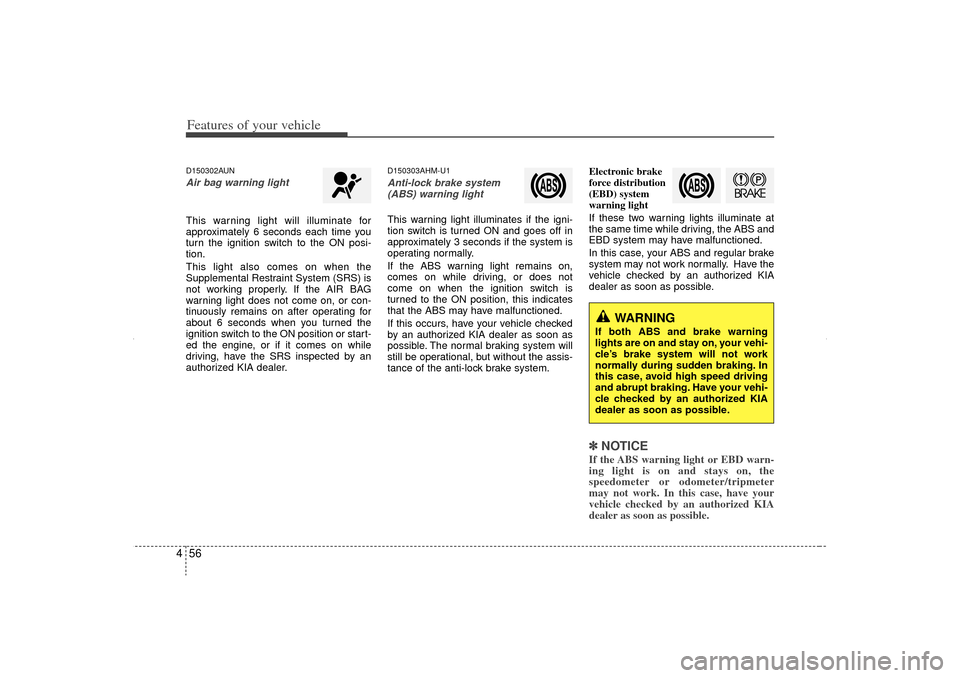
4D150302AUNAir bag warning lightThis warning light will illuminate for
approximately 6 seconds each time you
turn the ignition switch to the ON posi-
tion.
This light also comes on when the
Supplemental Restraint System (SRS) is
not working properly. If the AIR BAG
warning light does not come on, or con-
tinuously remains on after operating for
about 6 seconds when you turned the
ignition switch to the ON position or start-
ed the engine, or if it comes on while
driving, have the SRS inspected by an
authorized KIA dealer.
D150303AHM-U1Anti-lock brake system
(ABS) warning lightThis warning light illuminates if the igni-
tion switch is turned ON and goes off in
approximately 3 seconds if the system is
operating normally.
If the ABS warning light remains on,
comes on while driving, or does not
come on when the ignition switch is
turned to the ON position, this indicates
that the ABS may have malfunctioned.
If this occurs, have your vehicle checked
by an authorized KIA dealer as soon as
possible. The normal braking system will
still be operational, but without the assis-
tance of the anti-lock brake system. Electronic brake
force distribution
(EBD) system
warning light
If these two warning lights illuminate at
the same time while driving, the ABS and
EBD system may have malfunctioned.
In this case, your ABS and regular brake
system may not work normally. Have the
vehicle checked by an authorized KIA
dealer as soon as possible.
✽ ✽
NOTICEIf the ABS warning light or EBD warn-
ing light is on and stays on, the
speedometer or odometer/tripmeter
may not work. In this case, have your
vehicle checked by an authorized KIA
dealer as soon as possible.
WARNING
If both ABS and brake warning
lights are on and stay on, your vehi-
cle’s brake system will not work
normally during sudden braking. In
this case, avoid high speed driving
and abrupt braking. Have your vehi-
cle checked by an authorized KIA
dealer as soon as possible.
XM CAN (ENG) 4(~105).QXP 4/19/2011 10:38 AM Page 56
Page 147 of 388
457
Features of your vehicle
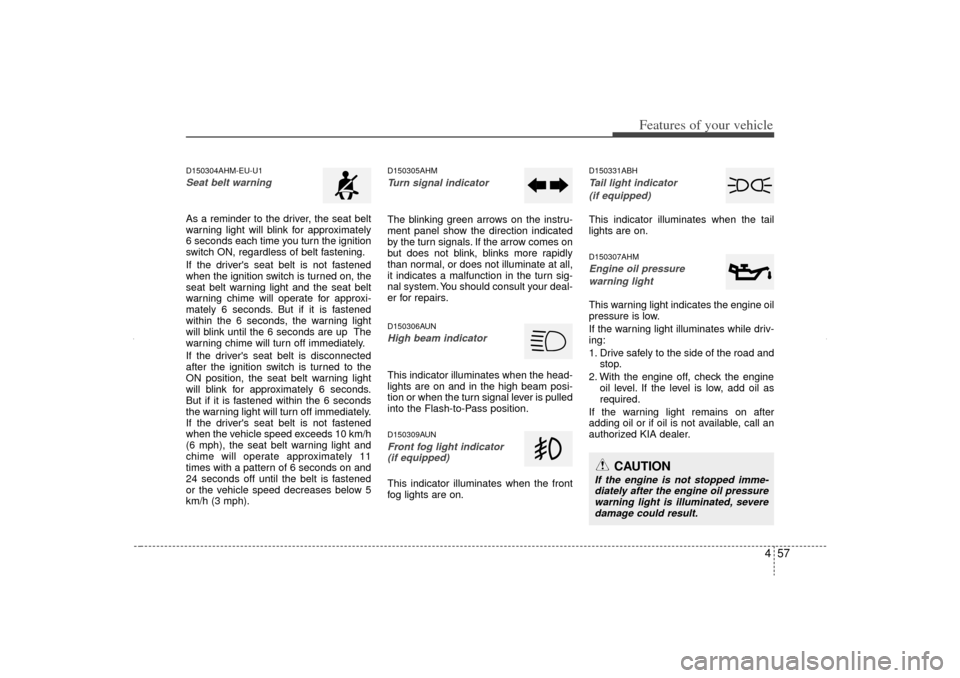
D150304AHM-EU-U1Seat belt warning As a reminder to the driver, the seat belt
warning light will blink for approximately
6 seconds each time you turn the ignition
switch ON, regardless of belt fastening.
If the driver's seat belt is not fastened
when the ignition switch is turned on, the
seat belt warning light and the seat belt
warning chime will operate for approxi-
mately 6 seconds. But if it is fastened
within the 6 seconds, the warning light
will blink until the 6 seconds are up The
warning chime will turn off immediately.
If the driver's seat belt is disconnected
after the ignition switch is turned to the
ON position, the seat belt warning light
will blink for approximately 6 seconds.
But if it is fastened within the 6 seconds
the warning light will turn off immediately.
If the driver's seat belt is not fastened
when the vehicle speed exceeds 10 km/h
(6 mph), the seat belt warning light and
chime will operate approximately 11
times with a pattern of 6 seconds on and
24 seconds off until the belt is fastened
or the vehicle speed decreases below 5
km/h (3 mph).
D150305AHMTurn signal indicatorThe blinking green arrows on the instru-
ment panel show the direction indicated
by the turn signals. If the arrow comes on
but does not blink, blinks more rapidly
than normal, or does not illuminate at all,
it indicates a malfunction in the turn sig-
nal system. You should consult your deal-
er for repairs.D150306AUNHigh beam indicator This indicator illuminates when the head-
lights are on and in the high beam posi-
tion or when the turn signal lever is pulled
into the Flash-to-Pass position.D150309AUNFront fog light indicator (if equipped)This indicator illuminates when the front
fog lights are on.
D150331ABHTail light indicator
(if equipped)This indicator illuminates when the tail
lights are on.D150307AHMEngine oil pressure warning lightThis warning light indicates the engine oil
pressure is low.
If the warning light illuminates while driv-
ing:
1. Drive safely to the side of the road and stop.
2. With the engine off, check the engine oil level. If the level is low, add oil as
required.
If the warning light remains on after
adding oil or if oil is not available, call an
authorized KIA dealer.
CAUTION
If the engine is not stopped imme- diately after the engine oil pressurewarning light is illuminated, severe damage could result.
XM CAN (ENG) 4(~105).QXP 4/19/2011 10:38 AM Page 57