brake light KIA Sorento 2014 3.G Owner's Manual
[x] Cancel search | Manufacturer: KIA, Model Year: 2014, Model line: Sorento, Model: KIA Sorento 2014 3.GPages: 508, PDF Size: 7.59 MB
Page 3 of 508
ii
1
2
3
4
5
6
78I
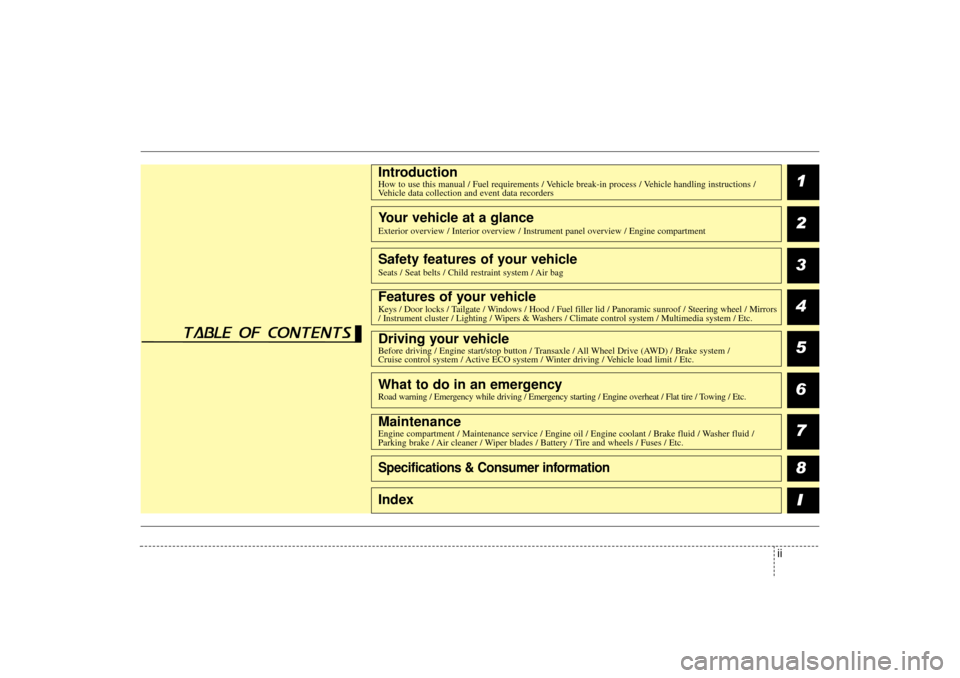
IntroductionHow to use this manual / Fuel requirements / Vehicle break-in process / Vehicle handling instructions /Vehicle data collection and event data recorders Your vehicle at a glanceExterior overview / Interior overview / Instrument panel overview / Engi\
ne compartment Safety features of your vehicleSeats / Seat belts / Child restraint system / Air bagFeatures of your vehicleKeys / Door locks / Tailgate / Windows / Hood / Fuel filler lid / Panoramic sunroof / Steering wheel / Mirrors
/ Instrument cluster / Lighting / Wipers & Washers / Climate control system / Multimedia system / Etc.Driving your vehicleBefore driving / Engine start/stop button / Transaxle / All Wheel Drive (AWD) / Brake system /
Cruise control system / Active ECO system / Winter driving / Vehicle load limit / Etc.What to do in an emergencyRoad warning / Emergency while driving / Emergency starting / Engine overheat / Flat tire / Towing / Etc. MaintenanceEngine compartment / Maintenance service / Engine oil / Engine coolant /\
Brake fluid / Washer fluid /
Parking brake / Air cleaner / Wiper blades / Battery / Tire and wheels / Fuses / Etc. Specifications & Consumer informationIndex
table of contents
XM(FL) CAN(ENG) FOREWORD.QXP 1/23/2013 3:19 PM Page 3
Page 12 of 508
Your vehicle at a glance42INTERIOR OVERVIEW
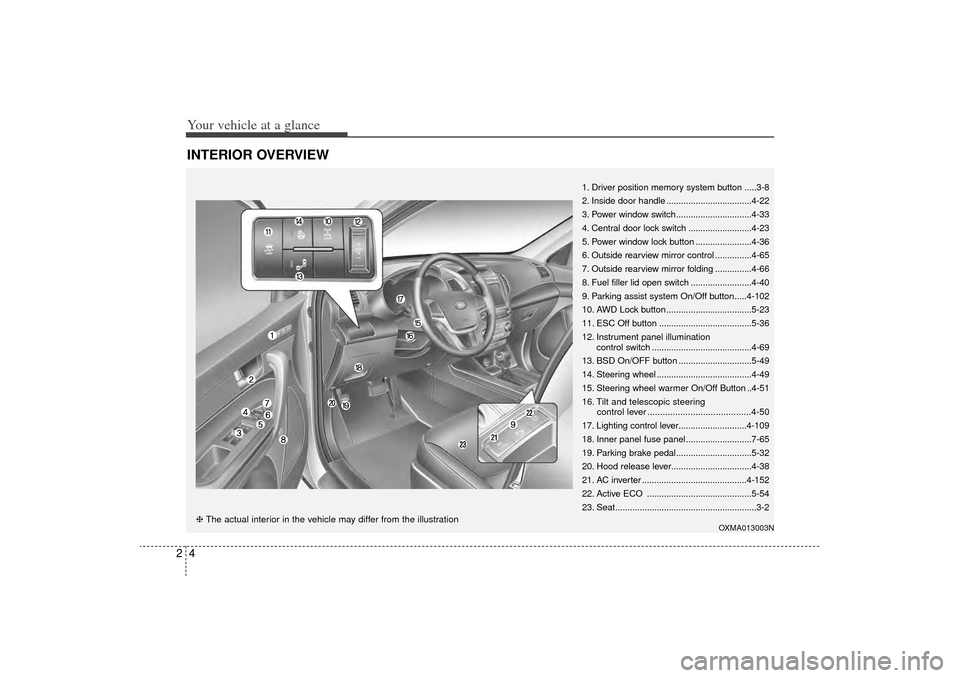
1. Driver position memory system button .....3-8
2. Inside door handle ...................................4-22
3. Power window switch...............................4-33
4. Central door lock switch ..........................4-23
5. Power window lock button .......................4-36
6. Outside rearview mirror control ...............4-65
7. Outside rearview mirror folding ...............4-66
8. Fuel filler lid open switch .........................4-40
9. Parking assist system On/Off button.....4-102
10. AWD Lock button ...................................5-23
11. ESC Off button ......................................5-36
12. Instrument panel illuminationcontrol switch .........................................4-69
13. BSD On/OFF button ..............................5-49
14. Steering wheel .......................................4-49
15. Steering wheel warmer On/Off Button ..4-51
16. Tilt and telescopic steering control lever .........................................4-50
17. Lighting control lever............................4-109
18. Inner panel fuse panel ...........................7-65
19. Parking brake pedal...............................5-32
20. Hood release lever.................................4-38
21. AC inverter ...........................................4-152
22. Active ECO ...........................................5-54
23. Seat..........................................................3-2
OXMA013003N
❈ The actual interior in the vehicle may differ from the illustration
XM(FL) CAN(ENG) 2.QXP 1/23/2013 3:21 PM Page 4
Page 129 of 508
Features of your vehicle38
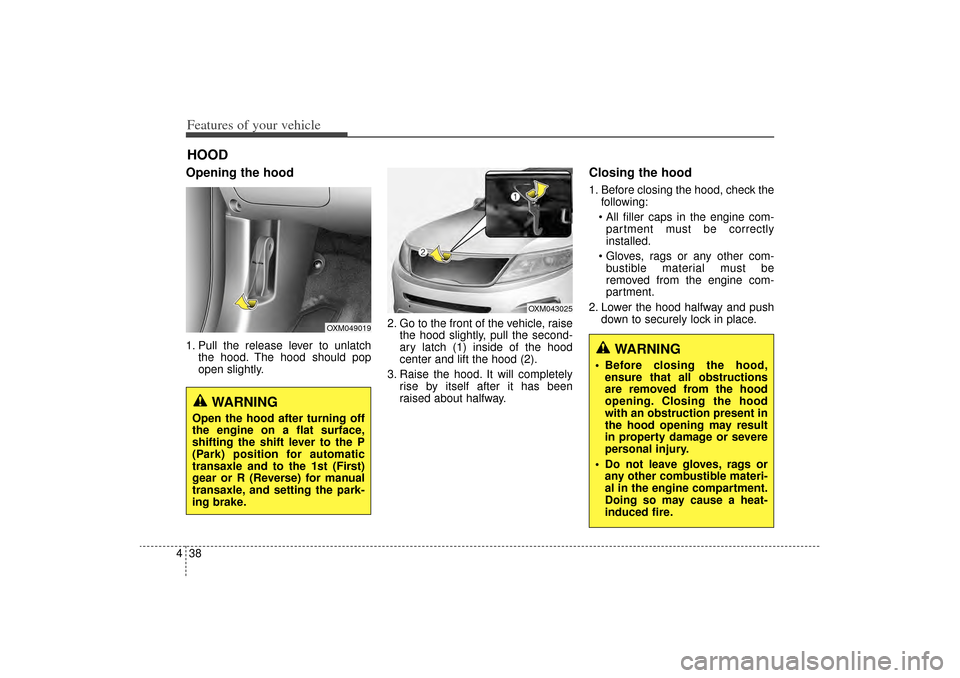
4Opening the hood 1. Pull the release lever to unlatch
the hood. The hood should pop
open slightly. 2. Go to the front of the vehicle, raise
the hood slightly, pull the second-
ary latch (1) inside of the hood
center and lift the hood (2).
3. Raise the hood. It will completely rise by itself after it has been
raised about halfway.
Closing the hood1. Before closing the hood, check thefollowing:
All filler caps in the engine com- partment must be correctly
installed.
Gloves, rags or any other com- bustible material must be
removed from the engine com-
partment.
2. Lower the hood halfway and push down to securely lock in place.
HOOD
OXM049019
OXM043025
WARNING
Open the hood after turning off
the engine on a flat surface,
shifting the shift lever to the P
(Park) position for automatic
transaxle and to the 1st (First)
gear or R (Reverse) for manual
transaxle, and setting the park-
ing brake.
WARNING
Before closing the hood,ensure that all obstructions
are removed from the hood
opening. Closing the hood
with an obstruction present in
the hood opening may result
in property damage or severe
personal injury.
Do not leave gloves, rags or any other combustible materi-
al in the engine compartment.
Doing so may cause a heat-
induced fire.
XM(FL) CAN(ENG) 4a(~158).QXP 1/23/2013 3:47 PM Page 38
Page 174 of 508
483
Features of your vehicle
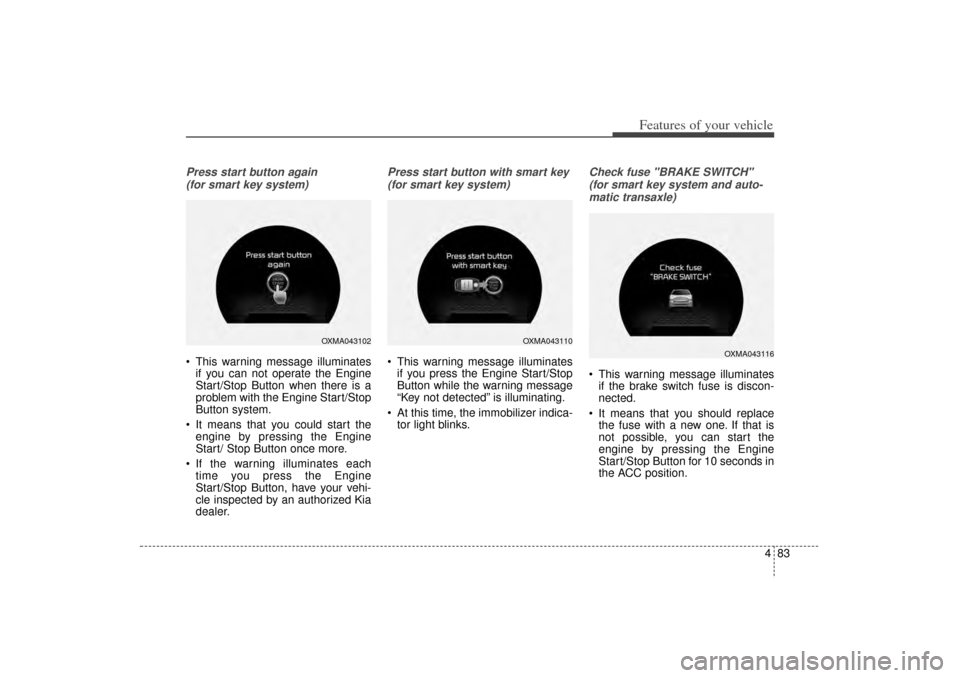
Press start button again (for smart key system) This warning message illuminates if you can not operate the Engine
Start/Stop Button when there is a
problem with the Engine Start/Stop
Button system.
It means that you could start the engine by pressing the Engine
Start/ Stop Button once more.
If the warning illuminates each time you press the Engine
Start/Stop Button, have your vehi-
cle inspected by an authorized Kia
dealer.
Press start button with smart key
(for smart key system) This warning message illuminates if you press the Engine Start/Stop
Button while the warning message
“Key not detected” is illuminating.
At this time, the immobilizer indica- tor light blinks.
Check fuse "BRAKE SWITCH"
(for smart key system and auto-matic transaxle) This warning message illuminates if the brake switch fuse is discon-
nected.
It means that you should replace the fuse with a new one. If that is
not possible, you can start the
engine by pressing the Engine
Start/Stop Button for 10 seconds in
the ACC position.
OXMA043102
OXMA043110
OXMA043116
XM(FL) CAN(ENG) 4a(~158).QXP 1/23/2013 3:50 PM Page 83
Page 183 of 508
Features of your vehicle92
4Parking Brake & Brake
Fluid Warning LightThis warning light illuminates:
Once you set the ignition switch or Engine Start/Stop Button to the ON
position.
- It illuminates for approximately 3seconds
- It remains on if the parking brake is applied.
When the parking brake is applied.
When the brake fluid level in the reservoir is low.
- If the warning light illuminateswith the parking brake released, it
indicates the brake fluid level in
reservoir is low. If the brake fluid level in the reservoir
is low:
1. Drive carefully to the nearest safe
location and stop your vehicle.
2. With the engine stopped, check the brake fluid level immediately and add
fluid as required (For more details,
refer to “Brake Fluid” in chapter 7).
Then check all brake components
for fluid leaks. If any leaks in the
brake system is still found, the
warning light remains on, or the
brakes do not operate properly, do
not drive the vehicle.
In this case, have your vehicle
towed to an authorized Kia dealer
and inspected. Dual-diagonal braking system
Your vehicle is equipped with dual-
diagonal braking systems. This
means you still have braking on two
wheels even if one of the dual sys-
tems should fail.
With only one of the dual systems
working, more than normal pedal
travel and greater pedal pressure are
required to stop the vehicle.
Also, the vehicle will not stop in as
short a distance with only a portion
of the brake system working.
If the brakes fail while you are driv-
ing, shift to a lower gear for addition-
al engine braking and stop the vehi-
cle as soon as it is safe to do so.
XM(FL) CAN(ENG) 4a(~158).QXP 1/23/2013 3:50 PM Page 92
Page 184 of 508
493
Features of your vehicle
Anti-lock Brake System(ABS) Warning LightThis warning light illuminates:
Once you set the ignition switch or Engine Start/Stop Button to the ON
position.
- It illuminates for approximately 3seconds and then goes off.
When there is a malfunction with the ABS (The normal braking sys-
tem will still be operational without
the assistance of the anti-lock
brake system).
In this case, have your vehicle
inspected by an authorized Kia
dealer.
Electronic
Brake forceDistribution(EBD) SystemWarning LightThese two warning lights illuminate at
the same time while driving:
When the ABS and regular brake system may not work normally.
In this case, have your vehicle
inspected by an authorized Kia
dealer.
WARNING -
Parking Brake
& Brake Fluid Warning Light
Driving the vehicle with a warn-
ing light ON is dangerous. If the
Parking Brake & Brake Fluid
Warning Light illuminates with
the parking brake released, it
indicates that the brake fluid
level is low.
In this case, have your vehicle
inspected by an authorized Kia
dealer.
WARNING -
Electronic
Brake force Distribution
(EBD) System Warning Light
When both ABS and Parking
Brake & Brake Fluid Warning
Lights are on, the brake system
will not work normally and you
may experience an unexpected
and dangerous situation during
sudden braking.
In this case, avoid high speed
driving and abrupt braking.
Have your vehicle inspected by
an authorized Kia dealer as
soon as possible.
XM(FL) CAN(ENG) 4a(~158).QXP 1/23/2013 3:50 PM Page 93
Page 185 of 508
Features of your vehicle94
4✽
✽
NOTICE
- Electronic Brake
force Distribution
(EBD) System
Warning Light
When the ABS Warning Light is on
or both ABS and Parking Brake &
Brake Fluid Warning Lights are on,
the speedometer, odometer, or trip-
meter may not work. Also, the EPS
Warning Light may illuminate and
the steering effort may increase or
decrease.
In this case, have your vehicle inspect-
ed by an authorized Kia dealer as
soon as possible.
Electronic Power
Steering (EPS) WarningLight (if equipped)This warning light illuminates:
Once you set the ignition switch or Engine Start/Stop Button to the ON
position.
- It remains on until the engine isstarted.
When there is a malfunction with the EPS.
In this case, have your vehicle
inspected by an authorized Kia
dealer.
Malfunction Indicator
Lamp (MIL)This warning light illuminates:
Once you set the ignition switch or Engine Start/Stop Button to the ON
position.
- It remains on until the engine isstarted.
When there is a malfunction with the emission control system.
In this case, have your vehicle
inspected by an authorized Kia
dealer.
CAUTION -
Malfunction
Indicator
Lamp (MIL)
Driving with the MalfunctionIndicator Lamp (MIL) on maycause damage to the emissioncontrol systems which couldeffect drivability and/or fueleconomy.
XM(FL) CAN(ENG) 4a(~158).QXP 1/23/2013 3:50 PM Page 94
Page 200 of 508
4 109
Features of your vehicle
Daytime running lightDaytime Running Lights (DRL) can
make it easier for others to see the
front of your vehicle during the day.
DRL can be helpful in many different
driving conditions, and it is especially
helpful after dawn and before sunset.
The DRL system will turn OFF when:
The headlights are ON.
Engine stops.
The parking brake is applied.
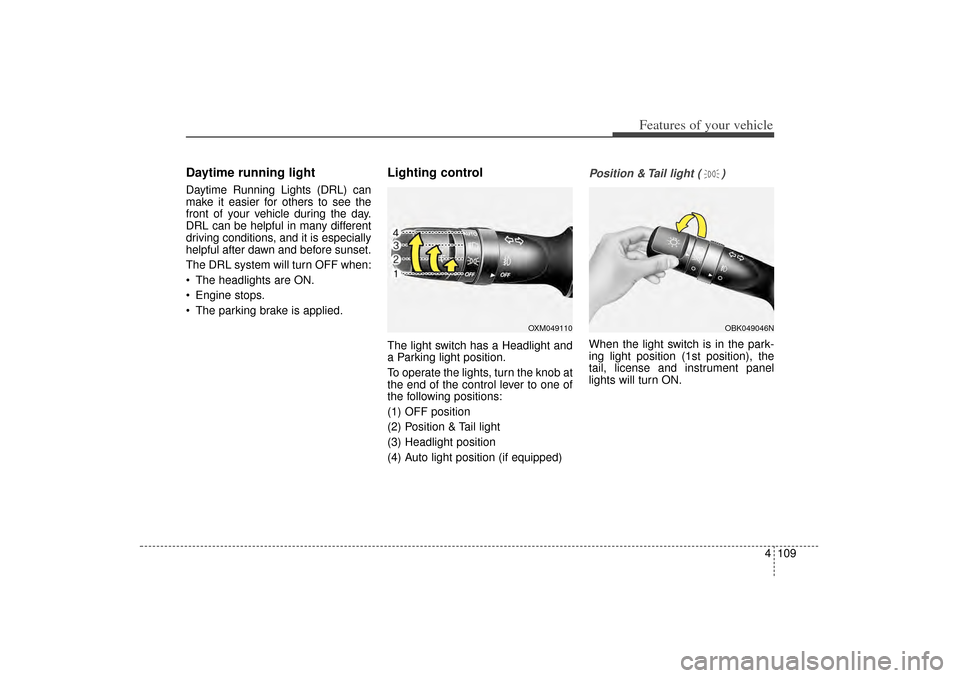
Lighting controlThe light switch has a Headlight and
a Parking light position.
To operate the lights, turn the knob at
the end of the control lever to one of
the following positions:
(1) OFF position
(2) Position & Tail light
(3) Headlight position
(4) Auto light position (if equipped)
Position & Tail light ( )When the light switch is in the park-
ing light position (1st position), the
tail, license and instrument panel
lights will turn ON.
OBK049046N
OXM049110
XM(FL) CAN(ENG) 4a(~158).QXP 1/23/2013 3:50 PM Page 109
Page 308 of 508
53
Driving your vehicle
Before entering vehicle• Be sure that all windows, outsidemirror(s), and outside lights are
clean.
Check the condition of the tires.
Check under the vehicle for any sign of leaks.
Be sure there are no obstacles behind you if you intend to back up.
Necessary inspectionsFluid levels, such as engine oil,
engine coolant, brake fluid, and
washer fluid should be checked on a
regular basis, at the exact interval
depending on the fluid. Further
details are provided in chapter 7,
“Maintenance”.
Before starting Close and lock all doors.
Position the seat so that all con-trols are easily reached.
Adjust the inside and outside rearview mirrors.
Be sure that all lights work.
Check all gauges.
Check the operation of warning lights when the ignition switch is
turned to the ON position.
Release the parking brake and make sure the brake warning light
goes out.
For safe operation, be sure you are
familiar with your vehicle and its
equipment.
BEFORE DRIVING
WARNING
Driving while distracted can
result in a loss of vehicle con-
trol, that may lead to an acci-
dent, severe personal injury,
and death. The driver’s primary
responsibility is in the safe and
legal operation of a vehicle, and
use of any handheld devices,
other equipment, or vehicle sys-
tems which take the driver’s
eyes, attention and focus away
from the safe operation of a
vehicle or which are not permis-
sible by law should never be
used during operation of the
vehicle.
XM(FL) CAN(ENG) 5.QXP 1/23/2013 3:29 PM Page 3
Page 310 of 508
55
Driving your vehicle
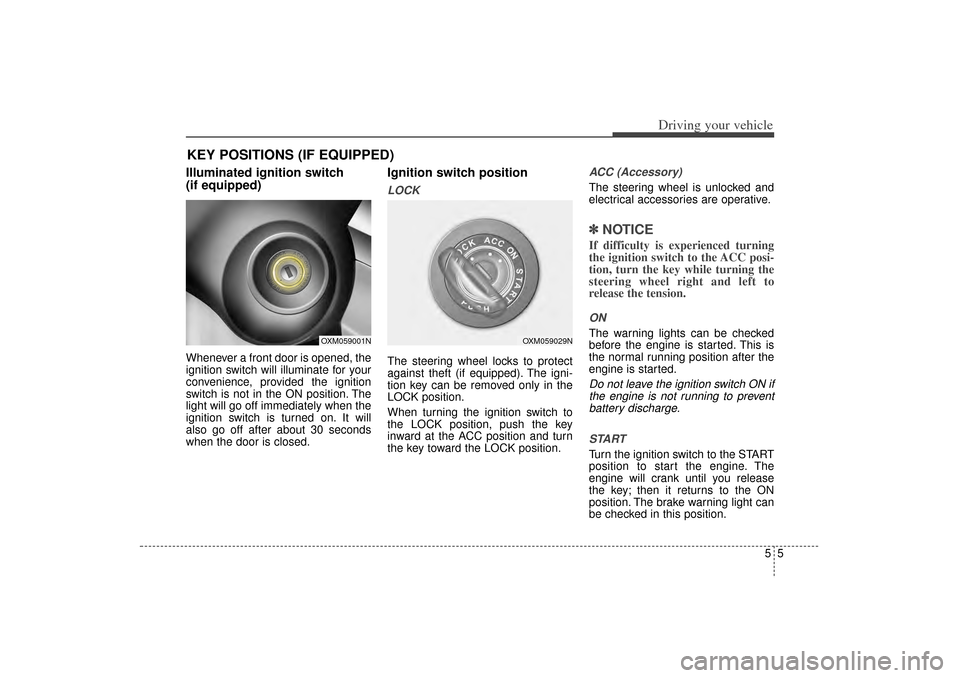
Illuminated ignition switch
(if equipped)Whenever a front door is opened, the
ignition switch will illuminate for your
convenience, provided the ignition
switch is not in the ON position. The
light will go off immediately when the
ignition switch is turned on. It will
also go off after about 30 seconds
when the door is closed.
Ignition switch positionLOCKThe steering wheel locks to protect
against theft (if equipped). The igni-
tion key can be removed only in the
LOCK position.
When turning the ignition switch to
the LOCK position, push the key
inward at the ACC position and turn
the key toward the LOCK position.
ACC (Accessory)The steering wheel is unlocked and
electrical accessories are operative.✽ ✽NOTICEIf difficulty is experienced turning
the ignition switch to the ACC posi-
tion, turn the key while turning the
steering wheel right and left to
release the tension.ONThe warning lights can be checked
before the engine is started. This is
the normal running position after the
engine is started.Do not leave the ignition switch ON if
the engine is not running to preventbattery discharge.
STARTTurn the ignition switch to the START
position to start the engine. The
engine will crank until you release
the key; then it returns to the ON
position. The brake warning light can
be checked in this position.
KEY POSITIONS (IF EQUIPPED)
OXM059001N
OXM059029N
XM(FL) CAN(ENG) 5.QXP 1/23/2013 3:29 PM Page 5