warning lights KIA SOUL 2019 Owners Manual
[x] Cancel search | Manufacturer: KIA, Model Year: 2019, Model line: SOUL, Model: KIA SOUL 2019Pages: 564, PDF Size: 14.2 MB
Page 88 of 564
Instrument cluster . . . . . . . . . . . . . . . . . . . . . . . . . 4-51
. . . . . . . . . . . . . . . . . . . . . 4-52
. . . . . . . . . . . . . . . . . . . . . . . . . . 4-52
. . . . . . . . . . . . . . . . . . . . . . . . . . . . . . . . . . . . \
. 4-53
. . . . . . . . . . . . . . . . . . . . . . 4-57
LCD display . . . . . . . . . . . . . . . . . . . . . . . . . . . . . . 4-59
. . . . . . . . . . . . . . . . 4-59
. . . . . . . . . . . . . . . . . . . . . . . . . . . . . . . . 4-60
. . . . . . . . . . . . . . . . . . . . . . . . . . . 4-67
. . . . . . . . . . . . . . . . . . . . . . . . . . . . 4-67
Trip computer . . . . . . . . . . . . . . . . . . . . . . . . . . . . . 4-71
. . . . . . . . . . . . . . . . . . . 4-72
. . . . . . . . . . . . . . . . . . . . . . . . . . . . . . . . 4-73
. . . . . 4-74
. . . . . . . . . . . 4-75
Warning and indicator lights . . . . . . . . . . . . . . . . 4-77
. . . . . . . . . . . . . . . . . . . . . . . . . . . . . . . 4-77
Rear camera display . . . . . . . . . . . . . . . . . . . . . . . 4-90
Lighting . . . . . . . . . . . . . . . . . . . . . . . . . . . . . . . . . . 4-91\
. . . . . . . . . . . . . . . . . . . . . . . . . . . . . 4-91
. . . . . . . . . . . . . . . . . . . . . . . . . 4-91 . . . . . . . . . . . . . . . . . . . . . . . . . . . . . . 4-91
. . . . . . . . . . . . 4-94
. . . . . . . . . . . . . . . . . . . . . . . . . . . . . . . 4-95
Wipers and washers . . . . . . . . . . . . . . . . . . . . . . . . 4-96
. . . . . . . . . . . . . . . . . . . . . . . . . . . . 4-96
. . . . . . . . . . 4-98
Interior light . . . . . . . . . . . . . . . . . . . . . . . . . . . . . . 4-99
. . . . . . . . . . . . . . . . . . . . . . . 4-99
. . . . . . . . . . . . . . . . . . . . . . . . . . . . . . . . . . 4-99\
. . . . . . . . . . . . . . . . . . . . . . . . . . . . . . . . . 4-100
. . . . . . . . . . . . . . . . . . . . . . . . . 4-101
. . . . . . . . . . . . . . . . . . . . . . . . . 4-101
. . . . . . . . . . . . . . . . . . . . . . . . . . . . . 4-103
. . . . . . . . . . . . . . . . . . . . . . . . . . 4-103
Defroster . . . . . . . . . . . . . . . . . . . . . . . . . . . . . . . . 4-104
. . . . . . . . . . . . . . . . . . . . . . . 4-104
Manual climate control system . . . . . . . . . . . . . . 4-106
. . . . . . . . . . . . . . . . . . 4-107
. . . . . . . . . . . . . . . . . . . . . . . . . . . . 4-113
. . . . . . . . . . . . . . . . . . . . . . 4-115
refrigerant and compressor lubricant . . . . . . . . . . 4-116
4
Page 91 of 564
45
Features of your vehicle
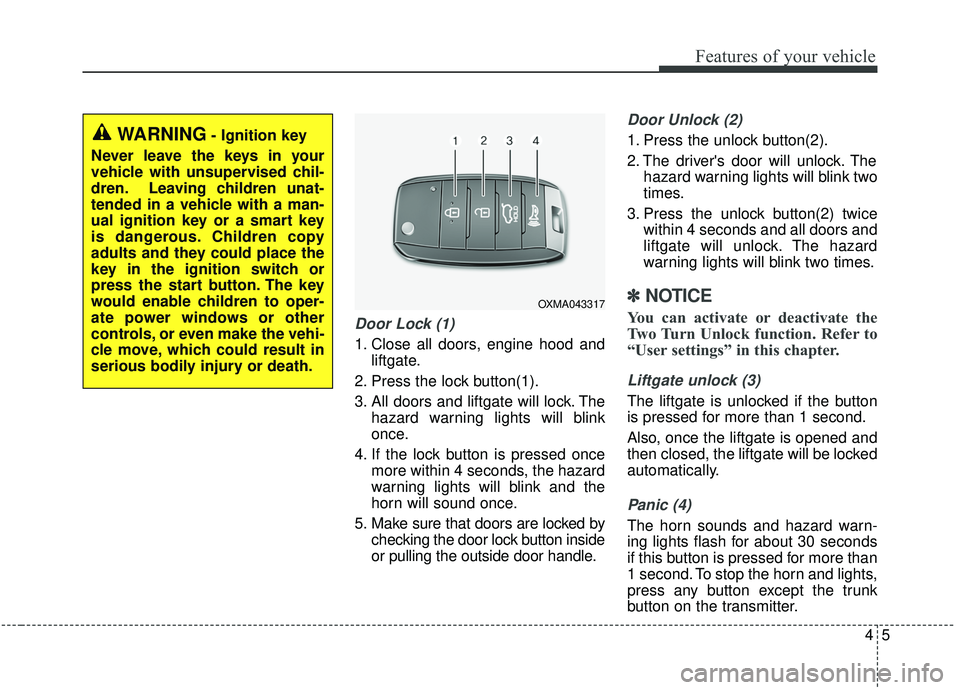
Door Lock (1)
1. Close all doors, engine hood andliftgate.
2. Press the lock button(1).
3. All doors and liftgate will lock. The hazard warning lights will blink
once.
4. If the lock button is pressed once more within 4 seconds, the hazard
warning lights will blink and the
horn will sound once.
5. Make sure that doors are locked by checking the door lock button inside
or pulling the outside door handle.
Door Unlock (2)
1. Press the unlock button(2).
2. The driver's door will unlock. Thehazard warning lights will blink two
times.
3. Press the unlock button(2) twice within 4 seconds and all doors and
liftgate will unlock. The hazard
warning lights will blink two times.
✽ ✽NOTICE
You can activate or deactivate the
Two Turn Unlock function. Refer to
“User settings” in this chapter.
Liftgate unlock (3)
The liftgate is unlocked if the button
is pressed for more than 1 second.
Also, once the liftgate is opened and
then closed, the liftgate will be locked
automatically.
Panic (4)
The horn sounds and hazard warn-
ing lights flash for about 30 seconds
if this button is pressed for more than
1 second. To stop the horn and lights,
press any button except the trunk
button on the transmitter.
OXMA043317
WARNING- Ignition key
Never leave the keys in your
vehicle with unsupervised chil-
dren. Leaving children unat-
tended in a vehicle with a man-
ual ignition key or a smart key
is dangerous. Children copy
adults and they could place the
key in the ignition switch or
press the start button. The key
would enable children to oper-
ate power windows or other
controls, or even make the vehi-
cle move, which could result in
serious bodily injury or death.
Page 96 of 564
Features of your vehicle
10
4
Record your key number
The key code num-
ber is stamped on
the key code tag
attached to the key
set. Should you
lose your keys, this number will
enable an authorized Kia dealer to
duplicate the keys easily. Remove
the key code tag and store it in a safe
place. Also, record the key code
number and keep it in a safe and
handy place, but not in the vehicle.
Smart key function
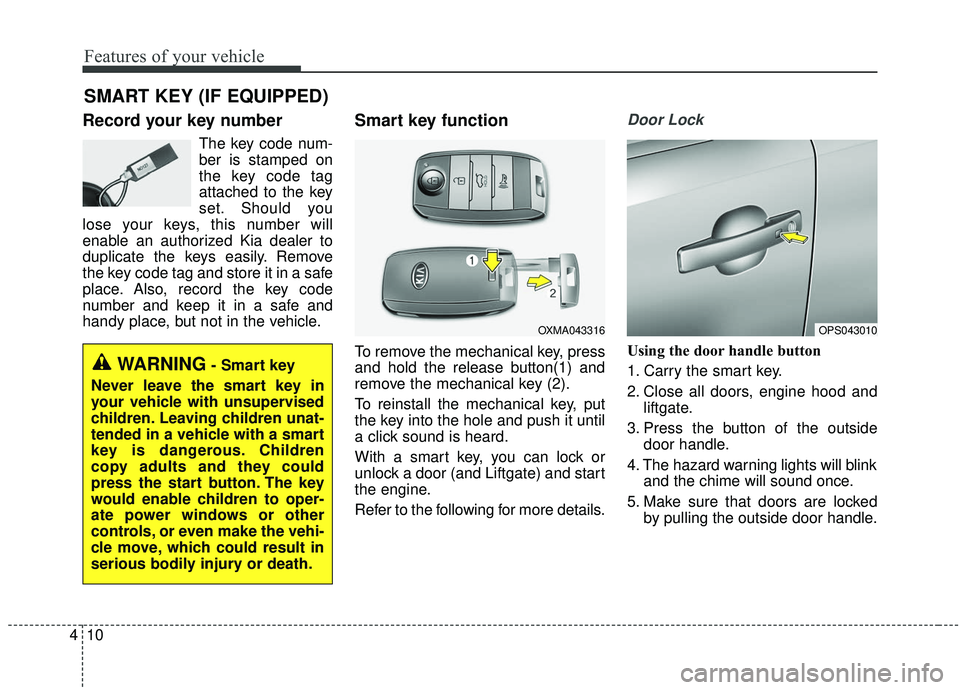
To remove the mechanical key, press
and hold the release button(1) and
remove the mechanical key (2).
To reinstall the mechanical key, put
the key into the hole and push it until
a click sound is heard.
With a smart key, you can lock or
unlock a door (and Liftgate) and start
the engine.
Refer to the following for more details.
Door Lock
Using the door handle button
1. Carry the smart key.
2. Close all doors, engine hood and liftgate.
3. Press the button of the outside door handle.
4. The hazard warning lights will blink and the chime will sound once.
5. Make sure that doors are locked by pulling the outside door handle.
SMART KEY (IF EQUIPPED)
OXMA043316OPS043010
WARNING- Smart key
Never leave the smart key in
your vehicle with unsupervised
children. Leaving children unat-
tended in a vehicle with a smart
key is dangerous. Children
copy adults and they could
press the start button. The key
would enable children to oper-
ate power windows or other
controls, or even make the vehi-
cle move, which could result in
serious bodily injury or death.
Page 97 of 564
411
Features of your vehicle
The button will only operate when
the smart key is within 0.7~1m
(28~40 in.) from the outside door
handle.
Even though you press the outside
door handle button, the doors will not
lock and the chime will sound for 3
seconds if any of following occur:
The smart key is in the vehicle.
The engine start/stop button is inACC or ON position.
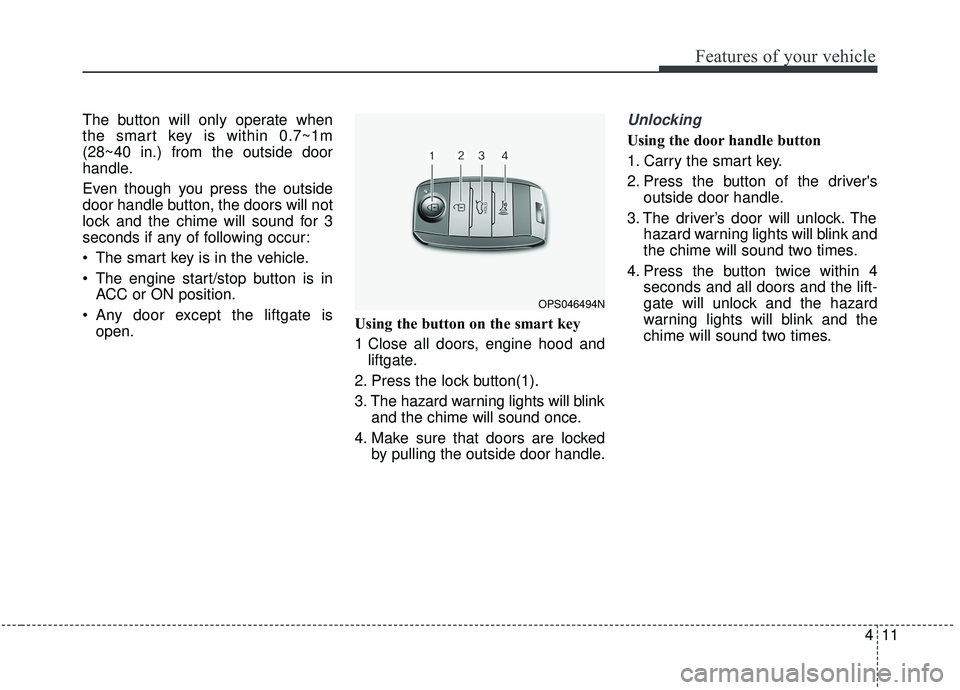
Any door except the liftgate is open. Using the button on the smart key
1 Close all doors, engine hood and
liftgate.
2. Press the lock button(1).
3. The hazard warning lights will blink and the chime will sound once.
4. Make sure that doors are locked by pulling the outside door handle.Unlocking
Using the door handle button
1. Carry the smart key.
2. Press the button of the driver'soutside door handle.
3. The driver’s door will unlock. The hazard warning lights will blink and
the chime will sound two times.
4. Press the button twice within 4 seconds and all doors and the lift-
gate will unlock and the hazard
warning lights will blink and the
chime will sound two times.
OPS046494N
Page 98 of 564
Features of your vehicle
12
4
The button will only operate when
the smart key is within 0.7~1m
(28~40 in.) from the outside door
handle.
When the smart key is recognized in the area of 0.7~1m (28~40 in.)
from the front outside door handle,
other people can also open the
doors.
After unlocking the driver’s door or all doors, the door(s) will lock auto-
matically unless the door is
opened. Using the button on the smart key
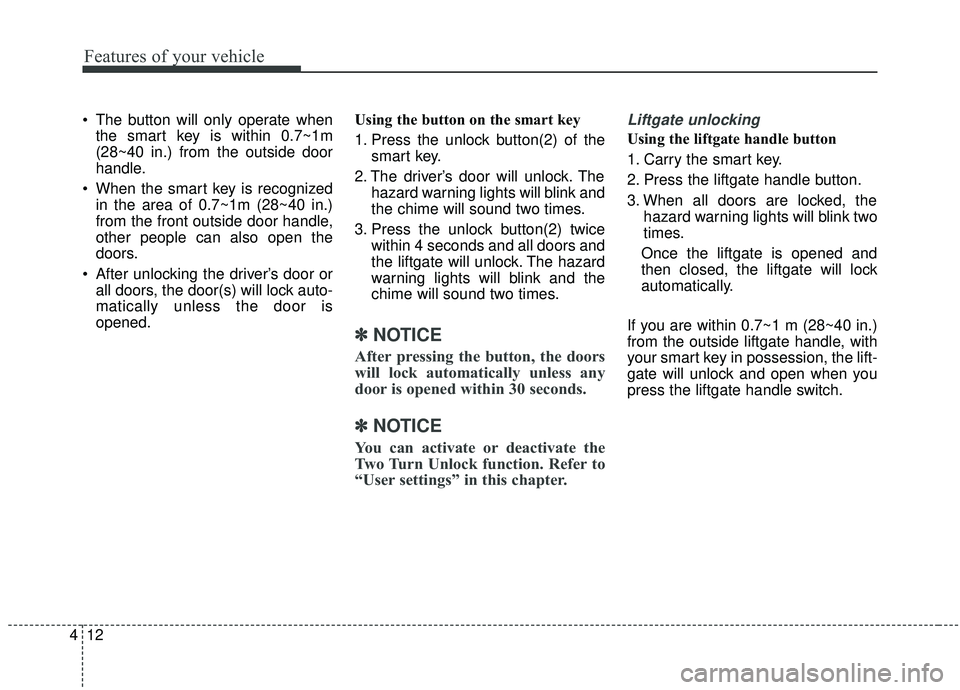
1. Press the unlock button(2) of the
smart key.
2. The driver’s door will unlock. The hazard warning lights will blink and
the chime will sound two times.
3. Press the unlock button(2) twice within 4 seconds and all doors and
the liftgate will unlock. The hazard
warning lights will blink and the
chime will sound two times.
✽ ✽NOTICE
After pressing the button, the doors
will lock automatically unless any
door is opened within 30 seconds.
✽ ✽NOTICE
You can activate or deactivate the
Two Turn Unlock function. Refer to
“User settings” in this chapter.
Liftgate unlocking
Using the liftgate handle button
1. Carry the smart key.
2. Press the liftgate handle button.
3. When all doors are locked, the
hazard warning lights will blink two
times.
Once the liftgate is opened and
then closed, the liftgate will lock
automatically.
If you are within 0.7~1 m (28~40 in.)
from the outside liftgate handle, with
your smart key in possession, the lift-
gate will unlock and open when you
press the liftgate handle switch.
Page 99 of 564
413
Features of your vehicle
Using the button on the smart key
1. Press the liftgate unlock button(3)for more than 1 second.
2. When all doors are locked, the hazard warning lights will blink two
times.
Panic
1. Press the panic button(4) for morethan 1 second.
2. The horn sounds and hazard warning light flash for about 30
seconds.
Start-up
You can start the engine without
inserting the key.
❈ For detailed information refer to
the “Engine start/stop button” in
chapter 6.
Loss of the smart key
A maximum of 2 smart keys can be
registered to a single vehicle.
If you happen to lose your smart key,
you will not be able to start the
engine. You should immediately take
the vehicle and remaining key to your
authorized Kia dealer(tow the vehi-
cle, if necessary) to protect it from
potential theft.
Smart key precautions
The smart key will not work if any
of the following occur:
- The smart key is close to a radiotransmitter such as a radio sta-
tion or an airport which can inter-
fere with normal operation of the
smart key.
- The smart key is near a mobile two way radio system or a cellular
phone.
- Another vehicle’s smart key is being operated close to your
vehicle.
When the smart key does not work correctly, open and close the door
with the mechanical key and contact
an authorized Kia dealer.
Page 128 of 564
Features of your vehicle
42
4
(Continued)
• When you operate the steering
wheel in low temperature, abnor-
mal noise may occur. If tempera-
ture rises, the noise will likely dis-
appear. This is a normal condition.
• When the charging system warn- ing light comes on due to the low
voltage (When the alternator or
battery does not operate normally
or it malfunctions), the steering
wheel may require increased
steering effort.Tilt and telescopic steering
Tilt and telescopic steering allows
you to adjust the steering wheel
before you drive. You can also raise it
to give your legs more room when
you exit and enter the vehicle.
The steering wheel should be posi-
tioned so that it is comfortable for
you to drive, while permitting you to
see the instrument panel warning
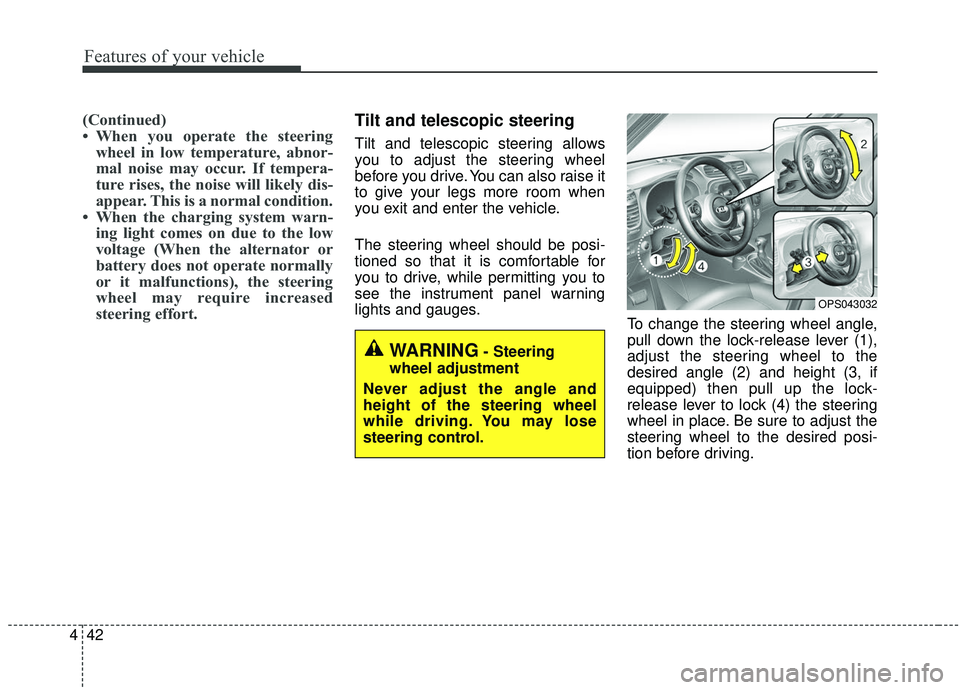
lights and gauges. To change the steering wheel angle,
pull down the lock-release lever (1),
adjust the steering wheel to the
desired angle (2) and height (3, if
equipped) then pull up the lock-
release lever to lock (4) the steering
wheel in place. Be sure to adjust the
steering wheel to the desired posi-
tion before driving.
OPS043032
WARNING- Steering
wheel adjustment
Never adjust the angle and
height of the steering wheel
while driving. You may lose
steering control.
Page 132 of 564
Features of your vehicle
46
4
MIRRORS
Inside rearview mirror
Adjust the rearview mirror so that the
center view through the rear window
is seen. Make this adjustment before
you start driving.
Do not place objects in the rear seat
or cargo area which would interfere
with your vision through the rear win-
dow.
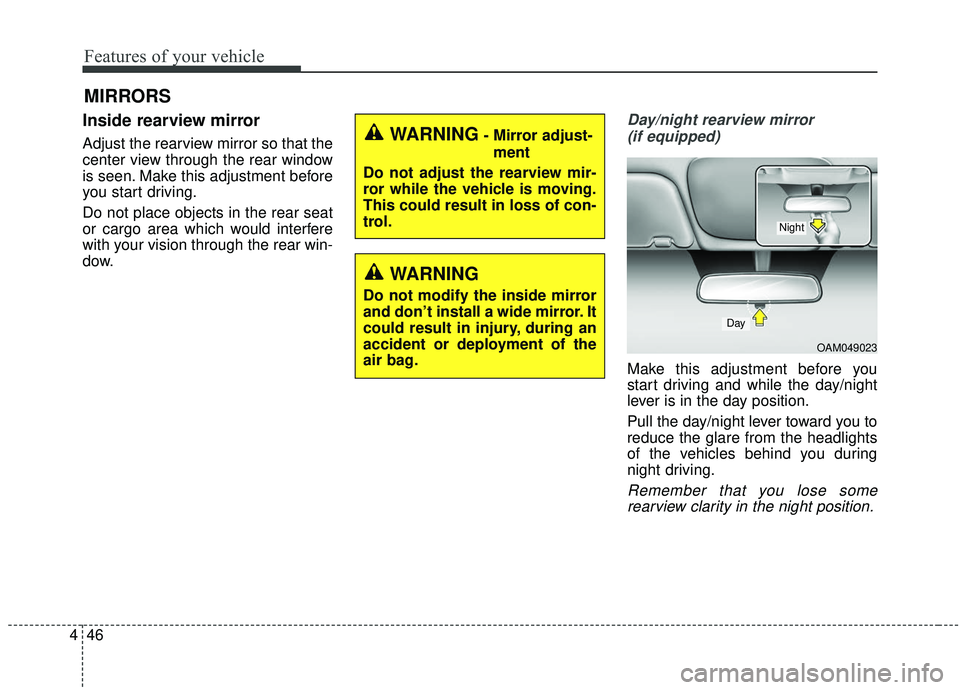
Day/night rearview mirror
(if equipped)
Make this adjustment before you
start driving and while the day/night
lever is in the day position.
Pull the day/night lever toward you to
reduce the glare from the headlights
of the vehicles behind you during
night driving.
Remember that you lose somerearview clarity in the night position.
WARNING- Mirror adjust-
ment
Do not adjust the rearview mir-
ror while the vehicle is moving.
This could result in loss of con-
trol.
WARNING
Do not modify the inside mirror
and don’t install a wide mirror. It
could result in injury, during an
accident or deployment of the
air bag.
OAM049023
Day
Night
Page 137 of 564
451
Features of your vehicle
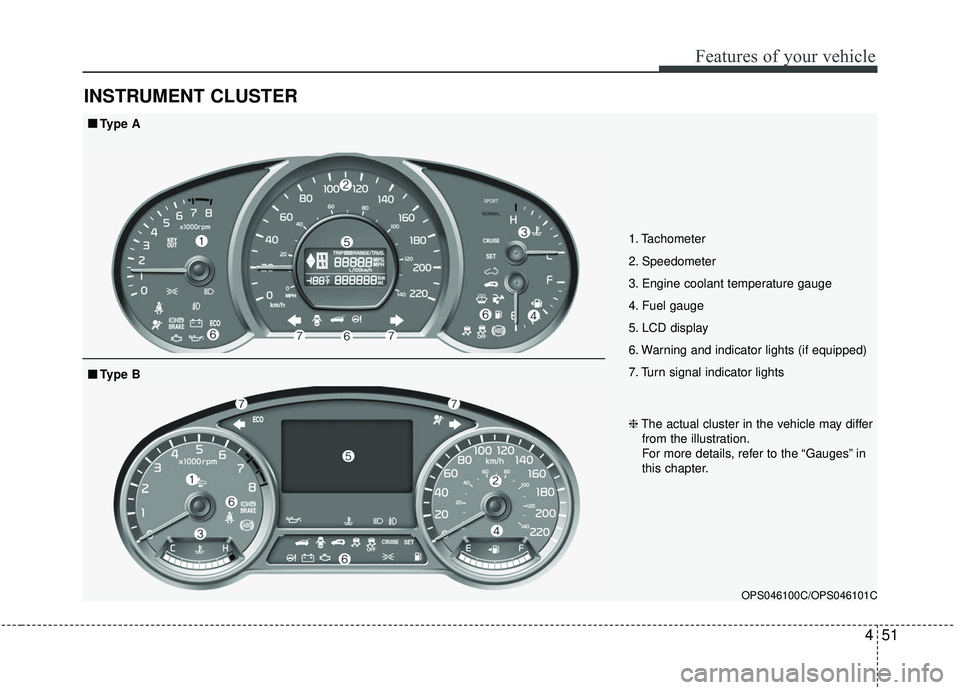
INSTRUMENT CLUSTER
1. Tachometer
2. Speedometer
3. Engine coolant temperature gauge
4. Fuel gauge
5. LCD display
6. Warning and indicator lights (if equipped)
7. Turn signal indicator lights
OPS046100C/OPS046101C
■ ■Type A
❈The actual cluster in the vehicle may differ
from the illustration.
For more details, refer to the “Gauges” in
this chapter.
■ ■ Type B
Page 163 of 564
477
Features of your vehicle
Warning lights
✽ ✽NOTICE - Warning lights
Make sure that all warning lights
are OFF after starting the engine. If
any light is still ON, this indicates a
situation that needs attention.
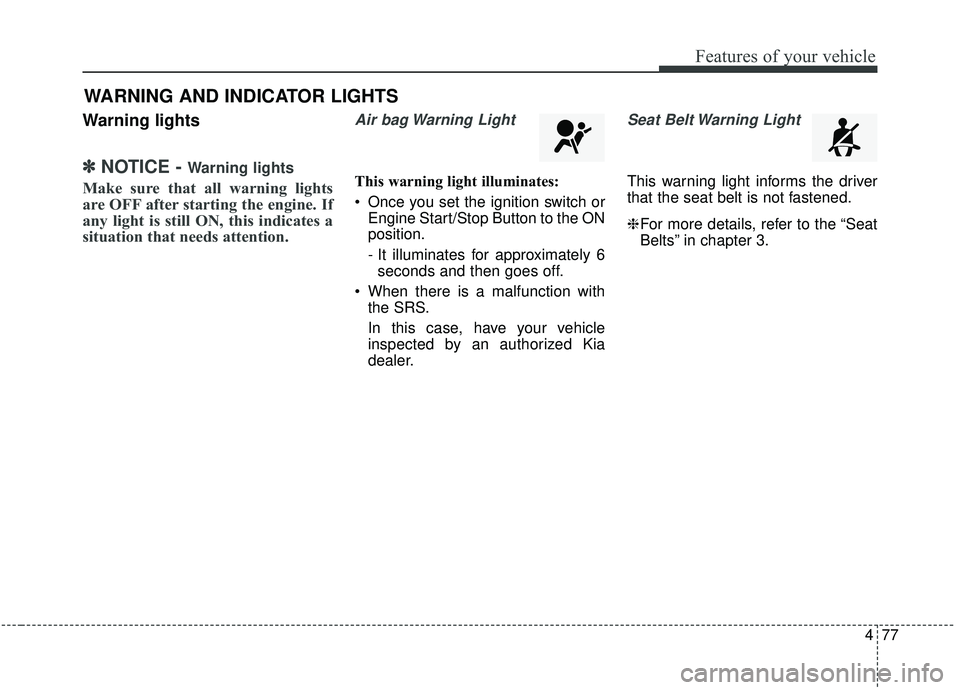
Air bag Warning Light
This warning light illuminates:
Once you set the ignition switch or
Engine Start/Stop Button to the ON
position.
- It illuminates for approximately 6seconds and then goes off.
When there is a malfunction with the SRS.
In this case, have your vehicle
inspected by an authorized Kia
dealer.
Seat Belt Warning Light
This warning light informs the driver
that the seat belt is not fastened.
❈For more details, refer to the “Seat
Belts” in chapter 3.
WARNING AND INDICATOR LIGHTS