start stop button KIA VENGA 2011 Owner's Manual
[x] Cancel search | Manufacturer: KIA, Model Year: 2011, Model line: VENGA, Model: KIA VENGA 2011Pages: 761, PDF Size: 34.65 MB
Page 564 of 761
Driving your vehicle
12
5
3. Press the ENGINE START/STOP but-
ton whilst depressing the brake pedal.
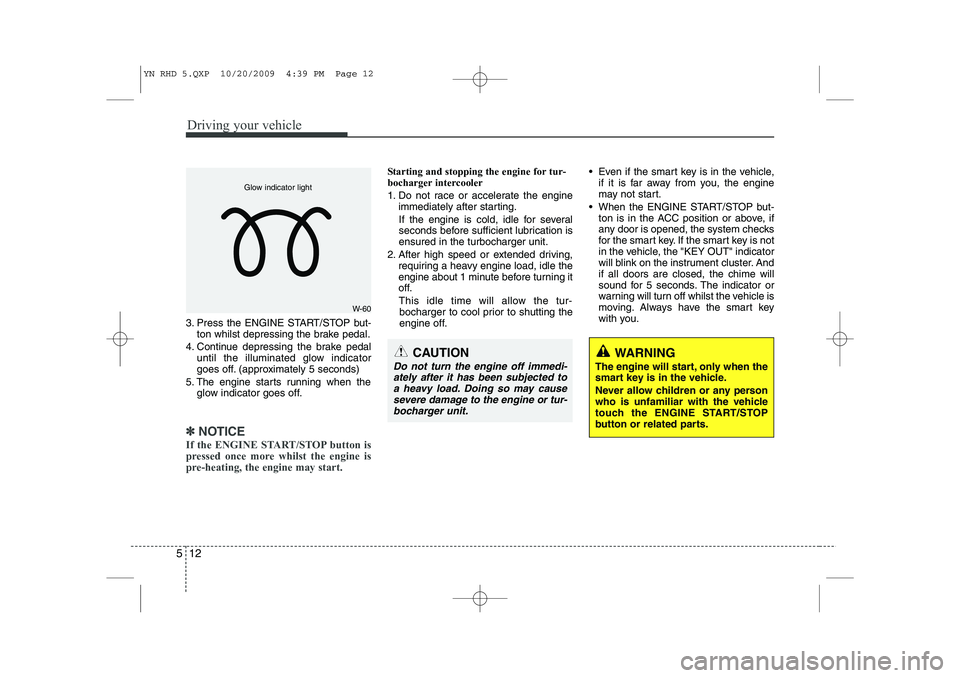
4. Continue depressing the brake pedal until the illuminated glow indicator
goes off. (approximately 5 seconds)
5. The engine starts running when the glow indicator goes off.
✽✽
NOTICE
If the ENGINE START/STOP button is
pressed once more whilst the engine is
pre-heating, the engine may start.
Starting and stopping the engine for tur-
bocharger intercooler
1. Do not race or accelerate the engine immediately after starting.
If the engine is cold, idle for several
seconds before sufficient lubrication isensured in the turbocharger unit.
2. After high speed or extended driving, requiring a heavy engine load, idle the
engine about 1 minute before turning it
off.
This idle time will allow the tur- bocharger to cool prior to shutting the
engine off. Even if the smart key is in the vehicle,
if it is far away from you, the engine
may not start.
When the ENGINE START/STOP but- ton is in the ACC position or above, if
any door is opened, the system checks
for the smart key. If the smart key is not
in the vehicle, the "KEY OUT" indicator
will blink on the instrument cluster. Andif all doors are closed, the chime will
sound for 5 seconds. The indicator or
warning will turn off whilst the vehicle is
moving. Always have the smart key
with you.
WARNING
The engine will start, only when the
smart key is in the vehicle.
Never allow children or any person
who is unfamiliar with the vehicle
touch the ENGINE START/STOP
button or related parts.
W-60
Glow indicator light
CAUTION
Do not turn the engine off immedi- ately after it has been subjected toa heavy load. Doing so may causesevere damage to the engine or tur-
bocharger unit.
YN RHD 5.QXP 10/20/2009 4:39 PM Page 12
Page 567 of 761
515
Driving your vehicle
ISG auto-starting
Before and after the engine enters the
idle stop mode, the ISG system will auto-
matically check all the necessary items
such as the safety of the vehicle and pas-
senger comfort.
The engine will start automatically with-
out the driver's action if any of the follow-ing occurs:
• If the brake vacuum pressure is low
If the fan speed of the manual climatecontrol system is set above the 3rd position when the air conditioning is on
If the fan speed of the automatic cli- mate control system is set above the6th position when the air conditioningis on
When a certain amount of time has passed with the climate control systemon
When the defroster is ON
When the battery charge status is low
If the vehicle speed is over 5km/h by rolling down a hill
It could be different up to the vehicle con-dition.
When the automatic starting occurs, the
"AUTO STOP" indicator on the cluster
will blink for 5 seconds. ISG(Idle Stop and Go) system
deactivation
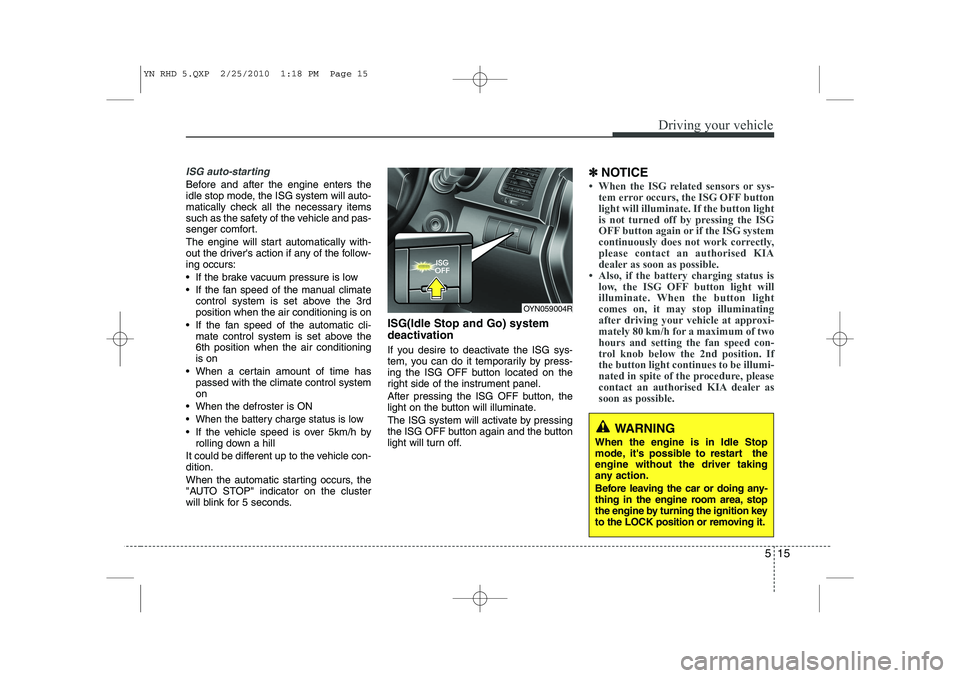
If you desire to deactivate the ISG sys-
tem, you can do it temporarily by press-
ing the ISG OFF button located on the
right side of the instrument panel.
After pressing the ISG OFF button, the
light on the button will illuminate.
The ISG system will activate by pressing
the ISG OFF button again and the button
light will turn off. ✽
✽
NOTICE
Page 568 of 761
Driving your vehicle
16
5
Manual transaxle operation
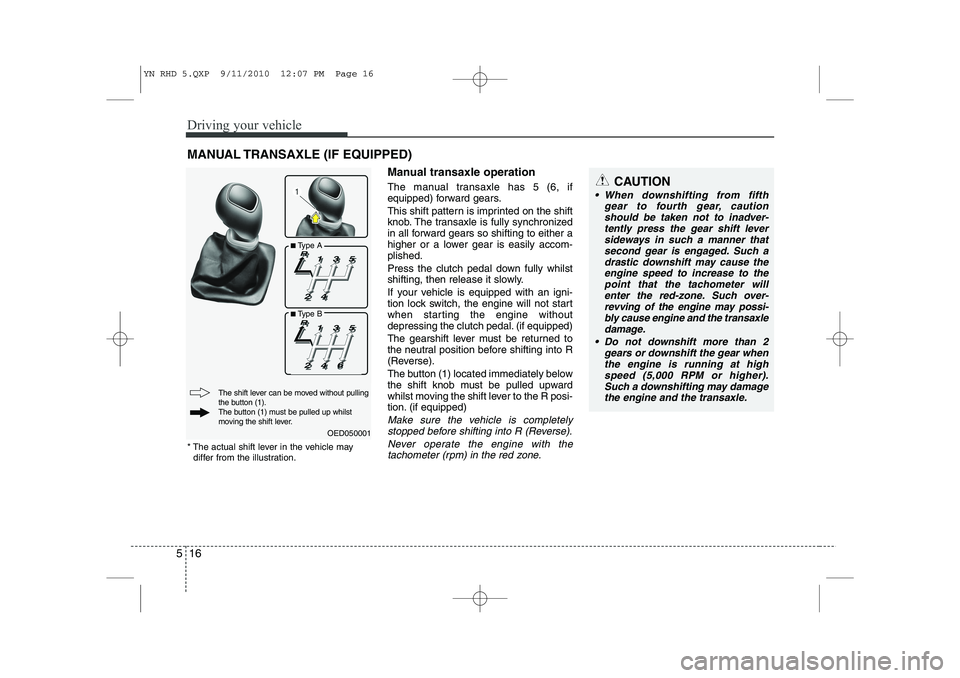
The manual transaxle has 5 (6, if
equipped) forward gears.
This shift pattern is imprinted on the shift
knob. The transaxle is fully synchronized
in all forward gears so shifting to either a
higher or a lower gear is easily accom-plished.
Press the clutch pedal down fully whilst
shifting, then release it slowly.
If your vehicle is equipped with an igni-
tion lock switch, the engine will not start
when starting the engine without
depressing the clutch pedal. (if equipped)
The gearshift lever must be returned to
the neutral position before shifting into R
(Reverse).
The button (1) located immediately below
the shift knob must be pulled upward
whilst moving the shift lever to the R posi-
tion. (if equipped)
Make sure the vehicle is completely
stopped before shifting into R (Reverse).
Never operate the engine with thetachometer (rpm) in the red zone.
MANUAL TRANSAXLE (IF EQUIPPED)
CAUTION
• When downshifting from fifth gear to fourth gear, caution
should be taken not to inadver-tently press the gear shift leversideways in such a manner that second gear is engaged. Such a
drastic downshift may cause the engine speed to increase to thepoint that the tachometer will
enter the red-zone. Such over-revving of the engine may possi- bly cause engine and the transaxledamage.
Do not downshift more than 2 gears or downshift the gear whenthe engine is running at highspeed (5,000 RPM or higher).
Such a downshifting may damagethe engine and the transaxle.
OED050001
The shift lever can be moved without pulling
the button (1).
The button (1) must be pulled up whilst
moving the shift lever.
* The actual shift lever in the vehicle may
differ from the illustration.
■ Type A
■ Type B
YN RHD 5.QXP 9/11/2010 12:07 PM Page 16
Page 578 of 761
Driving your vehicle
26
5
Releasing the parking brake
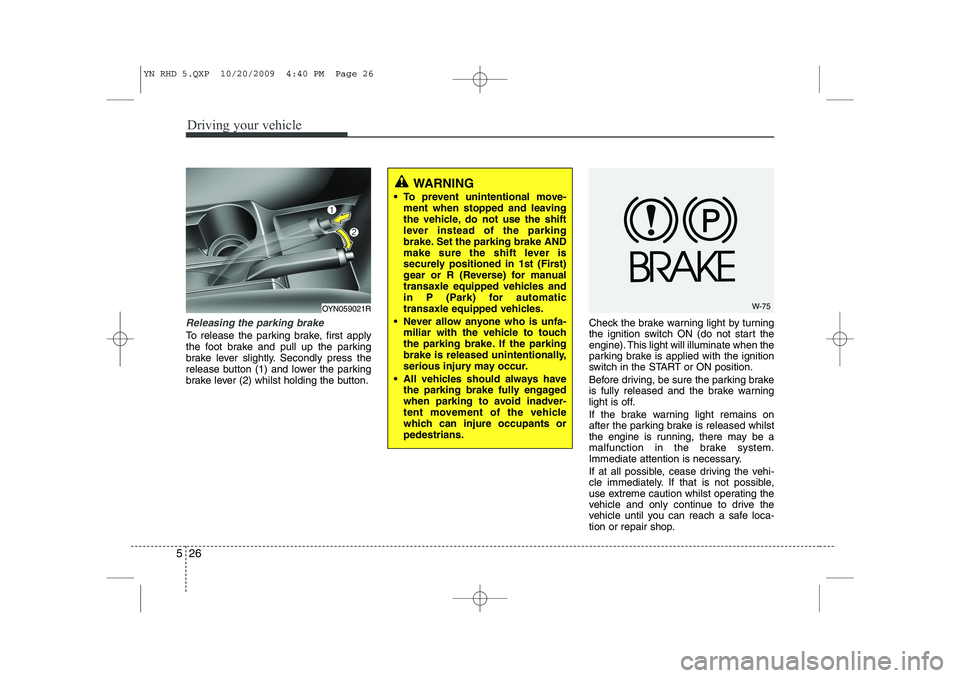
To release the parking brake, first apply
the foot brake and pull up the parking
brake lever slightly. Secondly press the
release button (1) and lower the parking
brake lever (2) whilst holding the button. Check the brake warning light by turning
the ignition switch ON (do not start the
engine). This light will illuminate when the
parking brake is applied with the ignition
switch in the START or ON position.
Before driving, be sure the parking brake
is fully released and the brake warning
light is off.
If the brake warning light remains on
after the parking brake is released whilst
the engine is running, there may be a
malfunction in the brake system.
Immediate attention is necessary.
If at all possible, cease driving the vehi-
cle immediately. If that is not possible,
use extreme caution whilst operating the
vehicle and only continue to drive the
vehicle until you can reach a safe loca-
tion or repair shop.
WARNING
To prevent unintentional move- ment when stopped and leaving
the vehicle, do not use the shift
lever instead of the parking
brake. Set the parking brake AND
make sure the shift lever is
securely positioned in 1st (First)
gear or R (Reverse) for manual
transaxle equipped vehicles and
in P (Park) for automatic
transaxle equipped vehicles.
Never allow anyone who is unfa- miliar with the vehicle to touch
the parking brake. If the parking
brake is released unintentionally,
serious injury may occur.
All vehicles should always have the parking brake fully engaged
when parking to avoid inadver-
tent movement of the vehicle
which can injure occupants orpedestrians.
W-75OYN059021R
YN RHD 5.QXP 10/20/2009 4:40 PM Page 26
Page 726 of 761
Index
2
I
Air bag - supplemental restraint system . . . . . . . . . 3-37
Air cleaner . . . . . . . . . . . . . . . . . . . . . . . . . . . . . . . . . . 7-33
Appearance care . . . . . . . . . . . . . . . . . . . . . . . . . . . . . 7-68
Audio system . . . . . . . . . . . . . . . . . . . . . . . . . . . . . . . . 4-99
Automatic climate control system . . . . . . . . . . . . . . . 4-81
Automatic transaxle . . . . . . . . . . . . . . . . . . . . . . . . . . 5-19
Automatic transaxle fluid . . . . . . . . . . . . . . . . . . . . . 7-29
Battery . . . . . . . . . . . . . . . . . . . . . . . . . . . . . . . . . . . . . 7-37
Before driving . . . . . . . . . . . . . . . . . . . . . . . . . . . . . . . . 5-3
Bonnet . . . . . . . . . . . . . . . . . . . . . . . . . . . . . . . . . . . . . 4-24
Brake system . . . . . . . . . . . . . . . . . . . . . . . . . . . . . . . . 5-24
Brake/clutch fluid . . . . . . . . . . . . . . . . . . . . . . . . . . . . 7-28
Bulb wattage . . . . . . . . . . . . . . . . . . . . . . . . . . . . . . . . . 8-2
Child restraint system . . . . . . . . . . . . . . . . . . . . . . . . 3-26
Cruise control system . . . . . . . . . . . . . . . . . . . . . . . . . 5-34
Defroster . . . . . . . . . . . . . . . . . . . . . . . . . . . . . . . . . . . 4-71
Dimensions. . . . . . . . . . . . . . . . . . . . . . . . . . . . . . . . . . . 8-2 Door locks . . . . . . . . . . . . . . . . . . . . . . . . . . . . . . . . . . 4-13
Economical operation . . . . . . . . . . . . . . . . . . . . . . . . . 5-40
Emergency starting. . . . . . . . . . . . . . . . . . . . . . . . . . . . 6-4
Emission control system . . . . . . . . . . . . . . . . . . . . . . . 7-74
Engine compartment . . . . . . . . . . . . . . . . . . . . . . . 2-4/7-2
Engine coolant . . . . . . . . . . . . . . . . . . . . . . . . . . . . . . . 7-25
Engine number . . . . . . . . . . . . . . . . . . . . . . . . . . . . . . . 8-7
Engine oil . . . . . . . . . . . . . . . . . . . . . . . . . . . . . . . . . . . 7-24
Engine start/stop button. . . . . . . . . . . . . . . . . . . . . . . . 5-8
Explanation of scheduled maintenance items . . . . . 7-20
Fuel filler lid . . . . . . . . . . . . . . . . . . . . . . . . . . . . . . . . 4-26
Fuel filter . . . . . . . . . . . . . . . . . . . . . . . . . . . . . . . . . . . 7-32
Fuel requirements . . . . . . . . . . . . . . . . . . . . . . . . . . . . . 1-2
Fuses . . . . . . . . . . . . . . . . . . . . . . . . . . . . . . . . . . . . . . . 7-50
Hazard warning flasher . . . . . . . . . . . . . . . . . . . . . . . 4-60
How to use this manual . . . . . . . . . . . . . . . . . . . . . . . . 1-2
If the engine overheats . . . . . . . . . . . . . . . . . . . . . . . . . 6-6
A
B
C
D
F
E
H
I
YN RHD INDEX.QXP 1/25/2010 11:51 AM Page 2
Page 743 of 761
Features of your vehicle
114
4
Listening to CD
Notes on CD
� This CD player is suitable for 12 cm discs and 8 cm discs with an adaptoronly and can read both audio and
MP3 format CD.
� Please do not use irregular shaped
CDs.
� CD-R’s or CD-RW’s can generally be
played. Due to varying quality of sur-
face conditions of CDs, as well as the
performance and condition of the CD
writer, certain CD-R/CD-RW CD may
not operate normally on this unit.
Notes on WMA
WMA files up to WMA Version 9.0 are
supported. CD playback
Starting/Stopping a CDIf no CD is located in the unit:
�
Insert a CD.
� The CD will be played from the first
title.
If a CD is located in the unit:
� Press CD button to start playback.
✎ If no CD is loaded into the unit “NO
DISC” will appear the display.
� Playback will stop when anothersource is selected.
Ejecting a CD
� Press the button.
� Remove the disc from the CD slot.
� The previous used source will be selected.
� If the CD is not removed from the slot,
it will be re-tracked into the unit with-
out being played.
Previous/Next Track
� Press the or button to select the
previous or next title OR Fast Forward/Reverse
�
Press and hold the or button to
for fast forward and reverse.
✎ During fast forward and fast reverse
audio is audible at reduced volume
Random Track
� Press the RDMbutton to activate/
deactivate “Random Track” feature.
Repeat Track
� Press the RPTbutton to activate/
deactivate the “Repeat Track” feature.
Scan Track
� Press SCAN button to activate/deac-
tivate the track (title) scan feature.
� The first 10 seconds of each track/title
will be played.
Page 745 of 761
Features of your vehicle
116
4
Playing MP3/WMA files
Starting/Stopping playback
� Press CD button to start playback.
� Playback will stop when another source is selected.
Previous/Next Track
� Press the or buttons to select
previous or next track.
Previous/Next Folder
� Press the or button to select
the previous or next folder.
Fast Forward/Reverse
� Press and hold the or button to
for fast reverse and fast forward.
✎ During fast forward and fast reverse
audio is audible at reduced volume.
Random
� Short press the RDM button to select
the Random Folder option.
✎ All files in the Random Folder will be
played randomly.
� Long press the RDM button to selectthe Random All option.
✎ All files on the CD will be played ran-
domly. Repeat
�
Short press the RPT button to select the Repeat file option.
✎ The current file will be repeated.
� Long press the RPT button to select
the Repeat Folder option.
✎ All files in the current folder will berepeated.
Scan
� Short press the SCAN button to select the Scan All option.
✎ All files in the CD will be scanned.
� Long press the SCAN button to select
the Scan Folder option.
✎ The first file in each folder will bescanned.
� CD plays the first 10 seconds of thesong.
� When a folder ends: scanning contin-
ues with the first file of the next folder.
� When a CD ends: scanning continues
with the first file of the first folder. Viewing Information of Compressed
Audio Files
�
Short press the INFObutton.
� File name, Song title*, Album name,
Artist name, Directory name and Total
track can be displayed.
✎ If no ID3 Tag is available “NO INFO”
will be displayed, otherwise the corre-
sponding information will be displayed
for 5 seconds.
� To abort this mode: press one of the
following buttons: or , Fast
or , RPT, RDM, INFO, SOUND,
SETUP and LIST.
List Function Compressed Audio Files ✎ With this mode you can browse fold-
ers and files located on the CD.
� The main menu of the LIST functionconsists of:
� Short press LIST to enter track brows-ing.
� Short press or button to
browse through the list of the selected
category.
� Short press OK to playback of the
selected track.
� To abort this mode: press one of the
following buttons: or , Fast
or , RPT, RDM, INFO, SOUND,
SETUP and LIST.