run flat Lancia Musa 2009 Owner handbook (in English)
[x] Cancel search | Manufacturer: LANCIA, Model Year: 2009, Model line: Musa, Model: Lancia Musa 2009Pages: 218, PDF Size: 3.7 MB
Page 140 of 218

139
WARNING
LIGHTS AND
MESSAGES
MAINTENANCE
AND CARE
TECHNICALSPECIFICATIONS
INDEX
DASHBOARD
AND CONTROLS
SAFETY
DEVICES
STARTING
AND
DRIVING
IN AN
EMERGENCY
fig. 3L0D0361m
fig. 4L0D0362m
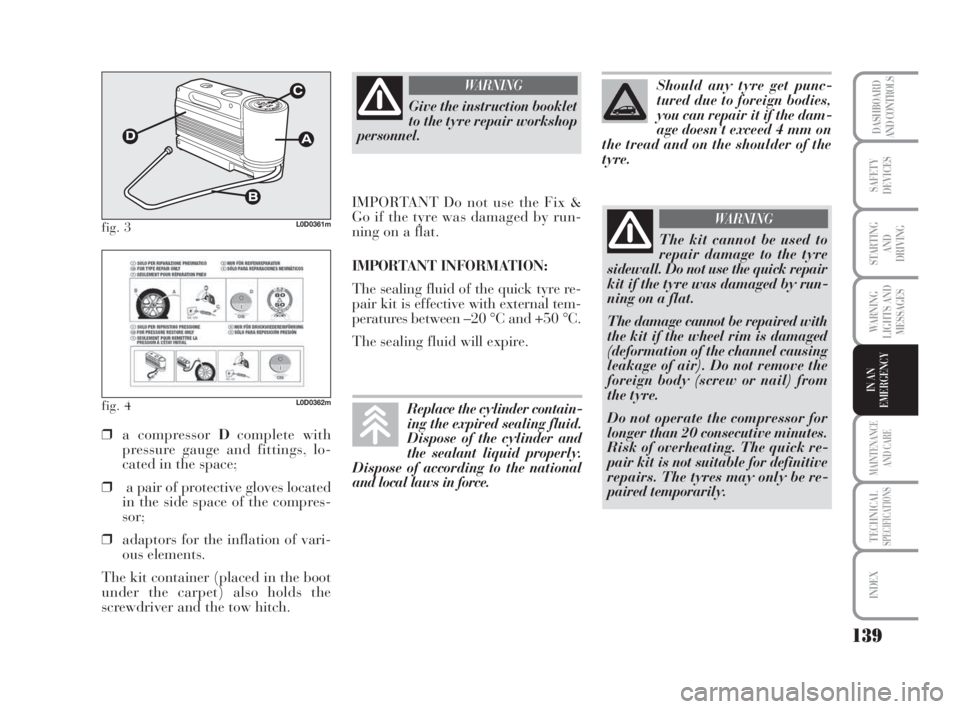
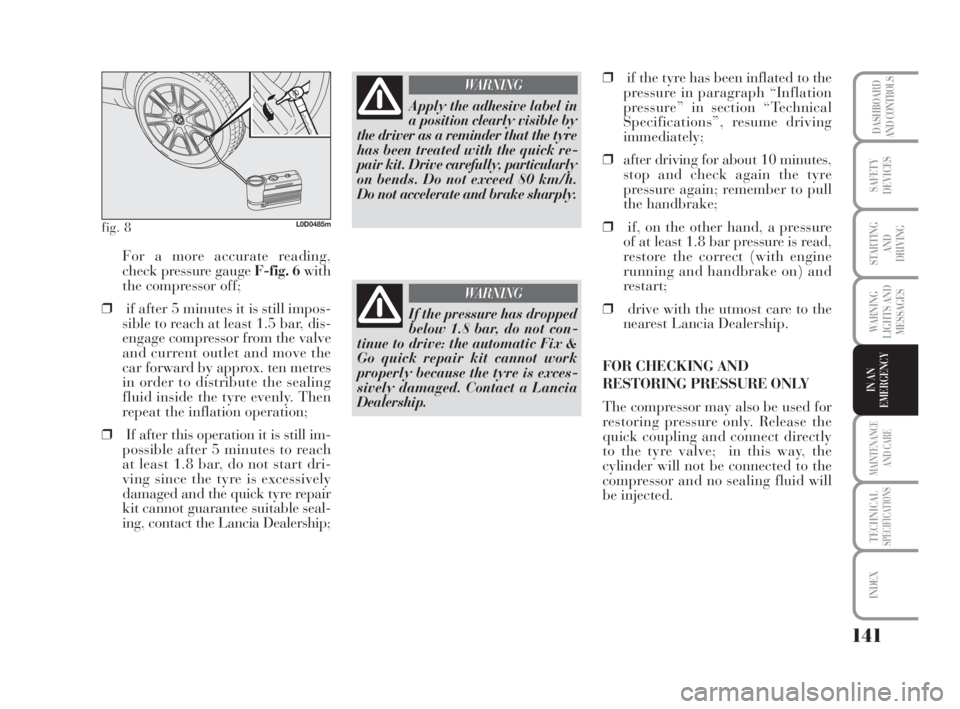
❒a compressor Dcomplete with
pressure gauge and fittings, lo-
cated in the space;
❒a pair of protective gloves located
in the side space of the compres-
sor;
❒adaptors for the inflation of vari-
ous elements.
The kit container (placed in the boot
under the carpet) also holds the
screwdriver and the tow hitch.
Give the instruction booklet
to the tyre repair workshop
personnel.
WARNING
IMPORTANT Do not use the Fix &
Go if the tyre was damaged by run-
ning on a flat.
IMPORTANT INFORMATION:
The sealing fluid of the quick tyre re-
pair kit is effective with external tem-
peratures between –20 °C and +50 °C.
The sealing fluid will expire.
The kit cannot be used to
repair damage to the tyre
sidewall. Do not use the quick repair
kit if the tyre was damaged by run-
ning on a flat.
The damage cannot be repaired with
the kit if the wheel rim is damaged
(deformation of the channel causing
leakage of air). Do not remove the
foreign body (screw or nail) from
the tyre.
Do not operate the compressor for
longer than 20 consecutive minutes.
Risk of overheating. The quick re-
pair kit is not suitable for definitive
repairs. The tyres may only be re-
paired temporarily.
WARNING
Should any tyre get punc-
tured due to foreign bodies,
you can repair it if the dam-
age doesn’t exceed 4 mm on
the tread and on the shoulder of the
tyre.
Replace the cylinder contain-
ing the expired sealing fluid.
Dispose of the cylinder and
the sealant liquid properly.
Dispose of according to the national
and local laws in force.
135-164 MUSA 1ed GB 10-07-2008 9:38 Pagina 139
Page 142 of 218

141
WARNING
LIGHTS AND
MESSAGES
MAINTENANCE
AND CARE
TECHNICALSPECIFICATIONS
INDEX
DASHBOARD
AND CONTROLS
SAFETY
DEVICES
STARTING
AND
DRIVING
IN AN
EMERGENCY
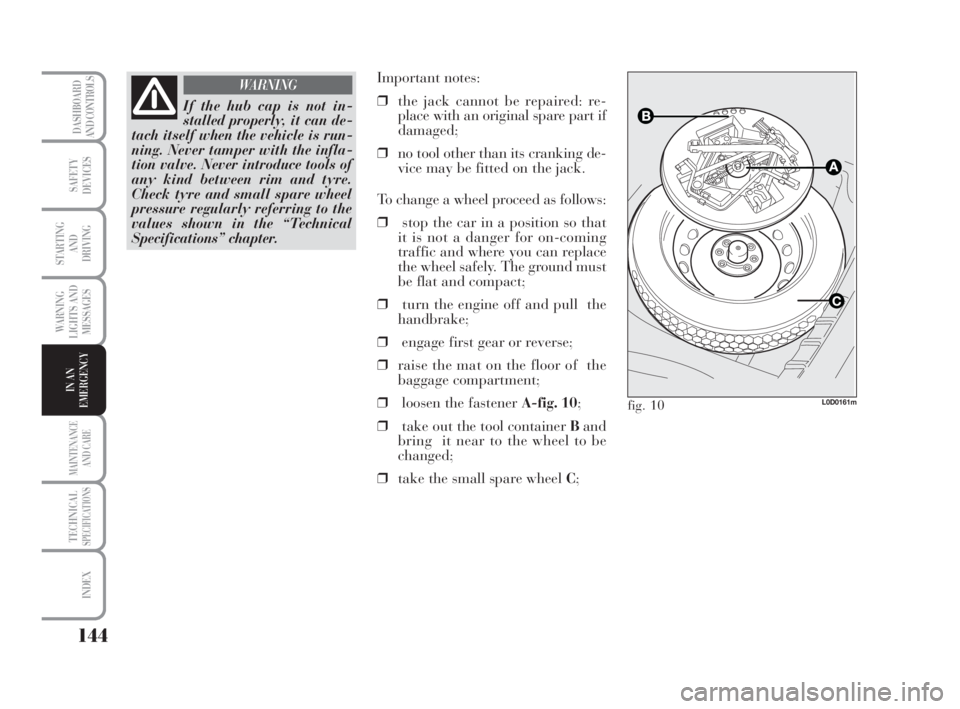
For a more accurate reading,
check pressure gauge F-fig. 6with
the compressor off;
❒if after 5 minutes it is still impos-
sible to reach at least 1.5 bar, dis-
engage compressor from the valve
and current outlet and move the
car forward by approx. ten metres
in order to distribute the sealing
fluid inside the tyre evenly. Then
repeat the inflation operation;
❒If after this operation it is still im-
possible after 5 minutes to reach
at least 1.8 bar, do not start dri-
ving since the tyre is excessively
damaged and the quick tyre repair
kit cannot guarantee suitable seal-
ing, contact the Lancia Dealership;
fig. 8L0D0485m
Apply the adhesive label in
a position clearly visible by
the driver as a reminder that the tyre
has been treated with the quick re-
pair kit. Drive carefully, particularly
on bends. Do not exceed 80 km/h.
Do not accelerate and brake sharply.
WARNING
If the pressure has dropped
below 1.8 bar, do not con-
tinue to drive: the automatic Fix &
Go quick repair kit cannot work
properly because the tyre is exces-
sively damaged. Contact a Lancia
Dealership.
WARNING
❒if the tyre has been inflated to the
pressure in paragraph “Inflation
pressure” in section “Technical
Specifications”, resume driving
immediately;
❒after driving for about 10 minutes,
stop and check again the tyre
pressure again; remember to pull
the handbrake;
❒if, on the other hand, a pressure
of at least 1.8 bar pressure is read,
restore the correct (with engine
running and handbrake on) and
restart;
❒drive with the utmost care to the
nearest Lancia Dealership.
FOR CHECKING AND
RESTORING PRESSURE ONLY
The compressor may also be used for
restoring pressure only. Release the
quick coupling and connect directly
to the tyre valve; in this way, the
cylinder will not be connected to the
compressor and no sealing fluid will
be injected.
135-164 MUSA 1ed GB 10-07-2008 9:38 Pagina 141
Page 145 of 218

144
WARNING
LIGHTS AND
MESSAGES
MAINTENANCE
AND CARE
TECHNICALSPECIFICATIONS
INDEX
DASHBOARD
AND CONTROLS
SAFETY
DEVICES
STARTING
AND
DRIVING
IN AN
EMERGENCY
If the hub cap is not in-
stalled properly, it can de-
tach itself when the vehicle is run-
ning. Never tamper with the infla-
tion valve. Never introduce tools of
any kind between rim and tyre.
Check tyre and small spare wheel
pressure regularly referring to the
values shown in the “Technical
Specifications” chapter.
WARNINGImportant notes:
❒the jack cannot be repaired: re-
place with an original spare part if
damaged;
❒no tool other than its cranking de-
vice may be fitted on the jack.
To change a wheel proceed as follows:
❒stop the car in a position so that
it is not a danger for on-coming
traffic and where you can replace
the wheel safely. The ground must
be flat and compact;
❒turn the engine off and pull the
handbrake;
❒engage first gear or reverse;
❒raise the mat on the floor of the
baggage compartment;
❒loosen the fastener A-fig. 10;
❒take out the tool container Band
bring it near to the wheel to be
changed;
❒take the small spare wheel C;
L0D0161mfig. 10
135-164 MUSA 1ed GB 10-07-2008 9:38 Pagina 144
Page 147 of 218

146
WARNING
LIGHTS AND
MESSAGES
MAINTENANCE
AND CARE
TECHNICALSPECIFICATIONS
INDEX
DASHBOARD
AND CONTROLS
SAFETY
DEVICES
STARTING
AND
DRIVING
IN AN
EMERGENCY
fig. 14L0D0165mfig. 15L0D0166m
❒fit the spare wheel, ensuring that
the holes coincide M-fig. 14with
their respective centring pins N;
❒using the wrench provided, tighten
the four fastening bolts;
❒turn the jack handle to lower the
car and remove the jack;
❒using the wrench provided, screw
the bolts right down in a criss-
cross fashion, in the sequence
shown in the figureREFITTING THE
STANDARD WHEEL
Following the procedure described
previously, raise the car and remove
the small spare wheel.
Versions with steel rims
Proceed as follows:
❒make sure the contact surfaces be-
tween spare wheel and hub are
clean and free from impurities so
that the fastening bolts will not
come loose;
❒fit the standard wheel by inserting
the first two-threaded bolt in the
hole nearest to the inflation valve;❒fit the wheel cap, ensuring that the
groove (in the cap itself) coincides
with the inflation valve. Then fit
the other three bolts;
❒for versions with snap-fitted wheel
cap, press down on the edge of the
cap, with the palm of your hand
(do not strike it) against the wheel;
❒Using the wrench provided, se-
curely tighten the fastening bolts;
❒lower the car and remove the jack;
❒Using the wrench provided, fully
tighten the bolts in the sequence
shown in fig. 15;
IMPORTANT If it is not fitted prop-
erly, the wheel cap may detach itself
when the vehicle is running.
135-164 MUSA 1ed GB 10-07-2008 9:38 Pagina 146
Page 180 of 218

179
WARNING
LIGHTS AND
MESSAGES
TECHNICALSPECIFICATIONS
INDEX
DASHBOARD
AND CONTROLS
SAFETY
DEVICES
STARTING
AND
DRIVING
IN AN
EMERGENCY
MAINTENANCE
AND CARE
IMPORTANT If the charge level re-
mains for a long time under 50%, the
battery is damaged by sulphation, re-
ducing its capacity and starting atti-
tude.
The battery will also be more at risk
of freezing (e.g. already at –10°C).
Refer to the paragraph “Car inactiv-
ity” in “Starting and driving” if the
car is left parked for a long time.
If after buying the car, you want to in-
stall electric accessories which require
permanent electric supply (alarm,
etc.) contact the Lancia Dealership
whose qualified personnel, in addition
to suggesting the most suitable devices
beloning to the Lancia Lineaccessori
line, will evaluate the overall electric
absorption, checking whether the car’s
electric system is capable of with-
standing the load required, or whether
it should be integrated with a more
powerful battery.
Since these devices continue absorb-
ing energy even when the ignition key
is off, they gradually run down the
battery.WHEELS
AND TYRES
Check the pressure of each type, in-
cluding the spare, approximately once
every two weeks and before starting a
long journey: this check must be per-
formed with the tyre rested and cold.
It is normal for the pressure to in-
crease when the car is used; for the
correct tyre inflation pressure, see
“Wheels” in “Technical specifica-
tions” section.
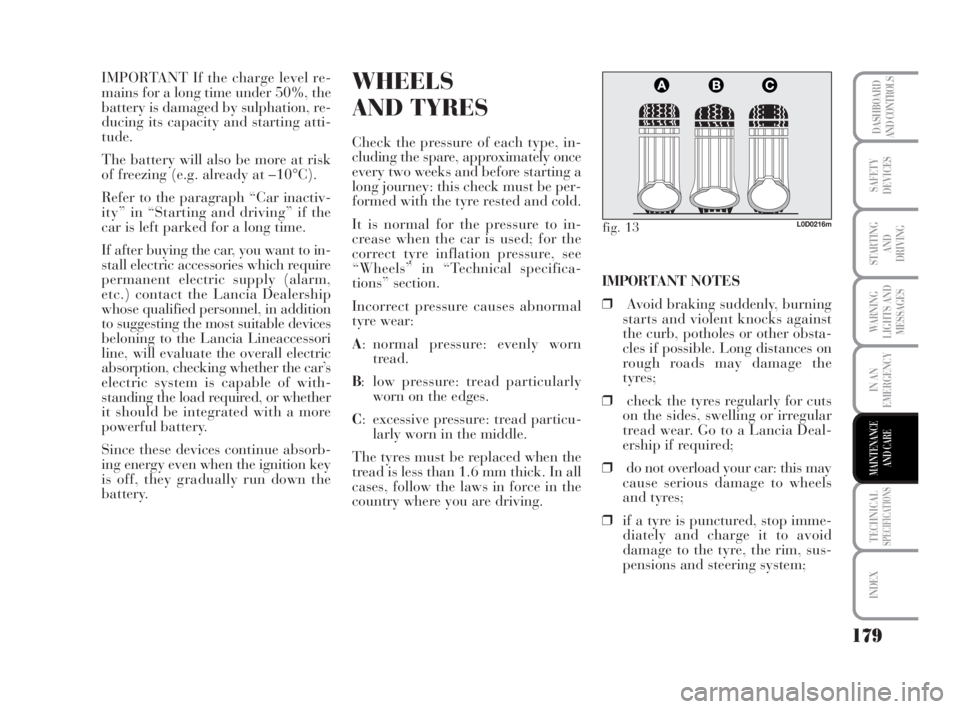
Incorrect pressure causes abnormal
tyre wear:
A: normal pressure: evenly worn
tread.
B: low pressure: tread particularly
worn on the edges.
C: excessive pressure: tread particu-
larly worn in the middle.
The tyres must be replaced when the
tread is less than 1.6 mm thick. In all
cases, follow the laws in force in the
country where you are driving.IMPORTANT NOTES
❒Avoid braking suddenly, burning
starts and violent knocks against
the curb, potholes or other obsta-
cles if possible. Long distances on
rough roads may damage the
tyres;
❒check the tyres regularly for cuts
on the sides, swelling or irregular
tread wear. Go to a Lancia Deal-
ership if required;
❒do not overload your car: this may
cause serious damage to wheels
and tyres;
❒if a tyre is punctured, stop imme-
diately and charge it to avoid
damage to the tyre, the rim, sus-
pensions and steering system;
fig. 13L0D0216m
165-186 MUSA 1ed GB 10-07-2008 9:39 Pagina 179