lock Lancia Thema 2013 Owner handbook (in English)
[x] Cancel search | Manufacturer: LANCIA, Model Year: 2013, Model line: Thema, Model: Lancia Thema 2013Pages: 336, PDF Size: 3.87 MB
Page 172 of 336
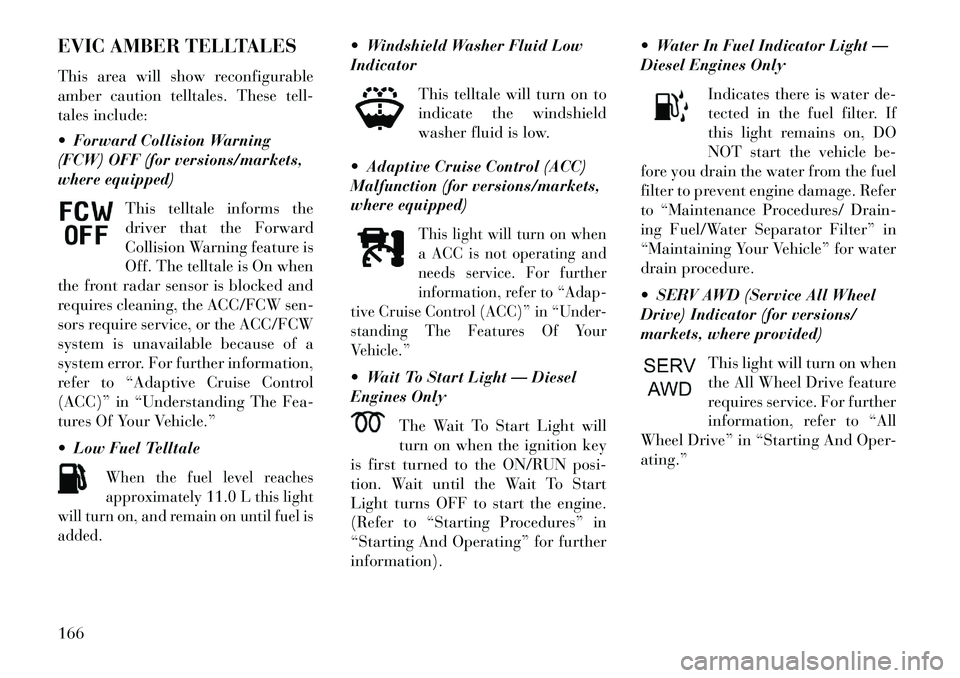
EVIC AMBER TELLTALES
This area will show reconfigurable
amber caution telltales. These tell-
tales include:
Forward Collision Warning
(FCW) OFF (for versions/markets,
where equipped)This telltale informs the
driver that the Forward
Collision Warning feature is
Off. The telltale is On when
the front radar sensor is blocked and
requires cleaning, the ACC/FCW sen-
sors require service, or the ACC/FCW
system is unavailable because of a
system error. For further information,
refer to “Adaptive Cruise Control
(ACC)” in “Understanding The Fea-
tures Of Your Vehicle.”
Low Fuel Telltale
When the fuel level reaches
approximately 11.0 L this light
will turn on, and remain on until fuel is
added.
Windshield Washer Fluid Low
Indicator
This telltale will turn on to
indicate the windshield
washer fluid is low.
Adaptive Cruise Control (ACC)
Malfunction (for versions/markets,
where equipped)
This light will turn on when
a ACC is not operating and
needs service. For further
information, refer to “Adap-
tive Cruise Control (ACC)” in “Under-
standing The Features Of Your
Vehicle.”
Wait To Start Light — Diesel
Engines Only
The Wait To Start Light will
turn on when the ignition key
is first turned to the ON/RUN posi-
tion. Wait until the Wait To Start
Light turns OFF to start the engine.
(Refer to “Starting Procedures” in
“Starting And Operating” for further
information). Water In Fuel Indicator Light —
Diesel Engines Only
Indicates there is water de-
tected in the fuel filter. If
this light remains on, DO
NOT start the vehicle be-
fore you drain the water from the fuel
filter to prevent engine damage. Refer
to “Maintenance Procedures/ Drain-
ing Fuel/Water Separator Filter” in
“Maintaining Your Vehicle” for water
drain procedure.
SERV AWD (Service All Wheel
Drive) Indicator (for versions/
markets, where provided)
This light will turn on when
the All Wheel Drive feature
requires service. For further
information, refer to “All
Wheel Drive” in “Starting And Oper-
ating.”
166
Page 178 of 336
Trans Temperature
Displays the actual transmissiontemperature.
Engine Hours
Displays the number of hours of engine operation.
MESSAGES #
Select from Main Menu using the UP
or DOWN buttons. This feature shows
the number of stored warning mes-
sages (in the # place holder). Pressing
the SELECT button will allow you to
see what the stored messages are.
Pressing the BACK button takes you
back to the Main Menu.
TURN MENU OFF
Select from Main Menu using the
DOWN button. Pressing the SELECT
button blanks the menu display.
Pressing any one of the four steering
wheel buttons brings the menu back. Uconnect Touch™
SETTINGS
The Uconnect Touch™ system uses a
combination of soft and hard keys
located on the center of the instru-
ment panel that allows you to access
and change the customer program-
mable features.
HARD-KEYS
Hard-Keys are located below the
Uconnect Touch™ system in the cen-
ter of the instrument panel. In addi-
tion, there is a Scroll/Enter control
knob located on the right side of the
Climate Controls in the center of the
instrument panel. Turn the control
knob to scroll through menus and
change settings (i.e., 30, 60, 90),
press the center of the control knob
one or more times to select or change a
setting (i.e., ON, OFF).
SOFT-KEYS
Soft-Keys are accessible on the
Uconnect Touch™ display.CUSTOMER
PROGRAMMABLE
FEATURES — Uconnect
Touch™ SYSTEM 8.4
SETTINGS
Press the More soft-key, then press the
Settings soft-key to display the menu
setting screen. In this mode the
Uconnect Touch™ system allows you
to access programmable features that
may be equipped such as Display,
Clock, Safety/Assistance, Lights,
Doors & Locks, Engine Off Opera-
tion, Compass Settings, Audio, and
Phone/Bluetooth.
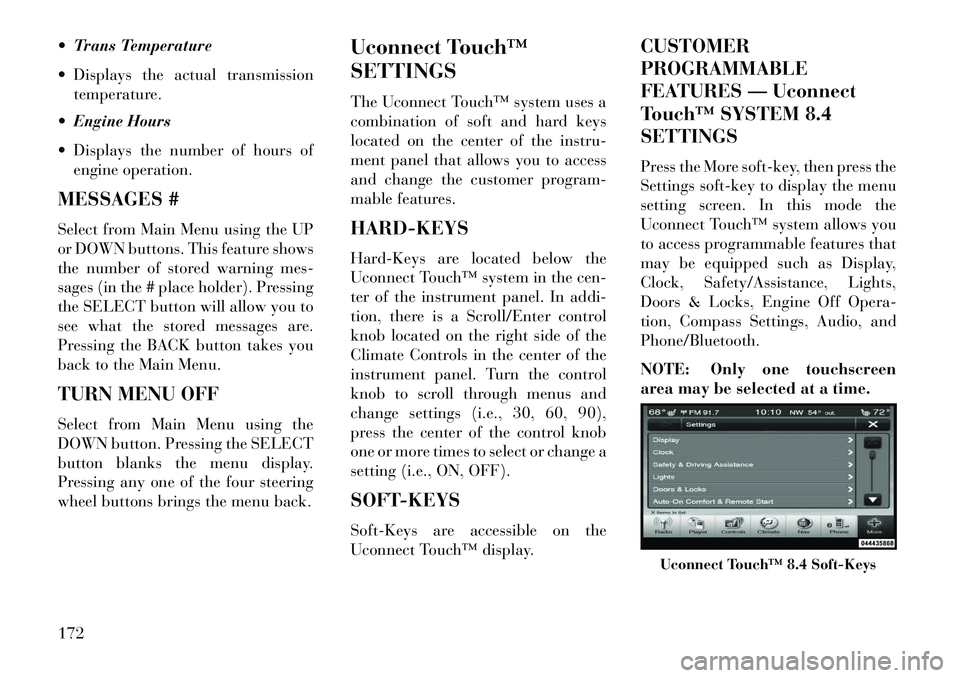
NOTE: Only one touchscreen
area may be selected at a time.
Uconnect Touch™ 8.4 Soft-Keys
172
Page 180 of 336
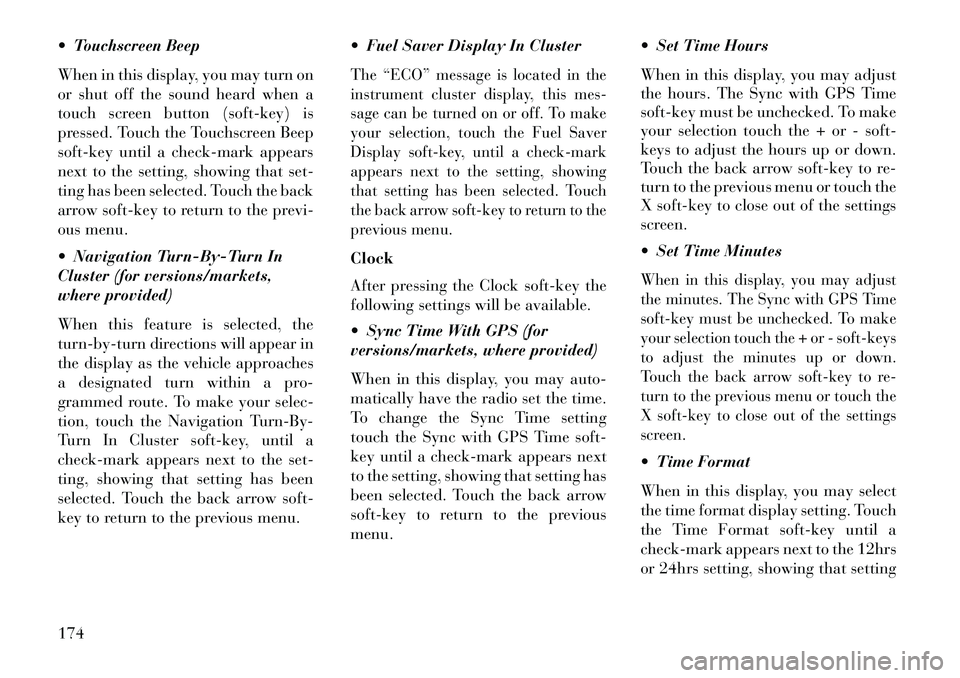
Touchscreen Beep
When in this display, you may turn on
or shut off the sound heard when a
touch screen button (soft-key) is
pressed. Touch the Touchscreen Beep
soft-key until a check-mark appears
next to the setting, showing that set-
ting has been selected. Touch the back
arrow soft-key to return to the previ-
ous menu.
Navigation Turn-By-Turn In
Cluster (for versions/markets,
where provided)
When this feature is selected, the
turn-by-turn directions will appear in
the display as the vehicle approaches
a designated turn within a pro-
grammed route. To make your selec-
tion, touch the Navigation Turn-By-
Turn In Cluster soft-key, until a
check-mark appears next to the set-
ting, showing that setting has been
selected. Touch the back arrow soft-
key to return to the previous menu. Fuel Saver Display In Cluster
The “ECO” message is located in the
instrument cluster display, this mes-
sage can be turned on or off. To make
your selection, touch the Fuel Saver
Display soft-key, until a check-mark
appears next to the setting, showing
that setting has been selected. Touch
the back arrow soft-key to return to the
previous menu.Clock
After pressing the Clock soft-key the
following settings will be available.
Sync Time With GPS (for
versions/markets, where provided)
When in this display, you may auto-
matically have the radio set the time.
To change the Sync Time setting
touch the Sync with GPS Time soft-
key until a check-mark appears next
to the setting, showing that setting has
been selected. Touch the back arrow
soft-key to return to the previous
menu. Set Time Hours
When in this display, you may adjust
the hours. The Sync with GPS Time
soft-key must be unchecked. To make
your selection touch the + or - soft-
keys to adjust the hours up or down.
Touch the back arrow soft-key to re-
turn to the previous menu or touch the
X soft-key to close out of the settings
screen.
Set Time Minutes
When in this display, you may adjust
the minutes. The Sync with GPS Time
soft-key must be unchecked. To make
your selection touch the + or - soft-keys
to adjust the minutes up or down.
Touch the back arrow soft-key to re-
turn to the previous menu or touch the
X soft-key to close out of the settings
screen. Time Format
When in this display, you may select
the time format display setting. Touch
the Time Format soft-key until a
check-mark appears next to the 12hrs
or 24hrs setting, showing that setting
174
Page 181 of 336
has been selected. Touch the back ar-
row soft-key to return to the previous
menu.
Show Time In Status Bar
When in this display, you may turn on
or shut off the digital clock in the
status bar. To change the Show Time
Status setting touch the Show Time in
Status Bar soft-key until a check-
mark appears next to setting, showing
that setting has been selected. Touch
the back arrow soft-key to return to
the previous menu.
Safety / Assistance
After pressing the Safety / Assistance
soft-key the following settings will be
available.
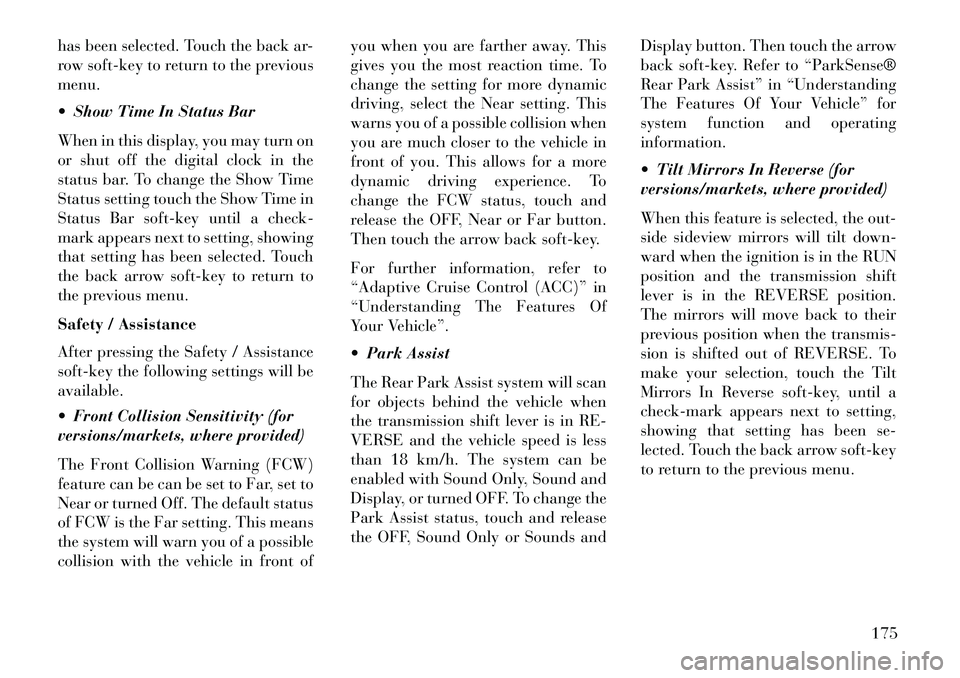
Front Collision Sensitivity (for
versions/markets, where provided)
The Front Collision Warning (FCW)
feature can be can be set to Far, set to
Near or turned Off. The default status
of FCW is the Far setting. This means
the system will warn you of a possible
collision with the vehicle in front ofyou when you are farther away. This
gives you the most reaction time. To
change the setting for more dynamic
driving, select the Near setting. This
warns you of a possible collision when
you are much closer to the vehicle in
front of you. This allows for a more
dynamic driving experience. To
change the FCW status, touch and
release the OFF, Near or Far button.
Then touch the arrow back soft-key.
For further information, refer to
“Adaptive Cruise Control (ACC)” in
“Understanding The Features Of
Your Vehicle”.
Park Assist
The Rear Park Assist system will scan
for objects behind the vehicle when
the transmission shift lever is in RE-
VERSE and the vehicle speed is less
than 18 km/h. The system can be
enabled with Sound Only, Sound and
Display, or turned OFF. To change the
Park Assist status, touch and release
the OFF, Sound Only or Sounds and
Display button. Then touch the arrow
back soft-key. Refer to “ParkSense®
Rear Park Assist” in “Understanding
The Features Of Your Vehicle” for
system function and operating
information.
Tilt Mirrors In Reverse (for
versions/markets, where provided)
When this feature is selected, the out-
side sideview mirrors will tilt down-
ward when the ignition is in the RUN
position and the transmission shift
lever is in the REVERSE position.
The mirrors will move back to their
previous position when the transmis-
sion is shifted out of REVERSE. To
make your selection, touch the Tilt
Mirrors In Reverse soft-key, until a
check-mark appears next to setting,
showing that setting has been se-
lected. Touch the back arrow soft-key
to return to the previous menu.
175
Page 183 of 336
Lights
After pressing the Lights soft-key the
following settings will be available.
Headlight Off DelayWhen this feature is selected, the driver
can choose to have the headlights re-
main on for 0, 30, 60, or 90 seconds
when exiting the vehicle. To change the
Headlight Off Delay status touch the 0,
30, 60 or 90 soft-key. Then touch the
arrow back soft-key. Headlight Illumination On
Approach
When this feature is selected, the
headlights will activate and remain on
for 0, 30, 60, or 90 seconds when the
doors are unlocked with the Remote
Keyless Entry (RKE) transmitter. To
change the Illuminated Approach sta-
tus, touch the + or - soft-key to select
your desired time interval. Touch the
back arrow soft-key to return to the
previous menu. Headlights With Wipers (for
versions/markets, where provided)
When this feature is selected, and the
headlight switch is in the AUTO posi-
tion, the headlights will turn on
approximately 10 seconds after the
wipers are turned on. The headlights
will also turn off when the wipers are
turned off if they were turned on by
this feature. To make your selection,
touch the Headlights With Wipers
soft-key, until a check-mark appears
next to setting, showing that setting
has been selected. Touch the back
arrow soft-key to return to the previ-
ous menu.
Auto Dim High Beams
“SmartBeam™” (for versions/
markets, where provided)
When this feature is selected, the high
beam headlights will deactivate auto-
matically under certain conditions. To
make your selection, touch the Auto
High Beams soft-key, until a check-
mark appears next to setting, showing
that setting has been selected. Touch
the back arrow soft-key to return to the previous menu. Refer to “Lights/
SmartBeam™ (for versions/markets,
where provided)” in “Understanding
The Features Of Your Vehicle” for fur-
ther information.
Daytime Running Lights (for
versions/markets, where provided)
When this feature is selected, the
headlights will turn on whenever the
engine is running. To make your se-
lection, touch the Daytime Running
Lights soft-key, until a check-mark
appears next to setting, showing that
setting has been selected. Touch the
back arrow soft-key to return to the
previous menu.
Steering Directed Lights (for
versions/markets, where provided)When this feature is selected, the head-
lights turn relative to a change in direc-
tion of the steering wheel. To make
your selection, touch the Steering Di-
rected Lights soft-key, until a check-
mark appears next to setting, showing
that setting has been selected. Touch
the back arrow soft-key to return to the
previous menu.
177
Page 184 of 336

Headlight Dipped Beam (Traffic
Changeover) (for versions/markets,
where provided)Low beam headlights have more con-
trol of upward light and direct most of
their light downward and either to the
left for right hand drive countries or to
the right for left hand drive countries to
provide safe forward visibility without
excessive glare.Doors & Locks
After pressing the Doors & Locks soft-
key the following settings will be
available.
Auto Unlock On ExitWhen this feature is selected, all doors
will unlock when the vehicle is stopped
and the transmission is in the PARK or
NEUTRAL position and the driver's
door is opened. To make your selection,
touch the Auto Unlock On Exit soft-
key, until a check-mark appears next
to setting, showing that setting has
been selected. Touch the back arrow
soft-key to return to the previous
menu.
1st Press Of Key Fob Unlocks
When 1st Press Of Key Fob Unlocks is
selected, only the driver's door will
unlock on the first press of the Remote
Keyless Entry (RKE) transmitter UN-
LOCK button. When 1st Press Of Key
Fob Unlocks is selected, you must
press the RKE transmitter UNLOCK
button twice to unlock the passenger's
doors. When Unlock All Doors On 1st
Press is selected, all of the doors will
unlock on the first press of the RKE
transmitter UNLOCK button.
NOTE: If the vehicle is pro-
grammed 1st Press Of Key Fob Un-
locks, all doors will unlock no
matter which Passive Entry
equipped door handle is grasped.
If 1st Press Of Key Fob Unlocks is
programmed, only the driver’s
door will unlock when the driver’s
door is grasped. With Passive En-
try, if 1st Press Of Key Fob Unlocks
is programmed touching the
handle more than once will only
result in the driver’s door opening.
If driver door first is selected, oncethe driver door is opened, the inte-
rior door lock/unlock switch can
be used to unlock all doors (or use
RKE transmitter).
Passive Entry
This feature allows you to lock and
unlock the vehicle’s door(s) without
having to press the Remote Keyless
Entry (RKE) transmitter lock or un-
lock buttons. To make your selection,
touch the Passive Entry soft-key, until
a check-mark appears next to setting,
showing that setting has been selected.
Touch the back arrow soft-key to re-
turn to the previous menu. Refer to
“Keyless Enter-N-Go” in “Things To
Know Before Starting Your Vehicle”. Personal Settings Linked To
FOB (for versions/markets,
where provided)This feature provides automatic driver
seat positioning to enhance driver mo-
bility when entering and exiting the
vehicle. To make your selection, touch
the Personal Settings Linked To FOB
soft-key, until a check-mark appears
next to setting, showing that setting
178
Page 185 of 336
has been selected. Touch the back
arrow soft-key to return to the previous
menu.NOTE:
The seat will return to the
memorized seat location (if Recall
Memory with Remote Key Unlock is
set to ON) when the Remote Keyless
Entry (RKE) transmitter is used to
unlock the door. Refer to “Driver
Memory Seat” in “Understanding
The Features Of Your Vehicle” for
further information.
Engine Off Options
After pressing the Engine Off Options
soft-key the following settings will be
available.
Easy Exit Seat (for versions/
markets, where provided)This feature provides automatic driver
seat positioning to enhance driver
mobility when entering and exiting the
vehicle. To make your selection, touch
the Easy Exit Seats soft-key, until a
check-mark appears next to setting,
showing that setting has been selected.
Touch the back arrow soft-key to re-
turn to the previous menu.
Engine Off Power Delay (for
versions/markets, where provided)When this feature is selected, the power
window switches, radio, Uconnect™
phone system (for versions/markets,
where provided), DVD video system
(for versions/markets, where pro-
vided), power sunroof (for versions/
markets, where provided), and power
outlets will remain active for up to
10 minutes after the ignition is cycled
to OFF.
Opening either front door will
cancel this feature. To change the
Engine Off Power Delay status touch
the 0 seconds, 45 seconds, 5 minutes or
10 minutes soft-key. Then touch the
arrow back soft-key.
Headlight Off Delay
When this feature is selected, the
driver can choose to have the head-
lights remain on for 0, 30, 60, or
90 seconds when exiting the vehicle.
To change the Headlight Off Delay
status touch the + or - soft-key to
select your desired time interval.
Touch the back arrow soft-key to re-
turn to the previous menu. Compass Settings
After pressing the Compass Settings
soft-key the following settings will be
available.
Variance
Compass Variance is the difference
between Magnetic North and Geo-
graphic North. To compensate for
the differences the variance should be
set for the zone where the vehicle is
driven, per the zone map. Once
properly set, the compass will auto-
matically compensate for the differ-
ences, and provide the most accurate
compass heading.
NOTE: Keep magnetic materials
away from the top of the instru-
ment panel, such as iPod's, Mobile
Phones, Laptops and Radar Detec-
tors. This is where the compass
module is located, and it can cause
interference with the compass sen-
sor, and it may give false readings.
179
Page 187 of 336
Equalizer
When in this display you may adjust
the Bass, Mid and Treble settings.
Adjust the settings with the + and –
setting soft-keys or by selecting any
point on the scale between the + and –
soft-keys. Then touch the arrow back
soft-key.
NOTE: Bass/Mid/Treble allow
you to simply slide your finger up
or down to change the setting as
well as touch directly on the de-
sired setting.
Speed Adjusted VolumeThis feature increases or decreases
volume relative to vehicle speed. To
change the Speed Adjusted Volume
touch the Off, 1, 2 or 3 soft-key. Then
touch the arrow back soft-key. Music Info Cleanup (for versions/
markets, where provided)
This feature helps organize music files
for optimized music navigation. To
make your selection, touch the Music
Info Cleanup soft-key, select On or Off
followed by pressing the arrow back
soft-key. Surround Sound (for versions/
markets, where provided)
This feature provides simulated sur-
round sound mode. To make your se-
lection, touch the Surround Sound
soft-key, select On or Off followed by
pressing the arrow back soft-key.
Phone/Bluetooth
After pressing the Phone/Bluetooth
soft-key the following settings will be
available.
Paired Devices
This feature shows which phones are
paired to the Phone/Bluetooth system.
For further information, refer to the
Uconnect Touch™ Supplement.SOUND SYSTEMS
Refer to your Sound Systems Booklet.
NAVIGATION SYSTEM
(for versions/markets,
where provided)
Refer to your Uconnect Touch™ User
Manual.
SETTING THE ANALOG
CLOCK
To set the analog clock at the top
center of the instrument panel, press
and hold the button until the setting is
correct.
Setting The Analog Clock
181
Page 189 of 336
Mode will only be available for video
media sources (DVDs, Video CDs, or
other video media supported by the
radio). Some audio will sound better
in DSS modes, others in Stereo mode.
When in “Audio Surround” mode,
balance is set automatically. Fader
control is available in surround mode
but should be set to the center position
for optimal surround performance.
STEERING WHEEL
AUDIO CONTROLS
The remote sound system controls are
located on the surface of the steering
wheel at the three and nine o'clock
positions.The right-hand control is a rocker-
type switch with a pushbutton in the
center and controls the volume and
mode of the sound system. Pressing
the top of the rocker switch will in-
crease the volume, and pressing the
bottom of the rocker switch will de-
crease the volume.
Pressing the center button will make
the radio switch between the various
modes available (MW/LW/CD, etc.).
The left-hand control is a rocker-type
switch with a pushbutton in the cen-
ter. The function of the left-hand con-
trol is different depending on which
mode you are in.
The following describes the left-hand
control operation in each mode.
Radio Operation
Pressing the top of the switch will
“Seek” up for the next listenable sta-
tion and pressing the bottom of the
switch will “Seek” down for the next
listenable station.The button located in the center of the
left-hand control will tune to the next
preset station that you have pro-
grammed in the radio preset push-
button.
CD Player
Pressing the top of the switch once
will go to the next track on the CD.
Pressing the bottom of the switch once
will go to the beginning of the current
track, or to the beginning of the pre-
vious track if it is within one second
after the current track begins to play.
If you press the switch up or down
twice, it plays the second track; three
times, it will play the third, etc.
The center button on the left side
rocker switch has no function for a
single-disc CD player. However, when
a multiple-disc CD player is equipped
on the vehicle, the center button will
select the next available CD in the
player.
Remote Sound System Controls
(Back View Of Steering Wheel)
183
Page 191 of 336
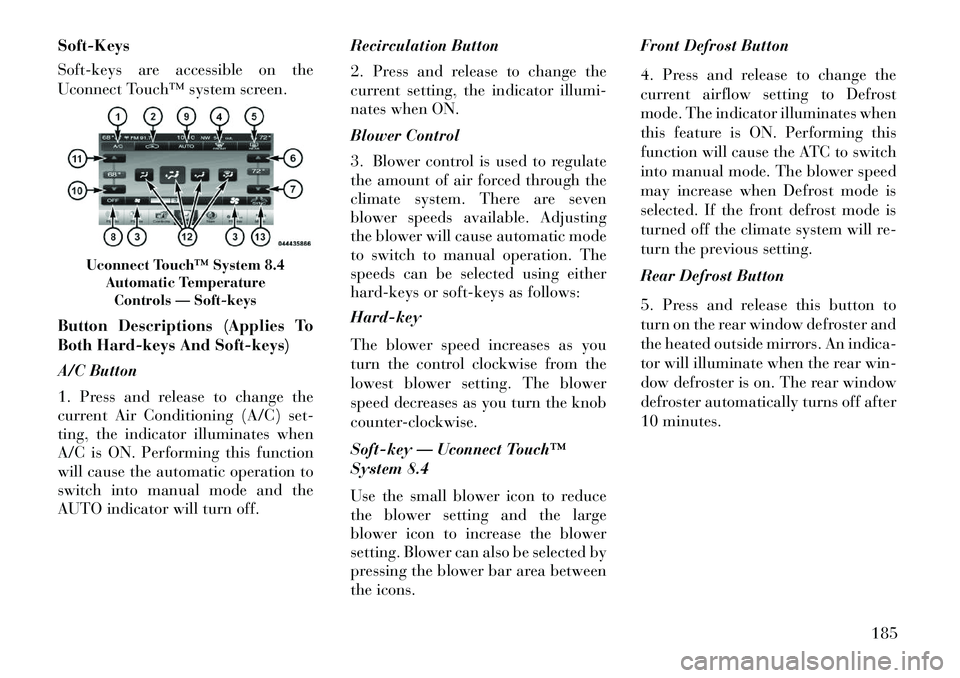
Soft-Keys
Soft-keys are accessible on the
Uconnect Touch™ system screen.
Button Descriptions (Applies To
Both Hard-keys And Soft-keys)
A/C Button
1. Press and release to change the
current Air Conditioning (A/C) set-
ting, the indicator illuminates when
A/C is ON. Performing this function
will cause the automatic operation to
switch into manual mode and the
AUTO indicator will turn off.Recirculation Button
2. Press and release to change the
current setting, the indicator illumi-
nates when ON.
Blower Control
3. Blower control is used to regulate
the amount of air forced through the
climate system. There are seven
blower speeds available. Adjusting
the blower will cause automatic mode
to switch to manual operation. The
speeds can be selected using either
hard-keys or soft-keys as follows:
Hard-key
The blower speed increases as you
turn the control clockwise from the
lowest blower setting. The blower
speed decreases as you turn the knob
counter-clockwise.
Soft-key — Uconnect Touch™
System 8.4
Use the small blower icon to reduce
the blower setting and the large
blower icon to increase the blower
setting. Blower can also be selected by
pressing the blower bar area between
the icons.Front Defrost Button
4. Press and release to change the
current airflow setting to Defrost
mode. The indicator illuminates when
this feature is ON. Performing this
function will cause the ATC to switch
into manual mode. The blower speed
may increase when Defrost mode is
selected. If the front defrost mode is
turned off the climate system will re-
turn the previous setting.
Rear Defrost Button
5. Press and release this button to
turn on the rear window defroster and
the heated outside mirrors. An indica-
tor will illuminate when the rear win-
dow defroster is on. The rear window
defroster automatically turns off after
10 minutes.
Uconnect Touch™ System 8.4
Automatic TemperatureControls — Soft-keys
185