warning Lancia Thema 2014 Owner handbook (in English)
[x] Cancel search | Manufacturer: LANCIA, Model Year: 2014, Model line: Thema, Model: Lancia Thema 2014Pages: 332, PDF Size: 3.46 MB
Page 5 of 332
Dear Customer,
Thank you for choosing LANCIA and congratulations on your choice of a LANCIA Thema.
We have written this handbook to help you get to know all your car and use it in the best possible way.
You should read it right through before taking to the road for the first time.
You will find information, tips and important warnings regarding the driving of your car to help you get the most from the
technological features of your LANCIA.
Carefully read the warnings and indications.
The enclosed Warranty Booklet lists the services that LANCIA offers to its customers:
the Warranty Certificate with terms and conditions for maintaining its validity
the range of additional services available to LANCIA customers.
Enjoy the read. Happy motoring!
This Owner Handbook describes all versions of the LANCIA Thema; please consider only the information rel-evant to your version, engine and configuration.
Page 9 of 332
1
INTRODUCTION
INTRODUCTION...........................4
IMPORTANT NOTICE ........................4
HOW TO USE THIS MANUAL .................6
WARNINGS AND CAUTIONS ..................7
VEHICLE IDENTIFICATION NUMBER ..........7
VEHICLE MODIFICATIONS/ALTERATIONS ......7
3
Page 13 of 332

WARNINGS AND
CAUTIONS
This Owners Manual contains
WARNINGSagainst operating proce-
dures that could result in a collision or
bodily injury. It also contains CAU-
TIONS against procedures that could
result in damage to your vehicle. If
you do not read this entire Owners
Manual, you may miss important in-
formation. Observe all Warnings and
Cautions.
VEHICLE
IDENTIFICATION
NUMBER
The vehicle identification number
(VIN) is on the left front corner of the
instrument panel. The VIN is visible
from outside of the vehicle through
the windshield. The VIN is also lo-
cated on the right front strut tower
inside the engine compartment and
printed on a label that is affixed to the
left rear C-Pillar.
VEHICLE
MODIFICATIONS/
ALTERATIONS
WARNING!
Any modifications or alterations to
this vehicle could seriously affect its
roadworthiness and safety and may
lead to a collision resulting in seri-
ous injury or death.
VIN Location
VIN Location
VIN Location
7
Page 16 of 332

TO UNLOCK THE DOORS.................18
TO LOCK THE DOORS ....................19
TO UNLATCH THE TRUNK ................19
TRANSMITTER BATTERY REPLACEMENT . . .19
GENERAL INFORMATION .................20
DOOR LOCKS ............................20
MANUAL DOOR LOCKS ...................20
POWER DOOR LOCKS ...................21
CHILD-PROTECTION DOOR LOCK SYSTEM — REAR DOORS ..........................22
KEYLESS ENTER-N-GO™ ..................23
WINDOWS ..............................25
POWER WINDOWS ......................25
WINDBUFFETING ......................27
TRUNK LOCK AND RELEASE ................27
TRUNK SAFETY WARNING ..................28
TRUNK EMERGENCY RELEASE ............28
OCCUPANT RESTRAINTS ...................28
LAP/SHOULDER BELTS ..................31
LAP/SHOULDER BELT UNTWISTING PROCEDURE ...........................33
SEAT BELTS IN PASSENGER SEATING POSITIONS ............................34
AUTOMATIC LOCKING RETRACTOR MODE (ALR) .................................34
ENERGY MANAGEMENT FEATURE ..........35
SEAT BELT PRETENSIONERS .............35
10
Page 19 of 332
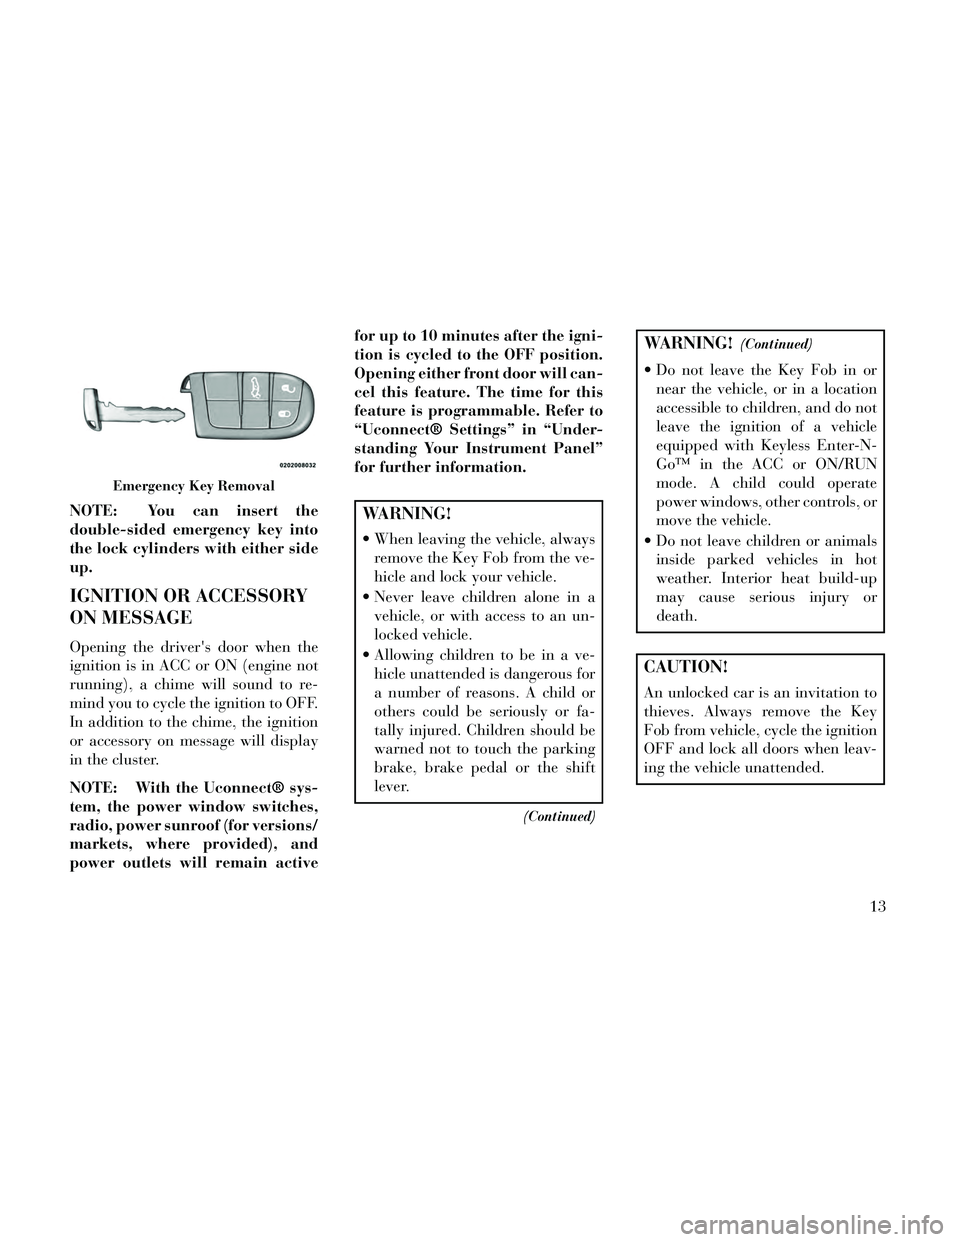
NOTE: You can insert the
double-sided emergency key into
the lock cylinders with either side
up.
IGNITION OR ACCESSORY
ON MESSAGE
Opening the driver's door when the
ignition is in ACC or ON (engine not
running), a chime will sound to re-
mind you to cycle the ignition to OFF.
In addition to the chime, the ignition
or accessory on message will display
in the cluster.
NOTE: With the Uconnect® sys-
tem, the power window switches,
radio, power sunroof (for versions/
markets, where provided), and
power outlets will remain activefor up to 10 minutes after the igni-
tion is cycled to the OFF position.
Opening either front door will can-
cel this feature. The time for this
feature is programmable. Refer to
“Uconnect® Settings” in “Under-
standing Your Instrument Panel”
for further information.
WARNING!
When leaving the vehicle, always
remove the Key Fob from the ve-
hicle and lock your vehicle.
Never leave children alone in a vehicle, or with access to an un-
locked vehicle.
Allowing children to be in a ve- hicle unattended is dangerous for
a number of reasons. A child or
others could be seriously or fa-
tally injured. Children should be
warned not to touch the parking
brake, brake pedal or the shift
lever.
(Continued)
WARNING!(Continued)
Do not leave the Key Fob in ornear the vehicle, or in a location
accessible to children, and do not
leave the ignition of a vehicle
equipped with Keyless Enter-N-
Go™ in the ACC or ON/RUN
mode. A child could operate
power windows, other controls, or
move the vehicle.
Do not leave children or animals inside parked vehicles in hot
weather. Interior heat build-up
may cause serious injury or
death.
CAUTION!
An unlocked car is an invitation to
thieves. Always remove the Key
Fob from vehicle, cycle the ignition
OFF and lock all doors when leav-
ing the vehicle unattended.
Emergency Key Removal
13
Page 27 of 332

If the door lock knob is down when
you shut the door, the door will lock.
Therefore, make sure the Key Fob is
not inside the vehicle before closing
the door.
WARNING!
For personal security and safetyin the event of an accident, lock
the vehicle doors before you drive
as well as when you park and
leave the vehicle.
When leaving the vehicle, always remove the key fob and lock your
vehicle.
(Continued)
WARNING!(Continued)
Never leave children alone in avehicle, or with access to an un-
locked vehicle.
Allowing children to be in a ve- hicle unattended is dangerous for
a number of reasons. A child or
others could be seriously or fa-
tally injured. Children should be
warned not to touch the parking
brake, brake pedal or the shift
lever.
Do not leave the key fob in or near the vehicle, or in a location acces-
sible to children, and do not leave
the ignition of a vehicle equipped
with Keyless Enter-N-Go in the
ACC or ON/RUN mode. A child
could operate power windows,
other controls, or move the ve-
hicle.
POWER DOOR LOCKS
A power door lock switch is on each
front door trim panel. Use this switch
to lock or unlock the doors. The doors can also be locked and un-
locked with the Keyless Enter-N-Go
(Passive Entry) system. For further
information, refer to “Keyless Enter-
N-Go” in “Things To Know Before
Starting Your Vehicle”.
If you press the power door lock
switch while the ignition is in the ACC
or ON/RUN position, and any front
door is open, the power locks will not
operate. This prevents you from acci-
dentally locking the Key Fob in the
vehicle. Cycling the ignition to the
OFF position or closing the door will
allow the locks to operate. If a door is
open, and the ignition is in the ACC or
ON/RUN position, a chime will sound
as a reminder to remove the Key Fob.
Door Lock KnobPower Door Lock Switch
21
Page 28 of 332

Automatic Door Locks
When enabled, the door locks will
lock automatically when the vehicle's
speed exceeds 24 km/h. The auto
door lock feature can be enabled or
disabled by your authorized dealer
per written request of the customer.
Please see your authorized dealer for
service.
Automatic Unlock Doors On Exit
The doors will unlock automatically
on vehicles with power door locks if:
1. The Automatic Unlock Doors On
Exit feature is enabled.
2. The transmission was in gear and
the vehicle speed returned to 0 km/h.
3. The transmission is in NEUTRAL
or PARK.
4. The driver door is opened.
5. The doors were not previously un-
locked.
6. The vehicle speed is 0 km/h.Automatic Unlock Doors On Exit
Programming
To change the current setting, refer to
“Uconnect® Settings” in “Under-
standing Your Instrument Panel” for
further information.
NOTE: Use the Automatic Unlock
Doors On Exit feature in accor-
dance with local laws.
CHILD-PROTECTION
DOOR LOCK SYSTEM —
REAR DOORS
To provide a safer environment for
small children riding in the rear seats,
the rear doors are equipped with
Child-Protection Door Lock system.
To Engage Or Disengage The
Child-Protection Door Lock
System
1. Open the rear door.
2. Insert the tip of the emergency key
into the lock and rotate to the LOCK
or UNLOCK position.
3. Repeat steps 1 and 2 for the oppo-
site rear door.
WARNING!
Avoid trapping anyone in a vehicle
in a collision. Remember that the
rear doors can only be opened from
the outside when the Child-
Protection locks are engaged
(locked).
NOTE: For emergency exit from
the rear seats when the Child-
Protection Door Lock System is
engaged, manually raise the door
lock knob to the unlocked posi-
tion, roll down the window, and
open the door using the outside
door handle.
Child-Protection Door Lock Function
22
Page 32 of 332

WARNING!
Never leave children unattended in
a vehicle. Do not leave the key fob
in or near the vehicle, and do not
leave the ignition of a vehicle
equipped with Keyless Enter-N-
Go™ in the ACC or ON/RUN
mode. Occupants, particularly un-
attended children, can become en-
trapped by the windows while op-
erating the power window switches.
Such entrapment may result in se-
rious injury or death.
AUTO-Down Feature
The driver door power window switch
and some model passenger door
power window switches have an
AUTO-down feature. Press the win-
dow switch to the second detent, re-
lease, and the window will go down
automatically.
To open the window part way, press
the window switch to the first detent
and release it when you want the win-
dow to stop. To stop the window from going all the
way down during the AUTO-down
operation, pull up on the switch
briefly.
AUTO-Up Feature With
Anti-Pinch Protection (for
versions/markets, where
provided)
Lift the window switch to the second
detent, release, and the window will
go up automatically.
To stop the window from going all the
way up during the AUTO-up opera-
tion, push down on the switch briefly.
To close the window part way, lift the
window switch to the first detent and
release it when you want the window
to stop.
NOTE:
If the window runs into any ob-
stacle during auto-closure, it
will reverse direction and then
go back down. Remove the ob-
stacle and use the window
switch again to close the win-
dow. Any impact due to rough road
conditions may trigger the auto-
reverse function unexpectedly
during auto-closure. If this hap-
pens, pull the switch lightly to
the first detent and hold to close
the window manually.
WARNING!
There is no anti-pinch protection
when the window is almost closed.
Be sure to clear all objects from the
window before closing.
Reset Auto-Up
Should the Auto Up feature stop
working, the window may need to be
reset. To reset Auto Up:
1. Make sure the door is fully closed.
2. Pull the window switch up to close
the window completely and continue
to hold the switch up for an additional
two seconds after the window is
closed.
26
Page 34 of 332
With the ignition in the ON/RUN po-
sition, the Trunk Open symbol will
display in the instrument cluster indi-
cating that the trunk is open. The
odometer display will reappear once
the trunk is closed.
With the ignition in the OFF position,
the Trunk Open symbol will display
until the trunk is closed.
Refer to “Keyless Enter-N-Go™” in
“Things To Know Before Starting
Your Vehicle” for more information
on trunk operation with the Passive
Entry feature.TRUNK SAFETY
WARNING
WARNING!
Do not allow children to have ac-
cess to the trunk, either by climbing
into the trunk from outside, or
through the inside of the vehicle.
Always close the trunk lid when
your vehicle is unattended. Once in
the trunk, young children may not
be able to escape, even if they en-
tered through the rear seat. If
trapped in the trunk, children can
die from suffocation or heat stroke.
TRUNK EMERGENCY
RELEASE
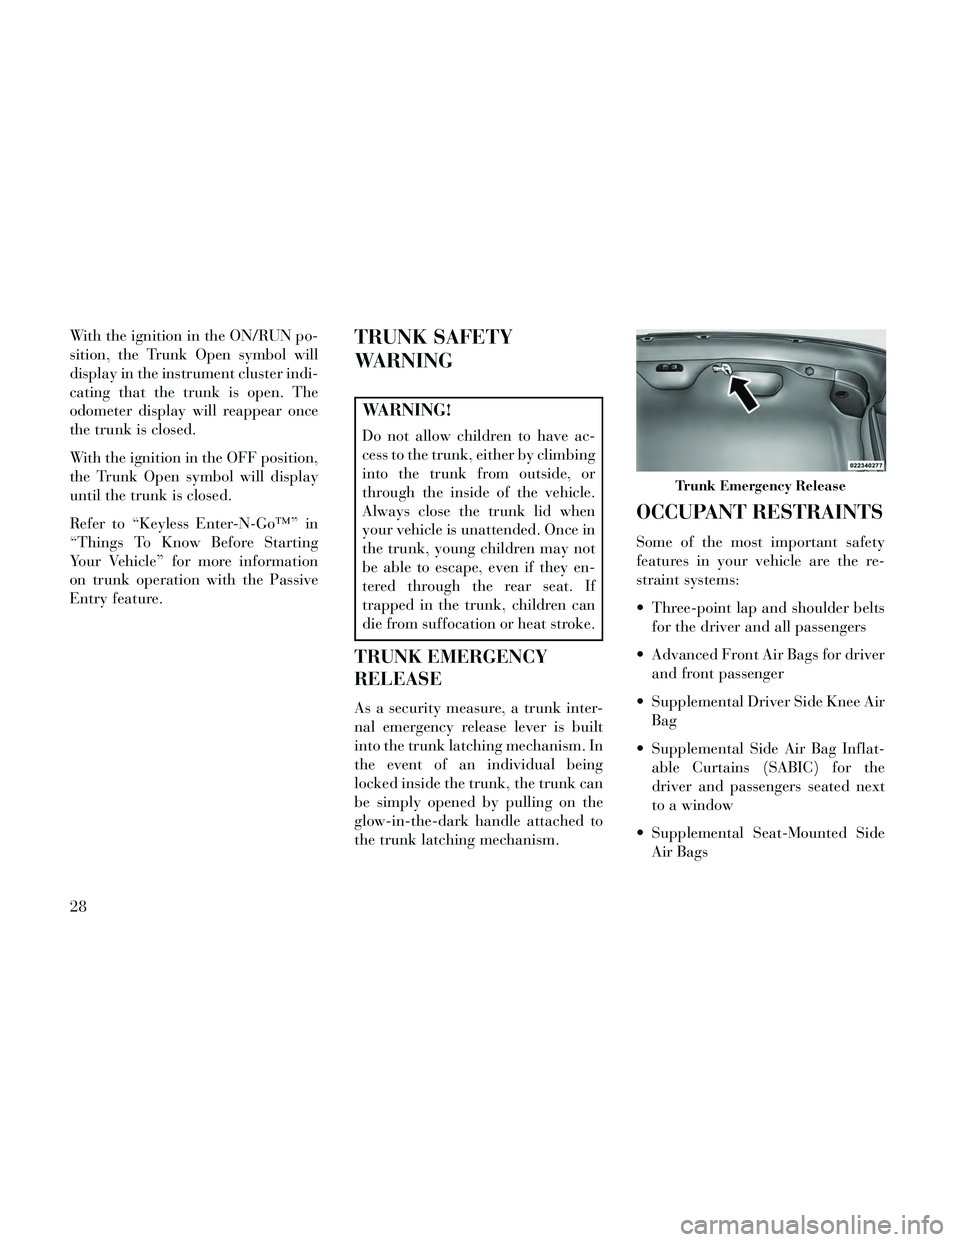
As a security measure, a trunk inter-
nal emergency release lever is built
into the trunk latching mechanism. In
the event of an individual being
locked inside the trunk, the trunk can
be simply opened by pulling on the
glow-in-the-dark handle attached to
the trunk latching mechanism.
OCCUPANT RESTRAINTS
Some of the most important safety
features in your vehicle are the re-
straint systems:
Three-point lap and shoulder beltsfor the driver and all passengers
Advanced Front Air Bags for driver and front passenger
Supplemental Driver Side Knee Air Bag
Supplemental Side Air Bag Inflat- able Curtains (SABIC) for the
driver and passengers seated next
to a window
Supplemental Seat-Mounted Side Air Bags
Trunk Emergency Release
28
Page 35 of 332
An energy-absorbing steering col-umn and steering wheel
Active Hood System
Knee bolsters/blockers for front seat occupants
Front seat belts incorporate preten- sioners that may enhance occupant
protection by managing occupant
energy during an impact event
All seat belt systems (except the driver’s and front passenger's) in-
clude Automatic Locking Retrac-
tors (ALRs), which lock the seat
belt webbing into position by ex-
tending the belt all the way out and
then adjusting the belt to the de-
sired length to restrain a child seat
or secure a large item in a seat
Please pay close attention to the infor-
mation in this section. It tells you how
to use your restraint system properly,
to keep you and your passengers as
safe as possible.
If you will be carrying children too
small for adult-sized seat belts, the
seat belts or the ISOFIX feature also can be used to hold infant and child
restraint systems. For more informa-
tion, refer to ISOFIX — Child Seat
Anchorage System.
NOTE: The Advanced Front Air
Bags have a multistage inflator de-
sign. This allows the air bag to
have different rates of inflation
based on several factors, including
the severity and type of collision.
Here are some simple steps you can
take to minimize the risk of harm
from a deploying air bag:
1.
Children 12 years old and un-
der should always ride buckled up
in a rear seat.
WARNING!
Never place a rear facing infant seat in front of an air bag. A de-
ploying Passenger Advanced
Front Air Bag can cause death or
serious injury to a child 12 years
or younger, including a child in a
rearward facing infant seat.
(Continued)
WARNING!(Continued)
Only use a rearward-facing childrestraint in a vehicle with a rear
seat.
Children that are not big enough to
wear the vehicle seat belt properly
(see section on Child Restraints)
should be secured in the rear seat in
child restraints or belt-positioning
booster seats. Older children who do
not use child restraints or belt-
positioning booster seats should ride
properly buckled up in the rear seat.
Never allow children to slide the
shoulder belt behind them or under
their arm.
You should read the instructions pro-
vided with your child restraint to
make sure that you are using it prop-
erly.
2. All occupants should always
wear their lap and shoulder belts
properly.
3. The driver and front passenger
seats should be moved back as far
as practical to allow the Advanced
Front Air Bags room to inflate.
29