288
2) Loosen the screws C(fig. 32)
and remove the ceiling light.
3) To remove bulb holders turn
them anticlockwise (fig. 33).
D- Central ceiling light bulb.
E- Courtesy light bulbs.4) Remove the clipped in glass
bulbs from the bulb holder and
replace them.
5) Insert the bulb holders and turn
them clockwise.
6) Refit the ceiling light and secure
it with the screws.
7) Refit the clipped in caps.
IMPORTANTWhen refitting the
ceiling light check that the electrical
wires are positioned correctly.REAR CEILING LIGHT
To replace the bulbs:
1) Remove the ceiling light by lev-
ering with a screwdriver on the front
edge (fig. 34).
2) To remove bulb holders turn
them anticlockwise (fig. 35).
fig. 32
L0A0130b
fig. 33
L0A0131b
fig. 34
L0A0288b
294
FUSES IN THE DASHBOARD
The fuses protecting the main
devices are arranged in a fusebox
located under the dashboard, on the
left of the steering column, behind
the glove compartment (fig. 72).
To reach the fuses open the glove
compartment A (fig. 71) and then
remove it by loosing the two screws B
with a screwdriver. After replacing
the fuses, refit the glove compart-
ment and secure it by the two screws.
The fusebox also contains tongs for
removing the fuses.Spare fusesA(fig. 72) are housed in
horizontal position in the upper part of
the fusebox. The spare fuse present
various amperages.
The devices protected by the fuses
(fig. 73) are listed in the tables on
the following pages.IMPORTANT Remember to
replace the spare fuse after replacing
a fuse.
FUSES IN THE ENGINE COM-
PARTMENT
The fusebox is located on the left
side of the engine compartment.
To reach the fuses remove the
cover A(fig. 74) after releasing the
fastening clips B.
fig. 71
L0A0144b
fig. 72
L0A0143b
fig. 73
L0A0265b
fig. 74
L0A0145b
323
Oil consumption is ex-
tremely low. If the oil level
needs topping up again af-
ter a short period of time, have the
system checked for leakage at a
Lancia Dealership.BRAKE AND HYDRAULIC
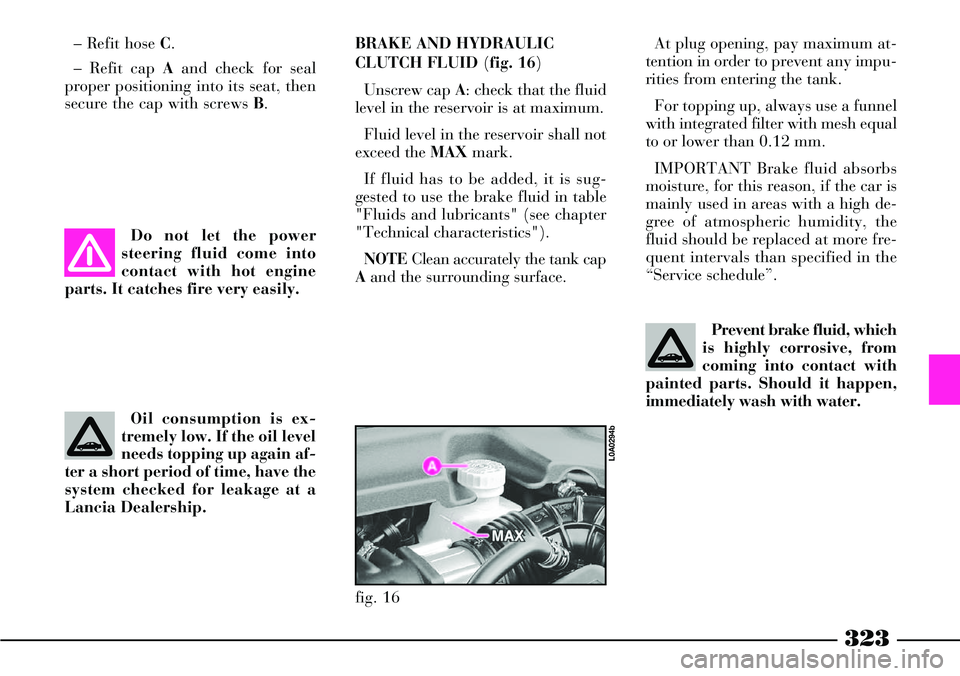
CLUTCH FLUID (fig. 16)
Unscrew cap A: check that the fluid
level in the reservoir is at maximum.
Fluid level in the reservoir shall not
exceed the MAXmark.
If fluid has to be added, it is sug-
gested to use the brake fluid in table
"Fluids and lubricants" (see chapter
"Technical characteristics").
NOTEClean accurately the tank cap
Aand the surrounding surface.
Prevent brake fluid, which
is highly corrosive, from
coming into contact with
painted parts. Should it happen,
immediately wash with water.
Do not let the power
steering fluid come into
contact with hot engine
parts. It catches fire very easily.
fig. 16
L0A0294b
– Refit hose C.
– Refit cap Aand check for seal
proper positioning into its seat, then
secure the cap with screws B.At plug opening, pay maximum at-
tention in order to prevent any impu-
rities from entering the tank.
For topping up, always use a funnel
with integrated filter with mesh equal
to or lower than 0.12 mm.
IMPORTANT Brake fluid absorbs
moisture, for this reason, if the car is
mainly used in areas with a high de-
gree of atmospheric humidity, the
fluid should be replaced at more fre-
quent intervals than specified in the
“Service schedule”.


