start stop button Lancia Voyager 2014 Owner handbook (in English)
[x] Cancel search | Manufacturer: LANCIA, Model Year: 2014, Model line: Voyager, Model: Lancia Voyager 2014Pages: 364, PDF Size: 3.49 MB
Page 20 of 364
REMOVING KEY FOB
FROM IGNITION
Place the shift lever in PARK. Turn
the Key Fob to the OFF position and
then remove the Key Fob.
NOTE: Power window switches
will also remain active for up to 10
minutes after the ignition switch
has been turned to OFF, depending
upon the accessory delay setting.
Opening either front door will can-
cel this feature.
WARNING!
Before exiting a vehicle, alwaysapply the parking brake, shift the
transmission into PARK, and
push ignition button to place ig-
nition in OFF position. When
leaving the vehicle, always lock
your vehicle.
Never leave children alone in a vehicle, or with access to an un-
locked vehicle.
(Continued)
WARNING!(Continued)
Allowing children to be in a ve-hicle unattended is dangerous for
a number of reasons. A child or
others could be seriously or fa-
tally injured. Children should be
warned not to touch the parking
brake, brake pedal or the shift
lever.
Do not leave the Key Fob in or near the vehicle, or in a location
accessible to children, and do not
leave the ignition of a vehicle
equipped with Keyless Enter-N-
Go™ in the ACC or ON/RUN
mode. A child could operate
power windows, other controls, or
move the vehicle.
Do not leave children or animals inside parked vehicles in hot
weather. Interior heat build-up
may cause serious injury or
death.
CAUTION!
An unlocked car is an invitation to
thieves. Always remove the Key
Fob from the ignition and lock all
doors when leaving the vehicle un-
attended.
KEY-IN-IGNITION
REMINDER
Opening the driver's door when the
Key Fob is in the ignition and the
ignition switch position is OFF or
ACC, a chime will sound to remind
you to remove the key.
NOTE: The Key-In-Ignition re-
minder only sounds when the Key
Fob is placed in the OFF or ACC
ignition position.
If your vehicle is equipped with Key-
less Enter-N-Go™, opening the driv-
er’s door when the vehicle’s ignition
switch is placed in ACC or ON/RUN
(engine stopped) will cause the re-
minder chime to sound. Refer to
“Starting Procedures” in “Starting
And Operating” for further informa-
tion.
14
Page 23 of 364
REARMING OF THE
SYSTEM
If something triggers the alarm, and
no action is taken to disarm it, the
Vehicle Security Alarm will turn off
the horn after 29 seconds, and turn off
all of the visual signals after an addi-
tional 31 seconds, then the Vehicle
Security Alarm will rearm itself.
TO ARM THE SYSTEM
Follow these steps to arm the Vehicle
Security Alarm:
1. Remove the key from the ignition
system (refer to "Starting Proce-
dures" in "Starting And Operating"
for further information).
For vehicles equipped with Keyless
Enter-N-Go™, make sure the vehicle
ignition system is "OFF".
For vehicles not equipped with Key-
less Enter-N-Go™, make sure the ve-
hicle ignition system is "OFF" and the
key is physically removed from the
ignition.2. Perform one of the following
methods to lock the vehicle:
Press LOCK on the interior power
door lock switch with the driver
and/or passenger door open.
Press the LOCK button on the exte-
rior Passive Entry Door Handle with a
valid Key Fob available in the same
exterior zone (refer to "Keyless Enter-
N-Go™" in "Things To Know Before
Starting Your Vehicle" for further in-
formation).
Press the LOCK button on the Re-
mote Keyless Entry (RKE) transmit-
ter.
3. If any doors are open, close them.
TO DISARM THE SYSTEM
The Vehicle Security Alarm can be
disarmed using any of the following
methods:
Press the UNLOCK button on the
Remote Keyless Entry (RKE)
transmitter. Grasp the Passive Entry Unlock
Door Handle (for versions/
markets, where provided), refer to
"Keyless Enter-N-Go™" in
"Things To Know Before Starting
Your Vehicle" for further
information).
Cycle the vehicle ignition system out of the OFF position.
For vehicles equipped with Key- less Enter-N-Go™, press the
Keyless Enter-N-Go™ Start/
Stop button (requires at least one
valid Key Fob in the vehicle).
For vehicles not equipped with Keyless Enter-N-Go™, insert a
valid key into the ignition switch
and turn the key to the ON posi-
tion.
NOTE:
The driver's door key cylinder and the liftgate button on the
RKE transmitter cannot arm or
disarm the Vehicle Security
Alarm.
17
Page 109 of 364
Uconnect® Phone will prompt you to
say the name or number of the person
you wish to send the message to.
List of Preset Messages:
1. Yes
2. No
3. Where are you?
4. I need more direction.
5. LOL
6. Why
7. I love you
8. Call me
9. Call me later
10. Thanks
11. See You in 15 minutes
12. Iamonmyway
13. I’ll be late14. Are you there yet?
15. Where are we meeting?
16. Can this wait?
17. Bye for now
18. When can we meet
19. Send number to call
20. Start without me
Turn Voice Text Reply Incoming
Announcement ON/OFF
Turning the Voice Text Reply Incom-
ing Announcement OFF will stop the
system from announcing the new in-
coming messages.
Press the
button.
After the “Ready” prompt and the following beep, say “Setup, Incom-
ing Message Announcement”, you
will then be given a choice to
change it.
Bluetooth®
COMMUNICATION LINK
Mobile phones have been found to
lose connection to the Uconnect®
Phone. When this happens, the con-
nection can generally be reestablished
by switching the phone off/on. Your
mobile phone is recommended to re-
main in Bluetooth® ON mode.
POWER-UP
After switching the ignition key from
OFF to either the ON or ACC position,
or after a language change, you must
wait at least fifteen seconds prior to
using the system.
103
Page 123 of 364
WARNING!(Continued)
Active Head Restraints may bedeployed if they are struck by an
object such as a hand, foot or
loose cargo. To avoid accidental
deployment of the Active Head
Restraint ensure that all cargo is
secured, as loose cargo could con-
tact the Active Head Restraint
during sudden stops. Failure to
follow this warning could cause
personal injury if the Active Head
Restraint is deployed.
Head Restraints — Second Row
Quad Seats
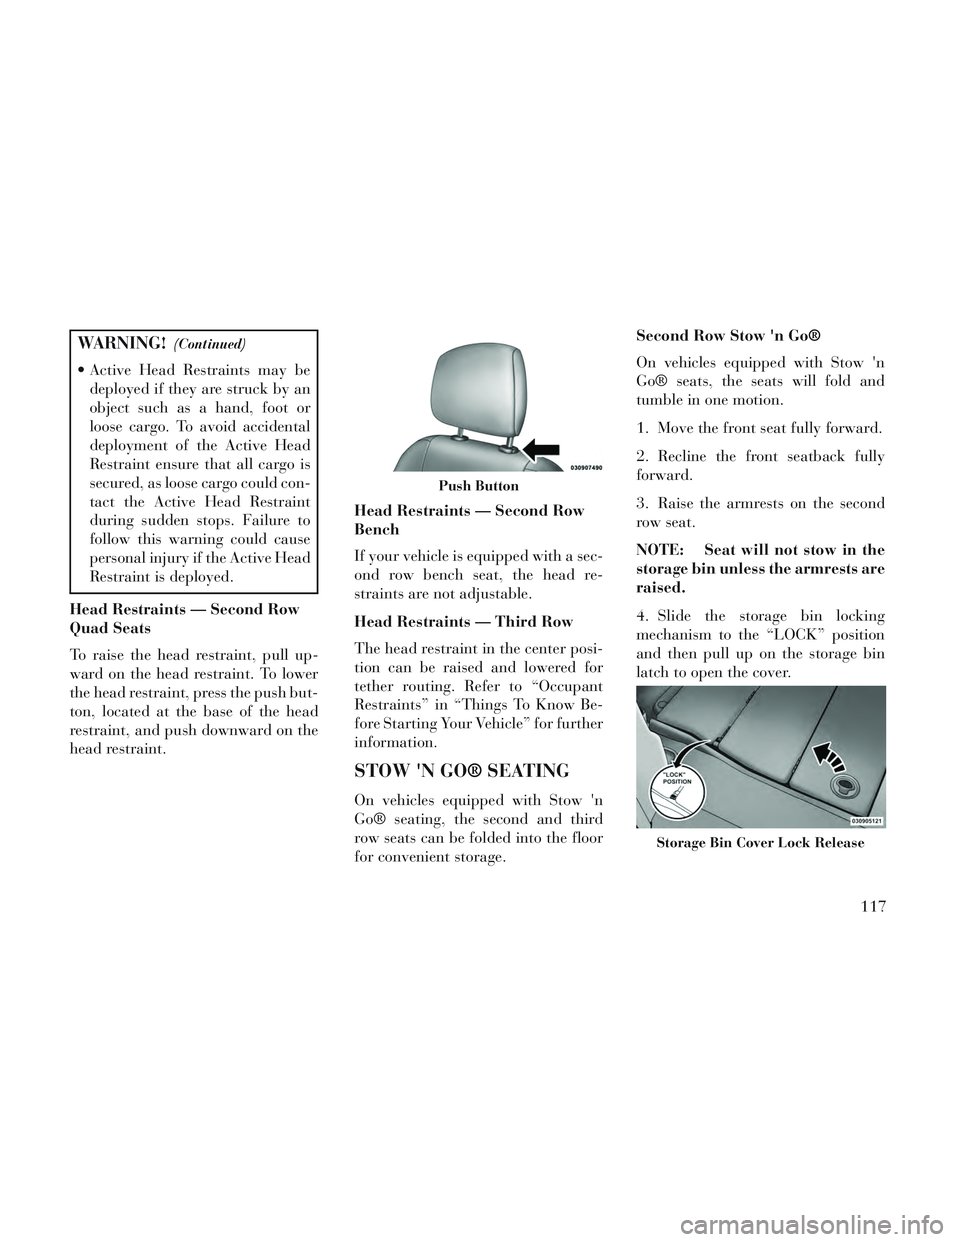
To raise the head restraint, pull up-
ward on the head restraint. To lower
the head restraint, press the push but-
ton, located at the base of the head
restraint, and push downward on the
head restraint. Head Restraints — Second Row
Bench
If your vehicle is equipped with a sec-
ond row bench seat, the head re-
straints are not adjustable.
Head Restraints — Third Row
The head restraint in the center posi-
tion can be raised and lowered for
tether routing. Refer to “Occupant
Restraints” in “Things To Know Be-
fore Starting Your Vehicle” for further
information.
STOW 'N GO® SEATING
On vehicles equipped with Stow 'n
Go® seating, the second and third
row seats can be folded into the floor
for convenient storage.Second Row Stow 'n Go®
On vehicles equipped with Stow 'n
Go® seats, the seats will fold and
tumble in one motion.
1. Move the front seat fully forward.
2. Recline the front seatback fully
forward.
3. Raise the armrests on the second
row seat.
NOTE: Seat will not stow in the
storage bin unless the armrests are
raised.
4. Slide the storage bin locking
mechanism to the “LOCK” position
and then pull up on the storage bin
latch to open the cover.
Push Button
Storage Bin Cover Lock Release
117
Page 157 of 364
the ash receiver, align the receiver so
the thumb grip on the lid is facing
rearward. Press the ash receiver into
either of the cup wells to secure. Pull
upward on the ash receiver to remove
for cleaning and/or storage.
The left rear trim panel cupholder is
designed to accommodate a second
ash receiver, if desired.
POWER INVERTER (for
versions/markets, where
provided)
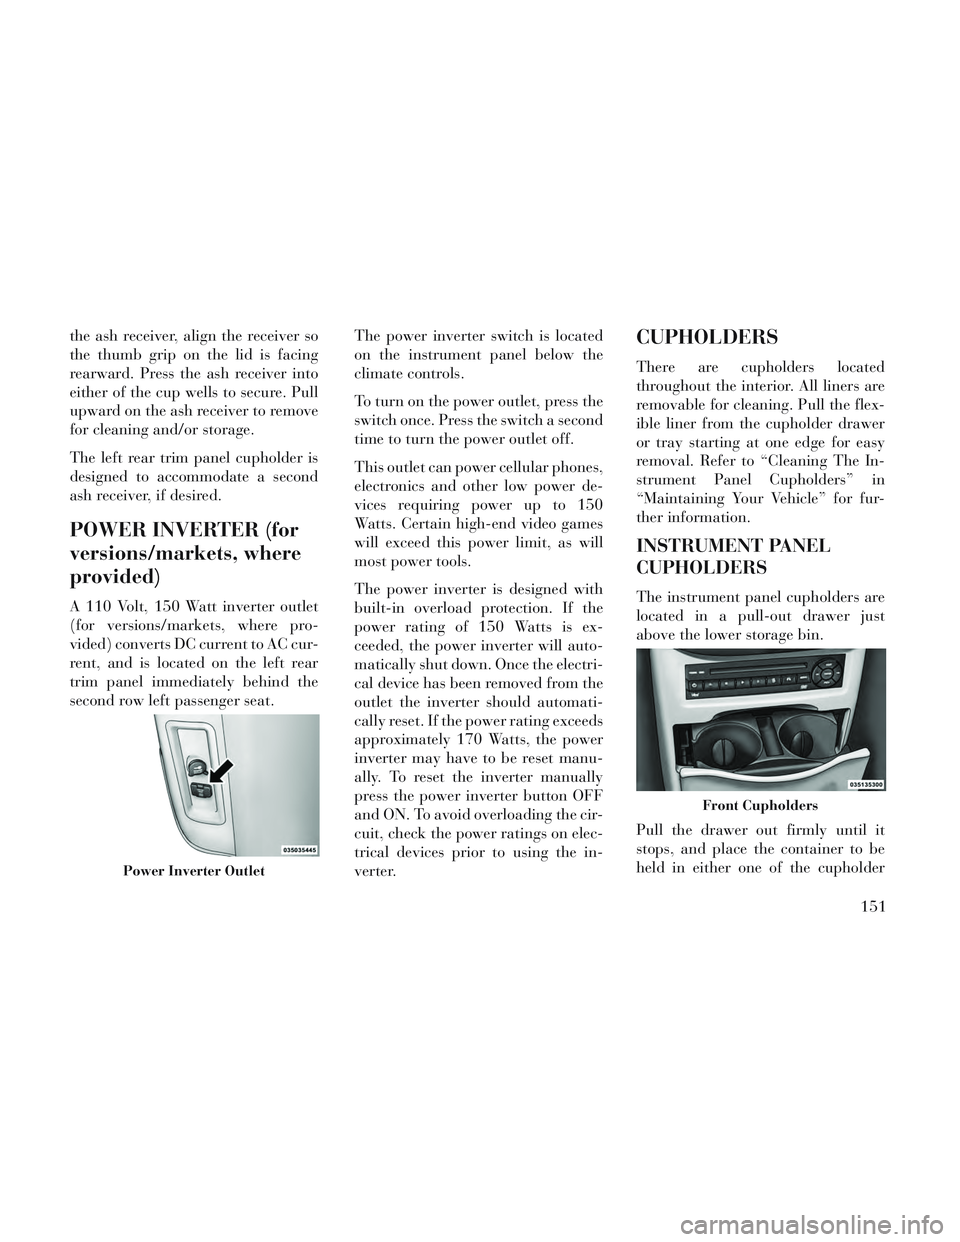
A 110 Volt, 150 Watt inverter outlet
(for versions/markets, where pro-
vided) converts DC current to AC cur-
rent, and is located on the left rear
trim panel immediately behind the
second row left passenger seat.The power inverter switch is located
on the instrument panel below the
climate controls.
To turn on the power outlet, press the
switch once. Press the switch a second
time to turn the power outlet off.
This outlet can power cellular phones,
electronics and other low power de-
vices requiring power up to 150
Watts. Certain high-end video games
will exceed this power limit, as will
most power tools.
The power inverter is designed with
built-in overload protection. If the
power rating of 150 Watts is ex-
ceeded, the power inverter will auto-
matically shut down. Once the electri-
cal device has been removed from the
outlet the inverter should automati-
cally reset. If the power rating exceeds
approximately 170 Watts, the power
inverter may have to be reset manu-
ally. To reset the inverter manually
press the power inverter button OFF
and ON. To avoid overloading the cir-
cuit, check the power ratings on elec-
trical devices prior to using the in-
verter.
CUPHOLDERS
There are cupholders located
throughout the interior. All liners are
removable for cleaning. Pull the flex-
ible liner from the cupholder drawer
or tray starting at one edge for easy
removal. Refer to “Cleaning The In-
strument Panel Cupholders” in
“Maintaining Your Vehicle” for fur-
ther information.
INSTRUMENT PANEL
CUPHOLDERS
The instrument panel cupholders are
located in a pull-out drawer just
above the lower storage bin.
Pull the drawer out firmly until it
stops, and place the container to be
held in either one of the cupholder
Power Inverter Outlet
Front Cupholders
151
Page 192 of 364
TIRE BAR
Press and release the UP or DOWN
button until ”Tire BAR” displays
highlighted in the EVIC. Press the
SELECT button to view a graphic of
the vehicle with a tire pressure value
at each corner of the graphic.
VEHICLE INFO
(CUSTOMER
INFORMATION FEATURES)
Press and release the UP or DOWN
button until “Vehicle Info” displays in
the EVIC and press the SELECT but-
ton. Press the UP and DOWN button
to scroll through the selections below:
Coolant Temp
Displays the actual coolant tempera-
ture.
Oil Pressure
Displays the actual oil pressure.
Engine Hours
Displays the number of hours of en-
gine operation.
MESSAGES
Press and release the UP or DOWN
button until “Messages: XX” displays
highlighted in the EVIC. If there is
more than one message, pressing the
SELECT button will display a stored
warning message. Press and release
the UP and DOWN buttons if there is
more than one message to step
through the remaining stored mes-
sages. If there are no message, press-
ing the SELECT button will do noth-
ing.
UNITS
Press and release the UP or DOWN
button until “Units” displays high-
lighted in the EVIC and press the
SELECT button. The EVIC, odom-
eter, and navigation system (for
versions/markets, where provided)
can be changed between English and
Metric units of measure. To make
your selection, scroll up or down until
the preferred setting is highlighted,
then press and release the SELECT
button until a check-mark appears
next to the setting, showing that the
setting has been selected.
KEYLESS ENTER-N-GO™
DISPLAY (for
versions/markets, where
provided)
When the ENGINE START/STOP
button is pressed to change ignition
switch position, current ignition sta-
tus will be displayed in the lower right
corner of the EVIC display to the right
of the odometer value.
Refer to “Keyless Enter-N-Go™” in
“Starting And Operating” for more
information.
COMPASS /
TEMPERATURE DISPLAY
(for versions/markets,
where provided)
The compass readings indicate the di-
rection the vehicle is facing. The
EVIC will display one of eight com-
pass readings and the outside tem-
perature.
NOTE: The system will display
the last known outside tempera-
ture when starting the vehicle and
186
Page 201 of 364
mode. In Play mode, the following
buttons on the radio faceplate may be
used to control the iPod® or external
USB device and display data:
Use the TUNE control knob to se-lect the next or previous track.
Turning it clockwise (forward) by one click, while playing a
track, skips to the next track or
press the VR button and say
"Next Track".
Turning it counterclockwise (backward) by one click, will
jump to the previous track in the
list or press the VR button and
say "Previous Track"
Jump backward in the current track by pressing and holding the
<< RW button. Holding the << RW
button long enough will jump to the
beginning of the current track.
Jump forward in the current track by pressing and holding the FF>>
button. A single press backward <<
RWor
forward FF>> will jump backward
or forward respectively, for five sec-
onds.
Use the << SEEKandSEEK>>
buttons to jump to the previous or
next track. Pressing the SEEK>>
button during play mode will jump
to the next track in the list, or press
the VR button and say "Next or
Previous Track".
While a track is playing, press the INFO button to see the associated
metadata (artist, track title, album,
etc.) for that track. Pressing the
INFO button again jumps to the
next screen of data for that track.
Once all screens have been viewed,
the last INFObutton press will go
back to the play mode screen on the
radio.
Pressing the REPEATbutton will
change the audio device mode to
repeat the current playing track or
press the VR button and say "Re-
peat ON" or "Repeat Off". Press the
SCANbutton to use
iPod®/USB/MP3 device scan
mode, which will play the first 10
seconds of each track in the current
list and then forward to the next
song. To stop SCAN mode and start
playing the desired track, when it is
playing the track, press the SCAN
button again. During Scan mode,
pressing the << SEEKand
SEEK>> buttons will select the
previous and next tracks.
RND button (available on sales
code RES radio only): Pressing this
button toggles between Shuffle ON
and Shuffle OFF modes for the
iPod® or external USB device, or
press the VR button and say
"Shuffle ON" or "Shuffle Off". If
the RND icon is showing on the
radio display, then the shuffle mode
is ON.
LIST OR BROWSE MODE
During Play mode, pressing any of the
buttons described below, will bring up
List mode. List mode enables scroll-
ing through the list of menus and
tracks on the audio device.
195
Page 205 of 364
2. Insert the DVD with the label fac-
ing up. The radio automatically se-
lects the appropriate mode after the
disc is recognized and displays the
menu screen or starts playing the first
track.
3. To watch a DVD on Screen 1 for
second row passengers, ensure the Re-
mote Control and Headphone switch
is on Channel 1.
4. To watch a DVD on Screen 2 for
third row passengers, ensure the Re-
mote Control and Headphone switch
is on Channel 2.
Using The Remote Control
1. Press the SOURCE button on the
Remote Control.
2. While looking at Screen 1 or 2,
highlight DISC by either pressing Up/
Down/Left/Right buttons or by re-
peatedly pressing the SOURCE but-
ton, then press ENTER/OK.NOTE:
Channel/Screen 1 select mode
information is shown on the left
side of the screen.
Channel/Screen 2 select mode information is shown on the
right side of the screen.
The VES™ will retain the last setting when turned off.
Using The Touch-Screen Radio
Controls
1. Press the MENU hard-key on the
radio faceplate.
2. Touch the Rear VES soft-key to
display the Rear VES Controls. If a
channel list is displayed, press the
HIDE LIST soft-key to display the
Rear VES Controls screen.
3. Touch the 1 or 2 soft-key and then
the DISC soft-key in the MEDIA col-
umn. To exit touch the back arrow at
the top left of the screen. NOTE:
To view a DVD on the radio
press the RADIO/MEDIA hard-
key, on the radio faceplate, then
touch the DISC tab soft-key and
then the VIEW VIDEO soft-key.
Viewing a DVD on the Touch- Screen radio screen is not avail-
able in all states/provinces. If
available, the vehicle must be
stopped and the shift lever must
be in the PARK position for ve-
hicles with an automatic trans-
mission. In vehicles with a
manual transmission the park-
ing brake must be engaged.
Touching the screen on a Touch- Screen radio while a DVD is
playing brings up basic remote
control functions for DVD play
such as scene selection, Play,
Pause, FF, RW, and Stop. Press-
ing the X in the upper corner
will turn off the remote control
screen functions.
199
Page 206 of 364
PLAY A DVD USING THE
VES™ PLAYER (for
versions/markets, where
provided)
1. Insert the DVD with the label fac-
ing up. The VES™ player automati-
cally selects the appropriate mode af-
ter the disc is recognized and starts
playing the DVD.
NOTE: The VES™ player has ba-
sic DVD control function such as
Menu, Play, Pause, FF, RW and
Stop.
2. To watch a DVD on Screen 1 for
second row passengers, ensure the Re-
mote Control and Headphone switch
is on Channel 1.
3. To watch a DVD on Screen 2 for
third row passengers, ensure the Re-
mote Control and Headphone switch
is on Channel 2.
Using The Remote Control
1. Press the SOURCE button on the
Remote Control.2. While looking at Screen 1 or 2,
highlight VES DISC by either press-
ing Up/Down/Left/Right buttons or
by repeatedly pressing the SOURCE
button, then press ENTER/OK on the
Remote Control.
NOTE:
Channel/Screen 1 select mode
information is shown on the left
side of the screen.
Channel/Screen 2 select mode information is shown on the
right side of the screen.
The VES™ will retain the last setting when turned off.
Using The Touch-Screen Radio
Controls
1. Press the MENU hard-key on the
radio faceplate.
2. Touch the Rear VES soft-key to
display the Rear VES Controls. If a
channel list is displayed, touch the
HIDE LIST soft-key to display the
Rear VES Controls screen. 3. Touch the 1 or 2 soft-key and then
the DISC soft-key in the VES column.
To exit touch the back arrow soft-key
at the top left of the screen.
NOTE:
To view a DVD on the radio
press the RADIO/MEDIA hard-
key, on the radio faceplate, then
touch the DISC tab soft-key and
then the VIEW VIDEO soft-key.
Viewing a DVD on the Touch- Screen radio screen is not avail-
able in all states/provinces. If
available, the vehicle must be
stopped and the shift lever must
be in the PARK position for ve-
hicles with an automatic trans-
mission. In vehicles with a
manual transmission the park-
ing brake must be engaged.
200
Page 207 of 364
PLAY A Blu-ray DISC
USING THE BLU-RAY
PLAYER (for versions/
markets, where provided)
1. Insert the Blu-ray disc with the
label facing up. The Blu-ray player
automatically selects the appropriate
mode after the disc is recognized and
starts playing the Blu-ray disc.
NOTE: The Blu-ray player has
basic control functions such as
Menu, Play, Pause, FF, RW and
Stop.
2. To watch a Blu-ray disc on Screen
1 for second row passengers, ensure
the Remote Control and Headphone
switch is on Channel 1.
3. To watch a Blu-ray disc on Screen
2 for third row passengers, ensure the
Remote Control and Headphone
switch is on Channel 2.
Using The Remote Control
1. Press the SOURCE button on the
Blu-ray player Remote Control.2. While looking at Screen 1 or 2,
highlight Blu-ray by either pressing
Up/Down/Left/Right buttons or by
repeatedly pressing the SOURCE but-
ton, then press OK on the Remote
Control.
NOTE:
Channel/Screen 1 select mode
information is shown on the left
side of the screen.
Channel/Screen 2 select mode information is shown on the
right side of the screen.
The VES™ will retain the last setting when turned off.
Using The Touch-Screen Radio
Controls
1. Press the MENU hard-key on the
radio faceplate.
2. Touch the Rear VES™ soft-key to
display the Rear VES™ Controls. If a
channel list is displayed, touch the
HIDE LIST soft-key to display the
Rear VES™ Controls screen. 3. Touch the 1 or 2 soft-key and then
the VES™ Disc soft-key in the VES™
column. To exit touch the back arrow
soft-key at the top left of the screen.
NOTE:
To view a Blu-ray Disc on the
radio press the RADIO/MEDIA
hard-key, on the radio faceplate,
then touch the VES™ Disc tab
soft-key and then the VIEW
VIDEO soft-key.
Viewing a Blu-ray Disc on the Touch-Screen radio screen is
not available in all states/
provinces. If available, the ve-
hicle must be stopped and the
shift lever must be in the PARK
position for vehicles with an au-
tomatic transmission. In ve-
hicles with a manual transmis-
sion the parking brake must be
engaged.
201