headlights Lancia Ypsilon 2011 Owner handbook (in English)
[x] Cancel search | Manufacturer: LANCIA, Model Year: 2011, Model line: Ypsilon, Model: Lancia Ypsilon 2011Pages: 299, PDF Size: 13.35 MB
Page 139 of 299

Electrical devices
Only use electrical devices for the time needed.
The heated rear window, additional headlights,
windscreen wipers and heater fan need a
considerable amount of energy, therefore
increasing fuel consumption (by up to 25% in the
urban cycle).
Climate control system
The use of the climate control system leads to
higher fuel consumption. If the temperature
outside permits, try to use ventilation only.
Devices for aerodynamic control
The use of non-certified devices for aerodynamic
control may adversely affect air drag and fuel
consumption.
DRIVING STYLE
Starting
Do not warm the engine with the car at a
standstill or at idle or high speed: under these
conditions the engine warms up much more
slowly, increasing consumption and emissions. It is
therefore advisable to move off immediately,
slowly, avoiding high speeds: in this way
the engine will warm up more quickly.Unnecessary actions
Avoid revving up when at traffic lights or before
stopping the engine. This and also double
declutching is absolutely pointless on modern cars
and also increases consumption and pollution.
Gear selection
Use a higher gear as soon as traffic and road
conditions allow. Using a low gear for faster
acceleration will increase consumption.
In the same way improper use of a high gear
increases consumption, emissions and engine wear.
Maximum speed
Fuel consumption considerably increases as speed
increases. Maintain a constant speed, avoiding
unnecessary braking and acceleration, which cost
in terms of both fuel and emissions.
Acceleration
Sudden acceleration has a very negative effect on
fuel consumption and emissions: accelerate
gradually.
137GETTING TO KNOW
YOUR CAR
SAFETYSTARTING AND
DRIVINGWARNING LIGHTS
AND
MESSAGES
IN AN
EMERGENCY
SERVICING AND
MAINTENANCE
TECHNICAL
SPECIFICATIONS
INDEX
Page 171 of 299

IMPORTANT When the weather is cold or damp
or after heavy rain or washing, the surface of
headlights or rear lights, may steam up and/or
form drops of condensation on the inside. This is a
natural phenomenon due to the difference in
temperature and humidity between the inside and
the outside of the glass which does not indicate a
fault and does not compromise the normal
operation of lighting devices. The mist disappears
quickly when the lights are turned on, starting
from the centre of the diffuser, extending
progressively towards the edges.
169GETTING TO KNOW
YOUR CAR
SAFETY
STARTING AND
DRIVING
WARNING LIGHTS
AND MESSAGESIN AN EMERGENCYSERVICING AND
MAINTENANCE
TECHNICAL
SPECIFICA
TIONS
INDEX
Page 173 of 299

BulbsUse Type Power Re. Figure
Dipped headlights\Main Beam Headlights H4 55W D
Dipped headlamps with gas discharge
bulbs (Xenon) (for versions/markets where
provided)D1S 35W F
Front side lights W5W 5W A
Daytime Running Lights (DRL) W21W 21W B
Rear side lights LEDs - -
Front direction indicators PY24W 24W B
Side direction indicators W5W 5W A
Rear direction indicators PY21W 21W B
Stop W16W 16W B
3rd brake light LEDs - -
Fog light H1 55W E
Reverse P21W 21W B
Rear fog lamp P21W 21W B
Number plate W5W 5W C
Front roof light C5W 5W C
Luggage compartment roof light W5W 5W A
Glove compartment light C5W 5W C
171GETTING TO KNOW
YOUR CAR
SAFETY
STARTING AND
DRIVING
WARNING LIGHTS
AND MESSAGESIN AN EMERGENCYSERVICING AND
MAINTENANCE
TECHNICAL
SPECIFICA
TIONS
INDEX
Page 174 of 299

REPLACING EXTERIOR BULBSFor the type of bulb and power rating, see
“Changing a bulb".
FRONT LIGHT UNITS
These contain the bulbs for the side lights/day
lights (DRL), dipped beams, main beams and
direction indicators. The bulbs are arranged
as follows fig. 125:ASide lights/day lights and main beam headlightsBDipped beam headlightsCDirection indicatorsSIDE LIGHTS/DAY LIGHTS (DRL)
To change the bulb, proceed as follows:
❒remove cover A fig. 125;
❒remove snap-fitted bulb holder B fig. 126,
remove the bulb C and replace it;
❒refit the new bulb then reinsert the bulb holder
B in its housing;
❒then refit the cover A fig. 125.fig. 125
L0F0033
fig. 126
L0F0069
172
GETTING TO KNOW
YOUR CAR
SAFETY
STARTING AND
DRIVING
WARNING LIGHTS
AND MESSAGESIN AN EMERGENCYSERVICING AND
MAINTENANCE
TECHNICAL
SPECIFICA
TIONS
INDEX
Page 175 of 299

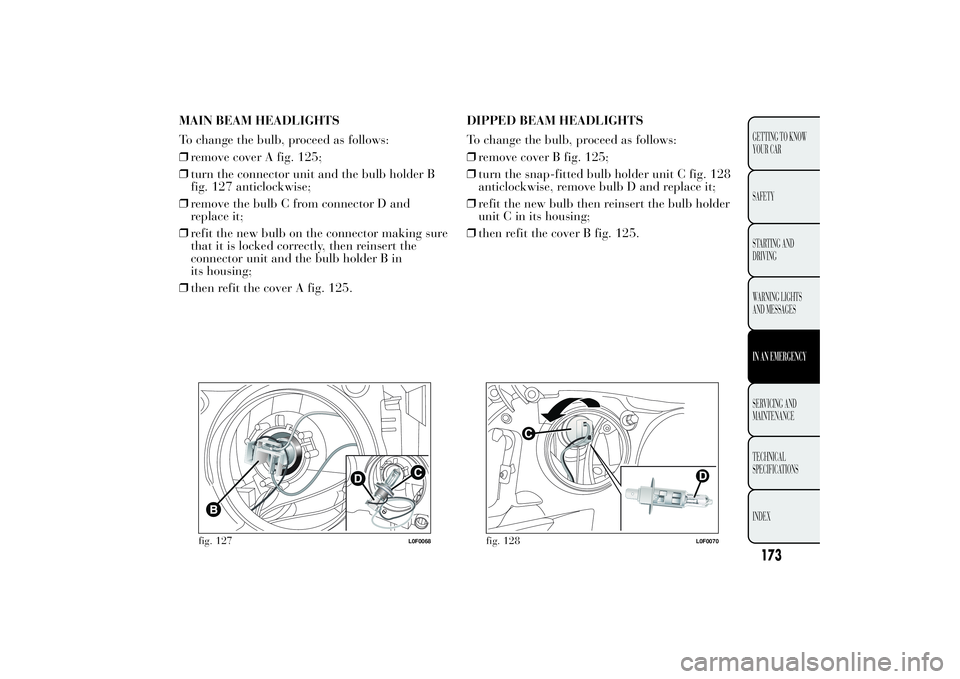
MAIN BEAM HEADLIGHTS
To change the bulb, proceed as follows:
❒remove cover A fig. 125;
❒turn the connector unit and the bulb holder B
fig. 127 anticlockwise;
❒remove the bulb C from connector D and
replace it;
❒refit the new bulb on the connector making sure
that it is locked correctly, then reinsert the
connector unit and the bulb holder B in
its housing;
❒then refit the cover A fig. 125.DIPPED BEAM HEADLIGHTS
To change the bulb, proceed as follows:
❒remove cover B fig. 125;
❒turn the snap-fitted bulb holder unit C fig. 128
anticlockwise, remove bulb D and replace it;
❒refit the new bulb then reinsert the bulb holder
unit C in its housing;
❒then refit the cover B fig. 125.
fig. 127
L0F0068
fig. 128
L0F0070
173GETTING TO KNOW
YOUR CAR
SAFETY
STARTING AND
DRIVING
WARNING LIGHTS
AND MESSAGESIN AN EMERGENCYSERVICING AND
MAINTENANCE
TECHNICAL
SPECIFICA
TIONS
INDEX
Page 190 of 299

FUSE SUMMARY TABLEEngine compartment fuse box FUSE AMPS
BCM F01 60
RDU F02 50
Ignition switch F03 20
BSM1 (pump) F04 40
EPS F05 70
Engine single speed cooling fan (heated engines) F06 20
Engine dual speed cooling fan solenoid valve/Engine
cooling fan low speed (conditioned engines)F06 30
Engine cooling electric fan high speed F07 40
Fog lights F08 30
Headlamp washer pump F09 20
Horns F10 15
Engine management system (secondary loads) F11 10
Main beam headlights F14 15
Sunroof motor F15 20
+15 ECM/coil T10 F16 7,5
ECM main loads (versions 0.9 TwinAir 85 HP/
F17 10
'+30 ECM/coil T09 F18 5
Fuel pump F19 15
188
GETTING TO KNOW
YOUR CAR
SAFETY
STARTING AND
DRIVING
WARNING LIGHTS
AND MESSAGESIN AN EMERGENCYSERVICING AND
MAINTENANCE
TECHNICAL
SPECIFICA
TIONS
INDEX
1.2 8V 69 HP)
Page 204 of 299

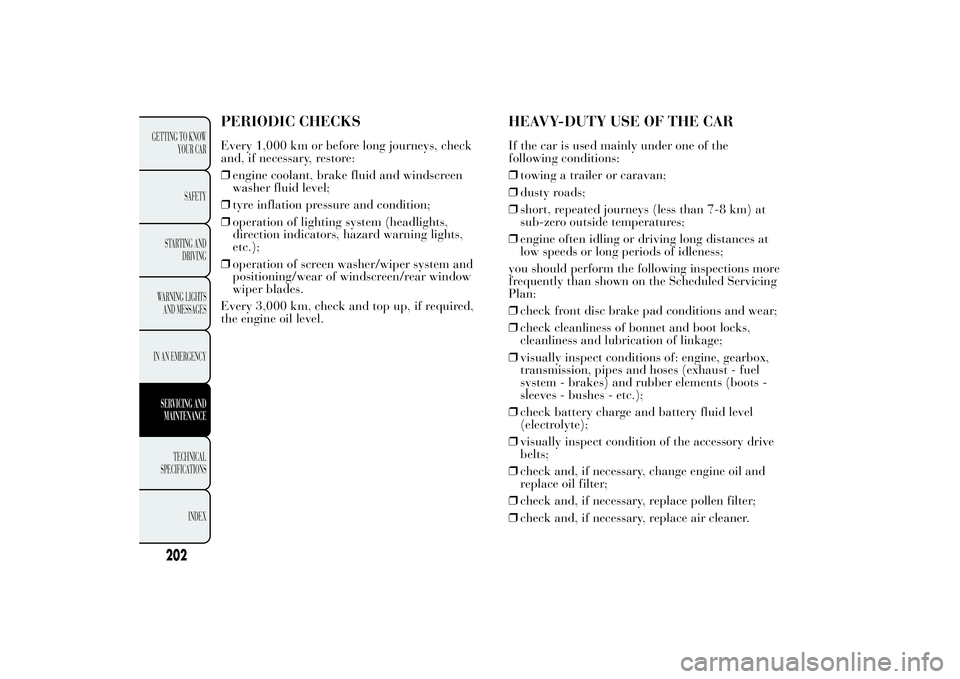
PERIODIC CHECKSEvery 1,000 km or before long journeys, check
and, if necessary, restore:
❒engine coolant, brake fluid and windscreen
washer fluid level;
❒tyre inflation pressure and condition;
❒operation of lighting system (headlights,
direction indicators, hazard warning lights,
etc.);
❒operation of screen washer/wiper system and
positioning/wear of windscreen/rear window
wiper blades.
Every 3,000 km, check and top up, if required,
the engine oil level.
HEAVY-DUTY USE OF THE CARIf the car is used mainly under one of the
following conditions:
❒towing a trailer or caravan;
❒dusty roads;
❒short, repeated journeys (less than 7-8 km) at
sub-zero outside temperatures;
❒engine often idling or driving long distances at
low speeds or long periods of idleness;
you should perform the following inspections more
frequently than shown on the Scheduled Servicing
Plan:
❒check front disc brake pad conditions and wear;
❒check cleanliness of bonnet and boot locks,
cleanliness and lubrication of linkage;
❒visually inspect conditions of: engine, gearbox,
transmission, pipes and hoses (exhaust - fuel
system - brakes) and rubber elements (boots -
sleeves - bushes - etc.);
❒check battery charge and battery fluid level
(electrolyte);
❒visually inspect condition of the accessory drive
belts;
❒check and, if necessary, change engine oil and
replace oil filter;
❒check and, if necessary, replace pollen filter;
❒check and, if necessary, replace air cleaner.
202
GETTING TO KNOW
YOUR CAR
SAFETY
STARTING AND
DRIVING
WARNING LIGHTS
AND MESSAGES
IN AN EMERGENCYSERVICING AND
MAINTENANCE
TECHNICAL
SPECIFICA
TIONS
INDEX
Page 217 of 299

Rear window washer
The rear window washer jets are fixed. The nozzle
holder is on the rear window fig. 165.HEADLIGHT WASHERS
(for versions/markets, where provided)
They are located inside the front bumper fig. 166.
They are activated when the dipped beam and/or
main beam headlights are on and the windscreen
washer is activated.
Check the correct condition and cleanliness of
nozzles at regular intervals.
fig. 165
L0F0223
fig. 166
L0F0023
215GETTING TO KNOW
YOUR CAR
SAFETY
STARTING AND
DRIVING
WARNING LIGHTS
AND MESSAGES
IN AN EMERGENCYSERVICING AND
MAINTENANCETECHNICAL
SPECIFICA
TIONS
INDEX
Page 219 of 299

Dry the less visible parts (e.g. door frames,
bonnet, headlight frames etc.) with special care, as
water may stagnate more easily in these areas.
The car should not be taken to a closed area
immediately, but left outside so that residual water
can evaporate.
Do not wash the car after it has been left in the
sun or with the bonnet hot: this may alter the
shine of the paintwork.
Exterior plastic parts must be cleaned in the same
way as the rest of the car.
Avoid parking under trees as much as possible; the
resin from trees dulls the paintwork and increases
the possibility of corrosion.
IMPORTANT Bird droppings must be washed off
immediately and thoroughly as the acid they
contain is particularly aggressive.
Detergents pollute the environment.
Only wash your car in areas equipped
to collect and treat wastewater from
this type of activity.In order to preserve the aesthetic
properties of the paintwork, abrasive
products and/or polishes should not be
used to clean the car.Windows
Use specific detergents and clean cloths to prevent
scratching or altering the transparency.
IMPORTANT Wipe the inside surface of the rear
window gently with a cloth in the direction of
the filaments to avoid damaging the heating
device.
Front headlights
Use a soft, damp cloth soaked in water and
detergent for washing cars.
IMPORTANT Never use aromatic substances (e.g.
petrol) or ketenes (e.g. acetone) for cleaning the
plastic lenses of the front headlights.
IMPORTANT When cleaning the car with a
pressure washer, keep the water jet at least 2 cm
away from the headlights.
Engine compartment
At the end of every winter, wash the engine
compartment thoroughly, taking care not to aim
the jet of water directly at the electronic control
units or at the windscreen wiper motors. Have this
operation performed at a specialised workshop.
IMPORTANT The washing should take place with
the engine cold and the ignition key in the STOP
position. After washing, make sure that the
various protective devices (e.g. rubber caps and
guards) have not been removed or damaged.
217GETTING TO KNOW
YOUR CAR
SAFETY
STARTING AND
DRIVING
WARNING LIGHTS
AND MESSAGES
IN AN EMERGENCYSERVICING AND
MAINTENANCETECHNICAL
SPECIFICA
TIONS
INDEX
Page 293 of 299

Index
ABS (system) ....................... 79
ABS system .......................... 79
Airbag ................................ 125
– Deactivation of
passenger side front
airbag and side bag ........ 127
– side bag .......................... 127
– side ................................ 127
– window bag .................... 128
Airbags
– front ............................... 125
Air cleaner .......................... 209
Ashtray ................................ 62
ASR system .......................... 81
ASR (system) ....................... 81
Automatic climate control
– controls............................ 39
– maintenance .................... 46Battery (charge) ................. 192
Battery................................ 210
– advice for extending
lifetime ........................... 210
– replacement.................... 210Body versions...................... 222
Bodywork
– bodywork codes.............. 222
– maintenance ................... 216
– protection from
atmospheric agents ......... 216
– warranty ........................ 216
Bonnet ................................. 74
Brake Assist system .............. 82
Brake Assist (system) ........... 82
Brakes
– brake fluid level ............. 208
– specifications .................. 225
bulb replacement......... 175-176
Bulb replacement
– external lights................. 172
– interior lights.................. 178
Bulbs
– bulbs (replacement) ....... 168
– general instructions ........ 168
– types of bulbs ................. 170
Car dimensions................... 233
Carrying children safely ...... 117
– Carrying children safely . 117
– child seats ...................... 124– Setup for "Isofix" child
seat ................................ 122
Central air diffusers ............. 35
Changing a wheel ............... 157
Checking levels .... 204-205-206
Child seats (compliance
for use) ............................. 121
CITY function ...................... 88
Cleaning and maintenance
– bodywork ....................... 216
– car interior ..................... 218
– engine compartment ....... 217
– front headlights .............. 217
– Leather parts.................. 219
– Leather seats .................. 218
– Plastic and coated parts.. 218
– seats ............................... 218
– windows ......................... 217
Climate control .................... 35
– Passenger compartment
air diffusers ..................... 36
Climatic comfort .................. 36
Clutch................................. 224
CO
2emissions..................... 242
CODE Card.......................... 24
Conditions of use ................ 138
291GETTING TO
KNOW YOUR CAR
SAFETY
STARTING AND
DRIVING
WARNING LIGHTS
AND MESSAGES
IN AN EMERGENCY
SERVICING AND
MAINTENANCE
TECHNICAL
SPECIFICATIONSINDEX