height Lancia Ypsilon 2011 Owner handbook (in English)
[x] Cancel search | Manufacturer: LANCIA, Model Year: 2011, Model line: Ypsilon, Model: Lancia Ypsilon 2011Pages: 299, PDF Size: 13.35 MB
Page 31 of 299

SEATS
WARNING
All adjustments must be made with
the car stationary
.
FRONT SEATS
Lengthwise adjustment
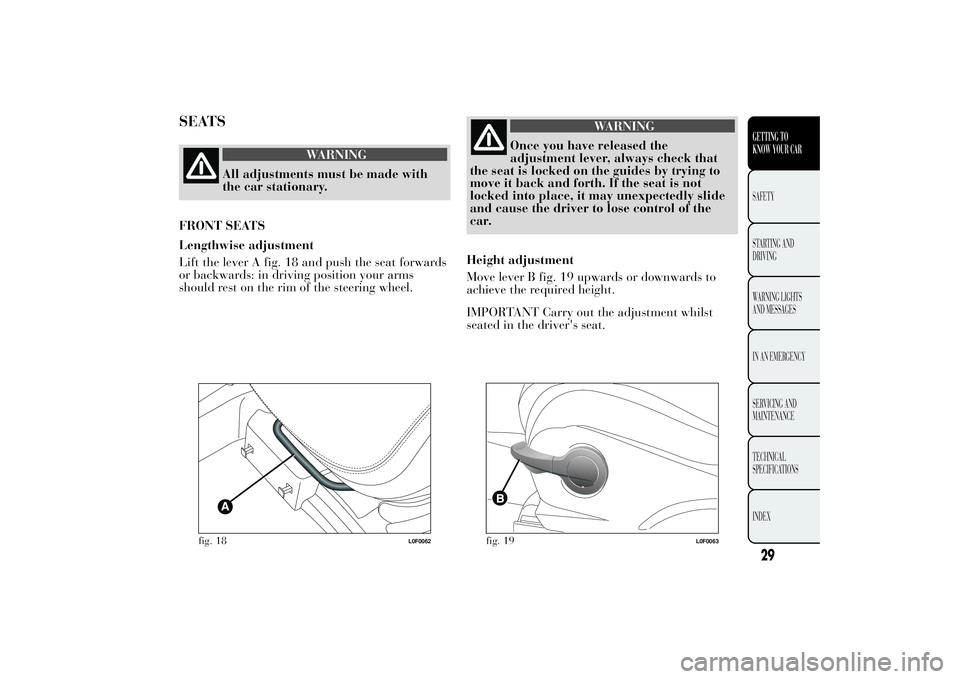
Lift the lever A fig. 18 and push the seat forwards
or backwards: in driving position your arms
should rest on the rim of the steering wheel.
WARNING
Once you have released the
adjustment lever,
always check that
the seat is locked on the guides by trying to
move it back and forth. If the seat is not
locked into place, it may unexpectedly slide
and cause the driver to lose control of the
car.
Height adjustment
Move lever B fig. 19 upwards or downwards to
achieve the required height.
IMPORTANT Carry out the adjustment whilst
seated in the driver's seat.
fig. 18
L0F0062
fig. 19
L0F0063
29GETTING TO
KNOW YOUR CARSAFETY
STARTING
AND
DRIVING
WARNING LIGHTS
AND MESSAGES
IN AN EMERGENCY
SERVICING AND
MAINTENANCE
TECHNICAL
SPECIFICATIONS
INDEX
Page 32 of 299

Backrest angle adjustment
Adjust knob C fig. 20 to obtain the required
position.
Lumbar adjustment(for versions/markets,
where provided)
The position of the back against the seat backrest
can be adjusted by turning knob D fig. 21.
HEAD RESTRAINTSFRONT
They are height-adjustable: to adjust them,
operate as follows.
Upwards adjustment:raise the head restraint
until it clicks into place.
fig. 20
L0F0064
fig. 21
L0F0273
30GETTING TO
KNOW YOUR CAR
SAFETY
STARTING
AND
DRIVING
WARNING LIGHTS
AND MESSAGES
IN AN EMERGENCY
SERVICING AND
MAINTENANCE
TECHNICAL
SPECIFICATIONS
INDEX
Page 33 of 299

Downwards adjustment:press button A fig. 22
and lower the head restraint.
"Anti-Whiplash" Device
The head restraints are equipped with an
“Anti-Whiplash” device, which reduces the
distance between head and head restraint in the
event of a rear impact, thus mitigating the
"whiplash" effect.
The head restraint may move when the backrest is
pressed by the occupant's torso or hand: this
behaviour is caused by the system and should not
be considered a malfunction.
WARNING
All adjustments must be made with
the car stationary
. Head restraints
must be adjusted so that the head, rather
than the neck, rests on them. Only when they
are adjusted in this manner can they serve
their intended purpose.
WARNING
To make the best use of the head
restraint's protective action,
adjust
the backrest so that you are sitting upright
and keep your head as close as possible
to the head restraint.
REAR
(for versions/markets, where provided)
Two height-adjustable head restraints are
provided for the rear seats. On some versions a
head restraint is also provided for the central seat.
Upwards adjustment:raise the head restraint
until it clicks into place.
fig. 22
L0F0061
31GETTING TO
KNOW YOUR CARSAFETY
STARTING
AND
DRIVING
WARNING LIGHTS
AND MESSAGES
IN AN EMERGENCY
SERVICING AND
MAINTENANCE
TECHNICAL
SPECIFICATIONS
INDEX
Page 34 of 299

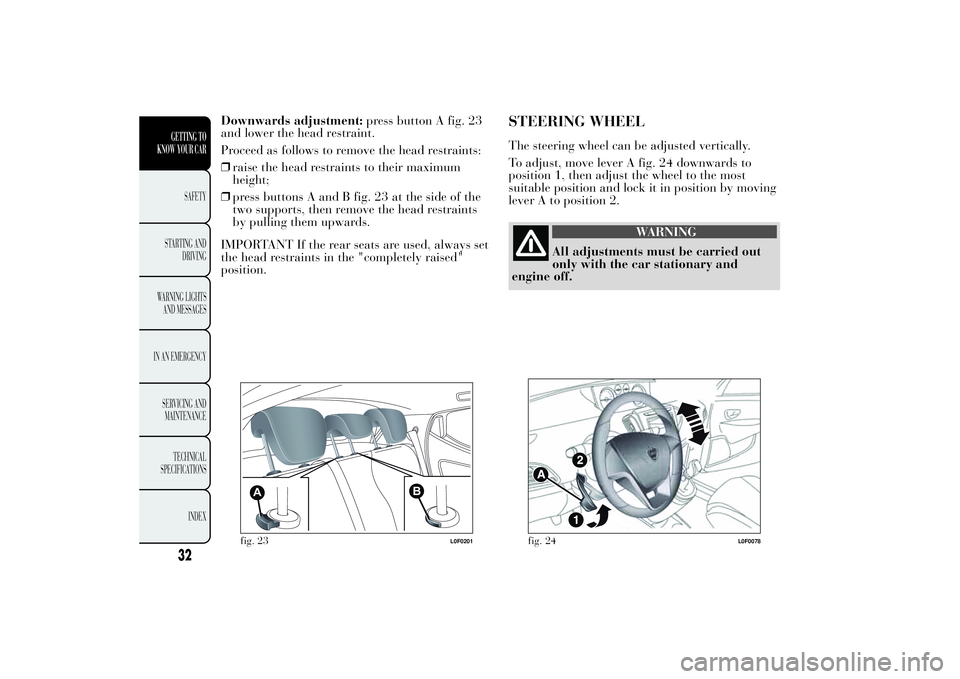
Downwards adjustment:press button A fig. 23
and lower the head restraint.
Proceed as follows to remove the head restraints:
❒raise the head restraints to their maximum
height;
❒press buttons A and B fig. 23 at the side of the
two supports, then remove the head restraints
by pulling them upwards.
IMPORTANT If the rear seats are used, always set
the head restraints in the "completely raised"
position.
STEERING WHEELThe steering wheel can be adjusted vertically.
To adjust, move lever A fig. 24 downwards to
position 1, then adjust the wheel to the most
suitable position and lock it in position by moving
lever A to position 2.
WARNING
All adjustments must be carried out
only with the
car stationary and
engine off.
A
B
fig. 23
L0F0201
fig. 24
L0F0078
32GETTING TO
KNOW YOUR CAR
SAFETY
STARTING
AND
DRIVING
WARNING LIGHTS
AND MESSAGES
IN AN EMERGENCY
SERVICING AND
MAINTENANCE
TECHNICAL
SPECIFICATIONS
INDEX
Page 74 of 299

LUGGAGE COMPARTMENT INITIALISATION
IMPORTANT If the battery is disconnected or the
protection fuse blows, the luggage compartment
opening/closing mechanism must be reinitialised
as follows:
❒close all the doors and the luggage
compartment;
❒Press the
button on the remote control;
❒press thebutton on the remote control.
EXTENDING THE LUGGAGE
COMPARTMENT
See the descriptions in “Removing the parcel
shelf” and “Folding back the seats” paragraphs
for how to expand the luggage compartment.
Removing the parcel shelf
Proceed as follows:
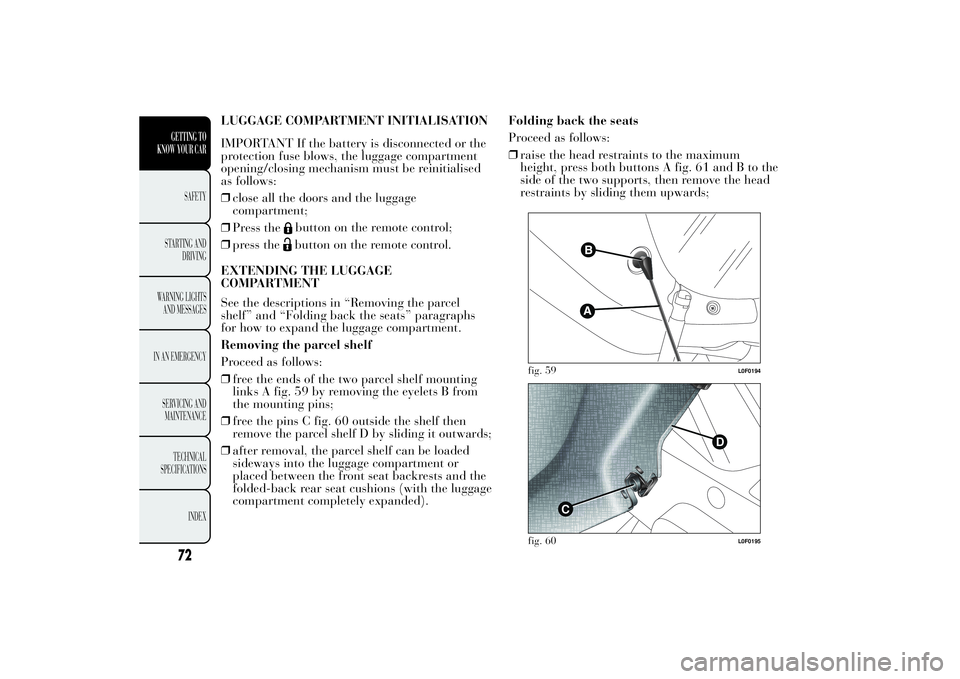
❒free the ends of the two parcel shelf mounting
links A fig. 59 by removing the eyelets B from
the mounting pins;
❒free the pins C fig. 60 outside the shelf then
remove the parcel shelf D by sliding it outwards;
❒after removal, the parcel shelf can be loaded
sideways into the luggage compartment or
placed between the front seat backrests and the
folded-back rear seat cushions (with the luggage
compartment completely expanded).Folding back the seats
Proceed as follows:
❒raise the head restraints to the maximum
height, press both buttons A fig. 61 and B to the
side of the two supports, then remove the head
restraints by sliding them upwards;
fig. 59
L0F0194
C
D
fig. 60
L0F0195
72GETTING TO
KNOW YOUR CAR
SAFETY
STARTING
AND
DRIVING
WARNING LIGHTS
AND MESSAGES
IN AN EMERGENCY
SERVICING AND
MAINTENANCE
TECHNICAL
SPECIFICATIONS
INDEX
Page 119 of 299

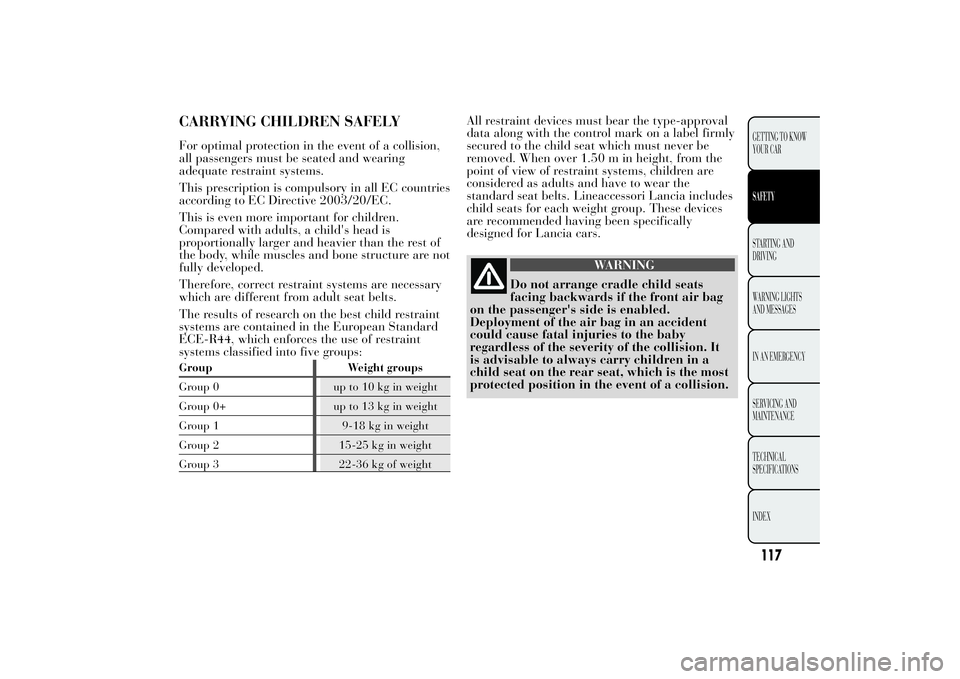
CARRYING CHILDREN SAFELYFor optimal protection in the event of a collision,
all passengers must be seated and wearing
adequate restraint systems.
This prescription is compulsory in all EC countries
according to EC Directive 2003/20/EC.
This is even more important for children.
Compared with adults, a child's head is
proportionally larger and heavier than the rest of
the body, while muscles and bone structure are not
fully developed.
Therefore, correct restraint systems are necessary
which are different from adult seat belts.
The results of research on the best child restraint
systems are contained in the European Standard
ECE-R44, which enforces the use of restraint
systems classified into five groups:Group Weight groups
Group 0 up to 10 kg in weight
Group 0+ up to 13 kg in weight
Group 1 9-18 kg in weight
Group 2 15-25 kg in weight
Group 3 22-36 kg of weight
All restraint devices must bear the type-approval
data along with the control mark on a label firmly
secured to the child seat which must never be
removed. When over 1.50 m in height, from the
point of view of restraint systems, children are
considered as adults and have to wear the
standard seat belts. Lineaccessori Lancia includes
child seats for each weight group. These devices
are recommended having been specifically
designed for Lancia cars.
WARNING
Do not arrange cradle child seats
facing backwards if
the front air bag
on the passenger's side is enabled.
Deployment of the air bag in an accident
could cause fatal injuries to the baby
regardless of the severity of the collision. It
is advisable to always carry children in a
child seat on the rear seat, which is the most
protected position in the event of a collision.
117GETTING TO KNOW
YOUR CARSAFETYSTARTING AND
DRIVING
W
ARNING LIGHTS
ANDMESSAGES
IN AN EMERGENCY
SERVICING AND
MAINTENANCE
TECHNICAL
SPECIFICATIONS
INDEX
Page 122 of 299

GROUP 3
For children from 22 kg up to 36 kg suitable
risers are available to position the seat belt
correctly.
Thefig. 100 shows an example of correct child seat
positioning on the rear seat.
Children over 1.50 m in height can wear seat belts
like adults.
WARNING
The figures are only examples for
fitting
purposes. Install the car seat
according to the instructions, which are
mandatorily included with this type of
restraint system.
fig. 100
L0F0015
120
GETTING TO KNOW
YOUR CAR
SAFETY
STARTING AND
DRIVING
W
ARNING LIGHTS
AND MESSAGES
IN AN EMERGENCY
SERVICING AND
MAINTENANCE
TECHNICAL
SPECIFICATIONS
INDEX
Page 229 of 299

WHEELSRIMS AND TYRES
Pressed steel or alloy rims. Tubeless radial carcass
tyres. The vehicle registration document also
lists all type-approved tyres.
IMPORTANT If there are any discrepancies
between the Owner handbook and the registration
document, take the information from the latter.
For safe driving, the car must be fitted with tyres
of the same make and type on all wheels.
IMPORTANT Do not use air chambers with
tubeless tires.
SPACE-SAVER WHEEL
Pressed steel rim. Tubeless tyre.
WHEEL GEOMETRY
Front wheel toe-in measured from rim to rim: 0 ±
1mm
The values refer to the car in running order.CORRECT TYRE READING
Example fig. 169: 185/55 R 15 82T
185
Nominal width (S, distance in mm between
sidewalls)
55
Height/width ratio (H/S) as a percentage
R
Radial tyre
15
Rim diameter in inches (Ø)
82
Load rating (capacity)
TMaximum speed ratingfig. 169
L0F0019
227GETTING TO KNOW
YOUR CAR
SAFETY
STARTING AND
DRIVING
WARNING LIGHTS
AND MESSAGES
IN AN EMERGENCY
SERVICING AND
MAINTENANCETECHNICAL
SPECIFICA
TIONSINDEX
Page 235 of 299

DIMENSIONSThe dimensions are expressed in mm fig. 171 and refer to the vehicle equipped with its original tyres.
Height is measured with vehicle unladen.
Boot capacity:capacity (V.D.A. standards)= 217 litres.Versions A B C D E F G H
0.9 TwinAir 85 HP3842 816 2390 636
15201414 1676 1408
1.2 8V 69 HP3842 816 2390 636
151414 1676 140
1.3 MultiJet3842 816 2390 636
1520141 1676 1408
fig. 171
L0F0003
233GETTING TO KNOW
YOUR CAR
SAFETY
STARTING AND
DRIVING
WARNING LIGHTS
AND MESSAGES
IN AN EMERGENCY
SERVICING AND
MAINTENANCETECHNICAL
SPECIFICA
TIONSINDEX
8
4 20