run flat Lancia Ypsilon 2020 Owner handbook (in English)
[x] Cancel search | Manufacturer: LANCIA, Model Year: 2020, Model line: Ypsilon, Model: Lancia Ypsilon 2020Pages: 200, PDF Size: 4.53 MB
Page 98 of 200

WARNING
110)Never leave children unattended in
the car. Always remove the key from the
ignition when leaving the car and take
it with you.
111)The car should be braked after a few
clicks of the lever, if it is not, contact a
Lancia Dealership to have it adjusted.
112)In the case of parking manoeuvres on
roads on a gradient, the front wheels
must be steered towards the pavement
(when parking downhill), or in the opposite
direction if the vehicle is parked uphill.
Block the wheels with a wedge or a stone if
the car is parked on a steep slope.
MANUAL GEARBOX
113)40)
To engage the gears, press the clutch
pedal fully and put the gear lever into
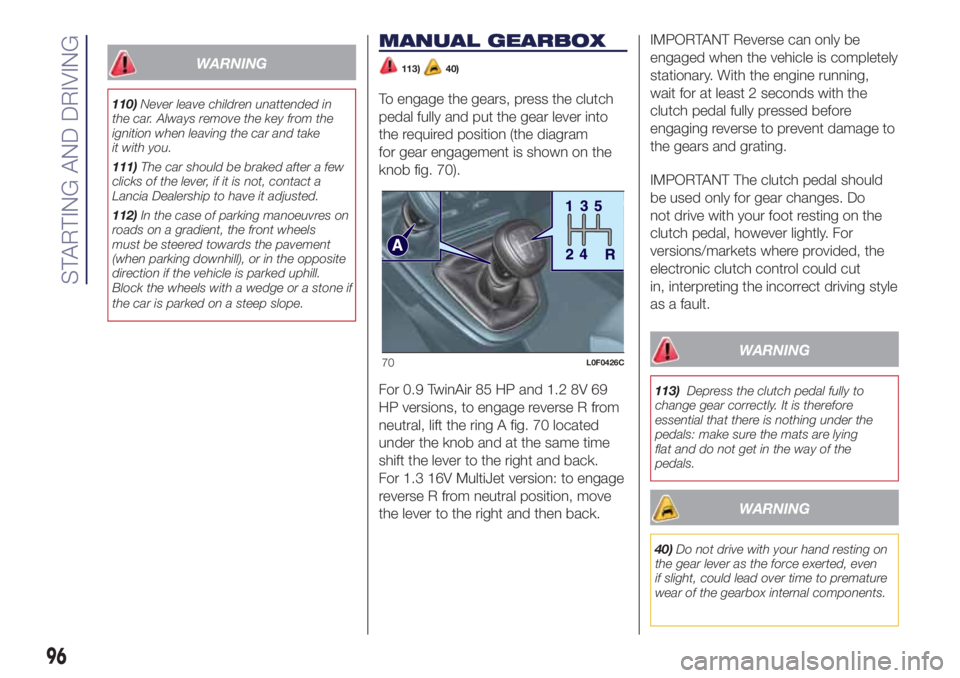
the required position (the diagram
for gear engagement is shown on the
knob fig. 70).
For 0.9 TwinAir 85 HP and 1.2 8V 69
HP versions, to engage reverse R from
neutral, lift the ring A fig. 70 located
under the knob and at the same time
shift the lever to the right and back.
For 1.3 16V MultiJet version: to engage
reverse R from neutral position, move
the lever to the right and then back.IMPORTANT Reverse can only be
engaged when the vehicle is completely
stationary. With the engine running,
wait for at least 2 seconds with the
clutch pedal fully pressed before
engaging reverse to prevent damage to
the gears and grating.
IMPORTANT The clutch pedal should
be used only for gear changes. Do
not drive with your foot resting on the
clutch pedal, however lightly. For
versions/markets where provided, the
electronic clutch control could cut
in, interpreting the incorrect driving style
as a fault.
WARNING
113)Depress the clutch pedal fully to
change gear correctly. It is therefore
essential that there is nothing under the
pedals: make sure the mats are lying
flat and do not get in the way of the
pedals.
WARNING
40)Do not drive with your hand resting on
the gear lever as the force exerted, even
if slight, could lead over time to premature
wear of the gearbox internal components.
70L0F0426C
96
STARTING AND DRIVING
Page 121 of 200

fit the standard wheel inserting the 4
bolts into the holes;
using the wrench provided, tighten
the fastening bolts;
lower the vehicle and remove the
jack;
using the wrench provided, fully
tighten the bolts in the sequence
shown previously.
press-fit the wheel cap, aligning the
special splining (on the cap) with the
inflation valve;
place the inner part of the hub cap
on the wheel rim;
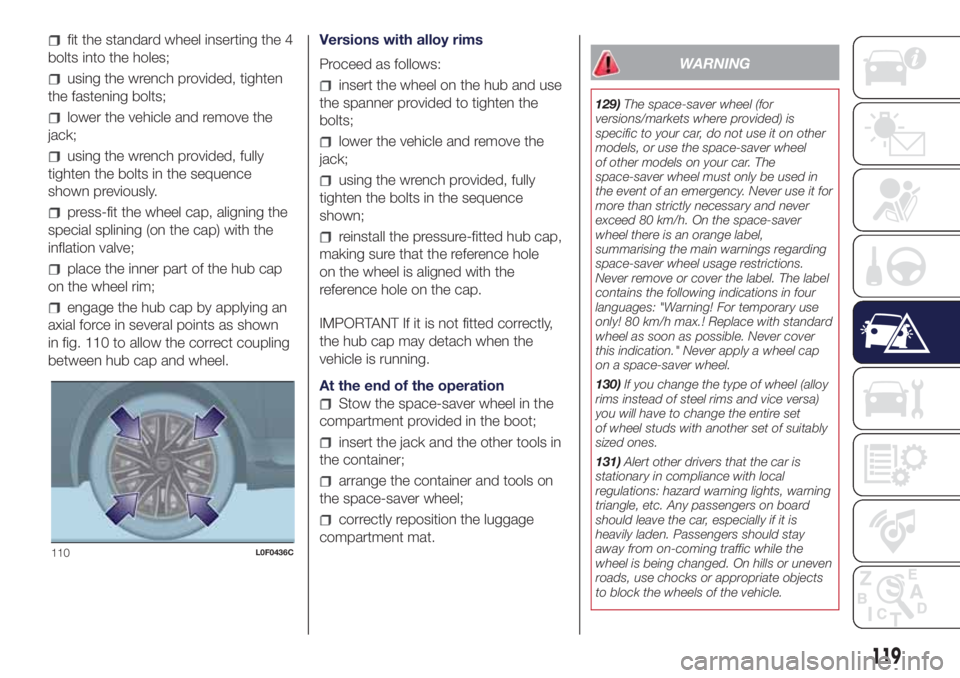
engage the hub cap by applying an
axial force in several points as shown
in fig. 110 to allow the correct coupling
between hub cap and wheel.Versions with alloy rims
Proceed as follows:
insert the wheel on the hub and use
the spanner provided to tighten the
bolts;
lower the vehicle and remove the
jack;
using the wrench provided, fully
tighten the bolts in the sequence
shown;
reinstall the pressure-fitted hub cap,
making sure that the reference hole
on the wheel is aligned with the
reference hole on the cap.
IMPORTANT If it is not fitted correctly,
the hub cap may detach when the
vehicle is running.
At the end of the operation
Stow the space-saver wheel in the
compartment provided in the boot;
insert the jack and the other tools in
the container;
arrange the container and tools on
the space-saver wheel;
correctly reposition the luggage
compartment mat.
WARNING
129)The space-saver wheel (for
versions/markets where provided) is
specific to your car, do not use it on other
models, or use the space-saver wheel
of other models on your car. The
space-saver wheel must only be used in
the event of an emergency. Never use it for
more than strictly necessary and never
exceed 80 km/h. On the space-saver
wheel there is an orange label,
summarising the main warnings regarding
space-saver wheel usage restrictions.
Never remove or cover the label. The label
contains the following indications in four
languages: "Warning! For temporary use
only! 80 km/h max.! Replace with standard
wheel as soon as possible. Never cover
this indication." Never apply a wheel cap
on a space-saver wheel.
130)If you change the type of wheel (alloy
rims instead of steel rims and vice versa)
you will have to change the entire set
of wheel studs with another set of suitably
sized ones.
131)Alert other drivers that the car is
stationary in compliance with local
regulations: hazard warning lights, warning
triangle, etc. Any passengers on board
should leave the car, especially if it is
heavily laden. Passengers should stay
away from on-coming traffic while the
wheel is being changed. On hills or uneven
roads, use chocks or appropriate objects
to block the wheels of the vehicle.
110L0F0436C
119
Page 123 of 200

INFLATION PROCEDURE
141) 142) 143) 144)
Proceed as follows:
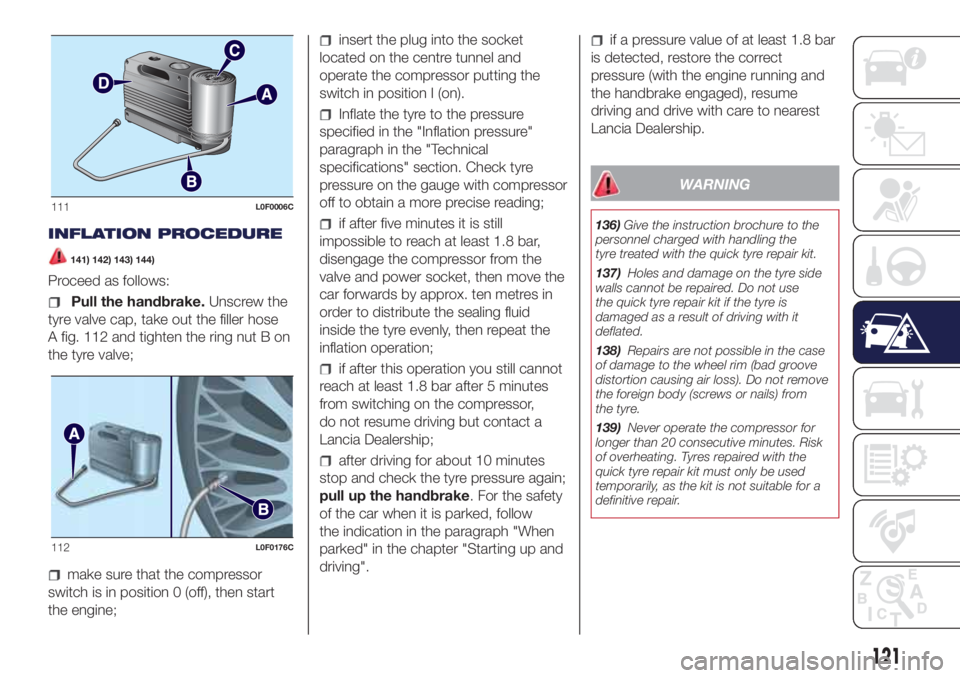
Pull the handbrake.Unscrew the
tyre valve cap, take out the filler hose
A fig. 112 and tighten the ring nut B on
the tyre valve;
make sure that the compressor
switch is in position 0 (off), then start
the engine;
insert the plug into the socket
located on the centre tunnel and
operate the compressor putting the
switch in position I (on).
Inflate the tyre to the pressure
specified in the "Inflation pressure"
paragraph in the "Technical
specifications" section. Check tyre
pressure on the gauge with compressor
off to obtain a more precise reading;
if after five minutes it is still
impossible to reach at least 1.8 bar,
disengage the compressor from the
valve and power socket, then move the
car forwards by approx. ten metres in
order to distribute the sealing fluid
inside the tyre evenly, then repeat the
inflation operation;
if after this operation you still cannot
reach at least 1.8 bar after 5 minutes
from switching on the compressor,
do not resume driving but contact a
Lancia Dealership;
after driving for about 10 minutes
stop and check the tyre pressure again;
pull up the handbrake. For the safety
of the car when it is parked, follow
the indication in the paragraph "When
parked" in the chapter "Starting up and
driving".
if a pressure value of at least 1.8 bar
is detected, restore the correct
pressure (with the engine running and
the handbrake engaged), resume
driving and drive with care to nearest
Lancia Dealership.
WARNING
136)Give the instruction brochure to the
personnel charged with handling the
tyre treated with the quick tyre repair kit.
137)Holes and damage on the tyre side
walls cannot be repaired. Do not use
the quick tyre repair kit if the tyre is
damaged as a result of driving with it
deflated.
138)Repairs are not possible in the case
of damage to the wheel rim (bad groove
distortion causing air loss). Do not remove
the foreign body (screws or nails) from
the tyre.
139)Never operate the compressor for
longer than 20 consecutive minutes. Risk
of overheating. Tyres repaired with the
quick tyre repair kit must only be used
temporarily, as the kit is not suitable for a
definitive repair.
111L0F0006C
112L0F0176C
121