warning lights Lancia Ypsilon 2020 Owner handbook (in English)
[x] Cancel search | Manufacturer: LANCIA, Model Year: 2020, Model line: Ypsilon, Model: Lancia Ypsilon 2020Pages: 200, PDF Size: 4.53 MB
Page 11 of 200
THE KEYS
1)1)1)
KEY WITHOUT REMOTE
CONTROL
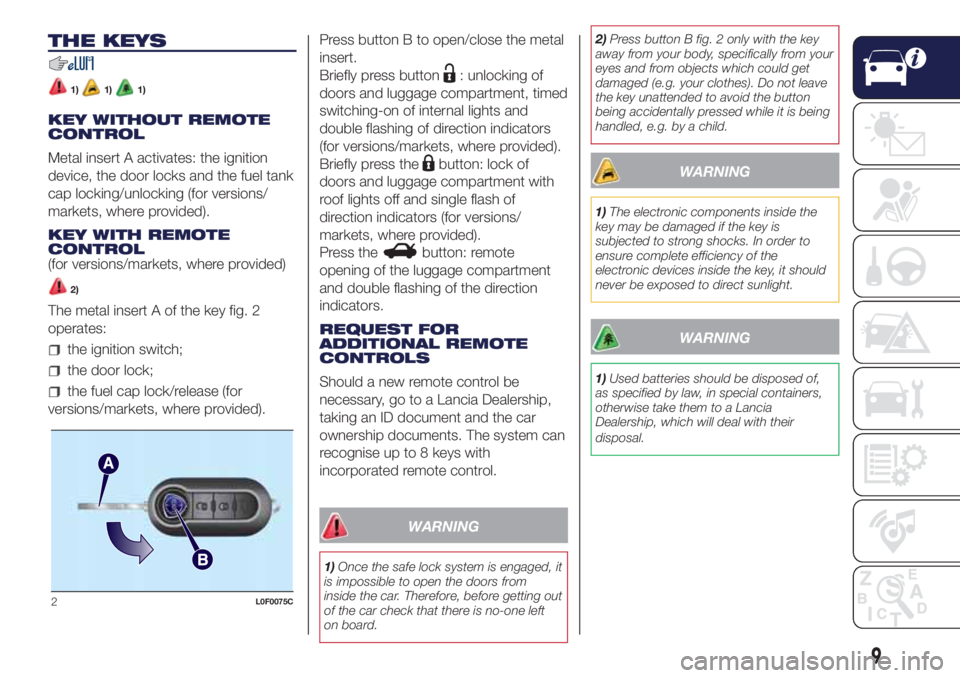
Metal insert A activates: the ignition
device, the door locks and the fuel tank
cap locking/unlocking (for versions/
markets, where provided).
KEY WITH REMOTE
CONTROL
(for versions/markets, where provided)
2)
The metal insert A of the key fig. 2
operates:
the ignition switch;
the door lock;
the fuel cap lock/release (for
versions/markets, where provided).Press button B to open/close the metal
insert.
Briefly press button
: unlocking of
doors and luggage compartment, timed
switching-on of internal lights and
double flashing of direction indicators
(for versions/markets, where provided).
Briefly press the
button: lock of
doors and luggage compartment with
roof lights off and single flash of
direction indicators (for versions/
markets, where provided).
Press the
button: remote
opening of the luggage compartment
and double flashing of the direction
indicators.
REQUEST FOR
ADDITIONAL REMOTE
CONTROLS
Should a new remote control be
necessary, go to a Lancia Dealership,
taking an ID document and the car
ownership documents. The system can
recognise up to 8 keys with
incorporated remote control.
WARNING
1)Once the safe lock system is engaged, it
is impossible to open the doors from
inside the car. Therefore, before getting out
of the car check that there is no-one left
on board.2)Press button B fig. 2 only with the key
away from your body, specifically from your
eyes and from objects which could get
damaged (e.g. your clothes). Do not leave
the key unattended to avoid the button
being accidentally pressed while it is being
handled, e.g. by a child.
WARNING
1)The electronic components inside the
key may be damaged if the key is
subjected to strong shocks. In order to
ensure complete efficiency of the
electronic devices inside the key, it should
never be exposed to direct sunlight.
WARNING
1)Used batteries should be disposed of,
as specified by law, in special containers,
otherwise take them to a Lancia
Dealership, which will deal with their
disposal.
2L0F0075C
9
Page 20 of 200
With the sensor active, it is possible to
flash the headlights but the main beam
headlights cannot be switched on. To
activate these lights, turn the ring nut A
to
and activate the fixed dipped
beam headlights.
When the lights have been activated
automatically and are then switched off
by the sensor, the dipped beam
headlights are switched off first,
followed by the side lights a few
seconds later.
If the sensor is activated but is
malfunctioning, the side lights and
dipped beam headlights are switched
on irrespective of the outside light
level and the sensor failure is indicated
on the display. It is also possible to
deactivate the sensor and switch on the
side lights and dipped beam headlights.
IMPORTANT The sensor cannot detect
the presence of fog. These lights must
therefore be switched on manually in
these circumstances.DAYTIME RUNNING
LIGHTS (DRL)
"Daytime Running Lights"
(for versions/markets, where provided)16) 17)
With the ignition key at MAR and ring
nut A fig. 17 turned toOthe daytime
running lights are activated
automatically; the other lights and
interior lighting remain off.
SIDE LIGHTS / DIPPED
BEAM HEADLIGHTS
With the ignition key turned to MAR,
turn ring nut A fig. 17 to
. If dipped
headlights are activated, the daytime
running lights switch off and the side
lights and dipped headlights switch on.
The
warning light switches on in
the instrument panel.
When the ignition key is turned to
STOP or removed and the ring nut A is
turned fromOto
, all the side
lights and the number plate lights come
on.
The
warning light switches on in
the instrument panel.PARKING LIGHTS
These lights can only be turned on with
ignition key in STOP position or
removed, by moving the ring nut A fig.
17 first to positionOand then to
position
. Thewarning light
switches on in the instrument panel.
When the direction indicator stalk
is activated the side for the lights (left or
right) can be selected.
MAIN BEAM HEADLIGHTS
To activate the main beam headlights,
with ring nut A fig. 17 at
, pull the
stalk towards the steering wheel
beyond the end of travel position. The
warning light switches on in the
instrument panel.
When the stalk is pulled towards the
steering wheel again, beyond the end
of travel position, the main beam
headlights deactivate, the dipped
headlights reactivate and the
warning light switches off.
It is not possible to switch on the main
beam headlights in fixed mode if the
automatic lighting control system is
active.
18
KNOWING YOUR CAR
Page 21 of 200
FLASHING
To do this, pull the stalk fig. 17 towards
the steering wheel (unstable position)
regardless of the position of ring nut A.
The
warning light switches on in
the instrument panel.
DIRECTION INDICATORS
Bring the stalk fig. 17 to the (stable)
position:
upwards:activates the right direction
indicator;
downwards:activates the left direction
indicator.
Warning light
orwill blink on the
instrument panel.
The direction indicators switch off
automatically when the steering wheel
is straightened.
"Lane Change" function
If you wish to signal a lane change,
place the left stalk in the unstable
position for less than half a second.
The direction indicator on the side
selected will flash five times and then
switch off automatically."FOLLOW ME HOME"
DEVICE
This allows the space in front of the
vehicle to be lit for a set time.
Activation
The "Follow Me Home" device is
activated by pulling the stalk fig. 17
towards the steering wheel, in addition
to the stroke end click.
It is possible to enable this function
within 2 minutes after turning off the
engine. This function allows turning on
lights and low beams.
It is possible to set the headlights
turning on time by pulling the left lever
towards the steering wheel (unstable
position) one or more times. In this case
it is possible to choose between 0, 30,
60, 90 up to a maximum of 210
seconds.
Each time the stalk is operated, the
warning light
on the instrument
panel switches on. The display shows a
message and the time set for the
function. The
warning light comes
on when the stalk is first moved and
stays on until the function is
automatically deactivated.Off
This function is deactivated turning on
again the headlights, sidelights or
pulling the left lever towards the
steering wheel (unstable position) for
more than 2 seconds, or switching the
starter to MAR.
"Follow me home" function with
Uconnect™ system interaction
IfUconnect™ is installed, the function
management remains the same, but
it takes place through interaction with
theUconnect™ menu.
FOG LIGHTS / REAR FOG
LIGHTS
(for versions/markets, where provided)
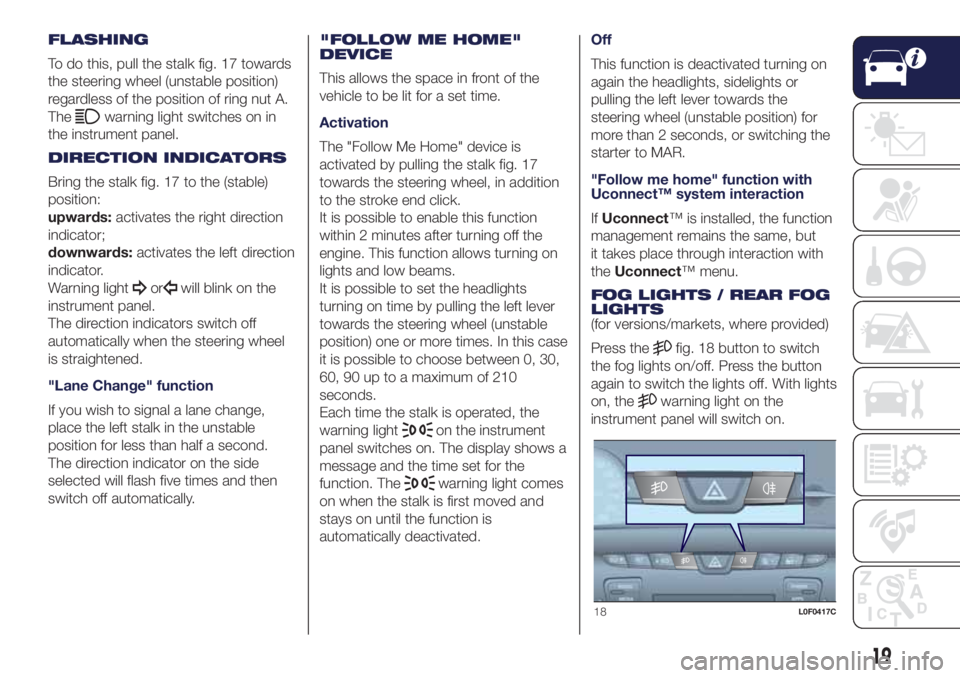
Press the
fig. 18 button to switch
the fog lights on/off. Press the button
again to switch the lights off. With lights
on, the
warning light on the
instrument panel will switch on.
18L0F0417C
19
Page 22 of 200
Rear fog lights
Press the
fig. 18 button to switch
the light on/off.
The rear fog light switches on only
when the dipped headlights or
fog lights are switched on. Press the
button again to switch the light off,
or switch off the dipped headlights or
the front fog lights (for versions/
markets, where provided).
WARNING
16)The daytime running lights are an
alternative to the dipped headlights for
driving during the daytime in countries
where it is compulsory to have lights on
during the day; where it is not compulsory,
the use of daytime running lights is
permitted.
17)Daytime running lights cannot replace
dipped beam headlights when driving at
night or through tunnels. The use of
daytime running lights is governed by the
highway code of the country in which
you are driving. Comply with legal
requirements.
INTERIOR LIGHTS
FRONT CEILING LIGHT
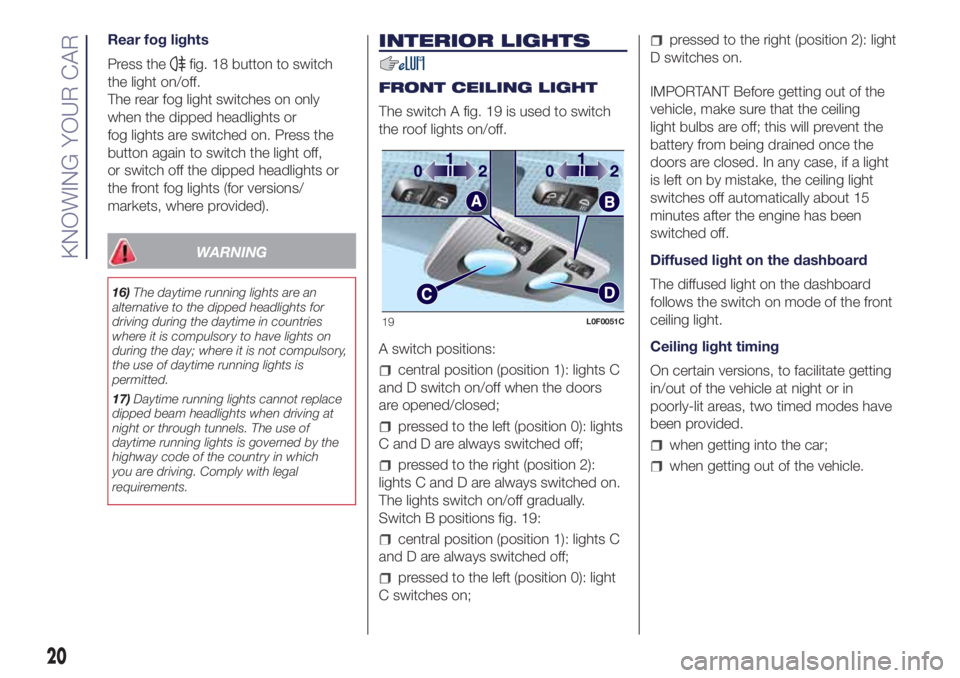
The switch A fig. 19 is used to switch
the roof lights on/off.
A switch positions:
central position (position 1): lights C
and D switch on/off when the doors
are opened/closed;
pressed to the left (position 0): lights
C and D are always switched off;
pressed to the right (position 2):
lights C and D are always switched on.
The lights switch on/off gradually.
Switch B positions fig. 19:
central position (position 1): lights C
and D are always switched off;
pressed to the left (position 0): light
C switches on;
pressed to the right (position 2): light
D switches on.
IMPORTANT Before getting out of the
vehicle, make sure that the ceiling
light bulbs are off; this will prevent the
battery from being drained once the
doors are closed. In any case, if a light
is left on by mistake, the ceiling light
switches off automatically about 15
minutes after the engine has been
switched off.
Diffused light on the dashboard
The diffused light on the dashboard
follows the switch on mode of the front
ceiling light.
Ceiling light timing
On certain versions, to facilitate getting
in/out of the vehicle at night or in
poorly-lit areas, two timed modes have
been provided.
when getting into the car;
when getting out of the vehicle.
19L0F0051C
20
KNOWING YOUR CAR
Page 40 of 200
KNOWING THE INSTRUMENT PANEL
This section of the handbook gives you
all the information you need to
understand, interpret and use the
instrument panel correctly.CONTROL PANEL AND
ON-BOARD INSTRUMENTS ........... 39
DISPLAY ......................................... 41
WARNING LIGHTS AND
MESSAGES .................................... 44
-Red warning lights / symbols............ 44
-Amber warning lights / symbols......... 52
-Green warning lights / symbols......... 61
-Blue warning lights............................ 62
38
KNOWING THE INSTRUMENT PANEL
Page 43 of 200
DISPLAY
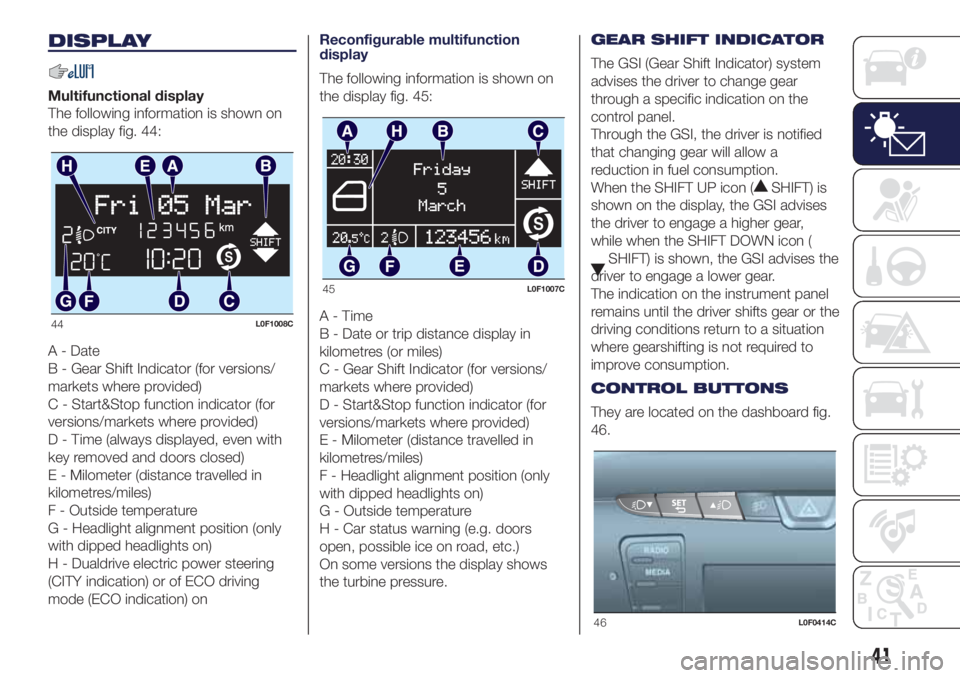
Multifunctional display
The following information is shown on
the display fig. 44:
A - Date
B - Gear Shift Indicator (for versions/
markets where provided)
C - Start&Stop function indicator (for
versions/markets where provided)
D - Time (always displayed, even with
key removed and doors closed)
E - Milometer (distance travelled in
kilometres/miles)
F - Outside temperature
G - Headlight alignment position (only
with dipped headlights on)
H - Dualdrive electric power steering
(CITY indication) or of ECO driving
mode (ECO indication) onReconfigurable multifunction
display
The following information is shown on
the display fig. 45:
A-Time
B - Date or trip distance display in
kilometres (or miles)
C - Gear Shift Indicator (for versions/
markets where provided)
D - Start&Stop function indicator (for
versions/markets where provided)
E - Milometer (distance travelled in
kilometres/miles)
F - Headlight alignment position (only
with dipped headlights on)
G - Outside temperature
H - Car status warning (e.g. doors
open, possible ice on road, etc.)
On some versions the display shows
the turbine pressure.GEAR SHIFT INDICATOR
The GSI (Gear Shift Indicator) system
advises the driver to change gear
through a specific indication on the
control panel.
Through the GSI, the driver is notified
that changing gear will allow a
reduction in fuel consumption.
When the SHIFT UP icon (
SHIFT) is
shown on the display, the GSI advises
the driver to engage a higher gear,
while when the SHIFT DOWN icon (
SHIFT) is shown, the GSI advises the
driver to engage a lower gear.
The indication on the instrument panel
remains until the driver shifts gear or the
driving conditions return to a situation
where gearshifting is not required to
improve consumption.
CONTROL BUTTONS
They are located on the dashboard fig.
46.
44L0F1008C
45L0F1007C
46L0F0414C
41
Page 44 of 200
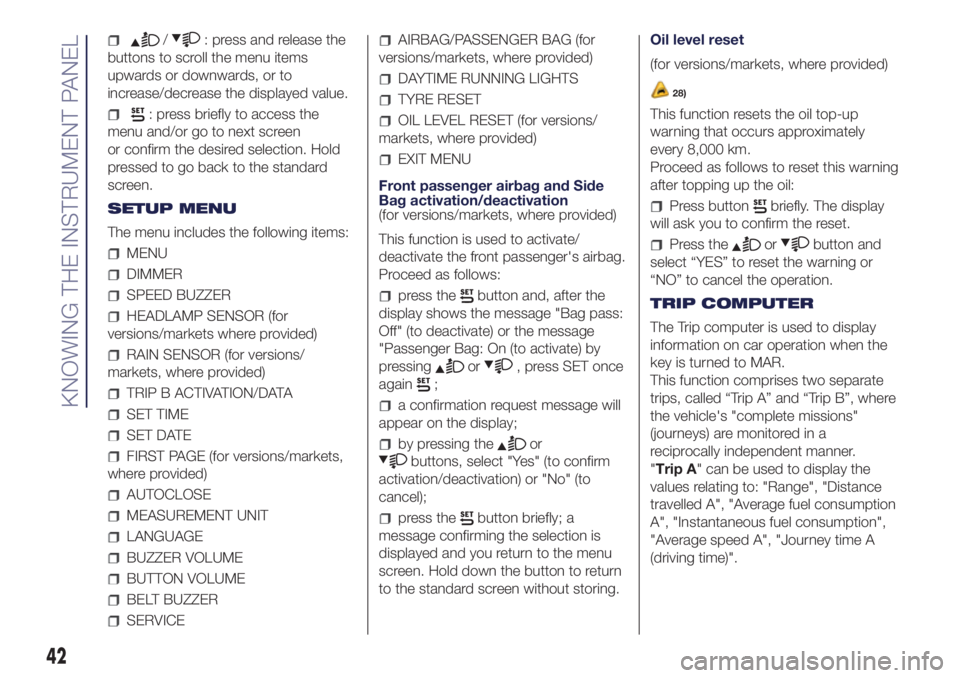
/: press and release the
buttons to scroll the menu items
upwards or downwards, or to
increase/decrease the displayed value.
: press briefly to access the
menu and/or go to next screen
or confirm the desired selection. Hold
pressed to go back to the standard
screen.
SETUP MENU
The menu includes the following items:
MENU
DIMMER
SPEED BUZZER
HEADLAMP SENSOR (for
versions/markets where provided)
RAIN SENSOR (for versions/
markets, where provided)
TRIP B ACTIVATION/DATA
SET TIME
SET DATE
FIRST PAGE (for versions/markets,
where provided)
AUTOCLOSE
MEASUREMENT UNIT
LANGUAGE
BUZZER VOLUME
BUTTON VOLUME
BELT BUZZER
SERVICE
AIRBAG/PASSENGER BAG (for
versions/markets, where provided)
DAYTIME RUNNING LIGHTS
TYRE RESET
OIL LEVEL RESET (for versions/
markets, where provided)
EXIT MENU
Front passenger airbag and Side
Bag activation/deactivation
(for versions/markets, where provided)
This function is used to activate/
deactivate the front passenger's airbag.
Proceed as follows:
press thebutton and, after the
display shows the message "Bag pass:
Off" (to deactivate) or the message
"Passenger Bag: On (to activate) by
pressing
or, press SET once
again
;
a confirmation request message will
appear on the display;
by pressing theor
buttons, select "Yes" (to confirm
activation/deactivation) or "No" (to
cancel);
press thebutton briefly; a
message confirming the selection is
displayed and you return to the menu
screen. Hold down the button to return
to the standard screen without storing.Oil level reset
(for versions/markets, where provided)
28)
This function resets the oil top-up
warning that occurs approximately
every 8,000 km.
Proceed as follows to reset this warning
after topping up the oil:
Press buttonbriefly. The display
will ask you to confirm the reset.
Press theorbutton and
select “YES” to reset the warning or
“NO” to cancel the operation.
TRIP COMPUTER
The Trip computer is used to display
information on car operation when the
key is turned to MAR.
This function comprises two separate
trips, called “Trip A” and “Trip B”, where
the vehicle's "complete missions"
(journeys) are monitored in a
reciprocally independent manner.
"Trip A" can be used to display the
values relating to: "Range", "Distance
travelled A", "Average fuel consumption
A", "Instantaneous fuel consumption",
"Average speed A", "Journey time A
(driving time)".
42
KNOWING THE INSTRUMENT PANEL
Page 46 of 200
WARNING LIGHTS AND MESSAGES
IMPORTANT NOTES
IMPORTANT The warning light switches on in the instrument panel together with a dedicated message and/or acoustic signal
when applicable. These indications are indicative and precautionary and as such must not be considered as exhaustive and/or
alternative to the information contained in the Owner Handbook, which you are advised to read carefully in all cases. In the
event of a failure indication, always refer to the contents of this chapter.
IMPORTANT Failure indications displayed are divided into two categories: very serious and less serious failures. Serious faults
are indicated by a repeated and prolonged warning "cycle". Less serious faults are indicated by a warning "cycle" with a shorter
duration. The display cycle of both categories can be interrupted by pressing the
button. The instrument panel warning
light will stay on until the cause of the malfunction is eliminated.
WARNING LIGHTS AND SYMBOLS ON INSTRUMENT PANEL
Red warning lights / symbols
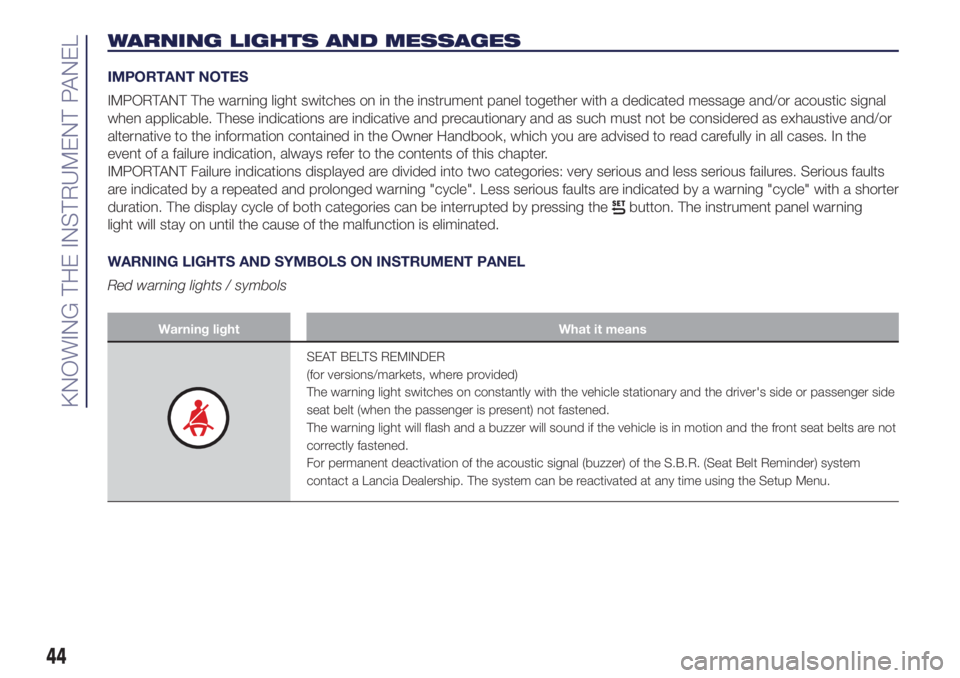
Warning light What it means
SEAT BELTS REMINDER
(for versions/markets, where provided)
The warning light switches on constantly with the vehicle stationary and the driver's side or passenger side
seat belt (when the passenger is present) not fastened.
The warning light will flash and a buzzer will sound if the vehicle is in motion and the front seat belts are not
correctly fastened.
For permanent deactivation of the acoustic signal (buzzer) of the S.B.R. (Seat Belt Reminder) system
contact a Lancia Dealership. The system can be reactivated at any time using the Setup Menu.
44
KNOWING THE INSTRUMENT PANEL
Page 47 of 200
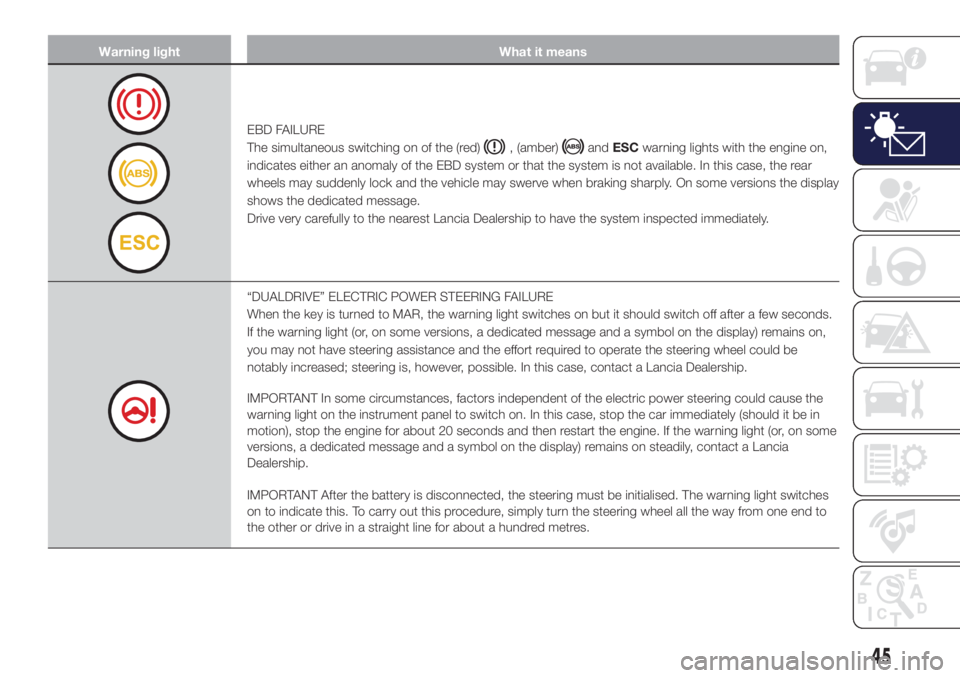
Warning light What it means
EBD FAILURE
The simultaneous switching on of the (red)
, (amber)andESCwarning lights with the engine on,
indicates either an anomaly of the EBD system or that the system is not available. In this case, the rear
wheels may suddenly lock and the vehicle may swerve when braking sharply. On some versions the display
shows the dedicated message.
Drive very carefully to the nearest Lancia Dealership to have the system inspected immediately.
“DUALDRIVE” ELECTRIC POWER STEERING FAILURE
When the key is turned to MAR, the warning light switches on but it should switch off after a few seconds.
If the warning light (or, on some versions, a dedicated message and a symbol on the display) remains on,
you may not have steering assistance and the effort required to operate the steering wheel could be
notably increased; steering is, however, possible. In this case, contact a Lancia Dealership.
IMPORTANT In some circumstances, factors independent of the electric power steering could cause the
warning light on the instrument panel to switch on. In this case, stop the car immediately (should it be in
motion), stop the engine for about 20 seconds and then restart the engine. If the warning light (or, on some
versions, a dedicated message and a symbol on the display) remains on steadily, contact a Lancia
Dealership.
IMPORTANT After the battery is disconnected, the steering must be initialised. The warning light switches
on to indicate this. To carry out this procedure, simply turn the steering wheel all the way from one end to
the other or drive in a straight line for about a hundred metres.
45
Page 54 of 200
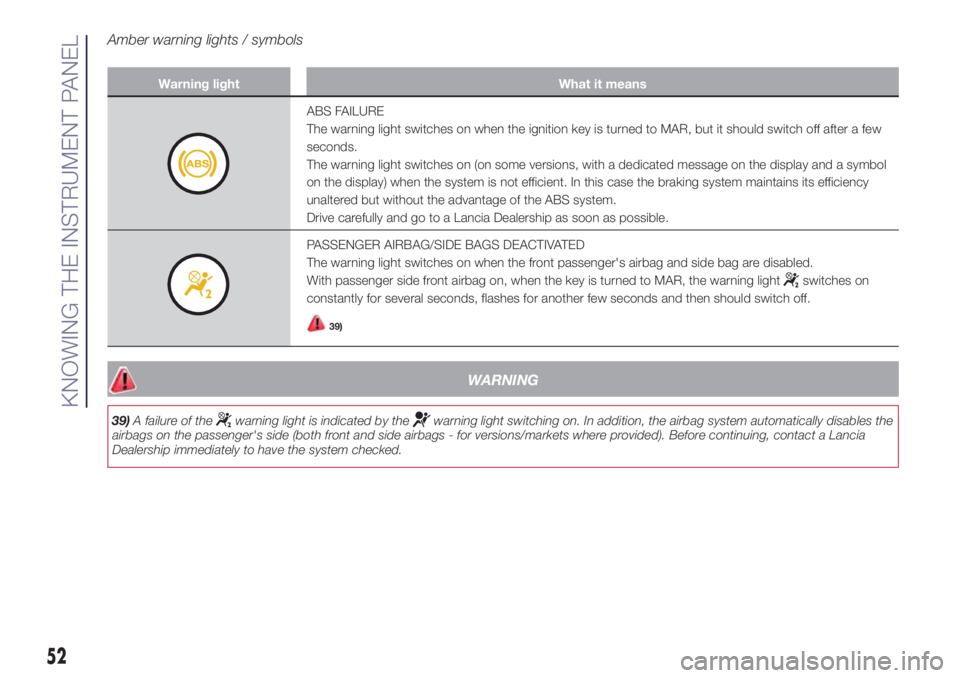
Amber warning lights / symbols
Warning light What it means
ABS FAILURE
The warning light switches on when the ignition key is turned to MAR, but it should switch off after a few
seconds.
The warning light switches on (on some versions, with a dedicated message on the display and a symbol
on the display) when the system is not efficient. In this case the braking system maintains its efficiency
unaltered but without the advantage of the ABS system.
Drive carefully and go to a Lancia Dealership as soon as possible.
PASSENGER AIRBAG/SIDE BAGS DEACTIVATED
The warning light switches on when the front passenger's airbag and side bag are disabled.
With passenger side front airbag on, when the key is turned to MAR, the warning light
switches on
constantly for several seconds, flashes for another few seconds and then should switch off.
39)
WARNING
39)A failure of thewarning light is indicated by thewarning light switching on. In addition, the airbag system automatically disables the
airbags on the passenger's side (both front and side airbags - for versions/markets where provided). Before continuing, contact a Lancia
Dealership immediately to have the system checked.
52
KNOWING THE INSTRUMENT PANEL