turning Lancia Ypsilon 2021 Owner handbook (in English)
[x] Cancel search | Manufacturer: LANCIA, Model Year: 2021, Model line: Ypsilon, Model: Lancia Ypsilon 2021Pages: 200, PDF Size: 4.53 MB
Page 13 of 200
THE LANCIA CODE
SYSTEM
This is an electronic engine locking
system which increases protection
against attempted thefts of the vehicle.
It is automatically activated when the
ignition key is removed.
Each key contains an electronic device
which modulates the signal emitted
during ignition by an antenna built into
the ignition device. The signal is the
"password", different every time the
vehicle is started, through which the
control unit recognises the key and
enables starting.
OPERATION
Each time the car is started by turning
the ignition key to MAR, the Lancia
CODE system control unit sends an
acknowledgement code to the
Powertrain Control Module to
deactivate the immobiliser. The code is
sent only if the control unit of the Lancia
CODE system has acknowledged the
code received from the key.Each time the ignition key is turned to
STOP, the Lancia CODE system
deactivates the functions of the
management engine control unit. If,
during starting, the code is not correctly
recognised, the
warning light
switches on in the instrument panel. In
this case, turn the key to STOP and
then to MAR-ON; if it is still locked, try
again with the other keys that come
with the car. Contact a Lancia
Dealership if you still cannot start the
engine.
If the
warning light switches on, this
means that the system is running a
self-diagnosis (for example due to
a voltage drop). If the problem persists,
contact a Lancia Dealership.
DOORS
LOCKING/UNLOCKING
DOORS FROM THE
INSIDE
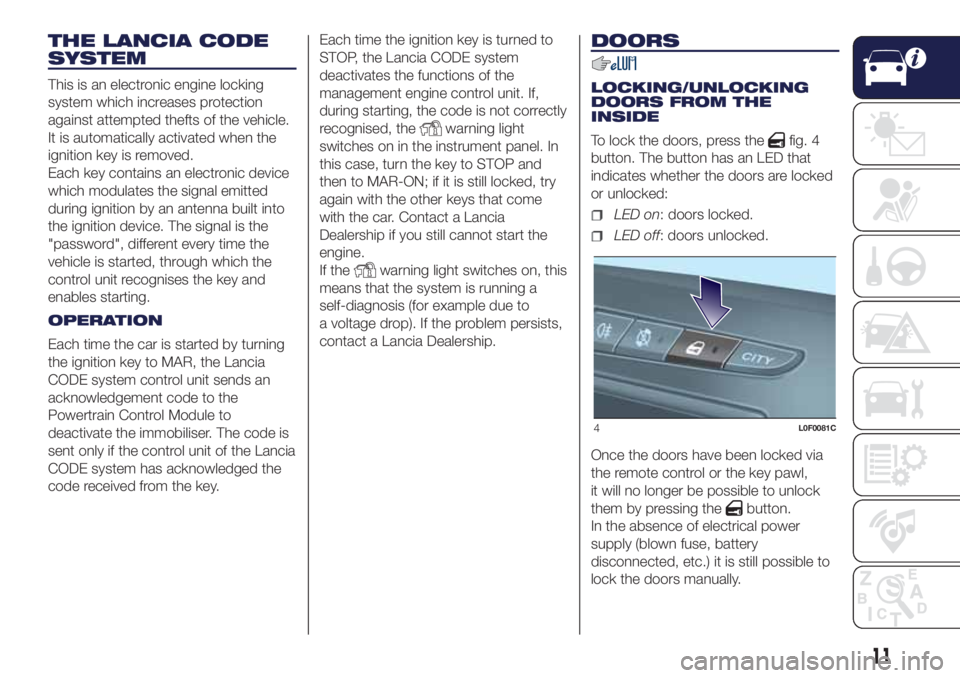
To lock the doors, press the
fig. 4
button. The button has an LED that
indicates whether the doors are locked
or unlocked:
LED on: doors locked.
LED off: doors unlocked.
Once the doors have been locked via
the remote control or the key pawl,
it will no longer be possible to unlock
them by pressing the
button.
In the absence of electrical power
supply (blown fuse, battery
disconnected, etc.) it is still possible to
lock the doors manually.
4L0F0081C
11
Page 14 of 200
IMPORTANT With central locking
active, pulling the internal opening lever
of the passenger side door unlocks
the door (the LED stays on). Pulling the
internal opening lever of the driver
side door activates central unlocking.
IMPORTANT The rear doors cannot be
opened from the inside when the
child-lock system is engaged (see the
description in the following paragraph).
LOCKING/UNLOCKING
DOORS FROM THE
OUTSIDE
Mechanical key:insert the metal
insert in the lock and turn it.
Key with remote control: press the
button to lock the doors, or the
button to unlock the doors.
SAFE LOCK DEVICE
2)
This safety device inhibits the operation
of the interior door handles and the
door locking/unlocking button.
Activating the device
The device is enabled on all the doors
by pressing the
button on the key
twice quickly.
The direction indicators flash 3 times
and the LED above the
fig. 4 button
flashes to indicate that the device has
been activated.Deactivating the device
The device disengages automatically:
pressing thebutton on the remote
control;
by turning the ignition key to the
MAR position.
CHILD SAFETY DEVICE
7)3)
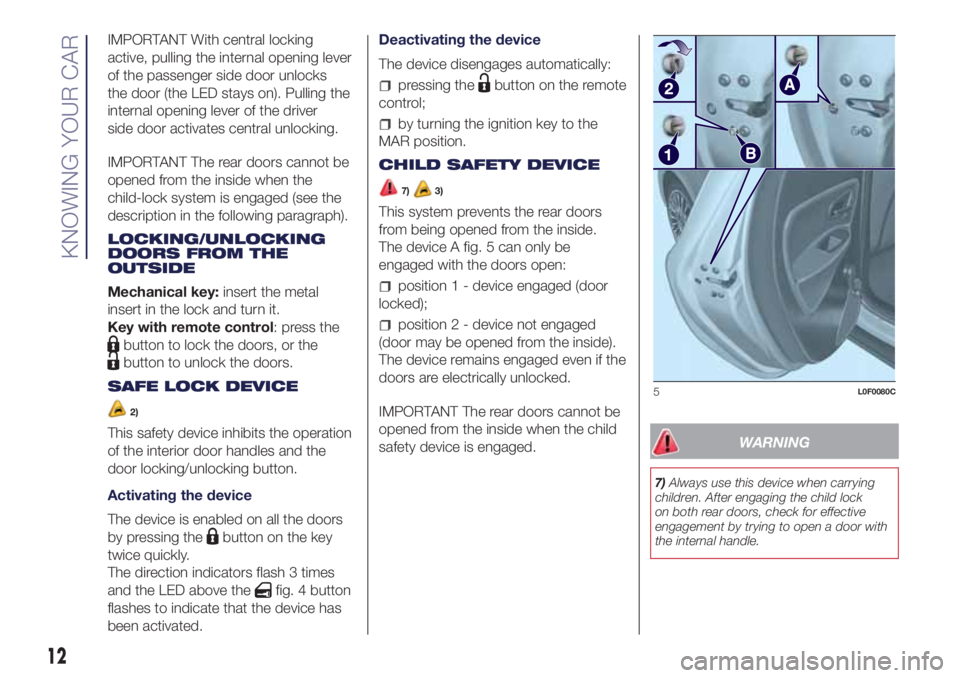
This system prevents the rear doors
from being opened from the inside.
The device A fig. 5 can only be
engaged with the doors open:
position 1 - device engaged (door
locked);
position 2 - device not engaged
(door may be opened from the inside).
The device remains engaged even if the
doors are electrically unlocked.
IMPORTANT The rear doors cannot be
opened from the inside when the child
safety device is engaged.
WARNING
7)Always use this device when carrying
children. After engaging the child lock
on both rear doors, check for effective
engagement by trying to open a door with
the internal handle.
5L0F0080C
12
KNOWING YOUR CAR
Page 15 of 200
WARNING
2)Once the Safe Lock system is engaged,
it is impossible to open the doors from
inside the car. Therefore, before getting out
of the car check that there is no one left
on board.
3)If the child lock and the the front
passenger door and rear doors emergency
lock device are engaged, operating the
internal opening handle will not open the
door: in this case, to open the door, the
outside handle must be used. The door
central locking/unlocking button
is not
disabled by the engagement of the
emergency lock.
SEATS
8) 9)4)
FRONT SEATS
Longitudinal adjustment
10)
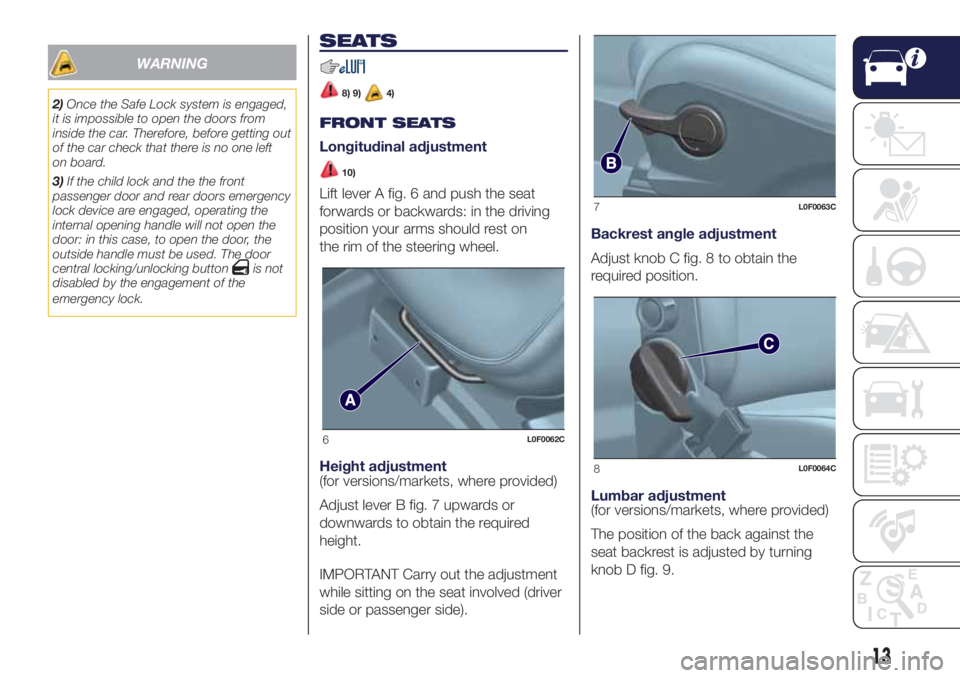
Lift lever A fig. 6 and push the seat
forwards or backwards: in the driving
position your arms should rest on
the rim of the steering wheel.
Height adjustment
(for versions/markets, where provided)
Adjust lever B fig. 7 upwards or
downwards to obtain the required
height.
IMPORTANT Carry out the adjustment
while sitting on the seat involved (driver
side or passenger side).Backrest angle adjustment
Adjust knob C fig. 8 to obtain the
required position.
Lumbar adjustment
(for versions/markets, where provided)
The position of the back against the
seat backrest is adjusted by turning
knob D fig. 9.
6L0F0062C
7L0F0063C
8L0F0064C
13
Page 21 of 200
FLASHING
To do this, pull the stalk fig. 17 towards
the steering wheel (unstable position)
regardless of the position of ring nut A.
The
warning light switches on in
the instrument panel.
DIRECTION INDICATORS
Bring the stalk fig. 17 to the (stable)
position:
upwards:activates the right direction
indicator;
downwards:activates the left direction
indicator.
Warning light
orwill blink on the
instrument panel.
The direction indicators switch off
automatically when the steering wheel
is straightened.
"Lane Change" function
If you wish to signal a lane change,
place the left stalk in the unstable
position for less than half a second.
The direction indicator on the side
selected will flash five times and then
switch off automatically."FOLLOW ME HOME"
DEVICE
This allows the space in front of the
vehicle to be lit for a set time.
Activation
The "Follow Me Home" device is
activated by pulling the stalk fig. 17
towards the steering wheel, in addition
to the stroke end click.
It is possible to enable this function
within 2 minutes after turning off the
engine. This function allows turning on
lights and low beams.
It is possible to set the headlights
turning on time by pulling the left lever
towards the steering wheel (unstable
position) one or more times. In this case
it is possible to choose between 0, 30,
60, 90 up to a maximum of 210
seconds.
Each time the stalk is operated, the
warning light
on the instrument
panel switches on. The display shows a
message and the time set for the
function. The
warning light comes
on when the stalk is first moved and
stays on until the function is
automatically deactivated.Off
This function is deactivated turning on
again the headlights, sidelights or
pulling the left lever towards the
steering wheel (unstable position) for
more than 2 seconds, or switching the
starter to MAR.
"Follow me home" function with
Uconnect™ system interaction
IfUconnect™ is installed, the function
management remains the same, but
it takes place through interaction with
theUconnect™ menu.
FOG LIGHTS / REAR FOG
LIGHTS
(for versions/markets, where provided)
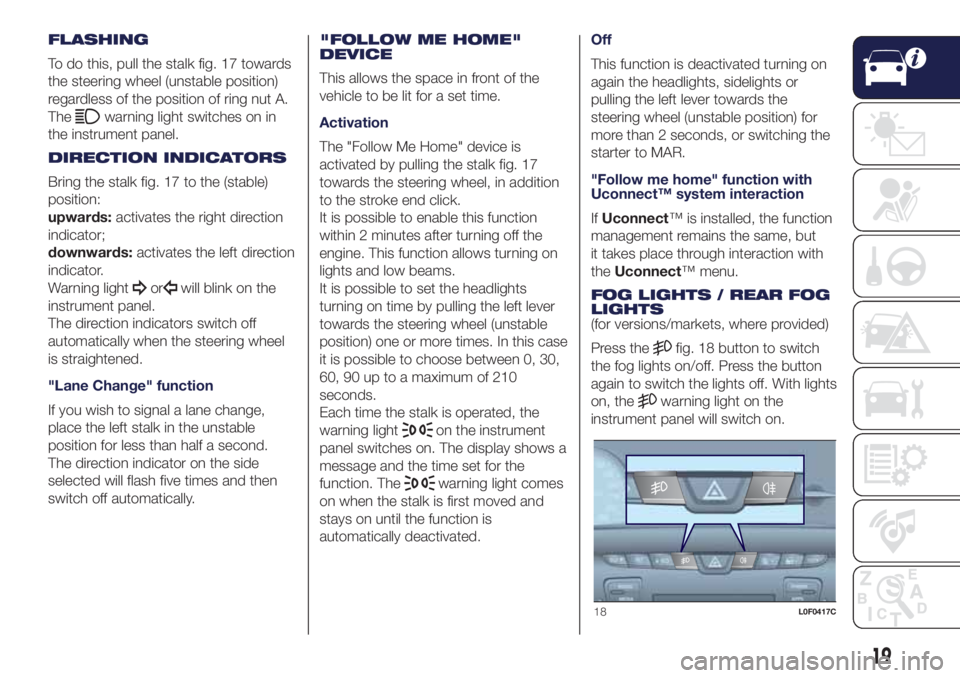
Press the
fig. 18 button to switch
the fog lights on/off. Press the button
again to switch the lights off. With lights
on, the
warning light on the
instrument panel will switch on.
18L0F0417C
19
Page 31 of 200
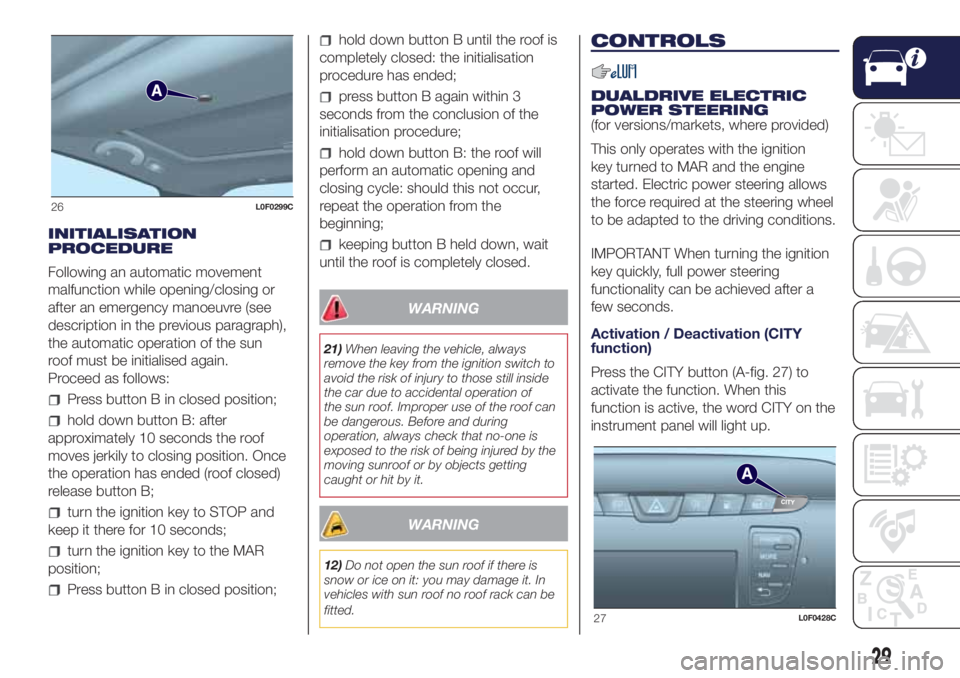
INITIALISATION
PROCEDURE
Following an automatic movement
malfunction while opening/closing or
after an emergency manoeuvre (see
description in the previous paragraph),
the automatic operation of the sun
roof must be initialised again.
Proceed as follows:
Press button B in closed position;
hold down button B: after
approximately 10 seconds the roof
moves jerkily to closing position. Once
the operation has ended (roof closed)
release button B;
turn the ignition key to STOP and
keep it there for 10 seconds;
turn the ignition key to the MAR
position;
Press button B in closed position;
hold down button B until the roof is
completely closed: the initialisation
procedure has ended;
press button B again within 3
seconds from the conclusion of the
initialisation procedure;
hold down button B: the roof will
perform an automatic opening and
closing cycle: should this not occur,
repeat the operation from the
beginning;
keeping button B held down, wait
until the roof is completely closed.
WARNING
21)When leaving the vehicle, always
remove the key from the ignition switch to
avoid the risk of injury to those still inside
the car due to accidental operation of
the sun roof. Improper use of the roof can
be dangerous. Before and during
operation, always check that no-one is
exposed to the risk of being injured by the
moving sunroof or by objects getting
caught or hit by it.
WARNING
12)Do not open the sun roof if there is
snow or ice on it: you may damage it. In
vehicles with sun roof no roof rack can be
fitted.
CONTROLS
DUALDRIVE ELECTRIC
POWER STEERING
(for versions/markets, where provided)
This only operates with the ignition
key turned to MAR and the engine
started. Electric power steering allows
the force required at the steering wheel
to be adapted to the driving conditions.
IMPORTANT When turning the ignition
key quickly, full power steering
functionality can be achieved after a
few seconds.
Activation / Deactivation (CITY
function)
Press the CITY button (A-fig. 27) to
activate the function. When this
function is active, the word CITY on the
instrument panel will light up.
26L0F0299C
27L0F0428C
29
Page 48 of 200
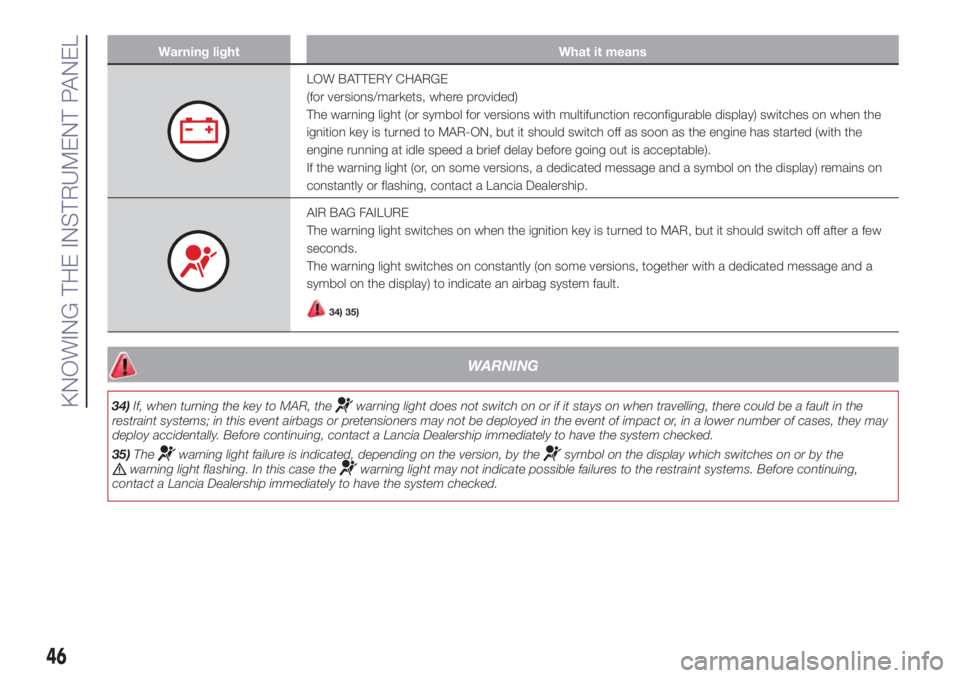
Warning light What it means
LOW BATTERY CHARGE
(for versions/markets, where provided)
The warning light (or symbol for versions with multifunction reconfigurable display) switches on when the
ignition key is turned to MAR-ON, but it should switch off as soon as the engine has started (with the
engine running at idle speed a brief delay before going out is acceptable).
If the warning light (or, on some versions, a dedicated message and a symbol on the display) remains on
constantly or flashing, contact a Lancia Dealership.
AIR BAG FAILURE
The warning light switches on when the ignition key is turned to MAR, but it should switch off after a few
seconds.
The warning light switches on constantly (on some versions, together with a dedicated message and a
symbol on the display) to indicate an airbag system fault.
34) 35)
WARNING
34)If, when turning the key to MAR, thewarning light does not switch on or if it stays on when travelling, there could be a fault in the
restraint systems; in this event airbags or pretensioners may not be deployed in the event of impact or, in a lower number of cases, they may
deploy accidentally. Before continuing, contact a Lancia Dealership immediately to have the system checked.
35)The
warning light failure is indicated, depending on the version, by thesymbol on the display which switches on or by thewarning light flashing. In this case thewarning light may not indicate possible failures to the restraint systems. Before continuing,
contact a Lancia Dealership immediately to have the system checked.
46
KNOWING THE INSTRUMENT PANEL
Page 58 of 200

Warning light What it means
DPF (PARTICULATE FILTER) CLEANING IN PROGRESS (Diesel versions with DPF)
The warning light switches on when the ignition key is turned to MAR, but it should switch off after a few
seconds.
The warning light (together with a dedicated message and a symbol on the display on some versions)
switches on constantly to notify the driver that the DPF system needs to eliminate captured pollutants
(particulate) through the regeneration process.
The warning light does not come on during every DPF regeneration, but only when driving conditions
require that the driver is notified. To switch the warning light off, the vehicle must be kept moving until the
regeneration process is completed. On average, the process lasts 15 minutes. Optimal conditions for
completing the process are achieved by travelling at 60 km/h with engine speed above 2000 rpm.
When this warning light switches on, it does not indicate a vehicle failure and thus it should not be taken to
a workshop. On some versions, together with the warning light switching on, the display shows a
dedicated message.
40)
WARNING
40)Vehicle travel speed should always be adapted to the traffic and weather conditions, and must always comply with traffic regulations. The
engine can be stopped even if the DPF warning light is on: however, repeated interruptions of the regeneration process could cause
premature deterioration of the engine oil. For this reason, it is always advisable to wait for the warning light to go off before turning the engine
off, following the instructions appearing above. Do not complete the DPF regeneration process when the vehicle is stopped.
56
KNOWING THE INSTRUMENT PANEL
Page 69 of 200
uphill:car stationary on a road with
a gradient higher than 5%, engine
running, brake pressed and gearbox in
neutral or gear (other than reverse)
engaged;
downhill:car stationary on a road
with a gradient higher than 5%, engine
running, brake pressed and reverse
gear engaged.
When setting off, the ESC system
control unit maintains the braking
pressure on the wheels until the torque
necessary for starting is reached, or
in any case for a maximum of 2
seconds, allowing your right foot to be
moved easily from the brake pedal to
the accelerator.
When the 2 seconds have elapsed,
without starting, the system is
automatically deactivated, gradually
releasing the braking pressure. During
this release stage, the typical
mechanical brake release noise can be
heard, indicating that the car is about
to move.
IMPORTANT The Hill Holder system is
not active with engaged parking brake.IMPORTANT The Hill Holder system is
not a parking brake, therefore do not
leave the car without activating the
handbrake, switching off the engine,
and engaging first gear, with the car
parked in safe conditions.
IMPORTANT The Hill Holder system is
not active with engaged parking brake.
If the parking brake is engaged and
at the same time you press the brake
pedal, the Hill Holder system is
activated only if the parking brake is
disengaged before releasing the brake
pedal.
56)
ASR (AntiSlip
Regulation) SYSTEM
This is an integral part of the ESC
system and automatically operates in
the event of one or both drive wheels
slipping, loss of grip on wet roads
(aquaplaning) and acceleration
on slippery, snowy or icy roads, etc.
Depending on the slipping conditions,
two different control systems are
activated:
if the slipping involves both drive
wheels, the ASR intervenes reducing
the power transmitted by the engine;
if the slipping only involves one of
the drive wheels, it intervenes
automatically braking the wheel that is
slipping.
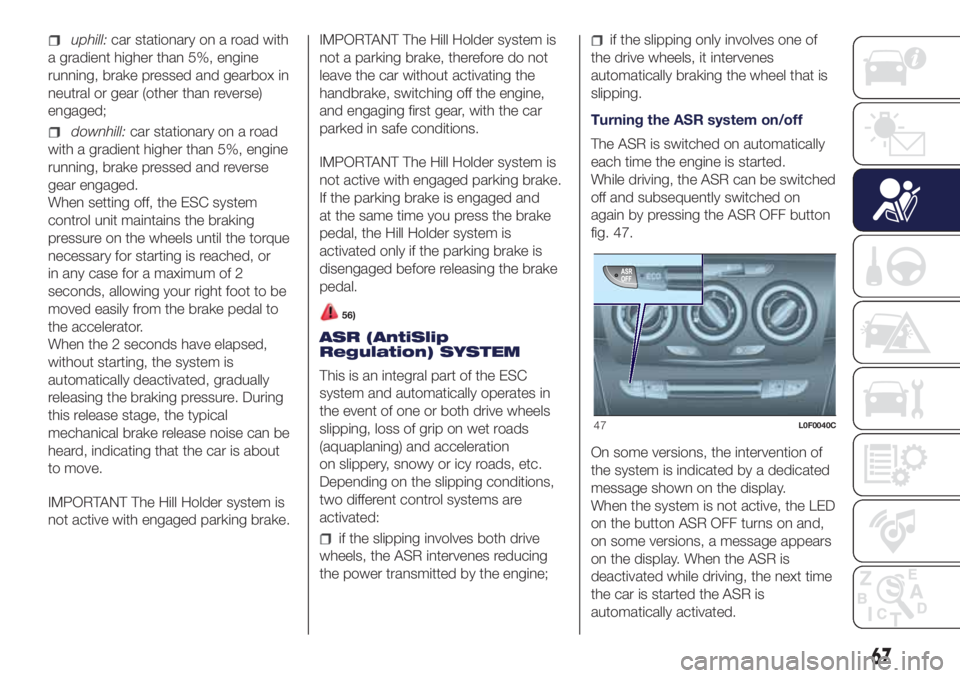
Turning the ASR system on/off
The ASR is switched on automatically
each time the engine is started.
While driving, the ASR can be switched
off and subsequently switched on
again by pressing the ASR OFF button
fig. 47.
On some versions, the intervention of
the system is indicated by a dedicated
message shown on the display.
When the system is not active, the LED
on the button ASR OFF turns on and,
on some versions, a message appears
on the display. When the ASR is
deactivated while driving, the next time
the car is started the ASR is
automatically activated.
47L0F0040C
67
Page 72 of 200
DRIVING
ASSISTANCE
SYSTEMS
iTPMS System (indirect
Tyre Pressure
Monitoring System)
(for versions/markets, where provided)
67) 68) 69) 70) 71) 72)
The car can be equipped with the
iTPMS (indirect Tire Pressure
Monitoring System) which monitors the
tyre inflation status thanks to wheel
speed sensors.
The system warns the driver if one or
more tyres are flat by the
warning
light continuously lit on the instrument
panel and a dedicated warning
message on the display.
If one tyre only is flat, the system can
indicate its position: it is in any case
recommended to check the pressure
on all four tyres.
The system does not recognise the tyre
pressure value, but it is able to indicate
if the pressure of one or more tyres
falls below a certain pressure threshold.
This indication is displayed also when
turning the engine off and on again until
the RESET procedure is carried out.Reset procedure
The iTPMS needs an initial "self-
learning" phase (with length depending
on the driving style and road conditions:
optimal conditions being driving on a
straight road at 80 km/h for at least 20
minutes) which starts when the Reset
procedure is carried out.
The Reset procedure must be carried
out:
each time tyre pressure is modified;
when even only one tyre is changed;
when tyres are rotated/inverted;
when the space-saver wheel is
fitted.
Before carrying out the Reset
procedure, inflate the tyres to the rated
pressure values specified in the inflation
pressure table (see "Wheels" paragraph
in the "Technical specifications"
chapter).
If the Reset procedure is not carried
out, in all above cases, the
warning
light may give false indications on
one or more tyres.
To carry out the RESET procedure, with
the car stopped and the ignition device
at MAR, use the Main Menu as follows:
briefly press thebutton: the
display will show Reset;
press thebutton or the
button to select ("Yes" or "No");
briefly press thebutton: the
display will show "Confirm";
pressbutton orto select
("Yes" to Reset or "No" to exit the video
page);
press thebutton again to return
to the standard screen or to the main
menu according to where you are in the
menu.
At the end of the Reset procedure the
display will show the "Reset saved"
message, indicating that the self-
learning has been started and you will
hear an acoustic warning beep.
If the iTPMS self-learning is not properly
executed, the message is not
displayed, and no beep is heard.
Operating conditions
The system is active for speeds above
15 km/h.
In a few situations such as sporty
driving, particular conditions of the road
surface (e.g. icy, snowy, unsurfaced
roads...) the signalling may be delayed
or partial in detecting the contemporary
deflation of more than one tyre.
70
SAFETY
Page 96 of 200
STARTING THE
ENGINE
107) 108)34) 35) 36) 37)
Before starting the engine, adjust the
seat, the interior rear view mirrors,
the door mirrors and fasten the seat
belt correctly.
Never press the accelerator pedal for
starting the engine.
PETROL VERSIONS
Proceed as follows:
engage the handbrake and put the
gear lever in neutral.On 0.9 TwinAir
versionsengage the handbrake and
place the gear lever in neutral or fully
press the clutch pedal if a gear other
than neutral is engaged;
for all versions (except 0.9
TwinAir)fully depress the clutch pedal
without touching the accelerator;
turn the ignition key to AVV and
release it as soon as the engine starts.
DIESEL VERSIONS
Proceed as follows:
engage the handbrake and put the
gear lever in neutral;
turn the ignition key to MAR: the
warning lights
andon the
instrument panel will turn on;
wait for the warning lightsand
to switch off;
fully depress the clutch pedal
without touching the accelerator;
turn the ignition key to the AVV
position as soon as the warning light
turns off. Waiting too long will waste
the heating work carried out by the
plugs. Release the key as soon as the
engine starts.
IMPORTANT With cold engine, the
accelerator must be entirely released
when turning the ignition key to position
AVV. If the engine does not start at the
first attempt, return the ignition key
to STOP before repeating the starting
procedure. If, when the ignition key is at
MAR, the instrument panel warning
light
remains lit, turn the key to
STOP and then back to MAR. If the
warning light remains on, try with the
other keys provided with the car.
Contact a Lancia Dealership if you still
cannot start the engine.VERSIONS WITH DUAL
FUNCTION SYSTEM
TRANSMISSION
109)
The system allows the engine to be
started both with a gear engaged and
with the transmission in neutral (N).
However, the brake pedal must always
be pressed first if neutral is not
engaged. It is therefore advisable to
position the gear lever at N before
starting the engine.
LPG AND NATURAL
POWER VERSIONS
38)
The engine always starts up on petrol
independently of the previously
selected mode.
SWITCHING OFF THE
ENGINE
39)
Turn the ignition key to STOP while the
engine is idling.
IMPORTANT After a demanding drive,
before turning the engine off you should
allow it to idle to allow the temperature
in the engine compartment to
decrease.
94
STARTING AND DRIVING