fuel filter LAND ROVER DEFENDER 1996 Workshop Manual
[x] Cancel search | Manufacturer: LAND ROVER, Model Year: 1996, Model line: DEFENDER, Model: LAND ROVER DEFENDER 1996Pages: 455, PDF Size: 6.44 MB
Page 21 of 455
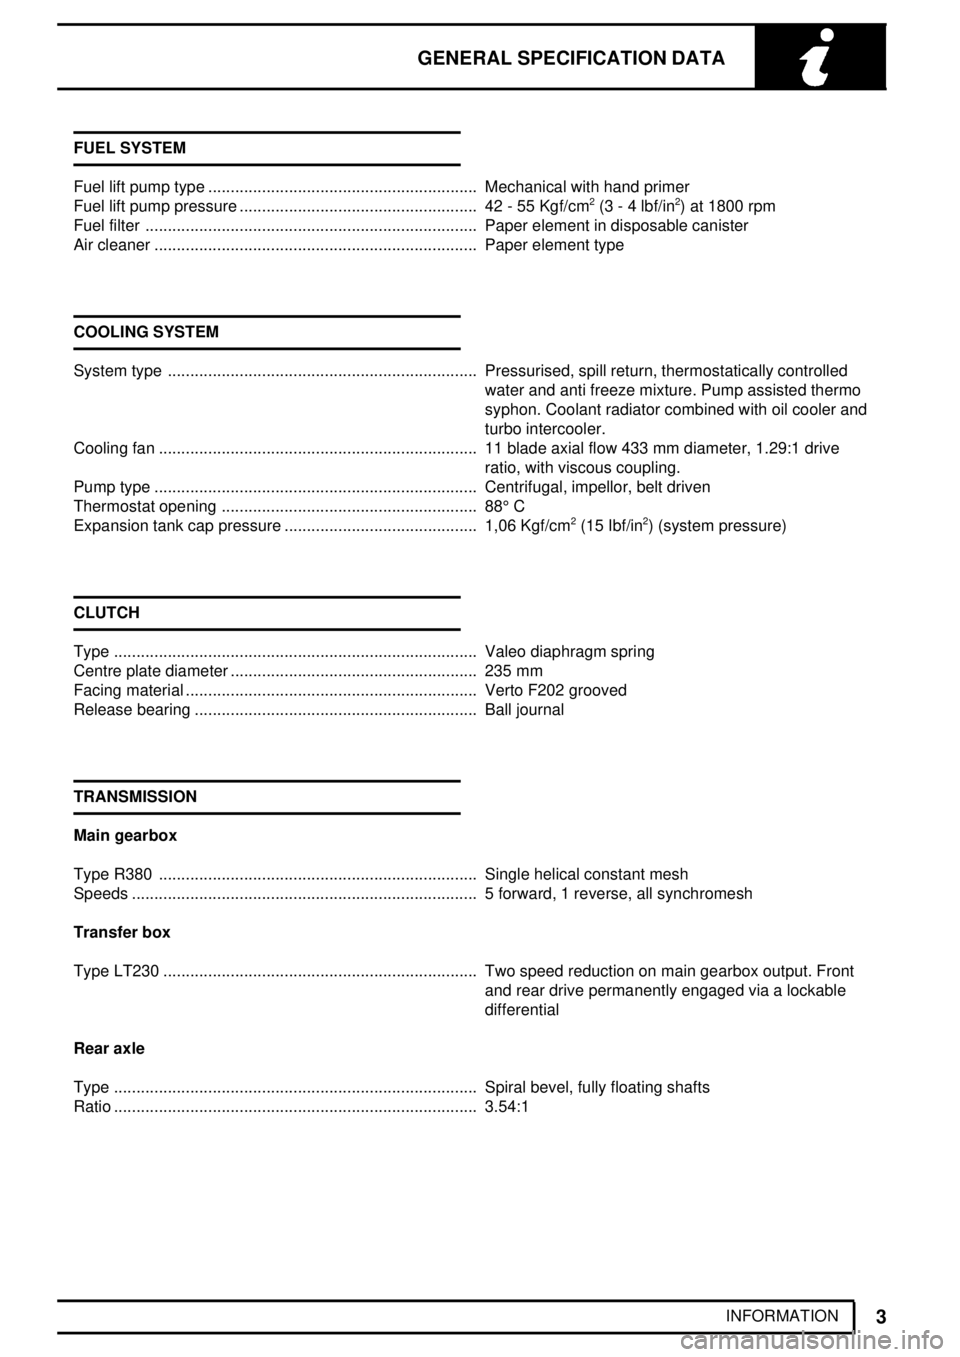
GENERAL SPECIFICATION DATA
3
INFORMATION FUEL SYSTEM
Fuel lift pump type Mechanical with hand primer............................................................
Fuel lift pump pressure 42 - 55 Kgf/cm
2(3 - 4 lbf/in2) at 1800 rpm .....................................................
Fuel filter Paper element in disposable canister..........................................................................
Air cleaner Paper element type........................................................................
COOLING SYSTEM
System type Pressurised, spill return, thermostatically controlled.....................................................................
water and anti freeze mixture. Pump assisted thermo
syphon. Coolant radiator combined with oil cooler and
turbo intercooler.
Cooling fan 11 blade axial flow 433 mm diameter, 1.29:1 drive.......................................................................
ratio, with viscous coupling.
Pump type Centrifugal, impellor, belt driven........................................................................
Thermostat opening 88°C .........................................................
Expansion tank cap pressure 1,06 Kgf/cm
2(15 Ibf/in2) (system pressure) ...........................................
CLUTCH
Type Valeo diaphragm spring.................................................................................
Centre plate diameter 235 mm.......................................................
Facing material Verto F202 grooved.................................................................
Release bearing Ball journal...............................................................
TRANSMISSION
Main gearbox
Type R380 Single helical constant mesh.......................................................................
Speeds 5 forward, 1 reverse, all synchromesh.............................................................................
Transfer box
Type LT230 Two speed reduction on main gearbox output. Front......................................................................
and rear drive permanently engaged via a lockable
differential
Rear axle
Type Spiral bevel, fully floating shafts.................................................................................
Ratio 3.54:1.................................................................................
Page 42 of 455
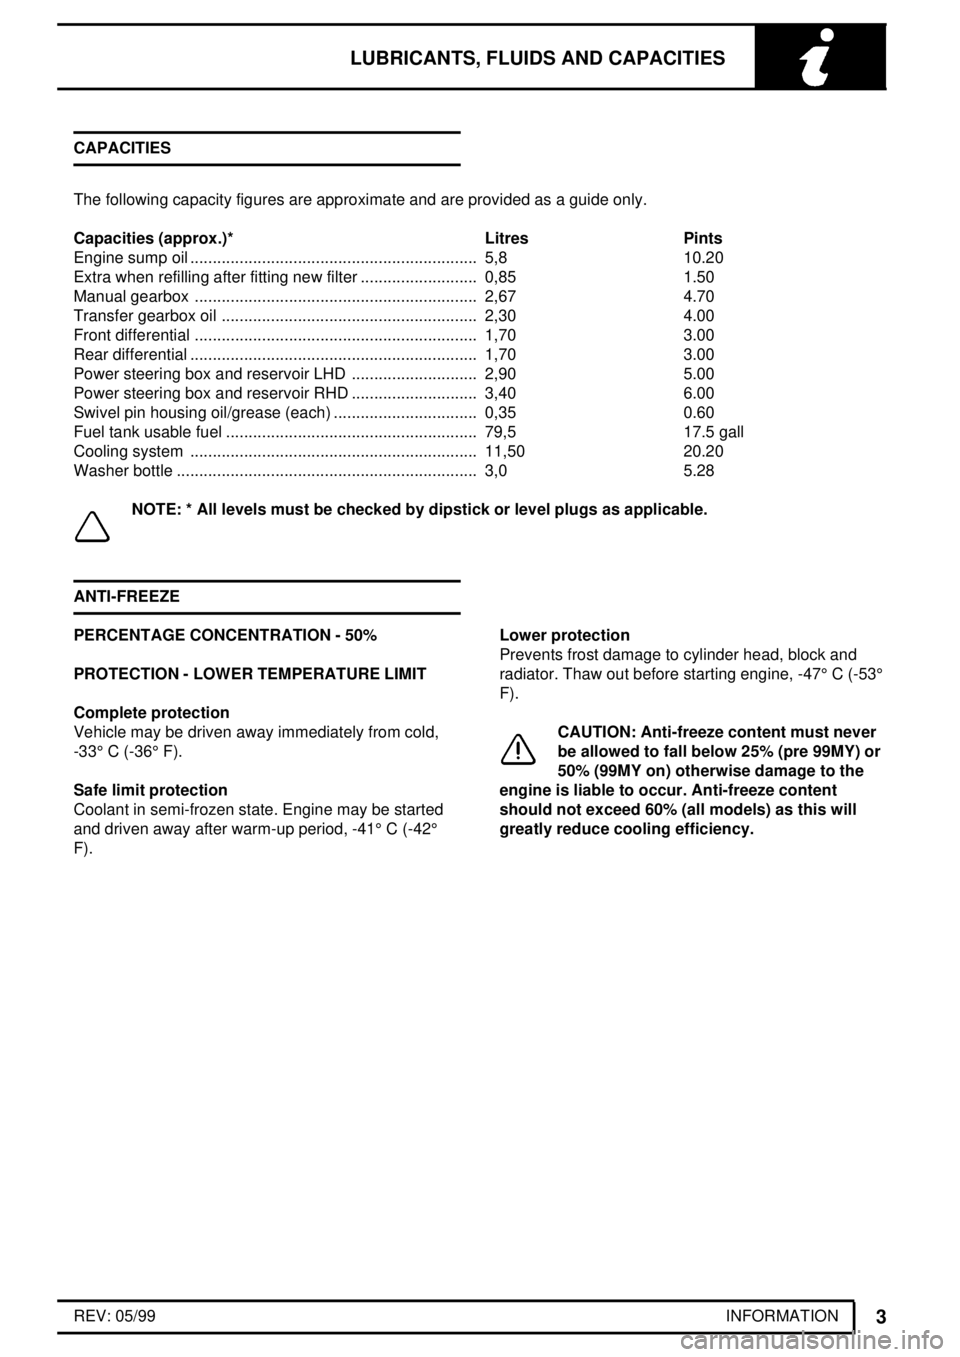
LUBRICANTS, FLUIDS AND CAPACITIES
3
INFORMATION REV: 05/99 CAPACITIES
The following capacity figures are approximate and are provided as a guide only.
Capacities (approx.)* Litres Pints
Engine sump oil 5,8................................................................ 10.20
Extra when refilling after fitting new filter 0,85.......................... 1.50
Manual gearbox 2,67............................................................... 4.70
Transfer gearbox oil 2,30......................................................... 4.00
Front differential 1,70............................................................... 3.00
Rear differential 1,70................................................................ 3.00
Power steering box and reservoir LHD 2,90............................ 5.00
Power steering box and reservoir RHD 3,40............................ 6.00
Swivel pin housing oil/grease (each) 0,35................................ 0.60
Fuel tank usable fuel 79,5........................................................ 17.5 gall
Cooling system 11,50................................................................ 20.20
Washer bottle 3,0................................................................... 5.28
NOTE: * All levels must be checked by dipstick or level plugs as applicable.
ANTI-FREEZE
PERCENTAGE CONCENTRATION - 50%
PROTECTION - LOWER TEMPERATURE LIMIT
Complete protection
Vehicle may be driven away immediately from cold,
-33°C (-36°F).
Safe limit protection
Coolant in semi-frozen state. Engine may be started
and driven away after warm-up period, -41°C (-42°
F).Lower protection
Prevents frost damage to cylinder head, block and
radiator. Thaw out before starting engine, -47°C (-53°
F).
CAUTION: Anti-freeze content must never
be allowed to fall below 25% (pre 99MY) or
50% (99MY on) otherwise damage to the
engine is liable to occur. Anti-freeze content
should not exceed 60% (all models) as this will
greatly reduce cooling efficiency.
Page 46 of 455
MAINTENANCE
3
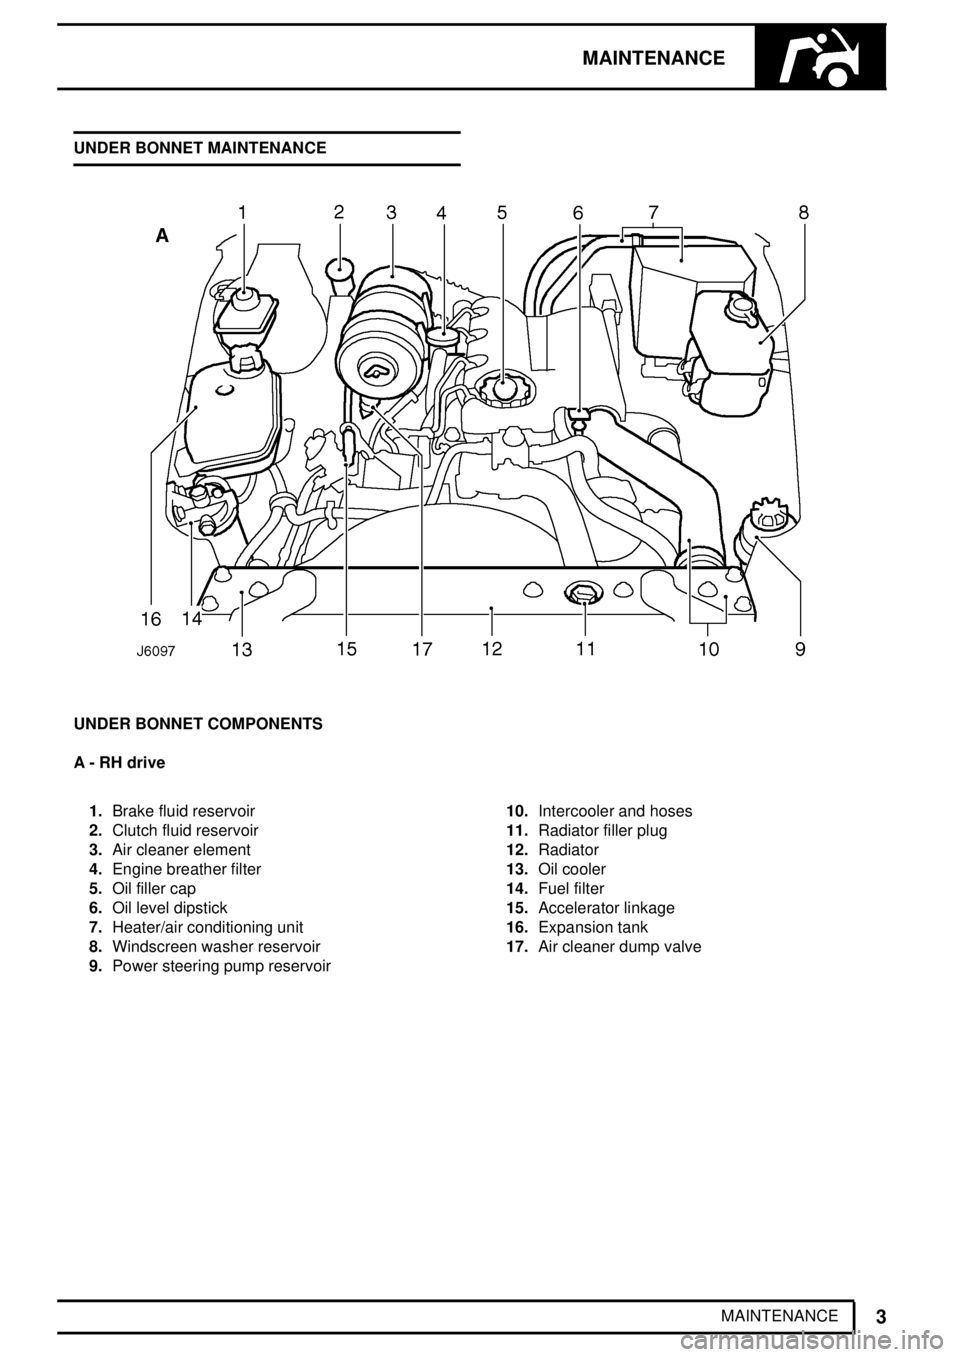
MAINTENANCE UNDER BONNET MAINTENANCE
UNDER BONNET COMPONENTS
A - RH drive
1.Brake fluid reservoir
2.Clutch fluid reservoir
3.Air cleaner element
4.Engine breather filter
5.Oil filler cap
6.Oil level dipstick
7.Heater/air conditioning unit
8.Windscreen washer reservoir
9.Power steering pump reservoir10.Intercooler and hoses
11.Radiator filler plug
12.Radiator
13.Oil cooler
14.Fuel filter
15.Accelerator linkage
16.Expansion tank
17.Air cleaner dump valve
Page 47 of 455
10MAINTENANCE
4
MAINTENANCE
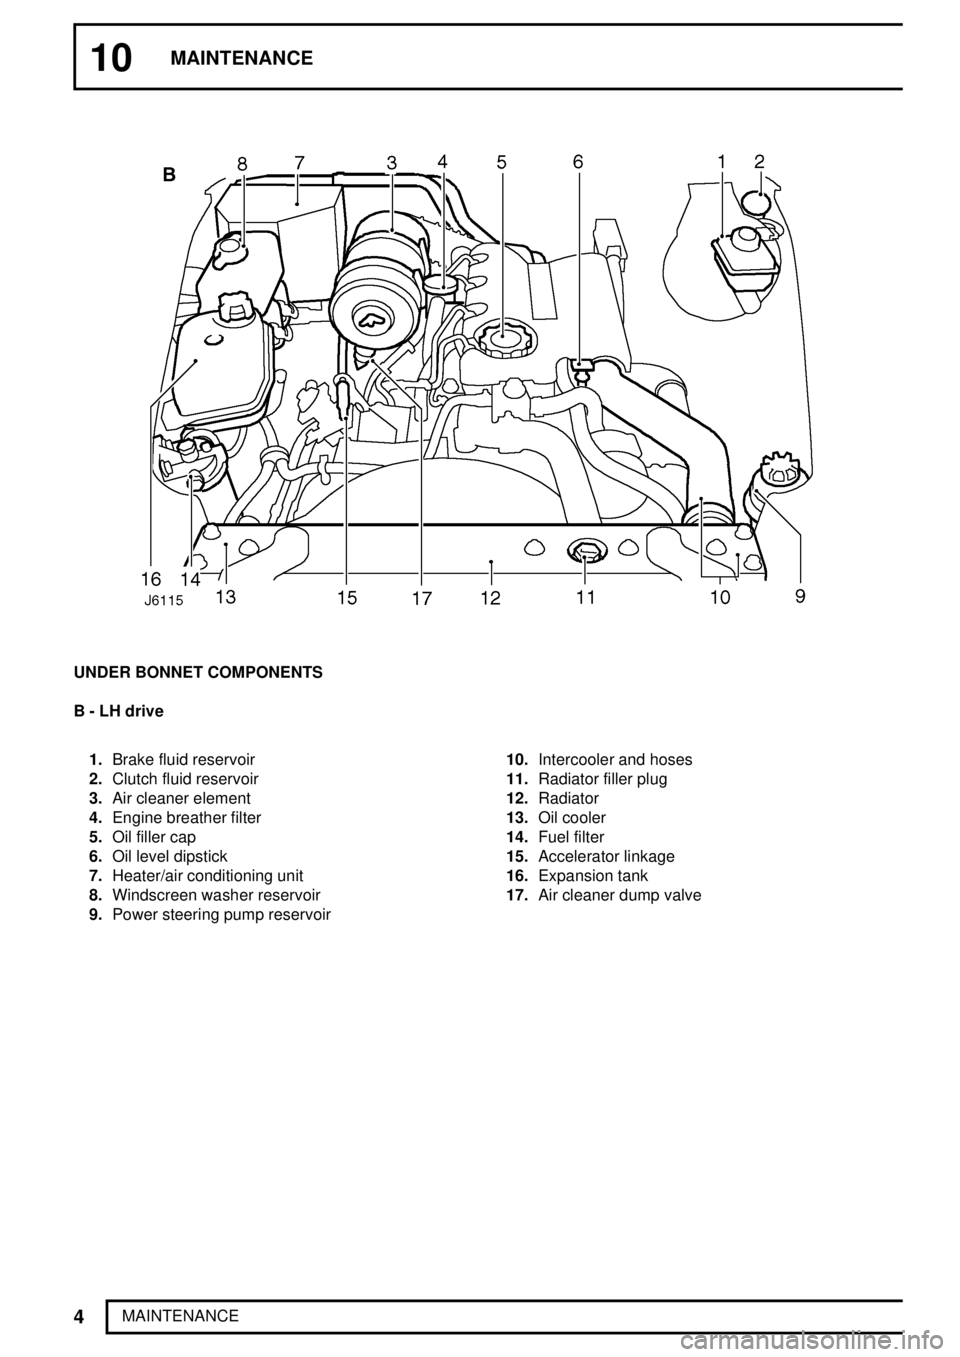
UNDER BONNET COMPONENTS
B - LH drive
1.Brake fluid reservoir
2.Clutch fluid reservoir
3.Air cleaner element
4.Engine breather filter
5.Oil filler cap
6.Oil level dipstick
7.Heater/air conditioning unit
8.Windscreen washer reservoir
9.Power steering pump reservoir10.Intercooler and hoses
11.Radiator filler plug
12.Radiator
13.Oil cooler
14.Fuel filter
15.Accelerator linkage
16.Expansion tank
17.Air cleaner dump valve
Page 48 of 455
MAINTENANCE
5
MAINTENANCE REV: 05/99 CHECK COOLING, INTERCOOLING AND HEATING
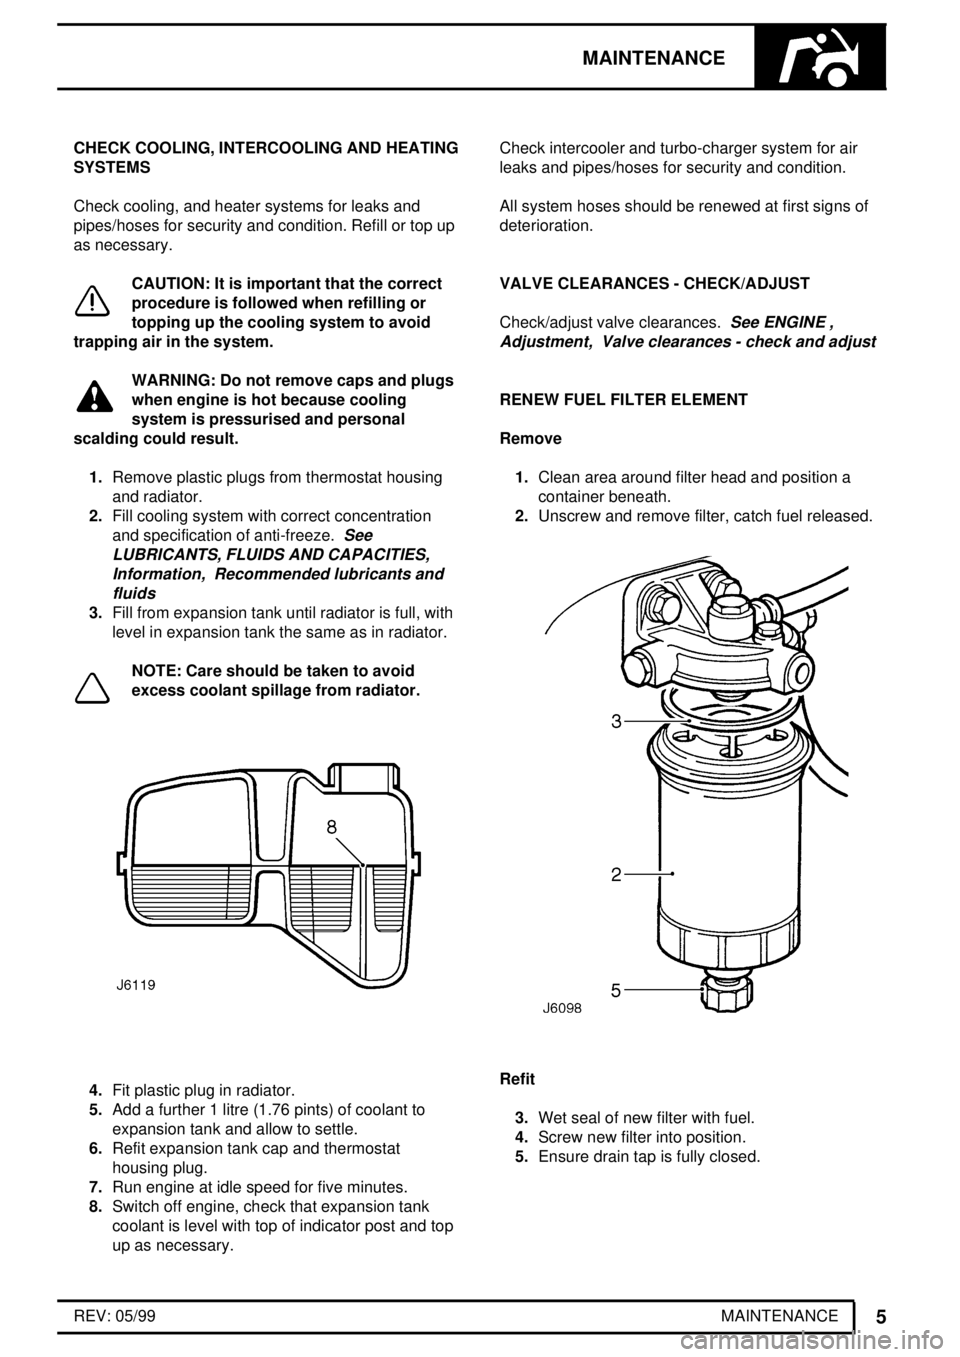
SYSTEMS
Check cooling, and heater systems for leaks and
pipes/hoses for security and condition. Refill or top up
as necessary.
CAUTION: It is important that the correct
procedure is followed when refilling or
topping up the cooling system to avoid
trapping air in the system.
WARNING: Do not remove caps and plugs
when engine is hot because cooling
system is pressurised and personal
scalding could result.
1.Remove plastic plugs from thermostat housing
and radiator.
2.Fill cooling system with correct concentration
and specification of anti-freeze.
See
LUBRICANTS, FLUIDS AND CAPACITIES,
Information, Recommended lubricants and
fluids
3.Fill from expansion tank until radiator is full, with
level in expansion tank the same as in radiator.
NOTE: Care should be taken to avoid
excess coolant spillage from radiator.
4.Fit plastic plug in radiator.
5.Add a further 1 litre (1.76 pints) of coolant to
expansion tank and allow to settle.
6.Refit expansion tank cap and thermostat
housing plug.
7.Run engine at idle speed for five minutes.
8.Switch off engine, check that expansion tank
coolant is level with top of indicator post and top
up as necessary.Check intercooler and turbo-charger system for air
leaks and pipes/hoses for security and condition.
All system hoses should be renewed at first signs of
deterioration.
VALVE CLEARANCES - CHECK/ADJUST
Check/adjust valve clearances.
See ENGINE ,
Adjustment, Valve clearances - check and adjust
RENEW FUEL FILTER ELEMENT
Remove
1.Clean area around filter head and position a
container beneath.
2.Unscrew and remove filter, catch fuel released.
Refit
3.Wet seal of new filter with fuel.
4.Screw new filter into position.
5.Ensure drain tap is fully closed.
Page 55 of 455
10MAINTENANCE
12
MAINTENANCEREV: 05/99 LUBRICATE PROPELLER SHAFT UNIVERSAL
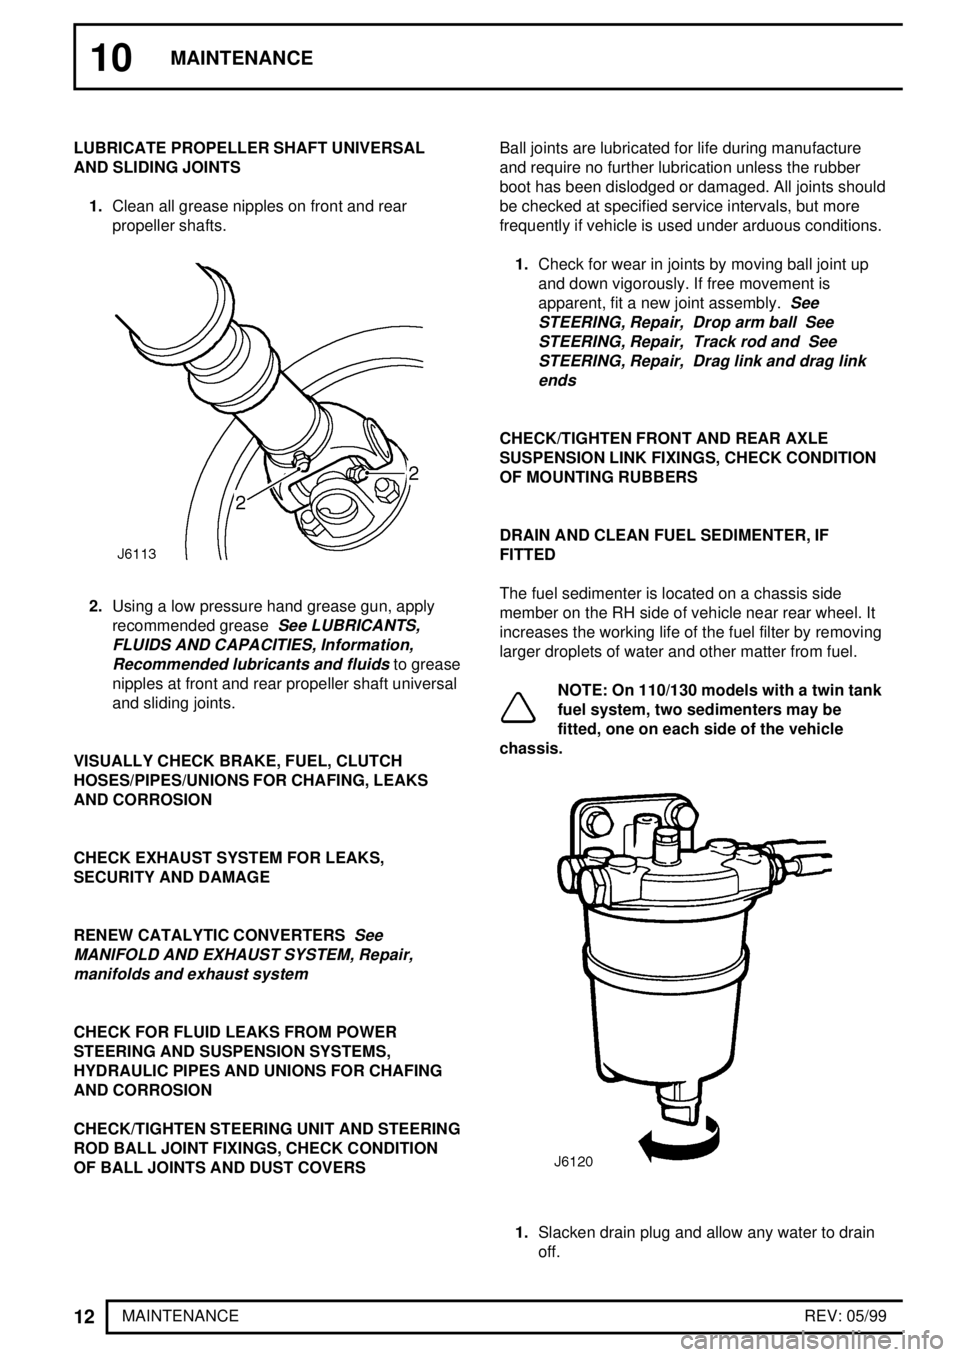
AND SLIDING JOINTS
1.Clean all grease nipples on front and rear
propeller shafts.
2.Using a low pressure hand grease gun, apply
recommended grease
See LUBRICANTS,
FLUIDS AND CAPACITIES, Information,
Recommended lubricants and fluids
to grease
nipples at front and rear propeller shaft universal
and sliding joints.
VISUALLY CHECK BRAKE, FUEL, CLUTCH
HOSES/PIPES/UNIONS FOR CHAFING, LEAKS
AND CORROSION
CHECK EXHAUST SYSTEM FOR LEAKS,
SECURITY AND DAMAGE
RENEW CATALYTIC CONVERTERS
See
MANIFOLD AND EXHAUST SYSTEM, Repair,
manifolds and exhaust system
CHECK FOR FLUID LEAKS FROM POWER
STEERING AND SUSPENSION SYSTEMS,
HYDRAULIC PIPES AND UNIONS FOR CHAFING
AND CORROSION
CHECK/TIGHTEN STEERING UNIT AND STEERING
ROD BALL JOINT FIXINGS, CHECK CONDITION
OF BALL JOINTS AND DUST COVERSBall joints are lubricated for life during manufacture
and require no further lubrication unless the rubber
boot has been dislodged or damaged. All joints should
be checked at specified service intervals, but more
frequently if vehicle is used under arduous conditions.
1.Check for wear in joints by moving ball joint up
and down vigorously. If free movement is
apparent, fit a new joint assembly.
See
STEERING, Repair, Drop arm ball See
STEERING, Repair, Track rod and See
STEERING, Repair, Drag link and drag link
ends
CHECK/TIGHTEN FRONT AND REAR AXLE
SUSPENSION LINK FIXINGS, CHECK CONDITION
OF MOUNTING RUBBERS
DRAIN AND CLEAN FUEL SEDIMENTER, IF
FITTED
The fuel sedimenter is located on a chassis side
member on the RH side of vehicle near rear wheel. It
increases the working life of the fuel filter by removing
larger droplets of water and other matter from fuel.
NOTE: On 110/130 models with a twin tank
fuel system, two sedimenters may be
fitted, one on each side of the vehicle
chassis.
1.Slacken drain plug and allow any water to drain
off.
Page 64 of 455

ENGINE
5
REPAIR
26.Disconnect both pipes from fuel lift pump.
27.Release fuel feed pipe from retaining clip on air
cleaner bracket.
28.Disconnect vacuum hose from brake servo.
29.Remove oil pipes from oil filter adaptor.30.Using suitable hoist, fit chains to lifting brackets
and support engine.
31.Remove nuts and plain washers securing front
engine mountings to chassis.
32.Support gearbox.
33.Remove engine to bell housing fixings, leaving
starter motor attached to engine.
34.Carefully raise engine to release from gearbox.
35.Ensure all relevant connections to engine have
been removed.
36.Remove engine.
Refit
37.Clean bell housing.
38.Apply Hylomar sealant to mating faces of bell
housing and flywheel housing.
39.Lubricate splines of gearbox primary pinion with
Rocol MV 3.
40.Carefully lower engine into position and locate
primary pinion into clutch and engage bell
housing dowels.
41.Fit engine to bell housing fixings. Tighten to
40
Nm (30 lbf/ft).
Page 65 of 455
12ENGINE
6
REPAIR 42.Raise engine, and locate front engine mountings
to chassis.
43.Remove gearbox support and lower engine.
44.Tighten front engine mounting to chassis fixings
to
45 Nm (33 lbf/ft).
45.Release chains from engine lifting brackets and
remove hoist.
46.Connect oil cooler pipes to oil filter adaptor.
47.Fit vacuum hose to brake servo adaptor.
48.Secure fuel feed pipe in retaining clip on air
cleaner bracket.
49.Fit fuel lift pump pipes.
50.Connect feed and spill return pipes to injector
pump.
51.If fitted, reconnect hand throttle cable to
mounting bracket and injector pump.
52.Fit outer cable adjusting nut into injector pump
mounting bracket.
53.Fit inner throttle cable to injector pump and
secure with clevis and split pin.
54.Secure bleed hose in retaining clips on front
timing cover.
55.Fit bleed hose to thermostat housing.
56.Connect inlet and outlet hoses to power steering
pump.
57.Fit down pipe to exhaust manifold and secure
with 3 nuts.
58.Connect starter motor battery and fuse box
leads.
59.If fitted, connect EGR valve multi-plug and
vacuum pipe.
60.Secure breather pipe clip to cylinder head.
61.Connect engine harness multi-plug.
62.Fit heater plug feed wire.
63.Connect electrical feed plug at rear of cylinder
head.
64.Fit heater hoses to cylinder head and heater
rails.
65.Fit feed pipe/hose to turbo-charger and
intercooler.
66.Fit rocker cover insulation.
67.Fit radiator assembly.
See COOLING SYSTEM,
Repair, Radiator
If applicable, fit air
conditioning condenser, compressor pipes and
heater matrix hoses.
See AIR CONDITIONING,
Repair, Condenser
68.Fit bonnet.
69.Reconnect battery.CRANKSHAFT PULLEY
Service repair no - 12.21.01
Remove
1.Disconnect battery.
2.Drain coolant.
See COOLING SYSTEM,
Repair, Drain and refill cooling system
3.Remove top hose from radiator.
4.Remove intercooler to induction manifold hose.
5.Remove viscous coupling and fan.
See
COOLING SYSTEM, Repair, Viscous
coupling and fan
6.Remove fan cowl.See COOLING SYSTEM,
Repair, Fan cowl
7.Remove drive belt.See ELECTRICAL, Repair,
Auxiliary drive belt
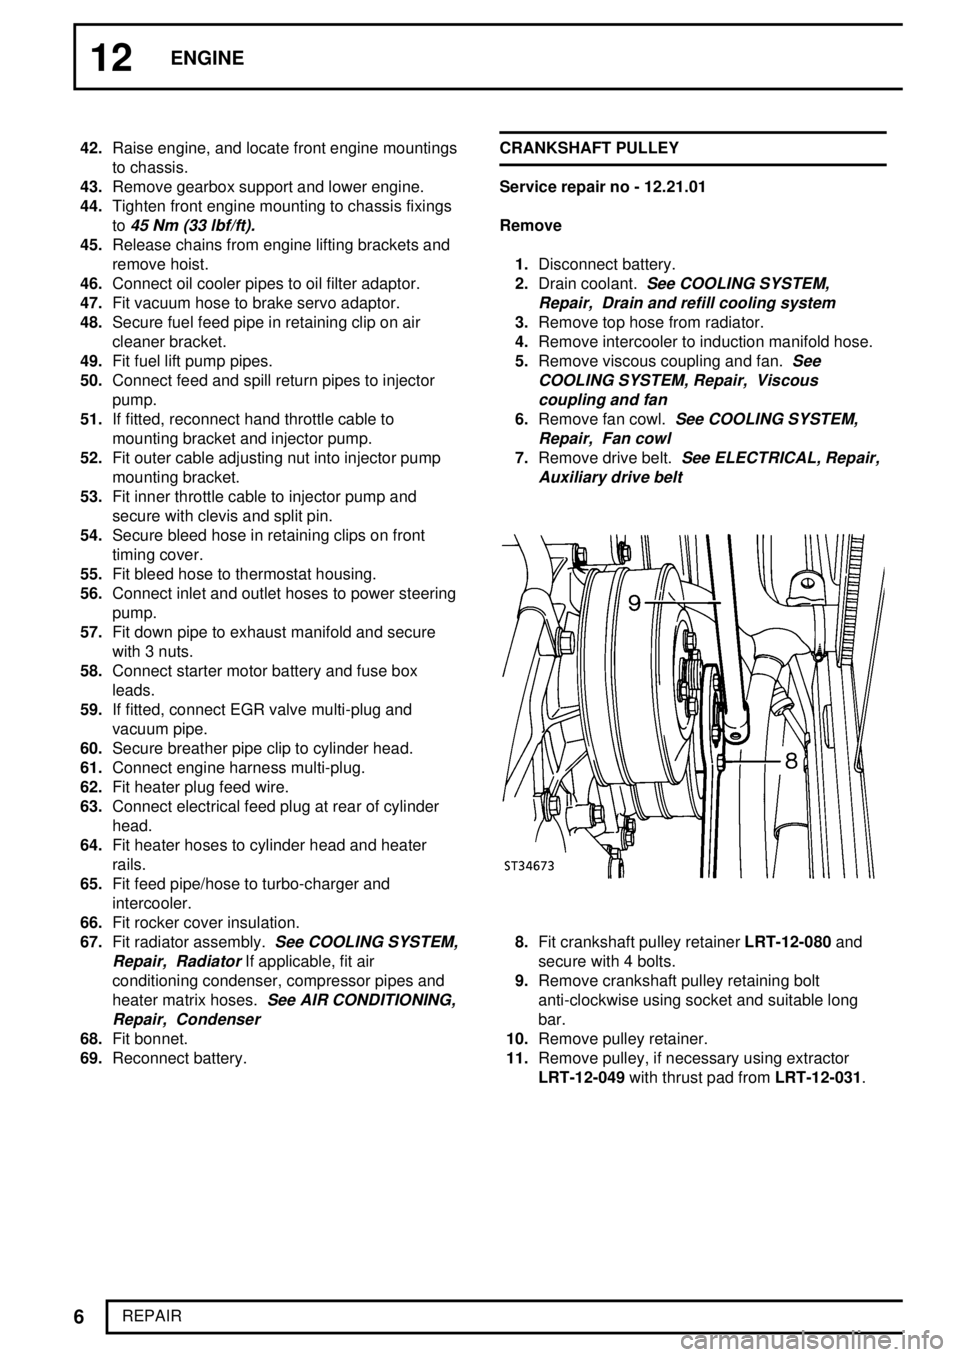
8.Fit crankshaft pulley retainerLRT-12-080and
secure with 4 bolts.
9.Remove crankshaft pulley retaining bolt
anti-clockwise using socket and suitable long
bar.
10.Remove pulley retainer.
11.Remove pulley, if necessary using extractor
LRT-12-049with thrust pad fromLRT-12-031.
Page 79 of 455
12ENGINE
20
REPAIR OIL FILTER HEAD GASKET
Service repair no - 12.60.03
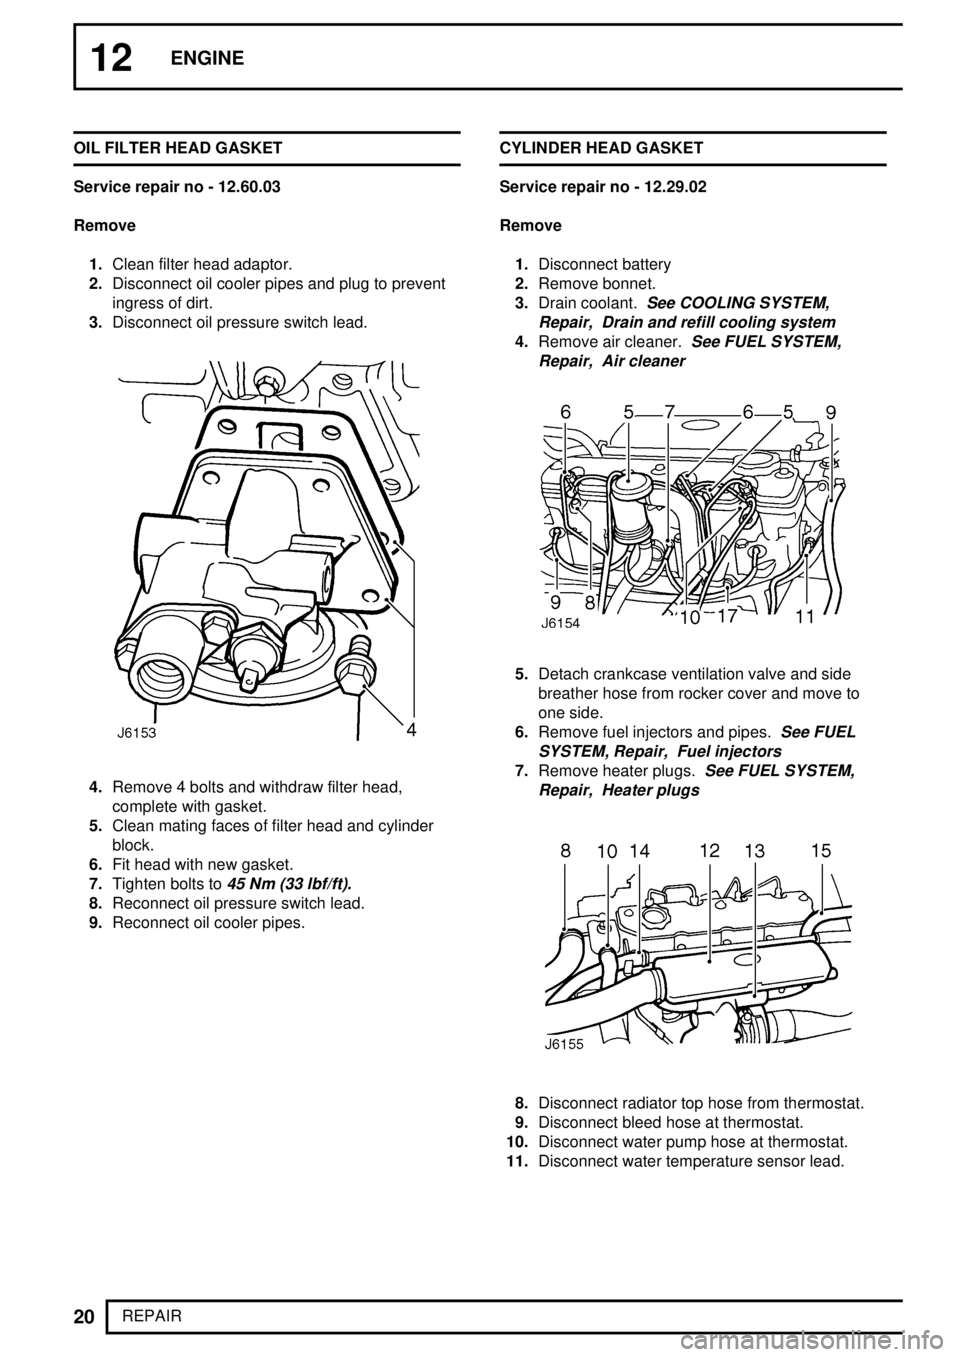
Remove
1.Clean filter head adaptor.
2.Disconnect oil cooler pipes and plug to prevent
ingress of dirt.
3.Disconnect oil pressure switch lead.
4.Remove 4 bolts and withdraw filter head,
complete with gasket.
5.Clean mating faces of filter head and cylinder
block.
6.Fit head with new gasket.
7.Tighten bolts to
45 Nm (33 lbf/ft).
8.Reconnect oil pressure switch lead.
9.Reconnect oil cooler pipes.CYLINDER HEAD GASKET
Service repair no - 12.29.02
Remove
1.Disconnect battery
2.Remove bonnet.
3.Drain coolant.
See COOLING SYSTEM,
Repair, Drain and refill cooling system
4.Remove air cleaner.See FUEL SYSTEM,
Repair, Air cleaner
5.Detach crankcase ventilation valve and side
breather hose from rocker cover and move to
one side.
6.Remove fuel injectors and pipes.
See FUEL
SYSTEM, Repair, Fuel injectors
7.Remove heater plugs.See FUEL SYSTEM,
Repair, Heater plugs
8.Disconnect radiator top hose from thermostat.
9.Disconnect bleed hose at thermostat.
10.Disconnect water pump hose at thermostat.
11.Disconnect water temperature sensor lead.
Page 84 of 455
ENGINE
1
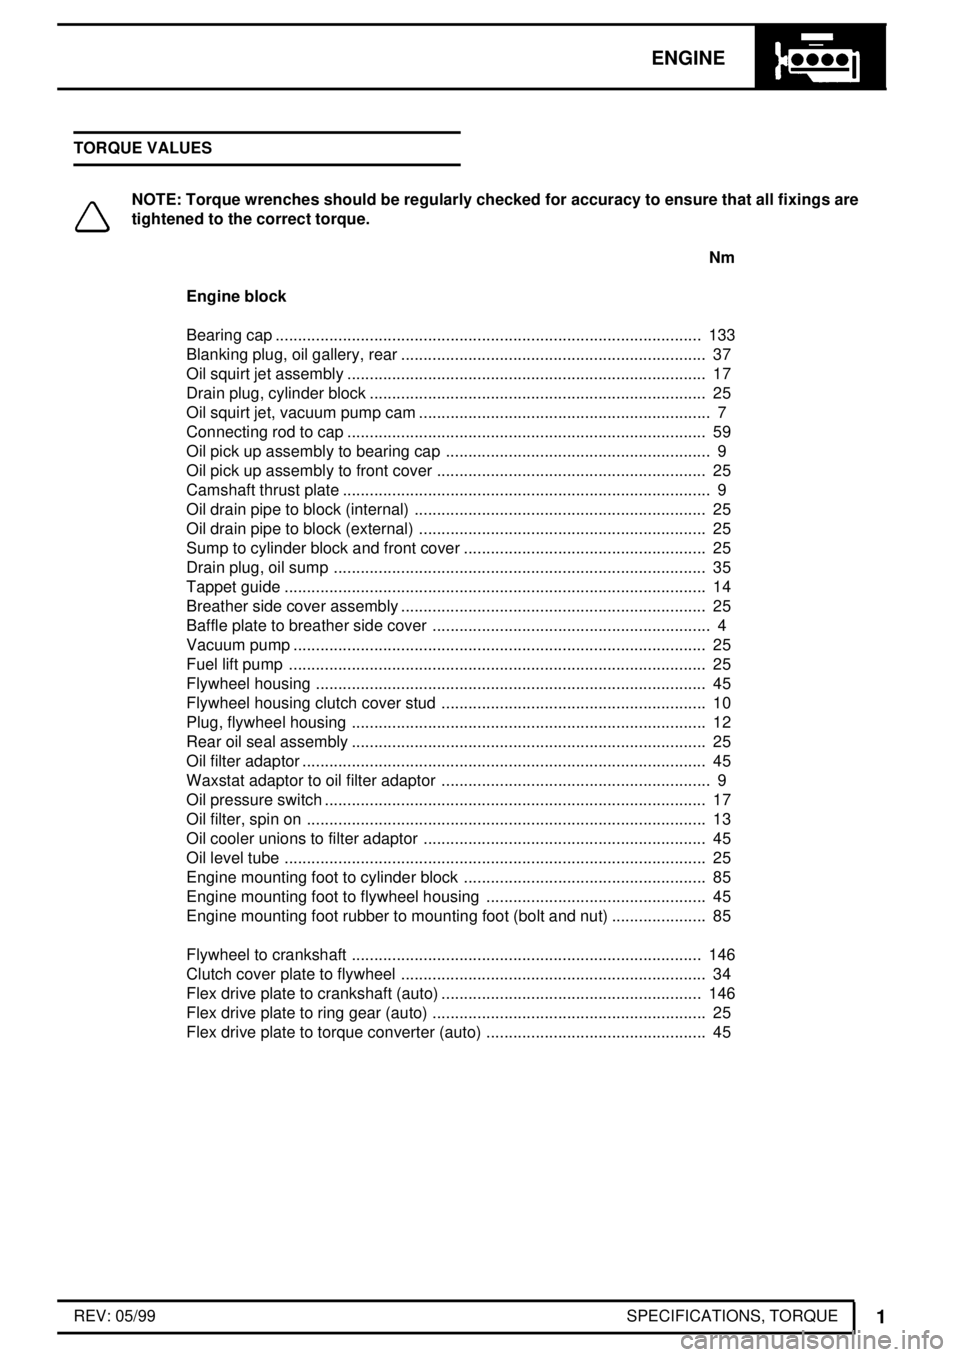
SPECIFICATIONS, TORQUE REV: 05/99 TORQUE VALUES
NOTE: Torque wrenches should be regularly checked for accuracy to ensure that all fixings are
tightened to the correct torque.
Nm
Engine block
Bearing cap 133...............................................................................................
Blanking plug, oil gallery, rear 37....................................................................
Oil squirt jet assembly 17................................................................................
Drain plug, cylinder block 25...........................................................................
Oil squirt jet, vacuum pump cam 7.................................................................
Connecting rod to cap 59................................................................................
Oil pick up assembly to bearing cap 9...........................................................
Oil pick up assembly to front cover 25............................................................
Camshaft thrust plate 9..................................................................................
Oil drain pipe to block (internal) 25.................................................................
Oil drain pipe to block (external) 25................................................................
Sump to cylinder block and front cover 25......................................................
Drain plug, oil sump 35...................................................................................
Tappet guide 14..............................................................................................
Breather side cover assembly 25....................................................................
Baffle plate to breather side cover 4..............................................................
Vacuum pump 25............................................................................................
Fuel lift pump 25.............................................................................................
Flywheel housing 45.......................................................................................
Flywheel housing clutch cover stud 10...........................................................
Plug, flywheel housing 12...............................................................................
Rear oil seal assembly 25...............................................................................
Oil filter adaptor 45..........................................................................................
Waxstat adaptor to oil filter adaptor 9............................................................
Oil pressure switch 17.....................................................................................
Oil filter, spin on 13.........................................................................................
Oil cooler unions to filter adaptor 45...............................................................
Oil level tube 25..............................................................................................
Engine mounting foot to cylinder block 85......................................................
Engine mounting foot to flywheel housing 45.................................................
Engine mounting foot rubber to mounting foot (bolt and nut) 85.....................
Flywheel to crankshaft 146..............................................................................
Clutch cover plate to flywheel 34....................................................................
Flex drive plate to crankshaft (auto) 146..........................................................
Flex drive plate to ring gear (auto) 25.............................................................
Flex drive plate to torque converter (auto) 45.................................................