maintenance LAND ROVER FRELANDER 2 2006 Repair Manual
[x] Cancel search | Manufacturer: LAND ROVER, Model Year: 2006, Model line: FRELANDER 2, Model: LAND ROVER FRELANDER 2 2006Pages: 3229, PDF Size: 78.5 MB
Page 12 of 3229
Publi s hed: 11-May-2011
General Information - General Service Information
Des cript ion and Operat ion
Introduction
This manual has been wri tt en in a format t hat i s desi gned to meet the needs of Land Rover technicians worl dwide and t oas si st them in t he efficient repai r and maintenance of Land Rover vehi cl es .
This manual provides descripti ons and methods for accomplis hing adjust ment, s ervi ce and repair work usi ng t es t ed andeffect ive procedures . Fol lowi ng thes e procedures wil l hel p ens ure product rel iabil ity.
Special Tools
The Speci al Tool(s ) Tabl e provided at t he begi nni ng of each procedure li st s t he s pecial t ool (s ) requi red t o carry out repairoperati ons wit hin t hat specific procedure. W herever poss i bl e, ill ust rat ions are provided whi ch wil l as s is t t echnicians i nidenti fyi ng the s pecial tool(s ) required and als o s howing s uch tool (s ) in use.
Speci al t ools may be obt ained from the manufact urer, SPX Tool s, t he addres ses of t heir branches will be found in theSpeci al Tools Gl oss ary.For addit ional informat ion, refer t o: Special Tool Glos sary (100-00 General Informati on, Des cri pti on and Operati on).
Important Safety Instructions
Appropri at e s ervi ce methods and correct repai r procedures are es sent ial for t he s afe and reli abl e operati on of all mot orvehi cl es as well as ens uri ng the personal s afety of t he i ndi vi dual carryi ng out the work.
This manual cannot poss ibl y anti ci pat e al l s uch vari at ions and provi de advi ce or cauti ons as to each. Any pers on whodeparts from t he ins t ructi ons provi ded in this manual mus t firs t es tabl is h t hat t hey compromis e nei ther thei r personals afety nor t he vehicle i ntegri ty by their choice of met hods , tool s or parts .
Indi vi dual s who undert ake their own repai rs should have s ome skil l or training and limi t repairs t o component s which coul dnot affect t he s afety of t he vehicle or i ts pas s engers. Any repai rs requi red to s afet y cri ti cal i tems such as s t eering, brakes,s uspens ion or s uppl ement al res traint s yst em s hould be carri ed out by a Land Rover Dealer. Repairs t o s uch i tems s houldNEVER be at tempt ed by untrai ned indivi duals .
Warnings, Cautions and Notes which appear in this manual
As you read through t his manual, you wi ll come acros s W arnings, Caut ions and Notes . A W arning, Cauti on or Not e i splaced at the beginni ng of a s eries of s t eps . If the warning, caut ion or note onl y appl ies t o one s t ep, i t is pl aced at t hebegi nning of t he specific s t ep aft er the s t ep number.
Warnings, Cautions and Not es have the foll owing meanings :
Warning: Procedures which mus t be foll owed to avoid the pos s ibil it y of pers onal i njury.
Caution: Cal ls at tent ion t o procedures which mus t be foll owed to avoid damage to components .
Note: Gi ves hel pful informati on.
References
References t o the Left Hand (LH) or Right Hand (RH) si de given i n t hi s manual are made when vi ewing t he vehi cl e or unitfrom the rear.
Fault Diagnostic Equipment
The vehi cl e i s equi pped wit h a number of electroni c cont rol s yst ems t o provide opt imum performance of the vehicl e'ss ys t ems .
Land Rover approved diagnos t ic equipment is avai lable and mus t be us ed where s pecified. The use of this equi pment willas si st wit h t he fault di agnos ti c abili ti es of the Deal er workshop. In parti cul ar, t he equi pment can be us ed t o i nterrogat et he elect roni c s ys t ems for di agnos is of faul ts whi ch may become evident during t he li fe of the vehicle.
This manual is produced as a reference s ource t o s uppl ement Land Rover approved di agnos ti c equipment.
Feat ures of t he equi pment include:
a. Ful ly upgradeable s upport for t he t echnician
b. Struct ured di agnos ti cs to accommodate al l ski ll levels
c. Direct print-out of screen i nformati on and tes t res ult s
Testing the vehicle
Operat ions covered in t his manual do not include reference t o t es t ing t he vehicle after repai r. It is es s ent ial t hat work i sins pect ed and t es t ed aft er compl eti on and if neces s ary, a road tes t of the vehicle is carried out , part icul arl y where s afet yrel ated i tems are concerned.
Repairs and Replacement Parts
Page 171 of 3229
Publi s hed: 11-May-2011
Maintenance Schedules - Maintenance Schedules - Gasoline Engines
Des cript ion and Operat ion
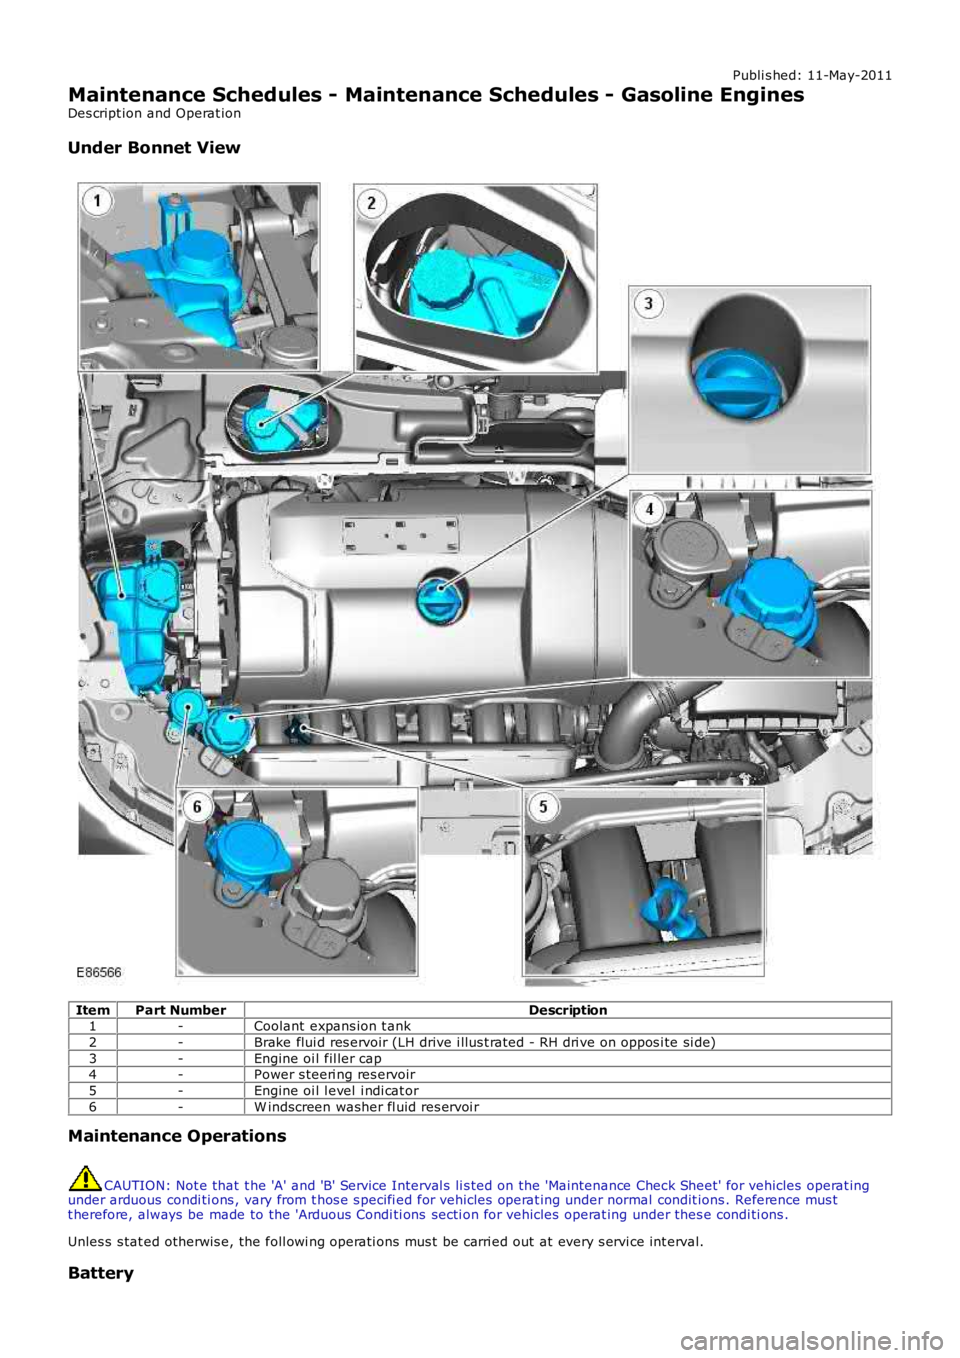
Under Bonnet View
ItemPart NumberDescription1-Coolant expans ion t ank
2-Brake flui d res ervoir (LH drive i llus t rated - RH dri ve on oppos i te si de)
3-Engine oi l fil ler cap4-Power s teeri ng res ervoir
5-Engine oi l l evel i ndi cat or
6-W indscreen washer fl uid res ervoi r
Maintenance Operations
CAUTION: Not e that t he 'A' and 'B' Service Interval s li s ted on the 'Maintenance Check Sheet' for vehicles operat ingunder arduous condi ti ons , vary from t hos e s pecifi ed for vehicles operat ing under normal condit ions . Reference mus tt herefore, always be made to the 'Arduous Condi ti ons secti on for vehicles operat ing under thes e condi ti ons .
Unles s s tat ed otherwis e, the foll owi ng operati ons mus t be carri ed out at every s ervice int erval.
Battery
Page 181 of 3229
Air Filtering
CAUTION: When vehicles are operating under arduous conditions, the following service item must be carried outevery 12 months or 15,000 miles (24,000 km).
Replace the ai r fi lt er el ement.For addit ional informat ion, refer t o: Air Cl eaner (303-12A Int ake Ai r Dis t ri but ion and Fi lt ering - I6 3.2L Petrol ,Removal and Inst all ati on).
Accessory Drive Belt
CAUTION: When vehicles are operating under arduous conditions, the following service item must be carried outevery 5 years or 75,000 miles (120,000 km).
Replace the access ory drive bel t.For addit ional informat ion, refer t o: Acces sory Drive Belt (303-05A Acces s ory Drive - I6 3.2L Pet rol , Removal andIns t allat ion).
Radiator and Cooling Fan
CAUTION: When vehicles are operating under arduous conditions, the following item must be carried out.
Vis uall y check radi at or for external obs truct ions , check cool ing fan blades for damage.
Continuous Use In Severe Off-Road Conditions
CAUTION: After 50 miles (80 km) continuous use in severe off-road conditions i.e. w ading, deep mud andabrasive grit/slurry, the following items must be cleaned and inspected.
The parking brake.The acces sory dri ve belt .
Vehicles used in dusty or field conditions or d eep wading:
More frequent att enti on to the ai r cl eaner wi ll be requi red.
Additional Items That May Require Attention
1. Every 6 years: It i s recommended t hat al l brake fl uid hydrauli c s eal s are replaced.
• NOTE: This i s in addi ti on to the maintenance requirement that fl exi ble brake hos es MUST be replaced at thi s s erviceint erval.
Page 182 of 3229
Publi s hed: 11-May-2011
Maintenance Schedules - Maintenance Schedules - Diesel Engines
Des cript ion and Operat ion
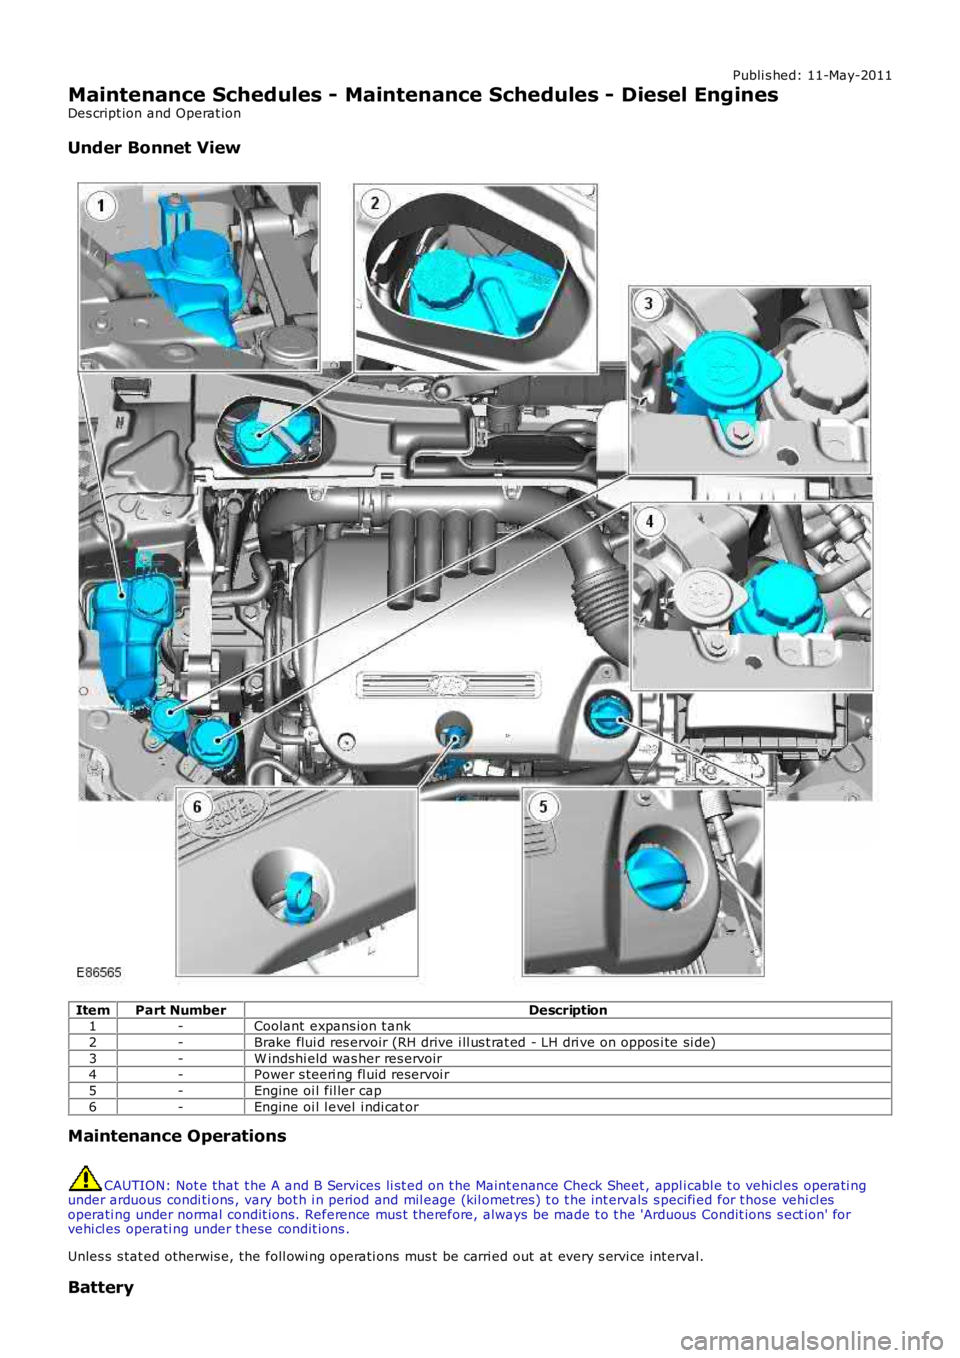
Under Bonnet View Item
Part Number Description
1 -Coolant expans ion t ank
2 -Brake flui d res ervoir (RH drive i ll us t rat ed - LH dri ve on oppos i te si de)
3 -W indshi eld was her res ervoir
4 -Power s teeri ng fl uid reservoi r
5 -Engine oi l fil ler cap
6 -Engine oi l l evel i ndi cat or
Maintenance Operations CAUTION: Not e that t he A and B Services li st ed on t he Maint enance Check Sheet , appl i
cabl e t o vehi cl es operati ng
under arduous condi ti ons , vary bot h i n period and mil eage (kil ometres) t o t he int erv als s pecifi ed for t hose vehi cl es
operati ng under normal condit ions. Reference mus t therefore, always be made t o t he ' Arduous Condit ions s ect ion' for
vehi cl es operati ng under t hese condit ions .
Unles s s tat ed otherwis e, the foll owi ng operati ons mus t be carri ed out at every s ervi ce int erval.
Battery
Page 193 of 3229
The parking brake.
The acces sory dri ve belt .
Vehicles used in dusty or field conditions or d eep wading:
More frequent att enti on to the ai r cl eaner wi ll be requi red. Fuel Filter
CAUTION:
When vehicles are operating under arduous conditions, the following service item mus t be carried out
every 3 months or 3,750 miles (6,000 km).
Drai n wat er from t he fuel fi lt er. Poor Fuel Quality
CAUTION:
When vehicles are operating under arduous conditions, the following service item mus t be carried out
every 3 months or 3,750 miles (6,000 km).
W here vehi cl es are us ed i n t hes e areas , t he fuel fi lt er may require drai ning at more frequent i nterval s.Additional Items That May Require Attention
1. Every 6 years: It i s recommended t hat al l brake fl uid hydrauli c s eal s are replaced.
• NOTE: This i s in addi ti on to the maintenance requirement that fl exi ble brake hos es MUST be replaced at thi s s ervice
int erval.
Page 451 of 3229
5-Brake shoe retai ni ng s pri ng
6-Brake shoe return s pri ng
7-Brake shoe mechanical adjust er8-Lower (l eadi ng) brake s hoe
9-Parki ng brake l ever cabl e
10-Parki ng brake cabl e equalizer11-Parki ng brake i nner cabl e
12-Equali zer fas t ener
13-Parki ng brake mi cros wit ch14-Parki ng brake l ever as sembl y
15-Parki ng brake outer cable
16-Brake dus t s hield
OVERVIEW
The parking brake is a manual ly actuat ed s ys t em t hat operat es brake s hoes located i n t he rear brake di scs . The ins idecent er of the rear brake dis c is manufact ured t o form the brake drum.
BRAKE SHOE ASSEMBLY
The brake s hoes are mount ed horizontal ly on an int egral brake dus t s hield and backplat e, and form an upper t rai li ng andlower l eading brake s hoe type s yst em. Retai ni ng pins pas s t hrough hol es in the dus t s hield and corres ponding hol es ineach brake s hoe bracket . Each pi n is secured t o t he brake s hoe wit h a ret ai ning cli p. The ret ai ning pins al low movement oft he brake s hoe toward the drum surface duri ng parking brake operat ion, but prevent si deways movement of the brake shoeaway from the dus t s hi eld.
An expander unit and manual adjust er are l ocat ed along t he hori zont al axis of t he dus t shi el d. The expander uni t isposi ti oned at the front of the dus t s hield and forms t he locati on for t he leading and t rai ling ends of t he brake s hoebracket s . The manual adjus t er i s mounted at t he rear of t he dust s hiel d and forms t he l ocati on and ful crum poi nt for theoppos it e ends of t he brake s hoe bracket s.
The manual adjus t er provides the means to adjust t he brake s hoe l ining t o drum clearance for maintenance purposes .Acces s t o t he manual adjus t er knurl ed wheel i s t hrough a formed hole in the front of the brake dis c. Adjust ment isrequired if t he brake s hoes or dis cs are renewed. A bedding-in procedure must al so be performed t o make s ure the drumbrakes operate sat is fact oril y.For addit ional informat ion, refer t o: Parking Brake Shoes Bedding-In (206-05 Parking Brake and Actuati on, GeneralProcedures).
The corres pondi ng ends of bot h t he upper and l ower brake shoe brackets are mai ntained i n contact wit h t he expander uni tand manual adjus t er by 2 ret urn springs . The return s pri ngs are l ocat ed bet ween t he ends of each upper and l ower brakes hoe and att ach to hol es formed in the brake shoe brackets . The ret urn springs pull t he brake s hoes away from t he drumwhen t he parking brake is released.
PARKING BRAKE LEVER
The parking brake lever is l ocat ed in t he floor cons ole bet ween the driver and pass enger s eats , and compri ses a toot hedquadrant , pawl and pres s-butt on rel eas e mechanis m. A si ngl e cabl e wi th a formed t hreaded rod-end connect s t he quadrantt o the equali zer unit , and is secured wit h eit her a locknut or a l ocking was her and nut.
The t hreaded rod all ows adjus tment s t o t he parking brake cable tens ion and parki ng brake lever travel t o be performed formaint enance purpos es.For addit ional informat ion, refer t o: Parking Brake Cabl e Adjus tment (206-05 Parki ng Brake and Actuat ion, GeneralProcedures).
The parking brake cable is routed from t he parking brake l ever equalizer, and al ong the chas si s t o t he rear parking brakeexpander uni t. The parki ng brake cabl e prot rudes t hrough t he brake dust s hiel d, and is formed wit h a nippl e that connectst o the expander unit . The oppos i te ends of each Left-Hand (LH) and Ri ght -Hand (RH) parking brake cabl e are formed wit h anipple that connect to the equali zer unit . The equal izer uni t makes sure t he LH and RH parki ng brake as s embl ies operat es imul taneous l y when the parking brake i s applied.
A micros wit ch is locat ed on t he base of the parki ng brake lever. The micros wit ch operates t he parking brake warni ngindicat or l amp l ocat ed in t he i ns t rument clus ter, when the parki ng brake i s appl ied.For addit ional informat ion, refer t o: Ins t rument Clus ter (413-01 Inst rument Cl us t er, Des cript ion and Operat ion).
PRINCIPLES OF OPERATION
As t he parking brake lever i s applied, t he toot hed quadrant rotat es and pul ls on the t hreaded rod and cable equali zer. Theequal izer pul ls t he 2 parki ng brake cables and operat es the 2 expander uni ts s i mult aneous ly. Movement of t he expanderunit caus es t he upper and l ower brake s hoes t o pivot agains t the manual adjus ter fulcrum, and t he brake s hoes cont actt he brake drum agai nst t he t ens i on of the 2 ret urn s pri ngs .
As t he parking brake lever quadrant rot ates , t he teet h on t he pawl engage wit h corresponding t eeth on the quadrant . Int he appl ied pos it ion, the pawl t eet h are held under spring t ensi on agai nst the quadrant teet h t o prevent the l ever fromdis engagi ng.
W i th the parki ng brake appli ed and the i gnit ion i n power mode 6 (ignit ion), t he mi cros wit ch connect s a ground to theins t rument clus ter and il lumi nat es t he parking brake warning i ndi cat or lamp.For addit ional informat ion, refer t o: Ins t rument Clus ter (413-01 Inst rument Cl us t er, Des cript ion and Operat ion).
W hen t he parking brake lever pres s-butt on is pres sed and t he l ever moved t o rel eas e t he parki ng brake, t he pawl teet hare rais ed clear from the quadrant t eet h. As the parki ng brake l ever i s lowered, t he parking brake cable cl oses t heexpander uni t and the brake s hoes are immediatel y moved away from the brake drum by the 2 ret urn s pri ngs .
Page 1813 of 3229
Publi shed: 14-Jul-2011
Battery and Charging System - General Information - Battery Care
Des cript ion and Operat ion
12V LEAD ACID BATTERY CARE MANUAL FOR DEALER / RETAILER USE
1. INTRODUCTION
2. GENERAL RULES FOR BATTERY CARE
3. EQU IPMENT (MINIMU M STANDARD)
4. HEALTH AND SAFETY PRECAUTIONS
5. DETERMINING BATTERY CONDITION
6. BATTERY CHARGING AND MAINTENANCE
7. CHARGING SYSTEM TEST AND DIAGNOSIS
8. VEHICLE QUIESCENT CURRENT TESTING
APPENDIX A: BATTERY TEST PROCESS
APPENDIX B: BATTERY REPORT FORM - IN SERVICE BATTERIES ONLY
1. INTRODUCTION
This publi cat ion s ets out , for t he benefit of dealers / ret ailers worl dwide, requirement s for the care and maint enance ofbatt eri es , from the vehicles hand-over to the dealer / retail er to the handover t o the cus t omer or i n t he cas e of a sparepart batt ery from i s delivery to the dealer / retail er to it s fi tment t o a cus tomer vehicle.
It appl ies t o all t ypes of 12 volt Lead Acid Bat teries us ed, whet her they are convent ional fl ooded t echnology or Abs orbedGlas s Mat (AGM) technol ogy and als o applies to bot h Pri mary and Secondary or Auxi li ary Bat teri es.
The clearl y lai d out and ill ust rat ed s ect ions guide dealers / ret ail ers t hrough each st age of the vehicl es or s pare partsreceipt , st orage, pre-del ivery and cus tomer hand-over. This publi cat ion can be us ed as a gui de to the handli ng and care ofbatt eri es in s ervi ce. It is vi tal t o appreci ate that unles s each proces s i s ri gorousl y appl ied on al l vehi cl es, t he cust omer wil lreceive a vehicl e wit h a bat tery or a s pare part bat t ery which will not provide a s at is fact ory s ervi ce life.
It is very import ant that all t est s quoted throughout this publ icat ion are adhered to. If t hey are appli ed incorrect lybatt eri es could be s crapped unneces s ari ly. Refer to the bat tery tes t ing s ect ion for detail ed informat ion.
It is equally important therefore to not e t he fol lowing key point s :
Mos t new vehi cl es leave t he factory wi th ei ther a t rans it relay i ns t alled and/or have a trans it mode programmedint o t he vehi cl e cont rol modules . The t rans it rel ay mus t be removed and t he t rans it mode di sabled (whereappl icable) us ing an approved diagnost ic sys tem, NOT MO RE T HAN 24 HOURS before t he cust omer t akes deli very.12 Volt Lead Acid Bat teries rely on i nternal chemical proces s es to create a vol tage and deli ver current. Theseprocess es and t he int ernal chemi cal s truct ure of the bat tery can be damaged i f the bat tery is allowed t o di schargeover a number of weeks / months , or is left i n a di scharged s t at e for a lengt hy ti me peri od. For t hi s reas on t hebatt ery mus t be t es ted / re-charged i f neces sary every mont h, and MUST BE re-charged after every t hree mont hperi od of st orage. Refer to the vehicle st orage manual and updat e t he vehi cl e his t ory s heet.Under no ci rcums tances should the bat tery be dis connected wit h the engi ne running becaus e under thes e condi ti onst he alt ernator can give a very high output volt age. This hi gh t rans ient vol tage wi ll damage t he electroni ccomponents in t he vehicle. Loos e or i ncompl et e bat tery connect ions may al s o caus e high transi ent volt age.On vehicles wi th conventi onal ignit ion keys , thes e mus t not be left in t he i gni ti on lock barrel when the t rans it relayhas been removed, ot herwi se qui escent current wi ll increas e and t he bat t ery wi ll discharge more rapi dl y.Two t ypes of Lead acid bat teri es are us ed; s tandard Fl ooded t ype and AGM (Absorbed Glas s Mat) or VRLA (Valveregulat ed Lead Aci d) types. AGM batt eries offer i mproved res is t ance t o cycl ing as seen i n s top st art appli cat ions .AGM Bat teries are ful ly s ealed and cannot have t he electrolyte level t opped up.
Dealers and retailers involved in the storage, handling of vehicles and spare parts batteries have a responsibility toensure that only vehicles and spare parts having a fully satisfactory battery may be processed further through thedistribution selling chain.
• NOTE: It is very important that t est proces s es quot ed t hroughout t hi s publicati on are adhered to.
If they are not adhered t o correct ly bat teries could be scrapped unneces saril y or a batt ery wit h an is s ue remains in use.Refer t o t he bat t ery t est ing s ecti on for detai led i nformat ion.
2. GENERAL RULES FOR BATTERY CARE
Frequency of Battery Cond ition Checks.
Any batt ery i n s torage whether it i s in a vehi cle or i n s pare part s i nventory mus t have it s charge s tat us checked every 30days as des cri bed in Appendix A, and mus t be recharged every 90 days as des cribed i n t he "Bat tery Charging andMaint enance" secti on of thi s manual.
Dealer Demonstration Vehicles
Page 1818 of 3229
6. BATTERY CHARGING AND MAINTENANCE
BATTERY CHARGING
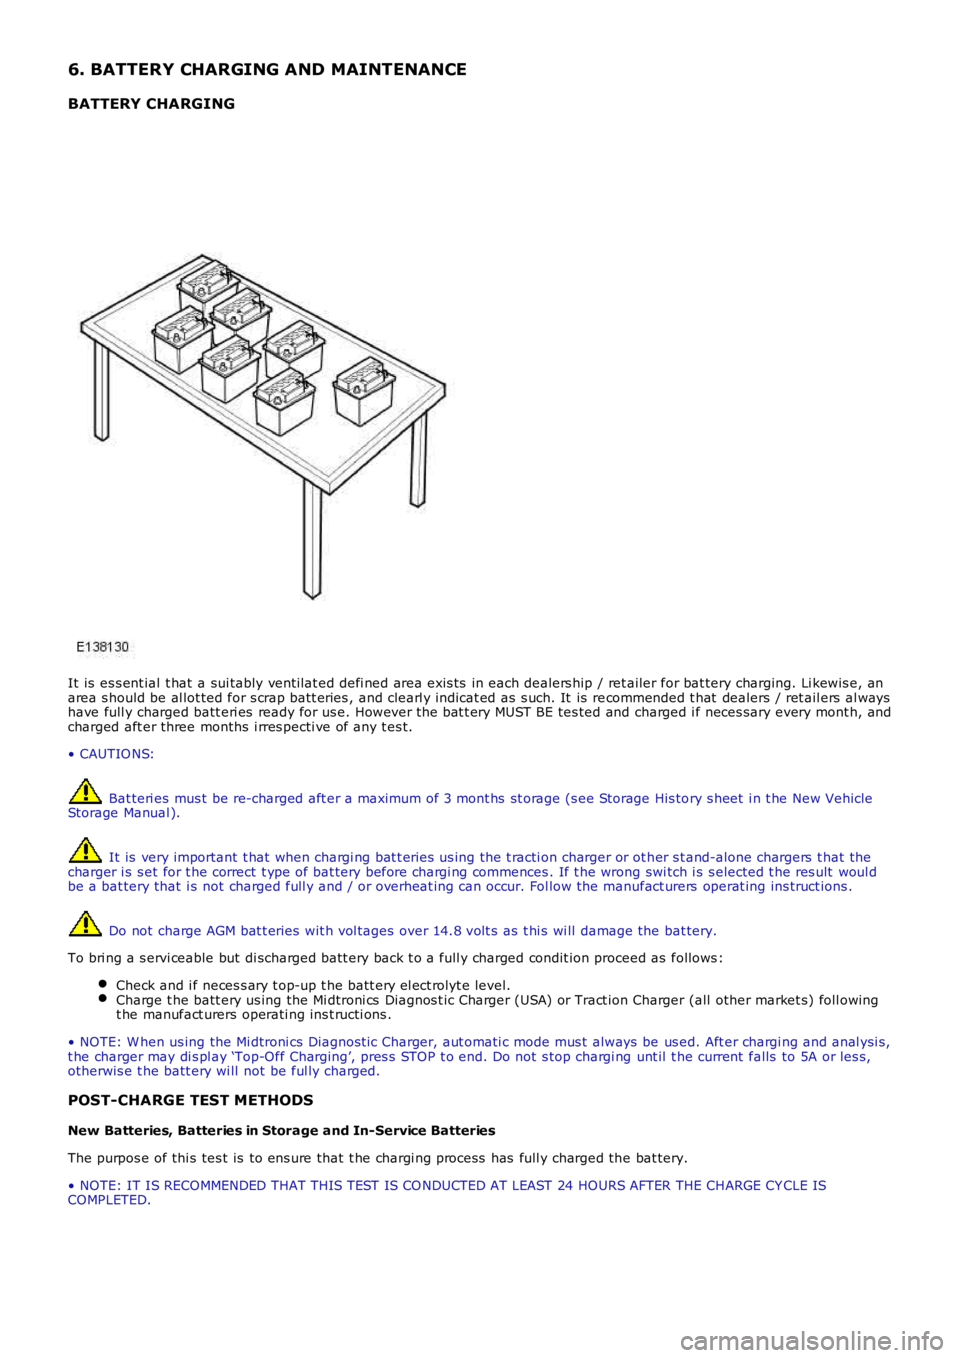
It is es s ent ial t hat a sui tably vent ilat ed defi ned area exis ts in each dealers hip / ret ailer for bat tery charging. Li kewis e, anarea s hould be al lot ted for s crap batt eries , and clearl y indicat ed as s uch. It is recommended t hat dealers / ret ail ers al wayshave full y charged batt eri es ready for us e. However t he bat t ery MUST BE tes ted and charged i f neces sary every mont h, andcharged aft er three months i rres pecti ve of any t es t.
• CAUTIO NS:
Bat teri es mus t be re-charged aft er a maximum of 3 mont hs st orage (s ee Storage His tory s heet i n t he New VehicleStorage Manual ).
It is very important t hat when chargi ng bat t eries us ing the t racti on charger or ot her s t and-alone chargers t hat thecharger i s s et for t he correct t ype of bat tery before chargi ng commences . If t he wrong swi tch i s s elected t he res ult woul dbe a bat tery that i s not charged full y and / or overheat ing can occur. Fol low the manufact urers operat ing ins truct ions .
Do not charge AGM bat t eries wit h vol tages over 14.8 volt s as t hi s wi ll damage the bat tery.
To bri ng a s ervi ceable but di scharged batt ery back t o a full y charged condit ion proceed as follows :
Check and i f neces s ary t op-up t he batt ery el ect rolyt e level.Charge t he batt ery us ing the Mi dtroni cs Diagnos t ic Charger (USA) or Tract ion Charger (all other market s) foll owingt he manufact urers operati ng ins t ructi ons .
• NOTE: W hen us ing the Mi dtroni cs Diagnost ic Charger, aut omati c mode mus t always be us ed. Aft er chargi ng and anal ysi s,t he charger may di s pl ay ‘Top-Off Charging’, pres s STOP t o end. Do not s top chargi ng unt il t he current falls to 5A or les s,otherwis e t he batt ery wi ll not be ful ly charged.
POST-CHARGE TEST METHODS
New Batteries, Batteries in Storage and In-Service Batteries
The purpos e of thi s tes t is to ens ure that t he chargi ng process has full y charged the bat tery.
• NOTE: IT IS RECOMMENDED THAT THIS TEST IS CO NDUCTED AT LEAST 24 HOURS AFTER THE CHARGE CY CLE ISCOMPLETED.
Page 2523 of 3229
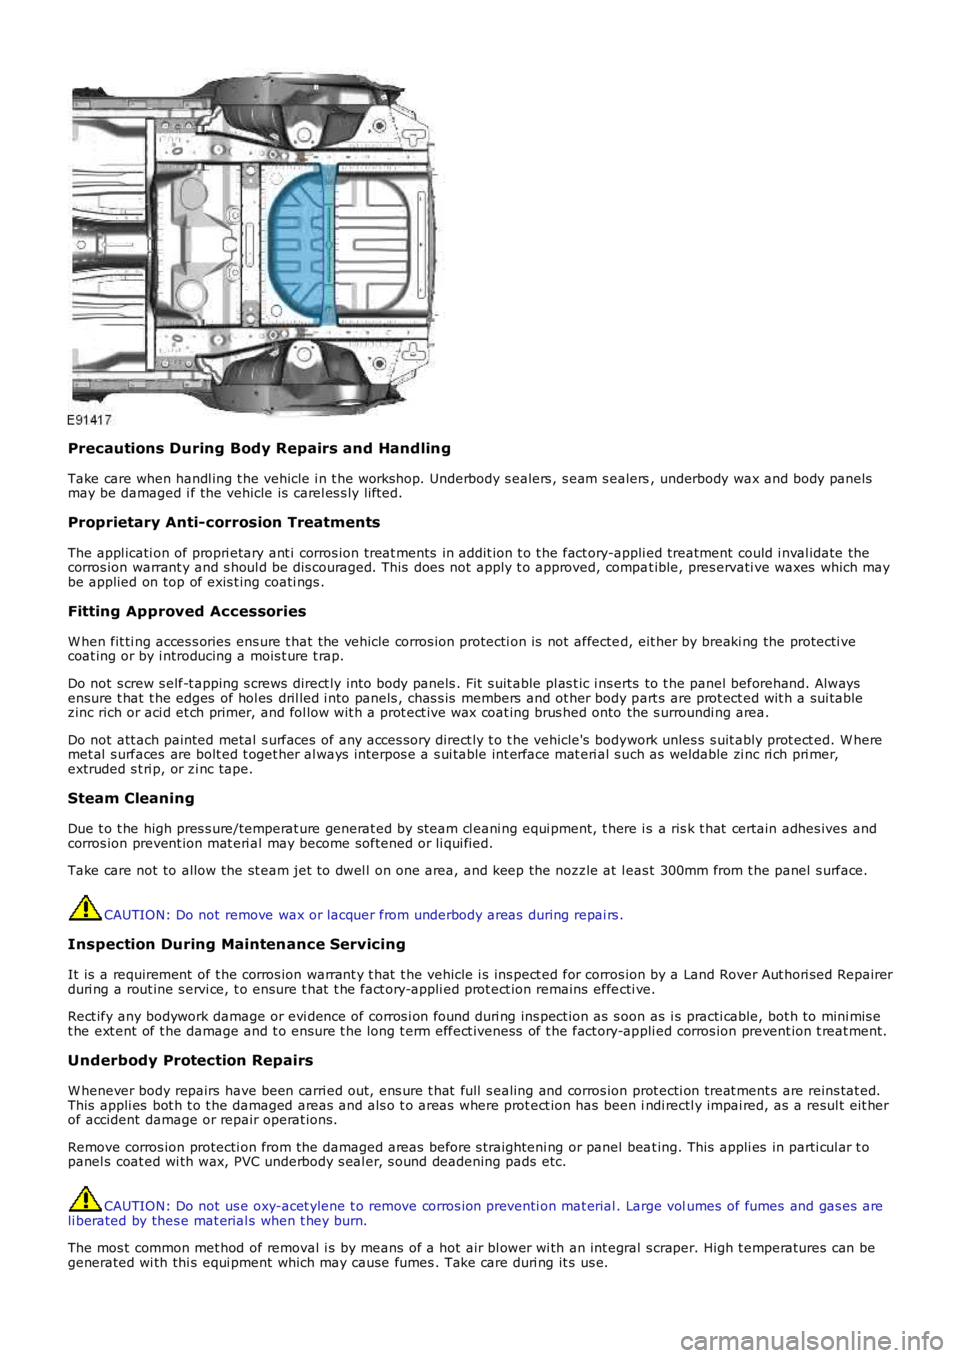
Precautions During Body Repairs and Handling
Take care when handl ing t he vehicle i n t he works hop. Underbody s ealers , s eam s ealers, underbody wax and body panelsmay be damaged i f the vehicle is carel es s ly lifted.
Proprietary Anti-corrosion Treatments
The appl icati on of propri etary ant i corros ion treat ments in addit ion t o t he fact ory-appli ed treatment could i nval idate thecorros ion warrant y and s houl d be dis couraged. This does not apply t o approved, compat ible, pres ervati ve waxes which maybe applied on top of exis t ing coati ngs .
Fitting Approved Accessories
W hen fit ti ng acces s ories ens ure t hat the vehicle corros ion protecti on is not affected, eit her by breaki ng the protecti vecoat ing or by i ntroducing a mois t ure t rap.
Do not s crew s elf-t apping s crews direct ly int o body panels . Fit s uit able pl as t ic i nserts to t he panel beforehand. Alwaysensure t hat t he edges of hol es dril led i nto panels , chas s is members and ot her body part s are prot ect ed wit h a sui tablezinc rich or aci d et ch primer, and fol low wit h a prot ect ive wax coat ing brus hed onto the s urroundi ng area.
Do not att ach painted metal s urfaces of any acces sory direct ly t o t he vehicle's bodywork unles s s uit ably prot ect ed. W heremet al s urfaces are bolt ed t oget her al ways interpos e a s ui table int erface mat eri al s uch as weldable zi nc ri ch pri mer,extruded s t ri p, or zi nc tape.
Steam Cleaning
Due t o t he high pres s ure/temperat ure generat ed by s team cl eani ng equi pment, t here i s a ris k t hat certain adhes ives andcorros ion prevent ion mat eri al may become softened or li qui fi ed.
Take care not to allow the st eam jet to dwel l on one area, and keep the nozzle at l eas t 300mm from t he panel s urface.
CAUTION: Do not remove wax or lacquer from underbody areas during repai rs .
Inspection During Maintenance Servicing
It is a requirement of t he corros ion warrant y t hat t he vehicle i s ins pect ed for corros ion by a Land Rover Aut hori sed Repairerduri ng a rout ine s ervi ce, t o ensure t hat t he fact ory-appli ed prot ect ion remains effecti ve.
Rect ify any bodywork damage or evi dence of corros i on found duri ng ins pect ion as s oon as i s practi cable, bot h to mini mis et he ext ent of t he damage and t o ensure t he long t erm effect iveness of t he fact ory-appli ed corros ion prevent ion t reat ment.
Underbody Protection Repairs
W henever body repairs have been carri ed out, ens ure t hat full s ealing and corros ion prot ecti on treat ment s are reins tat ed.This appli es bot h t o t he damaged areas and als o t o areas where prot ect ion has been indi rectl y impai red, as a resul t eit herof accident damage or repair operat ions.
Remove corros ion protecti on from the damaged areas before s traighteni ng or panel beat ing. This appli es in parti cul ar t opanel s coat ed wi th wax, PVC underbody s eal er, s ound deadening pads etc.
CAUTION: Do not us e oxy-acet ylene t o remove corros ion preventi on mat erial . Large volumes of fumes and gas es areli berated by thes e mat erial s when t hey burn.
The mos t common met hod of removal i s by means of a hot air bl ower wi th an int egral scraper. High t emperatures can begenerated wi th thi s equi pment which may cause fumes . Take care duri ng it s us e.
Page 2724 of 3229

Contents
4
L
Climate control
AIR VENTS ................................................... 101
MANUAL CLIMATE CONTROL ...................... 102
AUTOMATIC CLIMATE CONTROL ................. 103
HEATED WINDOWS AND MIRRORS ............ 104
AUXILIARY HEATER ..................................... 104
ELECTRIC SUNROOF .................................... 105
Convenience features
SUN VISORS ................................................ 107
CLOCK .......................................................... 107
CIGAR LIGHTER ........................................... 109
ASHTRAY ..................................................... 109
AUXILIARY POWER SOCKETS ..................... 110
CUP HOLDERS ............................................. 111
STORAGE COMPARTMENTS ........................ 112
Starting the engine
GENERAL INFORMATION ............................. 113
STARTING A PETROL ENGINE ..................... 114
STARTING A DIESEL ENGINE ....................... 115
DIESEL PARTICULATE FILTER (DPF) ........... 116
Transmission
MANUAL TRANSMISSION ............................ 118
AUTOMATIC TRANSMISSION ...................... 118
TECHNICAL SPECIFICATIONS ...................... 122
Brakes
PRINCIPLE OF OPERATION .......................... 123
HINTS ON DRIVING WITH ABS .................... 123
PARKING BRAKE .......................................... 124
Parking aid
PRINCIPLE OF OPERATION .......................... 126
USING THE PARKING AID ............................ 127
Driving hints
GENERAL DRIVING POINTS ......................... 128
REDUCED ENGINE PERFORMANCE ............. 128
RUNNING-IN ................................................ 128
ECONOMICAL DRIVING ................................ 129
Cruise control
PRINCIPLE OF OPERATION .......................... 130
USING CRUISE CONTROL ............................ 130
Terrain response
PRINCIPLE OF OPERATION .......................... 132
USING TERRAIN RESPONSE ........................ 132
Hill descent control (HDC)
PRINCIPLE OF OPERATION .......................... 136
USING HDC ................................................... 137
Traction control
USING TRACTION CONTROL ........................ 139
Stability control
PRINCIPLE OF OPERATION .......................... 140
USING STABILITY CONTROL ........................ 141
Fuel and refuelling
SAFETY PRECAUTIONS................................. 142
FUEL QUALITY .............................................. 142
RUNNING OUT OF FUEL................................ 144
FUEL CUT-OFF............................................... 144
FUEL FILLER FLAP ........................................ 144
REFUELLING ................................................. 145
TECHNICAL SPECIFICATIONS ....................... 146
Load carrying
GENERAL INFORMATION.............................. 147
LUGGAGE ANCHOR POINTS ......................... 148
LUGGAGE COVERS ....................................... 149
Towing
TOWING A TRAILER...................................... 150
LEVELLING.................................................... 151
ESSENTIAL TOWING CHECKS ...................... 151
RECOMMENDED TOWING WEIGHTS ............ 152
TOW BAR ...................................................... 153
Vehicle care
CLEANING THE ALLOY WHEELS................... 154
CLEANING THE EXTERIOR ............................ 154
CLEANING THE INTERIOR ............................ 155
REPAIRING MINOR PAINT DAMAGE ............ 156
Maintenance
GENERAL INFORMATION.............................. 157
OPENING AND CLOSING THE BONNET......... 160
ENGINE COMPARTMENT OVERVIEW ........... 161
ENGINE OIL CHECK....................................... 162