key Lexus CT200h 2012 Navigation Manual (in English)
[x] Cancel search | Manufacturer: LEXUS, Model Year: 2012, Model line: CT200h, Model: Lexus CT200h 2012Pages: 436, PDF Size: 28.25 MB
Page 98 of 436
98
1. DESTINATION SEARCH
CT200h_Navi_OM76078E_(EE)
14.02.06 12:29
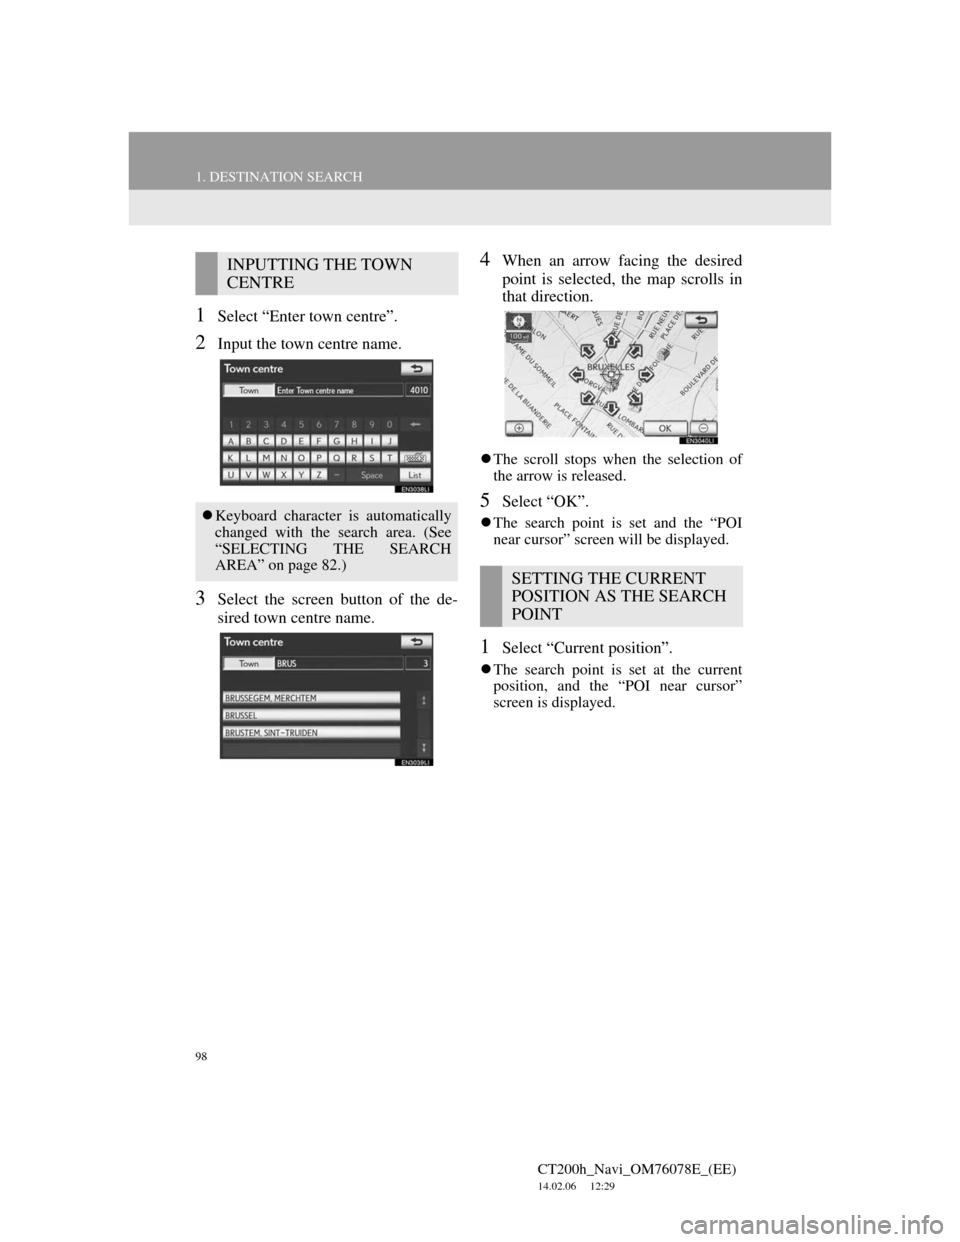
1Select “Enter town centre”.
2Input the town centre name.
3Select the screen button of the de-
sired town centre name.
4When an arrow facing the desired
point is selected, the map scrolls in
that direction.
The scroll stops when the selection of
the arrow is released.
5Select “OK”.
The search point is set and the “POI
near cursor” screen will be displayed.
1Select “Current position”.
The search point is set at the current
position, and the “POI near cursor”
screen is displayed.
INPUTTING THE TOWN
CENTRE
Keyboard character is automatically
changed with the search area. (See
“SELECTING THE SEARCH
AREA” on page 82.)
SETTING THE CURRENT
POSITION AS THE SEARCH
POINT
Page 136 of 436
136
3. MEMORY POINTS
CT200h_Navi_OM76078E_(EE)
14.02.06 12:29
SOUND ICONS
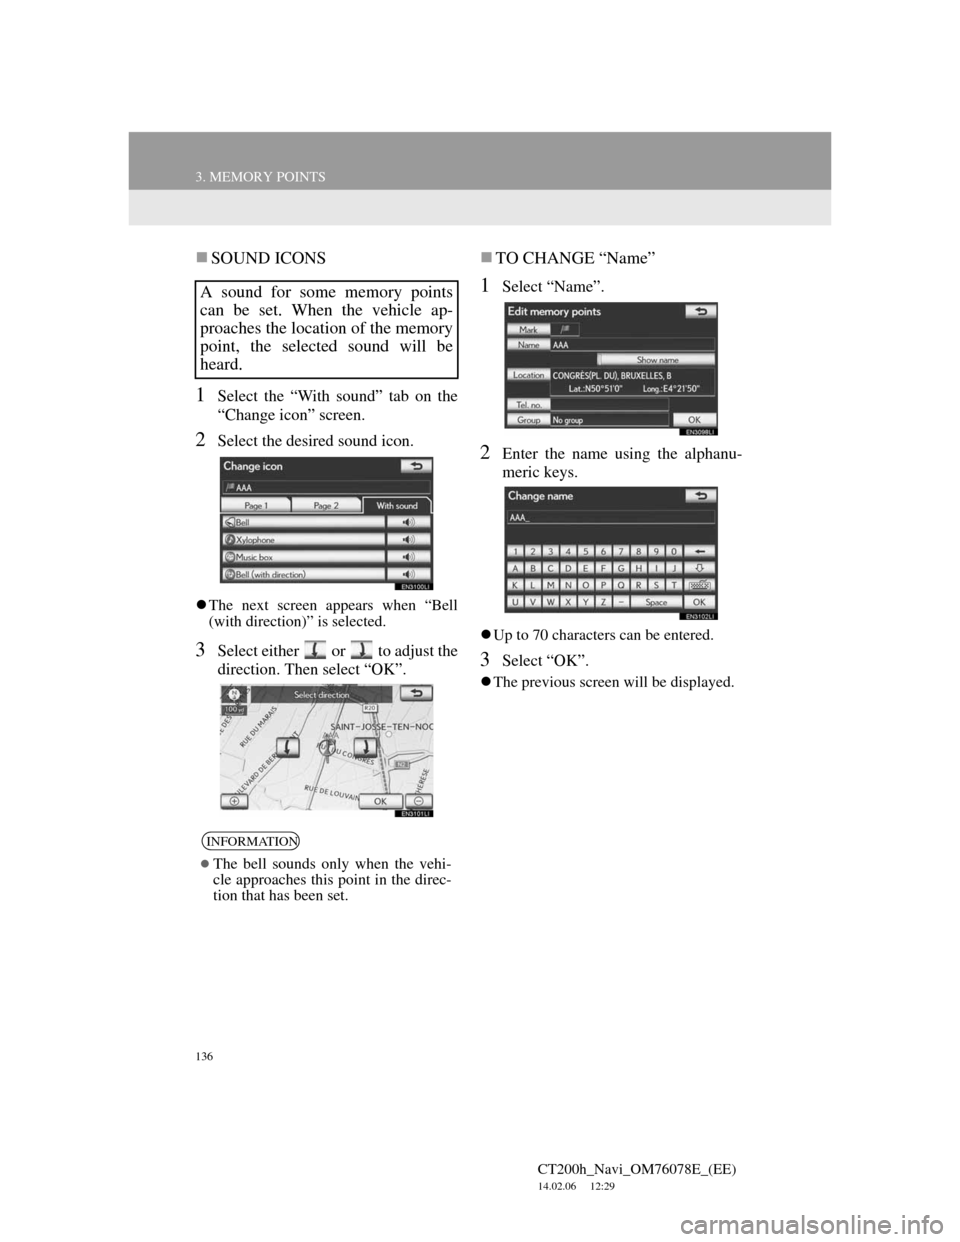
1Select the “With sound” tab on the
“Change icon” screen.
2Select the desired sound icon.
The next screen appears when “Bell
(with direction)” is selected.
3Select either or to adjust the
direction. Then select “OK”.
TO CHANGE “Name”
1Select “Name”.
2Enter the name using the alphanu-
meric keys.
Up to 70 characters can be entered.
3Select “OK”.
The previous screen will be displayed.
A sound for some memory points
can be set. When the vehicle ap-
proaches the location of the memory
point, the selected sound will be
heard.
INFORMATION
The bell sounds only when the vehi-
cle approaches this point in the direc-
tion that has been set.
Page 137 of 436
137
3. MEMORY POINTS
CT200h_Navi_OM76078E_(EE)
14.02.06 12:29
3
NAVIGATION SYSTEM
DISPLAYING MEMORY POINT
NAMES
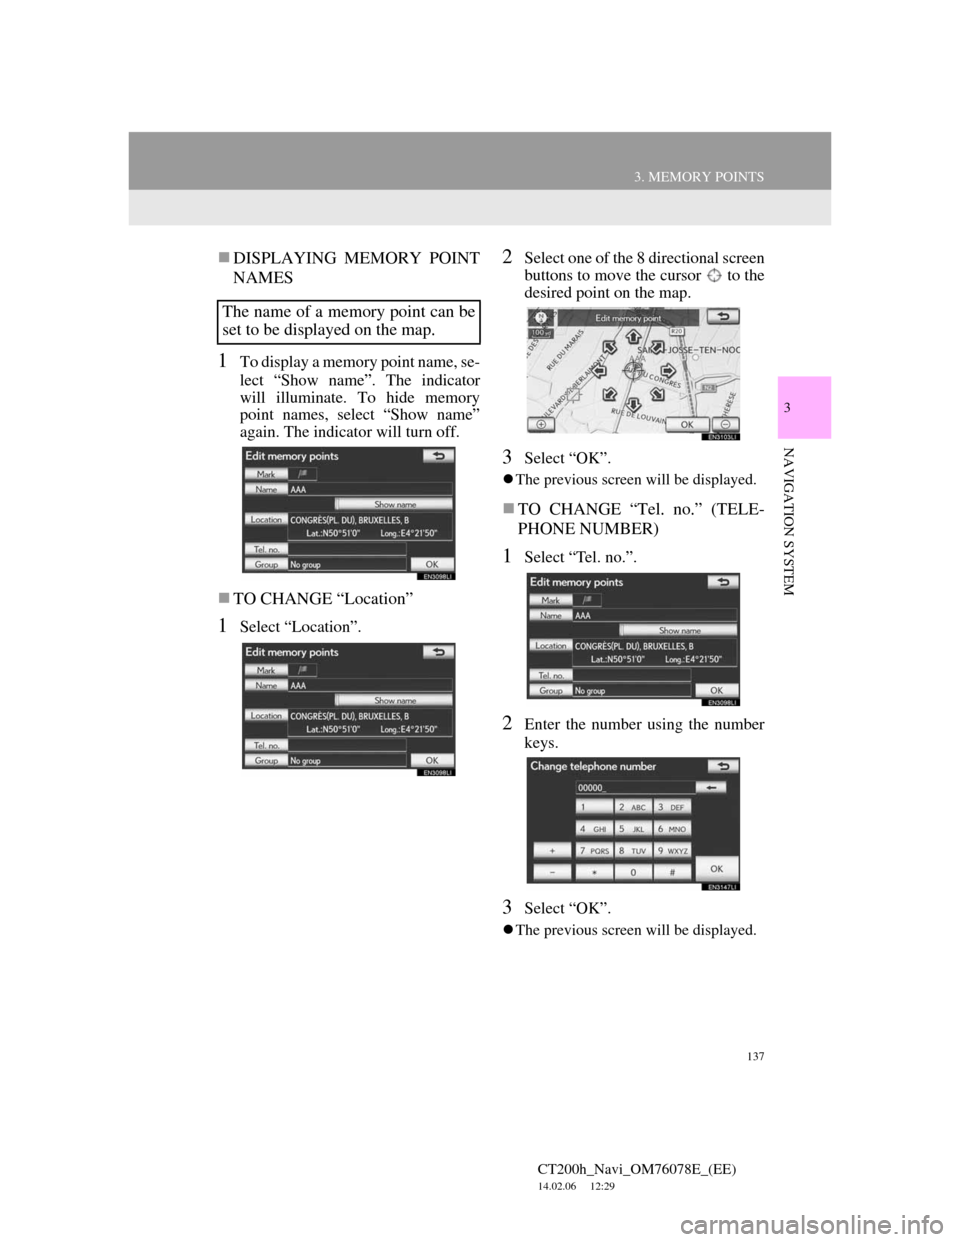
1To display a memory point name, se-
lect “Show name”. The indicator
will illuminate. To hide memory
point names, select “Show name”
again. The indicator will turn off.
TO CHANGE “Location”
1Select “Location”.
2Select one of the 8 directional screen
buttons to move the cursor to the
desired point on the map.
3Select “OK”.
The previous screen will be displayed.
TO CHANGE “Tel. no.” (TELE-
PHONE NUMBER)
1Select “Tel. no.”.
2Enter the number using the number
keys.
3Select “OK”.
The previous screen will be displayed.
The name of a memory point can be
set to be displayed on the map.
Page 144 of 436
144
3. MEMORY POINTS
CT200h_Navi_OM76078E_(EE)
14.02.06 12:29
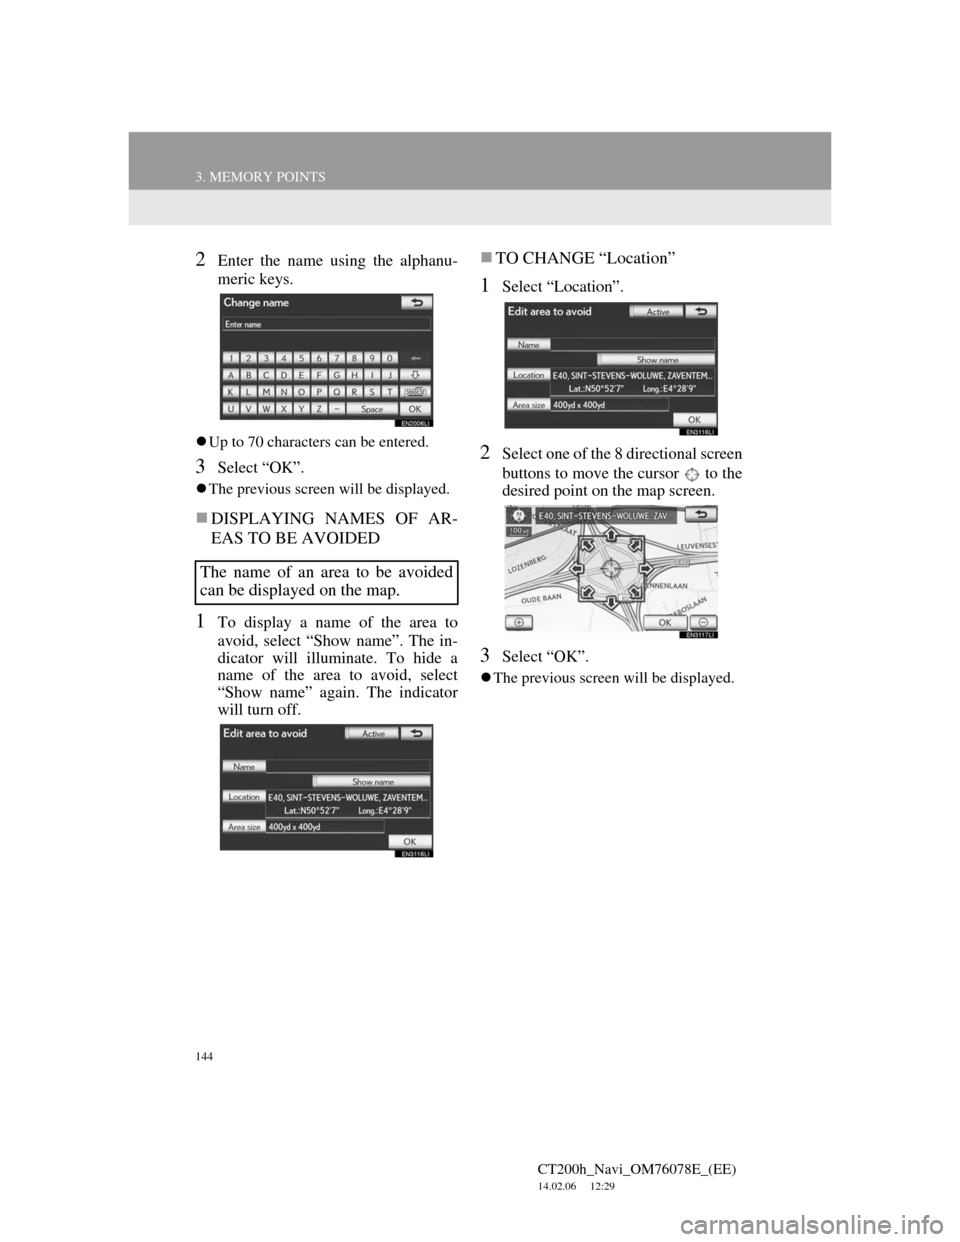
2Enter the name using the alphanu-
meric keys.
Up to 70 characters can be entered.
3Select “OK”.
The previous screen will be displayed.
DISPLAYING NAMES OF AR-
EAS TO BE AVOIDED
1To display a name of the area to
avoid, select “Show name”. The in-
dicator will illuminate. To hide a
name of the area to avoid, select
“Show name” again. The indicator
will turn off.
TO CHANGE “Location”
1Select “Location”.
2Select one of the 8 directional screen
buttons to move the cursor to the
desired point on the map screen.
3Select “OK”.
The previous screen will be displayed.
The name of an area to be avoided
can be displayed on the map.
Page 161 of 436
161
4. SETUP
CT200h_Navi_OM76078E_(EE)
14.02.06 12:30
3
NAVIGATION SYSTEM
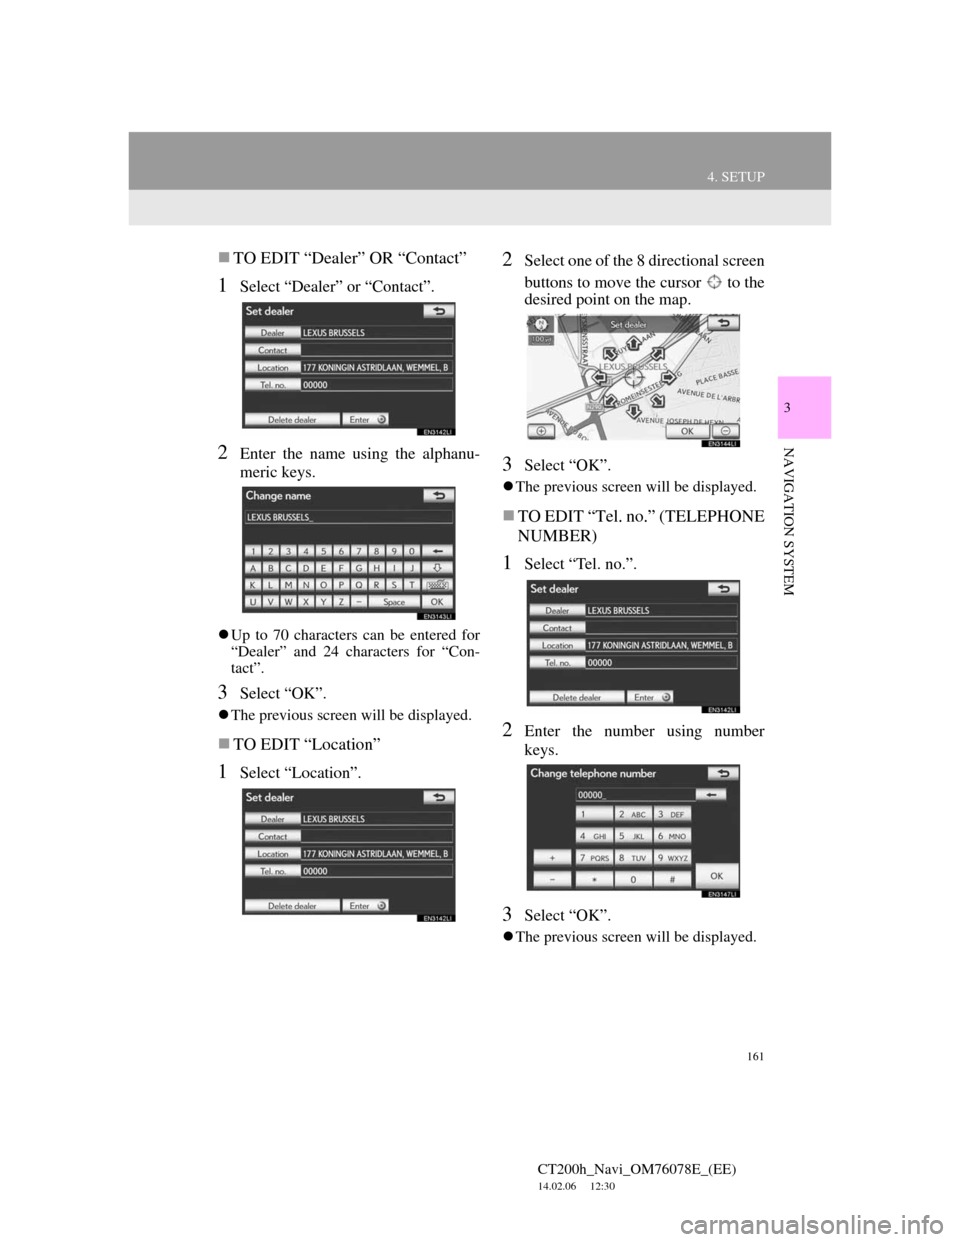
TO EDIT “Dealer” OR “Contact”
1Select “Dealer” or “Contact”.
2Enter the name using the alphanu-
meric keys.
Up to 70 characters can be entered for
“Dealer” and 24 characters for “Con-
tact”.
3Select “OK”.
The previous screen will be displayed.
TO EDIT “Location”
1Select “Location”.
2Select one of the 8 directional screen
buttons to move the cursor to the
desired point on the map.
3Select “OK”.
The previous screen will be displayed.
TO EDIT “Tel. no.” (TELEPHONE
NUMBER)
1Select “Tel. no.”.
2Enter the number using number
keys.
3Select “OK”.
The previous screen will be displayed.
Page 181 of 436
181
1. TELEPHONE OPERATION
CT200h_Navi_OM76078E_(EE)
14.02.06 12:30
4
TELEPHONE
4. CALL ON THE Bluetooth® PHONE
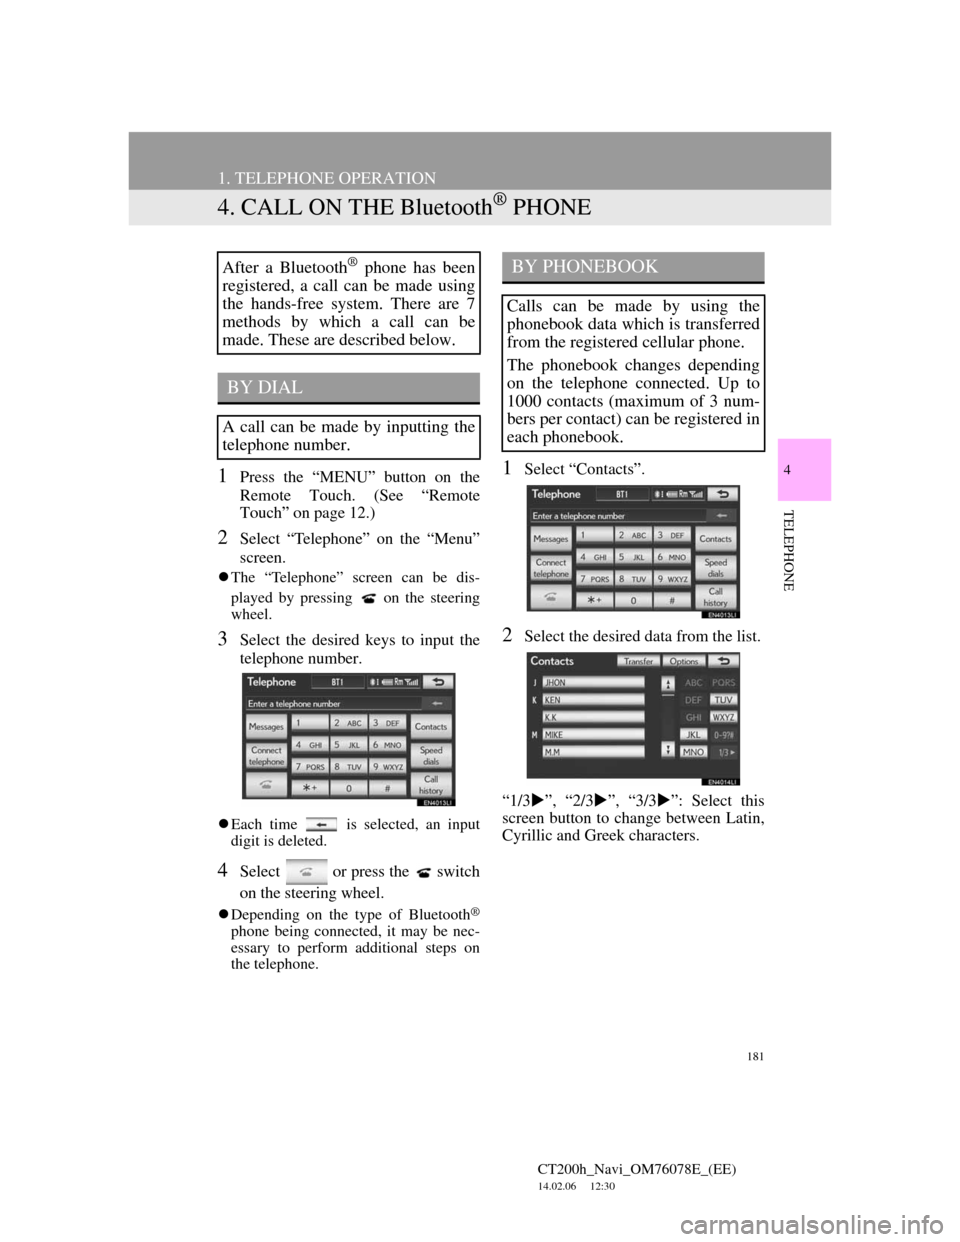
1Press the “MENU” button on the
Remote Touch. (See “Remote
Touch” on page 12.)
2Select “Telephone” on the “Menu”
screen.
The “Telephone” screen can be dis-
played by pressing
on the steering
wheel.
3Select the desired keys to input the
telephone number.
Each time is selected, an input
digit is deleted.
4Select or press the switch
on the steering wheel.
Depending on the type of Bluetooth®
phone being connected, it may be nec-
essary to perform additional steps on
the telephone.
1Select “Contacts”.
2Select the desired data from the list.
“1/3”, “2/3”, “3/3”: Select this
screen button to change between Latin,
Cyrillic and Greek characters.
After a Bluetooth® phone has been
registered, a call can be made using
the hands-free system. There are 7
methods by which a call can be
made. These are described below.
BY DIAL
A call can be made by inputting the
telephone number.
BY PHONEBOOK
Calls can be made by using the
phonebook data which is transferred
from the registered cellular phone.
The phonebook changes depending
on the telephone connected. Up to
1000 contacts (maximum of 3 num-
bers per contact) can be registered in
each phonebook.
Page 189 of 436
189
1. TELEPHONE OPERATION
CT200h_Navi_OM76078E_(EE)
14.02.06 12:30
4
TELEPHONE
6. TALK ON THE Bluetooth® PHONE
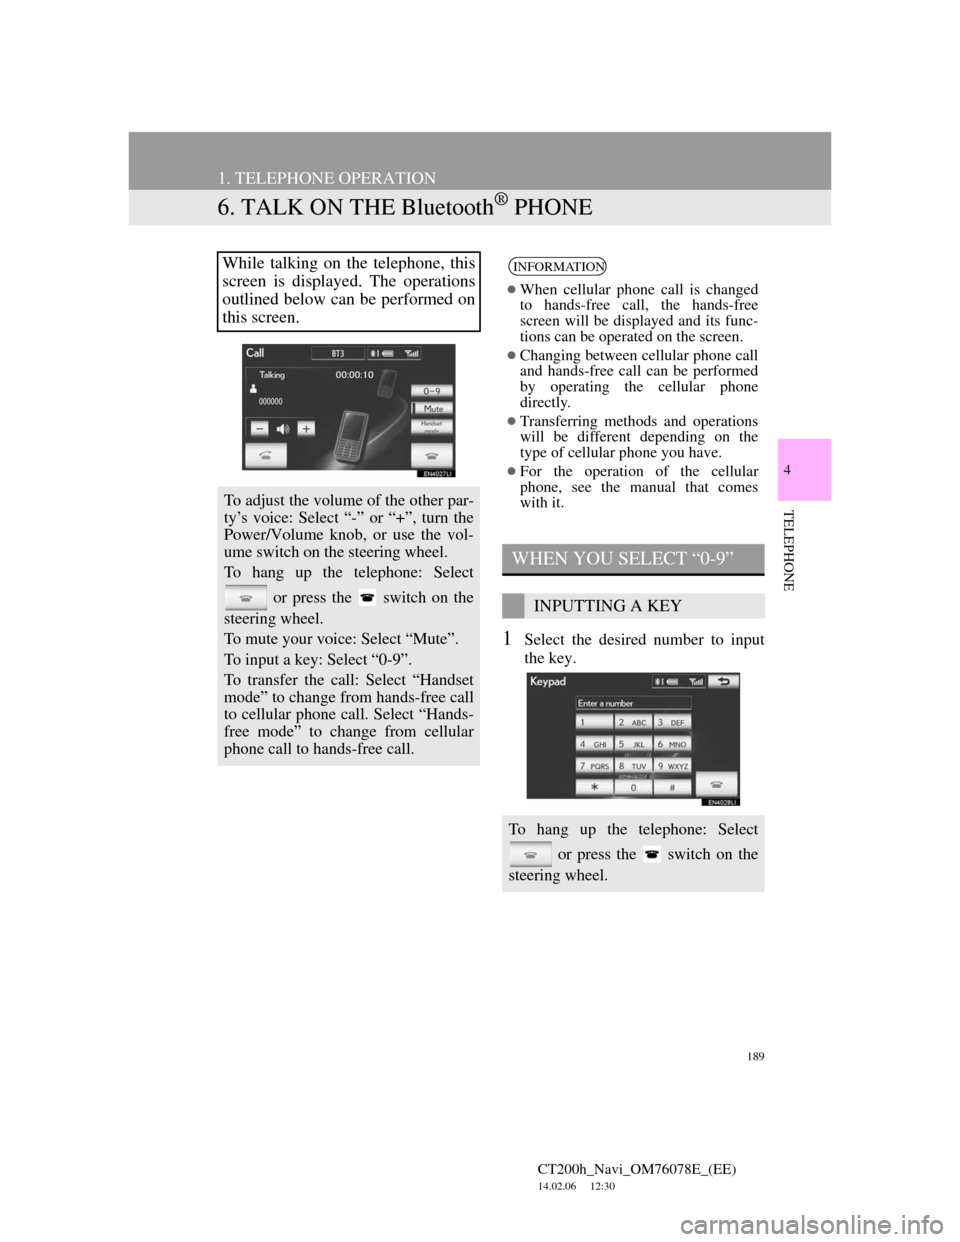
1Select the desired number to input
the key.
While talking on the telephone, this
screen is displayed. The operations
outlined below can be performed on
this screen.
To adjust the volume of the other par-
ty’s voice: Select “-” or “+”, turn the
Power/Volume knob, or use the vol-
ume switch on the steering wheel.
To hang up the telephone: Select
or press the switch on the
steering wheel.
To mute your voice: Select “Mute”.
To input a key: Select “0-9”.
To transfer the call: Select “Handset
mode” to change from hands-free call
to cellular phone call. Select “Hands-
free mode” to change from cellular
phone call to hands-free call.
INFORMATION
When cellular phone call is changed
to hands-free call, the hands-free
screen will be displayed and its func-
tions can be operated on the screen.
Changing between cellular phone call
and hands-free call can be performed
by operating the cellular phone
directly.
Transferring methods and operations
will be different depending on the
type of cellular phone you have.
For the operation of the cellular
phone, see the manual that comes
with it.
WHEN YOU SELECT “0-9”
INPUTTING A KEY
To hang up the telephone: Select
or press the switch on the
steering wheel.
Page 202 of 436
202
2. SETUP
CT200h_Navi_OM76078E_(EE)
14.02.06 12:30
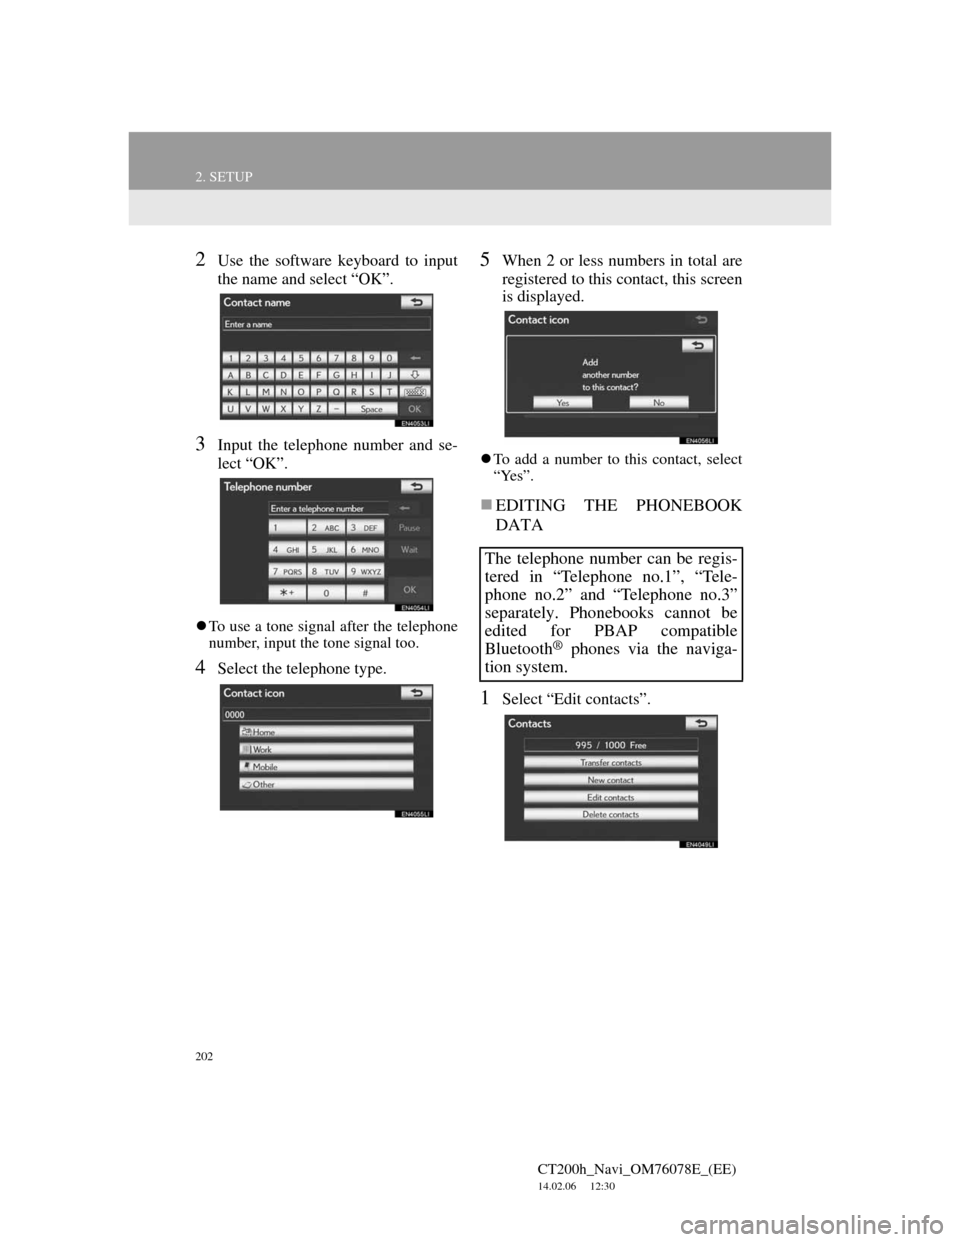
2Use the software keyboard to input
the name and select “OK”.
3Input the telephone number and se-
lect “OK”.
To use a tone signal after the telephone
number, input the tone signal too.
4Select the telephone type.
5When 2 or less numbers in total are
registered to this contact, this screen
is displayed.
To add a number to this contact, select
“Yes”.
EDITING THE PHONEBOOK
DATA
1Select “Edit contacts”.
The telephone number can be regis-
tered in “Telephone no.1”, “Tele-
phone no.2” and “Telephone no.3”
separately. Phonebooks cannot be
edited for PBAP compatible
Bluetooth
® phones via the naviga-
tion system.
Page 214 of 436
214
2. SETUP
CT200h_Navi_OM76078E_(EE)
14.02.06 12:30
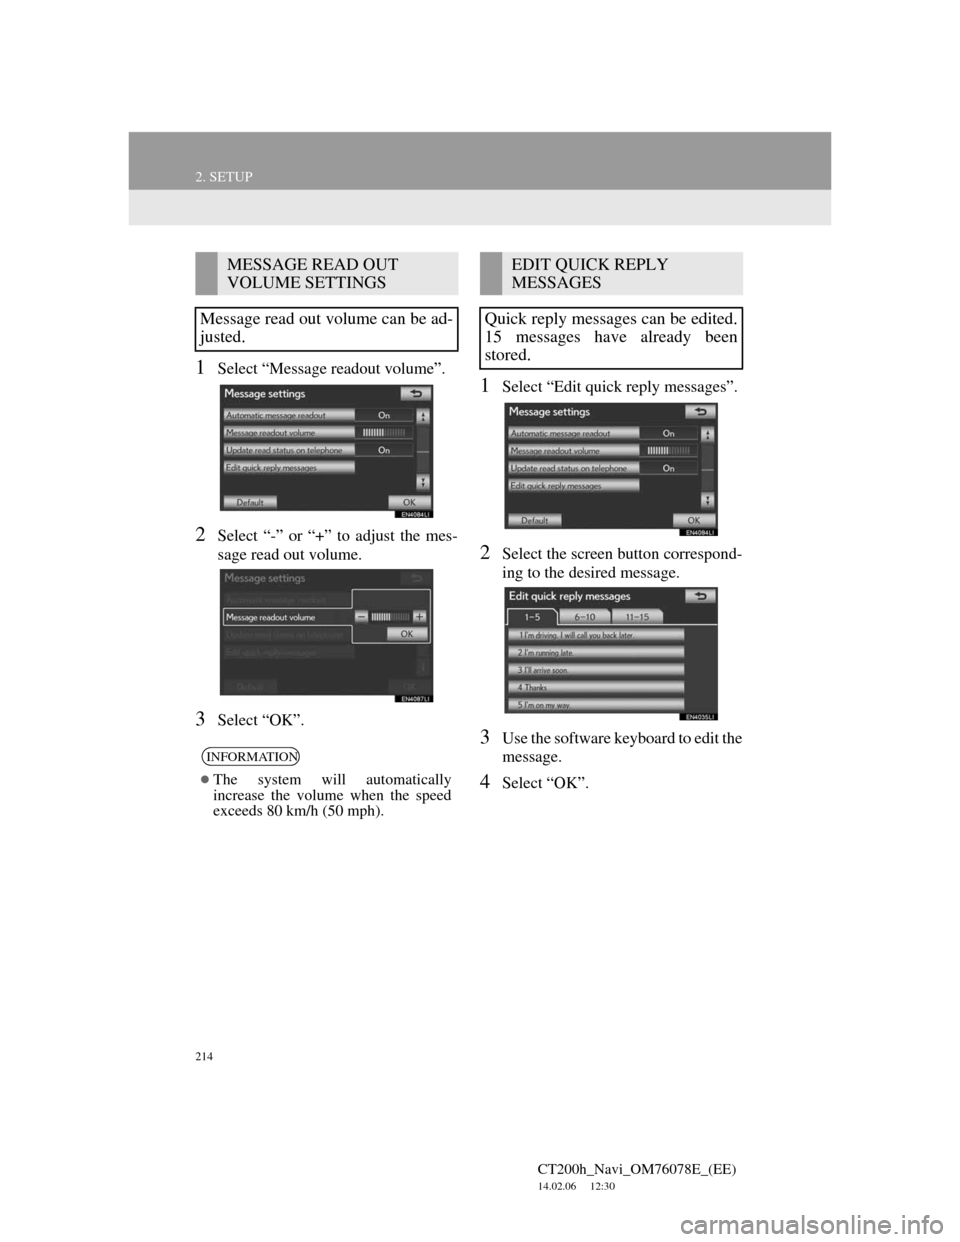
1Select “Message readout volume”.
2Select “-” or “+” to adjust the mes-
sage read out volume.
3Select “OK”.
1Select “Edit quick reply messages”.
2Select the screen button correspond-
ing to the desired message.
3Use the software keyboard to edit the
message.
4Select “OK”.
MESSAGE READ OUT
VOLUME SETTINGS
Message read out volume can be ad-
justed.
INFORMATION
The system will automatically
increase the volume when the speed
exceeds 80 km/h (50 mph).
EDIT QUICK REPLY
MESSAGES
Quick reply messages can be edited.
15 messages have already been
stored.
Page 222 of 436
222
2. SETUP
CT200h_Navi_OM76078E_(EE)
14.02.06 12:30
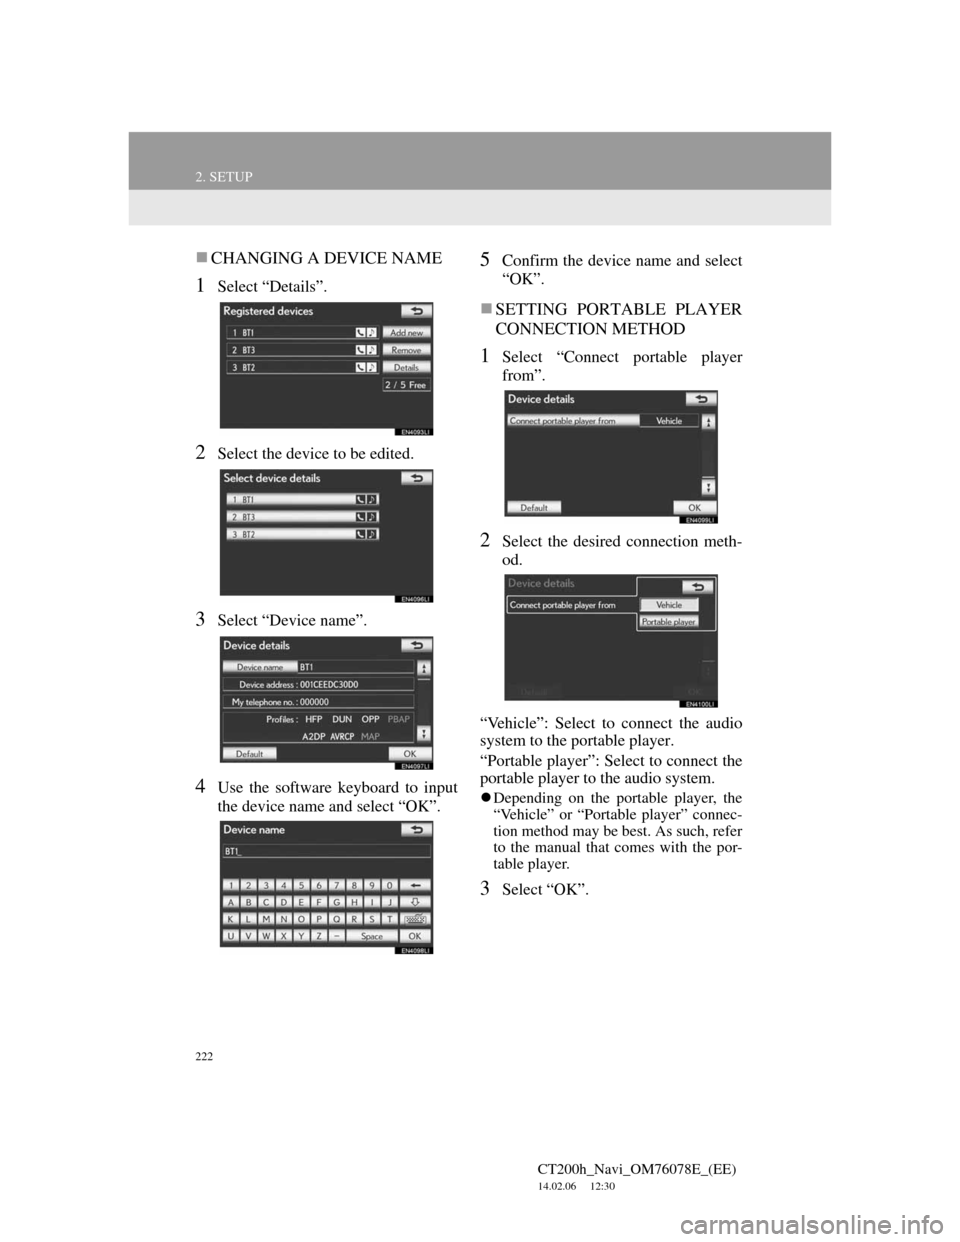
CHANGING A DEVICE NAME
1Select “Details”.
2Select the device to be edited.
3Select “Device name”.
4Use the software keyboard to input
the device name and select “OK”.
5Confirm the device name and select
“OK”.
SETTING PORTABLE PLAYER
CONNECTION METHOD
1Select “Connect portable player
from”.
2Select the desired connection meth-
od.
“Vehicle”: Select to connect the audio
system to the portable player.
“Portable player”: Select to connect the
portable player to the audio system.
Depending on the portable player, the
“Vehicle” or “Portable player” connec-
tion method may be best. As such, refer
to the manual that comes with the por-
table player.
3Select “OK”.