remote start Lexus CT200h 2012 Navigation Manual (in English)
[x] Cancel search | Manufacturer: LEXUS, Model Year: 2012, Model line: CT200h, Model: Lexus CT200h 2012Pages: 436, PDF Size: 28.25 MB
Page 8 of 436

TABLE OF CONTENTS
8
CT200h_Navi_OM76078E_(EE)
14.02.06 12:29
1. NAVIGATION OPERATION............. 12
Remote Touch ........................................12
HOME SCREEN ...................................13
REGISTERING HOME.........................15
REGISTERING QUICK ACCESS........17
OPERATION FLOW:
GUIDING THE ROUTE .....................19
SETTING HOME AS THE
DESTINATION ..................................21
2. FUNCTION INDEX ............................ 23
NAVIGATION SYSTEM FUNCTION
INDEX.................................................23
3. QUICK REFERENCE ......................... 25
MAP SCREEN.......................................25
NAVIGATION MENU SCREEN .........27
“Menu” SCREEN ..................................29
“Setup” SCREEN...................................31
“Information” SCREEN.........................33
1. BASIC INFORMATION BEFORE
OPERATION ..................................... 36
INITIAL SCREEN.................................36
DISPLAY OPERATION .......................37
HOW TO USE THE Remote Touch......38
INPUTTING LETTERS AND
NUMBERS/LIST SCREEN
OPERATION ......................................40
SCREEN ADJUSTMENT .....................45
MAP SCREEN OPERATION ...............47
2. SETUP ................................................. 60
GENERAL SETTINGS .........................60
VOICE SETTINGS ...............................73
1. DESTINATION SEARCH.................. 78
QUICK REFERENCE .......................... 78
DESTINATION SEARCH ................... 81
STARTING ROUTE GUIDANCE ..... 102
2. ROUTE GUIDANCE ........................ 105
ROUTE GUIDANCE SCREEN ......... 105
TYPICAL VOICE GUIDANCE
PROMPTS ........................................ 109
DISTANCE AND TIME TO
DESTINATION................................ 112
SUSPENDING AND RESUMING
GUIDANCE ..................................... 113
SETTING ROUTE .............................. 114
DISPLAY POI* ICONS...................... 122
3. MEMORY POINTS .......................... 125
MEMORY POINT SETTINGS .......... 125
4. SETUP ............................................... 151
NAVIGATION SETTINGS................ 151
VEHICLE SETTINGS ........................ 157
5. GPS (GLOBAL POSITIONING
SYSTEM) ........................................ 163
LIMITATIONS OF THE NAVIGATION
SYSTEM........................................... 163
MAP DATABASE VERSION AND
COVERED AREA............................ 166
1QUICK GUIDE
2BASIC FUNCTION
3NAVIGATION SYSTEM
*: Point of Interest
Page 20 of 436
20
1. NAVIGATION OPERATION
CT200h_Navi_OM76078E_(EE)
14.02.06 12:29
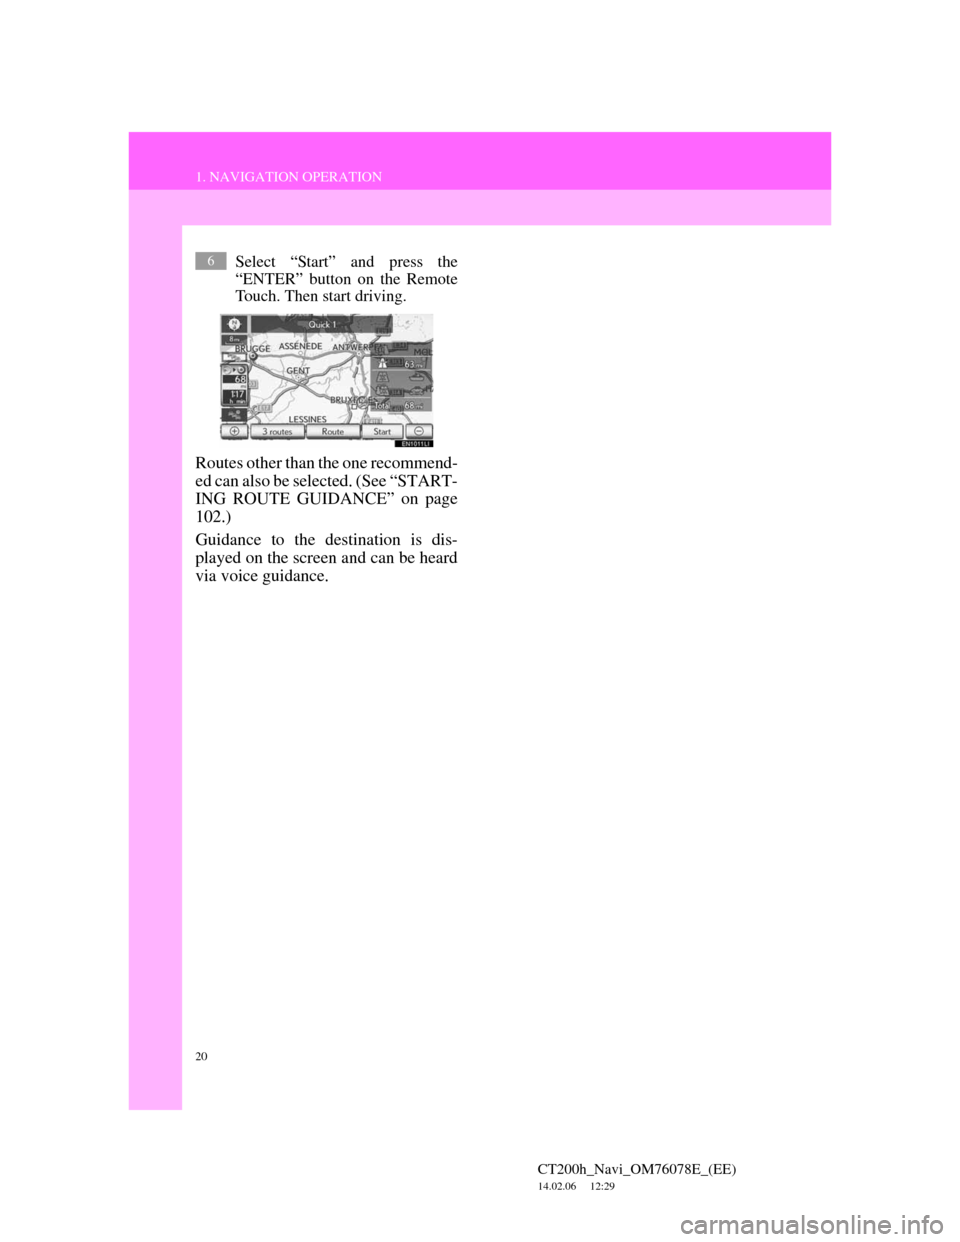
Select “Start” and press the
“ENTER” button on the Remote
Touch. Then start driving.
Routes other than the one recommend-
ed can also be selected. (See “START-
ING ROUTE GUIDANCE” on page
102.)
Guidance to the destination is dis-
played on the screen and can be heard
via voice guidance.
6
Page 22 of 436
22
1. NAVIGATION OPERATION
CT200h_Navi_OM76078E_(EE)
14.02.06 12:29
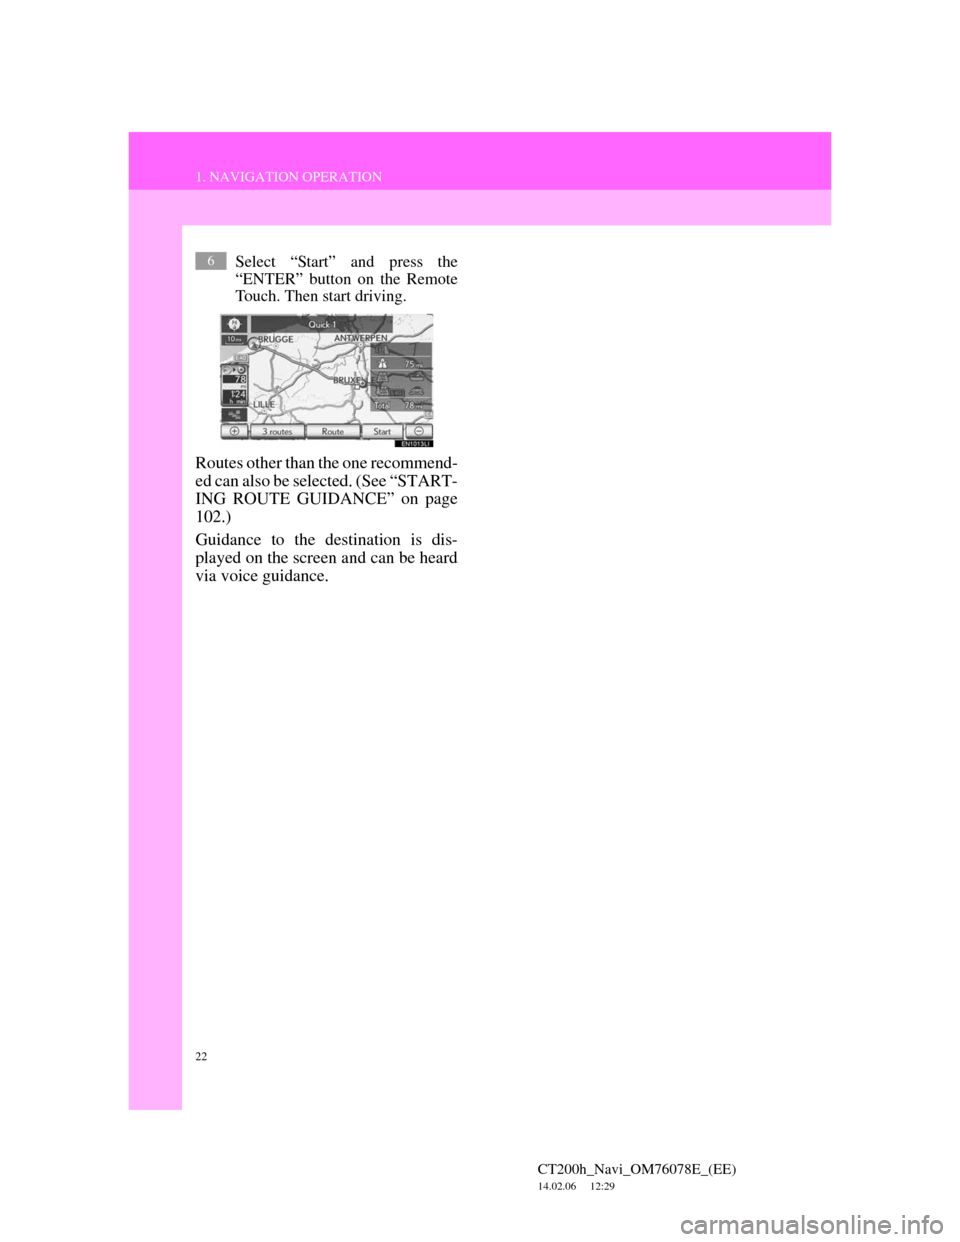
Select “Start” and press the
“ENTER” button on the Remote
Touch. Then start driving.
Routes other than the one recommend-
ed can also be selected. (See “START-
ING ROUTE GUIDANCE” on page
102.)
Guidance to the destination is dis-
played on the screen and can be heard
via voice guidance.
6
Page 48 of 436
48
1. BASIC INFORMATION BEFORE OPERATION
CT200h_Navi_OM76078E_(EE)
14.02.06 12:29
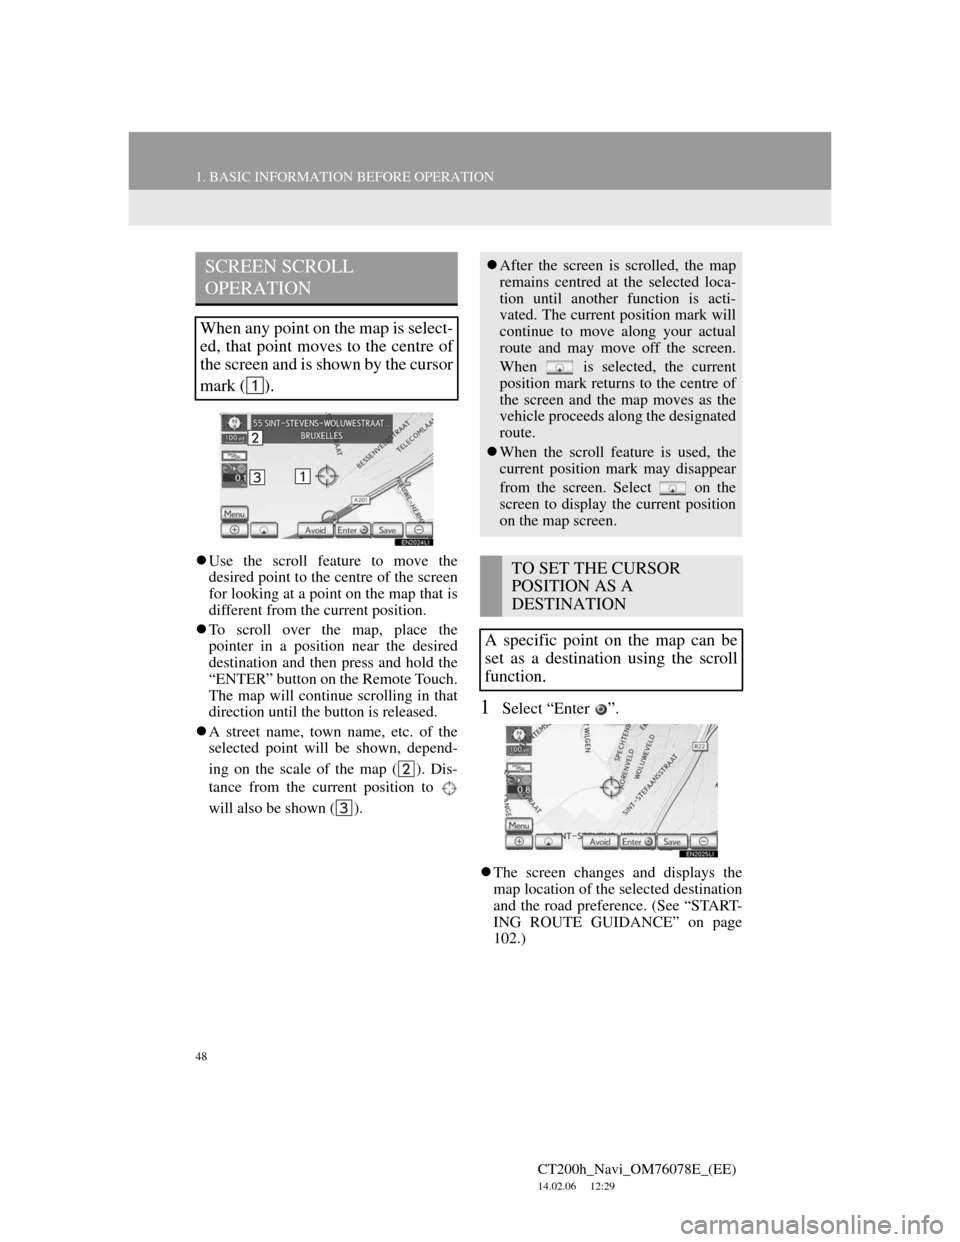
Use the scroll feature to move the
desired point to the centre of the screen
for looking at a point on the map that is
different from the current position.
To scroll over the map, place the
pointer in a position near the desired
destination and then press and hold the
“ENTER” button on the Remote Touch.
The map will continue scrolling in that
direction until the button is released.
A street name, town name, etc. of the
selected point will be shown, depend-
ing on the scale of the map ( ). Dis-
tance from the current position to
will also be shown ( ).
1Select “Enter ”.
The screen changes and displays the
map location of the selected destination
and the road preference. (See “START-
ING ROUTE GUIDANCE” on page
102.)
SCREEN SCROLL
OPERATION
When any point on the map is select-
ed, that point moves to the centre of
the screen and is shown by the cursor
mark ( ).
After the screen is scrolled, the map
remains centred at the selected loca-
tion until another function is acti-
vated. The current position mark will
continue to move along your actual
route and may move off the screen.
When is selected, the current
position mark returns to the centre of
the screen and the map moves as the
vehicle proceeds along the designated
route.
When the scroll feature is used, the
current position mark may disappear
from the screen. Select on the
screen to display the current position
on the map screen.
TO SET THE CURSOR
POSITION AS A
DESTINATION
A specific point on the map can be
set as a destination using the scroll
function.
Page 66 of 436
66
2. SETUP
CT200h_Navi_OM76078E_(EE)
14.02.06 12:29
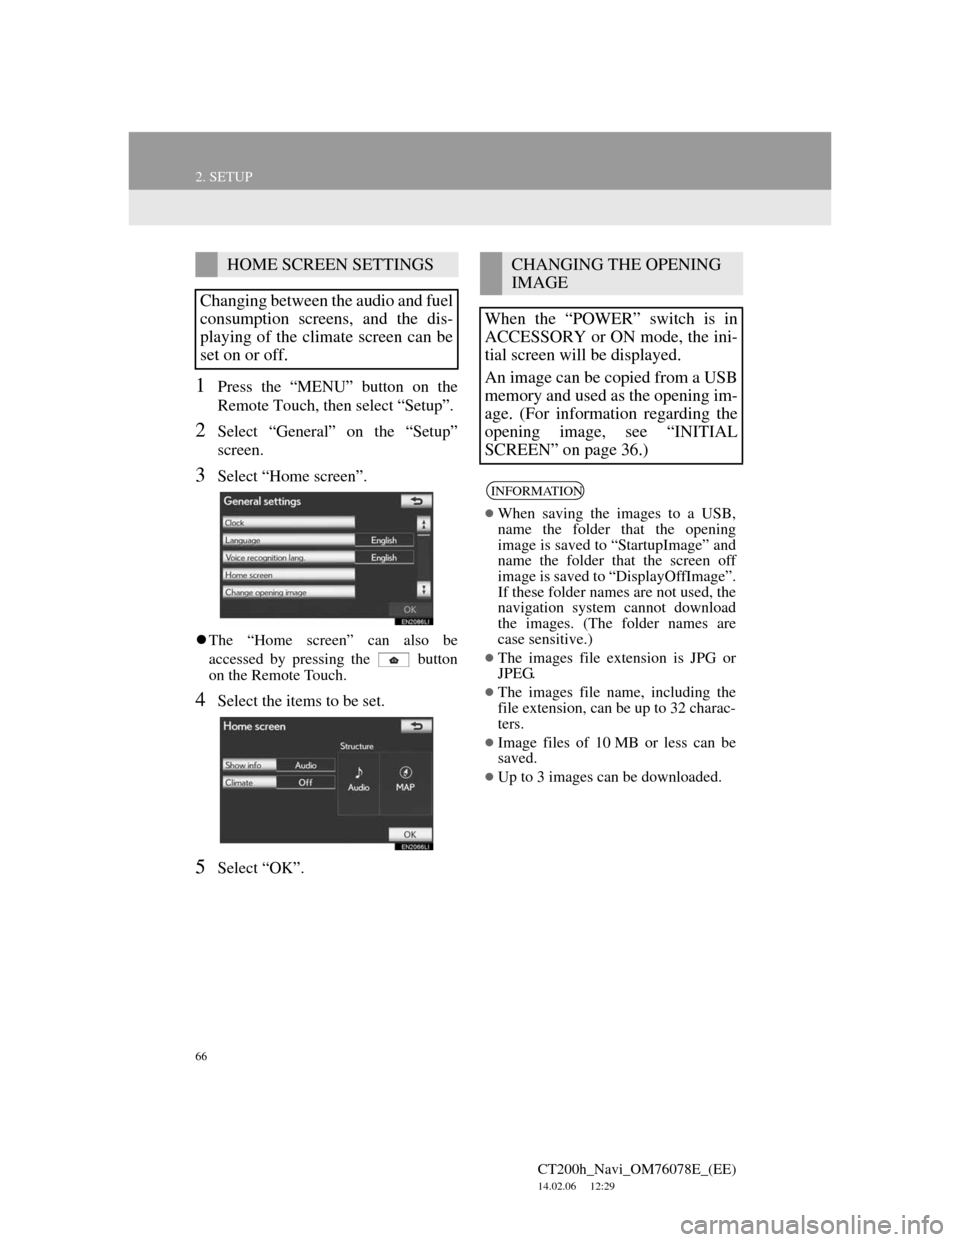
1Press the “MENU” button on the
Remote Touch, then select “Setup”.
2Select “General” on the “Setup”
screen.
3Select “Home screen”.
The “Home screen” can also be
accessed by pressing the button
on the Remote Touch.
4Select the items to be set.
5Select “OK”.
HOME SCREEN SETTINGS
Changing between the audio and fuel
consumption screens, and the dis-
playing of the climate screen can be
set on or off.CHANGING THE OPENING
IMAGE
When the “POWER” switch is in
ACCESSORY or ON mode, the ini-
tial screen will be displayed.
An image can be copied from a USB
memory and used as the opening im-
age. (For information regarding the
opening image, see “INITIAL
SCREEN” on page 36.)
INFORMATION
When saving the images to a USB,
name the folder that the opening
image is saved to “StartupImage” and
name the folder that the screen off
image is saved to “DisplayOffImage”.
If these folder names are not used, the
navigation system cannot download
the images. (The folder names are
case sensitive.)
The images file extension is JPG or
JPEG.
The images file name, including the
file extension, can be up to 32 charac-
ters.
Image files of 10 MB or less can be
saved.
Up to 3 images can be downloaded.
Page 84 of 436
84
1. DESTINATION SEARCH
CT200h_Navi_OM76078E_(EE)
14.02.06 12:29
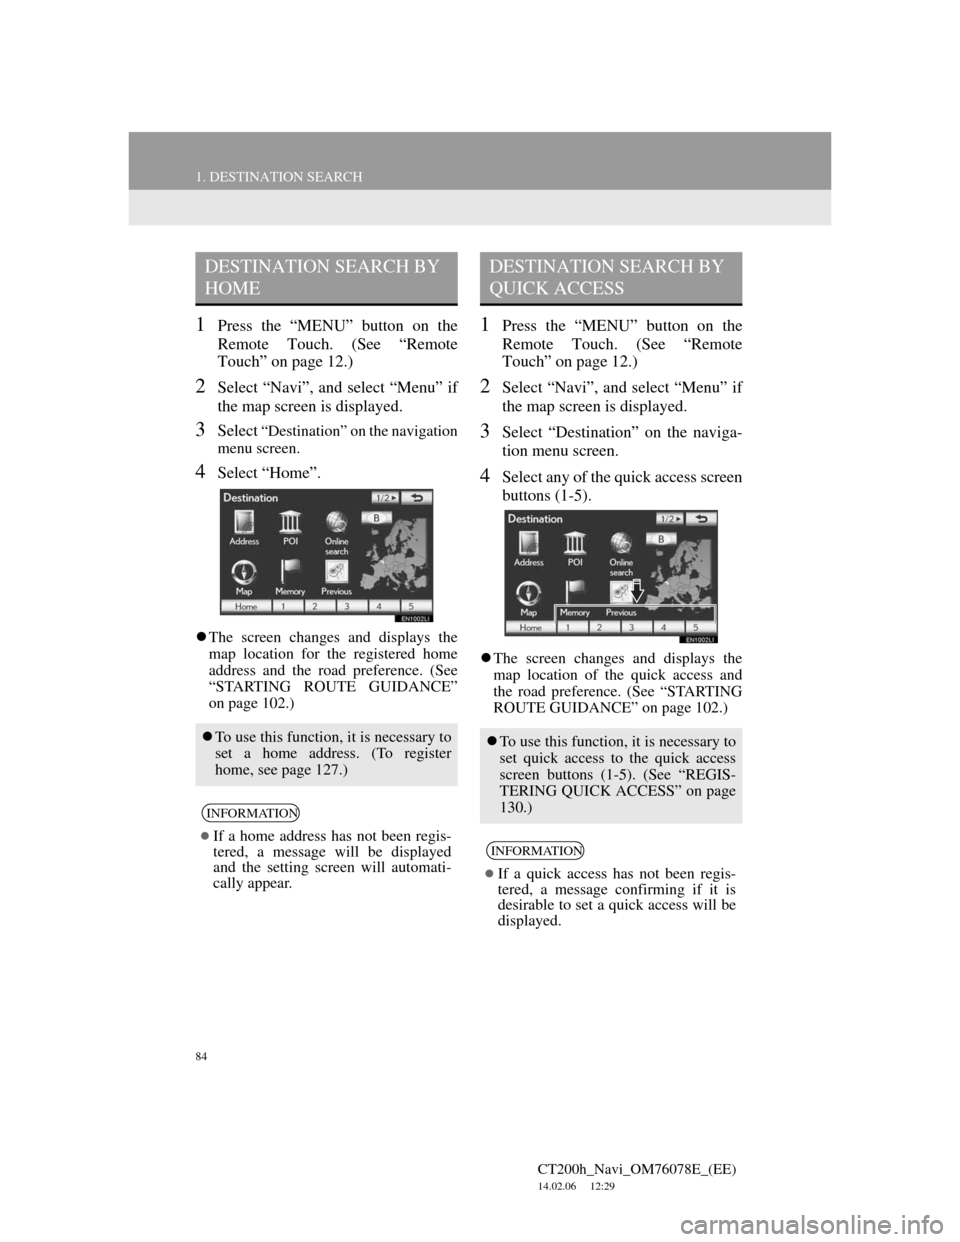
1Press the “MENU” button on the
Remote Touch. (See “Remote
Touch” on page 12.)
2Select “Navi”, and select “Menu” if
the map screen is displayed.
3Select “Destination” on the navigation
menu screen.
4Select “Home”.
The screen changes and displays the
map location for the registered home
address and the road preference. (See
“STARTING ROUTE GUIDANCE”
on page 102.)
1Press the “MENU” button on the
Remote Touch. (See “Remote
Touch” on page 12.)
2Select “Navi”, and select “Menu” if
the map screen is displayed.
3Select “Destination” on the naviga-
tion menu screen.
4Select any of the quick access screen
buttons (1-5).
The screen changes and displays the
map location of the quick access and
the road preference. (See “STARTING
ROUTE GUIDANCE” on page 102.)
DESTINATION SEARCH BY
HOME
To use this function, it is necessary to
set a home address. (To register
home, see page 127.)
INFORMATION
If a home address has not been regis-
tered, a message will be displayed
and the setting screen will automati-
cally appear.
DESTINATION SEARCH BY
QUICK ACCESS
To use this function, it is necessary to
set quick access to the quick access
screen buttons (1-5). (See “REGIS-
TERING QUICK ACCESS” on page
130.)
INFORMATION
If a quick access has not been regis-
tered, a message confirming if it is
desirable to set a quick access will be
displayed.
Page 86 of 436
86
1. DESTINATION SEARCH
CT200h_Navi_OM76078E_(EE)
14.02.06 12:29
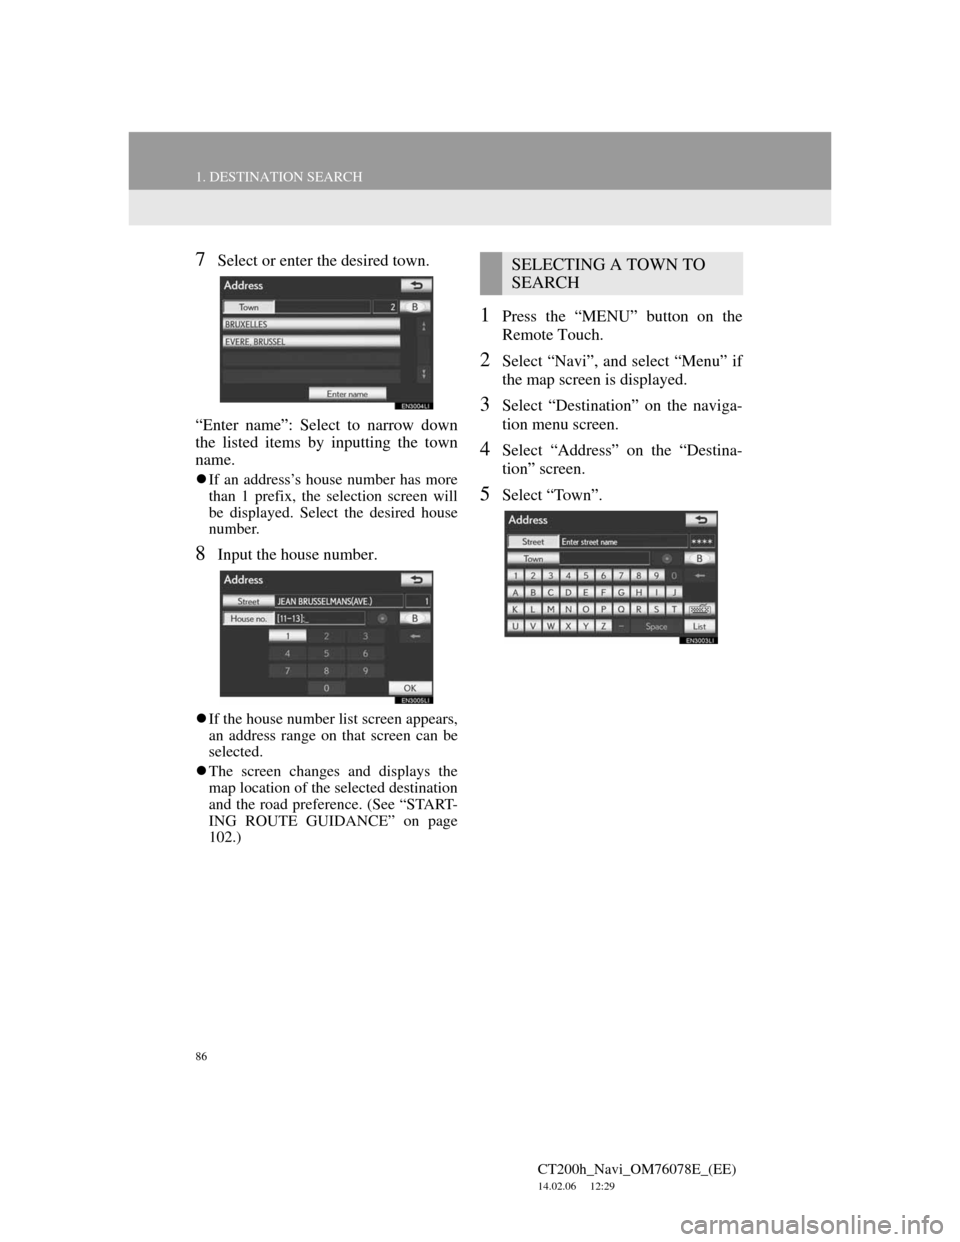
7Select or enter the desired town.
“Enter name”: Select to narrow down
the listed items by inputting the town
name.
If an address’s house number has more
than 1 prefix, the selection screen will
be displayed. Select the desired house
number.
8Input the house number.
If the house number list screen appears,
an address range on that screen can be
selected.
The screen changes and displays the
map location of the selected destination
and the road preference. (See “START-
ING ROUTE GUIDANCE” on page
102.)
1Press the “MENU” button on the
Remote Touch.
2Select “Navi”, and select “Menu” if
the map screen is displayed.
3Select “Destination” on the naviga-
tion menu screen.
4Select “Address” on the “Destina-
tion” screen.
5Select “Town”.
SELECTING A TOWN TO
SEARCH
Page 89 of 436
89
1. DESTINATION SEARCH
3
NAVIGATION SYSTEM
CT200h_Navi_OM76078E_(EE)
14.02.06 12:29
1Press the “MENU” button on the
Remote Touch. (See “Remote
Touch” on page 12.)
2Select “Navi”, and select “Menu” if
the map screen is displayed.
3Select “Destination” on the naviga-
tion menu screen.
4Select “POI” on the “Destination”
screen.
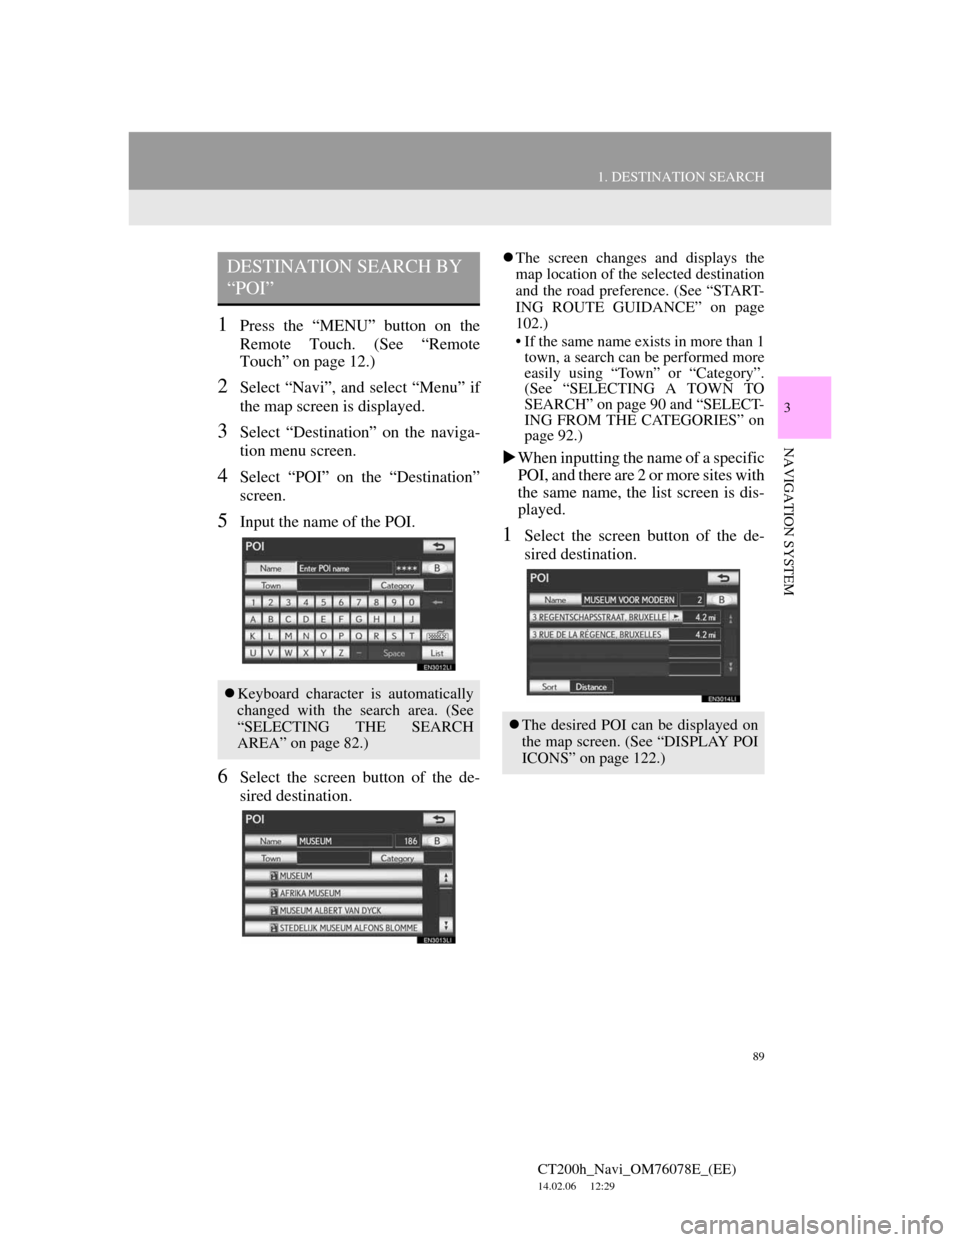
5Input the name of the POI.
6Select the screen button of the de-
sired destination.
The screen changes and displays the
map location of the selected destination
and the road preference. (See “START-
ING ROUTE GUIDANCE” on page
102.)
• If the same name exists in more than 1
town, a search can be performed more
easily using “Town” or “Category”.
(See “SELECTING A TOWN TO
SEARCH” on page 90 and “SELECT-
ING FROM THE CATEGORIES” on
page 92.)
When inputting the name of a specific
POI, and there are 2 or more sites with
the same name, the list screen is dis-
played.
1Select the screen button of the de-
sired destination.
DESTINATION SEARCH BY
“POI”
Keyboard character is automatically
changed with the search area. (See
“SELECTING THE SEARCH
AREA” on page 82.)
The desired POI can be displayed on
the map screen. (See “DISPLAY POI
ICONS” on page 122.)
Page 92 of 436
92
1. DESTINATION SEARCH
CT200h_Navi_OM76078E_(EE)
14.02.06 12:29
1Press the “MENU” button on the
Remote Touch.
2Select “Navi”, and select “Menu” if
the map screen is displayed.
3Select “Destination” on the naviga-
tion menu screen.
4Select “POI” on the “Destination”
screen.
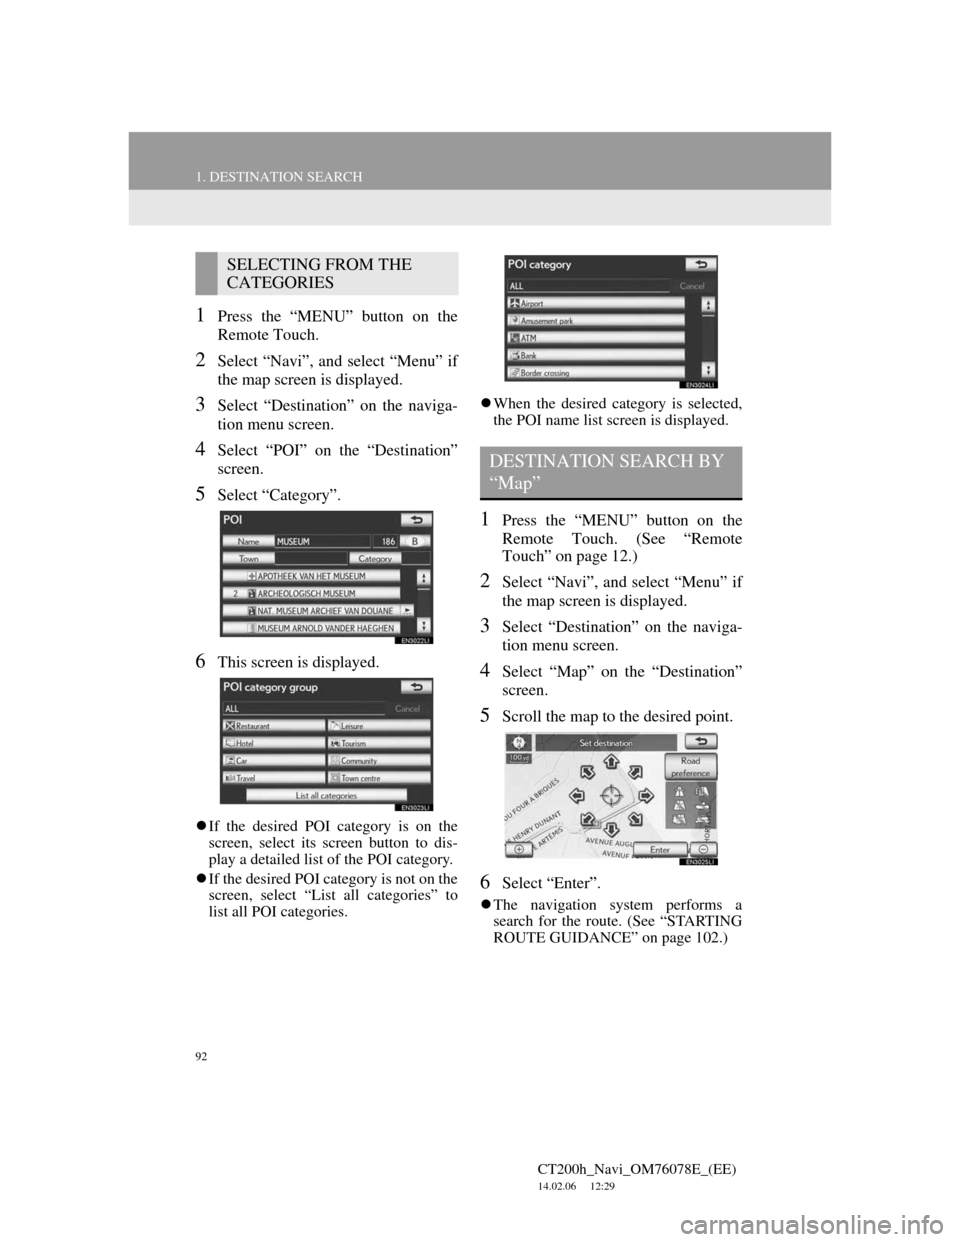
5Select “Category”.
6This screen is displayed.
If the desired POI category is on the
screen, select its screen button to dis-
play a detailed list of the POI category.
If the desired POI category is not on the
screen, select “List all categories” to
list all POI categories.When the desired category is selected,
the POI name list screen is displayed.
1Press the “MENU” button on the
Remote Touch. (See “Remote
Touch” on page 12.)
2Select “Navi”, and select “Menu” if
the map screen is displayed.
3Select “Destination” on the naviga-
tion menu screen.
4Select “Map” on the “Destination”
screen.
5Scroll the map to the desired point.
6Select “Enter”.
The navigation system performs a
search for the route. (See “STARTING
ROUTE GUIDANCE” on page 102.)
SELECTING FROM THE
CATEGORIES
DESTINATION SEARCH BY
“Map”
Page 93 of 436
93
1. DESTINATION SEARCH
3
NAVIGATION SYSTEM
CT200h_Navi_OM76078E_(EE)
14.02.06 12:29
1Press the “MENU” button on the
Remote Touch. (See “Remote
Touch” on page 12.)
2Select “Navi”, and select “Menu” if
the map screen is displayed.
3Select “Destination” on the naviga-
tion menu screen.
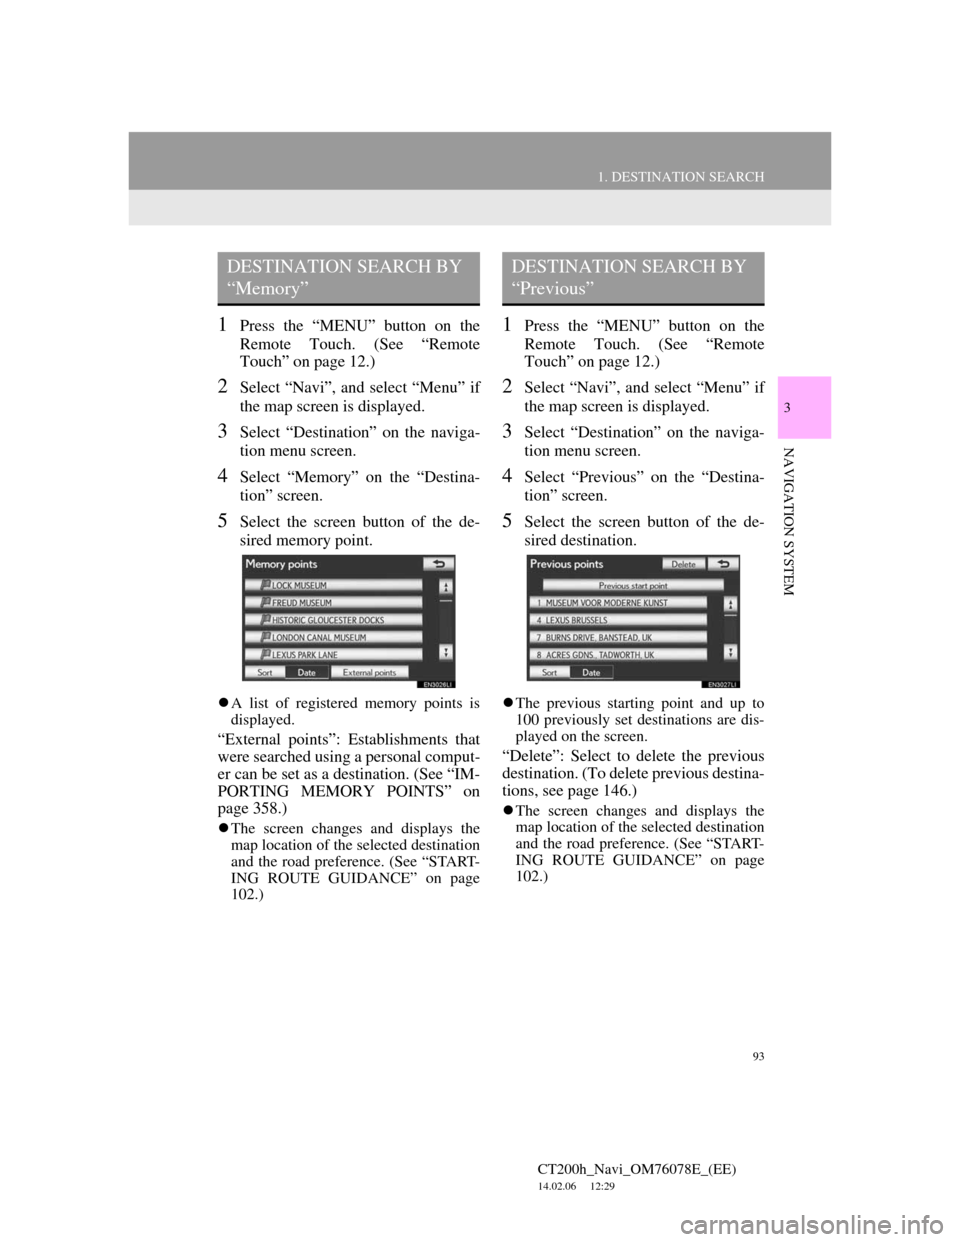
4Select “Memory” on the “Destina-
tion” screen.
5Select the screen button of the de-
sired memory point.
A list of registered memory points is
displayed.
“External points”: Establishments that
were searched using a personal comput-
er can be set as a destination. (See “IM-
PORTING MEMORY POINTS” on
page 358.)
The screen changes and displays the
map location of the selected destination
and the road preference. (See “START-
ING ROUTE GUIDANCE” on page
102.)
1Press the “MENU” button on the
Remote Touch. (See “Remote
Touch” on page 12.)
2Select “Navi”, and select “Menu” if
the map screen is displayed.
3Select “Destination” on the naviga-
tion menu screen.
4Select “Previous” on the “Destina-
tion” screen.
5Select the screen button of the de-
sired destination.
The previous starting point and up to
100 previously set destinations are dis-
played on the screen.
“Delete”: Select to delete the previous
destination. (To delete previous destina-
tions, see page 146.)
The screen changes and displays the
map location of the selected destination
and the road preference. (See “START-
ING ROUTE GUIDANCE” on page
102.)
DESTINATION SEARCH BY
“Memory”DESTINATION SEARCH BY
“Previous”