buttons Lexus CT200h 2014 Navigation manual (in English)
[x] Cancel search | Manufacturer: LEXUS, Model Year: 2014, Model line: CT200h, Model: Lexus CT200h 2014Pages: 410, PDF Size: 42.88 MB
Page 6 of 410
6
CT200h_Navi_OM76113E_(EE)
13.12.06 15:15
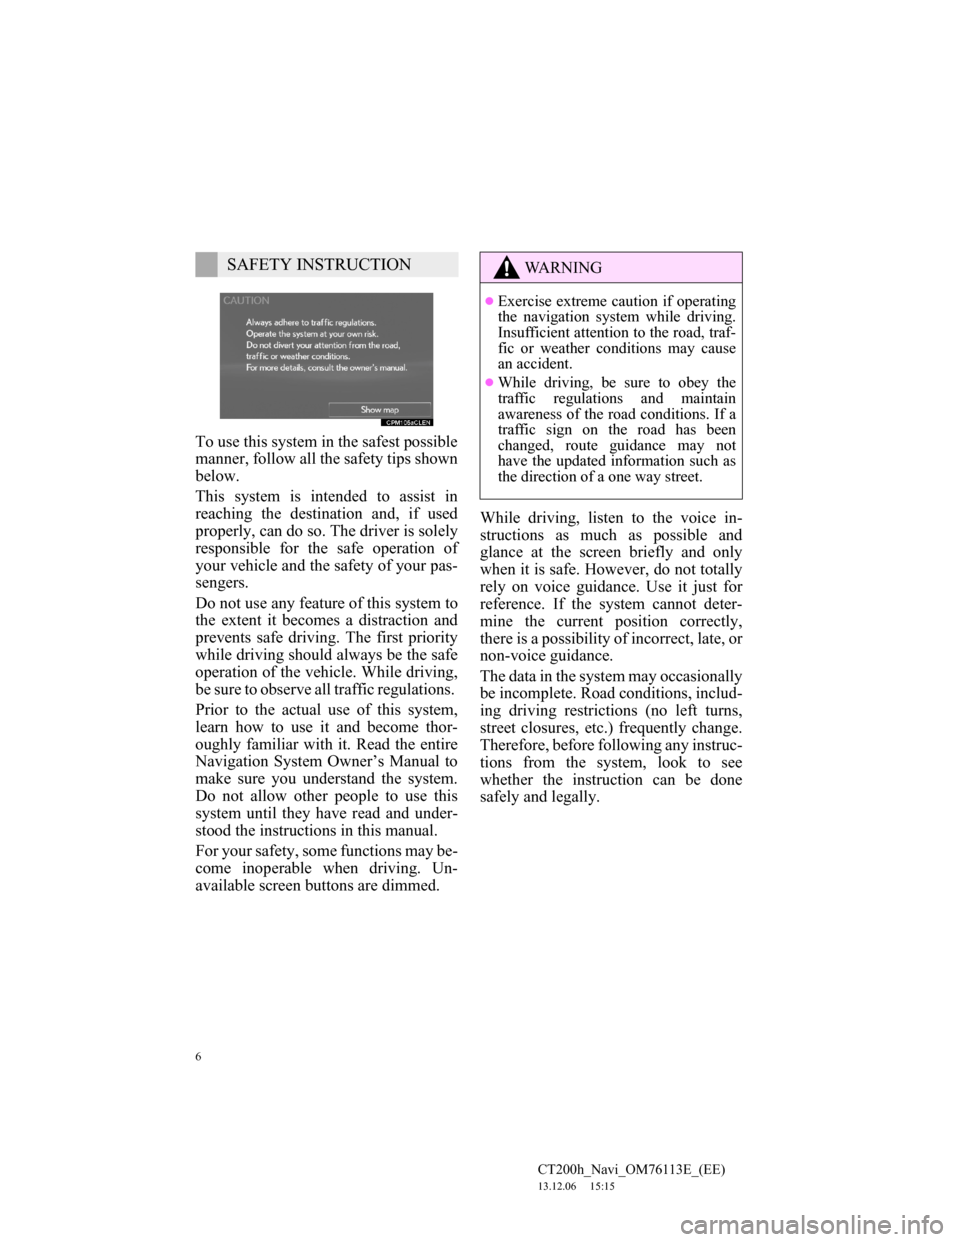
To use this system in the safest possible
manner, follow all the safety tips shown
below.
This system is intended to assist in
reaching the destination and, if used
properly, can do so. The driver is solely
responsible for the safe operation of
your vehicle and the safety of your pas-
sengers.
Do not use any feature of this system to
the extent it becomes a distraction and
prevents safe driving. The first priority
while driving should always be the safe
operation of the vehicle. While driving,
be sure to observe all traffic regulations.
Prior to the actual use of this system,
learn how to use it and become thor-
oughly familiar with it. Read the entire
Navigation System Owner’s Manual to
make sure you understand the system.
Do not allow other people to use this
system until they have read and under-
stood the instructions in this manual.
For your safety, some functions may be-
come inoperable when driving. Un-
available screen buttons are dimmed.While driving, listen to the voice in-
structions as much as possible and
glance at the screen briefly and only
when it is safe. However, do not totally
rely on voice guidance. Use it just for
reference. If the system cannot deter-
mine the current position correctly,
there is a possibility of incorrect, late, or
non-voice guidance.
The data in the system may occasionally
be incomplete. Road conditions, includ-
ing driving restrictions (no left turns,
street closures, etc.) frequently change.
Therefore, before following any instruc-
tions from the system, look to see
whether the instruction can be done
safely and legally.
SAFETY INSTRUCTIONWA R N I N G
Exercise extreme caution if operating
the navigation system while driving.
Insufficient attention to the road, traf-
fic or weather conditions may cause
an accident.
While driving, be sure to obey the
traffic regulations and maintain
awareness of the road conditions. If a
traffic sign on the road has been
changed, route guidance may not
have the updated information such as
the direction of a one way street.
Page 26 of 410
26
3. NAVIGATION OPERATION
CT200h_Navi_OM76113E_(EE)
13.12.06 15:15
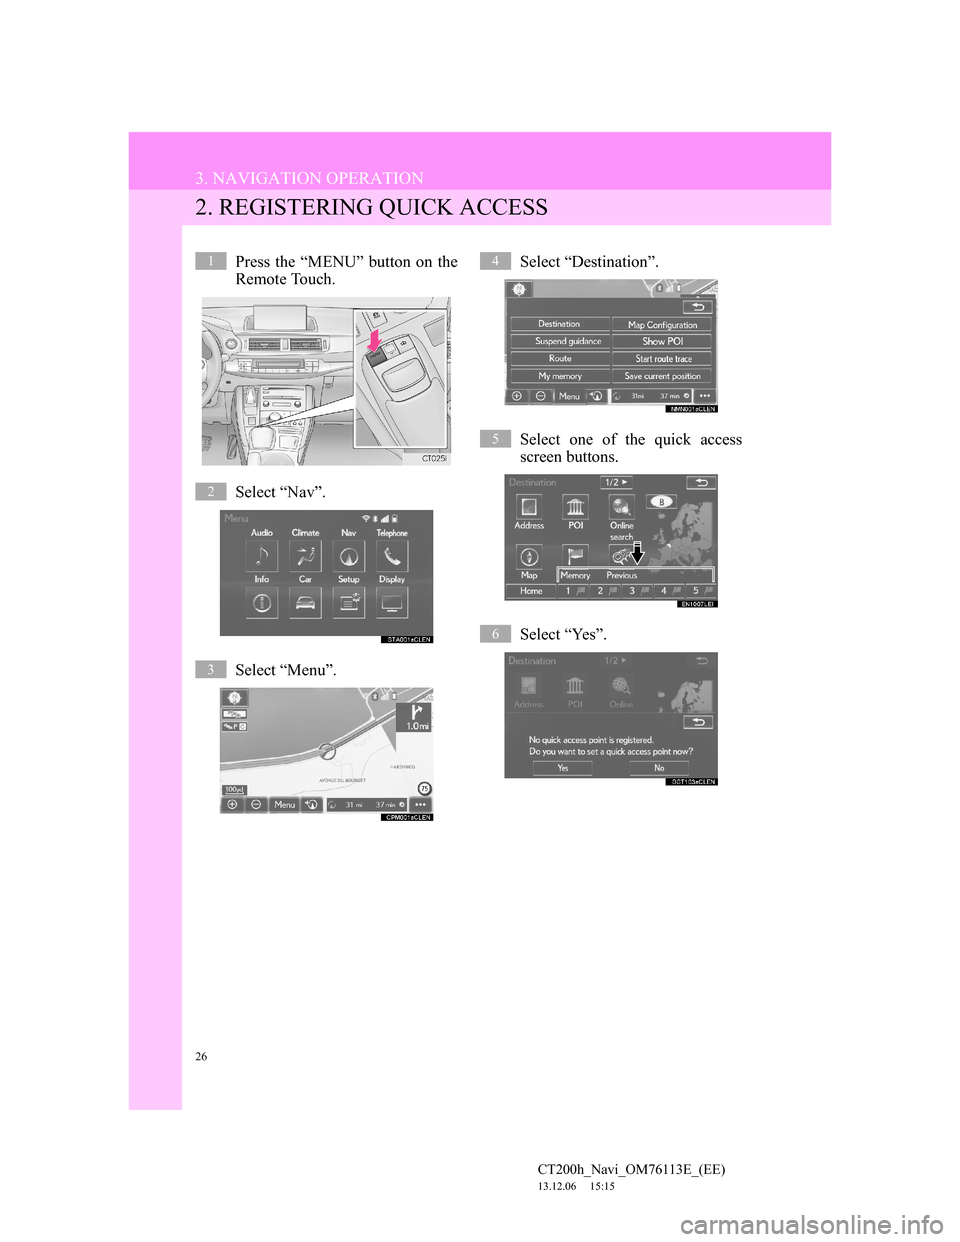
2. REGISTERING QUICK ACCESS
Press the “MENU” button on the
Remote Touch.
Select “Nav”.
Select “Menu”.Select “Destination”.
Select one of the quick access
screen buttons.
Select “Yes”.1
2
3
4
5
6
Page 38 of 410
38
1. BASIC INFORMATION BEFORE OPERATION
CT200h_Navi_OM76113E_(EE)
13.12.06 15:16
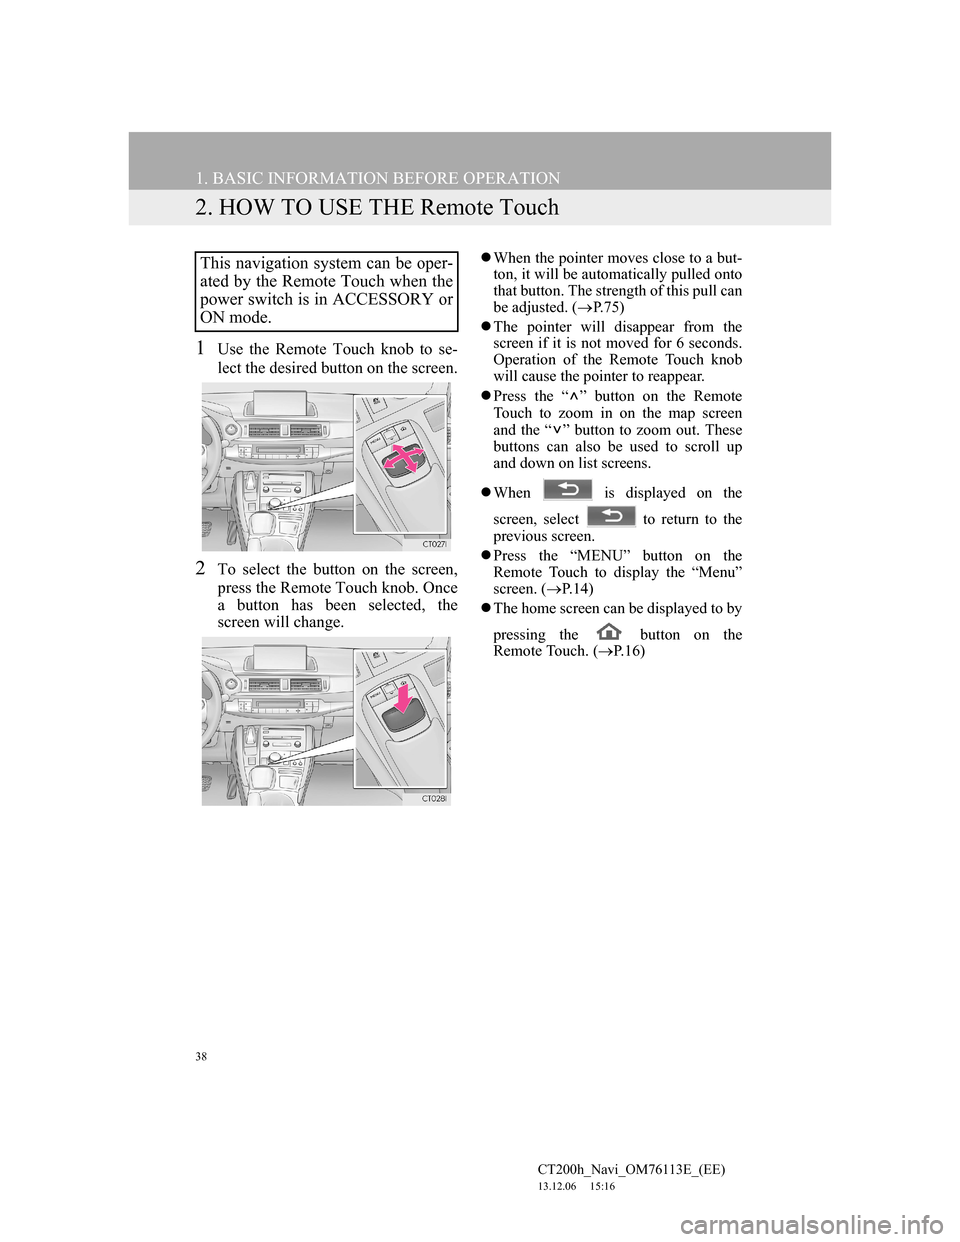
2. HOW TO USE THE Remote Touch
1Use the Remote Touch knob to se-
lect the desired button on the screen.
2To select the button on the screen,
press the Remote Touch knob. Once
a button has been selected, the
screen will change.
When the pointer moves close to a but-
ton, it will be automatically pulled onto
that button. The strength of this pull can
be adjusted. (P.75)
The pointer will disappear from the
screen if it is not moved for 6 seconds.
Operation of the Remote Touch knob
will cause the pointer to reappear.
Press the “ ” button on the Remote
Touch to zoom in on the map screen
and the “ ” button to zoom out. These
buttons can also be used to scroll up
and down on list screens.
When is displayed on the
screen, select to return to the
previous screen.
Press the “MENU” button on the
Remote Touch to display the “Menu”
screen. (P.14)
The home screen can be displayed to by
pressing the button on the
Remote Touch. (P. 1 6 )This navigation system can be oper-
ated by the Remote Touch when the
power switch is in ACCESSORY or
ON mode.
Page 44 of 410
44
1. BASIC INFORMATION BEFORE OPERATION
CT200h_Navi_OM76113E_(EE)
13.12.06 15:16
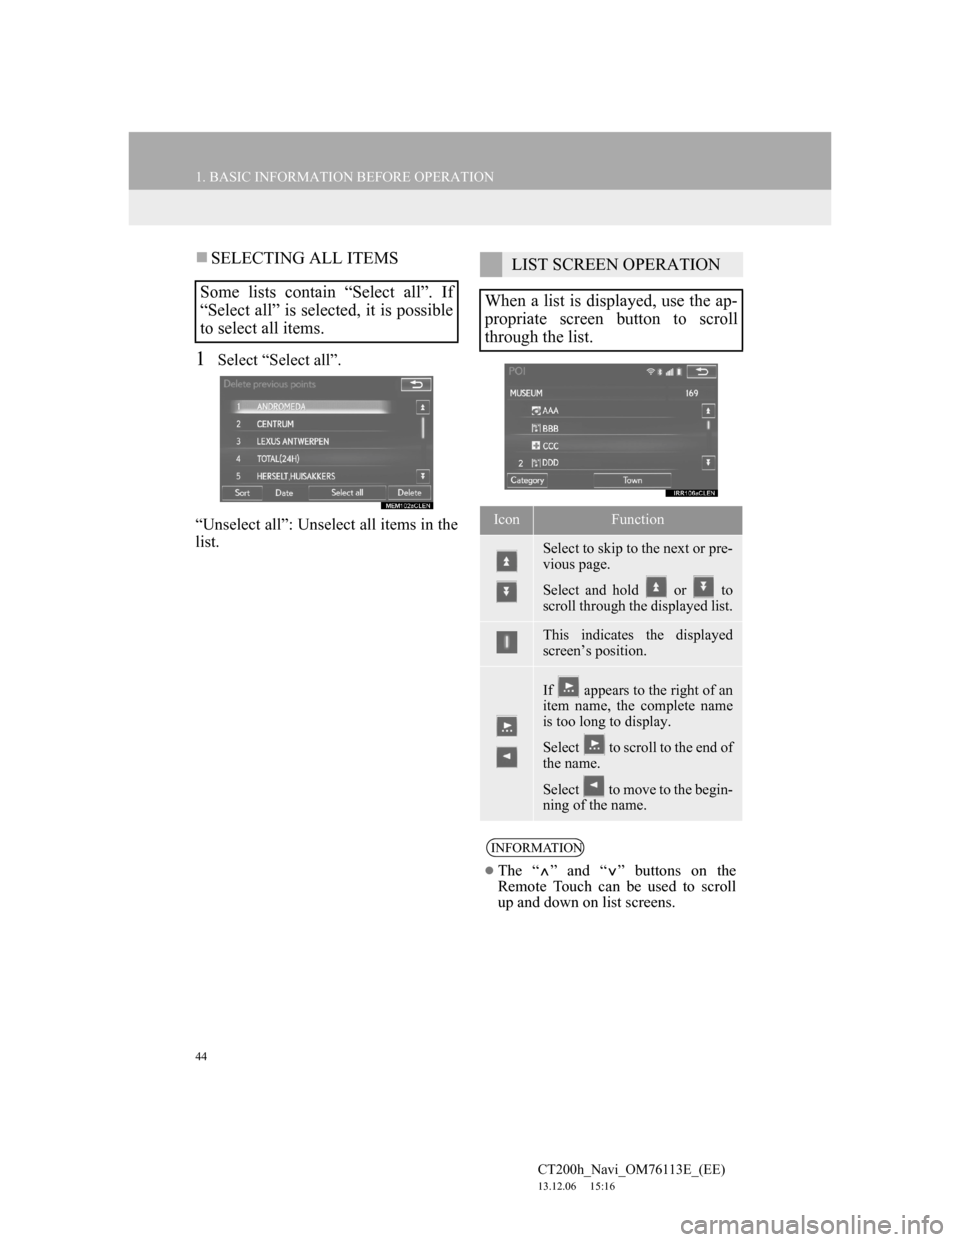
SELECTING ALL ITEMS
1Select “Select all”.
“Unselect all”: Unselect all items in the
list.
Some lists contain “Select all”. If
“Select all” is selected, it is possible
to select all items.
LIST SCREEN OPERATION
When a list is displayed, use the ap-
propriate screen button to scroll
through the list.
IconFunction
Select to skip to the next or pre-
vious page.
Select and hold or to
scroll through the displayed list.
This indicates the displayed
screen’s position.
If appears to the right of an
item name, the complete name
is too long to display.
Select to scroll to the end of
the name.
Select to move to the begin-
ning of the name.
INFORMATION
The “ ” and “ ” buttons on the
Remote Touch can be used to scroll
up and down on list screens.
Page 45 of 410
45
1. BASIC INFORMATION BEFORE OPERATION
2
BASIC FUNCTION
CT200h_Navi_OM76113E_(EE)
13.12.06 15:16
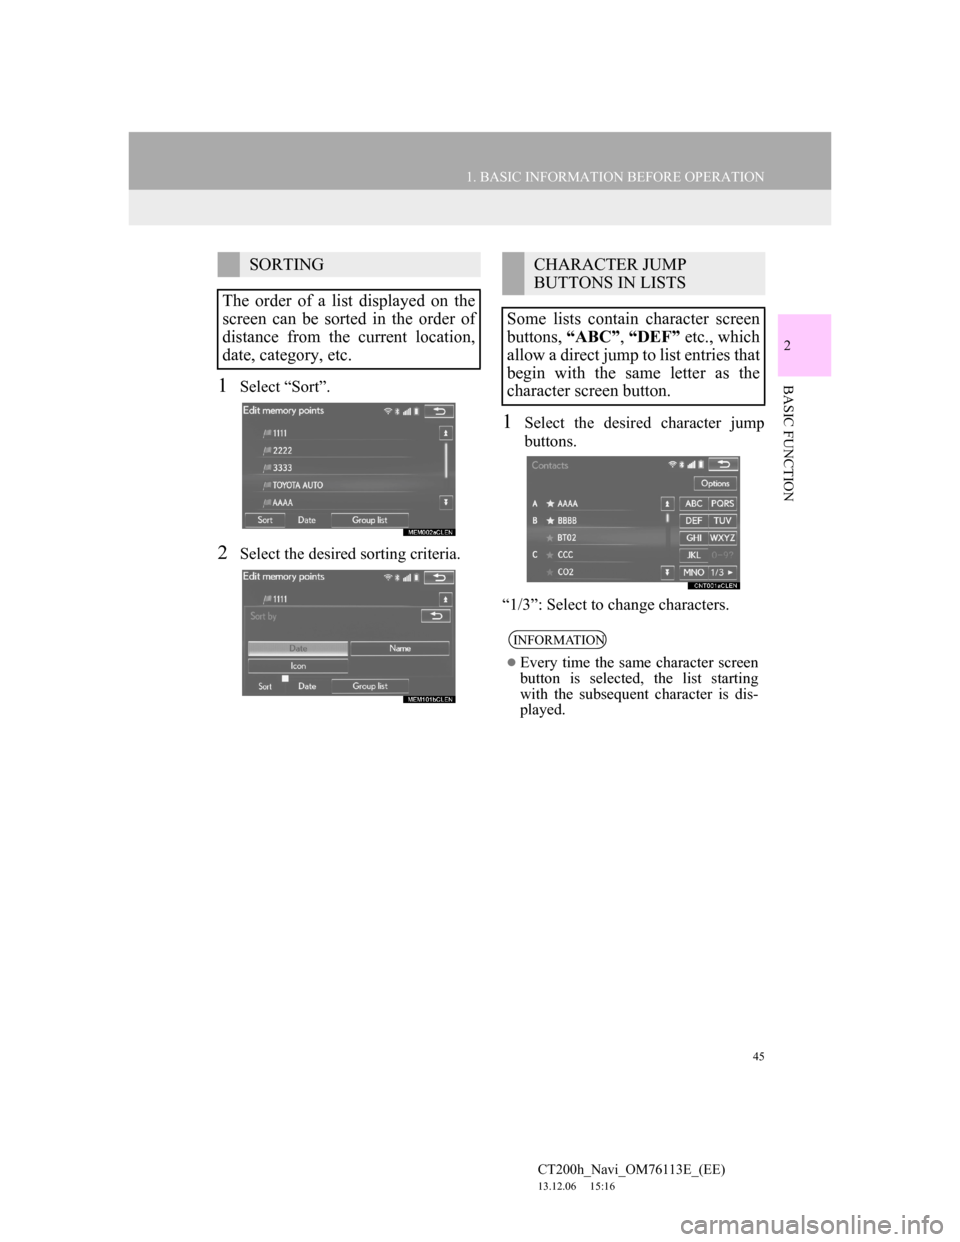
1Select “Sort”.
2Select the desired sorting criteria.
1Select the desired character jump
buttons.
“1/3”: Select to change characters.
SORTING
The order of a list displayed on the
screen can be sorted in the order of
distance from the current location,
date, category, etc.CHARACTER JUMP
BUTTONS IN LISTS
Some lists contain character screen
buttons, “ABC”, “DEF” etc., which
allow a direct jump to list entries that
begin with the same letter as the
character screen button.
INFORMATION
Every time the same character screen
button is selected, the list starting
with the subsequent character is dis-
played.
Page 77 of 410
77
3. OTHER SETTINGS
CT200h_Navi_OM76113E_(EE)
13.12.06 15:16
2
BASIC FUNCTION1Display the “General settings”
screen. (P.76)
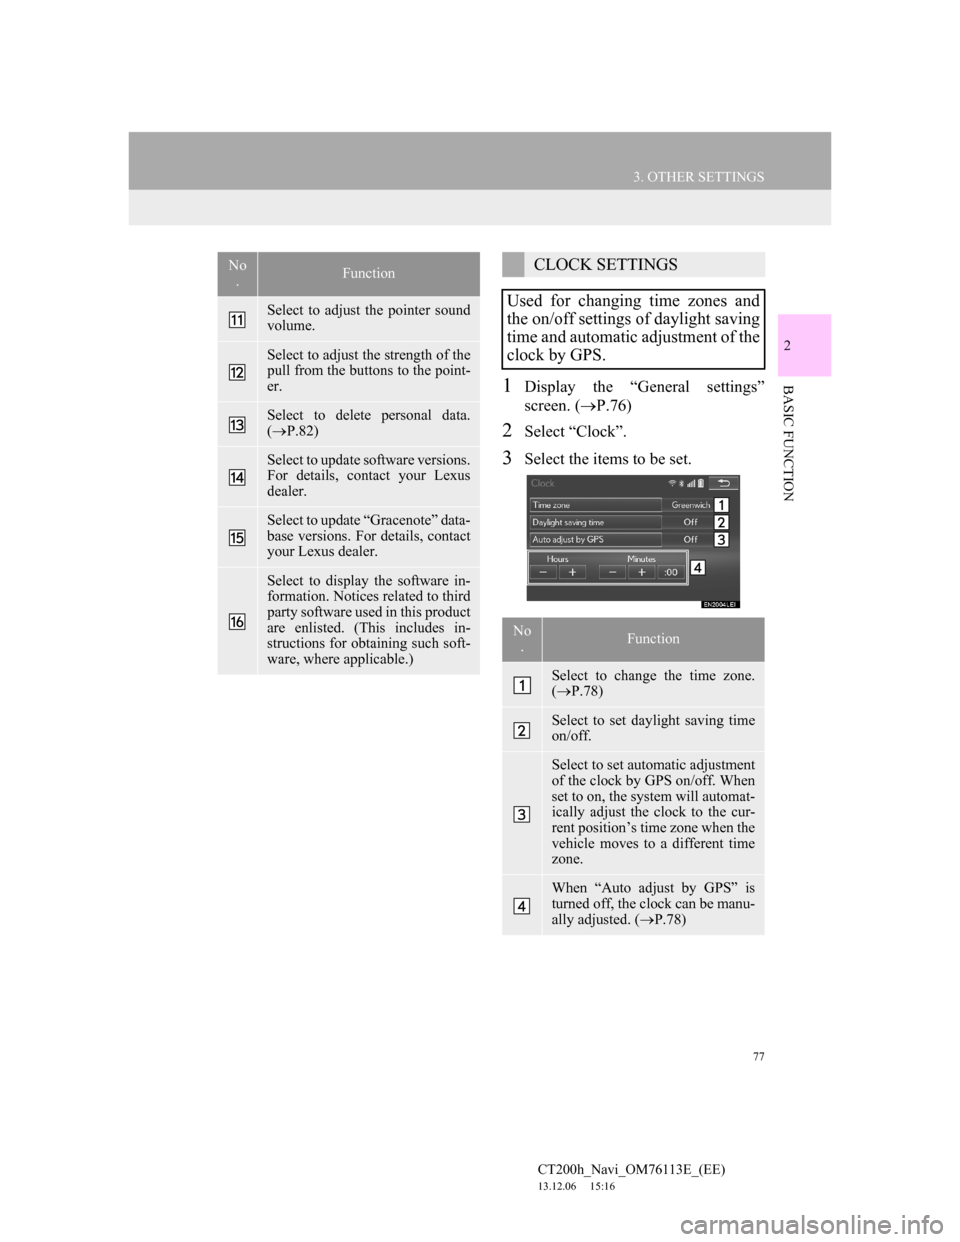
2Select “Clock”.
3Select the items to be set.
Select to adjust the pointer sound
volume.
Select to adjust the strength of the
pull from the buttons to the point-
er.
Select to delete personal data.
(P.82)
Select to update software versions.
For details, contact your Lexus
dealer.
Select to update “Gracenote” data-
base versions. For details, contact
your Lexus dealer.
Select to display the software in-
formation. Notices related to third
party software used in this product
are enlisted. (This includes in-
structions for obtaining such soft-
ware, where applicable.)
No
.FunctionCLOCK SETTINGS
Used for changing time zones and
the on/off settings of daylight saving
time and automatic adjustment of the
clock by GPS.
No
.Function
Select to change the time zone.
(P.78)
Select to set daylight saving time
on/off.
Select to set automatic adjustment
of the clock by GPS on/off. When
set to on, the system will automat-
ically adjust the clock to the cur-
rent position’s time zone when the
vehicle moves to a different time
zone.
When “Auto adjust by GPS” is
turned off, the clock can be manu-
ally adjusted. (P.78)
Page 93 of 410
93
1. BASIC OPERATION
3
NAVIGATION SYSTEM
CT200h_Navi_OM76113E_(EE)
13.12.06 15:16
Border guid-
anceWhen a vehicle crosses a borderline, the na-
tional flag of that country is displayed.
Speed limit iconDisplays speed limits170
Route informa-
tion change but-
tonSelect to display the current street name, ex-
pected travel time/arrival time to the destina-
tion, or the traffic information bar.
136
Route informa-
tion barDisplays the current street name, expected
travel time/arrival time to the destination or
the traffic information bar as selected.
Current position
buttonSelect to display the current position address
or repeat the voice guidance.
“Menu”Select to utilize functions such as setting a
destination and registering a memory point.94
Zoom in/out
button
Select to magnify or reduce the map scale.
When either button is selected, the map scale
indicator bar appears at the bottom of the
screen.
97
Scale indicatorThis figure indicates the map scale.
Manual update
buttonSelect to update the traffic or parking lot in-
formation manually. 179
Traffic indica-
torShows that traffic information is received. Se-
lect to start voice guidance for the traffic in-
formation.109
No.NameFunctionPage
Page 99 of 410
99
1. BASIC OPERATION
3
NAVIGATION SYSTEM
CT200h_Navi_OM76113E_(EE)
13.12.06 15:16
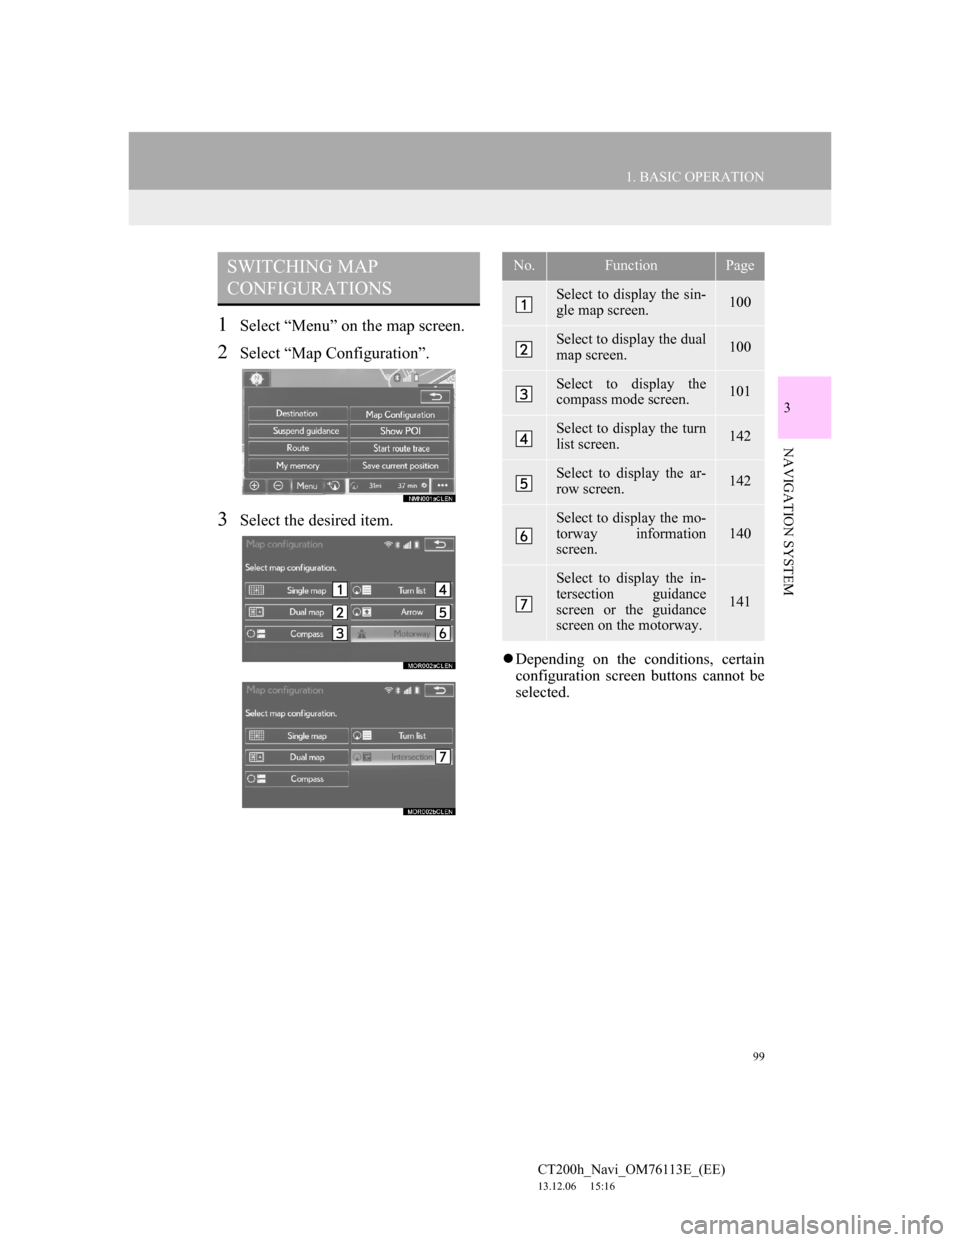
1Select “Menu” on the map screen.
2Select “Map Configuration”.
3Select the desired item.
Depending on the conditions, certain
configuration screen buttons cannot be
selected.
SWITCHING MAP
CONFIGURATIONSNo.FunctionPage
Select to display the sin-
gle map screen.100
Select to display the dual
map screen.100
Select to display the
compass mode screen.101
Select to display the turn
list screen.142
Select to display the ar-
row screen.142
Select to display the mo-
torway information
screen.
140
Select to display the in-
tersection guidance
screen or the guidance
screen on the motorway.
141
Page 120 of 410
120
2. DESTINATION SEARCH
CT200h_Navi_OM76113E_(EE)
13.12.06 15:16
1Display the “Destination” screen.
(P.118)
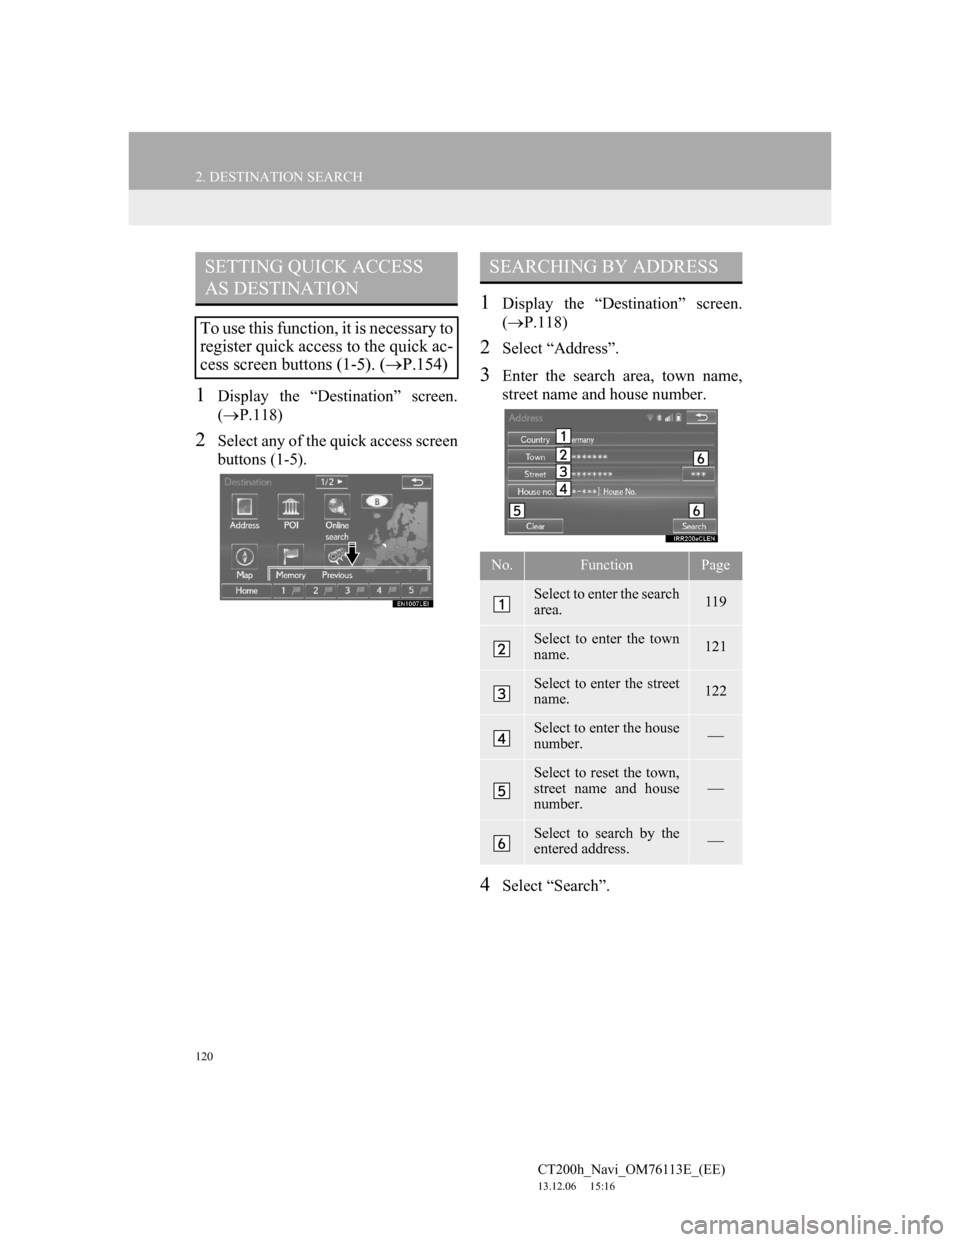
2Select any of the quick access screen
buttons (1-5).
1Display the “Destination” screen.
(P.118)
2Select “Address”.
3Enter the search area, town name,
street name and house number.
4Select “Search”.
SETTING QUICK ACCESS
AS DESTINATION
To use this function, it is necessary to
register quick access to the quick ac-
cess screen buttons (1-5). (P.154)
SEARCHING BY ADDRESS
No.FunctionPage
Select to enter the search
area.119
Select to enter the town
name.121
Select to enter the street
name.122
Select to enter the house
number.
Select to reset the town,
street name and house
number.
Select to search by the
entered address.
Page 153 of 410
153
4. MY MEMORY
CT200h_Navi_OM76113E_(EE)
13.12.06 15:16
3
NAVIGATION SYSTEM
1Select “Delete”.
2Select “Yes” when the confirmation
screen appears.
1Display the “My memory” screen.
(P.150)
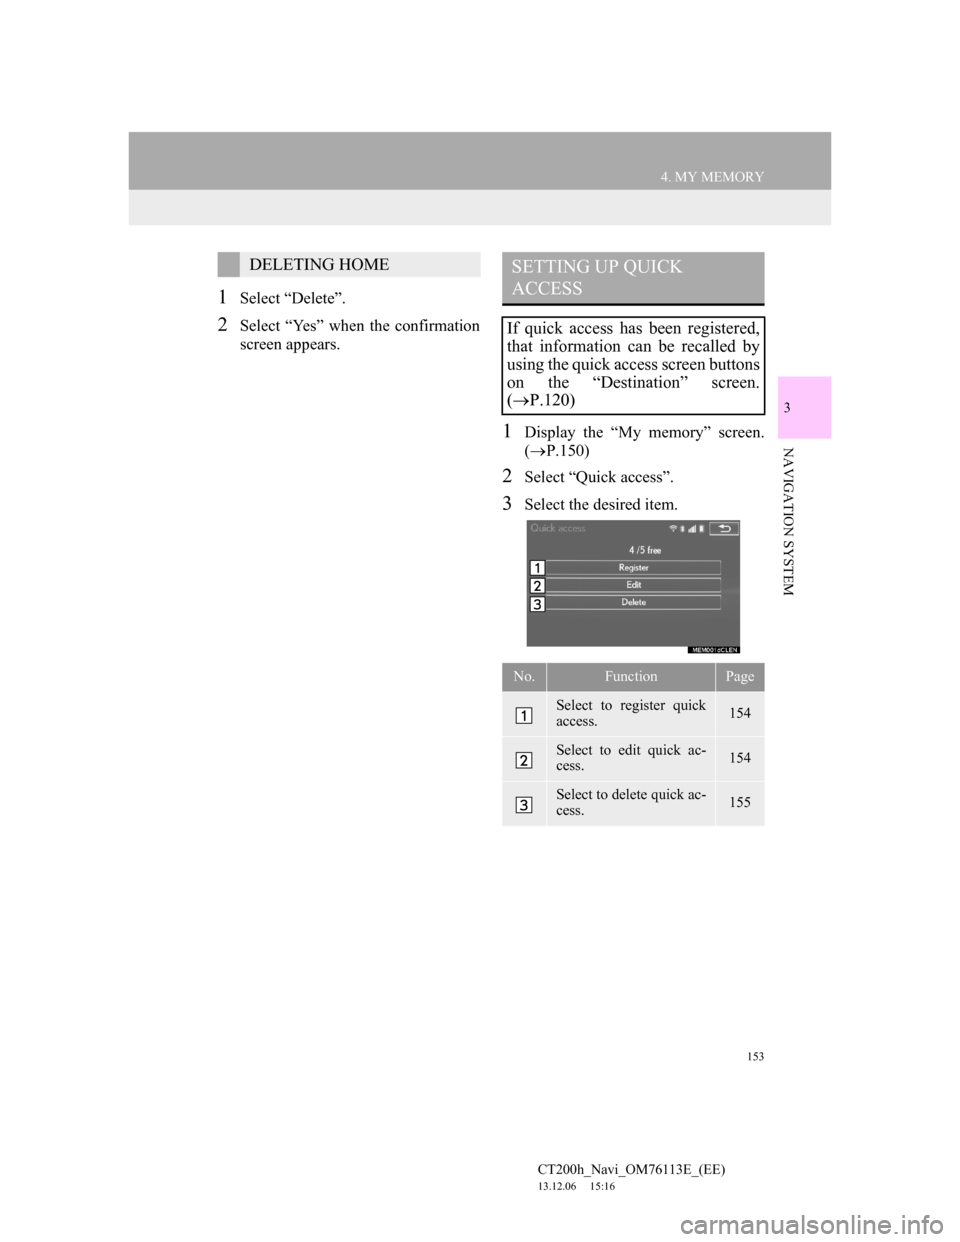
2Select “Quick access”.
3Select the desired item.
DELETING HOMESETTING UP QUICK
ACCESS
If quick access has been registered,
that information can be recalled by
using the quick access screen buttons
on the “Destination” screen.
(P.120)
No.FunctionPage
Select to register quick
access.154
Select to edit quick ac-
cess.154
Select to delete quick ac-
cess.155