navigation system Lexus ES300h 2015 Navigation Manual
[x] Cancel search | Manufacturer: LEXUS, Model Year: 2015, Model line: ES300h, Model: Lexus ES300h 2015Pages: 409, PDF Size: 24.08 MB
Page 140 of 409
139
3. ROUTE GUIDANCE
ES350/300h_Navi_OM33B43U_(U)14.06.23 09:44
NAVIGATION SYSTEM
31Display the “Route” screen. (→P.135)
2Select “Detour” .
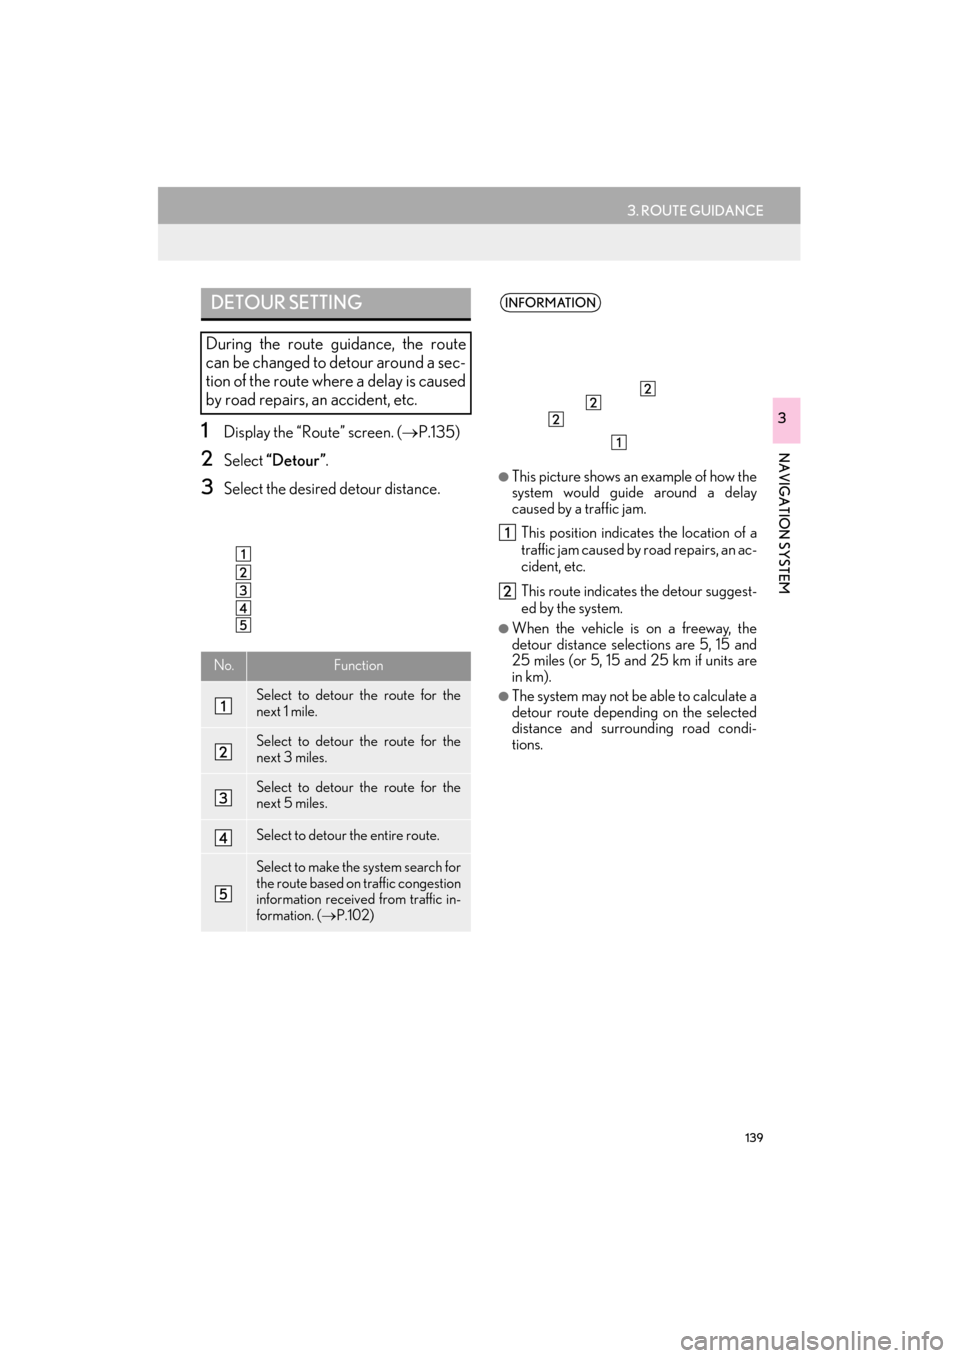
3Select the desired detour distance.
DETOUR SETTING
During the route guidance, the route
can be changed to detour around a sec-
tion of the route where a delay is caused
by road repairs, an accident, etc.
No.Function
Select to detour the route for the
next 1 mile.
Select to detour the route for the
next 3 miles.
Select to detour the route for the
next 5 miles.
Select to detour the entire route.
Select to make the system search for
the route based on traffic congestion
information received from traffic in-
formation. ( →P.102)
INFORMATION
●
This picture shows an example of how the
system would guide around a delay
caused by a traffic jam. This position indicates the location of a
traffic jam caused by road repairs, an ac-
cident, etc.
This route indicates the detour suggest-
ed by the system.
●When the vehicle is on a freeway, the
detour distance selections are 5, 15 and
25 miles (or 5, 15 and 25 km if units are
in km).
●The system may not be able to calculate a
detour route depending on the selected
distance and surrounding road condi-
tions.
Page 142 of 409
141
ES350/300h_Navi_OM33B43U_(U)14.06.23 09:44
NAVIGATION SYSTEM
3
4. MEMORY POINTS
1. MEMORY POINTS SETTINGS
1Press the “MENU” button on the
Remote Touch.
2Select “Setup” .
3Select “Navigation” .
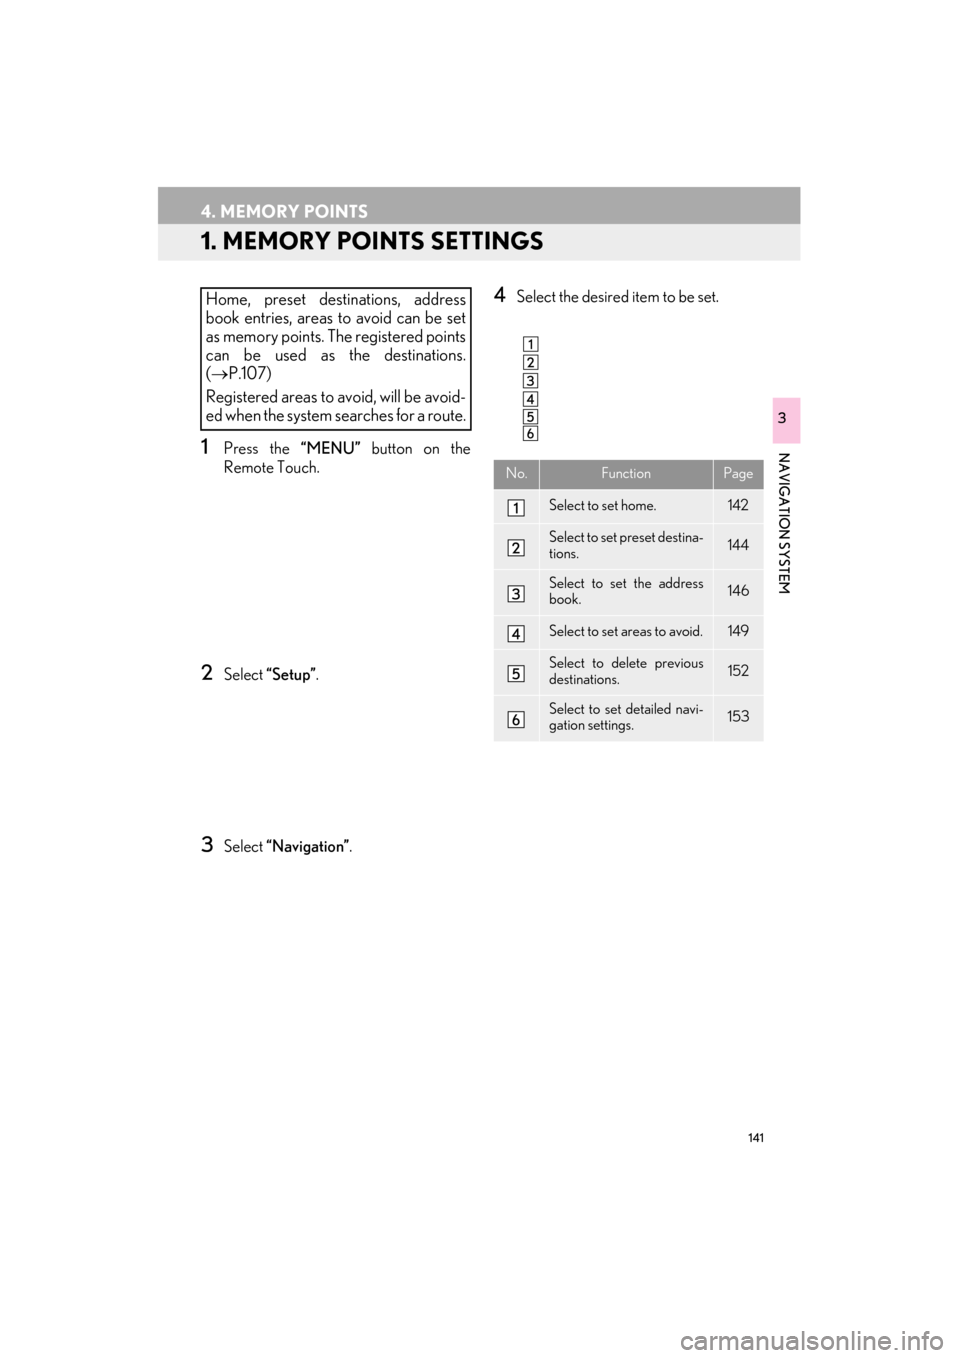
4Select the desired item to be set.Home, preset destinations, address
book entries, areas to avoid can be set
as memory points. The registered points
can be used as the destinations.
(→ P.107)
Registered areas to avoid, will be avoid-
ed when the system searches for a route.
No.FunctionPage
Select to set home.142
Select to set preset destina-
tions.144
Select to set the address
book.146
Select to set areas to avoid.149
Select to delete previous
destinations.152
Select to set detailed navi-
gation settings.153
Page 144 of 409
143
4. MEMORY POINTS
ES350/300h_Navi_OM33B43U_(U)14.06.23 09:44
NAVIGATION SYSTEM
3
1Select “Edit”.
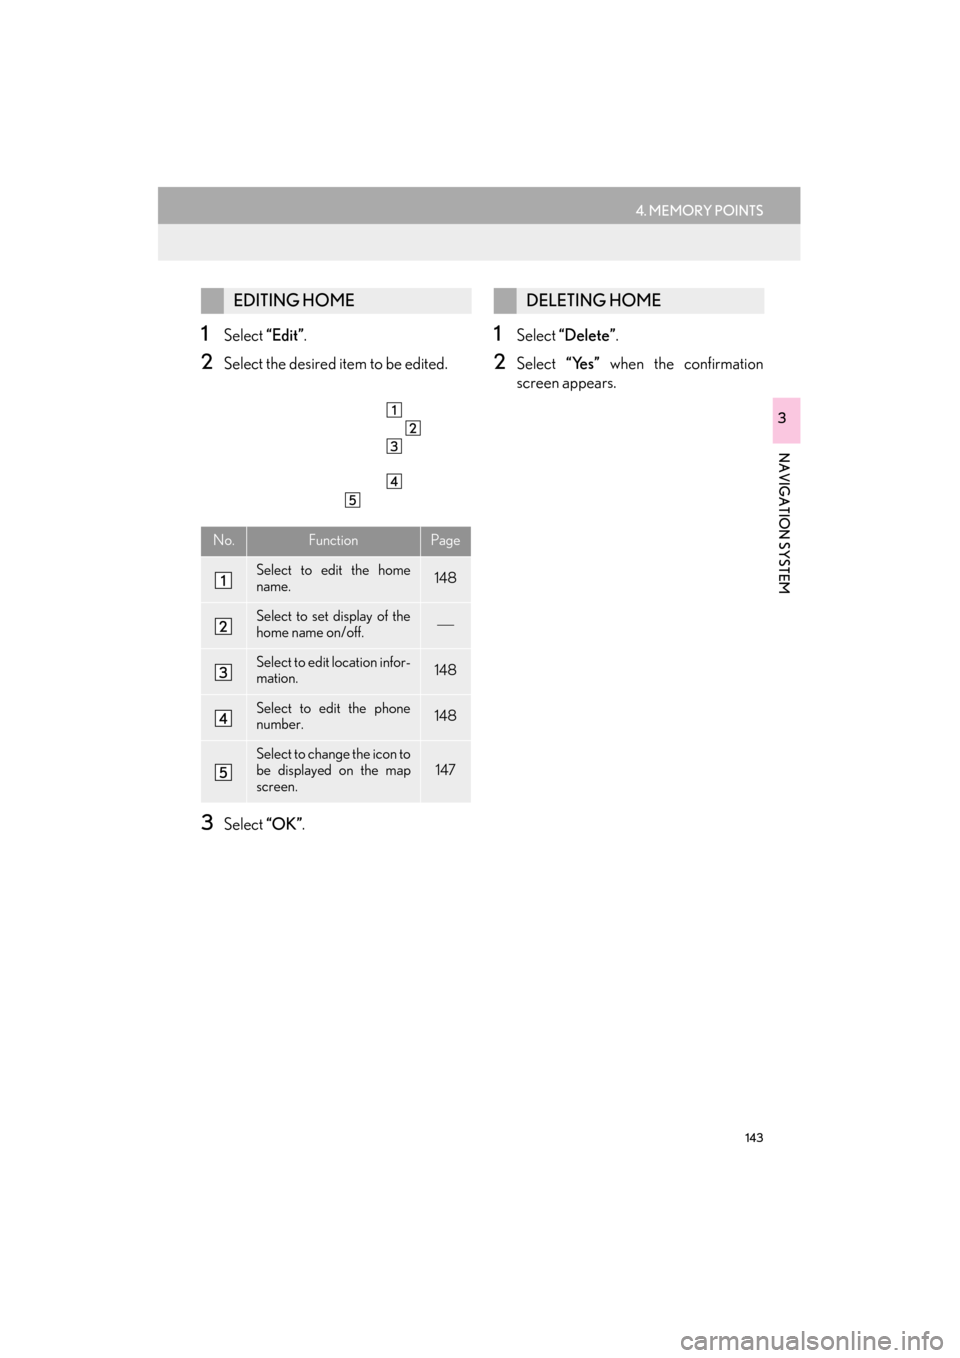
2Select the desired item to be edited.
3Select “OK”.
1Select “Delete” .
2Select “Yes” when the confirmation
screen appears.
EDITING HOME
No.FunctionPage
Select to edit the home
name.148
Select to set display of the
home name on/off.
Select to edit location infor-
mation.148
Select to edit the phone
number.148
Select to change the icon to
be displayed on the map
screen.147
DELETING HOME
Page 146 of 409
145
4. MEMORY POINTS
ES350/300h_Navi_OM33B43U_(U)14.06.23 09:44
NAVIGATION SYSTEM
3
1Select “Edit”.
2Select the desired preset destination.
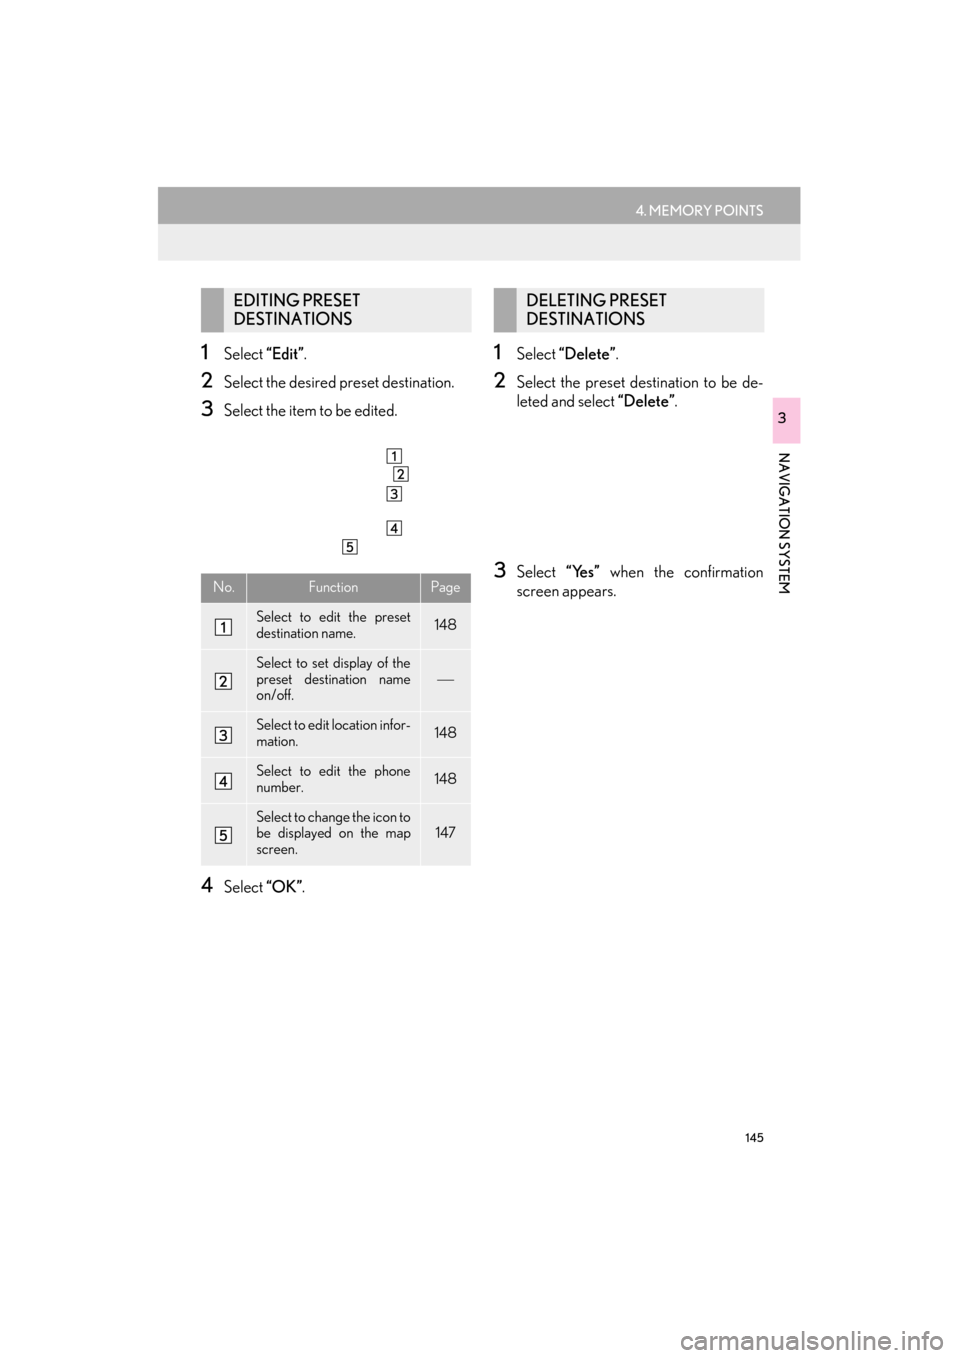
3Select the item to be edited.
4Select “OK”.
1Select “Delete” .
2Select the preset destination to be de-
leted and select “Delete”.
3Select “Yes” when the confirmation
screen appears.
EDITING PRESET
DESTINATIONS
No.FunctionPage
Select to edit the preset
destination name.148
Select to set display of the
preset destination name
on/off.
Select to edit location infor-
mation.148
Select to edit the phone
number.148
Select to change the icon to
be displayed on the map
screen.147
DELETING PRESET
DESTINATIONS
Page 148 of 409
147
4. MEMORY POINTS
ES350/300h_Navi_OM33B43U_(U)14.06.23 09:44
NAVIGATION SYSTEM
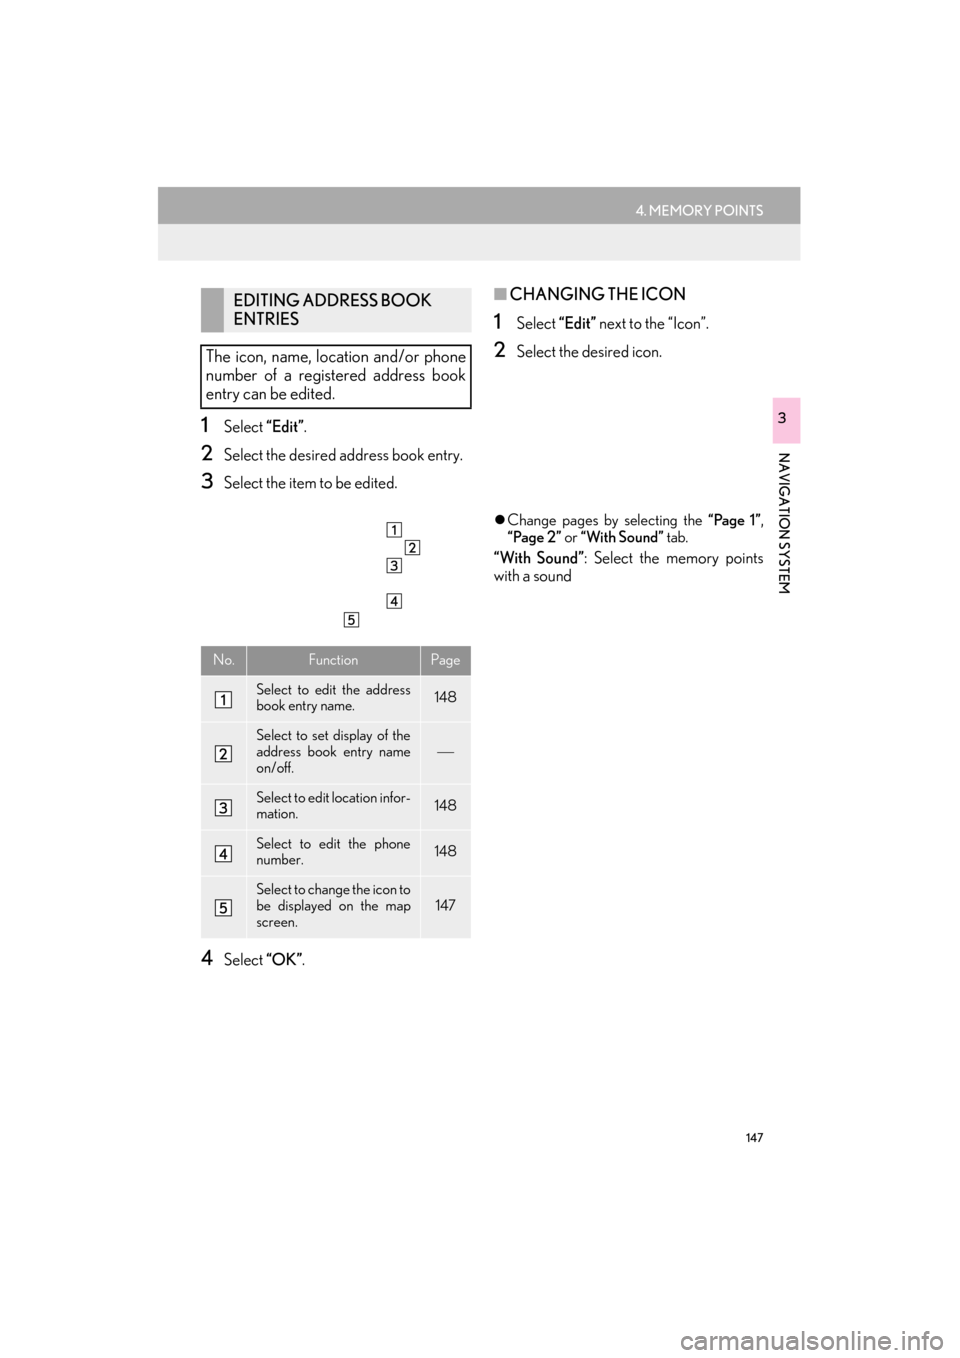
31Select “Edit”.
2Select the desired address book entry.
3Select the item to be edited.
4Select “OK”.
■CHANGING THE ICON
1Select “Edit” next to the “Icon”.
2Select the desired icon.
�zChange pages by selecting the “Page 1” ,
“Page 2” or “With Sound” tab.
“With Sound” : Select the memory points
with a sound
EDITING ADDRESS BOOK
ENTRIES
The icon, name, location and/or phone
number of a registered address book
entry can be edited.
No.FunctionPage
Select to edit the address
book entry name.148
Select to set display of the
address book entry name
on/off.
Select to edit location infor-
mation.148
Select to edit the phone
number.148
Select to change the icon to
be displayed on the map
screen.147
Page 150 of 409
149
4. MEMORY POINTS
ES350/300h_Navi_OM33B43U_(U)14.06.23 09:44
NAVIGATION SYSTEM
3
1Select “Delete” .
2Select the item to be deleted and select
“Delete”.
3Select “Yes” when the confirmation
screen appears.
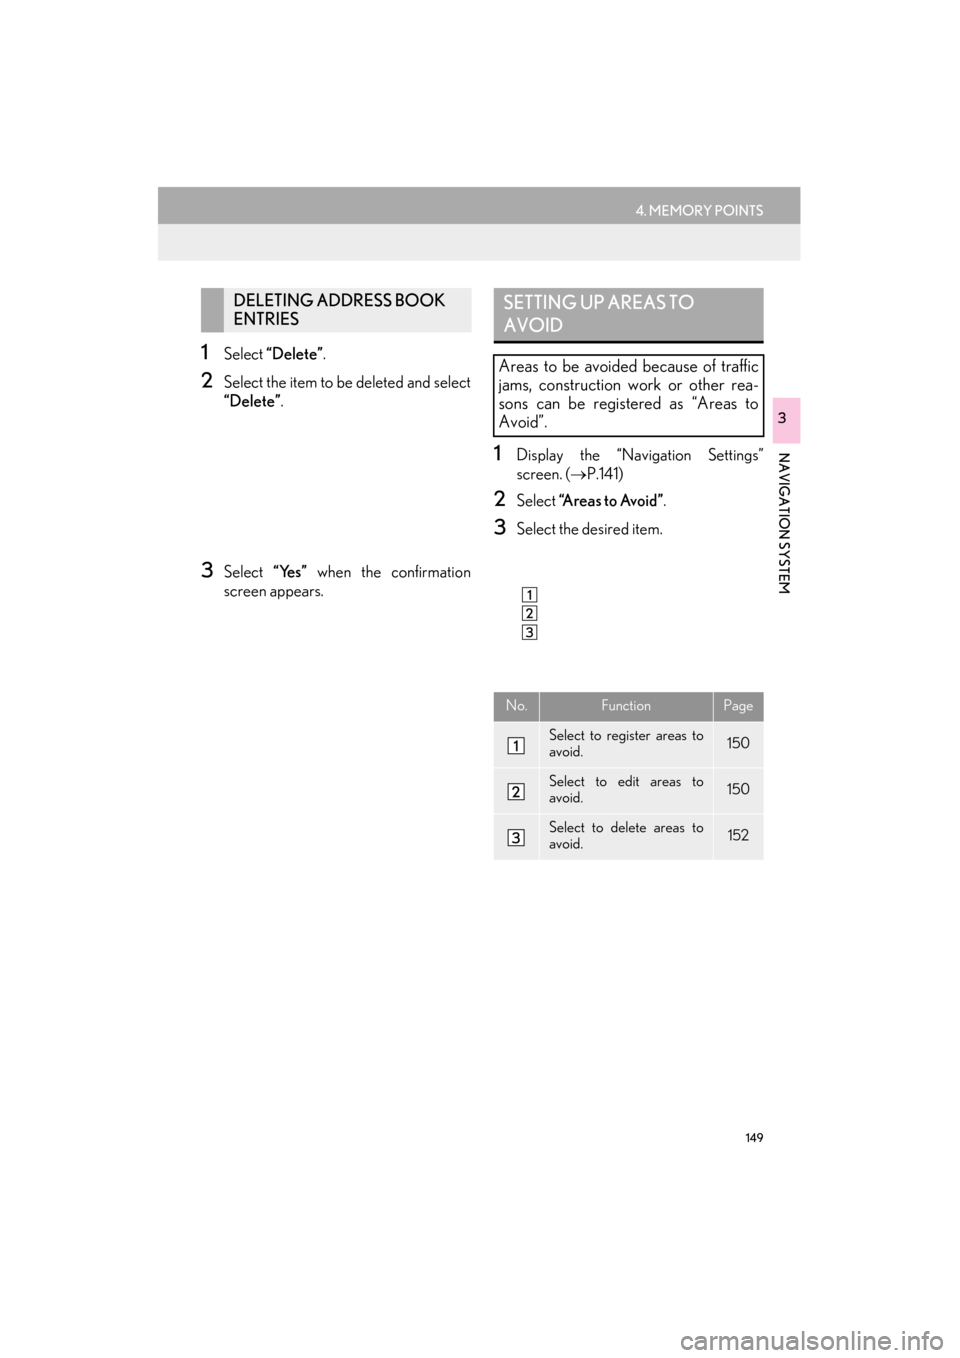
1Display the “Navigation Settings”
screen. ( →P.141)
2Select “A r e a s t o A v o i d ” .
3Select the desired item.
DELETING ADDRESS BOOK
ENTRIESSETTING UP AREAS TO
AVOID
Areas to be avoided because of traffic
jams, construction work or other rea-
sons can be registered as “Areas to
Avoid”.
No.FunctionPage
Select to register areas to
avoid.150
Select to edit areas to
avoid.150
Select to delete areas to
avoid.152
Page 152 of 409
151
4. MEMORY POINTS
ES350/300h_Navi_OM33B43U_(U)14.06.23 09:44
NAVIGATION SYSTEM
3
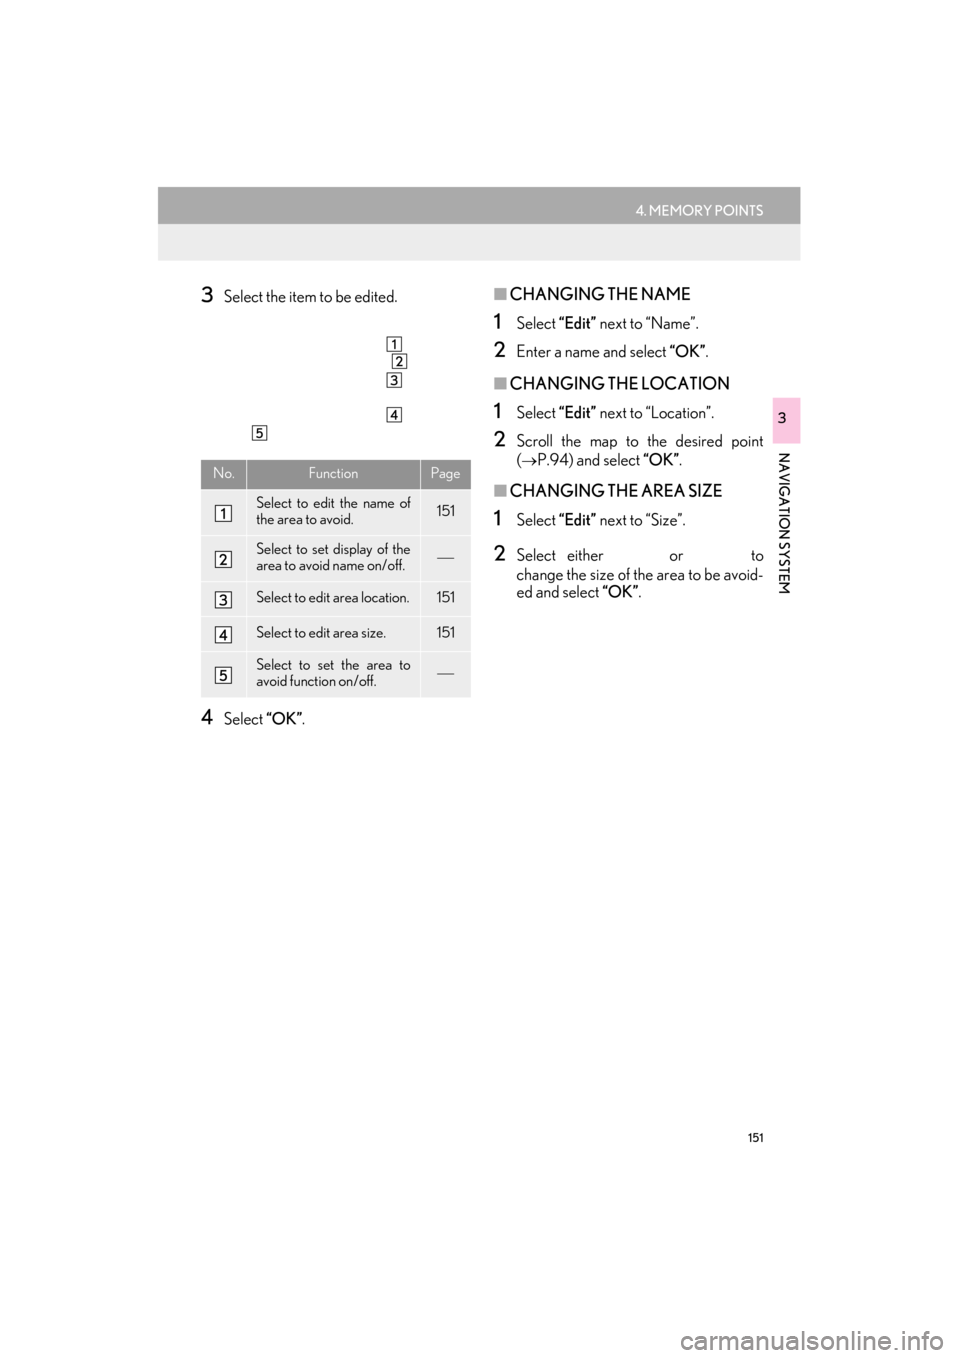
3Select the item to be edited.
4Select “OK”.
■CHANGING THE NAME
1Select “Edit” next to “Name”.
2Enter a name and select “OK”.
■CHANGING THE LOCATION
1Select “Edit” next to “Location”.
2Scroll the map to the desired point
(
→P.94) and select “OK” .
■CHANGING THE AREA SIZE
1Select “Edit” next to “Size”.
2Select either or to
change the size of the area to be avoid-
ed and select “OK”.
No.FunctionPage
Select to edit the name of
the area to avoid.151
Select to set display of the
area to avoid name on/off.
Select to edit area location.151
Select to edit area size.151
Select to set the area to
avoid function on/off.
Page 154 of 409
153
ES350/300h_Navi_OM33B43U_(U)14.06.23 09:44
NAVIGATION SYSTEM
3
5. SETUP
1. DETAILED NAVIGATION SETTINGS
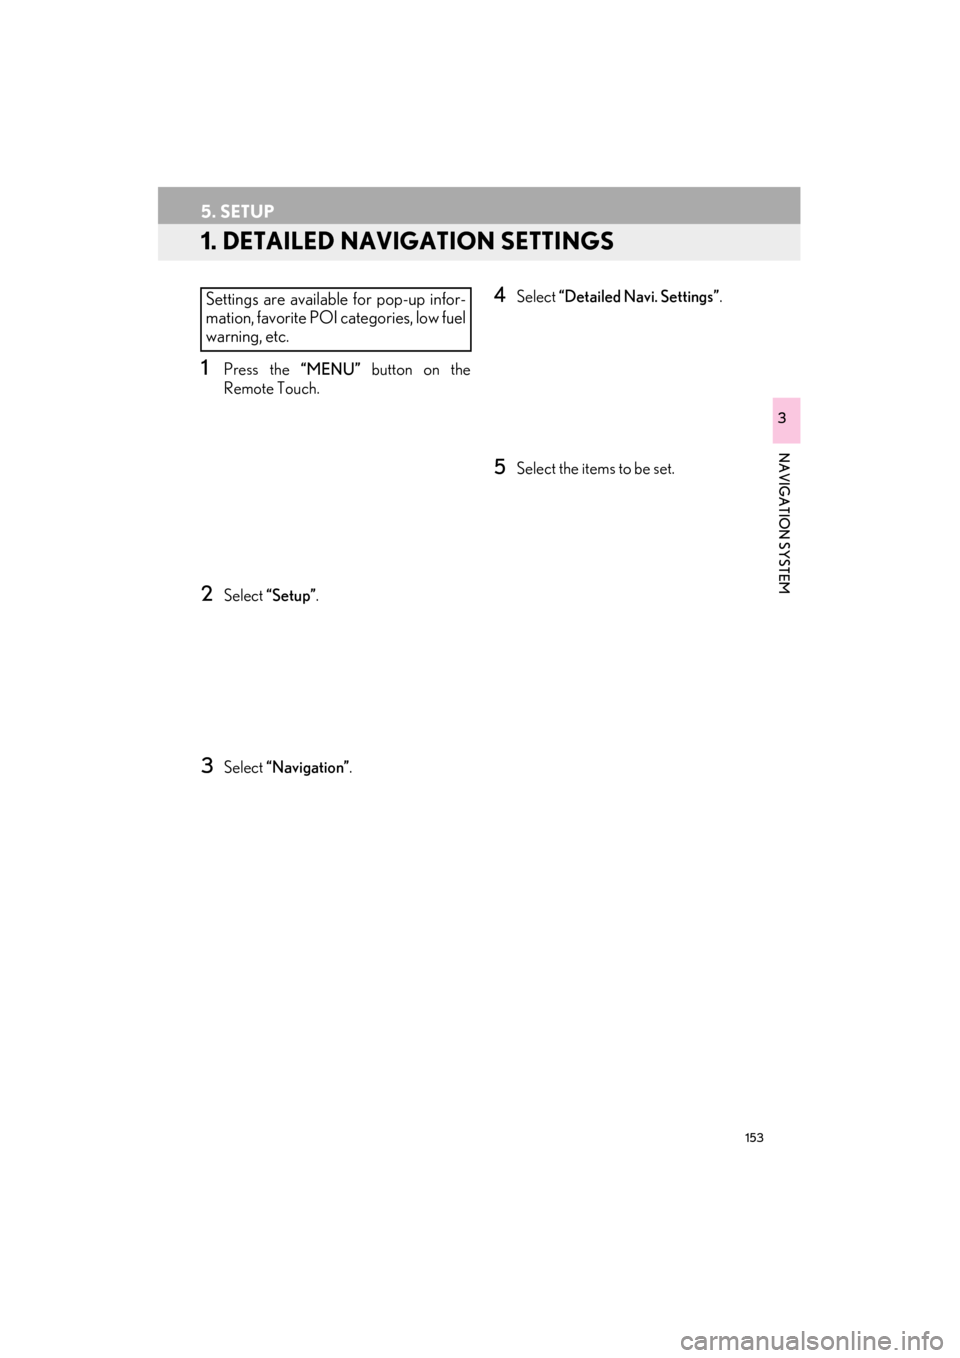
1Press the “MENU” button on the
Remote Touch.
2Select “Setup” .
3Select “Navigation” .
4Select “Detailed Navi. Settings” .
5Select the items to be set.
Settings are available for pop-up infor-
mation, favorite POI categories, low fuel
warning, etc.
Page 156 of 409
155
5. SETUP
ES350/300h_Navi_OM33B43U_(U)14.06.23 09:44
NAVIGATION SYSTEM
31Display the “Detailed Navi. Settings”
screen.
(→ P.1 5 3 )
2Select “Favorite POI Categories” .
3Select the category to be changed.
“Default” : Select to set the default catego-
ries.
4Select the desired POI category.
“List All Categories” : Select to display all
POI categories.
5Select the desired POI icon.
1Display the “Detailed Navi. Settings”
screen.
( → P.1 5 3 )
2Select “Low Fuel Warning” .
3Select “On” or “Off ” .
FAVORITE POI CATEGORIES
(SELECT POI ICONS)
Up to 6 POI icons, which are used for
selecting POIs on the map screen, can
be selected as favorites.LOW FUEL WARNING
When the fuel level is low, a warning
message will pop up on the screen.
Page 158 of 409
157
5. SETUP
ES350/300h_Navi_OM33B43U_(U)14.06.23 09:44
NAVIGATION SYSTEM
3
1Display the “Detailed Navi. Settings”
screen.
(→ P.1 5 3 )
2Select “Calibration” .
3Select the desired item.
■POSITION/DIRECTION CALI-
BRATION
1Select “Position / Direction” .
2Scroll the map to the desired point
(
→P.94) and select “OK” .
3Select an arrow to adjust the direction of
the current position mark and select
“OK”.
CURRENT POSITION/TIRE
CHANGE CALIBRATION
The current position mark can be adjust-
ed manually. Miscalculation of the dis-
tance caused by tire replacement can
also be adjusted.
�z For additional information on the accu-
racy of a current position: →P.1 6 2
When driving, the current position mark
will be automatically corrected by GPS
signals. If GPS reception is poor due to
location, the current position mark can
be adjusted manually.