ECU Lexus ES350 2019 / LEXUS 2019 ES350 (OM06130U) Owner's Guide
[x] Cancel search | Manufacturer: LEXUS, Model Year: 2019, Model line: ES350, Model: Lexus ES350 2019Pages: 444, PDF Size: 14.22 MB
Page 49 of 444
491-2. Child safety
1
For safety and security
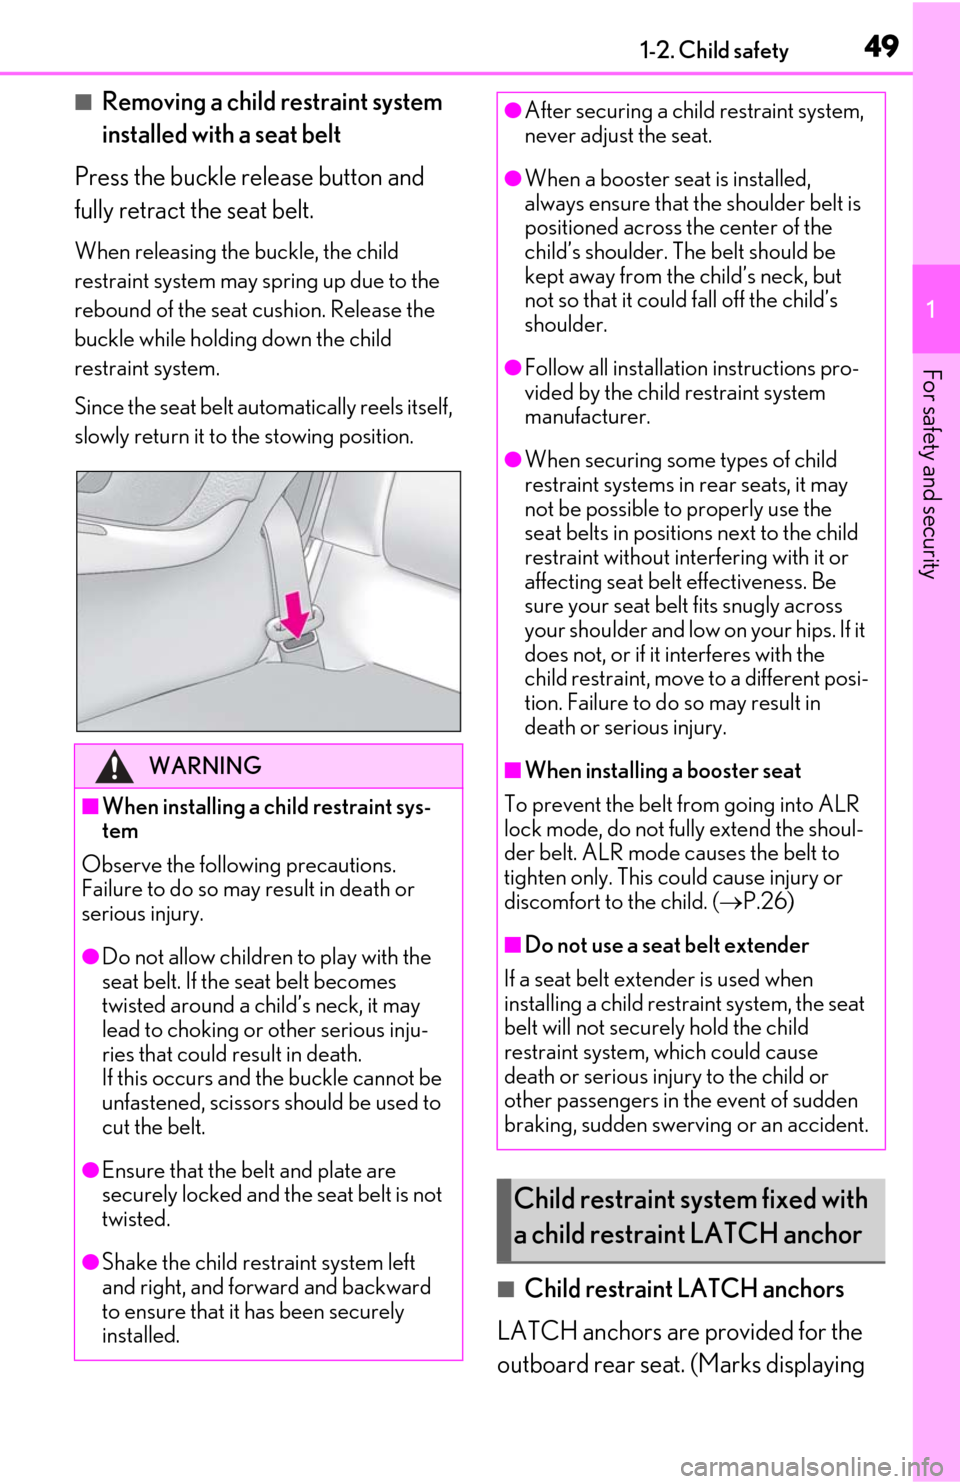
■Removing a child restraint system
installed with a seat belt
Press the buckle release button and
fully retract the seat belt.
When releasing the buckle, the child
restraint system may spring up due to the
rebound of the seat cushion. Release the
buckle while holding down the child
restraint system.
Since the seat belt automatically reels itself,
slowly return it to the stowing position.
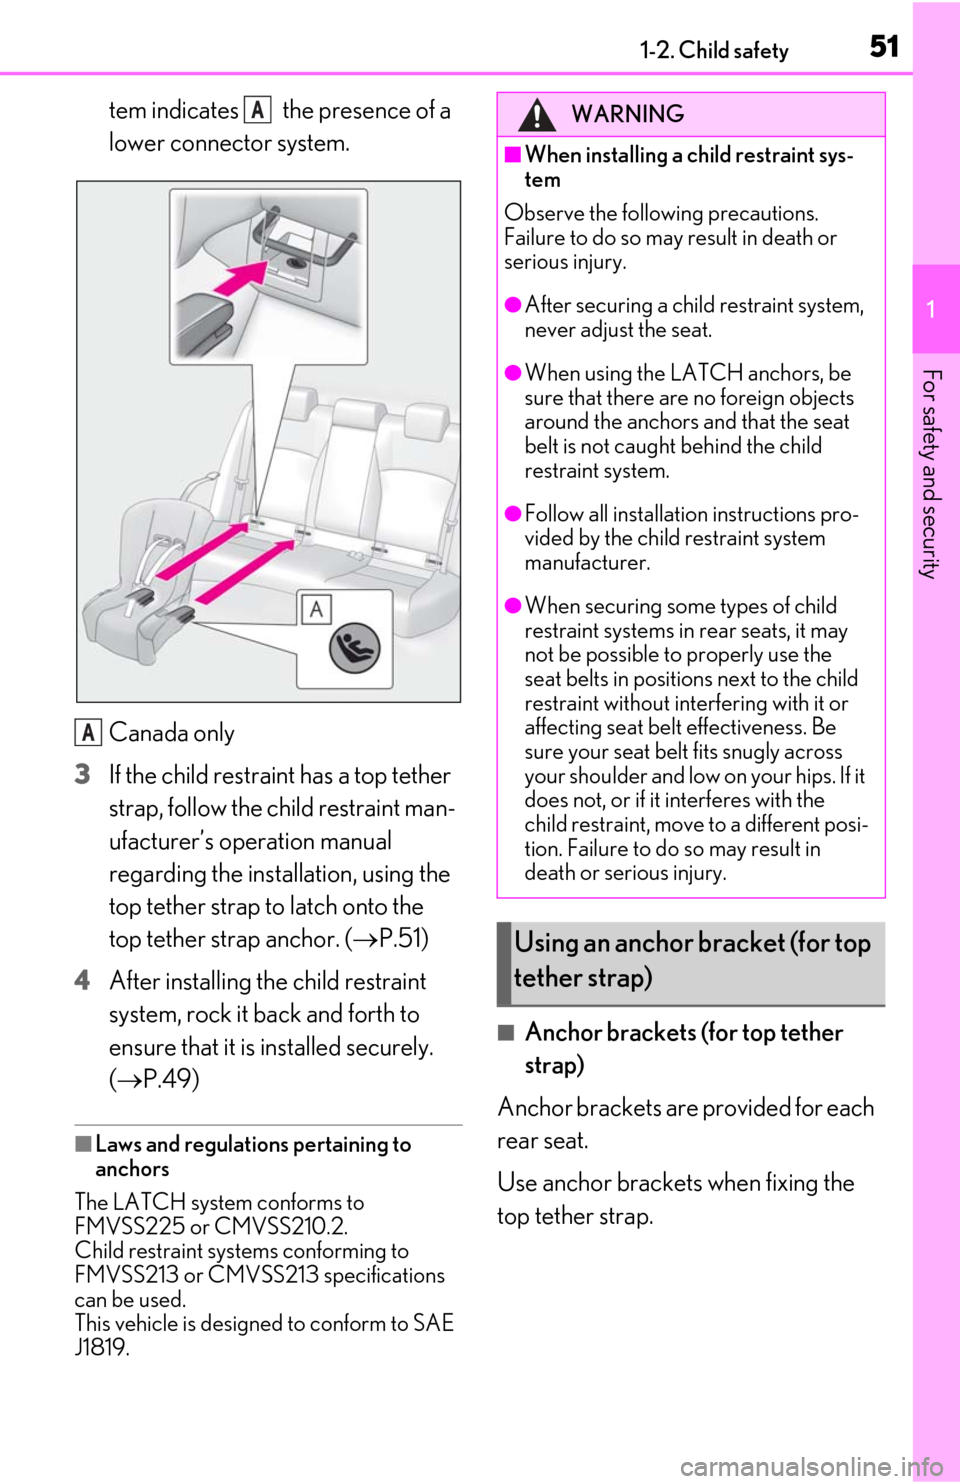
■Child restraint LATCH anchors
LATCH anchors are provided for the
outboard rear seat. (Marks displaying
WARNING
■When installing a child restraint sys-
tem
Observe the following precautions.
Failure to do so may result in death or
serious injury.
●Do not allow children to play with the
seat belt. If the seat belt becomes
twisted around a child’s neck, it may
lead to choking or other serious inju-
ries that could result in death.
If this occurs and the buckle cannot be
unfastened, scissors should be used to
cut the belt.
●Ensure that the belt and plate are
securely locked and the seat belt is not
twisted.
●Shake the child restraint system left
and right, and forward and backward
to ensure that it has been securely
installed.
●After securing a child restraint system,
never adjust the seat.
●When a booster seat is installed,
always ensure that th e shoulder belt is
positioned across the center of the
child’s shoulder. The belt should be
kept away from the child’s neck, but
not so that it could fall off the child’s
shoulder.
●Follow all installation instructions pro-
vided by the child restraint system
manufacturer.
●When securing some types of child
restraint systems in rear seats, it may
not be possible to properly use the
seat belts in position s next to the child
restraint without interfering with it or
affecting seat belt effectiveness. Be
sure your seat belt fits snugly across
your shoulder and low on your hips. If it
does not, or if it interferes with the
child restraint, move to a different posi-
tion. Failure to do so may result in
death or serious injury.
■When installing a booster seat
To prevent the belt from going into ALR
lock mode, do not fu lly extend the shoul-
der belt. ALR mode causes the belt to
tighten only. This could cause injury or
discomfort to the child. ( P.26)
■Do not use a seat belt extender
If a seat belt extender is used when
installing a child restra int system, the seat
belt will not securely hold the child
restraint system, which could cause
death or serious injury to the child or
other passengers in the event of sudden
braking, sudden swerving or an accident.
Child restraint system fixed with
a child restraint LATCH anchor
Page 51 of 444
511-2. Child safety
1
For safety and security
tem indicates the presence of a
lower connector system.
Canada only
3 If the child restraint has a top tether
strap, follow the child restraint man-
ufacturer’s operation manual
regarding the installation, using the
top tether strap to latch onto the
top tether strap anchor. ( P.51)
4 After installing the child restraint
system, rock it back and forth to
ensure that it is installed securely.
(P.49)
■Laws and regulations pertaining to
anchors
The LATCH system conforms to
FMVSS225 or CMVSS210.2.
Child restraint systems conforming to
FMVSS213 or CMVSS213 specifications
can be used.
This vehicle is designed to conform to SAE
J1819.
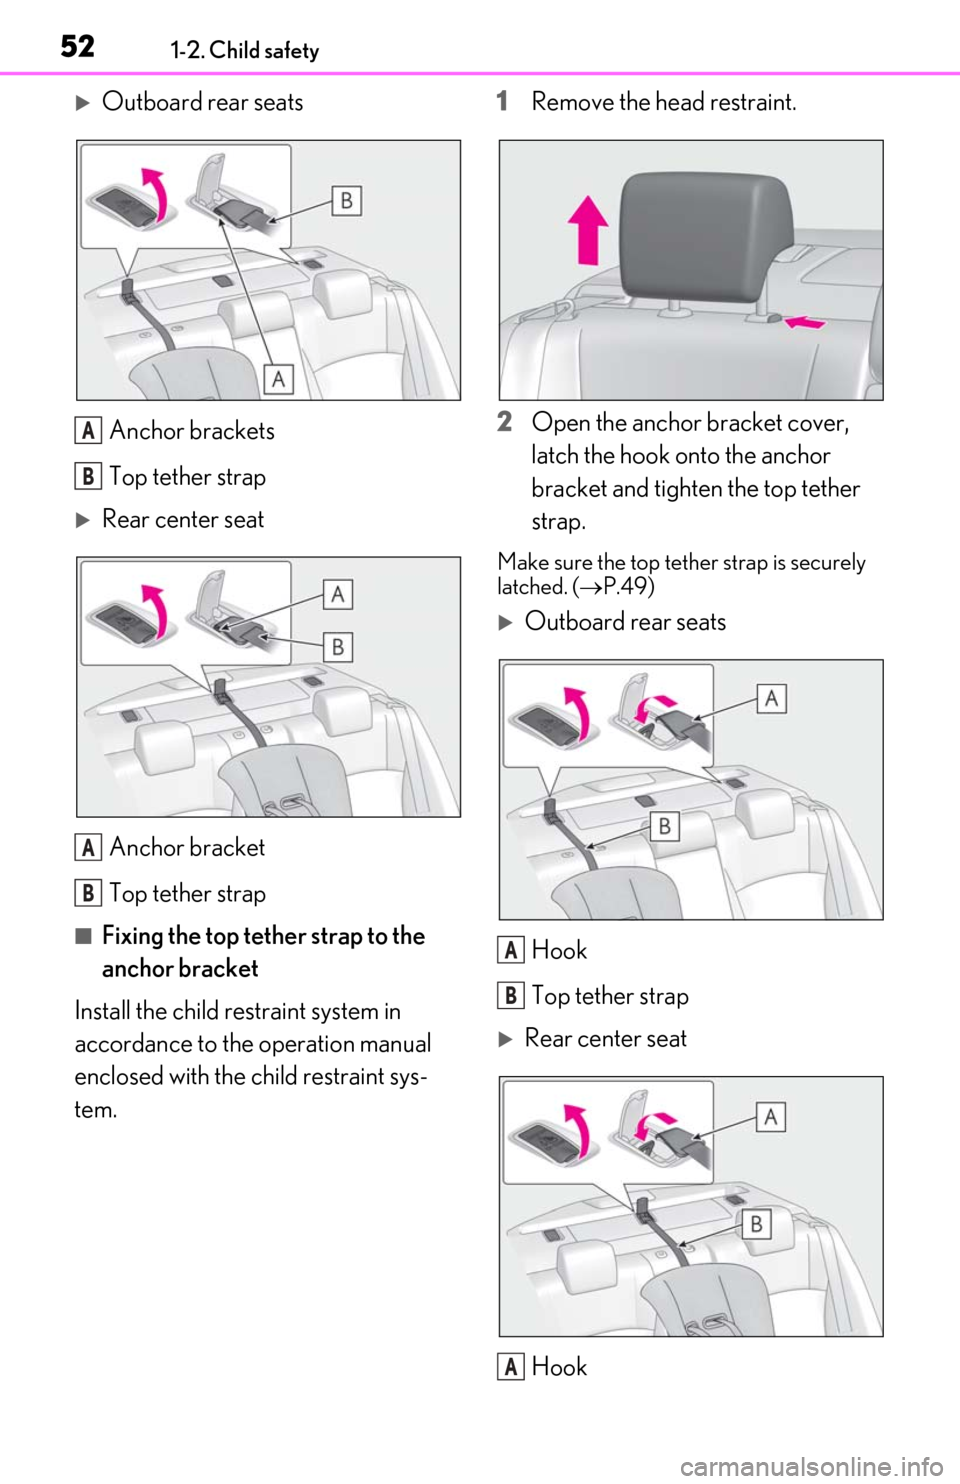
■Anchor brackets (for top tether
strap)
Anchor brackets are provided for each
rear seat.
Use anchor brackets when fixing the
top tether strap.
A
A
WARNING
■When installing a child restraint sys-
tem
Observe the following precautions.
Failure to do so may result in death or
serious injury.
●After securing a child restraint system,
never adjust the seat.
●When using the LATCH anchors, be
sure that there are no foreign objects
around the anchors and that the seat
belt is not caught behind the child
restraint system.
●Follow all installation instructions pro-
vided by the child restraint system
manufacturer.
●When securing some types of child
restraint systems in rear seats, it may
not be possible to properly use the
seat belts in position s next to the child
restraint without interfering with it or
affecting seat belt effectiveness. Be
sure your seat belt fits snugly across
your shoulder and low on your hips. If it
does not, or if it interferes with the
child restraint, move to a different posi-
tion. Failure to do so may result in
death or serious injury.
Using an anchor bracket (for top
tether strap)
Page 52 of 444
521-2. Child safety
Outboard rear seatsAnchor brackets
Top tether strap
Rear center seatAnchor bracket
Top tether strap
■Fixing the top tether strap to the
anchor bracket
Install the child restraint system in
accordance to the operation manual
enclosed with the child restraint sys-
tem. 1
Remove the head restraint.
2 Open the anchor bracket cover,
latch the hook onto the anchor
bracket and tighten the top tether
strap.
Make sure the top tether strap is securely
latched. ( P.49)
Outboard rear seats
Hook
Top tether strap
Rear center seatHook
A
B
A
B
A
B
A
Page 53 of 444
531-2. Child safety
1
For safety and security
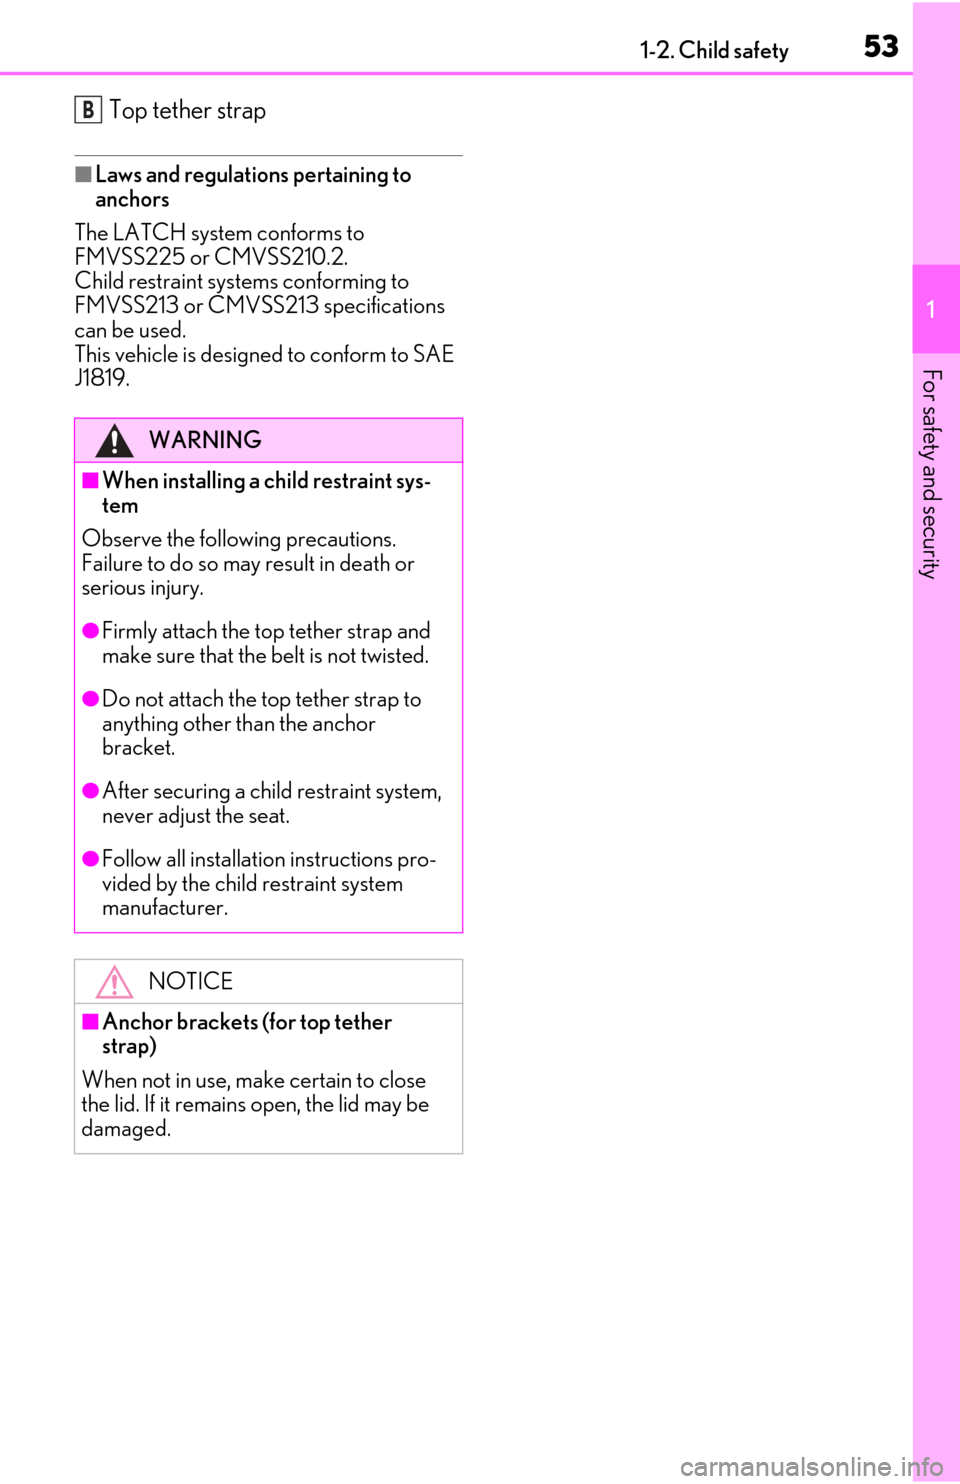
Top tether strap
■Laws and regulations pertaining to
anchors
The LATCH system conforms to
FMVSS225 or CMVSS210.2.
Child restraint systems conforming to
FMVSS213 or CMVSS213 specifications
can be used.
This vehicle is designed to conform to SAE
J1819.
WARNING
■When installing a child restraint sys-
tem
Observe the following precautions.
Failure to do so may result in death or
serious injury.
●Firmly attach the top tether strap and
make sure that the belt is not twisted.
●Do not attach the top tether strap to
anything other than the anchor
bracket.
●After securing a child restraint system,
never adjust the seat.
●Follow all installation instructions pro-
vided by the child restraint system
manufacturer.
NOTICE
■Anchor brackets (for top tether
strap)
When not in use, make certain to close
the lid. If it remains open, the lid may be
damaged.
B
Page 54 of 444
541-3. Theft deterrent system
1-3.Theft deterrent system
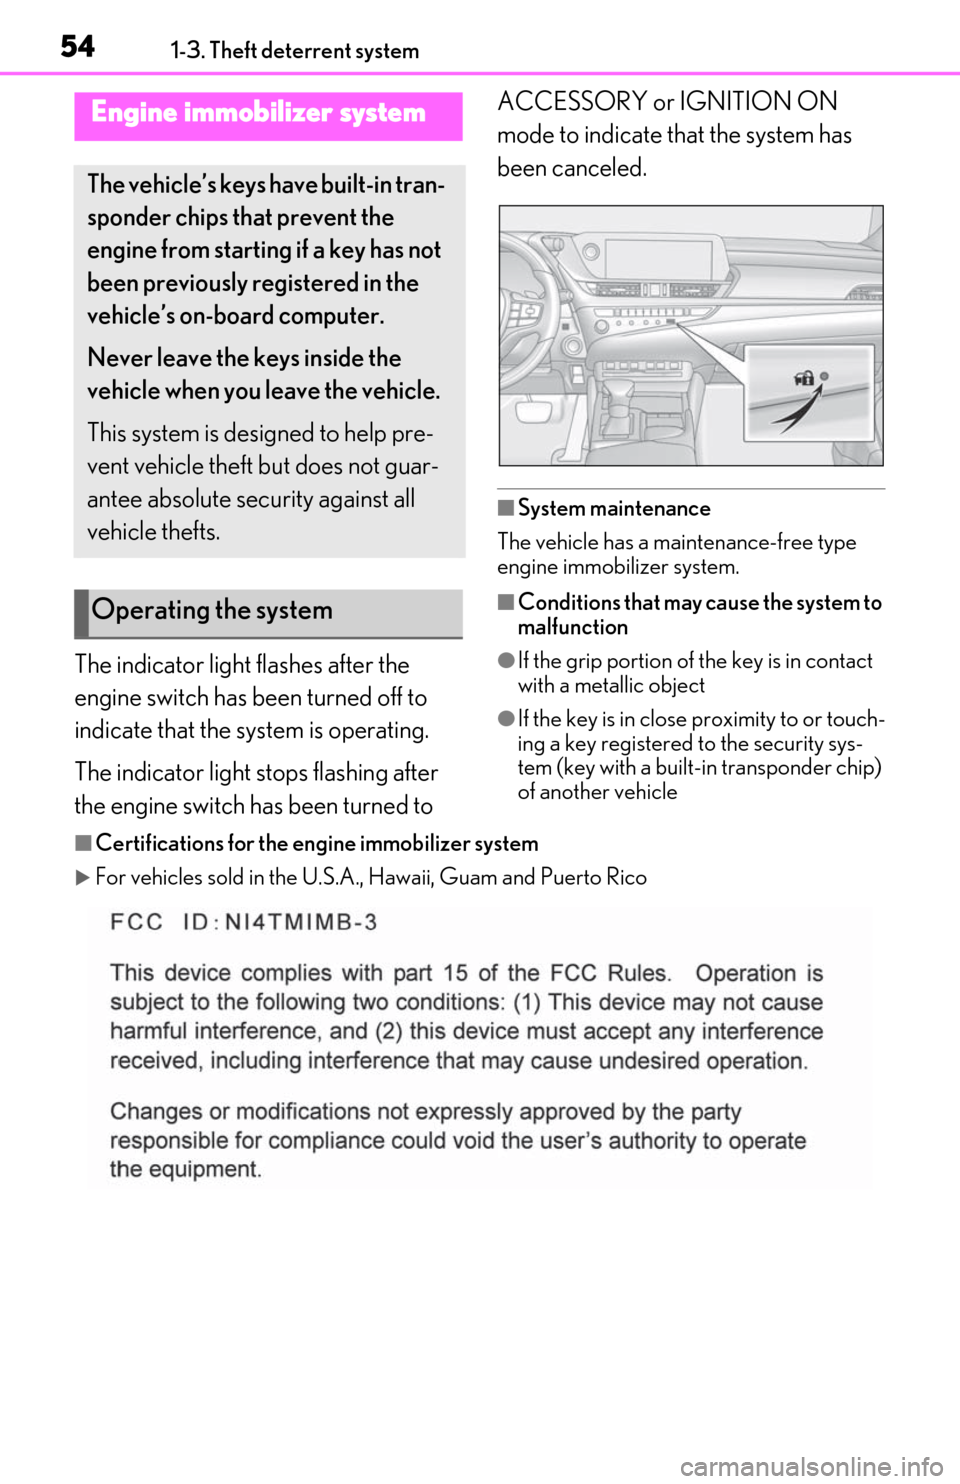
The indicator light flashes after the
engine switch has been turned off to
indicate that the system is operating.
The indicator light stops flashing after
the engine switch has been turned to ACCESSORY or IGNITION ON
mode to indicate that the system has
been canceled.
■System maintenance
The vehicle has a maintenance-free type
engine immobilizer system.
■Conditions that may cause the system to
malfunction
●If the grip portion of the key is in contact
with a metallic object
●If the key is in close proximity to or touch-
ing a key registered to the security sys-
tem (key with a built-in transponder chip)
of another vehicle
■Certifications for the en gine immobilizer system
For vehicles sold in the U.S.A., Hawaii, Guam and Puerto Rico
Engine immobilizer system
The vehicle’s keys have built-in tran-
sponder chips that prevent the
engine from starting if a key has not
been previously registered in the
vehicle’s on-board computer.
Never leave the keys inside the
vehicle when you leave the vehicle.
This system is designed to help pre-
vent vehicle theft but does not guar-
antee absolute security against all
vehicle thefts.
Operating the system
Page 55 of 444
551-3. Theft deterrent system
1
For safety and security
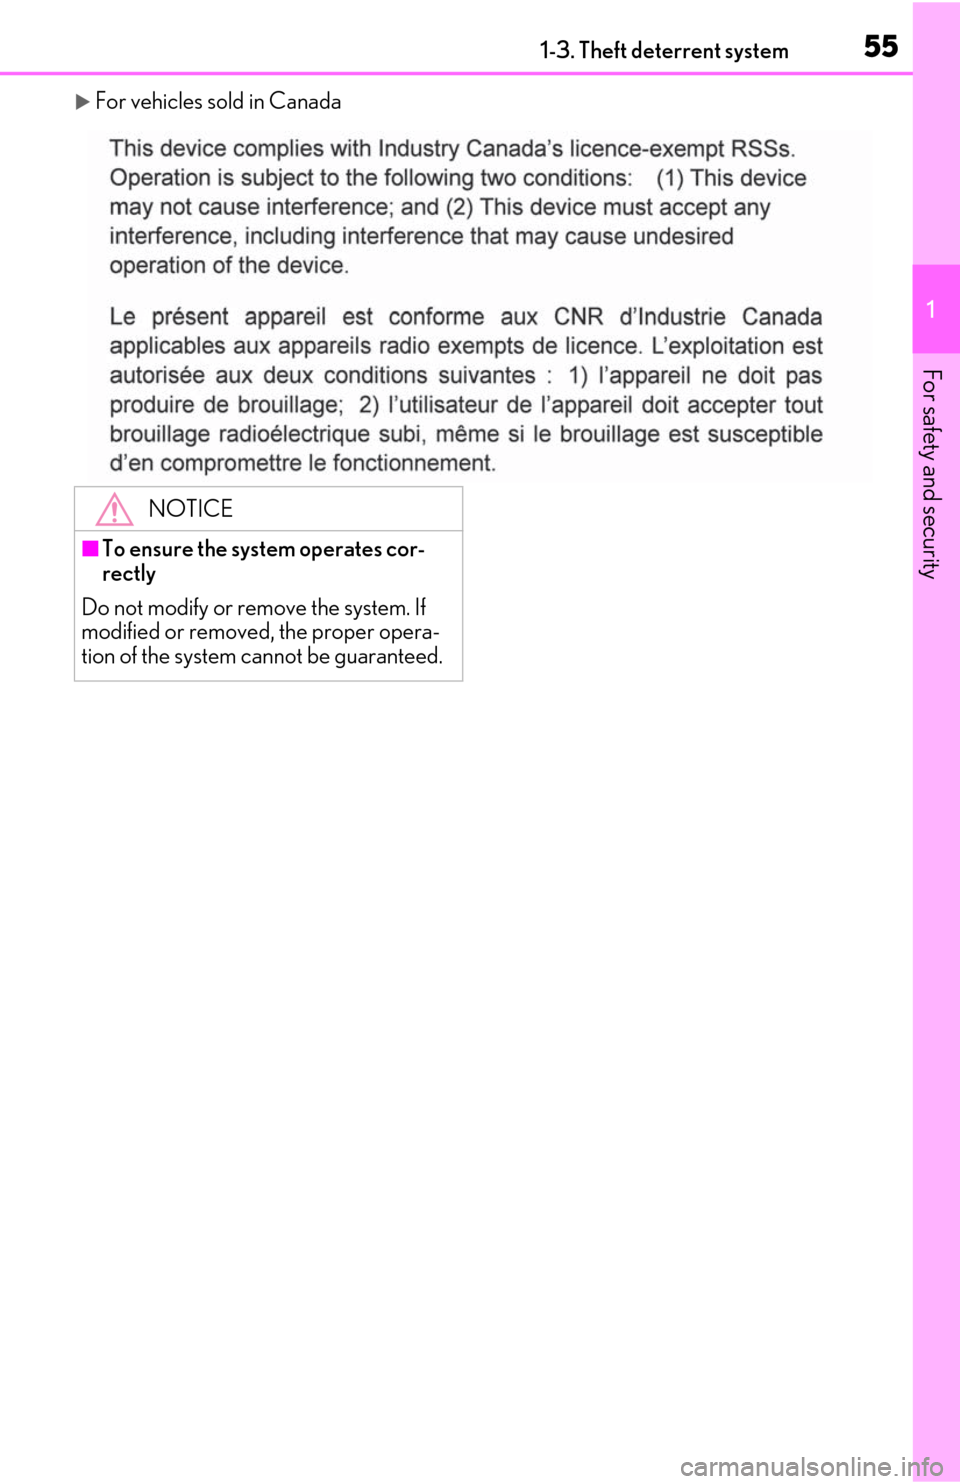
For vehicles sold in Canada
NOTICE
■To ensure the system operates cor-
rectly
Do not modify or remove the system. If
modified or removed, the proper opera-
tion of the system cannot be guaranteed.
Page 57 of 444
571-3. Theft deterrent system
1
For safety and security
using a door lock switch.
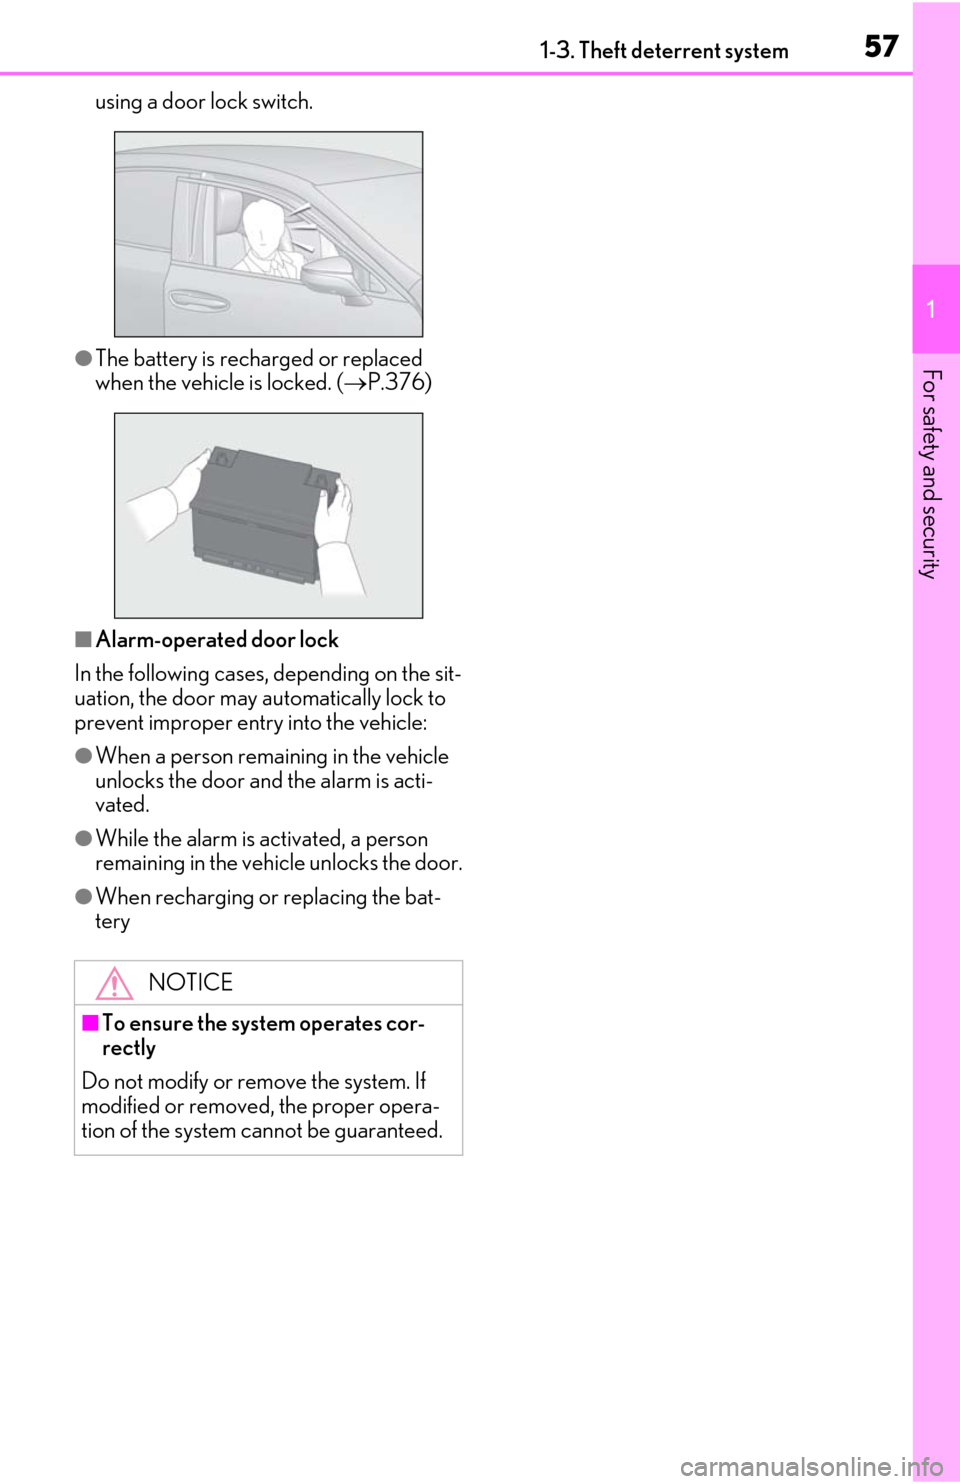
●The battery is recharged or replaced
when the vehicle is locked. ( P.376)
■Alarm-operated door lock
In the following cases, depending on the sit-
uation, the door may automatically lock to
prevent improper entry into the vehicle:
●When a person remaining in the vehicle
unlocks the door and the alarm is acti-
vated.
●While the alarm is activated, a person
remaining in the vehicle unlocks the door.
●When recharging or replacing the bat-
tery
NOTICE
■To ensure the system operates cor-
rectly
Do not modify or remove the system. If
modified or removed, the proper opera-
tion of the system cannot be guaranteed.
Page 63 of 444
632-1. Instrument cluster
2
Vehicle status information and indicators
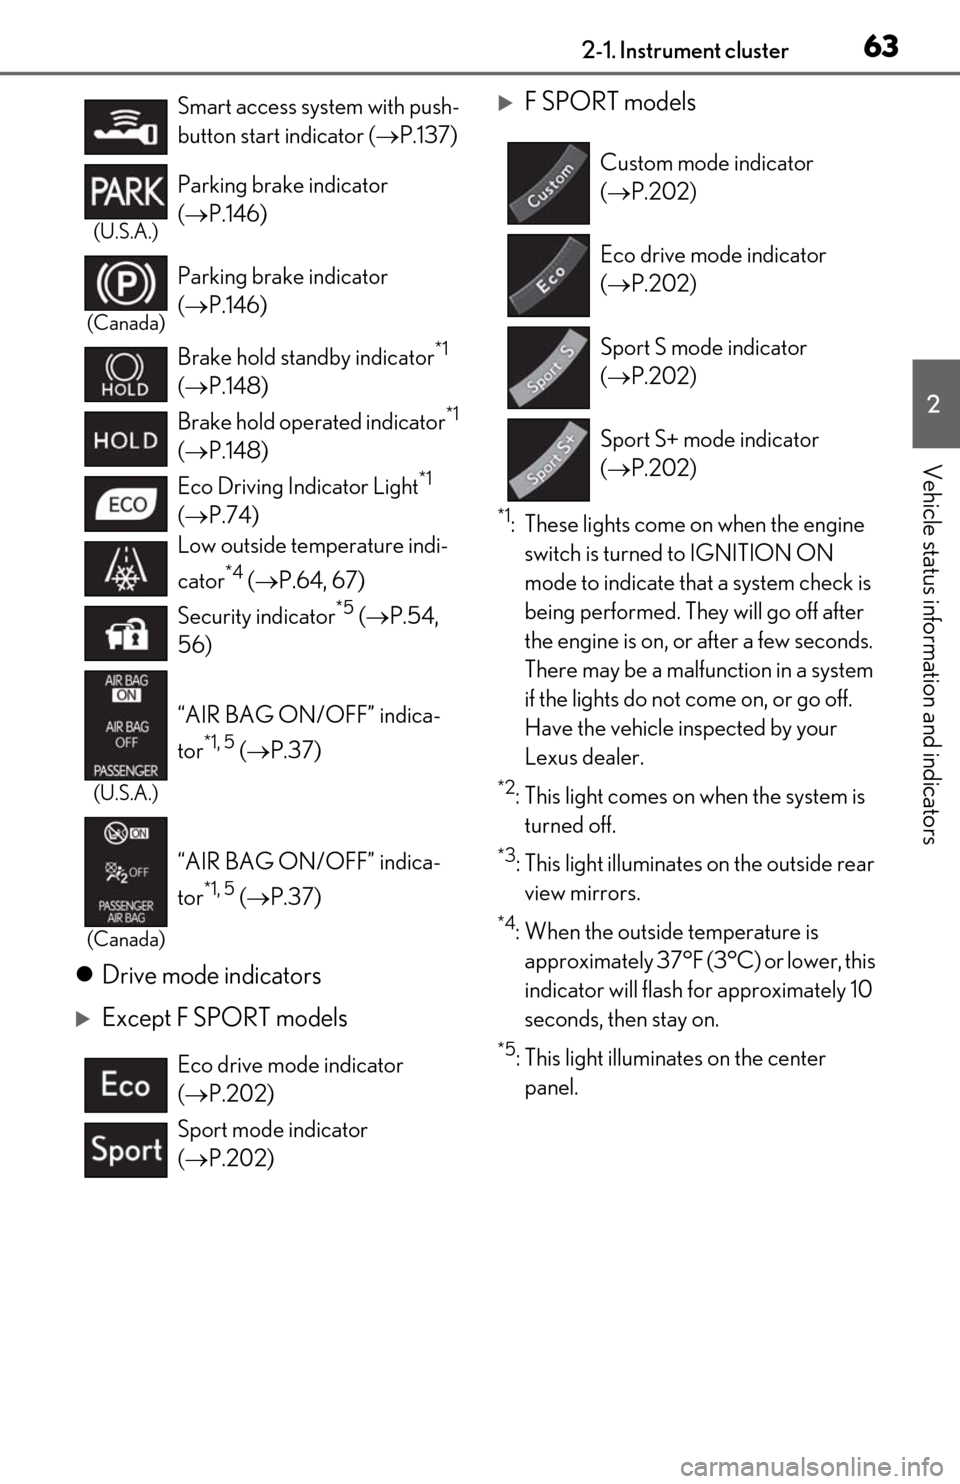
Drive mode indicators
Except F SPORT models
F SPORT models
*1: These lights come on when the engine
switch is turned to IGNITION ON
mode to indicate that a system check is
being performed. They will go off after
the engine is on, or after a few seconds.
There may be a malfunction in a system
if the lights do not come on, or go off.
Have the vehicle inspected by your
Lexus dealer.
*2: This light comes on when the system is turned off.
*3: This light illuminates on the outside rear view mirrors.
*4: When the outside temperature is approximately 37°F (3°C) or lower, this
indicator will flash for approximately 10
seconds, then stay on.
*5: This light illuminates on the center panel.
Smart access system with push-
button start indicator (
P.137)
(U.S.A.)
Parking brake indicator
( P.146)
(Canada)
Parking brake indicator
( P.146)
Brake hold standby indicator
*1
( P.148)
Brake hold operated indicator
*1
( P.148)
Eco Driving Indicator Light
*1
( P.74)
Low outside temperature indi-
cator
*4 ( P.64, 67)
Security indicator
*5 ( P.54,
56)
(U.S.A.)
“AIR BAG ON/OFF” indica-
tor
*1, 5 ( P.37)
(Canada)
“AIR BAG ON/OFF” indica-
tor
*1, 5 ( P.37)
Eco drive mode indicator
( P.202)
Sport mode indicator
( P.202)
Custom mode indicator
( P.202)
Eco drive mode indicator
( P.202)
Sport S mode indicator
( P.202)
Sport S+ mode indicator
( P.202)
Page 89 of 444
893-2. Opening, closing and locking the doors and trunk
3
Before driving
3-2.Opening, closing and locking the doors and trunk
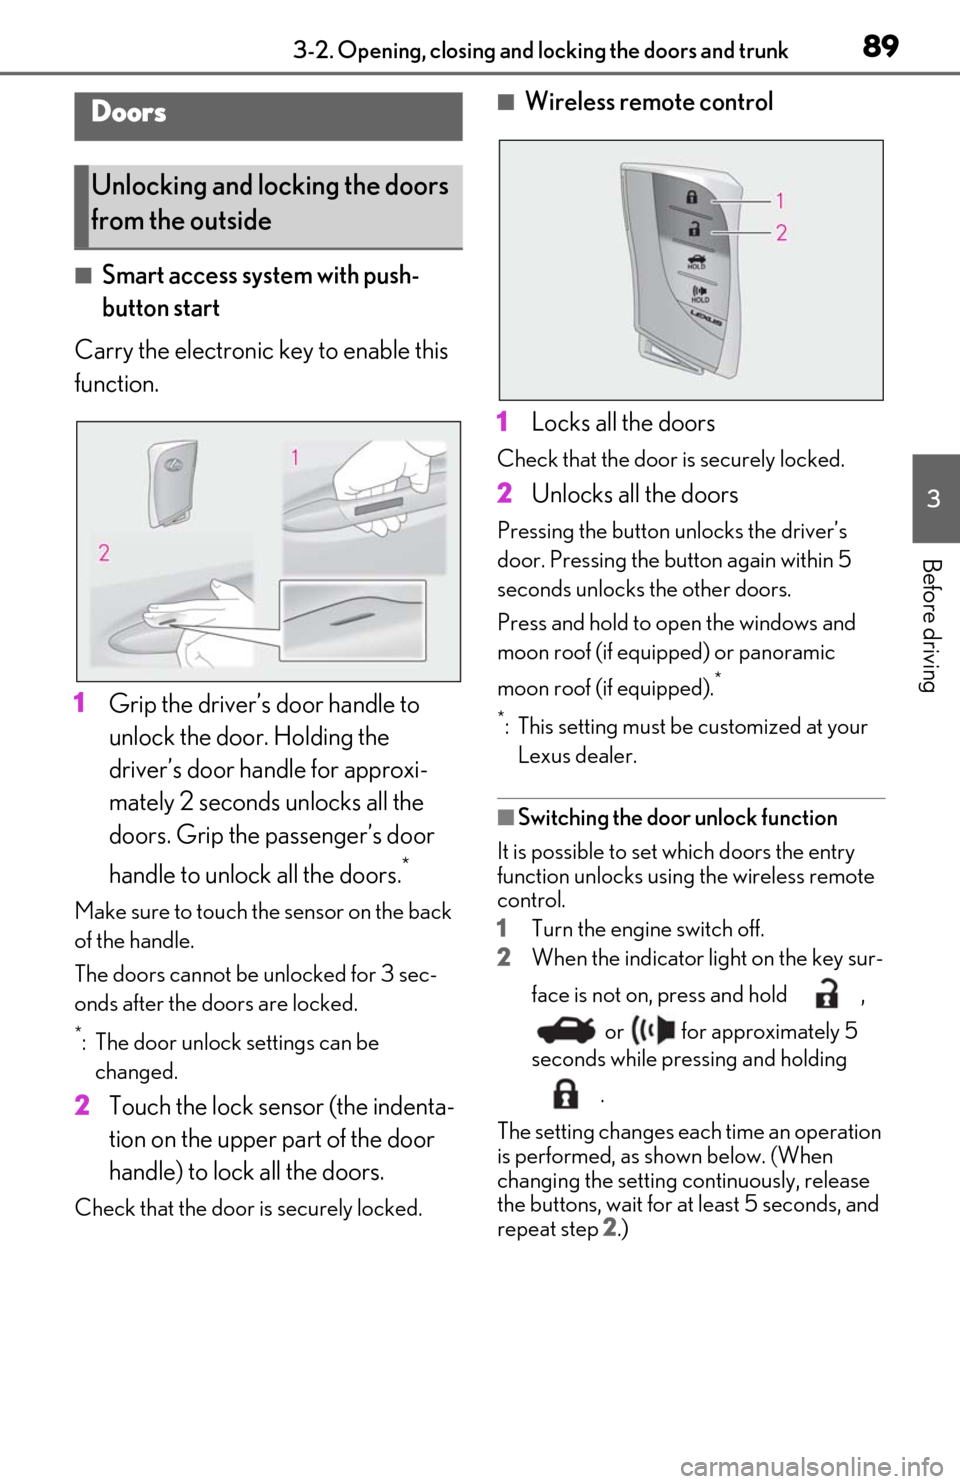
■Smart access system with push-
button start
Carry the electronic key to enable this
function.
1 Grip the driver’s door handle to
unlock the door. Holding the
driver’s door ha ndle for approxi-
mately 2 seconds unlocks all the
doors. Grip the passenger’s door
handle to unlock all the doors.
*
Make sure to touch the sensor on the back
of the handle.
The doors cannot be unlocked for 3 sec-
onds after the doors are locked.
*: The door unlock settings can be changed.
2 Touch the lock sensor (the indenta-
tion on the upper part of the door
handle) to lock all the doors.
Check that the door is securely locked.
■Wireless remote control
1 Locks all the doors
Check that the door is securely locked.
2Unlocks all the doors
Pressing the button unlocks the driver’s
door. Pressing the button again within 5
seconds unlocks the other doors.
Press and hold to open the windows and
moon roof (if equipped) or panoramic
moon roof (if equipped).
*
*
: This setting must be customized at your Lexus dealer.
■Switching the door unlock function
It is possible to set which doors the entry
function unlocks using the wireless remote
control.
1 Turn the engine switch off.
2 When the indicator light on the key sur-
face is not on, press and hold ,
or for approximately 5
seconds while pre ssing and holding
.
The setting changes each time an operation
is performed, as shown below. (When
changing the setting continuously, release
the buttons, wait for at least 5 seconds, and
repeat step 2 .)
Doors
Unlocking and locking the doors
from the outside
Page 90 of 444
903-2. Opening, closing and locking the doors and trunk
To prevent unintended triggering of the
alarm, unlock the doors using the wireless
remote control and open and close a door
once after the settings have been changed.
(If a door is not opened within 60 seconds
after is pressed, the doors will be
locked again and the alarm will automati-
cally be set.)
In a case that the alarm is triggered, imme-
diately stop the alarm. (P.56)
■Impact detection door lock release sys-
tem
In the event that the vehicle is subject to a
strong impact, all the doors are unlocked.
Depending on the force of the impact or the
type of accident, however, the system may
not operate.
■Operation signals
A buzzer sounds and the emergency flash-
ers flash to indicate that the doors have
been locked/unlocked. (Locked: once;
Unlocked: twice)
Windows and moon roof (if equipped) or
panoramic moon roof (if equipped): A
buzzer sounds to indicate that the windows
and moon roof or panoramic moon roof are
opening.
■Security feature
If a door is not opened within approximately
60 seconds after the vehicle is unlocked,
the security feature automatically locks the
vehicle again. (However, depending on the
location of the electronic key, the key may
be detected as being in the vehicle. In this
case, vehicle may be unlocked.)
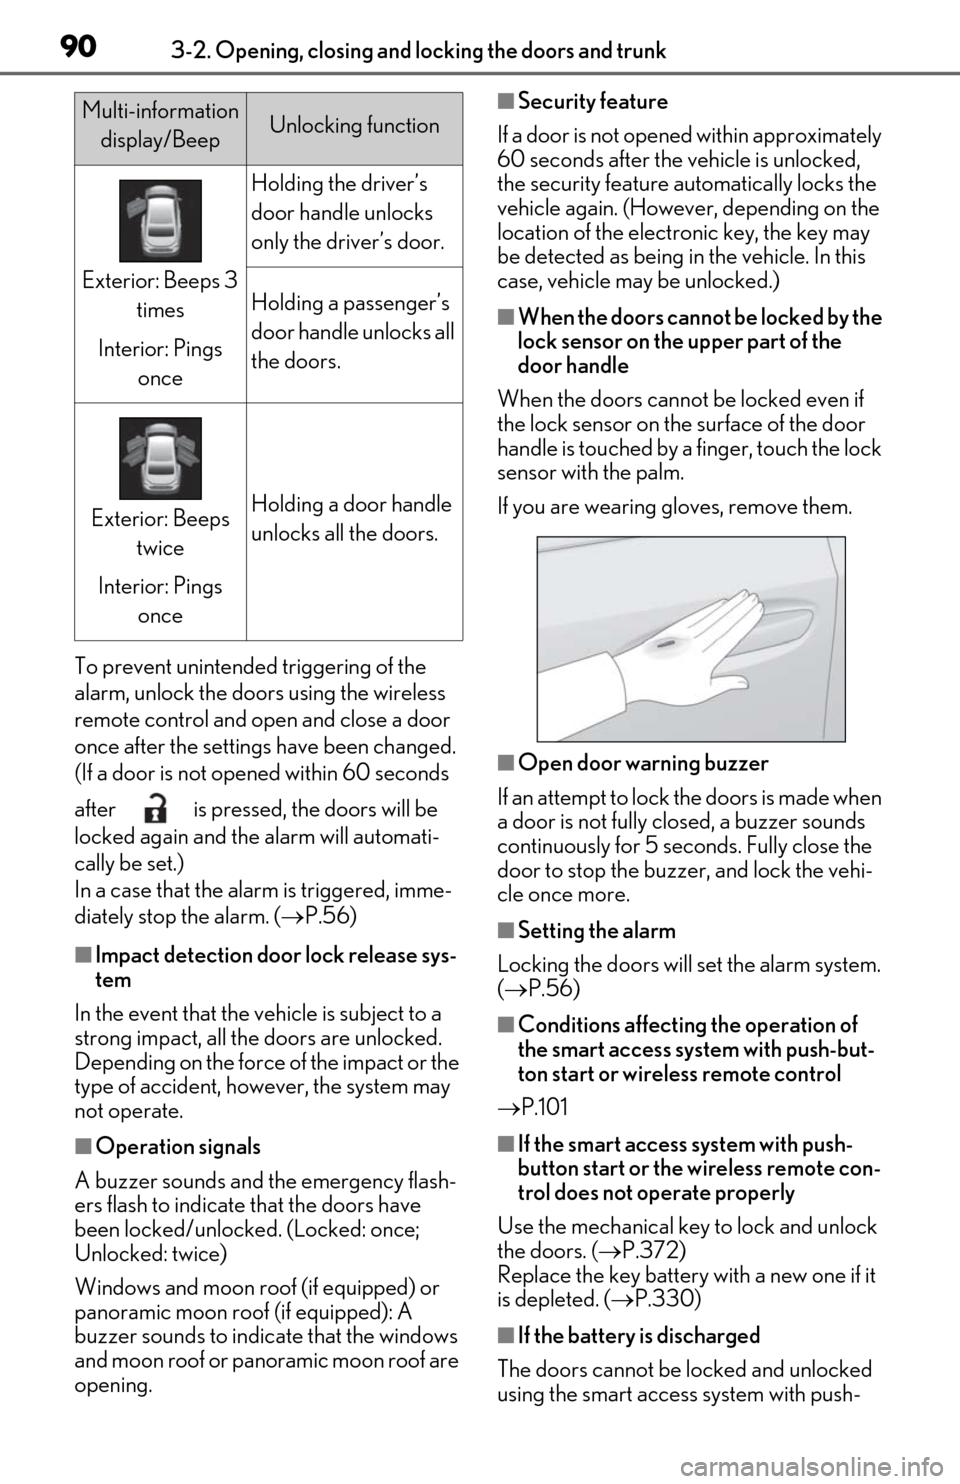
■When the doors cannot be locked by the
lock sensor on the upper part of the
door handle
When the doors cannot be locked even if
the lock sensor on the surface of the door
handle is touched by a finger, touch the lock
sensor with the palm.
If you are wearing gloves, remove them.
■Open door warning buzzer
If an attempt to lock the doors is made when
a door is not fully closed, a buzzer sounds
continuously for 5 seconds. Fully close the
door to stop the buzzer, and lock the vehi-
cle once more.
■Setting the alarm
Locking the doors will set the alarm system.
( P.56)
■Conditions affecting the operation of
the smart access system with push-but-
ton start or wireless remote control
P.101
■If the smart access system with push-
button start or the wireless remote con-
trol does not operate properly
Use the mechanical key to lock and unlock
the doors. ( P.372)
Replace the key battery with a new one if it
is depleted. ( P.330)
■If the battery is discharged
The doors cannot be locked and unlocked
using the smart access system with push-
Multi-information display/BeepUnlocking function
Exterior: Beeps 3 times
Interior: Pings once
Holding the driver’s
door handle unlocks
only the driver’s door.
Holding a passenger’s
door handle unlocks all
the doors.
Exterior: Beeps twice
Interior: Pings onceHolding a door handle
unlocks all the doors.