sensor Lexus GS250 2012 User Guide
[x] Cancel search | Manufacturer: LEXUS, Model Year: 2012, Model line: GS250, Model: Lexus GS250 2012Pages: 914, PDF Size: 53.04 MB
Page 91 of 914

901-2. Theft deterrent system
GS350/250_EE (OM30C36E)
Canceling and automatic re-enabling of the intrusion sensor and tilt sensor
The alarm will still be set even when the intrusion sensor and tilt sensor are
canceled.
After the intrusion sensor and tilt sensor are canceled, pressing the engine
switch or unlocking the doors using the entry function, wireless remote con-
trol or mechanical key will re-enable the intrusion sensor and tilt sensor.
The intrusion sensor and tilt sensor will automatically be re-enabled when
the alarm system is deactivated.
Intrusion sensor detection considerations
The sensor may trigger the alarm in the following situations:
Places with extreme vibrations or noises, or situations in which the vehicle
is subject to repeated impacts or vibrations:
• When parked in a parking garage
• When the vehicle is transported by a ferry, trailer, train, etc.
• When ice adhering to the vehicle is removed
• When the vehicle is in an automatic or high-pressure car wash
• When in a hail or lightning storm
A window or the moon roof is open.
In this case, the sensor may detect the
following:
• Wind or the movement of objects
such as leaves and insects inside the
vehicle
• Ultrasonic waves emitted from
devices such as the intrusion sensors
of other vehicles
• The movement of people outside the
vehicle
Unstable items, such as dangling acces-
sories or clothes hanging on the coat
hooks, are in the vehicle.
Page 92 of 914

911-2. Theft deterrent system
1
GS350/250_EE (OM30C36E)
For safety and security
Tilt sensor detection considerations (if equipped)
The sensor may trigger the alarm in the following situations:
The vehicle is transported by a ferry, trailer, train, etc.
The vehicle is parked in a parking garage.
The vehicle is inside a car wash that moves the vehicle.
Any of the tires loses air pressure.
The vehicle is jacked up.
An earthquake occurs or the road caves in.
NOTICE
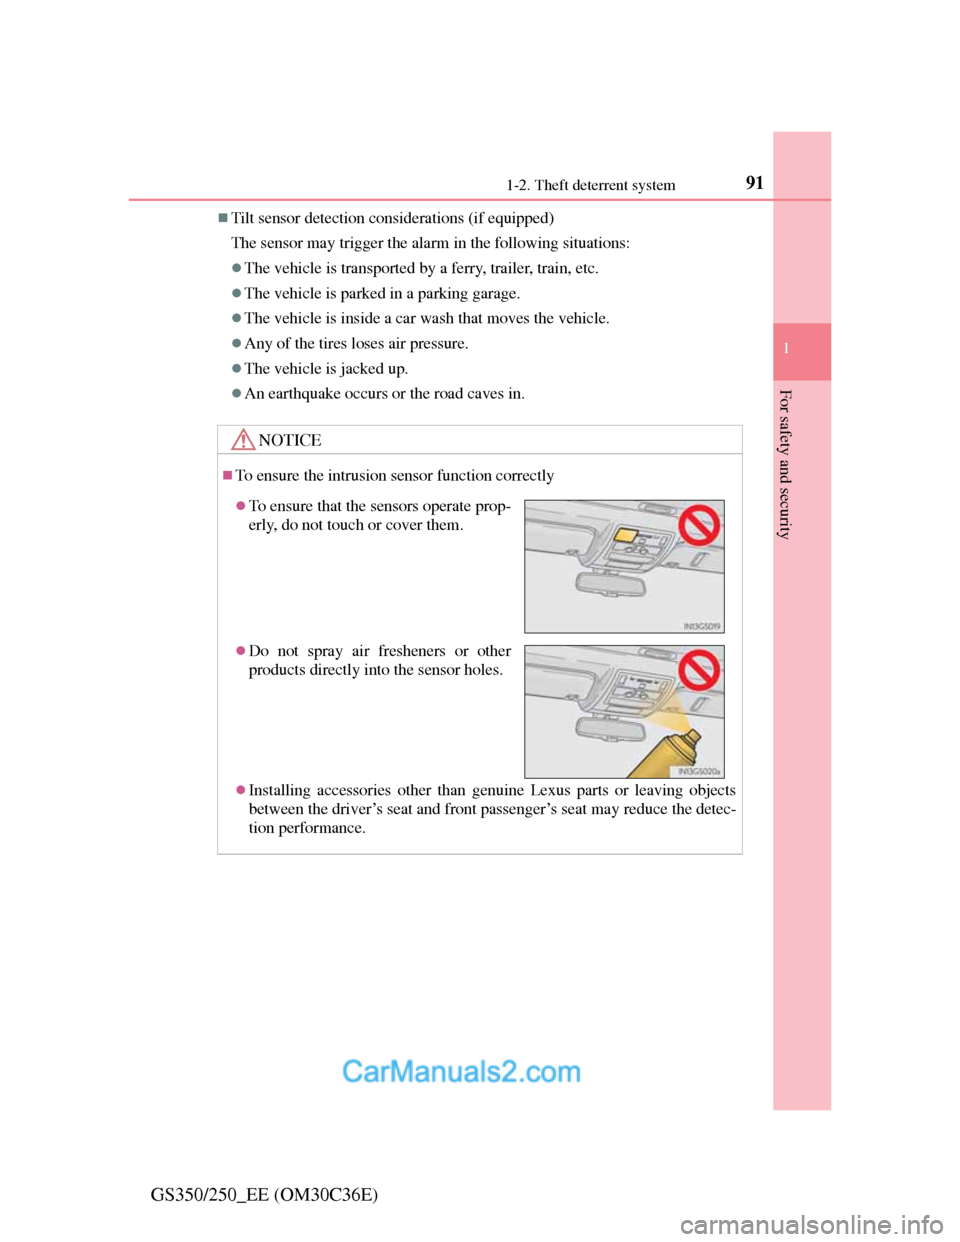
To ensure the intrusion sensor function correctly
Installing accessories other than genuine Lexus parts or leaving objects
between the driver’s seat and front passenger’s seat may reduce the detec-
tion performance.
To ensure that the sensors operate prop-
erly, do not touch or cover them.
Do not spray air fresheners or other
products directly into the sensor holes.
Page 97 of 914

962. Instrument cluster
GS350/250_EE (OM30C36E)
inspected by any authorized Lexus dealer or repairer, or another duly qual-
ified and equipped professional.
*2: The light flashes to indicate a malfunction.
The indicators inform the driver of the operating state of the vehi-
cle’s various systems.
Indicators
Turn signal indicator
(P. 222)Cruise control “SET”
indicator (P. 254)
Tail light indicator
(P. 228)
(if
equipped)
LKA (Lane-Keeping
Assist) indicator
(P. 276)
Headlight high beam
indicator (P. 228)
(if
equipped)
Lexus parking assist-
sensor indicator (P.
285)
(if
equipped)
Automatic High Beam
indicator (P. 233)
*1
(if
equipped)
“AFS OFF” indicator
(P. 230)
(if
equipped)
Front fog light indicator
(P. 239)*1, 2 Slip indicator
(P. 333, 339)
Rear fog light indicator
(P. 239)
*1VSC OFF indicator
(P. 334)
Cruise control indicator
(P. 254)
*1, 3
(if
equipped)
“PCS” warning light
(P. 342)
(if
equipped)
Radar cruise control
indicator (P. 258)Parking brake indicator
(P. 224)
Page 102 of 914

101
2 2. Instrument cluster
Instrument cluster
GS350/250_EE (OM30C36E)
The meters and display illuminate when
The engine switch is in IGNITION ON mode.
Instrument panel brightness adjustment
The instrument panel brightness levels when the tail lights are on and off can
be adjusted individually. However, when the surroundings are bright (day-
time, etc.), turning on the tail lights will not change the instrument panel
brightness.
Limitation of brightness adjustment
The brightness of the instrument panel lights is automatically adjusted based
on the light sensor detecting how bright the surroundings are. However, if the
instrument panel brightness has been manually set to either the brightest or
darkest setting, the automatic adjustment will not be performed.
ECO lamp and SPORT lamp
When sport mode is selected, SPORT lamp (red) will illuminate.
When all of the following conditions are satisfied and Eco-friendly driving,
ECO lamp (blue) will illuminate. (ECO lamp will become brighter the more
Eco-friendly driving you perform. Also, while the acceleration exceeds
Zone of Eco driving, ECO lamp turns off. (P. 109) However, when Eco
drive mode is selected, while the acceleration exceeds Zone of Eco driving,
ECO lamp does not turn off.):
• Driving with the shift lever in D
• Paddle shift switch is not operated.
• Either normal mode or Eco drive mode is selected.
• The vehicle speed is approximately 130 km/h (80 mph) or below.
Customization
Settings (e.g. on/off operation of ECO lamp) can be changed.
(Customizable features P. 857)
NOTICE
To prevent damage to the engine and its components
Do not let the indicator needle of the tachometer enter the red zone, which
indicates the maximum engine speed.
The engine may be overheating if the engine coolant temperature gauge is
in the red zone (H). In this case, immediately stop the vehicle in a safe
place, and check the engine after it has cooled completely. (P. 829)
Page 103 of 914

1022. Instrument cluster
GS350/250_EE (OM30C36E)
Multi-information display
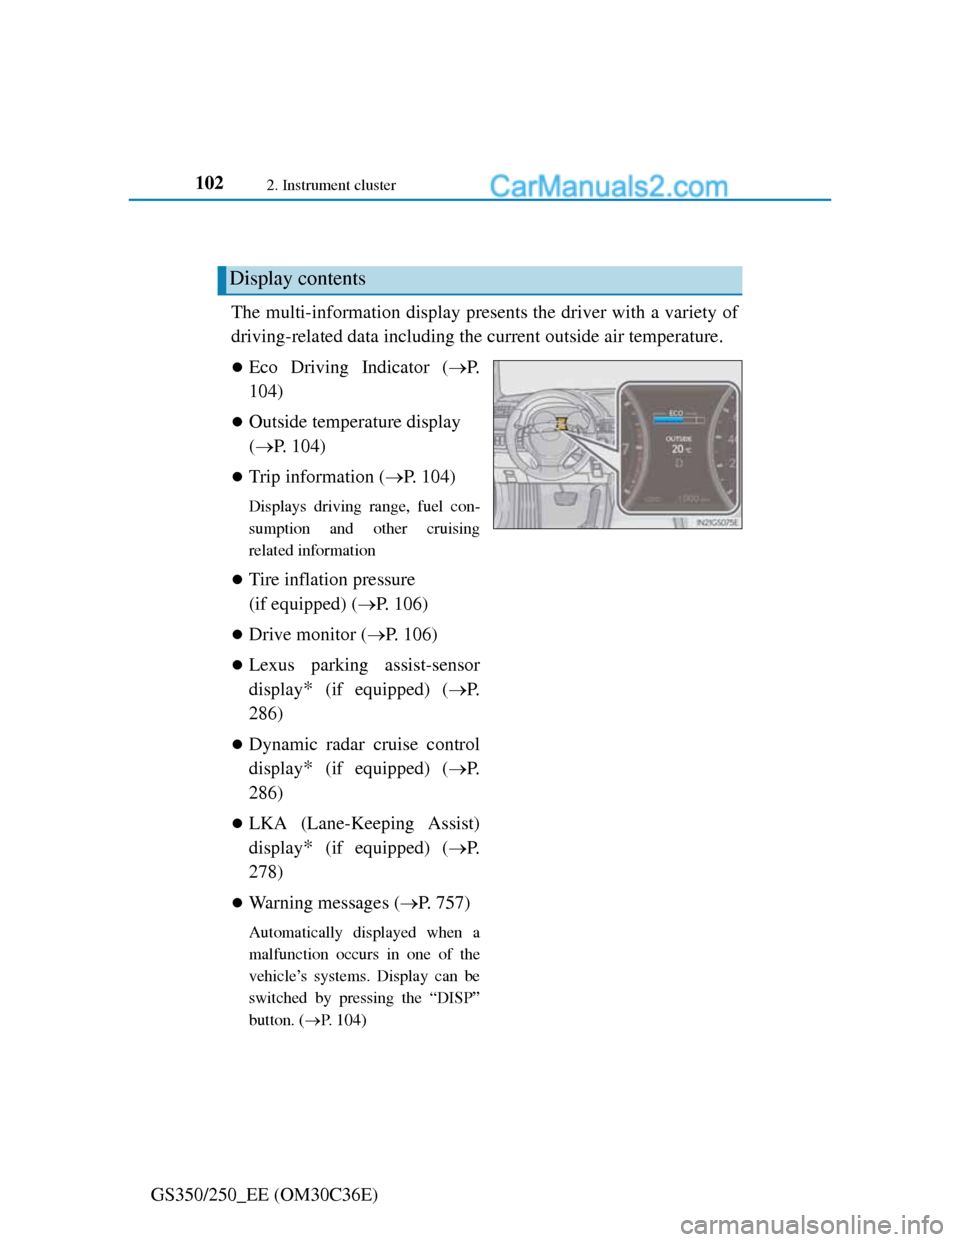
The multi-information display presents the driver with a variety of
driving-related data including the current outside air temperature.
Eco Driving Indicator (P.
104)
Outside temperature display
(P. 104)
Trip information (P. 104)
Displays driving range, fuel con-
sumption and other cruising
related information
Tire inflation pressure
(if equipped) (P. 106)
Drive monitor (P. 106)
Lexus parking assist-sensor
display
* (if equipped) (P.
286)
Dynamic radar cruise control
display
* (if equipped) (P.
286)
LKA (Lane-Keeping Assist)
display
* (if equipped) (P.
278)
Warning messages (P. 757)
Automatically displayed when a
malfunction occurs in one of the
vehicle’s systems. Display can be
switched by pressing the “DISP”
button. (P. 104)
Display contents
Page 127 of 914

1243-2. Opening, closing and locking the doors and trunk
GS350/250_EE (OM30C36E)Grip the handle to unlock the
doors.
Make sure to touch the sensor on
the back of the handle.
The doors cannot be unlocked for
3 seconds after the doors are
locked.
Touch the lock sensor (the inden-
tation on the upper part of the
door handle) to lock the doors.
Press the button.
If the vehicle is equipped with
power trunk lid, the trunk lid auto-
matically opens fully.
Unlocking and locking the doors
Opening the trunk
Page 129 of 914

1263-2. Opening, closing and locking the doors and trunk
GS350/250_EE (OM30C36E)
Effective range (areas within which the electronic key is
detected)
When locking or unlocking
the doors
The system can be operated
when the electronic key is
within about 0.7 m (2.3 ft.) of an
outside door handle. (Only the
doors detecting the key can be
operated.)
When opening the trunk
The system can be operated
when the electronic key is
within about 0.7 m (2.3 ft.) of
the trunk release button.
When starting the engine or
changing engine switch
modes
The system can be operated
when the electronic key is inside
the vehicle.
When the door cannot be locked by the lock sensor on the upper part of the
door handle
If the door will not lock even when the
topside sensor area is touched, try touch-
ing both the topside and underside sensor
areas at the same time.
Page 131 of 914

1283-2. Opening, closing and locking the doors and trunk
GS350/250_EE (OM30C36E)
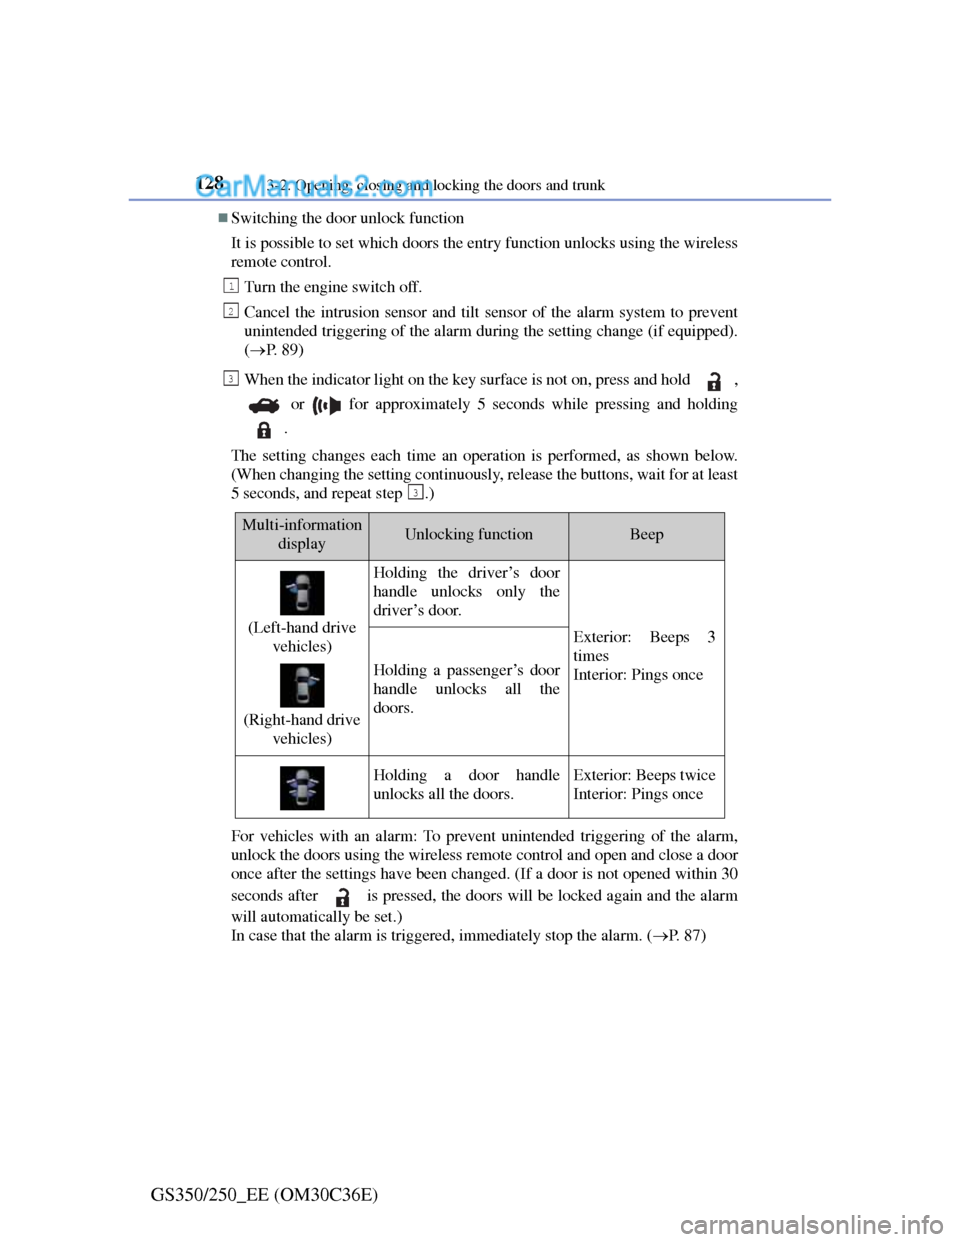
Switching the door unlock function
It is possible to set which doors the entry function unlocks using the wireless
remote control.
Turn the engine switch off.
Cancel the intrusion sensor and tilt sensor of the alarm system to prevent
unintended triggering of the alarm during the setting change (if equipped).
(P. 8 9 )
When the indicator light on the key surface is not on, press and hold ,
or for approximately 5 seconds while pressing and holding
.
The setting changes each time an operation is performed, as shown below.
(When changing the setting continuously, release the buttons, wait for at least
5 seconds, and repeat step .)
For vehicles with an alarm: To prevent unintended triggering of the alarm,
unlock the doors using the wireless remote control and open and close a door
once after the settings have been changed. (If a door is not opened within 30
seconds after is pressed, the doors will be locked again and the alarm
will automatically be set.)
In case that the alarm is triggered, immediately stop the alarm. (P. 8 7 )
1
2
3
3
Multi-information
displayUnlocking functionBeep
(Left-hand drive
vehicles)
(Right-hand drive
vehicles)
Holding the driver’s door
handle unlocks only the
driver’s door.
Exterior: Beeps 3
times
Interior: Pings once
Holding a passenger’s door
handle unlocks all the
doors.
Holding a door handle
unlocks all the doors.Exterior: Beeps twice
Interior: Pings once
Page 135 of 914

1323-2. Opening, closing and locking the doors and trunk
GS350/250_EE (OM30C36E)
Note for locking the doors
Touching the door lock sensor while wearing gloves may delay or prevent
lock operation. Remove the gloves and touch the lock sensor again.
If the door handle becomes wet while the electronic key is within the effec-
tive range, the door may lock and unlock repeatedly. In that case, follow the
following correction procedures to wash the vehicle:
• Place the electronic key in a location 2 m (6 ft.) or more away from the
vehicle. (Take care to ensure that the key is not stolen.)
• Set the electronic key to battery-saving mode to disable the smart entry
& start system. (P. 129)
If the electronic key is inside the vehicle and a door handle becomes wet
during a car wash, a message may be shown on the multi-information dis-
play and a buzzer will sound outside the vehicle. To turn off the alarm, lock
all the doors.
The lock sensor may not work properly if it comes into contact with ice,
snow, mud, etc. Clean the lock sensor and attempt to operate it again, or use
the lock sensor on the lower part of the door handle.
Fingernails may scrape against the door during operation of the door han-
dle. Be careful not to injure fingernails or damage the surface of the door.
Note for the unlocking function
A sudden approach to the effective range or door handle may prevent the
doors from being unlocked. In this case, return the door handle to the origi-
nal position and check that the doors unlock before pulling the door handle
again.
Gripping the door handle when wearing a glove may not unlock the door.
If the door handle becomes wet while the electronic key is within the effec-
tive range, the door may lock and unlock repeatedly. In that case, follow the
following correction procedures to wash the vehicle:
• Place the electronic key in a location 2 m (6 ft.) or more away from the
vehicle. (Take care to ensure that the key is not stolen.)
• Set the electronic key to battery-saving mode to disable the smart entry
& start system. (P. 129)
If there is another electronic key in the detection area, it may take slightly
longer to unlock the doors after the door handle is gripped.
Fingernails may scrape against the door during operation of the door han-
dle. Be careful not to injure fingernails or damage the surface of the door.
Page 176 of 914

1723-4. Adjusting the steering wheel and mirrors
GS350/250_EE (OM30C36E)
Auto anti-glare inside rear view mirror
Responding to the level of brightness of the headlights of vehicles
behind, the reflected light is automatically reduced.
Changing automatic anti-glare
function mode
ON/OFF
When the automatic anti-glare
function is in ON mode, the indi-
cator illuminates.
The function will set to ON mode
each time the engine switch is
turned to IGNITION ON mode.
Pressing the button turns the func-
tion to OFF mode. (The indicator
also turns off.)
To prevent sensor error (vehicles with auto anti-glare inside rear view mirror)
Indicator
To ensure that the sensors operate prop-
erly, do not touch or cover them.