phone Lexus GS350 2007 Using the front audio system / LEXUS 2007 GS430/350 (OM30A04U) Owner's Guide
[x] Cancel search | Manufacturer: LEXUS, Model Year: 2007, Model line: GS350, Model: Lexus GS350 2007Pages: 562, PDF Size: 17.95 MB
Page 306 of 562

286
3-4. Using the hands-free system
Setting the volume
Press .
To u c h on the “Information” screen.
To u c h on the “Telephone” screen.
To u c h on the “Settings” screen.
To u c h or to lower or raise
the volume.
Voice Volume: Change the
speaker volume
Ring Volume: Change the ring vol -
ume
STEP1
STEP2
STEP3
STEP4
STEP5
■Adaptive Volume Control
When traveling at 50 mph (80 km/h) or over, the system automatically raises the
vo
lume one level.
If the vehicle’s speed drops to 43 mph (70 km/h), the volume will return to its origi -
nal level.
You can turn this function ON/OFF by touching .
■To return to the default volume settings
To u c h , then .
Page 308 of 562

288
3-4. Using the hands-free system
■“Incoming Call Display” settings
Press .
To u c h on the “Information” screen.
To u c h on the “Telephone” screen.
To u c h on the “Settings” screen.
Select the desired switch.
: The hands-free screen is displayed when a call is received, and you can operate the system from that
scr
een.
: A message is displayed at the top of the scr
een, and
you can only operate the s
ystem with the steering
switches.
■ “
Auto Answer” settings
Press .
To u c h on the “Information” screen.
To u c h on the “Telephone” screen.
To u c h on the “Settings” screen.
To u c h in the “Auto Answer” section of the “Screen Set -
tings” screen.
Set the wait time using and . (1 - 60 seconds)
STEP1
STEP2
STEP3
STEP4
STEP5
STEP1
STEP2
STEP3
STEP4
STEP5
STEP6
Page 309 of 562

289
3-4. Using the hands-free system
3
Interior features
■“Show Bluetooth* connection status at startup” settings
Press .
To u c h on the “Information” screen.
To u c h on the “Telephone” screen.
To u c h on the “Settings” screen.
To u c h / in the “Show Bluetooth* connection
status at startup” section of the “Screen Settings” screen.
*: Bluetooth is a registered trademark of Bluetooth SIG. Inc.
■To set the screen settings to default
To u c h , then .
STEP1
STEP2
STEP3
STEP4
STEP5
Page 310 of 562

290
3-4. Using the hands-free system
Phone book settings
Up to 1000 names, 2 items per name, can be registered.
■T
ransferring mobile phone data
Press .
To u c h on the “Information” screen.
To u c h on the “Telephone” screen.
To u c h on the “Settings” screen.
To u c h .
Select the group to transfer to.
STEP1
STEP2
STEP3
STEP4
STEP5
STEP6
Page 311 of 562
291
3-4. Using the hands-free system
3
Interior features
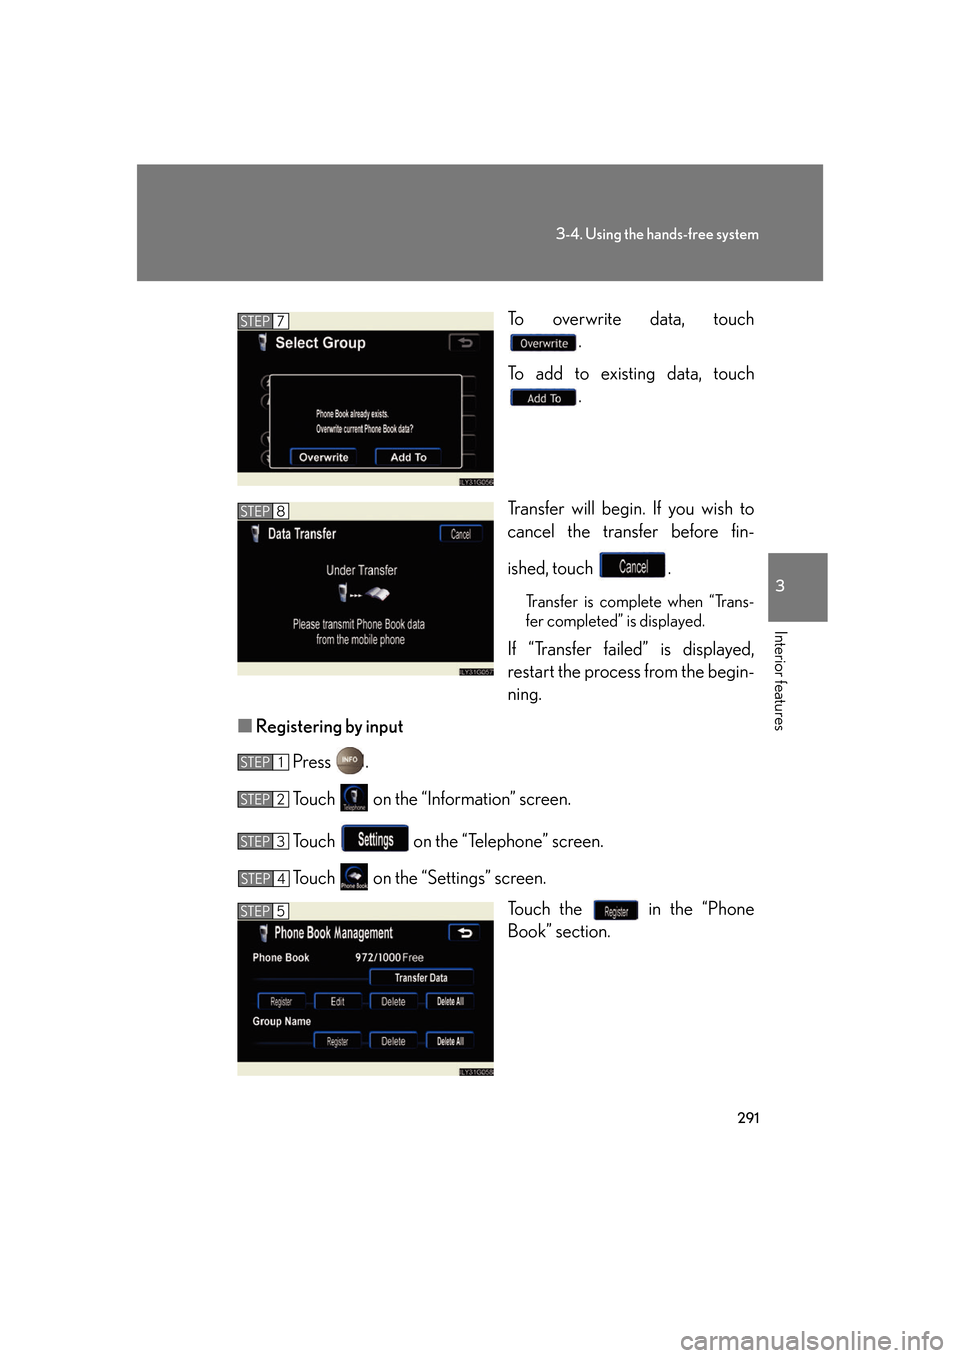
To overwrite data, touch .
To add to existing data, touch .
Transfer will begin. If you wish to
cancel the tr
ansfer before fin -
ished, touch .
Transfer is complete when “Trans -
fer completed” is displayed.
If “Transfer failed” is displayed,
restart the process from the begin -
ning.
■ R
egistering by input
Press .
To u c h on the “Information” screen.
To u c h on the “Telephone” screen.
To u c h on the “Settings” screen.
Touch the in the “Phone
Book” section.
STEP7
STEP8
STEP1
STEP2
STEP3
STEP4
STEP5
Page 312 of 562
292
3-4. Using the hands-free system
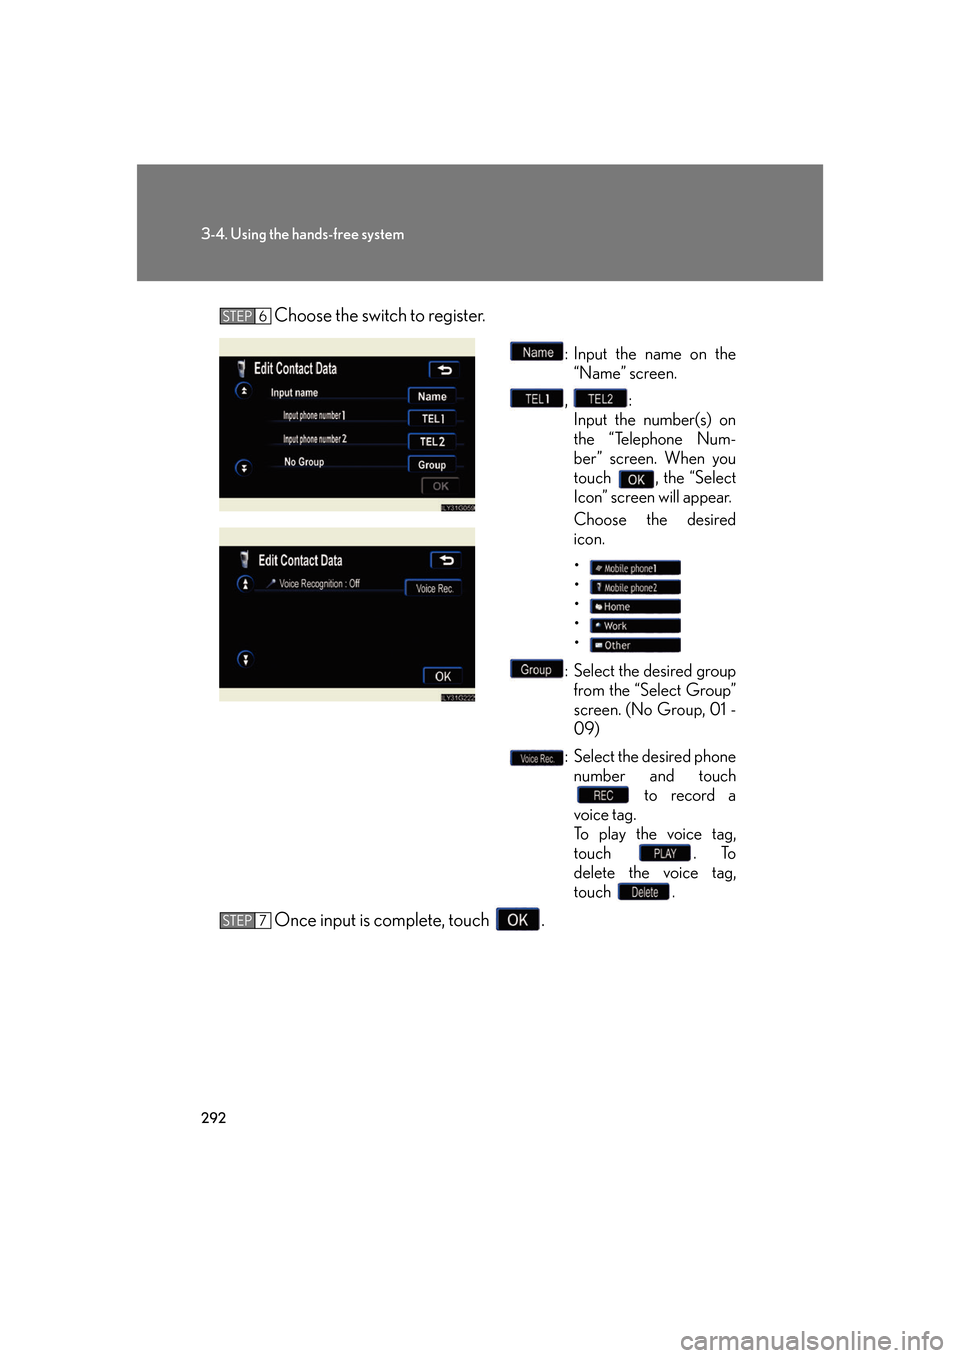
Choose the switch to register.
: Input the name on the “Name” screen.
, :
Input the number(s) on
the “
Telephone Num -
ber” screen. When you
tou
ch , the “Select
Icon” screen will appear.
Choose the desired
ic
on.
•
•
•
•
•
: Select the desired group from the “Select Group”
scr
een. (No Group, 01 -
09)
: Select the desired phone number and touch to record a
voice tag.
To play the voice tag,
tou
ch . To
delete the voice tag,
tou
ch .
Once input is complete, touch .
STEP6
STEP7
Page 313 of 562
293
3-4. Using the hands-free system
3
Interior features
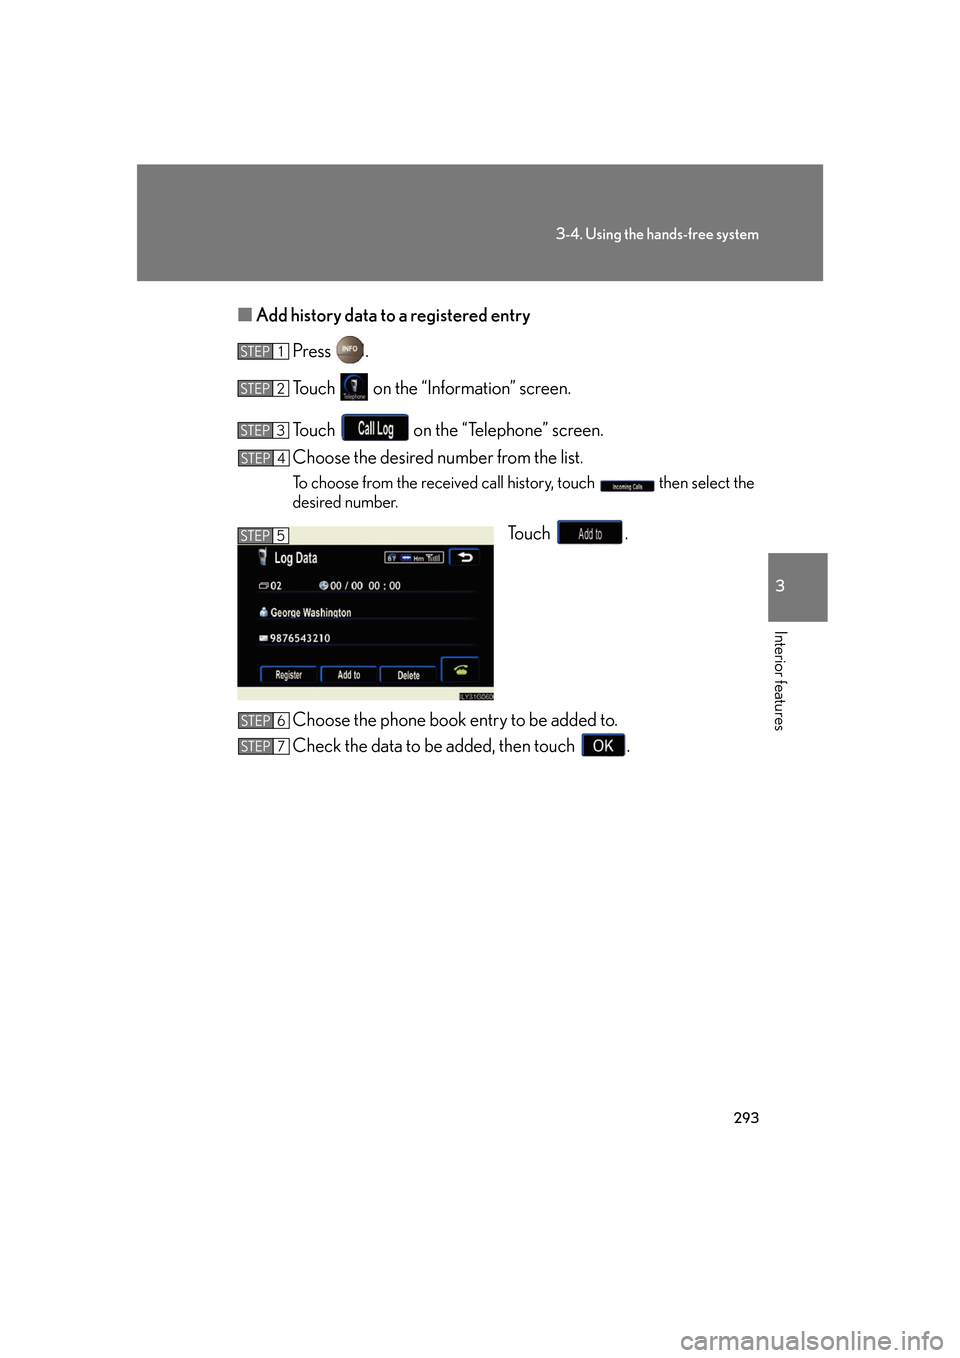
■Add history data to a registered entry
Press .
To u c h on the “Information” screen.
To u c h on the “Telephone” screen.
Choose the desired number from the list.
To choose from the received call history, touch then select the
desired number.
To u c h .
Choose the phone book entry to be added to.
Check the data to be added, then touch .
STEP1
STEP2
STEP3
STEP4
STEP5
STEP6
STEP7
Page 314 of 562
294
3-4. Using the hands-free system
■Editing phone book data
Press .
To u c h on the “Information” screen.
To u c h on the “Telephone” screen.
To u c h on the “Settings” screen.
To u c h in the “Phone Book” section of the “Phone Book
Management” screen.
Choose the data to edit.
Choose the switch to edit.
After editing, press .
■ Deleting phone book data
Press .
To u c h on the “Information” screen.
To u c h on the “Telephone” screen.
To u c h on the “Settings” screen.
To u c h in the “Phone Book” section of the “Phone Book
Management” screen.
Select the data to delete.
A confirmation message wi ll be display
ed. If everything is correct,
touch .
STEP1
STEP2
STEP3
STEP4
STEP5
STEP6
STEP7
STEP8
STEP1
STEP2
STEP3
STEP4
STEP5
STEP6
STEP7
Page 315 of 562
295
3-4. Using the hands-free system
3
Interior features
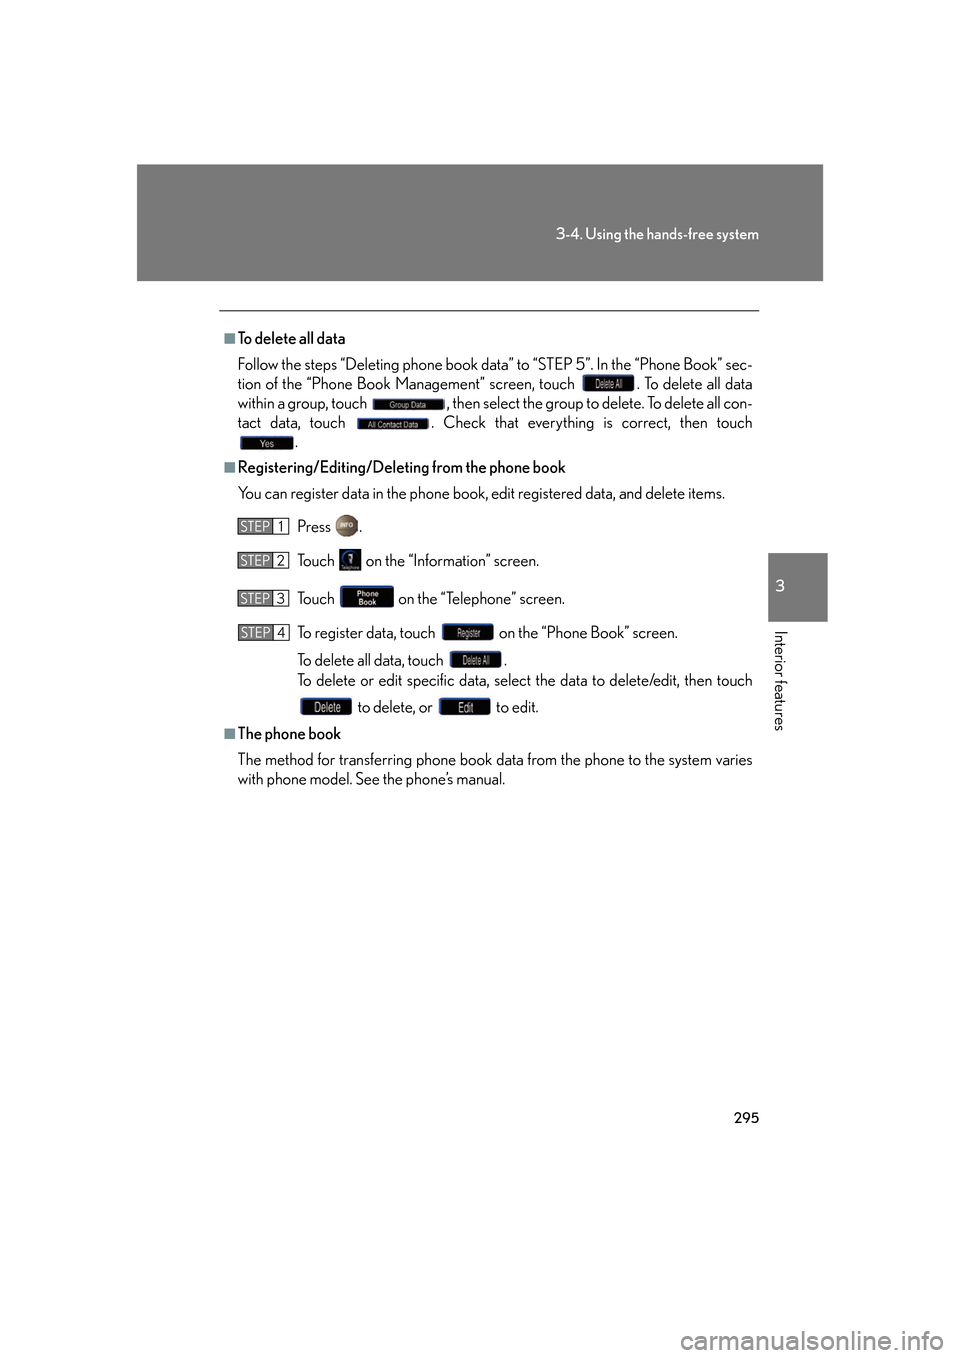
■To delete all data
Follow the steps “Deleting phone book data” to “STEP 5”. In the “Phone Book” sec-
tion of the “Phone Book Management” screen, touch . To delete all data
within a group, touch , then select the group to delete. To delete all con -
tact data, touch . Check that everything is correct, then touch
.
■Registering/Editing/Deleting from the phone book
You can register data in the phone book, ed
it registered data, and delete items.
Press .
To u c h on the “Information” screen.
To u c h on the “Telephone” screen.
To r e g i s t e r d a t a , t o u c h on the “Phone Book” screen.
To delete all data, touch .
To delete or edit specific data, select the data to delete/edit, then touch
to delete, or to edit.
■The phone book
The method for transferring phone book da t
a from the phone to the system varies
with phone model. See the phone’s manual.
STEP1
STEP2
STEP3
STEP4
Page 316 of 562
296
3-4. Using the hands-free system
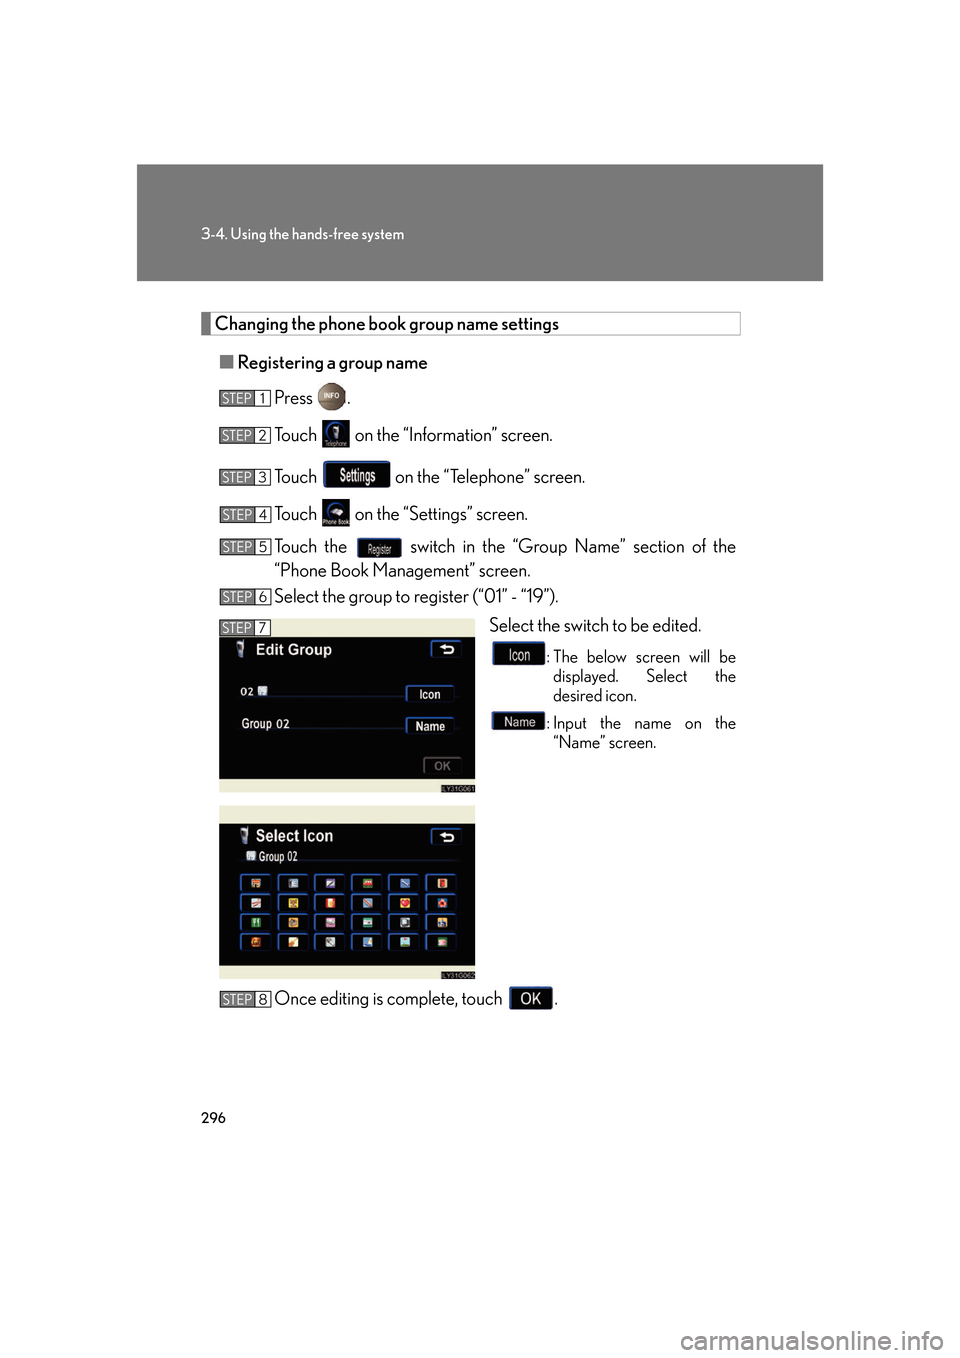
Changing the phone book group name settings
■Registering a group name
Press .
To u c h on the “Information” screen.
To u c h on the “Telephone” screen.
To u c h on the “Settings” screen.
Touch the switch in the “Group Name” section of the
“Phone Book Management” screen.
Select the group to register (“01” - “19”).
Select the switch to be edited.
: The below screen will be displayed. Select the
de
sired icon.
: Input the name on the “Name” screen.
Once editing is complete, touch .
STEP1
STEP2
STEP3
STEP4
STEP5
STEP6
STEP7
STEP8