Lexus GS350 2015 Navigation Manual
Manufacturer: LEXUS, Model Year: 2015, Model line: GS350, Model: Lexus GS350 2015Pages: 383, PDF Size: 46.51 MB
Page 351 of 383
351
1. CONNECTED SERVICES
GS_Navi+MM_OM30F13E_(EE)
15.09.01 14:54
CONNECTED SERVICES
8
6. Panoramio
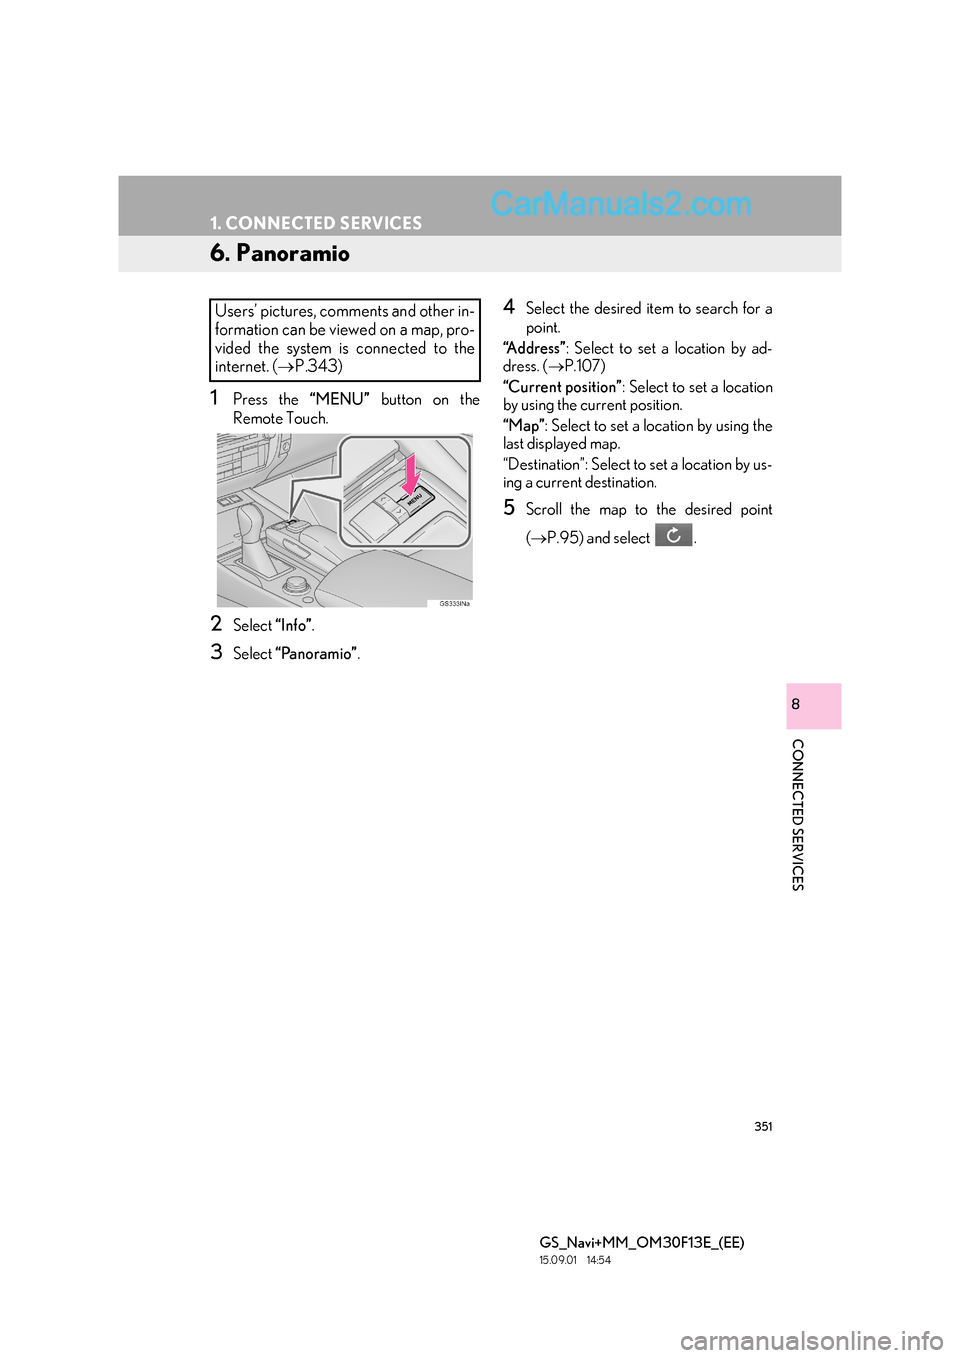
1Press the “MENU” button on the
Remote Touch.
2Select “Info”.
3Select “Panoramio” .
4Select the desired item to search for a
point.
“Address” : Select to set a location by ad-
dress. ( →P.107)
“Current position” : Select to set a location
by using the current position.
“Map” : Select to set a location by using the
last displayed map.
“Destination”: Select to set a location by us-
ing a current destination.
5Scroll the map to the desired point
( → P.95) and select .
Users’ pictures, comments and other in-
formation can be viewed on a map, pro-
vided the system is connected to the
internet. ( →P.343)
Page 352 of 383
352
1. CONNECTED SERVICES
GS_Navi+MM_OM30F13E_(EE)
15.09.01 14:54
6Check that the thumbnails screen is dis-
played.: Select to display the selected picture’s
title bar.
“Info” : Select to display the selected picture
in full screen.
: Select to magnify or reduce
the map scale.
: Select to display the previous 6 pic-
tures.
: Select to update the thumbnails
screen. Up to 6 pictures are displayed.
: Select to download up to another 6
pictures when there are more than 6 pic-
tures available.■ VIEWING A FULL SCREEN PIC-
TURE
1Select “Info” on the title bar.
2Check that a full screen view of the pic-
ture is displayed.
“Detail” : Select to view user comments.
“Enter ” : Select to set as a destination.
( → P.115) If a destination has already been
set, “Add to ” and “Replace ” will be dis-
played.
�z “Add to ” : Select to add a destination.
�z “Replace ” : Select to delete the existing
destination(s) and set a new one.
INFORMATION
●
This function is not available while driving.
Page 353 of 383
353
1. CONNECTED SERVICES
GS_Navi+MM_OM30F13E_(EE)
15.09.01 14:54
CONNECTED SERVICES
8
7. WEATHER
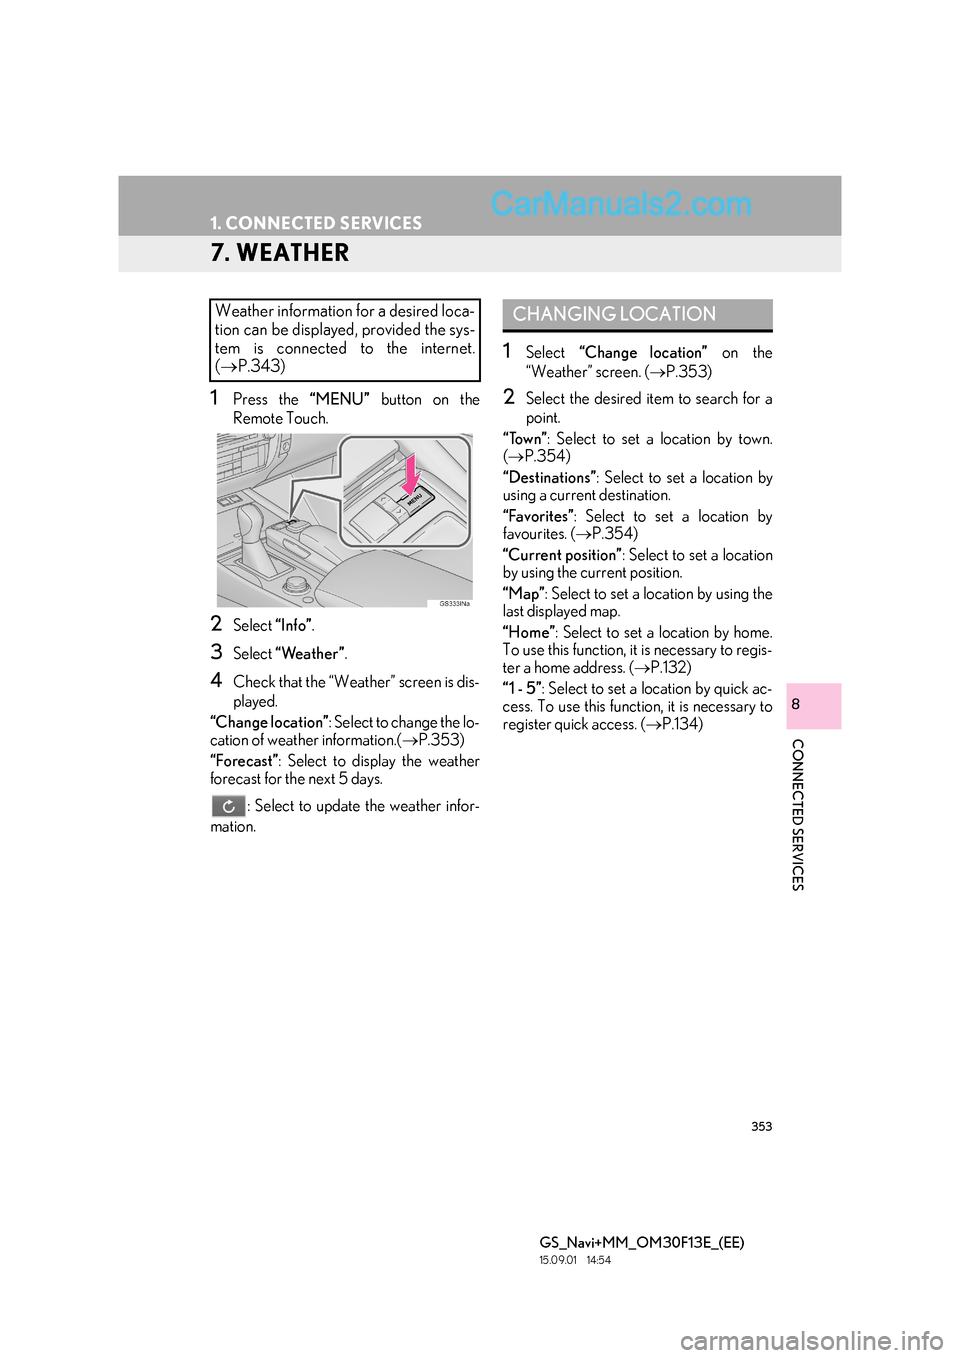
1Press the “MENU” button on the
Remote Touch.
2Select “Info”.
3Select “Weather” .
4Check that the “Weather” screen is dis-
played.
“Change location” : Select to change the lo-
cation of weather information.( →P.353)
“Forecast” : Select to display the weather
forecast for the next 5 days.
: Select to update the weather infor-
mation.
1Select “Change location” on the
“Weather” screen. ( →P.353)
2Select the desired item to search for a
point.
“Town” : Select to set a location by town.
( → P.354)
“Destinations” : Select to set a location by
using a current destination.
“Favorites” : Select to set a location by
favourites. ( →P.354)
“Current position” : Select to set a location
by using the current position.
“Map” : Select to set a location by using the
last displayed map.
“Home” : Select to set a location by home.
To use this function, it is necessary to regis-
ter a home address. ( →P.132)
“1 - 5” : Select to set a location by quick ac-
cess. To use this function, it is necessary to
register quick access. ( →P.134)
Weather information for a desired loca-
tion can be displayed, provided the sys-
tem is connected to the internet.
(→ P.343)CHANGING LOCATION
Page 354 of 383
354
1. CONNECTED SERVICES
GS_Navi+MM_OM30F13E_(EE)
15.09.01 14:54
1Select “Town” .
2Select the desired item.
“Country” : Select to enter the country
name.
“Town” : Select to enter the town name.
“History” : Select to set a previously set
town.
1Select “Favorites” .
2Select the desired location.
“(Add new)” : Select to register a new loca-
tion.( →P.354)
“Delete” : Select to delete favourites.
■REGISTERING FAVOURITES
1Select “(Add new)” .
2Select the desired item.
“Country” : Select to enter the country
name.
“Town” : Select to enter the town name.
“History” : Select to set a previously set
town.
SETTING BY TOWN
SETTING BY FAVOURITES
INFORMATION
●
Up to 10 locations can be registered as
favourites.
Page 355 of 383
355
1. CONNECTED SERVICES
GS_Navi+MM_OM30F13E_(EE)
15.09.01 14:54
CONNECTED SERVICES
8
8. FUEL PRICE
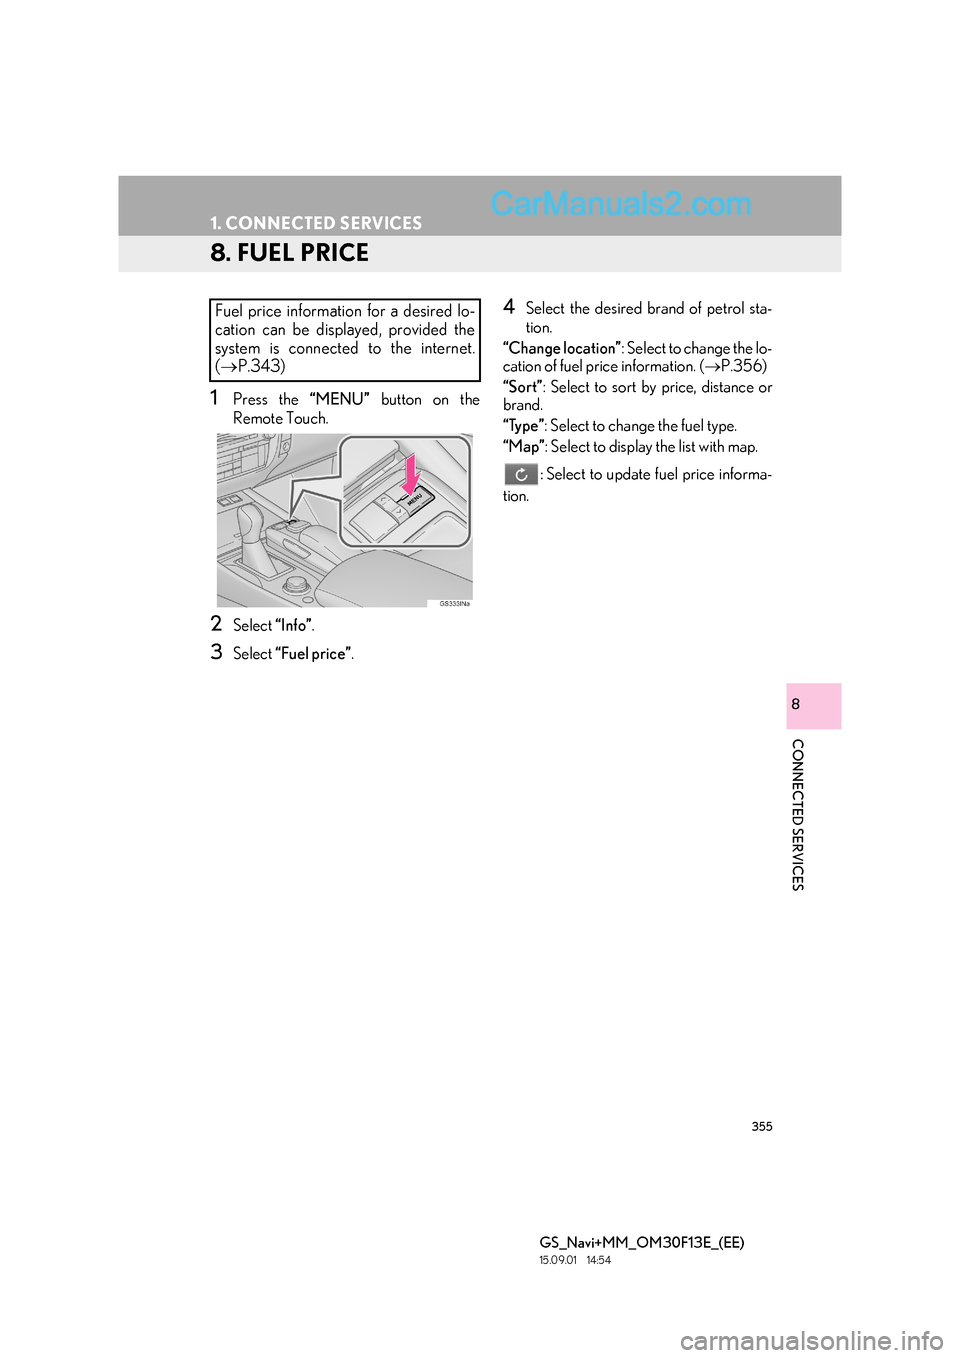
1Press the “MENU” button on the
Remote Touch.
2Select “Info”.
3Select “Fuel price” .
4Select the desired brand of petrol sta-
tion.
“Change location” : Select to change the lo-
cation of fuel price information. ( →P.356)
“Sort” : Select to sort by price, distance or
brand.
“Type” : Select to change the fuel type.
“Map” : Select to display the list with map.
: Select to update fuel price informa-
tion.
Fuel price information for a desired lo-
cation can be displayed, provided the
system is connected to the internet.
( → P.343)
Page 356 of 383
356
1. CONNECTED SERVICES
GS_Navi+MM_OM30F13E_(EE)
15.09.01 14:54
5Check that the fuel price information is
displayed.
“Detail” : Select to display detailed informa-
tion.
“Enter ” : Select to set as a destination.
( → P.115) If a destination has already been
set, “Add to ” and “Replace ” will be dis-
played.
�z “Add to ” : Select to add a destination.
�z “Replace ” : Select to delete the existing
destination(s) and set a new one.
1Select “Change location” on the “Fuel
price” screen. ( →P.355)
2Select the desired item to search for a
point.
“Destinations” : Select to set a location by
using a current destination.
“Previous destinations” : Select to set a lo-
cation by using a previous destination.
“Current position” : Select to set a location
by using the current position.
“Map” : Select to set a location by using the
last displayed map.
“Home” : Select to set a location by home.
To use this function, it is necessary to regis-
ter a home address. ( →P.132)
“1 - 5” : Select to set a location by quick ac-
cess. To use this function, it is necessary to
register quick access. ( →P.134)
CHANGING LOCATION
Page 357 of 383
357
GS_Navi+MM_OM30F13E_(EE)
15.09.01 14:54
CONNECTED SERVICES
8
2. SETUP
1. CONNECTED SERVICE SETTINGS
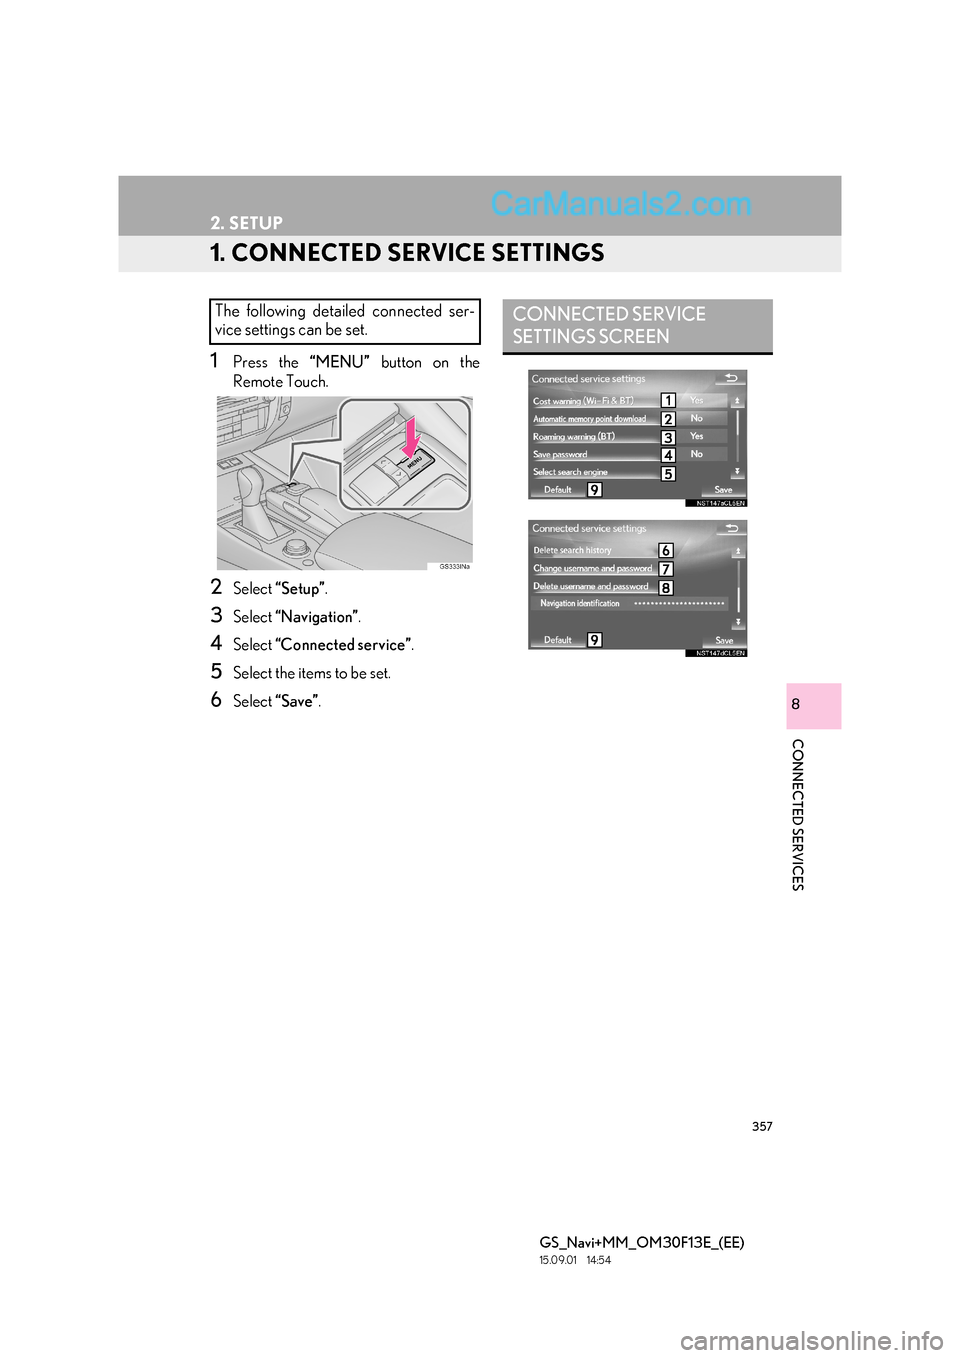
1Press the “MENU” button on the
Remote Touch.
2Select “Setup” .
3Select “Navigation” .
4Select “Connected service” .
5Select the items to be set.
6Select “Save” .
The following detailed connected ser-
vice settings can be set.CONNECTED SERVICE
SETTINGS SCREEN
Page 358 of 383
358
2. SETUP
GS_Navi+MM_OM30F13E_(EE)
15.09.01 14:54
No.Function
When connecting, the cost warn-
ing display can be set on or off by
selecting “Yes” or “No” .
When the system is started up,
the automatic downloading of
memory points and routes can be
set on or off by selecting “Yes” or
“No” . For memory points and
routes to be automatically down-
loaded, auto connection needs to
be set to “Yes”.
When connecting in a roaming
area, the display of the roaming
warning can be set on or off by
selecting “Yes” or “No” .
When connecting to Lexus portal
site, the required portal user
name and password can be re-
membered by selecting “Yes” or
“No” . When “Yes” is selected, the
user name and password does
not need to be entered when ac-
cessing Lexus portal site.
The desired search engine can
be selected. ( →P.359)
Online search history can be de-
leted. ( →P.359)
When a different user uses the
system, the user name and pass-
word can be changed.
(→ P.359)
Your Lexus portal site user name
and password can be deleted
from the system. ( →P.359)
Select to reset all setup items.
No.Function
Page 359 of 383
359
2. SETUP
GS_Navi+MM_OM30F13E_(EE)
15.09.01 14:54
CONNECTED SERVICES
8
1Display the “Connected service set-
tings” screen. (→P.357)
2Select “Select search engine” .
3Select the desired search engine.
�zThe selected search engine indicator will
illuminate.
1Display the “Connected service set-
tings” screen. ( →P.357)
2Select “Delete search history” .
3Select “Yes” when the confirmation
screen appears.
1Display the “Connected service set-
tings” screen. ( →P.357)
2Select “Change username and pass-
word” .
3Enter the desired user name and select
“OK”.
4Enter the desired password and select
“OK”.
�zIn order for the new user name and pass-
word to be applied to the system, the sys-
tem needs to connect to Lexus portal site.
1Display the “Connected service set-
tings” screen. ( →P.357)
2Select “Delete username and pass-
word” .
3Select “Yes” when the confirmation
screen appears.
SELECTING A SEARCH
ENGINE
The desired search engine can be set.
Before using a new search engine, the
terms of use must be read and agreed to
on Lexus portal site. Depending on the
conditions, certain search engines can-
not be selected.
DELETING SEARCH HISTORY
CHANGING USER NAME
AND PASSWORD
DELETING USER NAME AND
PASSWORD
Page 360 of 383

360
2. SETUP
GS_Navi+MM_OM30F13E_(EE)
15.09.01 14:54