navigation Lexus GS350 2017 Navigation Manual
[x] Cancel search | Manufacturer: LEXUS, Model Year: 2017, Model line: GS350, Model: Lexus GS350 2017Pages: 379, PDF Size: 7.77 MB
Page 23 of 379
2. QUICK REFERENCE
21
GS_Navi+MM_OM30F99U_(U)16.07.11 14:00
QUICK GUIDE
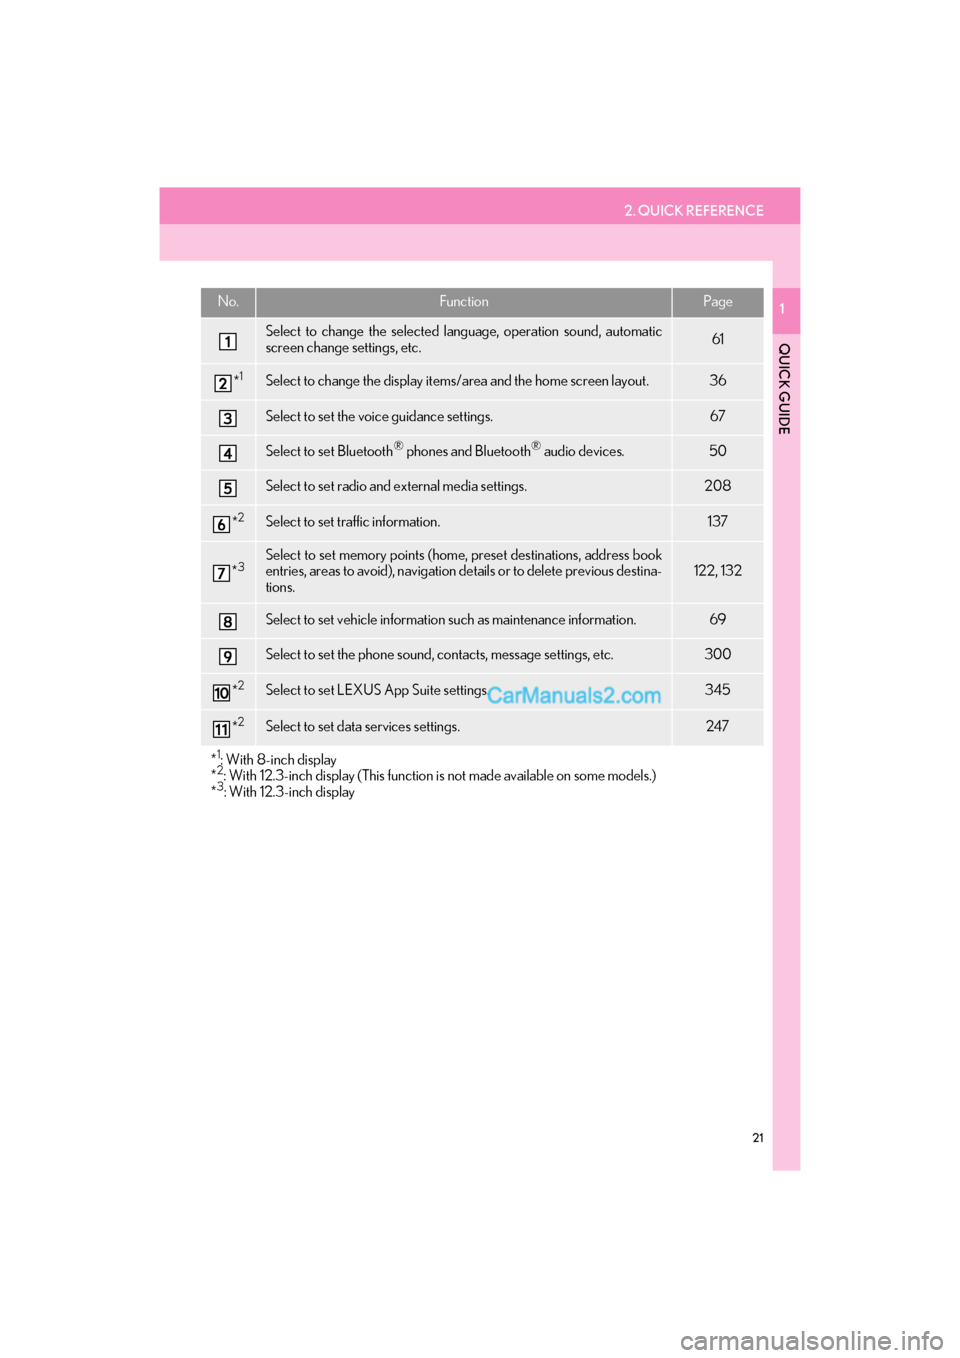
1No.FunctionPage
Select to change the selected language, operation sound, automatic
screen change settings, etc.61
*1Select to change the display items/area and the home screen layout.36
Select to set the voice guidance settings.67
Select to set Bluetooth® phones and Bluetooth® audio devices.50
Select to set radio and external media settings.208
*2Select to set traffic information.137
*3Select to set memory points (home, preset destinations, address book
entries, areas to avoid), navigation details or to delete previous destina-
tions.122, 132
Select to set vehicle information such as maintenance information.69
Select to set the phone sound, contacts, message settings, etc.300
*2Select to set LEXUS App Suite settings.345
*2Select to set data services settings.247
*
1: With 8-inch display
*2: With 12.3-inch display (This function is not made available on some models.)
*3: With 12.3-inch display
Page 26 of 379
24
GS_Navi+MM_OM30F99U_(U)16.07.11 14:00
3. NAVIGATION OPERATION
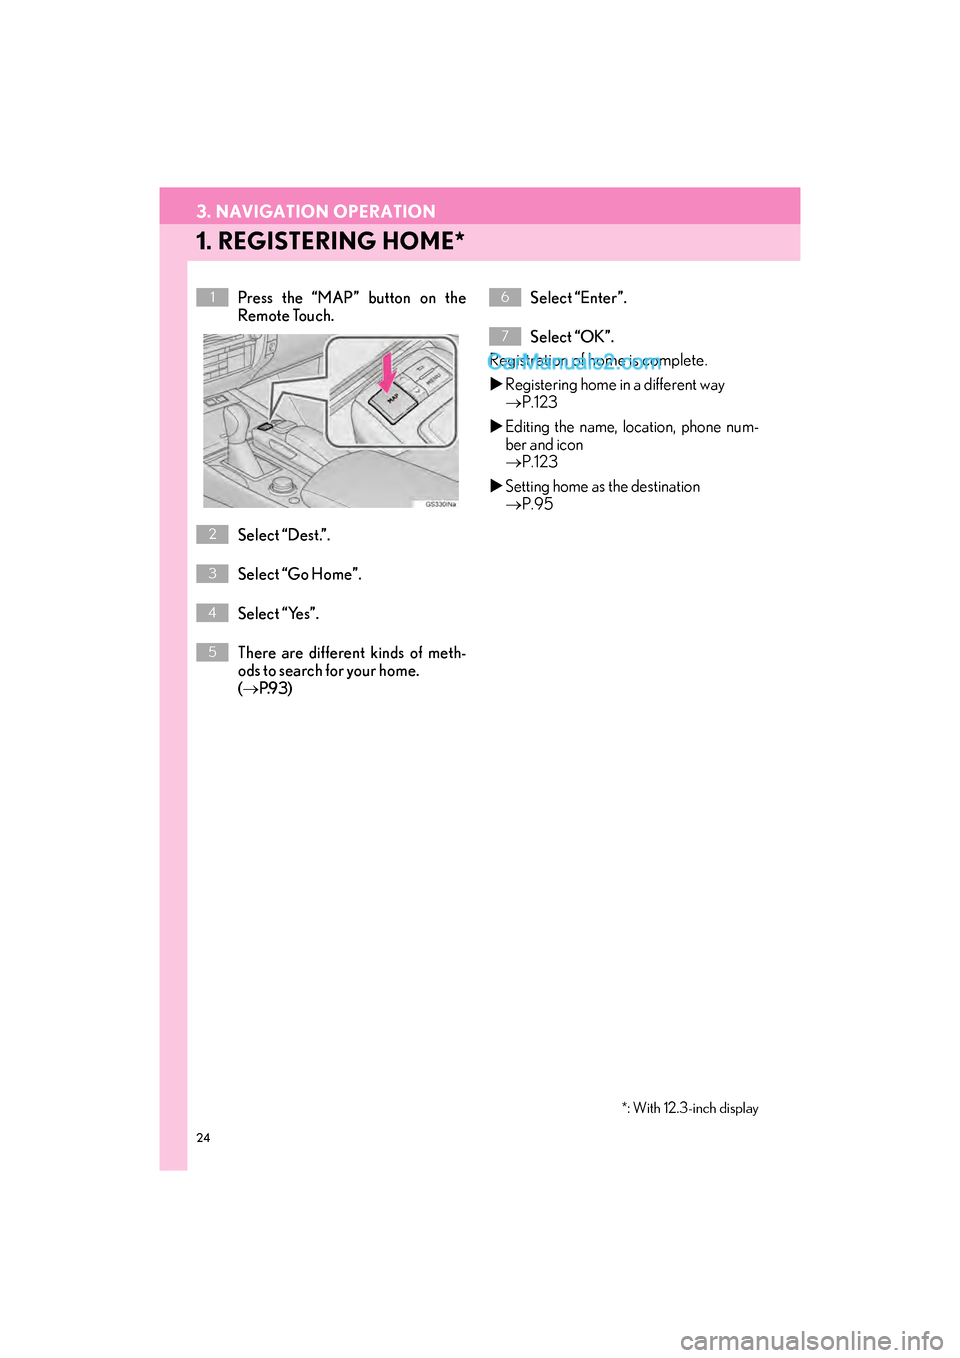
1. REGISTERING HOME*
Press the “MAP” button on the
Remote Touch.
Select “Dest.”.
Select “Go Home”.
Select “Yes”.
There are different kinds of meth-
ods to search for your home.
(→ P.9 3 ) Select “Enter”.
Select “OK”.
Registration of home is complete.
�X
Registering home in a different way
→ P.123
�X Editing the name, location, phone num-
ber and icon
→ P.123
�X Setting home as the destination
→ P.95
1
*: With 12.3-inch display
2
3
4
5
6
7
Page 27 of 379
25
3. NAVIGATION OPERATION
GS_Navi+MM_OM30F99U_(U)16.07.11 14:00
QUICK GUIDE
1
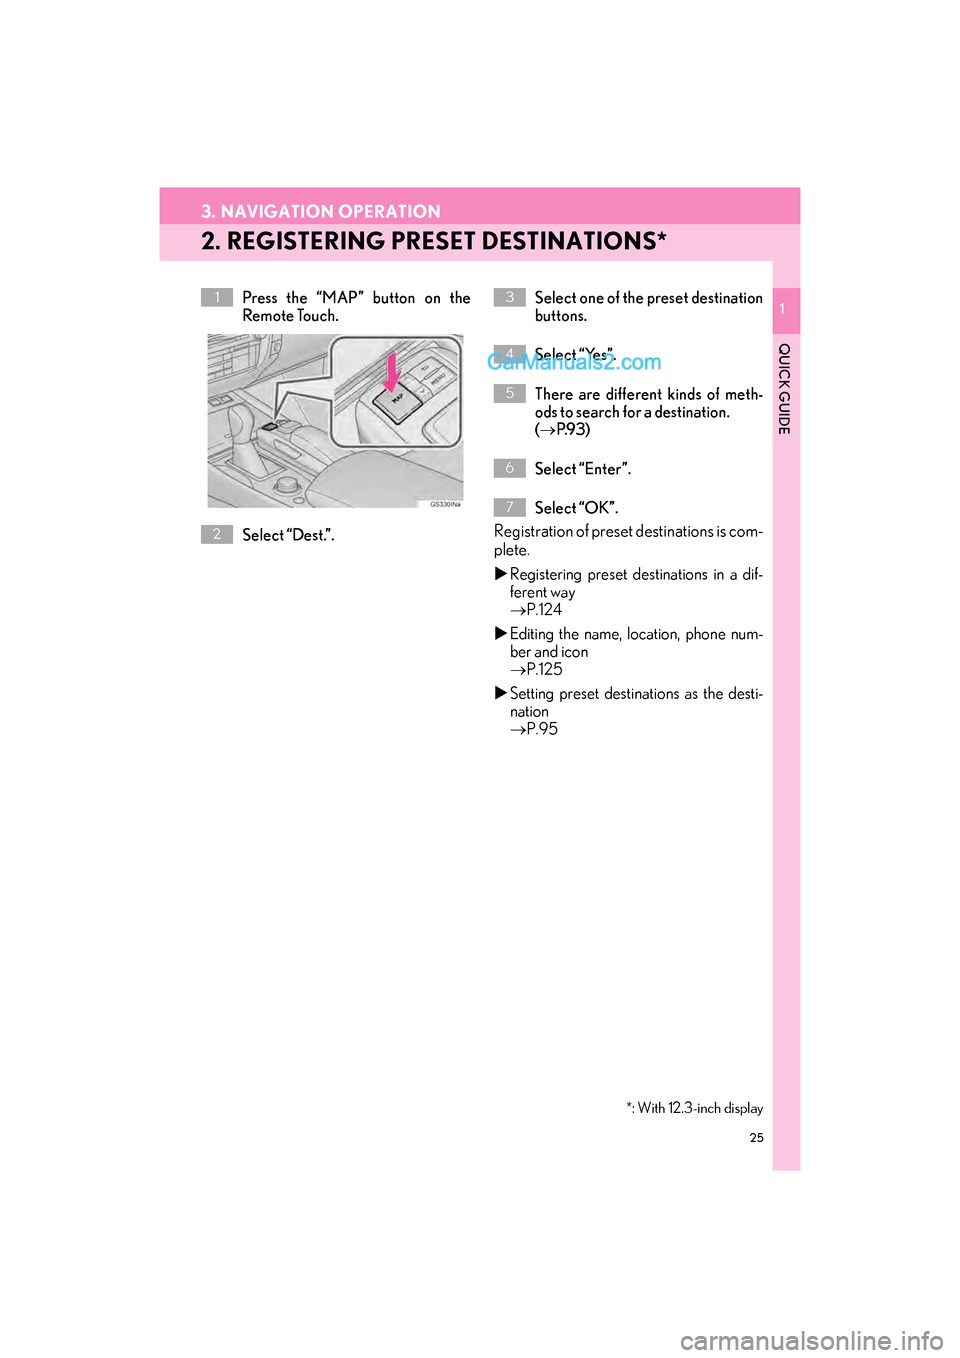
2. REGISTERING PRESET DESTINATIONS*
Press the “MAP” button on the
Remote Touch.
Select “Dest.”. Select one of the preset destination
buttons.
Select “Yes”.
There are different kinds of meth-
ods to search for a destination.
(
→ P.9 3 )
Select “Enter”.
Select “OK”.
Registration of preset destinations is com-
plete.
�X Registering preset destinations in a dif-
ferent way
→ P.124
�X Editing the name, location, phone num-
ber and icon
→ P.125
�X Setting preset destinations as the desti-
nation
→ P.95
1
*: With 12.3-inch display
2
3
4
5
6
7
Page 28 of 379
26
3. NAVIGATION OPERATION
GS_Navi+MM_OM30F99U_(U)16.07.11 14:00
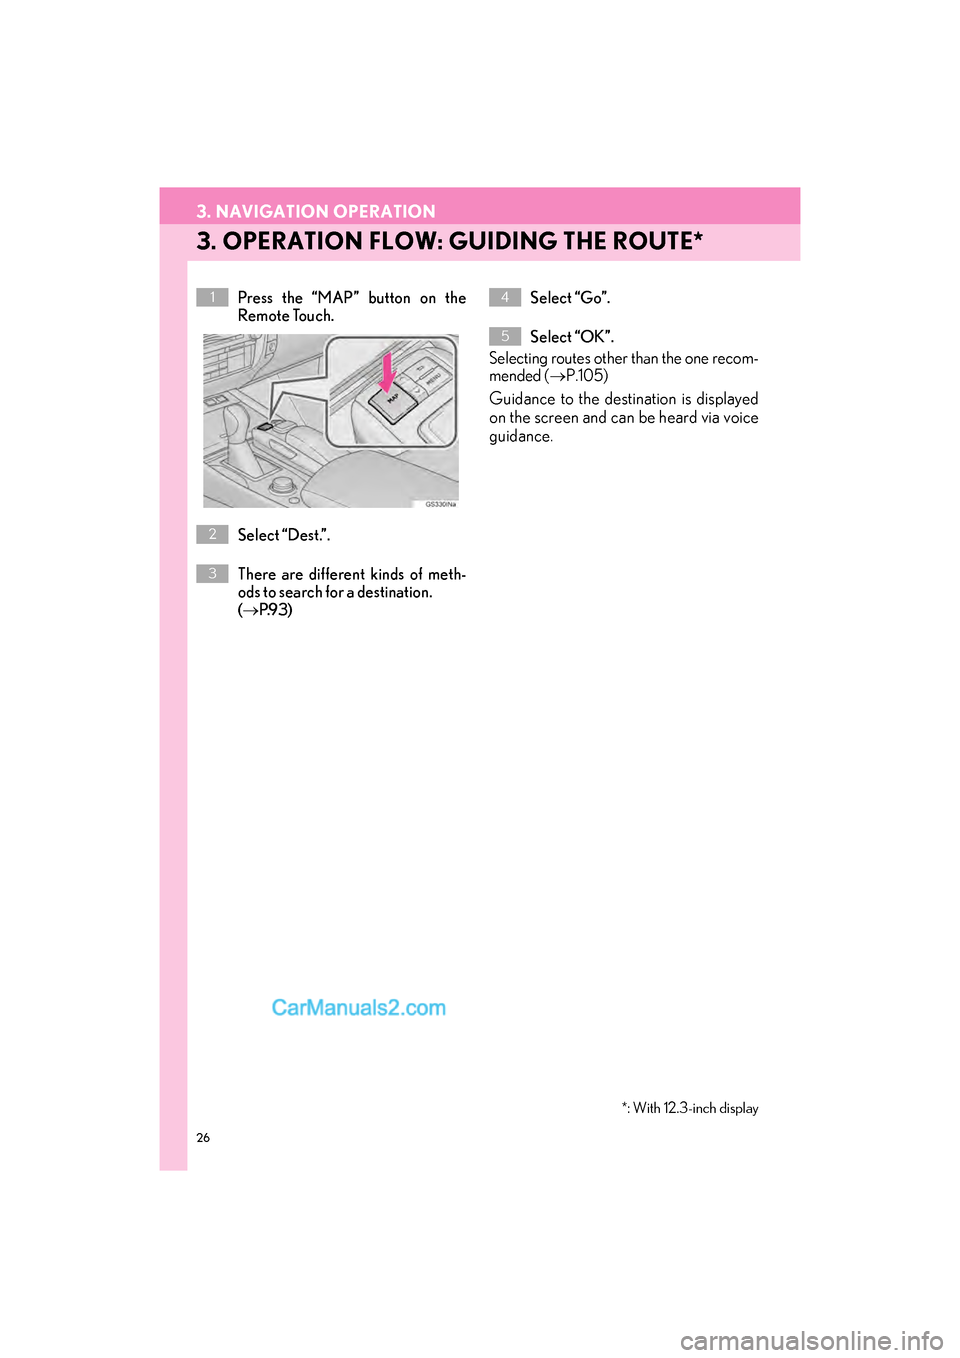
3. OPERATION FLOW: GUIDING THE ROUTE*
Press the “MAP” button on the
Remote Touch.
Select “Dest.”.
There are different kinds of meth-
ods to search for a destination.
(→ P.9 3 ) Select “Go”.
Select “OK”.
Selecting routes other than the one recom-
mended ( →P.105)
Guidance to the destination is displayed
on the screen and can be heard via voice
guidance.
1
*: With 12.3-inch display
2
3
4
5
Page 29 of 379
27
3. NAVIGATION OPERATION
GS_Navi+MM_OM30F99U_(U)16.07.11 14:00
QUICK GUIDE
1
4. SETTING HOME AS THE DESTINATION*
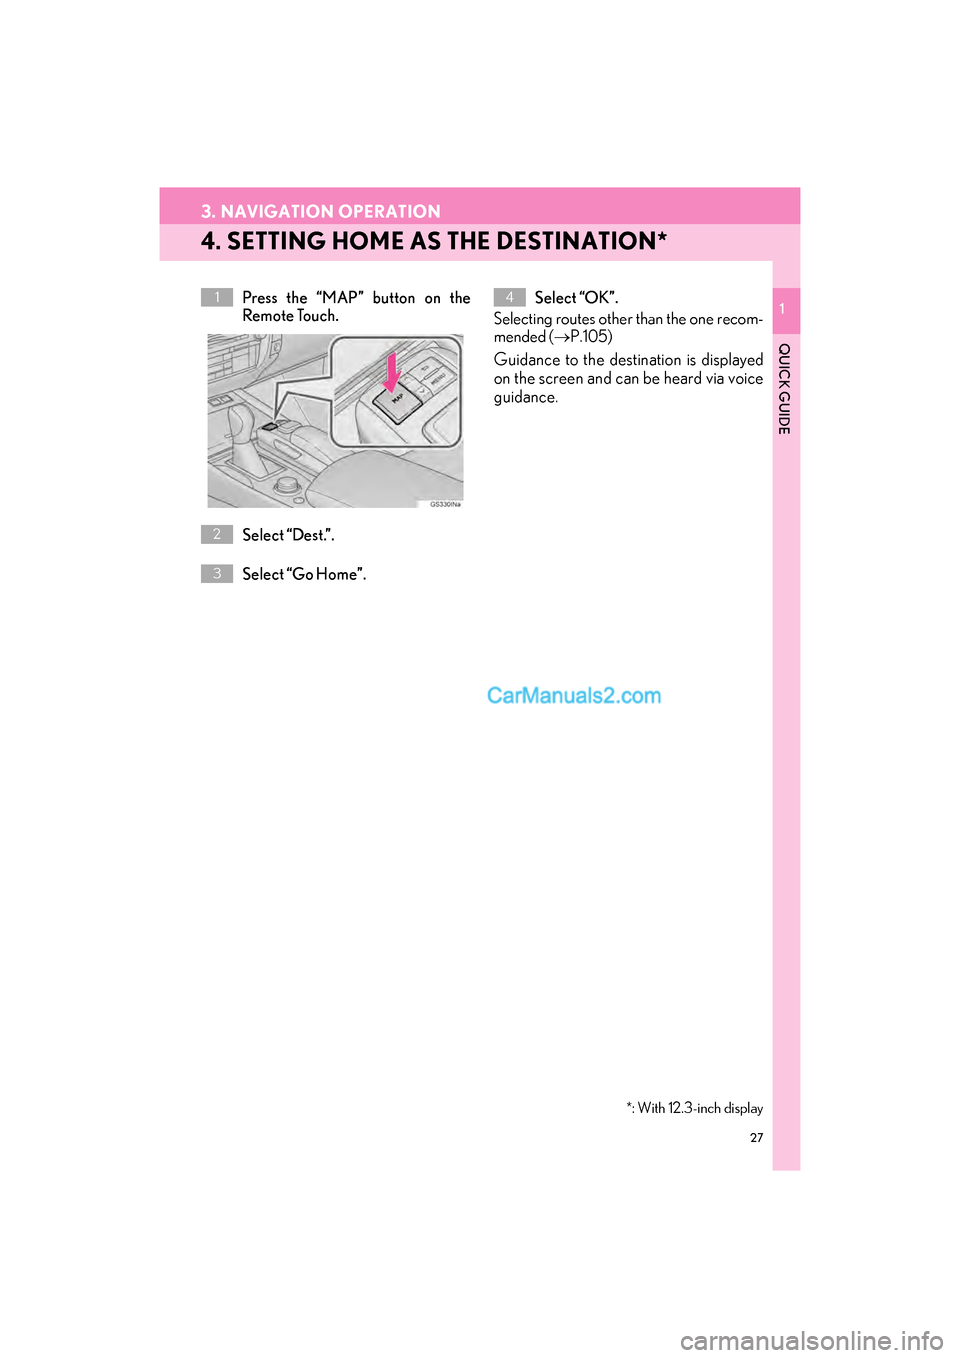
Press the “MAP” button on the
Remote Touch.
Select “Dest.”.
Select “Go Home”.Select “OK”.
Selecting routes other than the one recom-
mended ( →P.105)
Guidance to the destination is displayed
on the screen and can be heard via voice
guidance.
1
*: With 12.3-inch display
2
3
4
Page 33 of 379
2
31
GS_Navi+MM_OM30F99U_(U)16.07.11 14:00
1
2
3 4
5
6
7
8 9
10
1. INITIAL SCREEN ....................................... 32
2. HOW TO USE THE Remote Touch...... 34
3. HOME SCREEN OPERATION ........... 36
4. ENTERING LETTERS AND NUMBERS/LIST SCREEN
OPERATION............................................ 38
ENTERING LETTERS AND NUMBERS ....... 38
LIST SCREEN............................................................... 39
5. SCREEN ADJUSTMENT ......................... 41
6. LINKING MULTI-INFORMATION
DISPLAY AND NAVIGATION
SYSTEM...................................................... 43 1. REGISTERING/CONNECTING
Bluetooth
® DEVICE ............................... 44
REGISTERING A Bluetooth® PHONE
FOR THE FIRST TIME .......................................... 44
REGISTERING A Bluetooth
® AUDIO
PLAYER FOR THE FIRST TIME ...................... 46
PROFILES ..................................................................... 48
2. SETTING Bluetooth® DETAILS ............ 50
“Bluetooth* Setup” SCREEN ................................ 50
REGISTERING A Bluetooth® DEVICE ........... 51
DELETING A Bluetooth® DEVICE.................. 53
CONNECTING A Bluetooth® DEVICE ...... 53
EDITING THE Bluetooth® DEVICE
INFORMATION .................................................... 55
“System Settings” SCREEN .................................... 57
1. GENERAL SETTINGS............................... 61
GENERAL SETTINGS SCREEN ........................ 61
2. VOICE SETTINGS ..................................... 67
VOICE SETTINGS SCREEN ............................... 67
3. VEHICLE SETTINGS ................................ 69
MAINTENANCE ....................................................... 70
1BASIC INFORMATION BEFORE
OPERATION2Bluetooth® SETTINGS
3OTHER SETTINGS
BASIC FUNCTION
*: The Bluetooth® word mark and logos are registered trademarks owned by Bluetooth SIG, Inc.
Page 36 of 379
34
1. BASIC INFORMATION BEFORE OPERATION
GS_Navi+MM_OM30F99U_(U)16.07.11 14:00
2. HOW TO USE THE Remote Touch
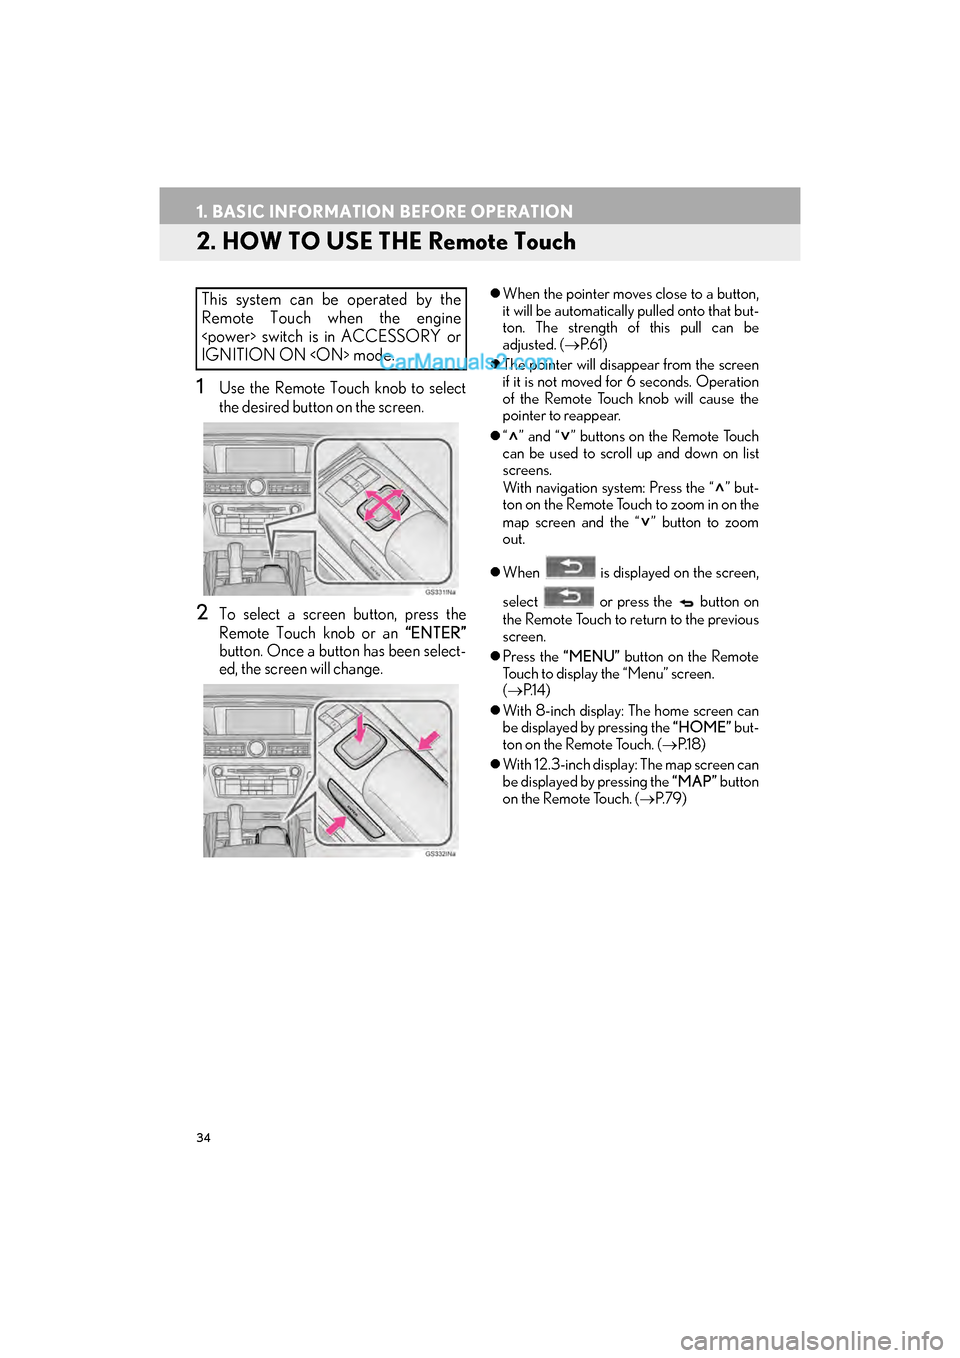
1Use the Remote Touch knob to select
the desired button on the screen.
2To select a screen button, press the
Remote Touch knob or an “ENTER”
button. Once a button has been select-
ed, the screen will change.
�z When the pointer moves close to a button,
it will be automatically pulled onto that but-
ton. The strength of this pull can be
adjusted. ( →P. 6 1 )
�z The pointer will disappear from the screen
if it is not moved for 6 seconds. Operation
of the Remote Touch knob will cause the
pointer to reappear.
�z “ ” and “ ” buttons on the Remote Touch
can be used to scroll up and down on list
screens.
With navigation system: Press the “ ” but-
ton on the Remote Touch to zoom in on the
map screen and the “ ” button to zoom
out.
�z When is displayed on the screen,
select or press the button on
the Remote Touch to return to the previous
screen.
�z Press the “MENU” button on the Remote
Touch to display the “Menu” screen.
( → P.1 4 )
�z With 8-inch display: The home screen can
be displayed by pressing the “HOME” but-
ton on the Remote Touch. ( →P.1 8 )
�z With 12.3-inch display: The map screen can
be displayed by pressing the “MAP” button
on the Remote Touch. ( →P. 7 9 )This system can be operated by the
Remote Touch when the engine
IGNITION ON
Page 41 of 379
39
1. BASIC INFORMATION BEFORE OPERATION
GS_Navi+MM_OM30F99U_(U)16.07.11 14:00
BASIC FUNCTION
2
■SELECTING ALL ITEMS
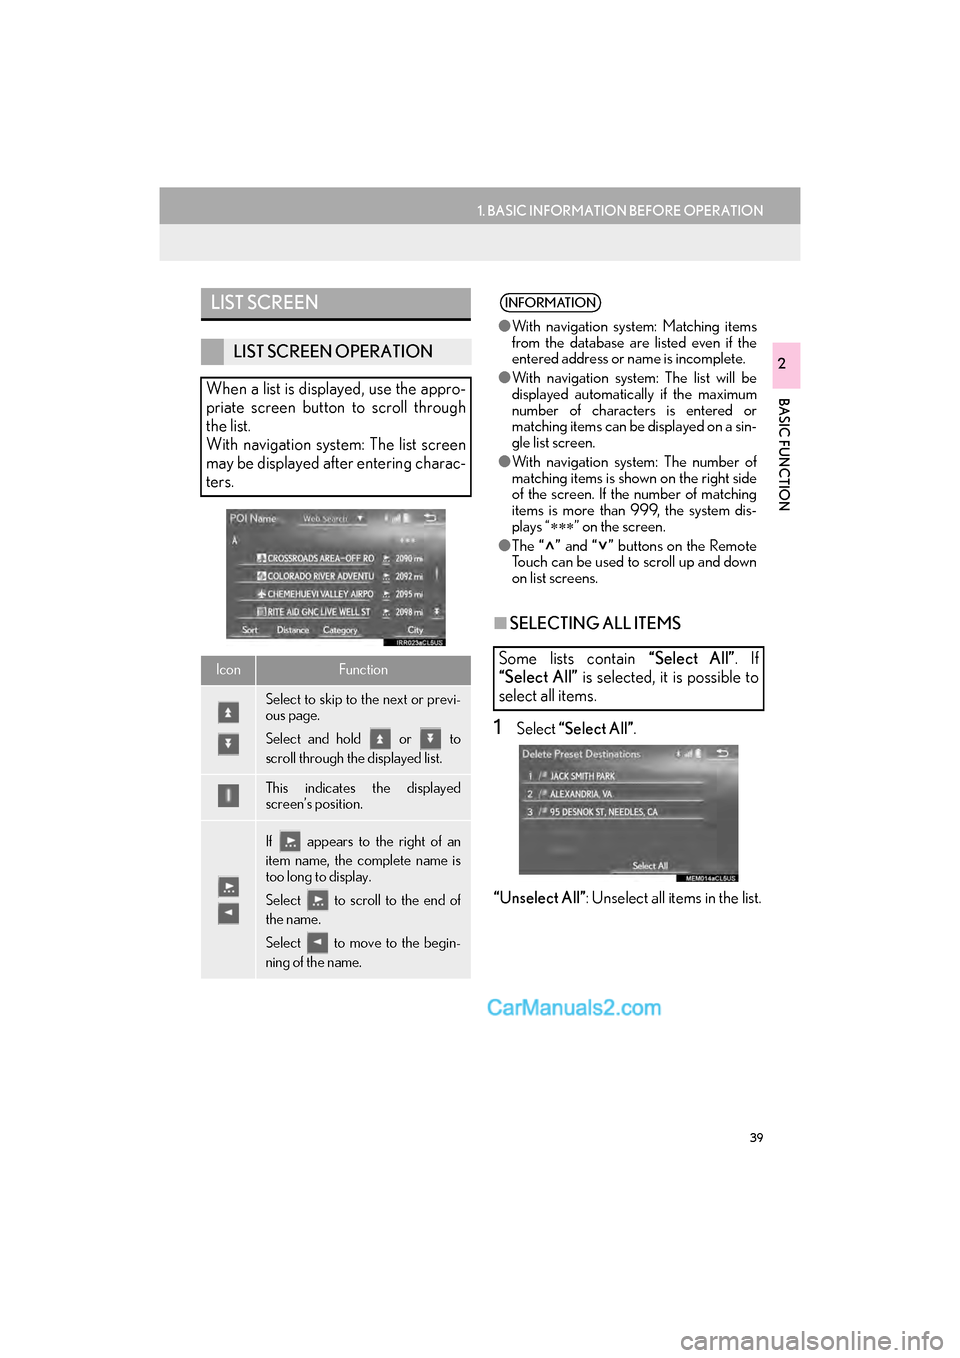
1Select “Select All” .
“Unselect All” : Unselect all items in the list.
LIST SCREEN
LIST SCREEN OPERATION
When a list is displayed, use the appro-
priate screen button to scroll through
the list.
With navigation system: The list screen
may be displayed after entering charac-
ters.
IconFunction
Select to skip to the next or previ-
ous page.
Select and hold or to
scroll through the displayed list.
This indicates the displayed
screen’s position.
If appears to the right of an
item name, the complete name is
too long to display.
Select to scroll to the end of
the name.
Select to move to the begin-
ning of the name.
INFORMATION
● With navigation system: Matching items
from the database are listed even if the
entered address or name is incomplete.
● With navigation system: The list will be
displayed automatically if the maximum
number of characters is entered or
matching items can be displayed on a sin-
gle list screen.
● With navigation system: The number of
matching items is shown on the right side
of the screen. If the number of matching
items is more than 999, the system dis-
plays “ ∗∗∗” on the screen.
● The “” and “” buttons on the Remote
Touch can be used to scroll up and down
on list screens.
Some lists contain “Select All”. If
“Select All” is selected, it is possible to
select all items.
Page 45 of 379
43
1. BASIC INFORMATION BEFORE OPERATION
GS_Navi+MM_OM30F99U_(U)16.07.11 14:00
BASIC FUNCTION
2
6. LINKING MULTI-INFORMATION DISPLAY AND NAVIGATION SYSTEM
The following functions of the navigation system are linked with the multi-information
display in the instrument cluster:• Navigation*
•Audio
etc.
These functions can be operated using multi-information display control switches on
the steering wheel. For details, refer to “Owner’s Manual”.
*: With 12.3-inch display
Page 68 of 379
66
3. OTHER SETTINGS
GS_Navi+MM_OM30F99U_(U)16.07.11 14:00
■DELETING TRANSFERRED IMAG-
ES
1Select “Delete Images”.
2Select the images to be deleted and se-
lect “Delete” .
3Select “Yes” when the confirmation
screen appears.
1Display the “General Settings” screen.
( → P.61)
2Select “Delete Personal Data” .
3Select “Delete” .
4Select “Yes” when the confirmation
screen appears.
�z Registered or changed personal settings
will be deleted or returned to their default
conditions.
For example:
• General settings
• Navigation settings*
• Audio settings
•Phone settings
•Lexus Enform settings*
DELETING PERSONAL DATANOTICE
●With navigation system: Make sure the
map microSD card is inserted when
deleting personal data. The personal data
cannot be deleted when the map
microSD card is removed. To delete the
data, after inserting the map microSD
card, turn the engine
ACCESSORY or IGNITION ON
mode.
*: With 12.3-inch display