display Lexus GS450h 2012 Navigation manual
[x] Cancel search | Manufacturer: LEXUS, Model Year: 2012, Model line: GS450h, Model: Lexus GS450h 2012Pages: 257, PDF Size: 30.79 MB
Page 204 of 257
202
1. CONNECTED SERVICES
GS450h/250 (EE) NAVI 30C48E
13.12.17 15:42
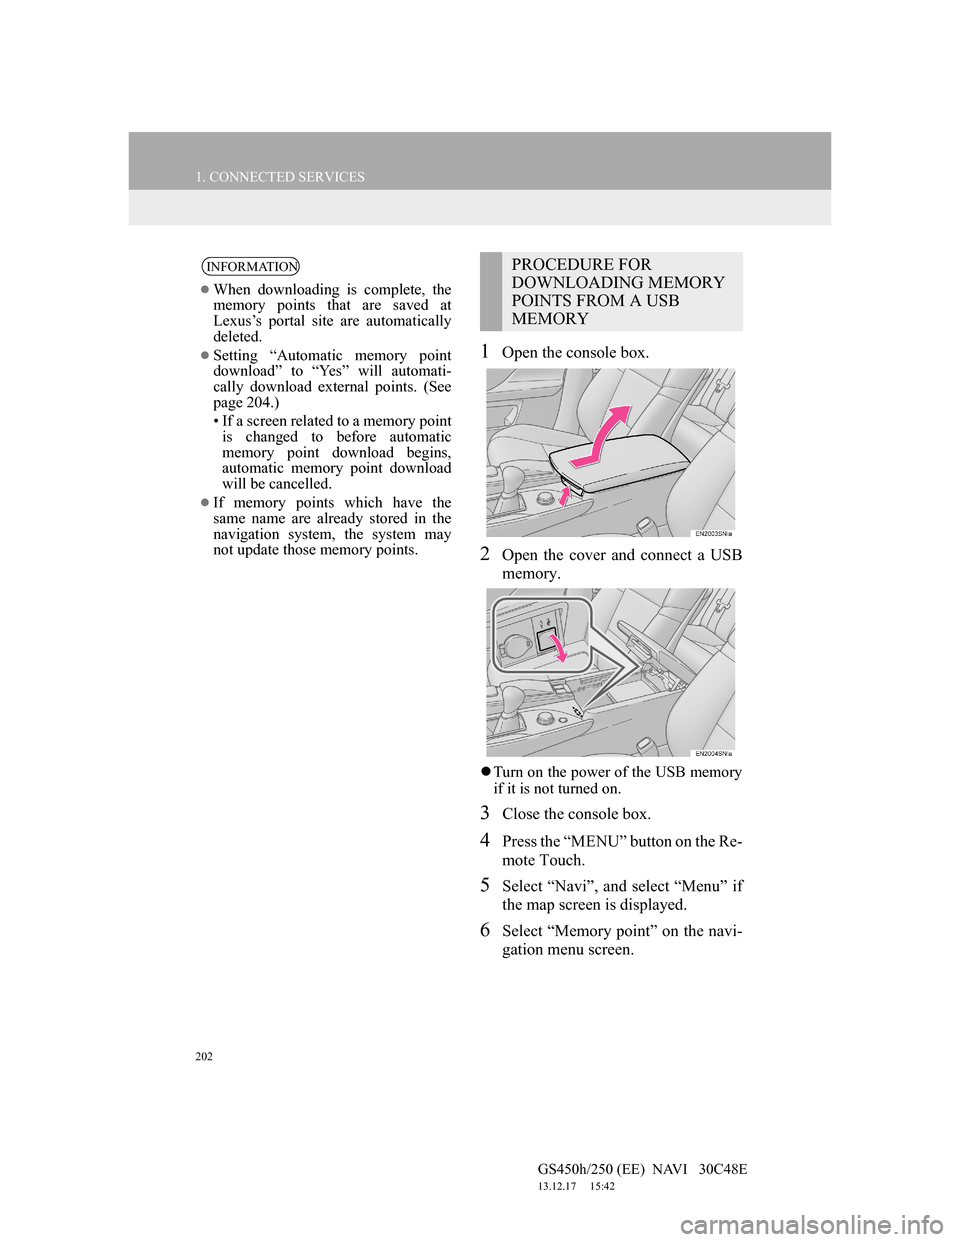
1Open the console box.
2Open the cover and connect a USB
memory.
Turn on the power of the USB memory
if it is not turned on.
3Close the console box.
4Press the “MENU” button on the Re-
mote Touch.
5Select “Navi”, and select “Menu” if
the map screen is displayed.
6Select “Memory point” on the navi-
gation menu screen.
INFORMATION
When downloading is complete, the
memory points that are saved at
Lexus’s portal site are automatically
deleted.
Setting “Automatic memory point
download” to “Yes” will automati-
cally download external points. (See
page 204.)
• If a screen related to a memory point
is changed to before automatic
memory point download begins,
automatic memory point download
will be cancelled.
If memory points which have the
same name are already stored in the
navigation system, the system may
not update those memory points.
PROCEDURE FOR
DOWNLOADING MEMORY
POINTS FROM A USB
MEMORY
Page 205 of 257
203
1. CONNECTED SERVICES
6
CONNECTED SERVICES
GS450h/250 (EE) NAVI 30C48E
13.12.17 15:42
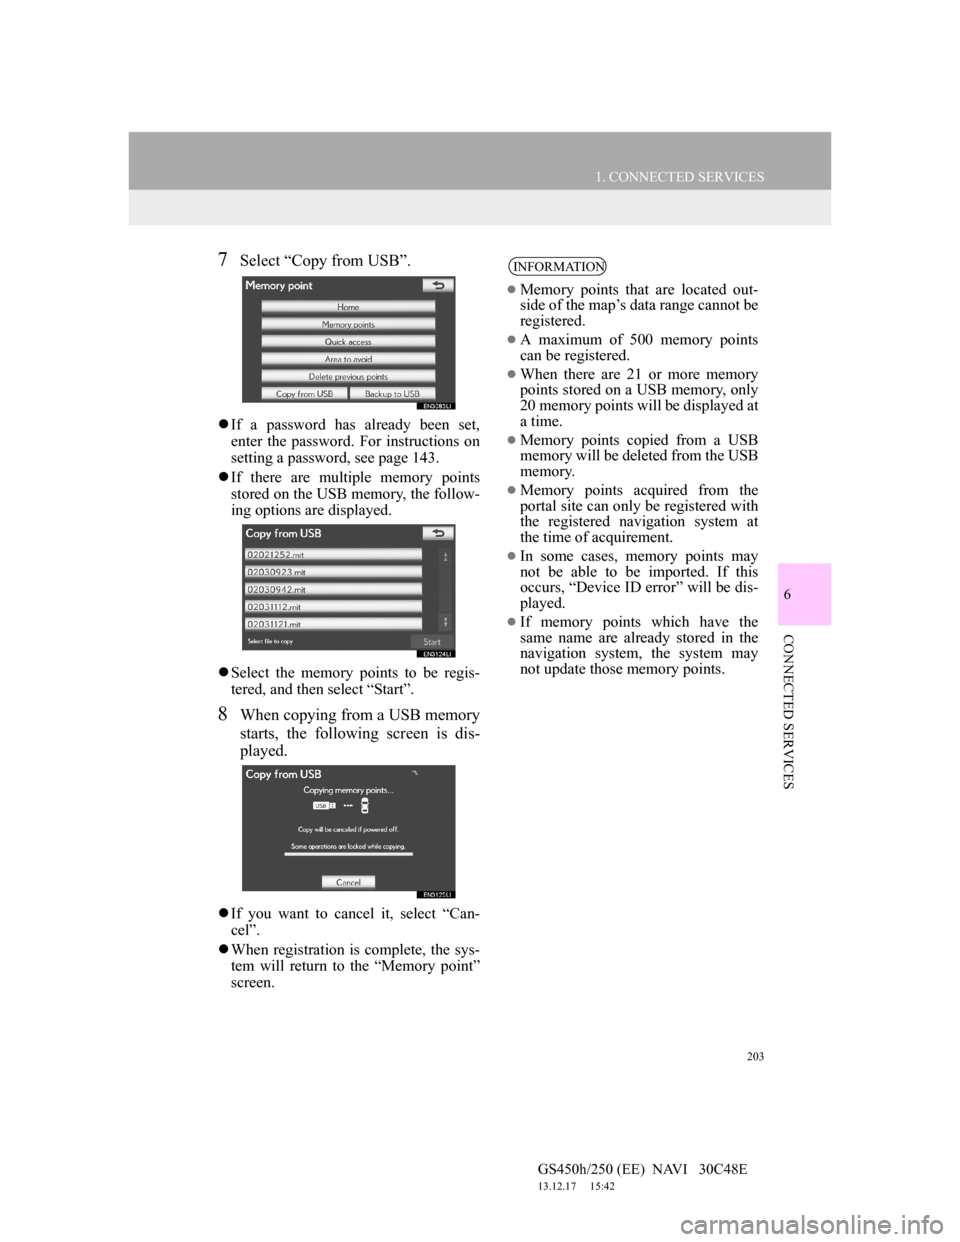
7Select “Copy from USB”.
If a password has already been set,
enter the password. For instructions on
setting a password, see page 143.
If there are multiple memory points
stored on the USB memory, the follow-
ing options are displayed.
Select the memory points to be regis-
tered, and then select “Start”.
8When copying from a USB memory
starts, the following screen is dis-
played.
If you want to cancel it, select “Can-
cel”.
When registration is complete, the sys-
tem will return to the “Memory point”
screen.
INFORMATION
Memory points that are located out-
side of the map’s data range cannot be
registered.
A maximum of 500 memory points
can be registered.
When there are 21 or more memory
points stored on a USB memory, only
20 memory points will be displayed at
a time.
Memory points copied from a USB
memory will be deleted from the USB
memory.
Memory points acquired from the
portal site can only be registered with
the registered navigation system at
the time of acquirement.
In some cases, memory points may
not be able to be imported. If this
occurs, “Device ID error” will be dis-
played.
If memory points which have the
same name are already stored in the
navigation system, the system may
not update those memory points.
Page 207 of 257
205
2. SETUP
6
CONNECTED SERVICES
GS450h/250 (EE) NAVI 30C48E
13.12.17 15:42
To reset all setup items, select
“Default”.
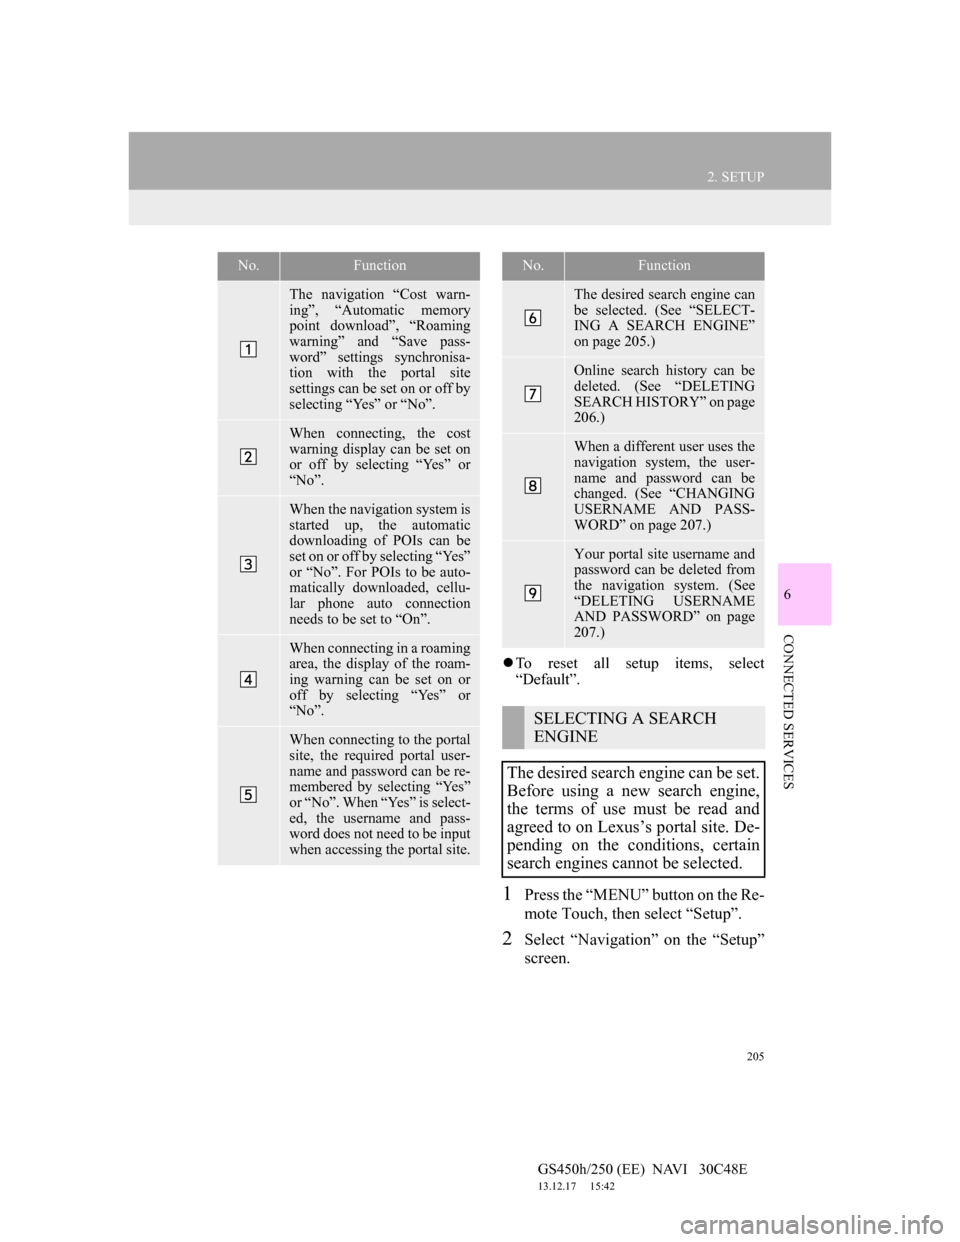
1Press the “MENU” button on the Re-
mote Touch, then select “Setup”.
2Select “Navigation” on the “Setup”
screen.
No.Function
The navigation “Cost warn-
ing”, “Automatic memory
point download”, “Roaming
warning” and “Save pass-
word” settings synchronisa-
tion with the portal site
settings can be set on or off by
selecting “Yes” or “No”.
When connecting, the cost
warning display can be set on
or off by selecting “Yes” or
“No”.
When the navigation system is
started up, the automatic
downloading of POIs can be
set on or off by selecting “Yes”
or “No”. For POIs to be auto-
matically downloaded, cellu-
lar phone auto connection
needs to be set to “On”.
When connecting in a roaming
area, the display of the roam-
ing warning can be set on or
off by selecting “Yes” or
“No”.
When connecting to the portal
site, the required portal user-
name and password can be re-
membered by selecting “Yes”
or “No”. When “Yes” is select-
ed, the username and pass-
word does not need to be input
when accessing the portal site.
The desired search engine can
be selected. (See “SELECT-
ING A SEARCH ENGINE”
on page 205.)
Online search history can be
deleted. (See “DELETING
SEARCH HISTORY” on page
206.)
When a different user uses the
navigation system, the user-
name and password can be
changed. (See “CHANGING
USERNAME AND PASS-
WORD” on page 207.)
Your portal site username and
password can be deleted from
the navigation system. (See
“DELETING USERNAME
AND PASSWORD” on page
207.)
SELECTING A SEARCH
ENGINE
The desired search engine can be set.
Before using a new search engine,
the terms of use must be read and
agreed to on Lexus’s portal site. De-
pending on the conditions, certain
search engines cannot be selected.
No.Function
Page 209 of 257
207
2. SETUP
6
CONNECTED SERVICES
GS450h/250 (EE) NAVI 30C48E
13.12.17 15:42
1Press the “MENU” button on the Re-
mote Touch, then select “Setup”.
2Select “Navigation” on the “Setup”
screen.
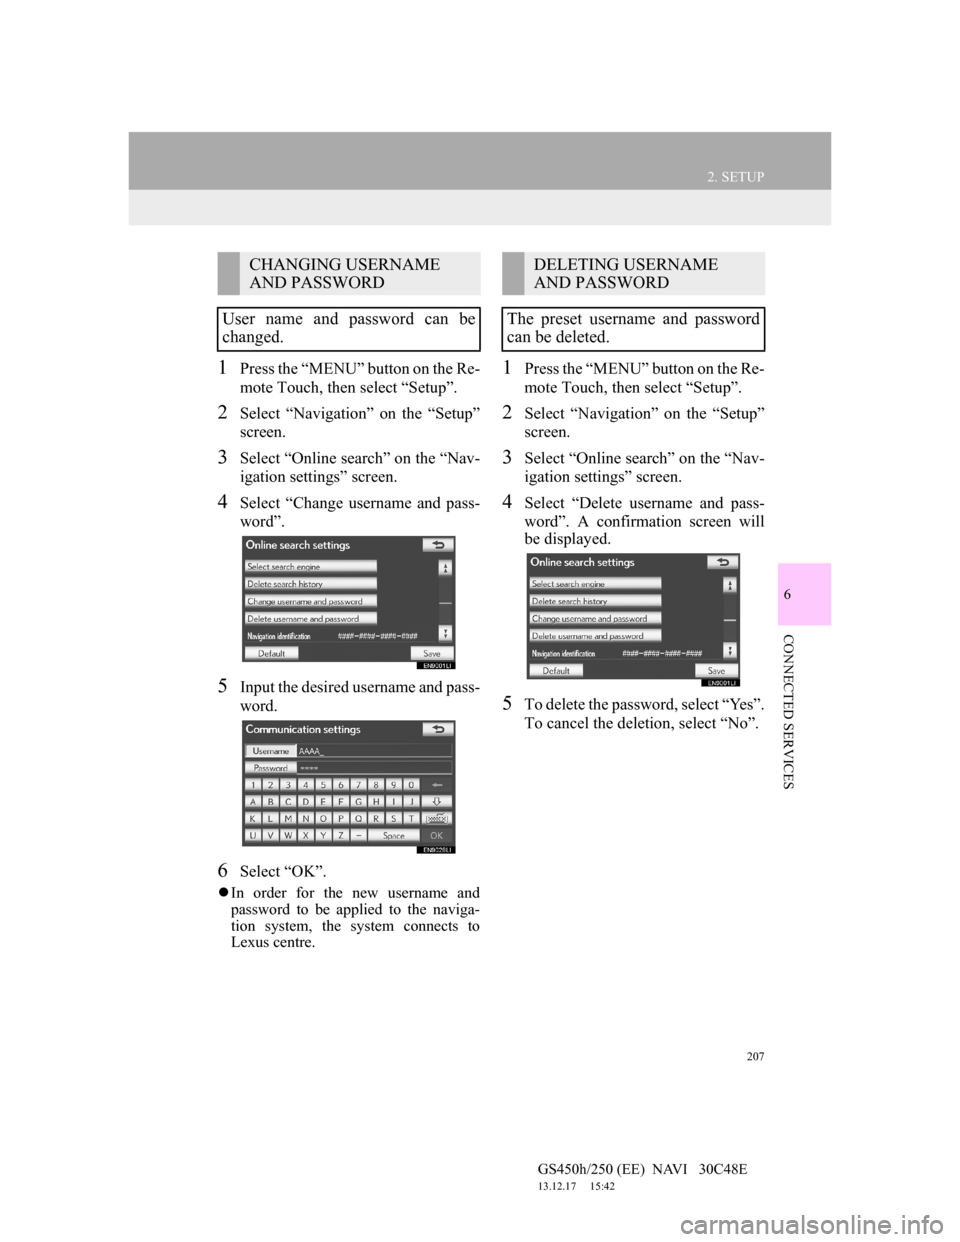
3Select “Online search” on the “Nav-
igation settings” screen.
4Select “Change username and pass-
word”.
5Input the desired username and pass-
word.
6Select “OK”.
In order for the new username and
password to be applied to the naviga-
tion system, the system connects to
Lexus centre.
1Press the “MENU” button on the Re-
mote Touch, then select “Setup”.
2Select “Navigation” on the “Setup”
screen.
3Select “Online search” on the “Nav-
igation settings” screen.
4Select “Delete username and pass-
word”. A confirmation screen will
be displayed.
5To delete the password, select “Yes”.
To cancel the deletion, select “No”.
CHANGING USERNAME
AND PASSWORD
User name and password can be
changed.DELETING USERNAME
AND PASSWORD
The preset username and password
can be deleted.
Page 211 of 257
7
209
1
2
3
4
5
6
7
GS450h/250 (EE) NAVI 30C48E
13.12.17 15:42
1. 12.3-INCH
DISPLAY-OVERVIEW ............... 210
12.3-INCH DISPLAY OPERATION ..... 211
2. INITIAL SCREEN .......................... 212
SETTING THE OPENING IMAGE ...... 212
3. “Menu” SCREEN ............................ 214
4. BASIC SCREENS ........................... 215
SWITCHING THE BASIC SCREEN .... 215
TO DISPLAY ON THE “Main Display” 215
Bluetooth
® CONNECTION STATUS ... 215
AUDIO/VIDEO SYSTEM ..................... 216
AIR CONDITIONING SYSTEM .......... 217
VEHICLE INFORMATION .................. 220
5. INTERRUPTION SCREENS ......... 222
SWITCHING THE INTERRUPTION
SCREEN .............................................. 222
HANDS-FREE SYSTEM
(FOR CELLULAR PHONE) ............... 222
112.3-INCH DISPLAY
OPERATION
12.3-INCH DISPLAY
Page 212 of 257
210
GS450h/250 (EE) NAVI 30C48E
13.12.17 15:42
1. 12.3-INCH DISPLAY OPERATION
1. 12.3-INCH DISPLAY-OVERVIEW
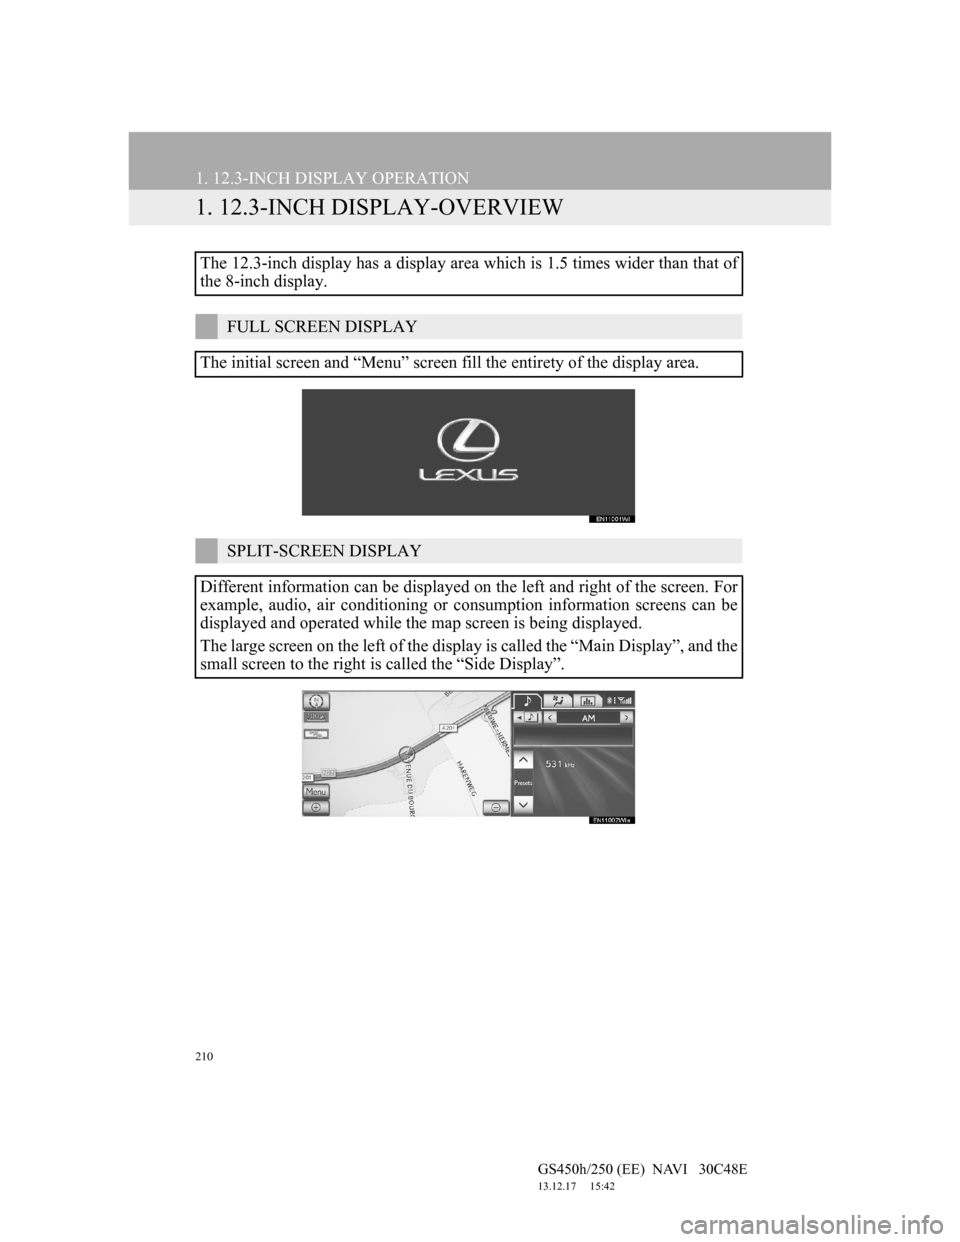
The 12.3-inch display has a display area which is 1.5 times wider than that of
the 8-inch display.
FULL SCREEN DISPLAY
The initial screen and “Menu” screen fill the entirety of the display area.
SPLIT-SCREEN DISPLAY
Different information can be displayed on the left and right of the screen. For
example, audio, air conditioning or consumption information screens can be
displayed and operated while the map screen is being displayed.
The large screen on the left of the display is called the “Main Display”, and the
small screen to the right is called the “Side Display”.
Page 213 of 257
211
1. 12.3-INCH DISPLAY OPERATION
7
12.3-INCH DISPLAY
GS450h/250 (EE) NAVI 30C48E
13.12.17 15:42
Basic screens (See page 215.)
• Audio
• Air conditioning
• Vehicle information
Interrupt screens (See page 222.)
• Lexus parking assist-sensor
• Telephone
• Driving mode
• Lexus night view (vehicles with
hybrid system)
SELECTING THE OPERATION
SCREEN
1When selecting the “Side Display”,
move the Remote Touch knob to the
right until is displayed at the
boundary between the “Main Dis-
play” and the “Side Display”, and
then move it further to the right.
When selecting the “Main Display”,
move the Remote Touch knob to the
left until is displayed at the
boundary between the “Main Dis-
play” and the “Side Display”, and
then move it further to the left.
12.3-INCH DISPLAY
OPERATION
This section describes only the char-
acteristics of the 12.3-inch display,
paying particular attention to the
“Side Display”.
For details of the functions and oper-
ation of the “Main Display”, refer to
the respective section.
THE “Side Display”
The following functions can be dis-
played and operated on the “Side
Display”.
OPERATING
CHARACTERISTICS OF THE
SPLIT-SCREEN DISPLAY
When the split-screen is displayed, it
is necessary to select the screen you
wish to operate (“Main Display” or
“Side Display”).
Page 214 of 257

212
1. 12.3-INCH DISPLAY OPERATION
GS450h/250 (EE) NAVI 30C48E
13.12.17 15:42
2. INITIAL SCREEN
1When the engine
mode, the initial screen will be displayed and the system will begin operating.
1Press the “MENU” button on the Remote Touch.
2Select “Setup” on the “Menu” screen.
3Select “General” on the “Setup” screen.
4Select “Change opening image” on the “General settings” screen.
5Select the desired movie or image.
6Select “OK”.
Images shown on the initial screen can be changed to suit individual preferences.
SETTING THE OPENING IMAGE
The opening image can be selected from 3 preregistered movies.
Also, an image can be copied from a USB memory and used as the opening im-
age.
To download image, see “CHANGING THE OPENING IMAGE” on page 64.
Page 215 of 257

213
1. 12.3-INCH DISPLAY OPERATION
7
12.3-INCH DISPLAY
GS450h/250 (EE) NAVI 30C48E
13.12.17 15:42
PREREGISTERED MOVIES
Type A
Type B
Type C
Page 216 of 257

214
1. 12.3-INCH DISPLAY OPERATION
GS450h/250 (EE) NAVI 30C48E
13.12.17 15:42
3. “Menu” SCREEN
To display the “Menu” screen, press the “MENU” button on the Remote
Touch.
For the functions and operation of the “Menu” screen, see ““Menu” SCREEN” on
page 28.
INFORMATION
When an interruption screen is being displayed on the “Side Display”, the “Menu”
screen will be shown on the “Main Display”.