Air Lexus GS450h 2012 Navigation manual
[x] Cancel search | Manufacturer: LEXUS, Model Year: 2012, Model line: GS450h, Model: Lexus GS450h 2012Pages: 257, PDF Size: 30.79 MB
Page 29 of 257
29
3. QUICK REFERENCE
1
QUICK GUIDE
GS450h/250 (EE) NAVI 30C48E
13.12.17 15:42
No.NameFunctionPage
“Car”Select to display fuel consumption screen.Owner’s
Manual
“Info”Select to display the “Information” screen.32, 174
“Display”Select to adjust the contrast and brightness of
the screens, turn the display off, etc.44
“Setup”Select to display the “Setup” screen.
30, 59, 71,
145, 151,
179, 189,
204
“Telephone”Select to display the hands-free operation
screen.Owner’s
Manual
“Climate”Select to display the air conditioning opera-
tion screen.Owner’s
Manual
“Audio”Select this button to operate the audio system.Owner’s
Manual
“Navi”Select to display the navigation screen.24, 26
Page 38 of 257
38
1. BASIC INFORMATION BEFORE OPERATION
GS450h/250 (EE) NAVI 30C48E
13.12.17 15:42
2. Remote Touch OPERA-
TION
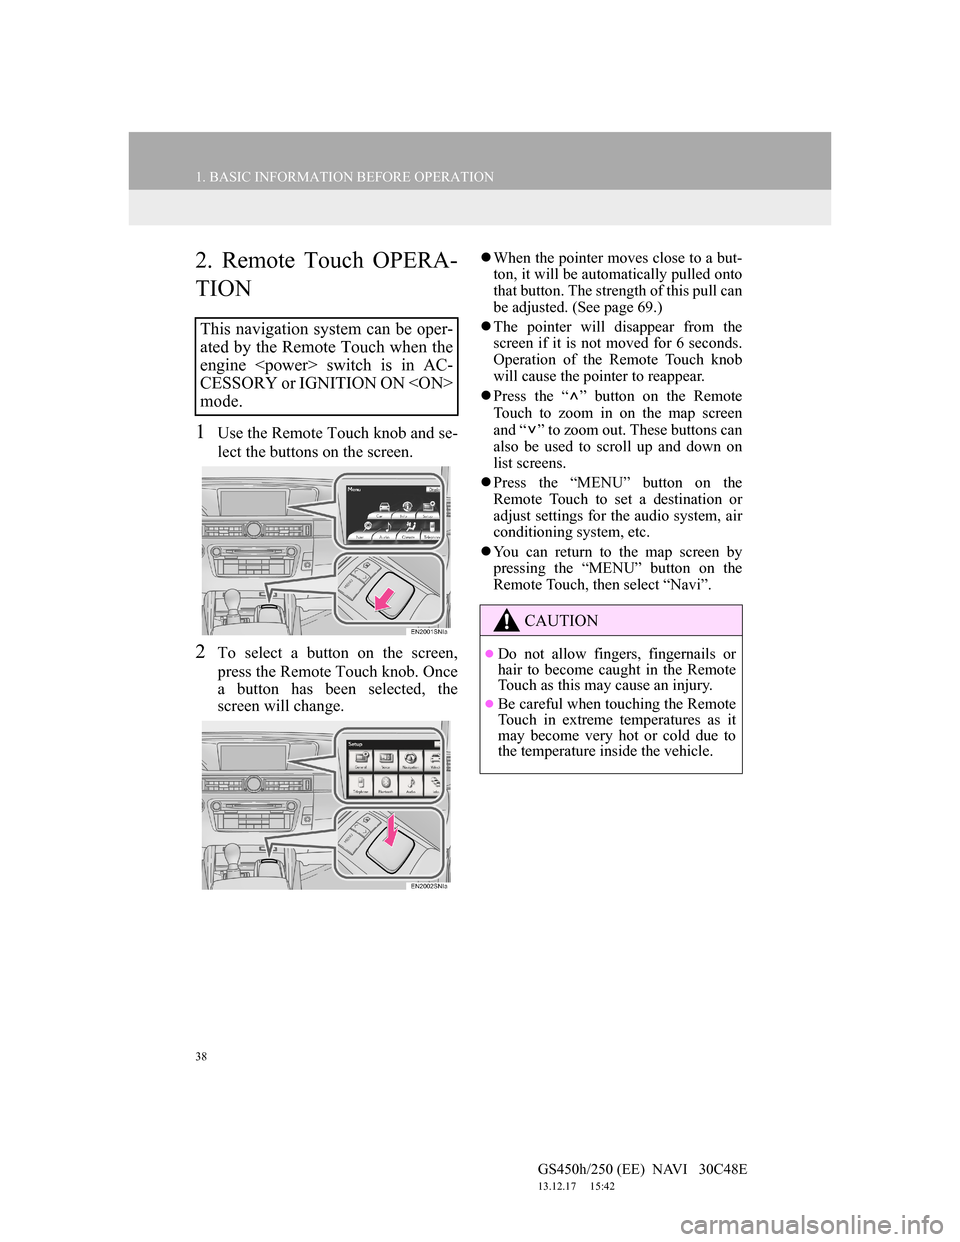
1Use the Remote Touch knob and se-
lect the buttons on the screen.
2To select a button on the screen,
press the Remote Touch knob. Once
a button has been selected, the
screen will change.
When the pointer moves close to a but-
ton, it will be automatically pulled onto
that button. The strength of this pull can
be adjusted. (See page 69.)
The pointer will disappear from the
screen if it is not moved for 6 seconds.
Operation of the Remote Touch knob
will cause the pointer to reappear.
Press the “ ” button on the Remote
Touch to zoom in on the map screen
and “ ” to zoom out. These buttons can
also be used to scroll up and down on
list screens.
Press the “MENU” button on the
Remote Touch to set a destination or
adjust settings for the audio system, air
conditioning system, etc.
You can return to the map screen by
pressing the “MENU” button on the
Remote Touch, then select “Navi”.
This navigation system can be oper-
ated by the Remote Touch when the
engine
CESSORY or IGNITION ON
mode.
CAUTION
Do not allow fingers, fingernails or
hair to become caught in the Remote
Touch as this may cause an injury.
Be careful when touching the Remote
Touch in extreme temperatures as it
may become very hot or cold due to
the temperature inside the vehicle.
Page 59 of 257
59
1. BASIC INFORMATION BEFORE OPERATION
2
BASIC FUNCTION
GS450h/250 (EE) NAVI 30C48E
13.12.17 15:42
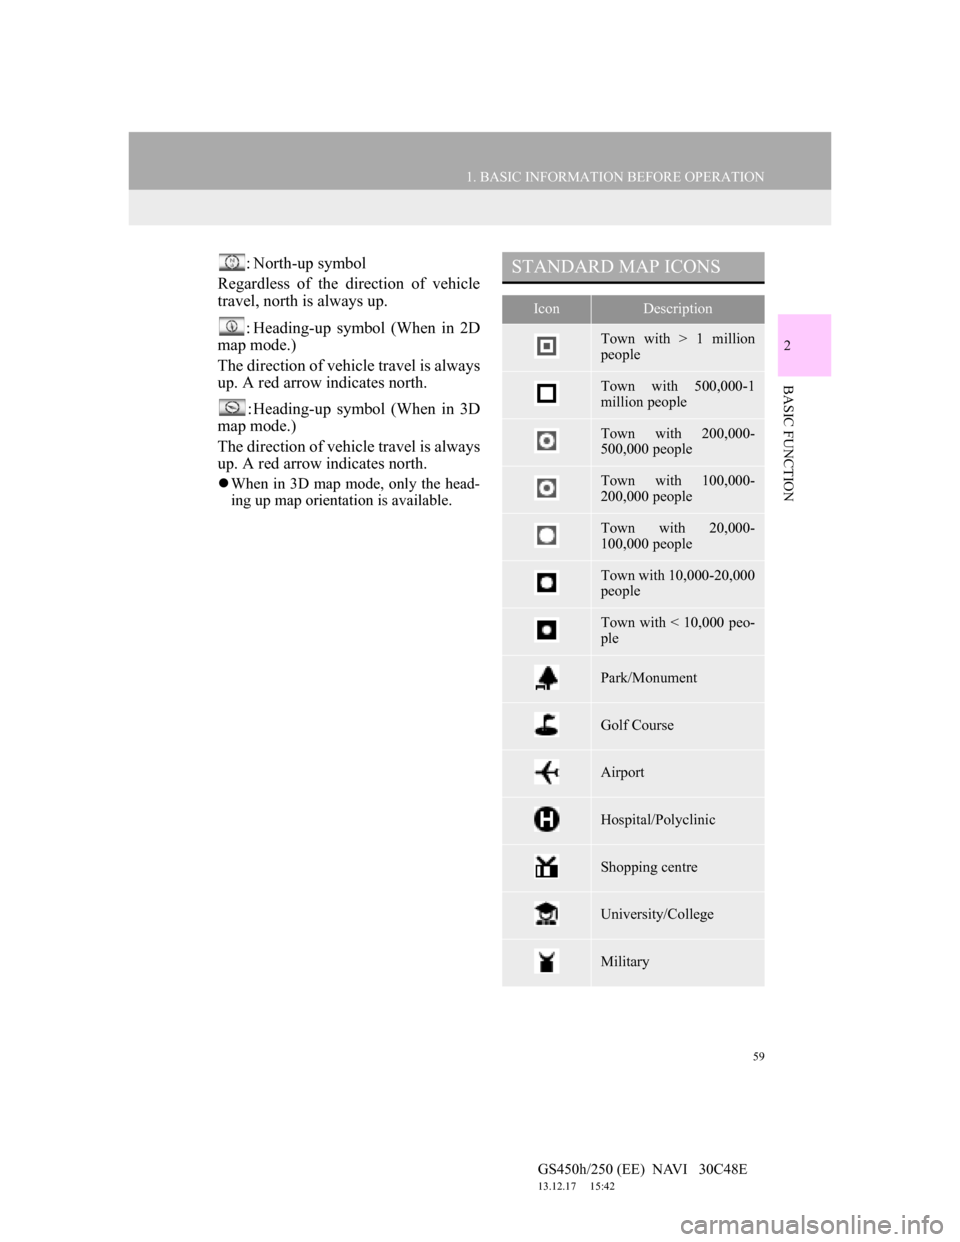
: North-up symbol
Regardless of the direction of vehicle
travel, north is always up.
: Heading-up symbol (When in 2D
map mode.)
The direction of vehicle travel is always
up. A red arrow indicates north.
: Heading-up symbol (When in 3D
map mode.)
The direction of vehicle travel is always
up. A red arrow indicates north.
When in 3D map mode, only the head-
ing up map orientation is available.
STANDARD MAP ICONS
IconDescription
Town with > 1 million
people
Town with 500,000-1
million people
Town with 200,000-
500,000 people
Town with 100,000-
200,000 people
Town with 20,000-
100,000 people
Town with 10,000-20,000
people
Town with < 10,000 peo-
ple
Park/Monument
Golf Course
Airport
Hospital/Polyclinic
Shopping centre
University/College
Military
Page 61 of 257
60
2. SETUP
GS450h/250 (EE) NAVI 30C48E
13.12.17 15:42
*: Vehicles without a 12.3-inch display
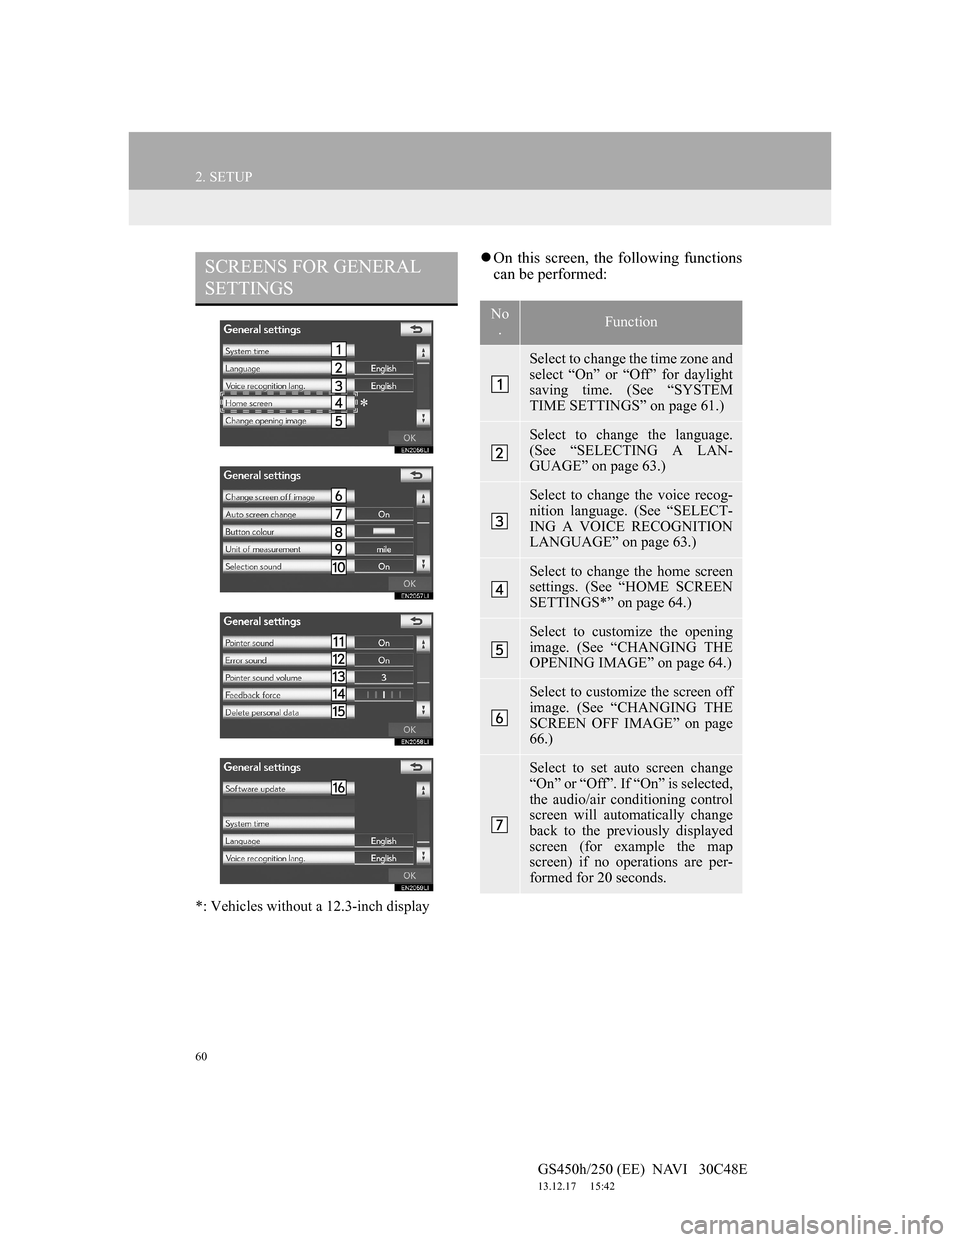
On this screen, the following functions
can be performed:SCREENS FOR GENERAL
SETTINGS
*
No
.Function
Select to change the time zone and
select “On” or “Off” for daylight
saving time. (See “SYSTEM
TIME SETTINGS” on page 61.)
Select to change the language.
(See “SELECTING A LAN-
GUAGE” on page 63.)
Select to change the voice recog-
nition language. (See “SELECT-
ING A VOICE RECOGNITION
LANGUAGE” on page 63.)
Select to change the home screen
settings. (See “HOME SCREEN
SETTINGS*” on page 64.)
Select to customize the opening
image. (See “CHANGING THE
OPENING IMAGE” on page 64.)
Select to customize the screen off
image. (See “CHANGING THE
SCREEN OFF IMAGE” on page
66.)
Select to set auto screen change
“On” or “Off”. If “On” is selected,
the audio/air conditioning control
screen will automatically change
back to the previously displayed
screen (for example the map
screen) if no operations are per-
formed for 20 seconds.
Page 62 of 257
61
2. SETUP
GS450h/250 (EE) NAVI 30C48E
13.12.17 15:42
2
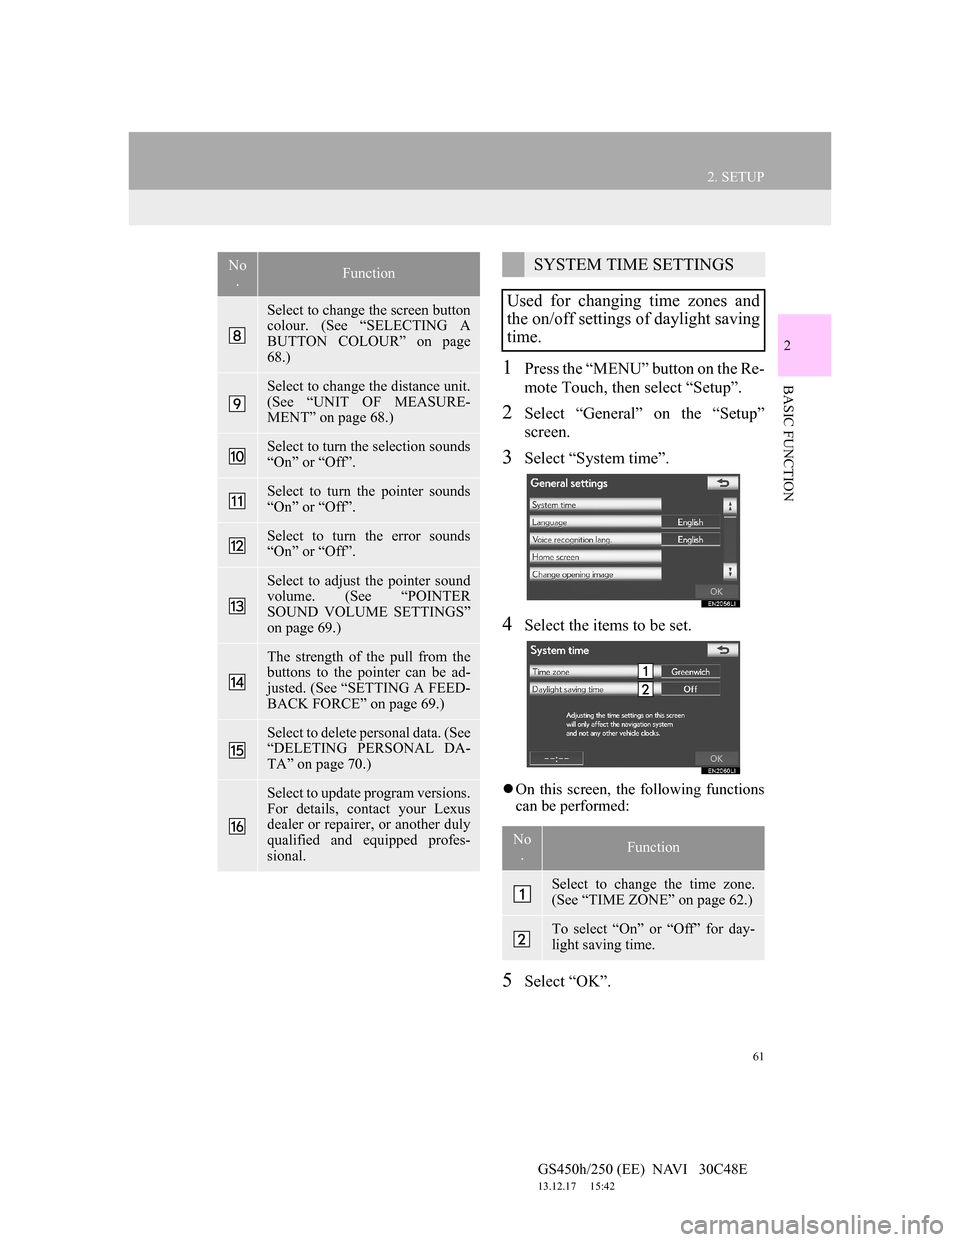
BASIC FUNCTION1Press the “MENU” button on the Re-
mote Touch, then select “Setup”.
2Select “General” on the “Setup”
screen.
3Select “System time”.
4Select the items to be set.
On this screen, the following functions
can be performed:
5Select “OK”.
Select to change the screen button
colour. (See “SELECTING A
BUTTON COLOUR” on page
68.)
Select to change the distance unit.
(See “UNIT OF MEASURE-
MENT” on page 68.)
Select to turn the selection sounds
“On” or “Off”.
Select to turn the pointer sounds
“On” or “Off”.
Select to turn the error sounds
“On” or “Off”.
Select to adjust the pointer sound
volume. (See “POINTER
SOUND VOLUME SETTINGS”
on page 69.)
The strength of the pull from the
buttons to the pointer can be ad-
justed. (See “SETTING A FEED-
BACK FORCE” on page 69.)
Select to delete personal data. (See
“DELETING PERSONAL DA-
TA” on page 70.)
Select to update program versions.
For details, contact your Lexus
dealer or repairer, or another duly
qualified and equipped profes-
sional.
No
.FunctionSYSTEM TIME SETTINGS
Used for changing time zones and
the on/off settings of daylight saving
time.
No
.Function
Select to change the time zone.
(See “TIME ZONE” on page 62.)
To select “On” or “Off” for day-
light saving time.
Page 116 of 257
115
2. ROUTE GUIDANCE
GS450h/250 (EE) NAVI 30C48E
13.12.17 15:42
3
NAVIGATION SYSTEM
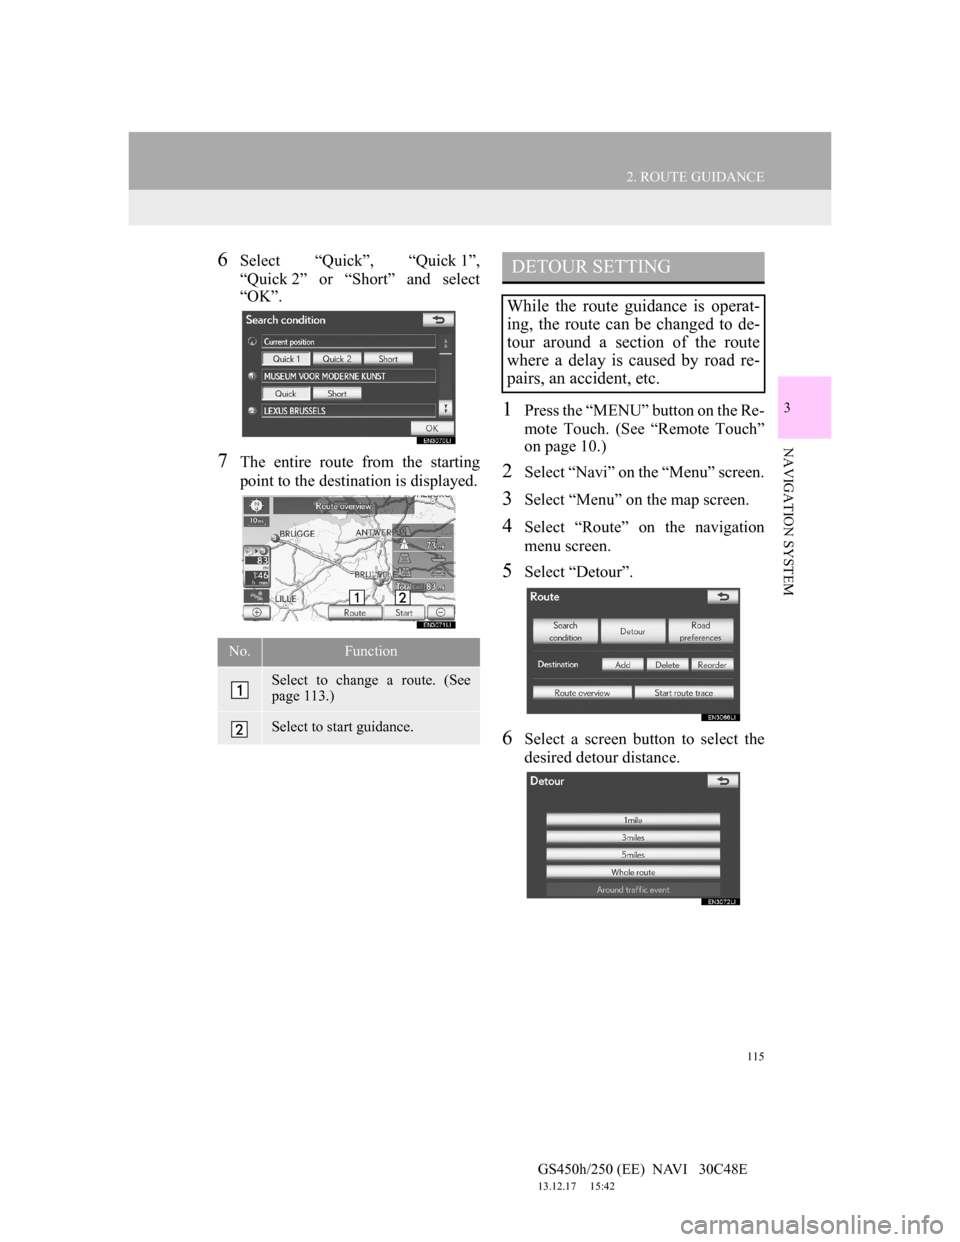
6Select “Quick”, “Quick 1”,
“Quick 2” or “Short” and select
“OK”.
7The entire route from the starting
point to the destination is displayed.
1Press the “MENU” button on the Re-
mote Touch. (See “Remote Touch”
on page 10.)
2Select “Navi” on the “Menu” screen.
3Select “Menu” on the map screen.
4Select “Route” on the navigation
menu screen.
5Select “Detour”.
6Select a screen button to select the
desired detour distance.
No.Function
Select to change a route. (See
page 113.)
Select to start guidance.
DETOUR SETTING
While the route guidance is operat-
ing, the route can be changed to de-
tour around a section of the route
where a delay is caused by road re-
pairs, an accident, etc.
Page 117 of 257
116
2. ROUTE GUIDANCE
GS450h/250 (EE) NAVI 30C48E
13.12.17 15:42
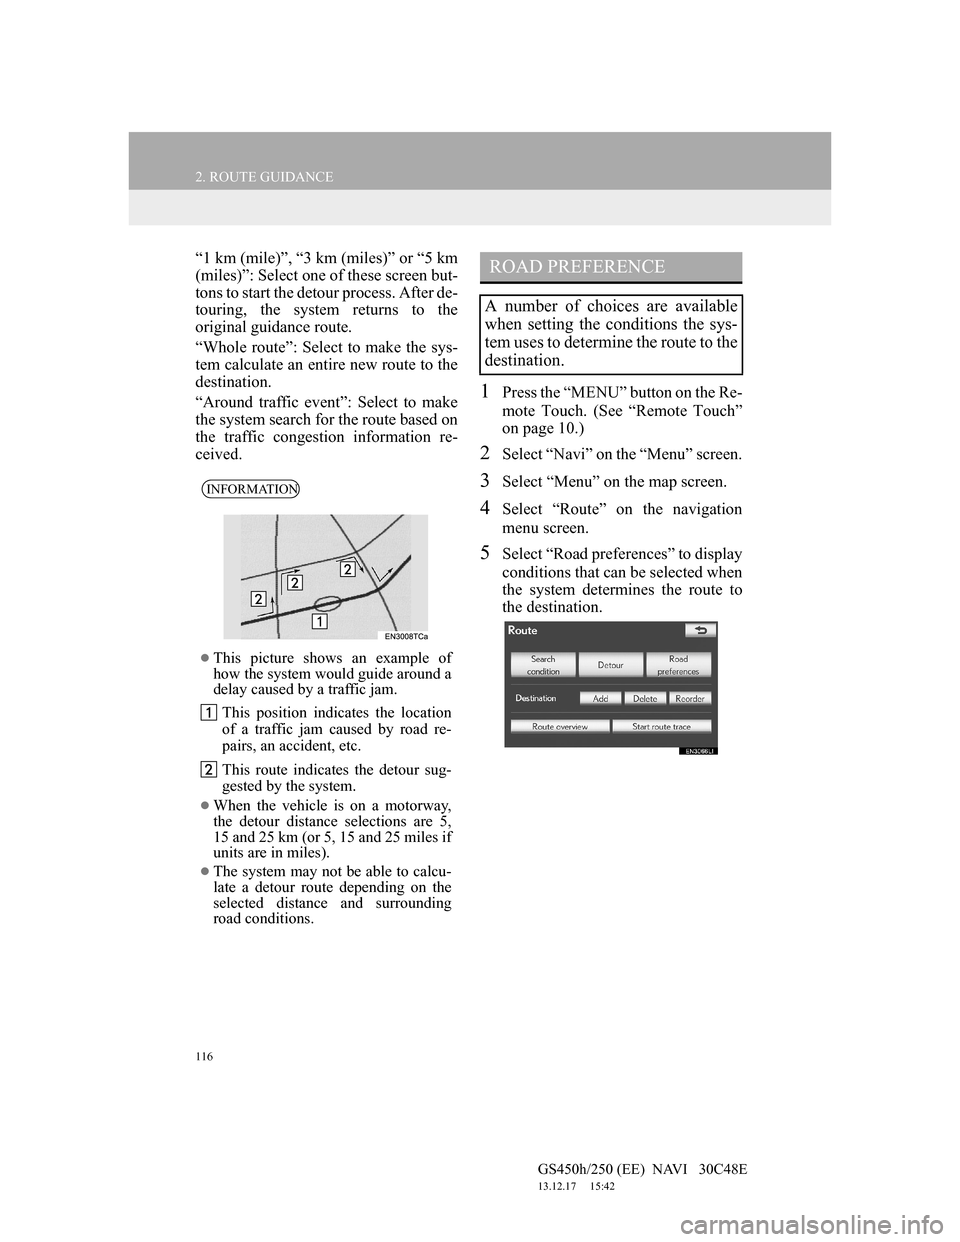
“1 km (mile)”, “3 km (miles)” or “5 km
(miles)”: Select one of these screen but-
tons to start the detour process. After de-
touring, the system returns to the
original guidance route.
“Whole route”: Select to make the sys-
tem calculate an entire new route to the
destination.
“Around traffic event”: Select to make
the system search for the route based on
the traffic congestion information re-
ceived.
1Press the “MENU” button on the Re-
mote Touch. (See “Remote Touch”
on page 10.)
2Select “Navi” on the “Menu” screen.
3Select “Menu” on the map screen.
4Select “Route” on the navigation
menu screen.
5Select “Road preferences” to display
conditions that can be selected when
the system determines the route to
the destination.
INFORMATION
This picture shows an example of
how the system would guide around a
delay caused by a traffic jam.
This position indicates the location
of a traffic jam caused by road re-
pairs, an accident, etc.
This route indicates the detour sug-
gested by the system.
When the vehicle is on a motorway,
the detour distance selections are 5,
15 and 25 km (or 5, 15 and 25 miles if
units are in miles).
The system may not be able to calcu-
late a detour route depending on the
selected distance and surrounding
road conditions.
ROAD PREFERENCE
A number of choices are available
when setting the conditions the sys-
tem uses to determine the route to the
destination.
Page 144 of 257
143
3. MEMORY POINTS
GS450h/250 (EE) NAVI 30C48E
13.12.17 15:42
3
NAVIGATION SYSTEM
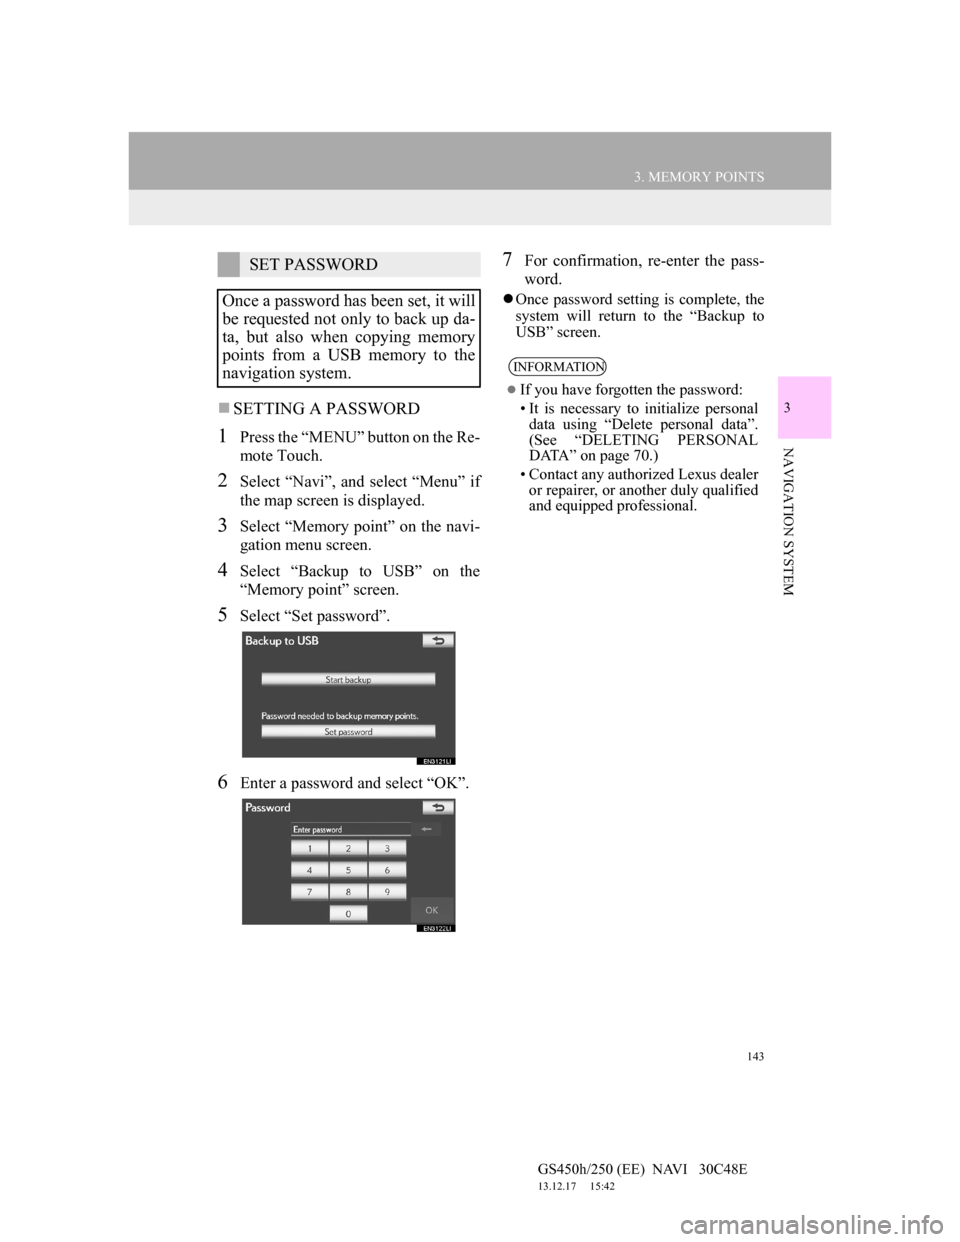
SETTING A PASSWORD
1Press the “MENU” button on the Re-
mote Touch.
2Select “Navi”, and select “Menu” if
the map screen is displayed.
3Select “Memory point” on the navi-
gation menu screen.
4Select “Backup to USB” on the
“Memory point” screen.
5Select “Set password”.
6Enter a password and select “OK”.
7For confirmation, re-enter the pass-
word.
Once password setting is complete, the
system will return to the “Backup to
USB” screen.
SET PASSWORD
Once a password has been set, it will
be requested not only to back up da-
ta, but also when copying memory
points from a USB memory to the
navigation system.
INFORMATION
If you have forgotten the password:
• It is necessary to initialize personal
data using “Delete personal data”.
(See “DELETING PERSONAL
DATA” on page 70.)
• Contact any authorized Lexus dealer
or repairer, or another duly qualified
and equipped professional.
Page 154 of 257
152
4. SETUP
GS450h/250 (EE) NAVI 30C48E
13.12.17 15:42
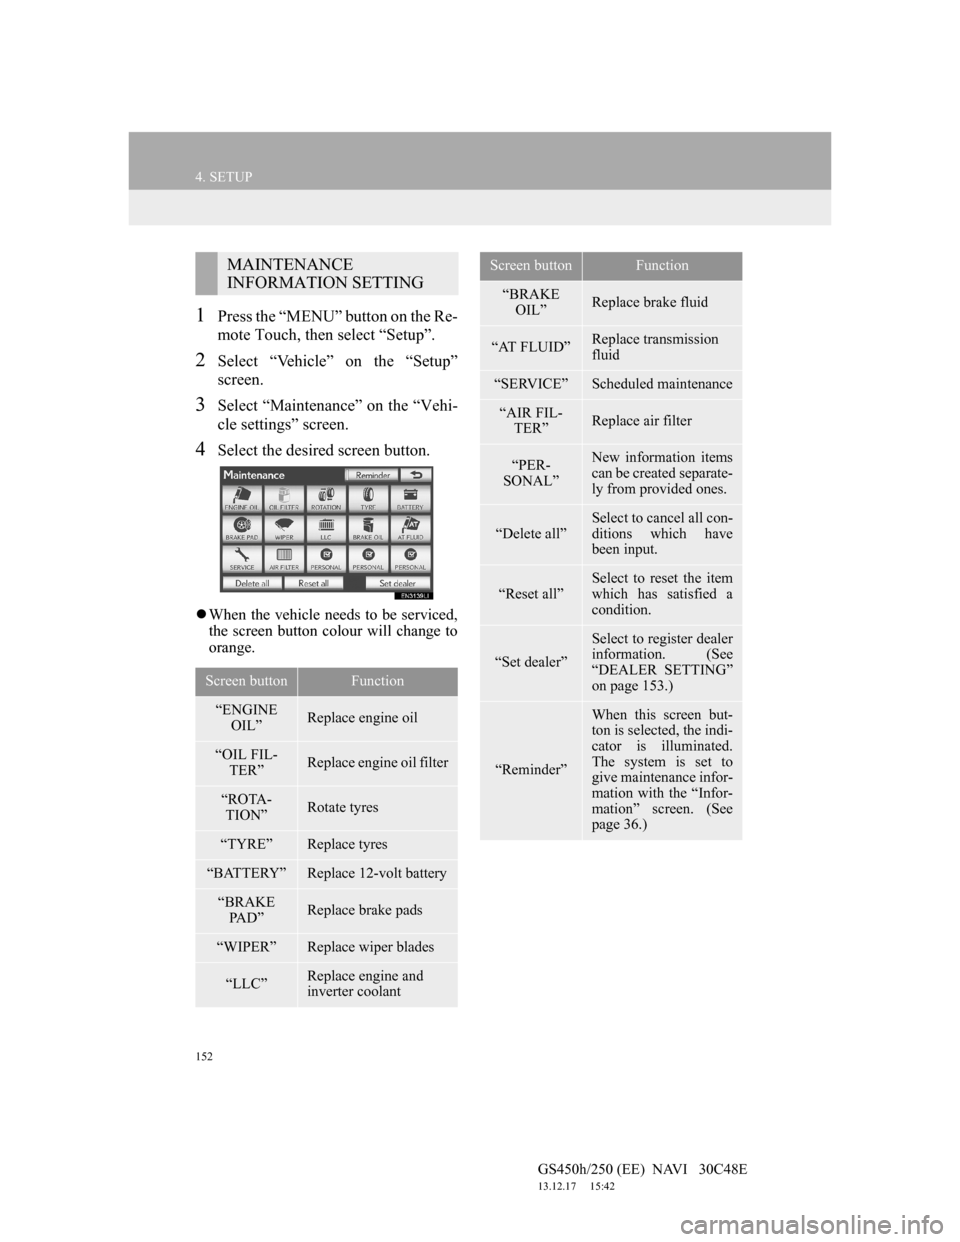
1Press the “MENU” button on the Re-
mote Touch, then select “Setup”.
2Select “Vehicle” on the “Setup”
screen.
3Select “Maintenance” on the “Vehi-
cle settings” screen.
4Select the desired screen button.
When the vehicle needs to be serviced,
the screen button colour will change to
orange.
MAINTENANCE
INFORMATION SETTING
Screen buttonFunction
“ENGINE
OIL”Replace engine oil
“OIL FIL-
TER”Replace engine oil filter
“ROTA-
TION”Rotate tyres
“TYRE”Replace tyres
“BATTERY”Replace 12-volt battery
“BRAKE
PA D ”Replace brake pads
“WIPER”Replace wiper blades
“LLC”Replace engine and
inverter coolant
“BRAKE
OIL”Replace brake fluid
“AT FLUID”Replace transmission
fluid
“SERVICE”Scheduled maintenance
“AIR FIL-
TER”Replace air filter
“PER-
SONAL”New information items
can be created separate-
ly from provided ones.
“Delete all”
Select to cancel all con-
ditions which have
been input.
“Reset all”Select to reset the item
which has satisfied a
condition.
“Set dealer”
Select to register dealer
information. (See
“DEALER SETTING”
on page 153.)
“Reminder”
When this screen but-
ton is selected, the indi-
cator is illuminated.
The system is set to
give maintenance infor-
mation with the “Infor-
mation” screen. (See
page 36.)
Screen buttonFunction
Page 159 of 257
157
GS450h/250 (EE) NAVI 30C48E
13.12.17 15:42
3
NAVIGATION SYSTEM
5. GPS (GLOBAL POSITIONING SYSTEM)
1. LIMITATIONS OF THE NAVIGATION SYSTEM
The Global Positioning System (GPS)
developed and operated by the U.S. De-
partment of Defense provides an accu-
rate current position, normally using 4
or more satellites, and in some case 3
satellites. The GPS system has a certain
level of inaccuracy. While the naviga-
tion system will compensate for this
most of the time, occasional positioning
errors of up to 100 m (300 feet) can and
should be expected. Generally, position
errors will be corrected within a few
seconds.When the vehicle is receiving signals
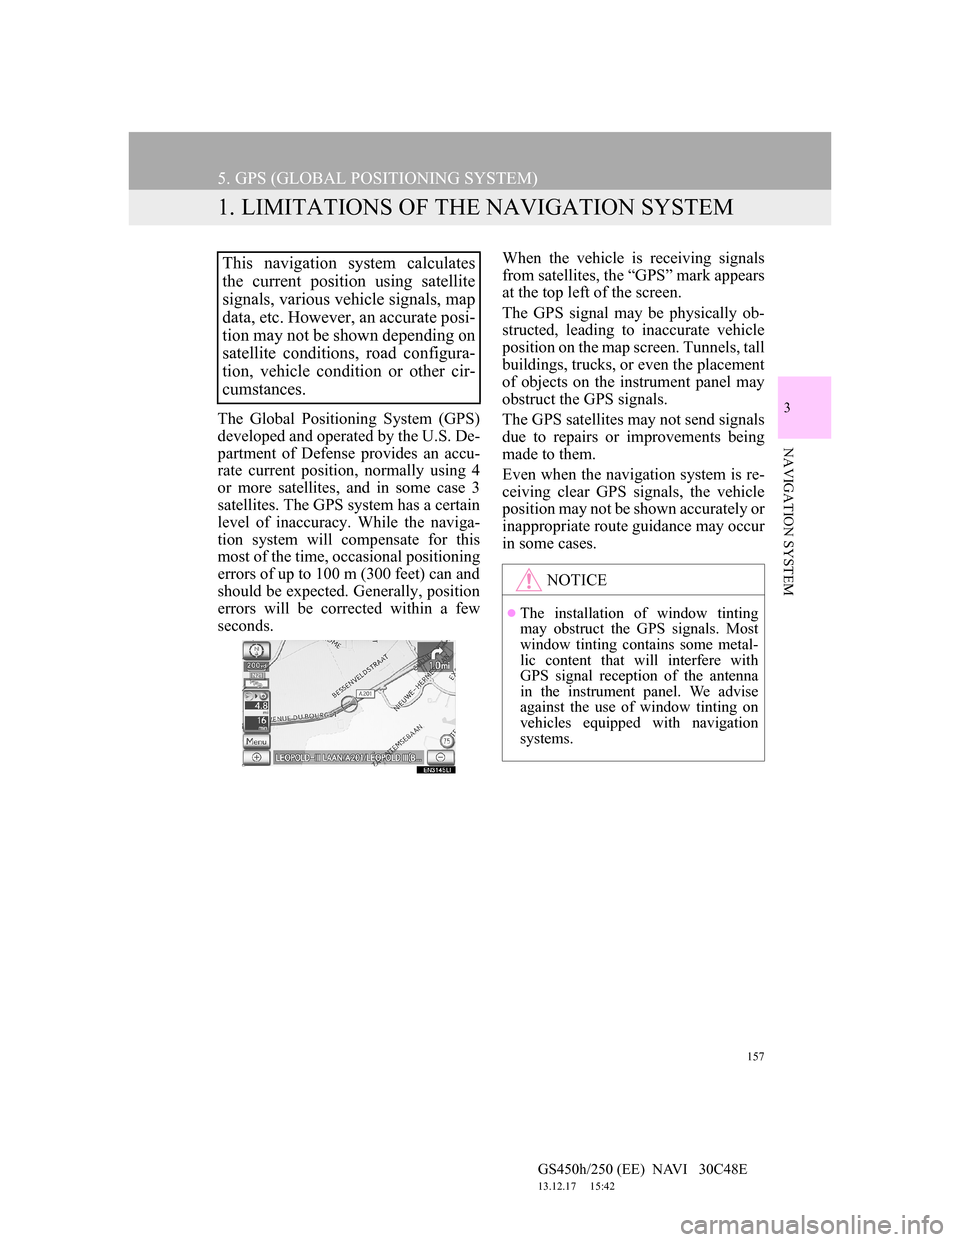
from satellites, the “GPS” mark appears
at the top left of the screen.
The GPS signal may be physically ob-
structed, leading to inaccurate vehicle
position on the map screen. Tunnels, tall
buildings, trucks, or even the placement
of objects on the instrument panel may
obstruct the GPS signals.
The GPS satellites may not send signals
due to repairs or improvements being
made to them.
Even when the navigation system is re-
ceiving clear GPS signals, the vehicle
position may not be shown accurately or
inappropriate route guidance may occur
in some cases.
This navigation system calculates
the current position using satellite
signals, various vehicle signals, map
data, etc. However, an accurate posi-
tion may not be shown depending on
satellite conditions, road configura-
tion, vehicle condition or other cir-
cumstances.
NOTICE
The installation of window tinting
may obstruct the GPS signals. Most
window tinting contains some metal-
lic content that will interfere with
GPS signal reception of the antenna
in the instrument panel. We advise
against the use of window tinting on
vehicles equipped with navigation
systems.