phone Lexus GX460 2010 Navigation Manual
[x] Cancel search | Manufacturer: LEXUS, Model Year: 2010, Model line: GX460, Model: Lexus GX460 2010Pages: 428, PDF Size: 6.27 MB
Page 289 of 428
AUDIO/VIDEO SYSTEM
288
XMr
Cargo loaded on the roof luggage carrier,
especially metal objects, may adversely
affect the reception of XM rSatellite Radio.
Alternation or modifications carried out
without appropriate authorization may in-
validate the user ’s right to operate the
equipment.
iPod r
About iPod r—
iPod is registered trademarks of Apple,
Inc.
Compatible models —
DiPod r5th generation Ver. 1.2 or later
DiPod nano r3rd generation Ver. 1.0 or
later
DiPod nano r2nd generation Ver. 1.1.2
or later
DiPod nano rVer. 1.3 or later
DiPod touch rVer. 1.1 or later
DiPod classic rVer. 1.0 or later
iPhone t, iPod rmini, iPod shuffle r, iPod r
photo and 4th generation and earlier mod-
els of iPod rare not compatible with this
system.
USB memory
USB memorys that can be used for MP3
and WMA playback.
DUSB communication formats: USB 2.0
FS (12 MBPS)
DFile formats: FAT 16/32 (Windows r)
DCorrespondence class: Mass storage
class CARING FOR YOUR CD CHANGER,
DVD CHANGER AND DISCS
DYour CD changer and DVD changer is
intended for use with 4.7 in. (12 cm)
discs only.
DExtremely high temperatures can keep
your CD changer and DVD changer
from working. On hot days, use the air
conditioning to cool the vehicle interior
before you use the changer and player.
DBumpy roads or other vibrations may
make your CD changer and DVD chan-
ger skip.
DIf moisture gets into your CD changer
and DVD changer, you may not play
even though they appear to be workin-
g. Remove the discs from the changer
and wait until it dries.
CAUTION
CD changer and DVD changer use an
invisible laser beam which could
cause hazardous radiation exposure
if directed outside the unit. Be sure to
operate the changers correctly.
GX460 Navi (U)
OM60E73U
Finish
09.09.24
Page 330 of 428
SECTION11
SETUP
329
SETUP
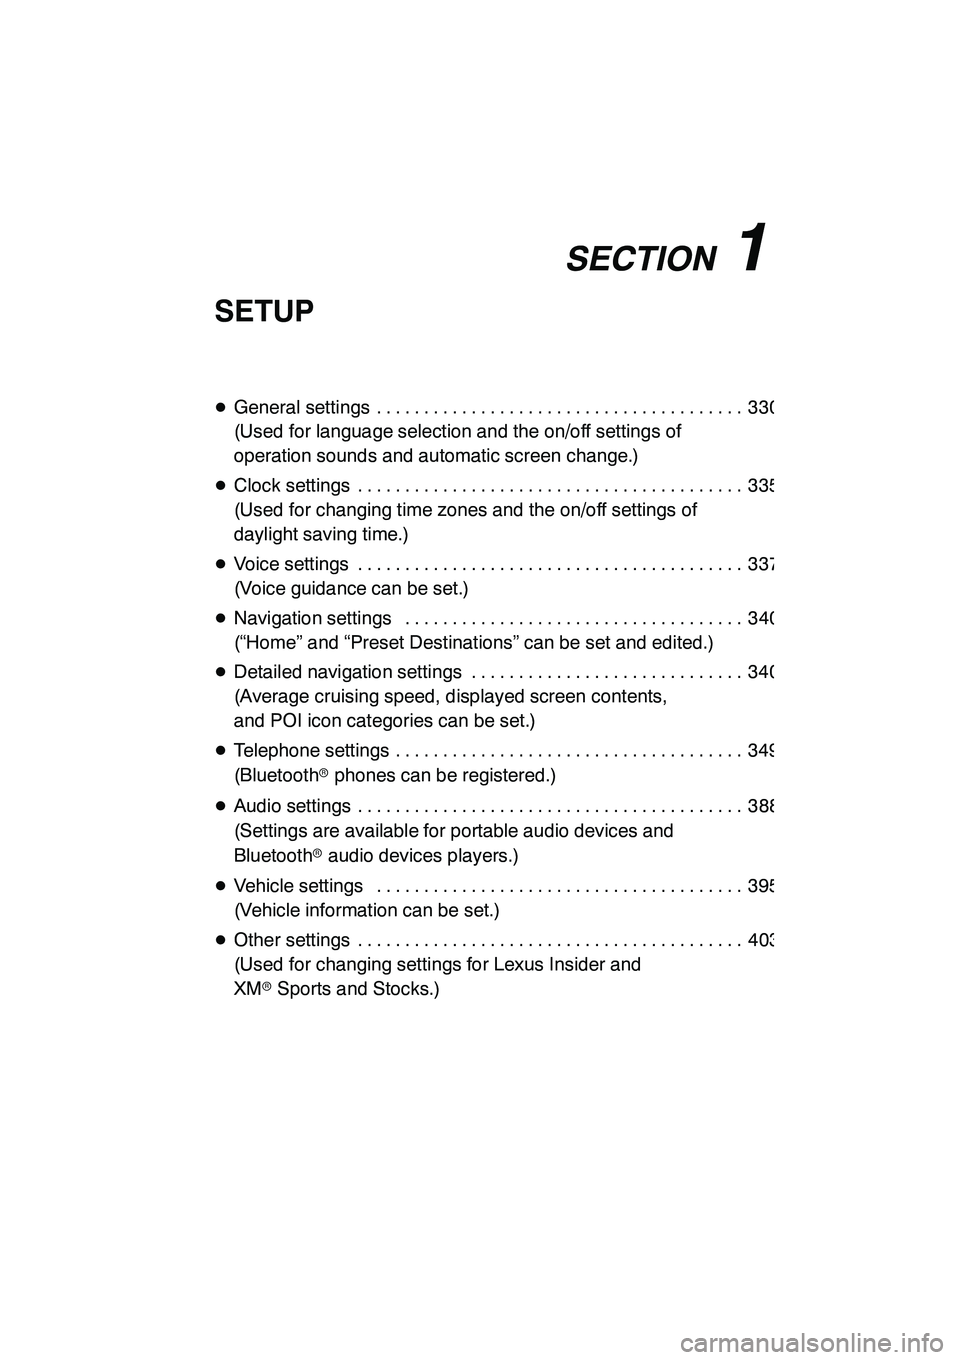
DGeneral settings 330 .......................................
(Used for language selection and the on/off settings of
operation sounds and automatic screen change.)
D Clock settings 335 .........................................
(Used for changing time zones and the on/off settings of
daylight saving time.)
D Voice settings 337 .........................................
(Voice guidance can be set.)
D Navigation settings 340 ....................................
(“Home” and “Preset Destinations” can be set and edited.)
D Detailed navigation settings 340 .............................
(Average cruising speed, displayed screen contents,
and POI icon categories can be set.)
D Telephone settings 349 .....................................
(Bluetooth rphones can be registered.)
D Audio settings 388 .........................................
(Settings are available for portable audio devices and
Bluetooth raudio devices players.)
D Vehicle settings 395 .......................................
(Vehicle information can be set.)
D Other settings 403 .........................................
(Used for changing settings for Lexus Insider and
XM rSports and Stocks.)
GX460 Navi (U)
OM60E73U
Finish
09.09.24
11
Page 335 of 428
SETUP
334 D
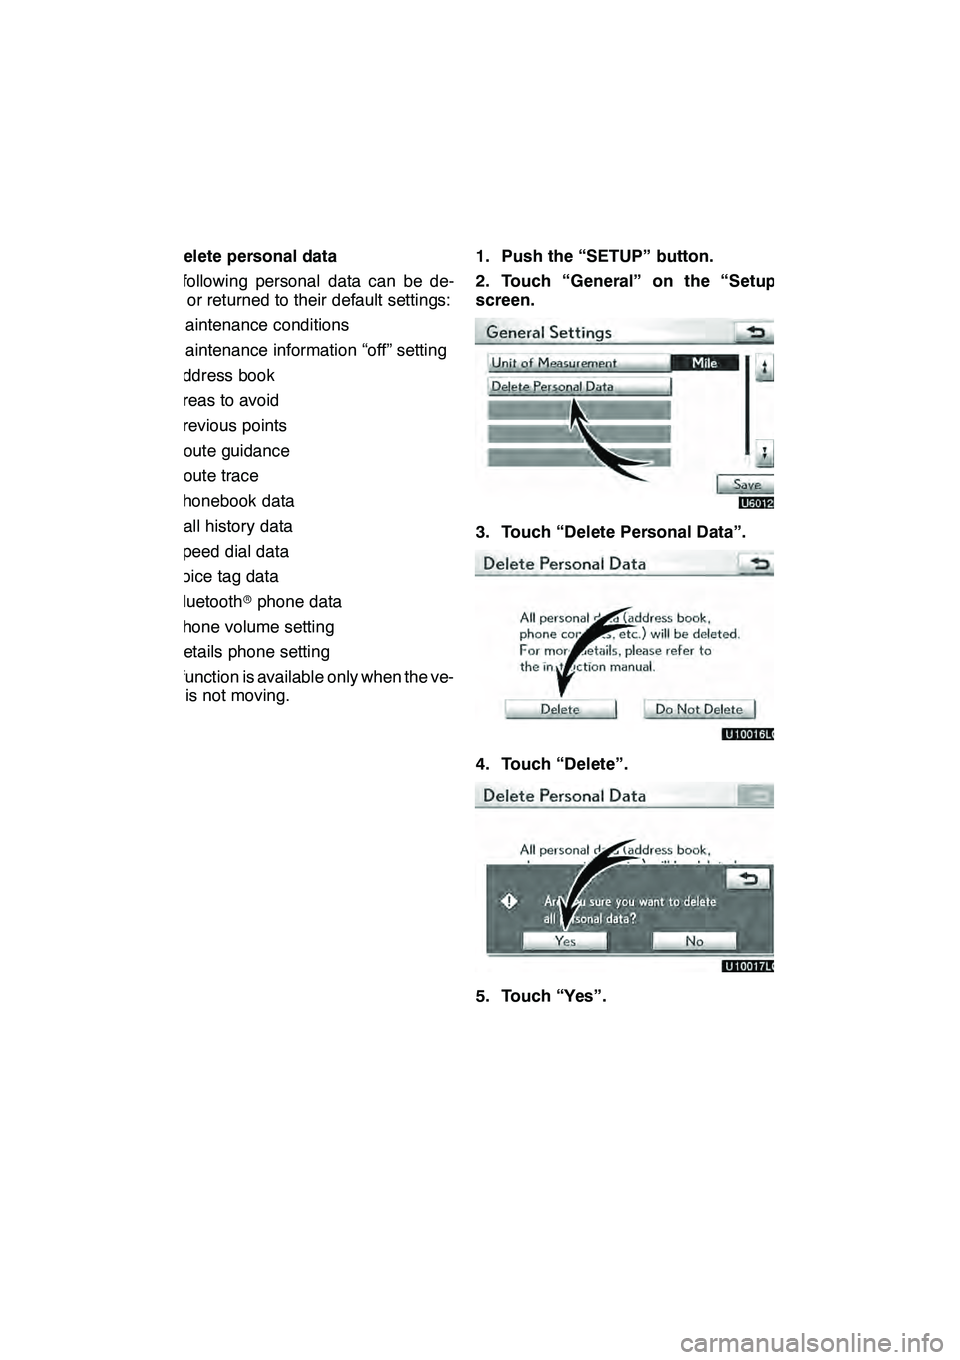
Delete personal data
The following personal data can be de-
leted or returned to their default settings:
DMaintenance conditions
DMaintenance information “off” setting
DAddress book
DAreas to avoid
DPrevious points
DRoute guidance
DRoute trace
DPhonebook data
DCall history data
DSpeed dial data
DVoice tag data
DBluetooth rphone data
DPhone volume setting
DDetails phone setting
This function is available only when the ve-
hicle is not moving. 1. Push the “SETUP” button.
2. Touch “General” on the “Setup”
screen.
3. Touch “Delete Personal Data”.
4. Touch “Delete”.
5. Touch “Yes”.
GX460 Navi (U)
OM60E73U
Finish
09.09.24
Page 350 of 428
SETUP
349
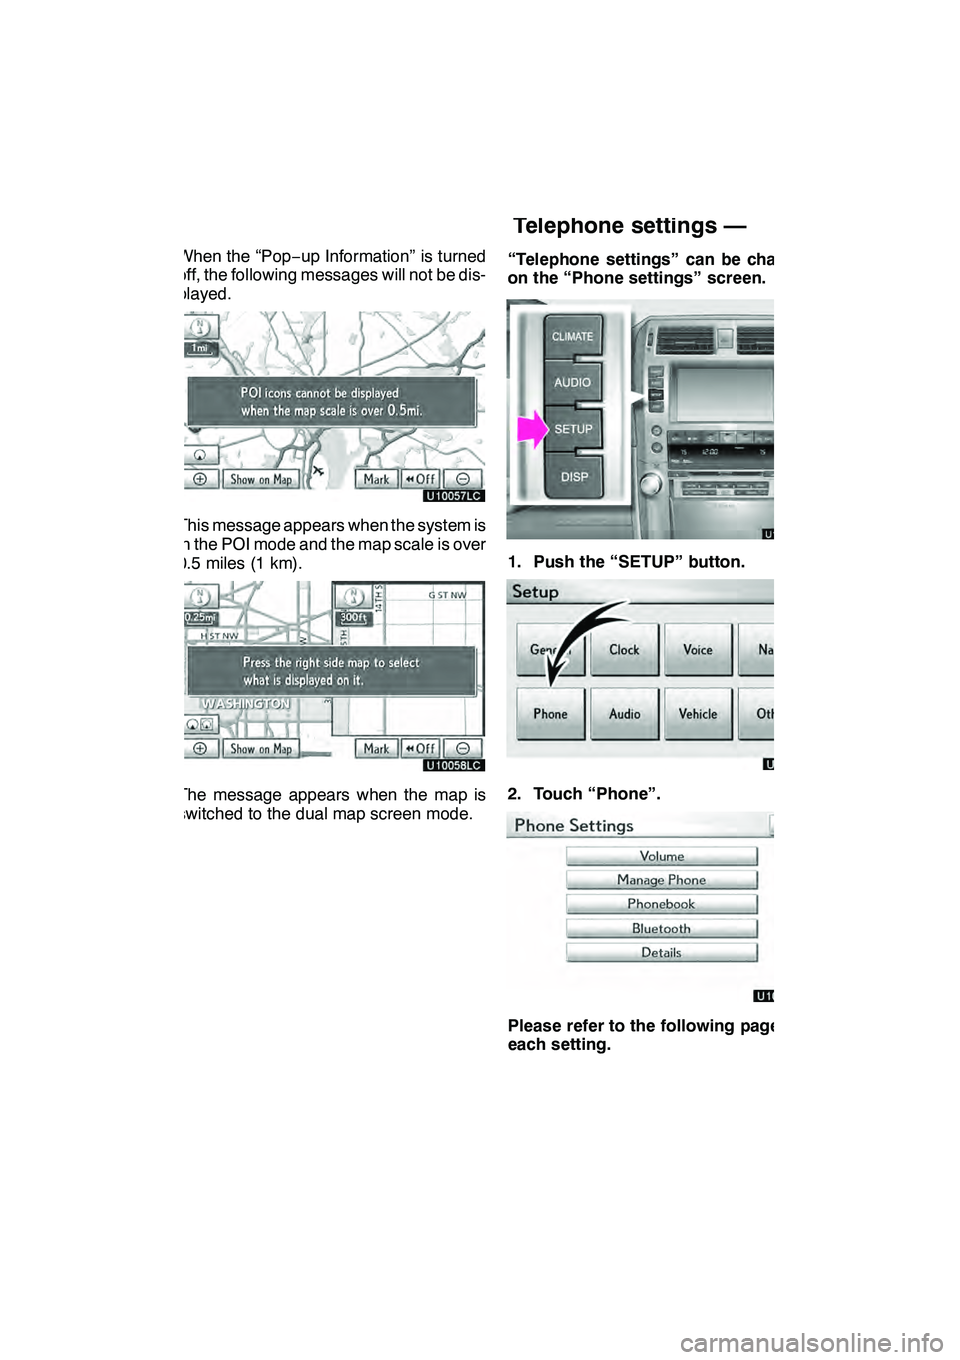
When the “Pop−up Information” is turned
off, the following messages will not be dis-
played.
This message appears when the system is
in the POI mode and the map scale is over
0.5 miles (1 km).
The message appears when the map is
switched to the dual map screen mode. “Telephone settings” can be changed
on the “Phone settings” screen.
1. Push the “SETUP” button.
2. Touch “Phone”.
Please refer to the following pages for
each setting.
GX460 Navi (U)
OM60E73U
Finish
09.09.24
Telephone settings —
11
Page 352 of 428
SETUP
351
D
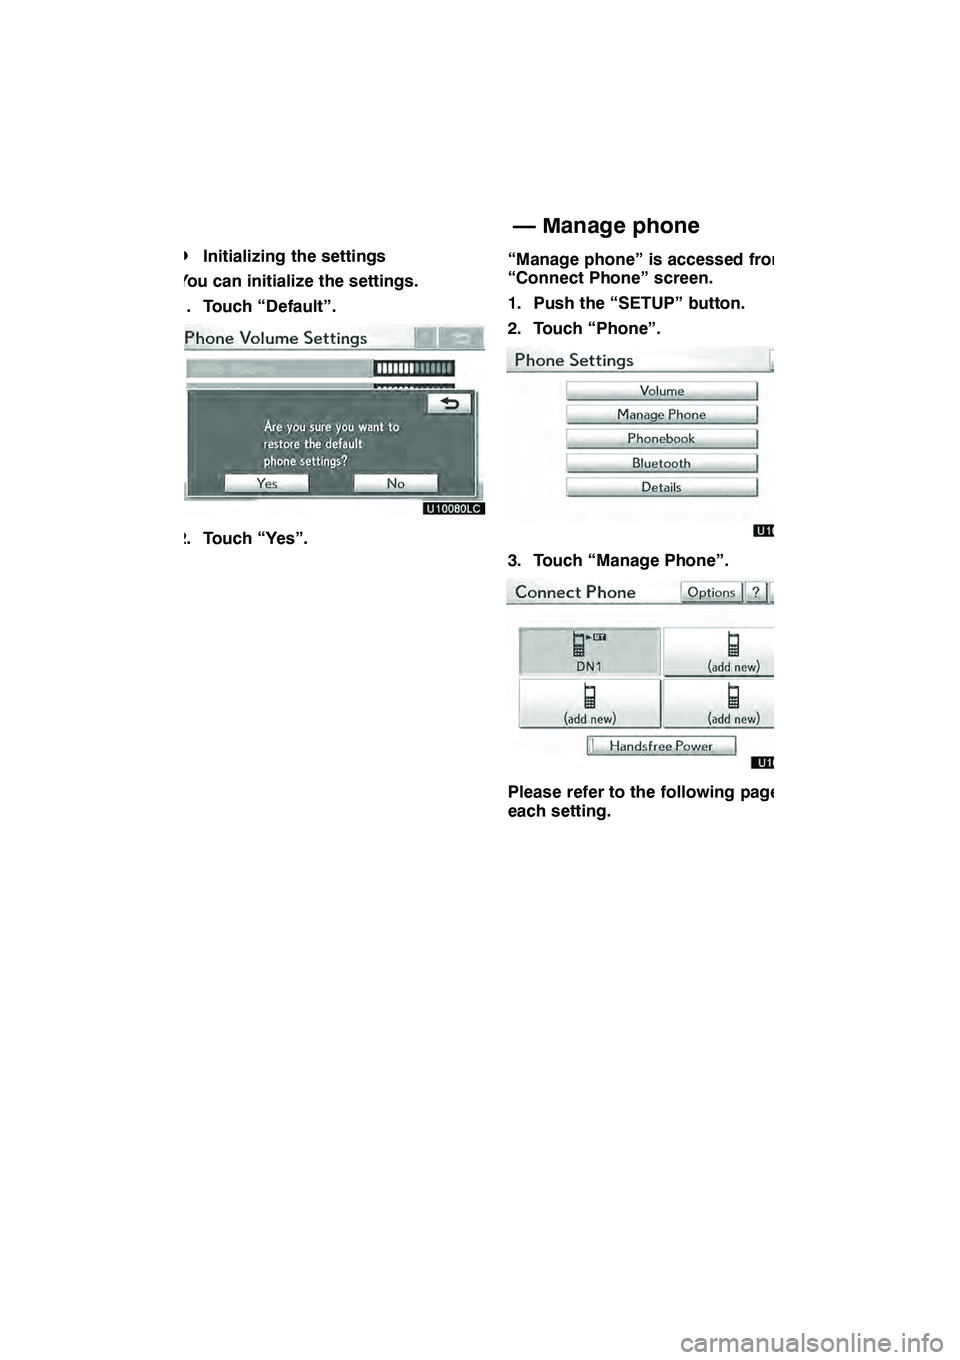
Initializing the settings
You can initialize the settings.
1. Touch “Default”.
2. Touch “Yes”. “Manage phone” is accessed from the
“Connect Phone” screen.
1. Push the “SETUP” button.
2. Touch “Phone”.
3. Touch “Manage Phone”.
Please refer to the following pages for
each setting.
GX460 Navi (U)
OM60E73U
Finish
09.09.24
11
— Manage phone
Page 353 of 428
SETUP
352 D
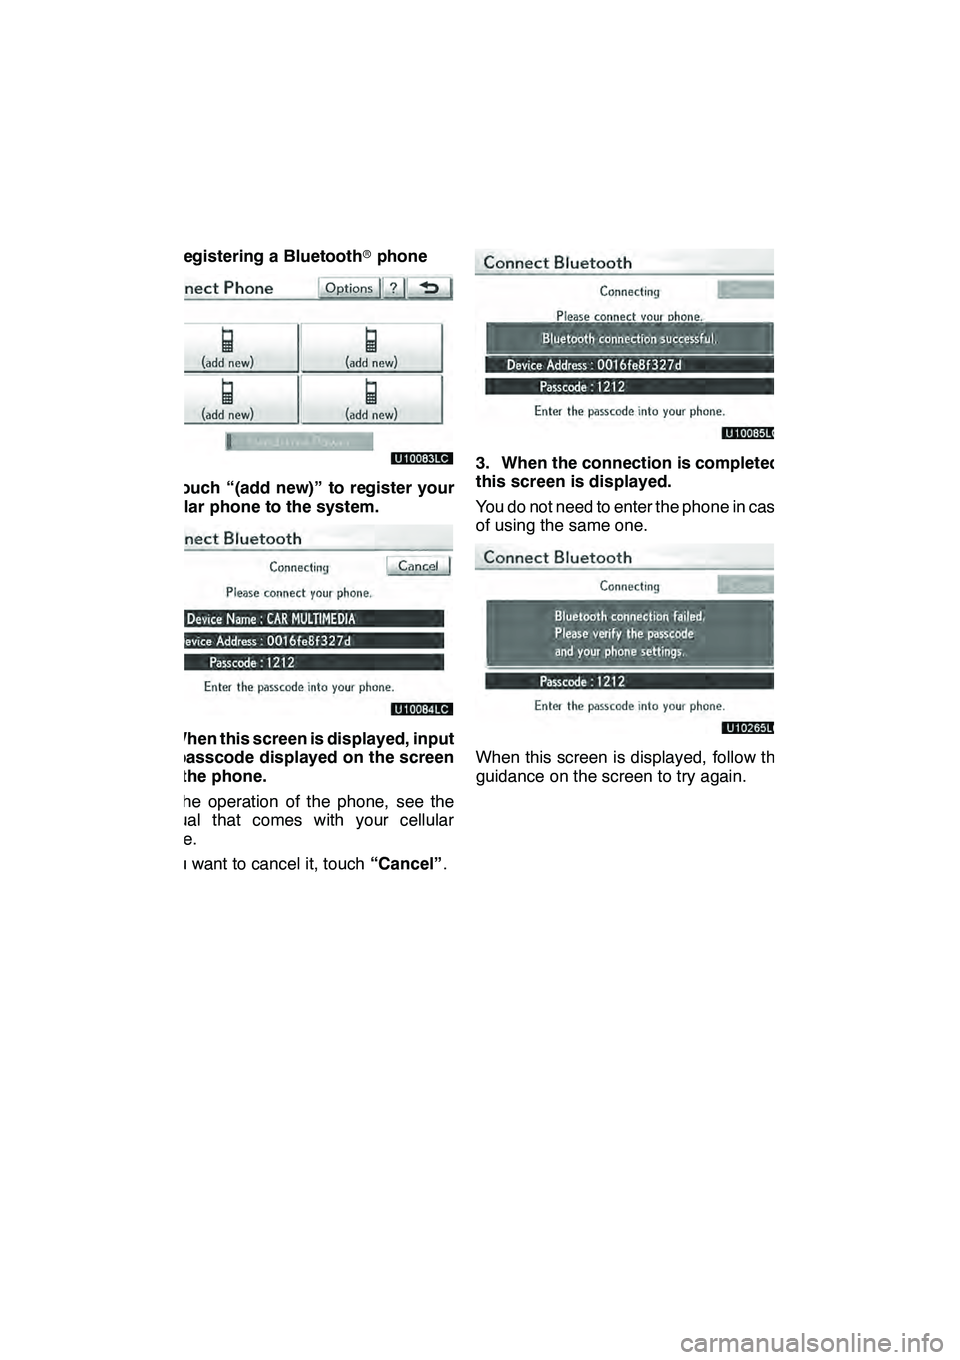
Registering a Bluetoothrphone
1. Touch “(add new)” to register your
cellular phone to the system.
2. When this screen is displayed, input
the passcode displayed on the screen
into the phone.
For the operation of the phone, see the
manual that comes with your cellular
phone.
If you want to cancel it, touch “Cancel”.
3. When the connection is completed,
this screen is displayed.
You do not need to enter the phone in case
of using the same one.
When this screen is displayed, follow the
guidance on the screen to try again.
GX460 Navi (U)
OM60E73U
Finish
09.09.24
Page 354 of 428
SETUP
353
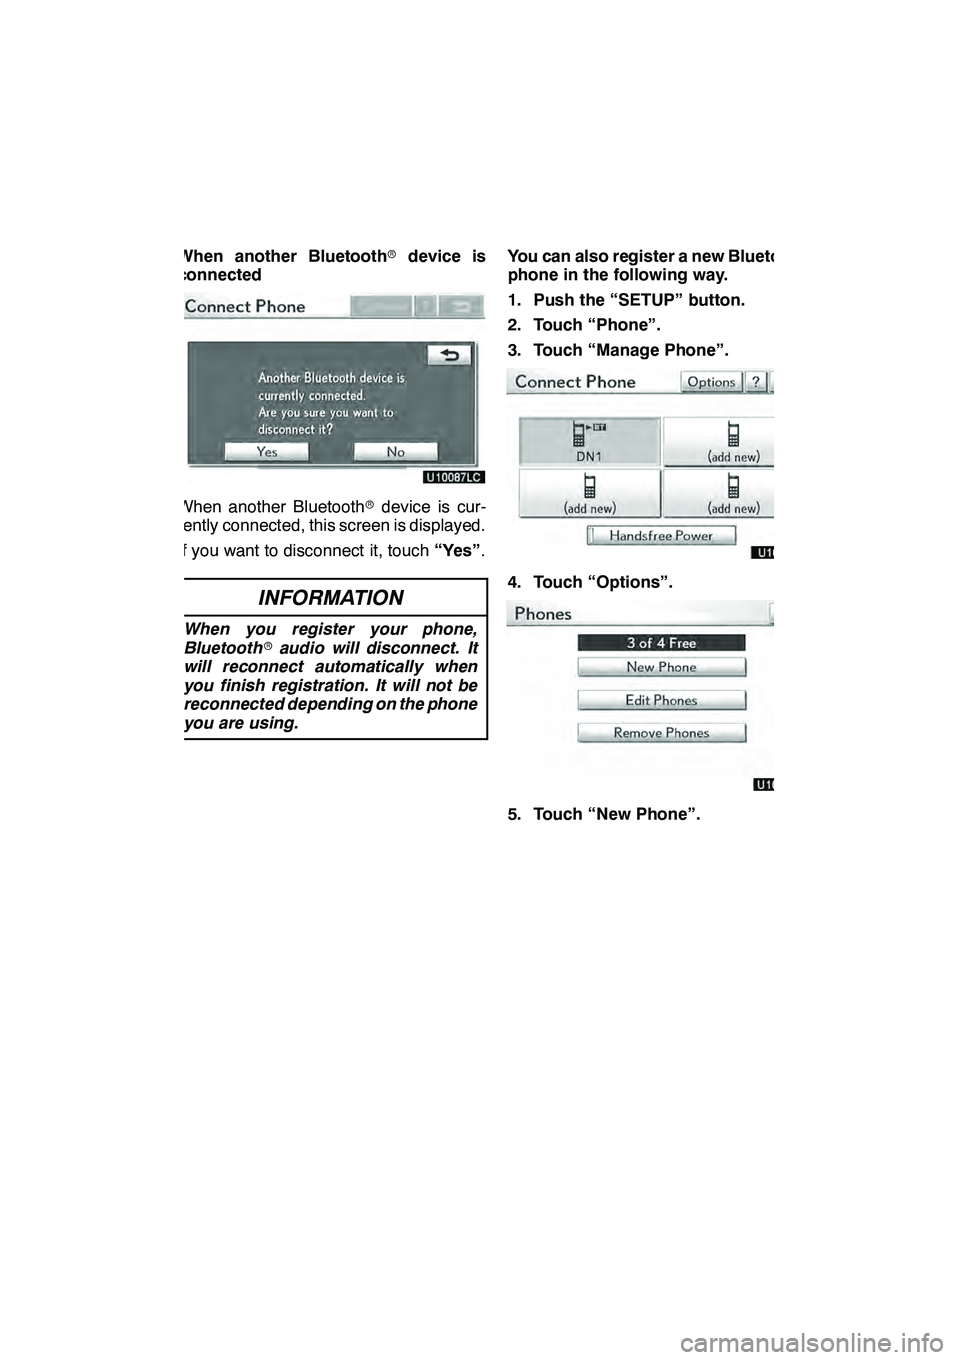
When another Bluetoothrdevice is
connected
When another Bluetooth rdevice is cur-
rently connected, this screen is displayed.
If you want to disconnect it, touch “Yes”.
INFORMATION
When you register your phone,
Bluetooth raudio will disconnect. It
will reconnect automatically when
you finish registration. It will not be
reconnected depending on the phone
you are using.
You can also register a new Bluetooth r
phone in the following way.
1. Push the “SETUP” button.
2. Touch “Phone”.
3. Touch “Manage Phone”.
4. Touch “Options”.
5. Touch “New Phone”.
GX460 Navi (U)
OM60E73U
Finish
09.09.24
11
Page 355 of 428
SETUP
354
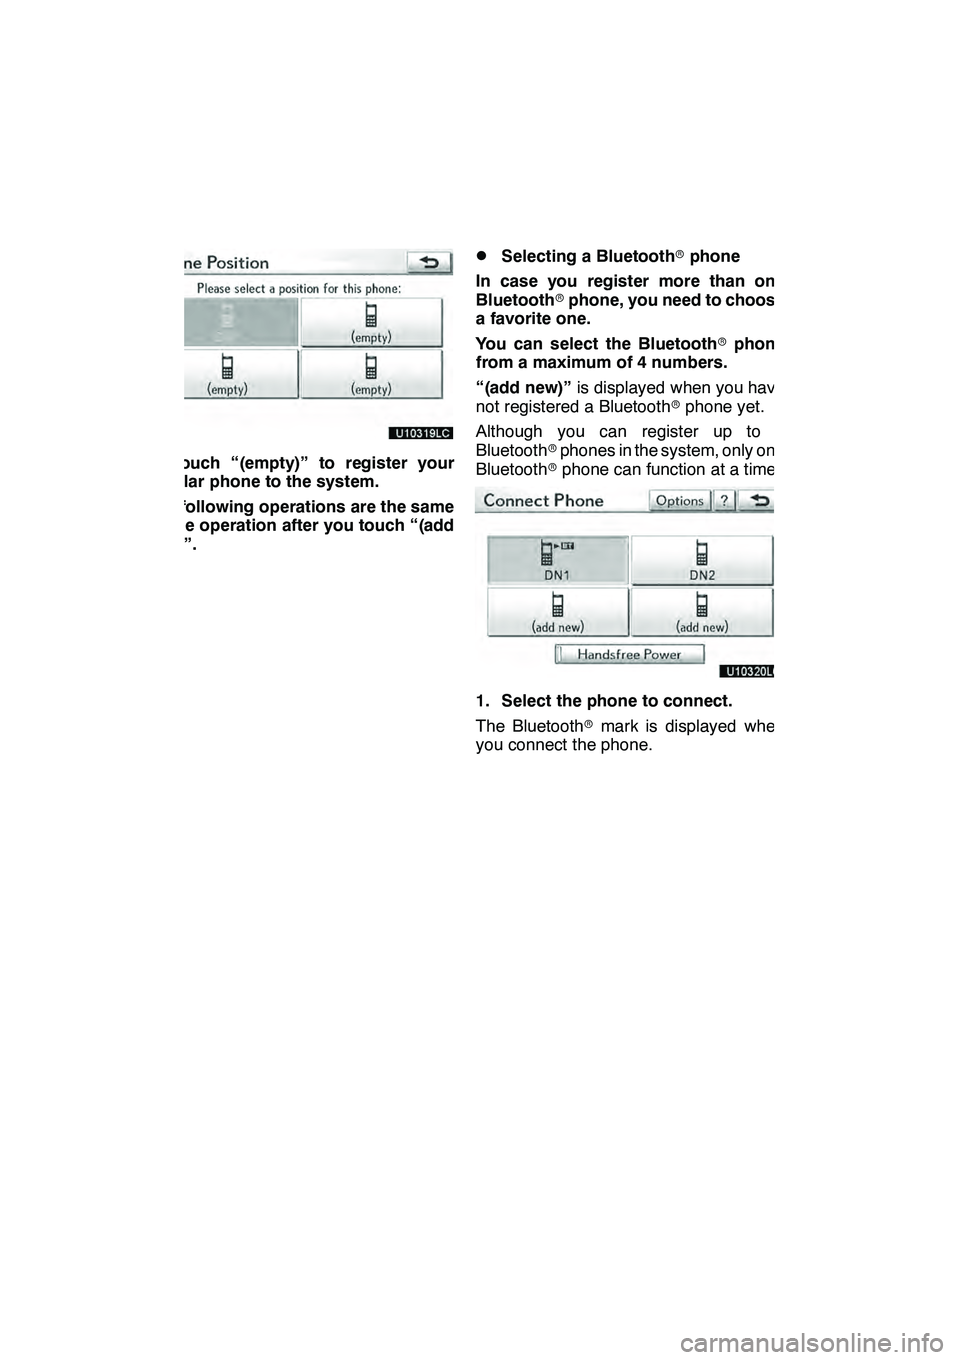
6. Touch “(empty)” to register your
cellular phone to the system.
The following operations are the same
as the operation after you touch “(add
new)”.
DSelecting a Bluetoothrphone
In case you register more than one
Bluetooth rphone, you need to choose
a favorite one.
You can select the Bluetooth rphone
from a maximum of 4 numbers.
“(add new)” is displayed when you have
not registered a Bluetooth rphone yet.
Although you can register up to 4
Bluetooth rphones in the system, only one
Bluetooth rphone can function at a time.
1. Select the phone to connect.
The Bluetooth rmark is displayed when
you connect the phone.
GX460 Navi (U)
OM60E73U
Finish
09.09.24
Page 356 of 428
SETUP
355
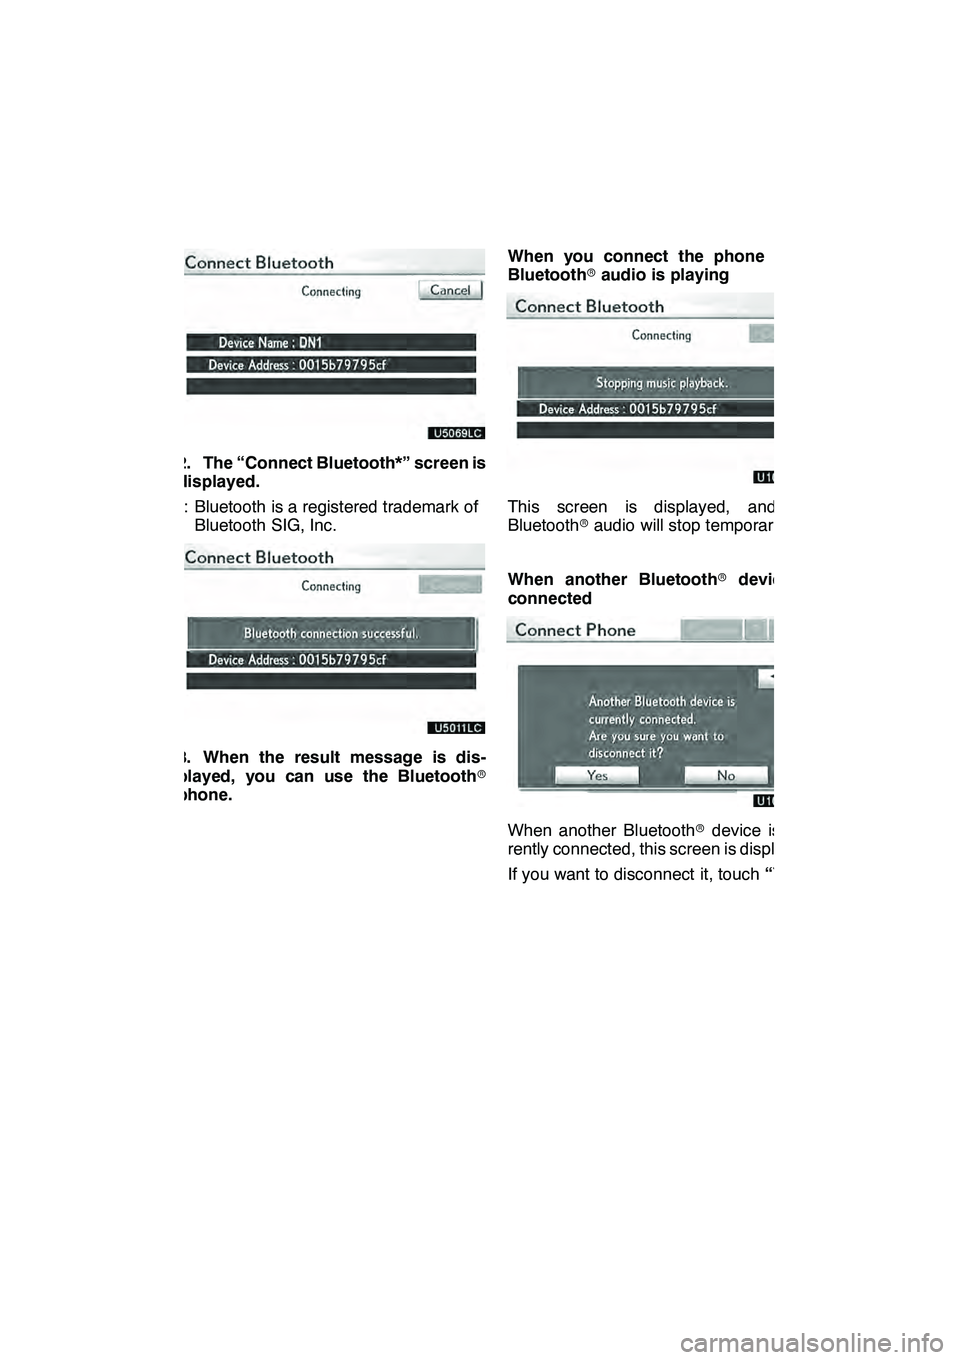
2. The “Connect Bluetooth*” screen is
displayed.
*: Bluetooth is a registered trademark ofBluetooth SIG, Inc.
3. When the result message is dis-
played, you can use the Bluetooth r
phone. When you connect the phone while
Bluetooth
raudio is playing
This screen is displayed, and the
Bluetooth raudio will stop temporarily.
When another Bluetooth rdevice is
connected
When another Bluetooth rdevice is cur-
rently connected, this screen is displayed.
If you want to disconnect it, touch “Yes”.
GX460 Navi (U)
OM60E73U
Finish
09.09.24
11
Page 357 of 428
SETUP
356
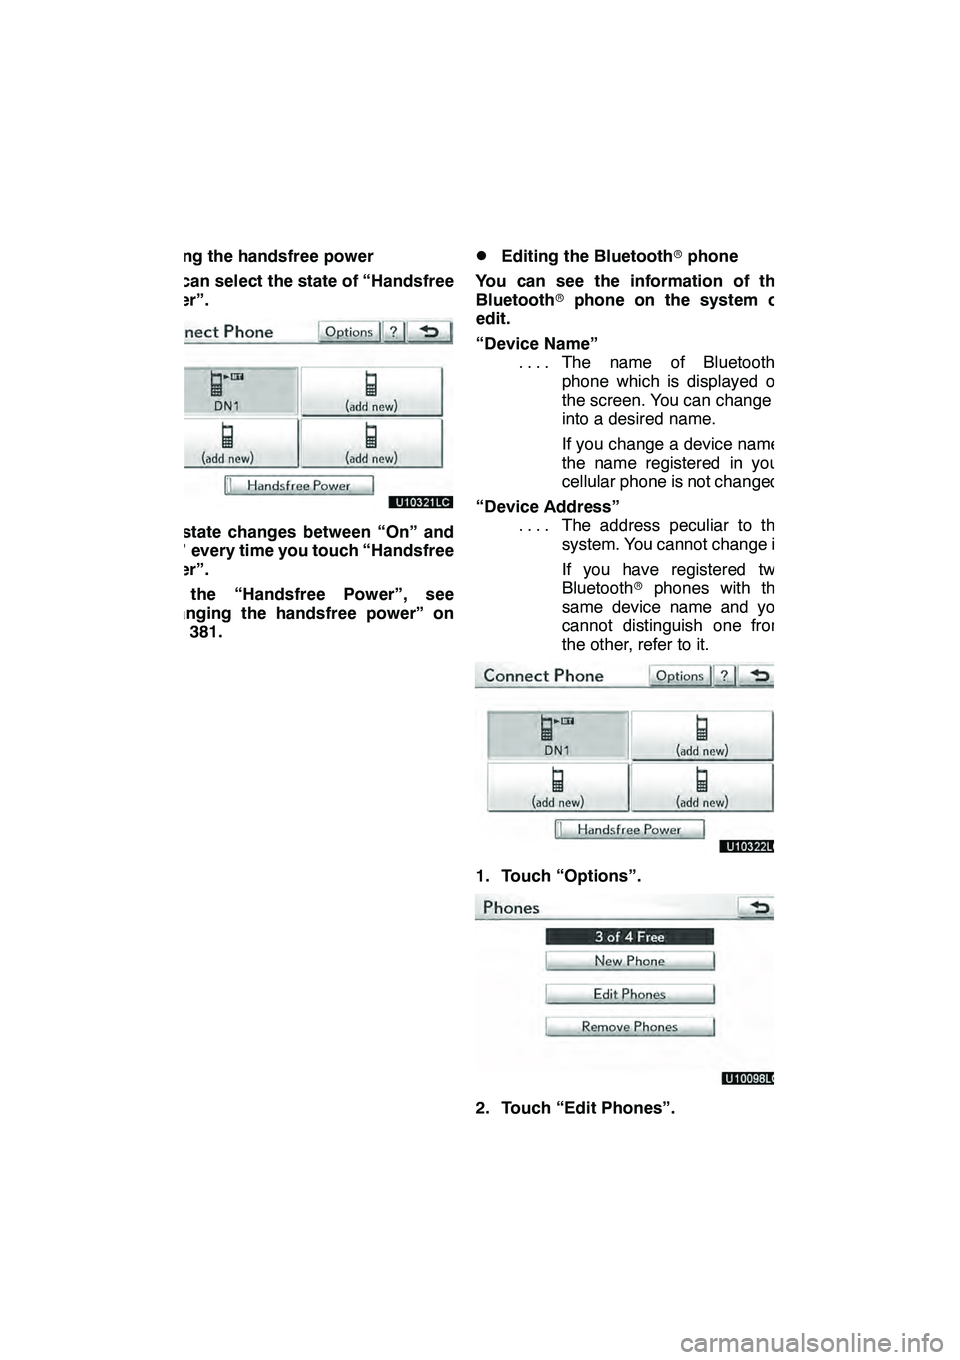
Setting the handsfree power
You can select the state of “Handsfree
Power”.
The state changes between “On” and
“Off” every time you touch “Handsfree
Power”.
For the “Handsfree Power”, see
“Changing the handsfree power” on
page 381.
DEditing the Bluetoothrphone
You can see the information of the
Bluetooth rphone on the system or
edit.
“Device Name” The name of Bluetooth r
....
phone which is displayed on
the screen. You can change it
into a desired name.
If you change a device name,
the name registered in your
cellular phone is not changed.
“Device Address” The address peculiar to the
....
system. You cannot change it.
If you have registered two
Bluetooth rphones with the
same device name and you
cannot distinguish one from
the other, refer to it.
1. Touch “Options”.
2. Touch “Edit Phones”.
GX460 Navi (U)
OM60E73U
Finish
09.09.24