Lexus IS200t 2015 Owner's Manual
IS200t 2015
Lexus
Lexus
https://www.carmanualsonline.info/img/36/29714/w960_29714-0.png
Lexus IS200t 2015 Owner's Manual
Trending: windshield wipers, sensor, oil reset, coolant level, battery, spare tire location, oil
Page 531 of 612
5318-2. Steps to take in an emergency
8
When trouble arises
IS200t_EE(OM53D19E)
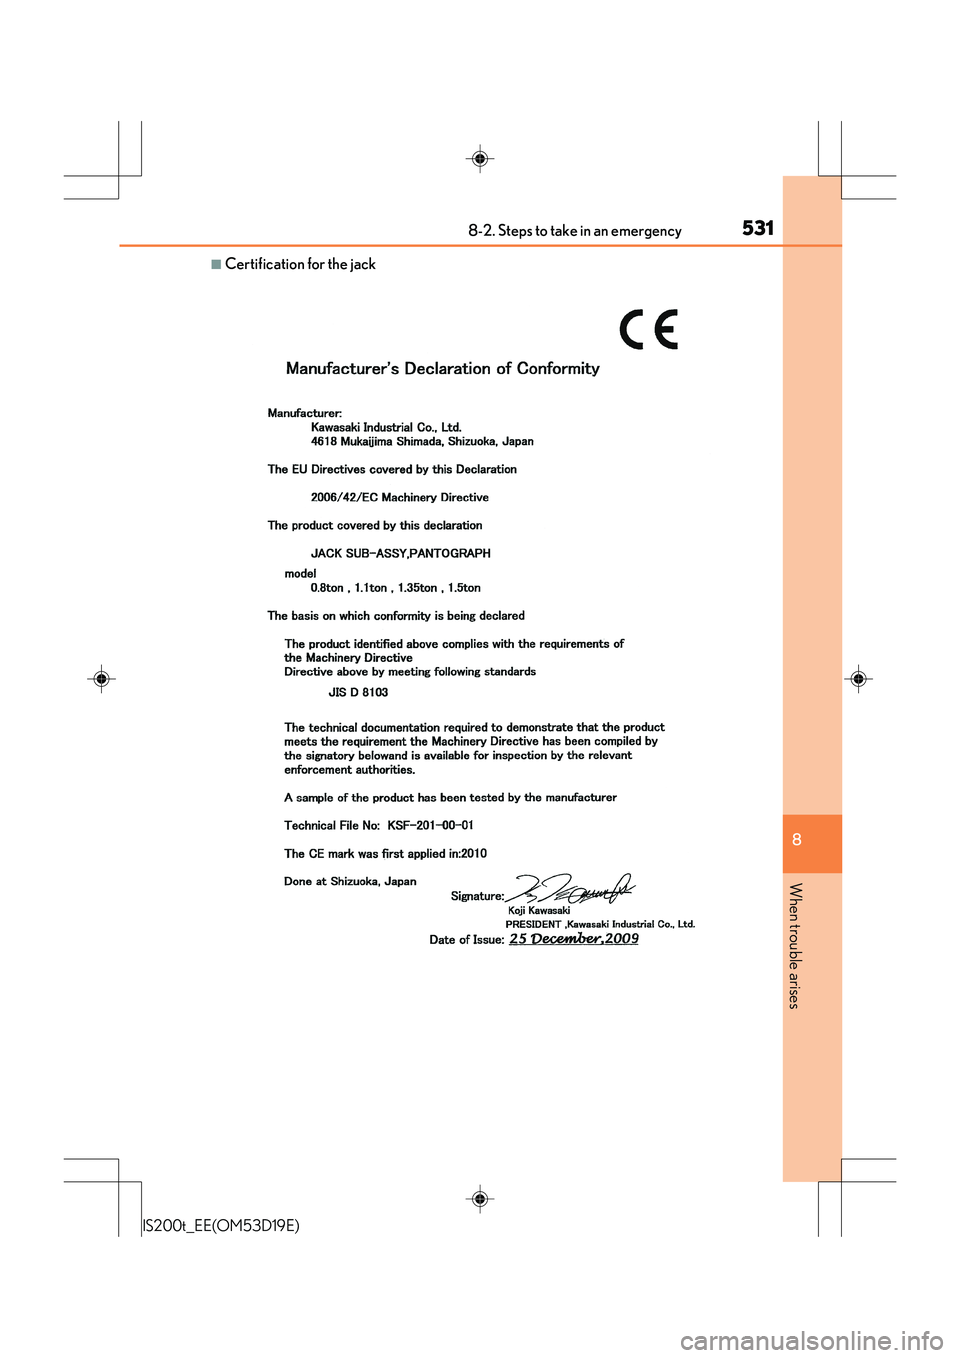
■Certification for the jack
Page 532 of 612
5328-2. Steps to take in an emergency
IS200t_EE(OM53D19E)
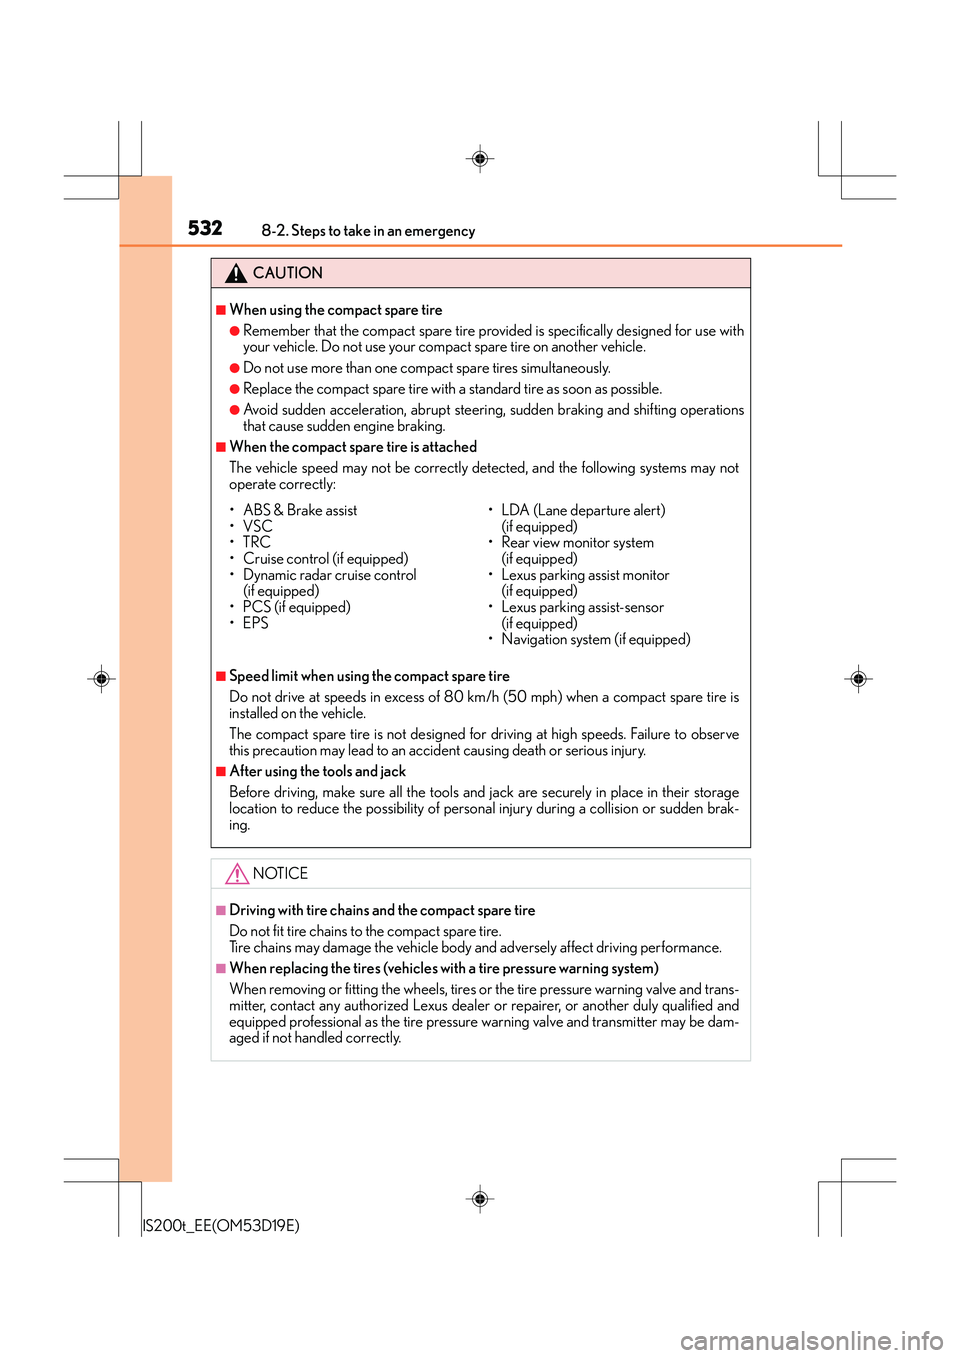
CAUTION
■When using the compact spare tire
●Remember that the compact spare tire provided is specifically designed for use with
your vehicle. Do not use your compact spare tire on another vehicle.
●Do not use more than one compact spare tires simultaneously.
●Replace the compact spare tire with a standard tire as soon as possible.
●Avoid sudden acceleration, abrupt steeri ng, sudden braking and shifting operations
that cause sudden engine braking.
■When the compact spare tire is attached
The vehicle speed may not be correctly detected, and the following systems may not
operate correctly:
■Speed limit when using the compact spare tire
Do not drive at speeds in excess of 80 km/h (50 mph) when a compact spare tire is
installed on the vehicle.
The compact spare tire is not designed for driving at high speeds. Failure to observe
this precaution may lead to an accid ent causing death or serious injury.
■After using the tools and jack
Before driving, make sure all the tools and jack are securely in place in their storage
location to reduce the possibility of personal injury during a collision or sudden brak-
ing.
NOTICE
■Driving with tire chains and the compact spare tire
Do not fit tire chains to the compact spare tire.
Tire chains may damage the vehicle body and adversely affect driving performance.
■When replacing the tires (vehicles with a tire pressure warning system)
When removing or fitting the wheels, tires or the tire pressure warning valve and trans-
mitter, contact any authorized Lexus dealer or repairer, or another duly qualified and
equipped professional as the tire pressure warning valve and transmitter may be dam-
aged if not handled correctly.
• ABS & Brake assist
•VSC
•TRC
• Cruise control (if equipped)
• Dynamic radar cruise control (if equipped)
•PCS (if equipped)
•EPS • LDA (Lane departure alert)
(if equipped)
• Rear view monitor system (if equipped)
• Lexus parking assist monitor (if equipped)
• Lexus parking assist-sensor
(if equipped)
• Navigation system (if equipped)
Page 533 of 612
5338-2. Steps to take in an emergency
8
When trouble arises
IS200t_EE(OM53D19E)
●Stop the vehicle in a safe place on a hard, flat surface.
●Set the parking brake.
●Shift the shift lever to P.
●Stop the engine.
●Turn on the emergency flashers. (→P. 4 9 0 )
If you have a flat tire (vehicles with emergency tire
puncture repair kit)
Your vehicle is not equipped with a sp are tire, but instead is equipped with an
emergency tire puncture repair kit.
A puncture caused by a nail or screw passing through the tire tread can be
repaired temporarily with the em ergency tire puncture repair kit.
CAUTION
■If you have a flat tire
Do not continue driving with a flat tire.
Driving even a short distance with a flat tire can damage the tire and the wheel beyond
repair, which could result in an accident.
Before repairing the vehicle
Page 534 of 612
5348-2. Steps to take in an emergency
IS200t_EE(OM53D19E)
*: Use of the jack (→P. 5 2 6 )
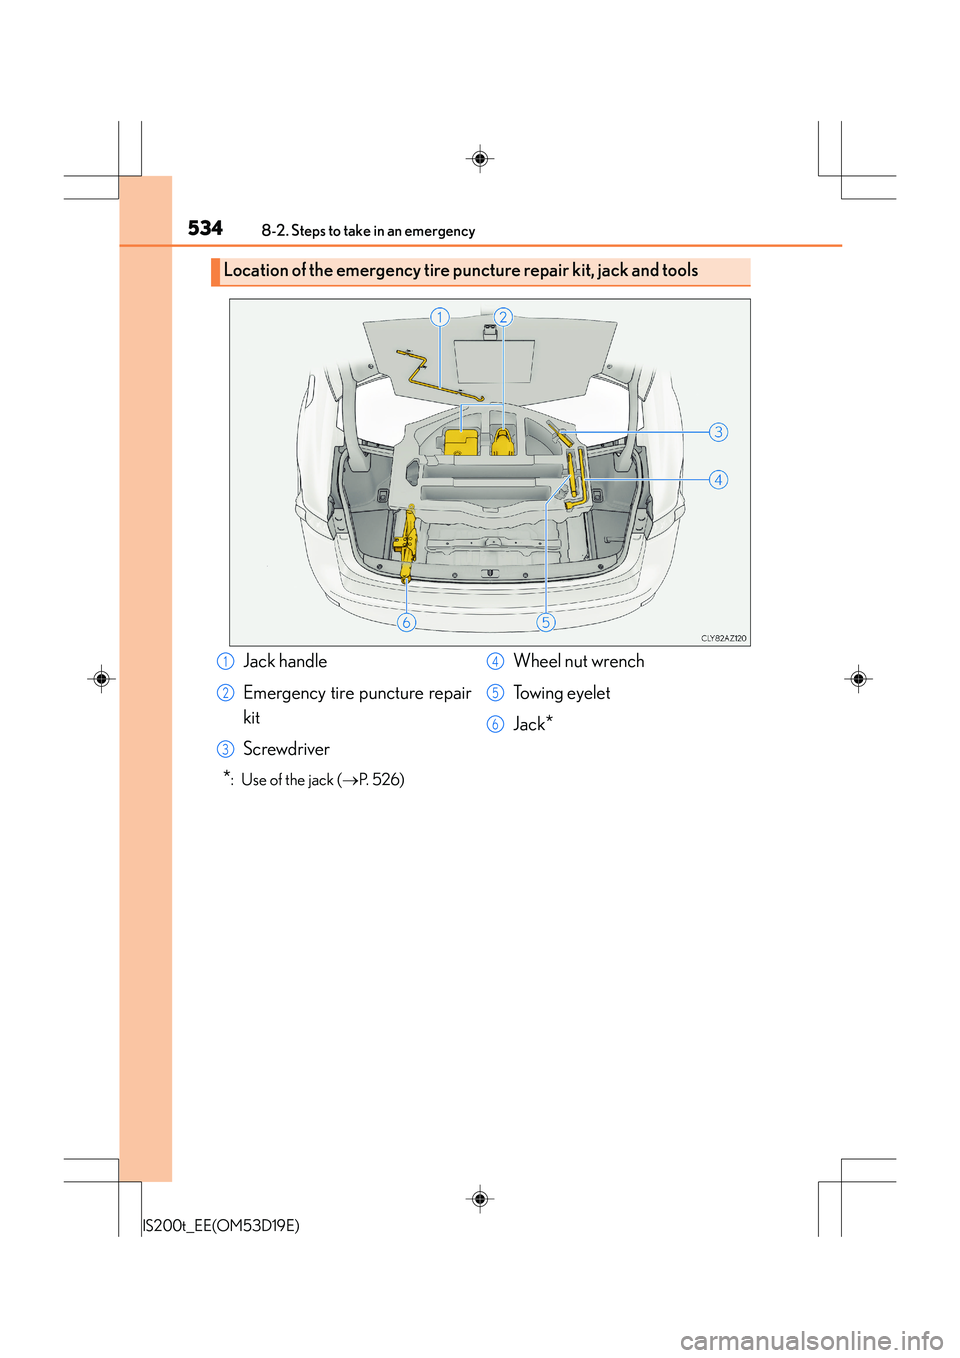
Location of the emergency tire puncture repair kit, jack and tools
Jack handle
Emergency tire puncture repair
kit
Screwdriver Wheel nut wrench
Towing eyelet
Jack
*
1
2
3
4
5
6
Page 535 of 612
5358-2. Steps to take in an emergency
8
When trouble arises
IS200t_EE(OM53D19E)
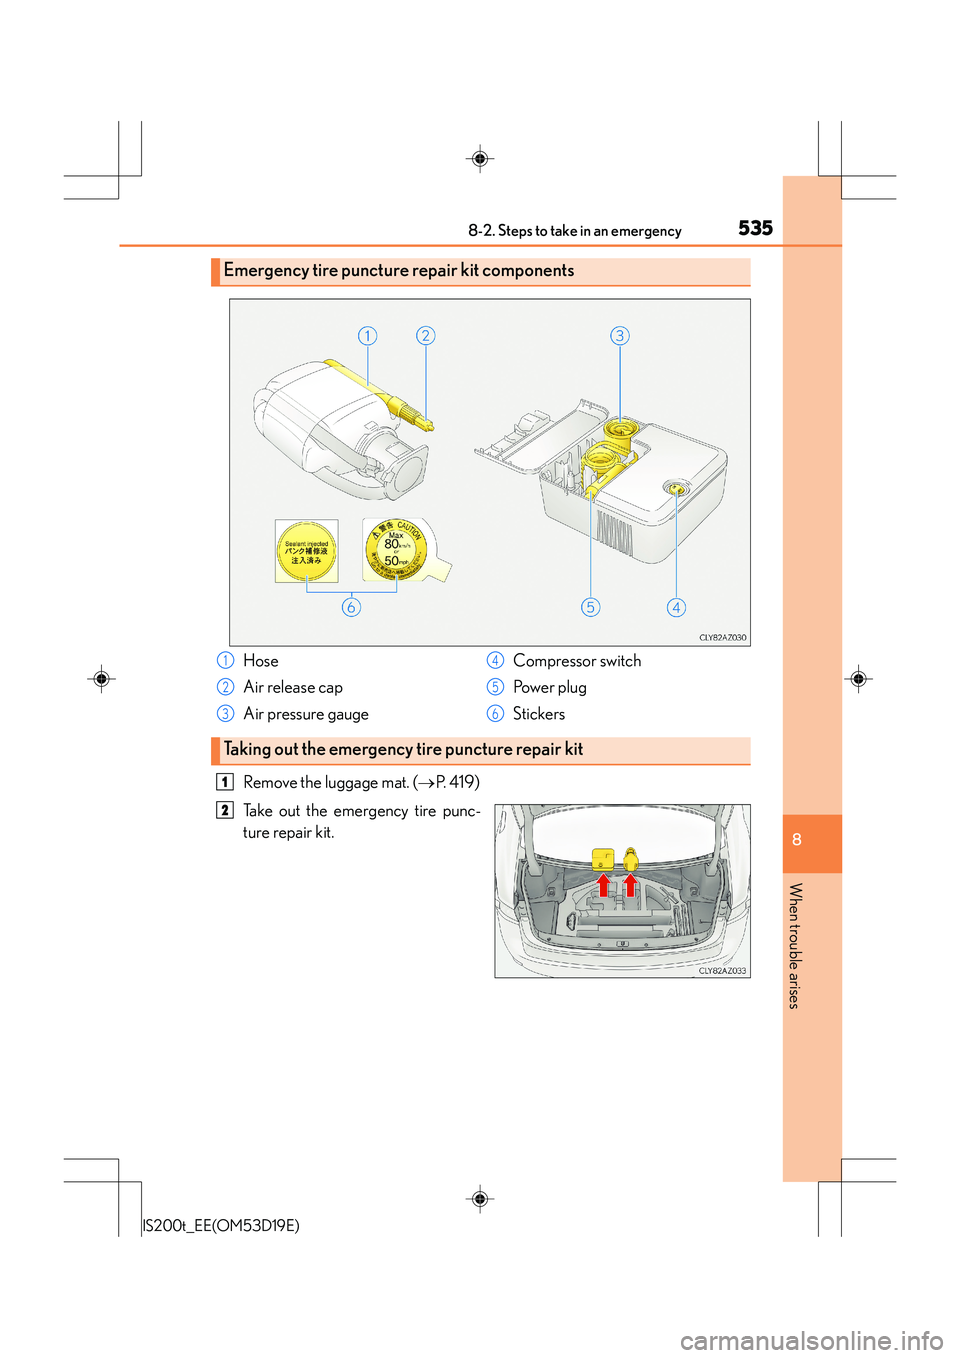
Remove the luggage mat. (→P. 4 1 9 )
Take out the emergency tire punc-
ture repair kit.
Emergency tire puncture repair kit components
Hose
Air release cap
Air pressure gauge Compressor switch
Po w e r p l u g
Stickers
Taking out the emergency tire puncture repair kit
1
2
3
4
5
6
1
2
Page 536 of 612
5368-2. Steps to take in an emergency
IS200t_EE(OM53D19E)
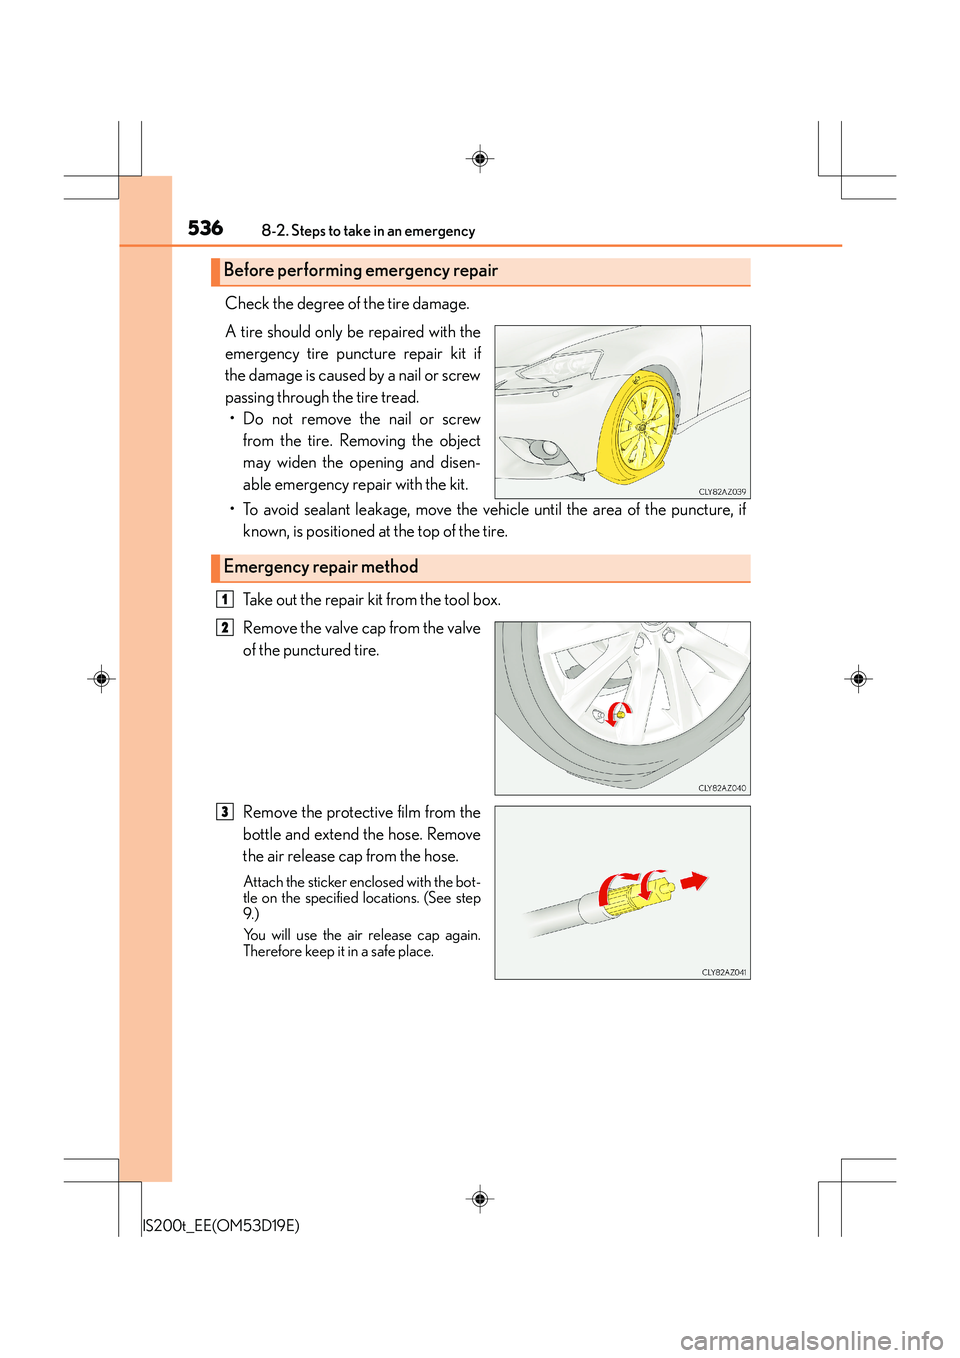
Check the degree of the tire damage.
A tire should only be repaired with the
emergency tire puncture repair kit if
the damage is caused by a nail or screw
passing through the tire tread.• Do not remove the nail or screw
from the tire. Removing the object
may widen the opening and disen-
able emergency repair with the kit.
• To avoid sealant leakage, move the vehicle until the area of the puncture, if known, is positioned at the top of the tire.
Take out the repair kit from the tool box.
Remove the valve cap from the valve
of the punctured tire.
Remove the protective film from the
bottle and extend the hose. Remove
the air release cap from the hose.
Attach the sticker enclosed with the bot-
tle on the specified locations. (See step
9. )
You will use the air release cap again.
Therefore keep it in a safe place.
Before performing emergency repair
Emergency repair method
1
2
3
Page 537 of 612
5378-2. Steps to take in an emergency
8
When trouble arises
IS200t_EE(OM53D19E)
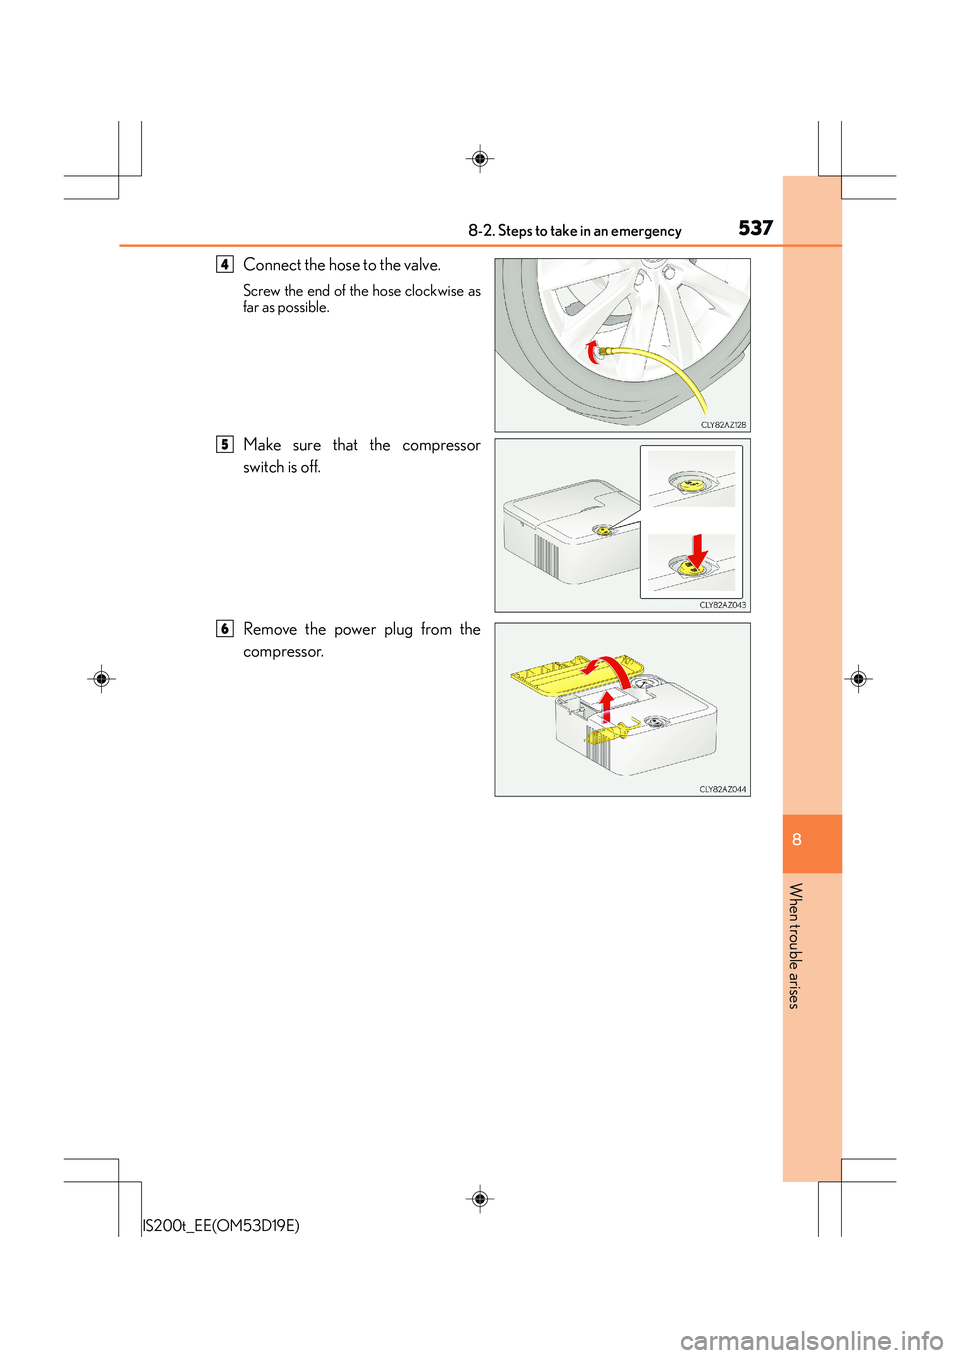
Connect the hose to the valve.
Screw the end of the hose clockwise as
far as possible.
Make sure that the compressor
switch is off.
Remove the power plug from the
compressor.
4
5
6
Page 538 of 612
5388-2. Steps to take in an emergency
IS200t_EE(OM53D19E)
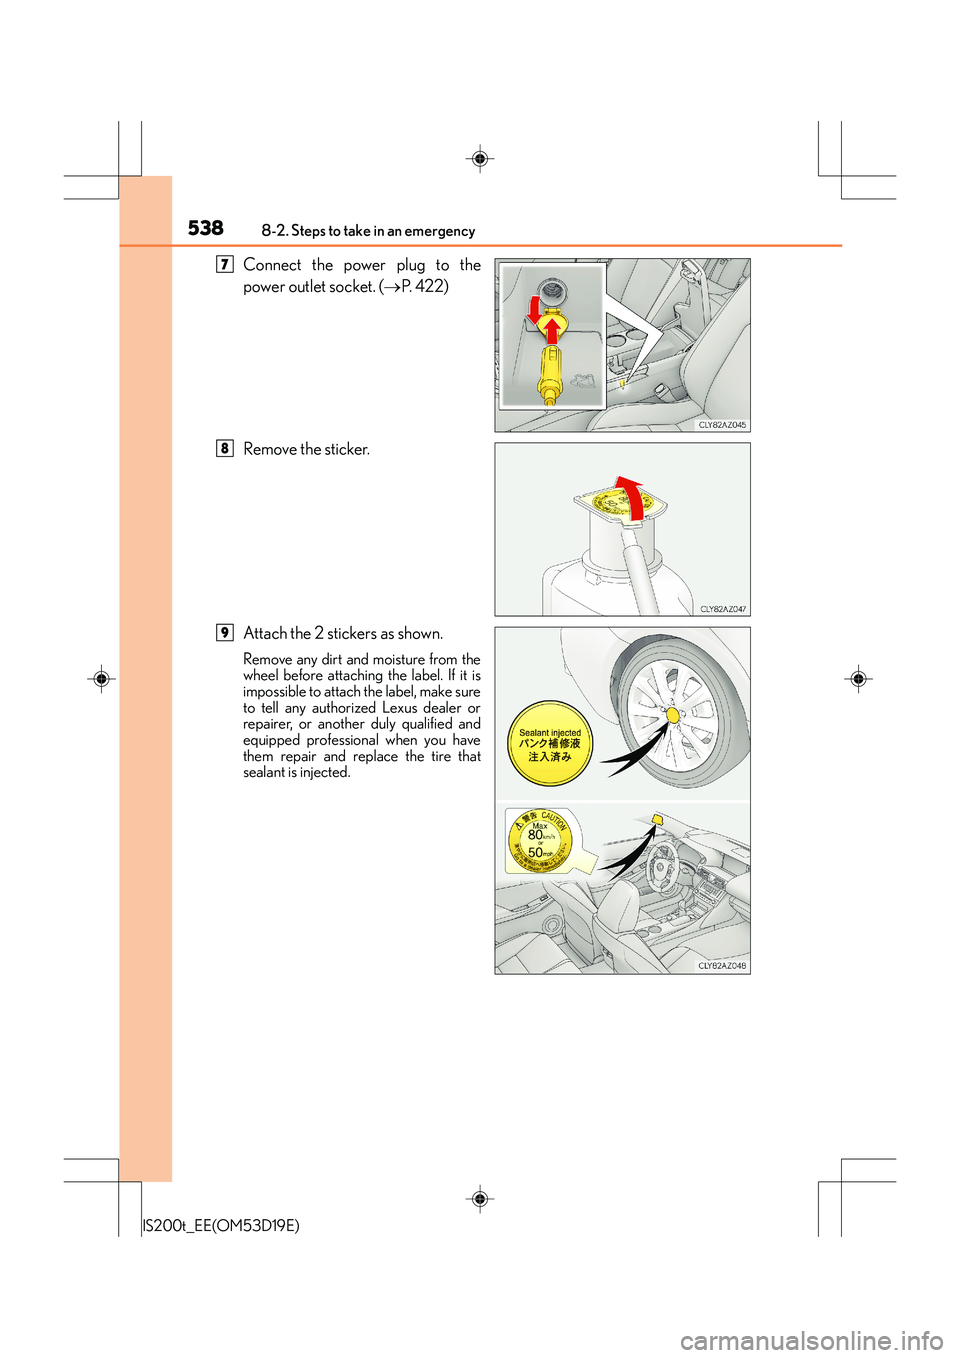
Connect the power plug to the
power outlet socket. (→P. 422)
Remove the sticker.
Attach the 2 stickers as shown.
Remove any dirt and moisture from the
wheel before attaching the label. If it is
impossible to attach the label, make sure
to tell any authorized Lexus dealer or
repairer, or another duly qualified and
equipped professional when you have
them repair and replace the tire that
sealant is injected.
7
8
9
Page 539 of 612
5398-2. Steps to take in an emergency
8
When trouble arises
IS200t_EE(OM53D19E)
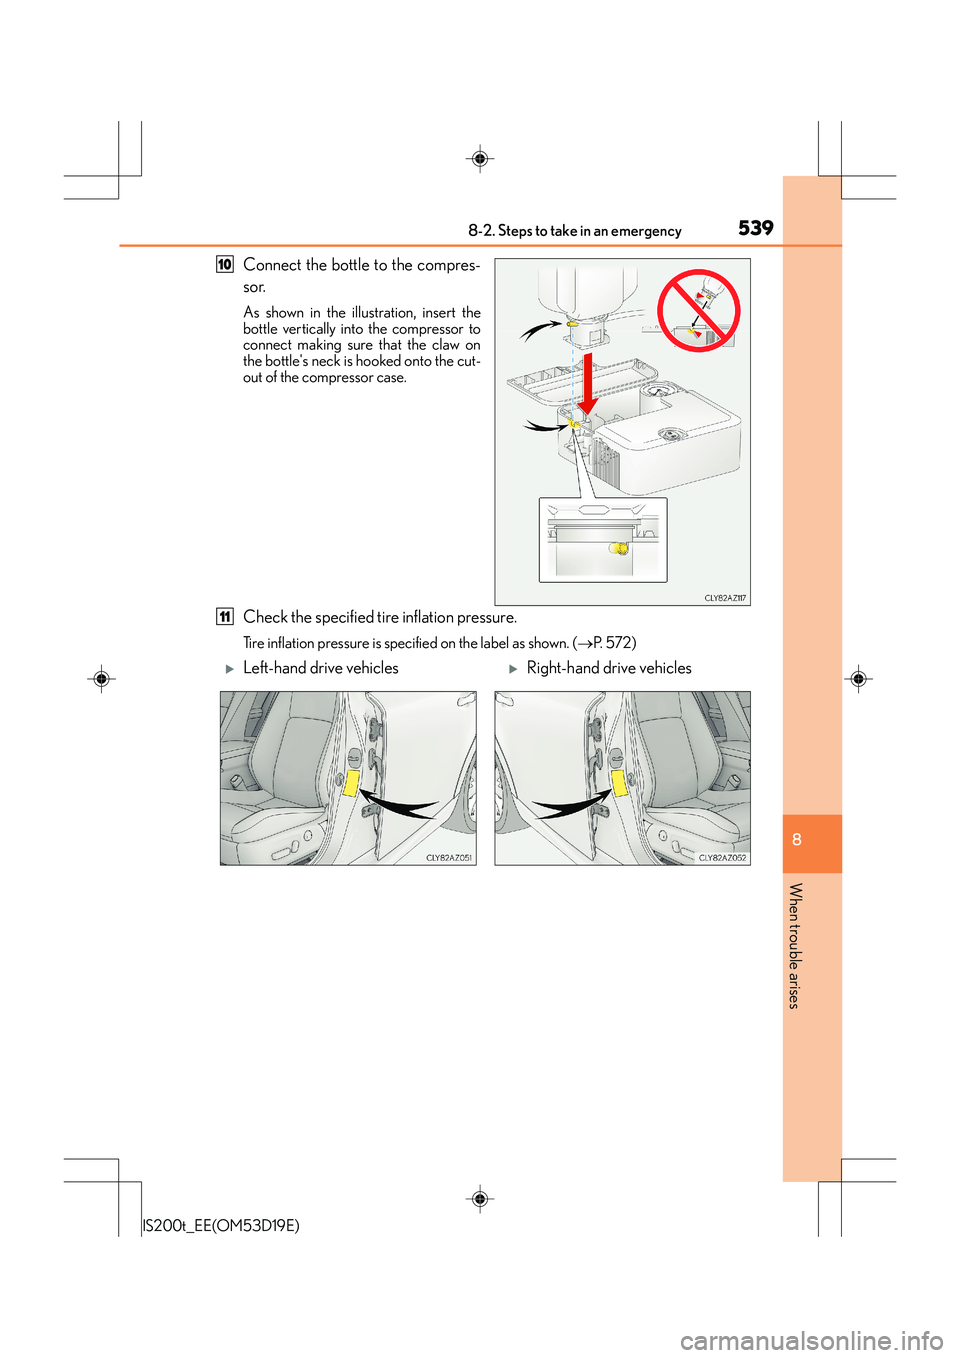
Connect the bottle to the compres-
sor.
As shown in the illustration, insert the
bottle vertically into the compressor to
connect making sure that the claw on
the bottle's neck is hooked onto the cut-
out of the compressor case.
Check the specified tire inflation pressure.
Tire inflation pressure is specified on the label as shown. (→P. 5 7 2 )
10
11
�XLeft-hand drive vehicles�XRight-hand drive vehicles
Page 540 of 612
5408-2. Steps to take in an emergency
IS200t_EE(OM53D19E)
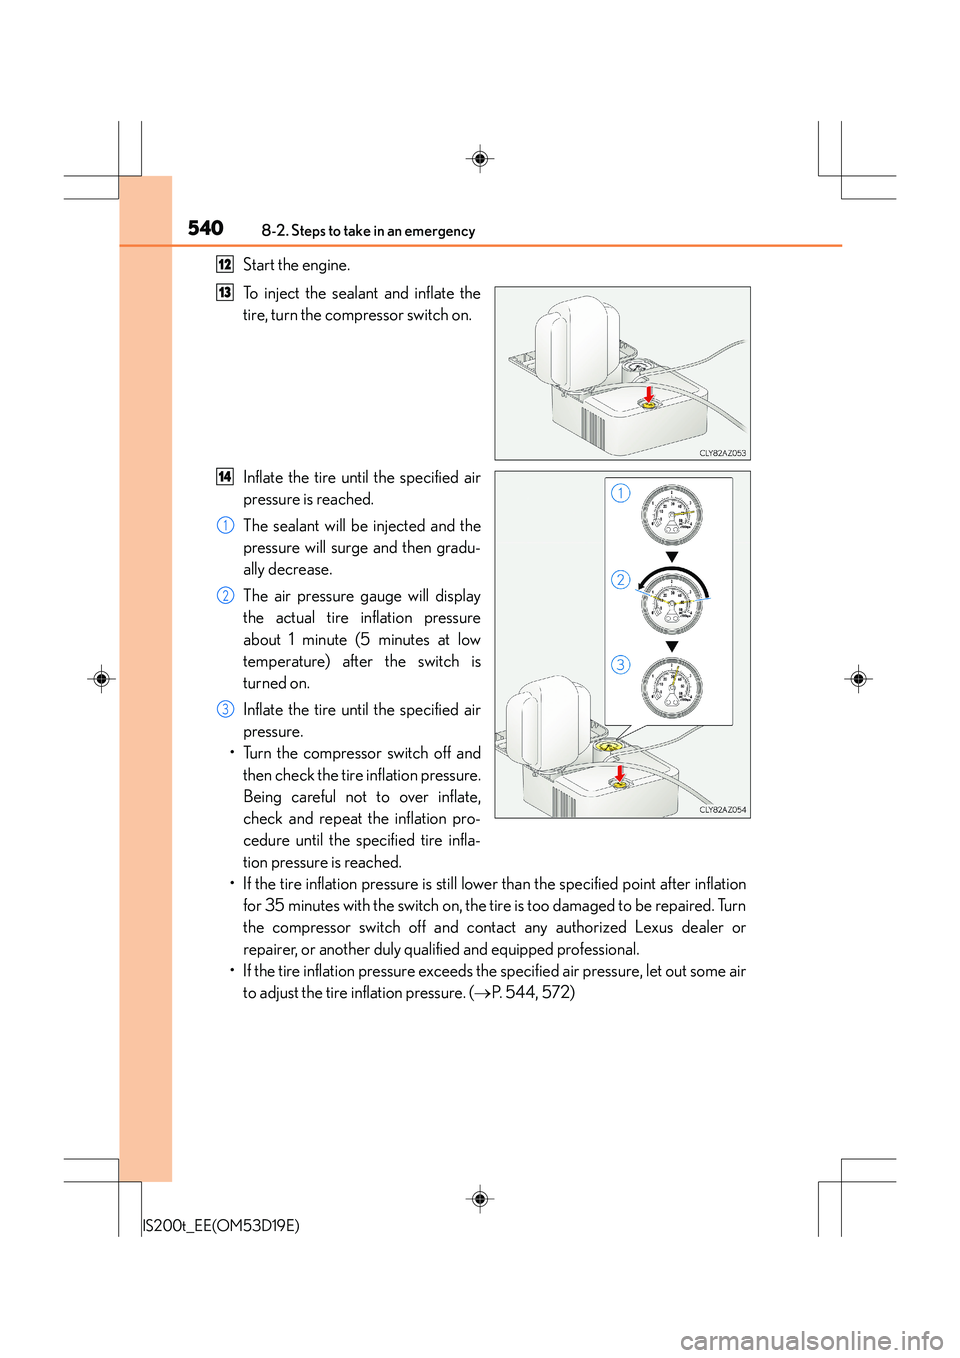
Start the engine.
To inject the sealant and inflate the
tire, turn the compressor switch on.
Inflate the tire until the specified air
pressure is reached.
The sealant will be injected and the
pressure will surge and then gradu-
ally decrease.
The air pressure gauge will display
the actual tire inflation pressure
about 1 minute (5 minutes at low
temperature) after the switch is
turned on.
Inflate the tire until the specified air
pressure.
• Turn the compressor switch off and
then check the tire inflation pressure.
Being careful not to over inflate,
check and repeat the inflation pro-
cedure until the specified tire infla-
tion pressure is reached.
• If the tire inflation pressure is still lower than the specified point after inflation
for 35 minutes with the switch on, the tire is too damaged to be repaired. Turn
the compressor switch off and contact any authorized Lexus dealer or
repairer, or another duly qualified and equipped professional.
• If the tire inflation pressure exceeds the specified air pressure, let out some air
to adjust the tire inflation pressure. ( →P. 5 4 4 , 5 7 2 )12
13
14
1
2
3
Trending: buttons, width, check engine light, warning, ECU, brake sensor, recommended oil
