Lexus IS220d 2012 Owner's Manual
Manufacturer: LEXUS, Model Year: 2012, Model line: IS220d, Model: Lexus IS220d 2012Pages: 609, PDF Size: 14.63 MB
Page 361 of 609

344
3-4. Using the hands-free phone system (for mobile phones)
IS250/220d/200d_EE
Security and system setup
To enter the menu of each setting, follow the steps below.
Security setting items and operation procedures
Press the off-hook switch and select “Setup” using ,
and .
Select “Security” using , and .
Select one of the following items using , and
:
Setting or changing the PIN (Personal Identification Num-
ber)
“Set PIN”
Locking the phone book
“Phbk Lock”
Unlocking the phone book
“Phbk Unlock”
System setup items and operation procedures
Press the off-hook switch and select “Setup” using ,
and .
Select “System Setup” using , and .
Select one of the following items using , and
:
Setting voice guidance volume
“Guidance Vol”
Displaying the Bluetooth
® device address and name
“Device Name”
Initializing the system
STEP1
STEP2
STEP3
STEP1
STEP2
STEP3
Page 362 of 609

345
3-4. Using the hands-free phone system (for mobile phones)
3
Interior features
IS250/220d/200d_EE
Setting or changing the PIN
Setting a PIN
Select “Set PIN” using , and .
Enter a PIN using , and .
Input the code 1 digit at a time.
Changing the PIN
Select “Set PIN” using , and .
Enter the registered PIN using , and .
Enter a new PIN using , and .
Input the code 1 digit at a time.
Locking or unlocking the phone book
Select “Phbk Lock” or “Phbk Unlock” using ,
and .
Input a new PIN using , and , and select
“Confirm” using , and .
Input the code 1 digit at a time.
Setting voice guidance volume
Select “Guidance Vol” using , , and .
Change the voice guidance volume using , and
.
STEP1
STEP2
STEP1
STEP2
STEP3
STEP1
STEP2
STEP1
STEP2
Page 363 of 609

346
3-4. Using the hands-free phone system (for mobile phones)
IS250/220d/200d_EE
Displaying the Bluetooth® device address and name
Select “Device Name” using , and .
Press or to display the Bluetooth
® device
address and name.
Select “Go Back” using , and to return to
“System Setup”.
Initializing the system
Select “Initialize” and then “Confirm” using ,
and .
Select “Confirm” again using , and .
STEP1
STEP2
STEP3
STEP1
STEP2
Page 364 of 609

347
3-4. Using the hands-free phone system (for mobile phones)
3
Interior features
IS250/220d/200d_EE
Initialization
The following data in the system can be initialized:
• Phone book
• Outgoing and incoming call history
• Speed dials
• Registered mobile phone data
• Security code
• Registered Bluetooth
® enabled portable player data
• Passkeys for the mobile phones
• Passkey for the Bluetooth
® audio players
• Guidance volume
• Receiver volume
• Ring tone volume
Once the initialization has been completed, the data cannot be restored to
its original state.
When the phone book is locked
The following functions cannot be used:
Dialing by inputting a name
Speed dialing
Dialing a number stored in the call history memory
Using the phone book
Page 365 of 609

348
3-4. Using the hands-free phone system (for mobile phones)
IS250/220d/200d_EE
Using the phone book
Adding a new phone number
The following methods can be used to add a new phone number:
Transferring data from the mobile phone
Inputting a phone number using , and
Selecting a phone number from outgoing or incoming call his-
tory
To enter the menu of each setting, follow the steps below.
Press the off-hook switch and select “Phonebook” using
, and .
Select one of the following items using , and
:
Adding a new phone number
“Add Entry”
Changing the registered name in the phone book
“Change Name”
Listing the registered data
“List Names”
Setting speed dials
“Speed Dial”
Deleting the registered data
“Delete Entry”
Deleting speed dials
“Del Spd Dial”
STEP1
STEP2
Page 366 of 609

349
3-4. Using the hands-free phone system (for mobile phones)
3
Interior features
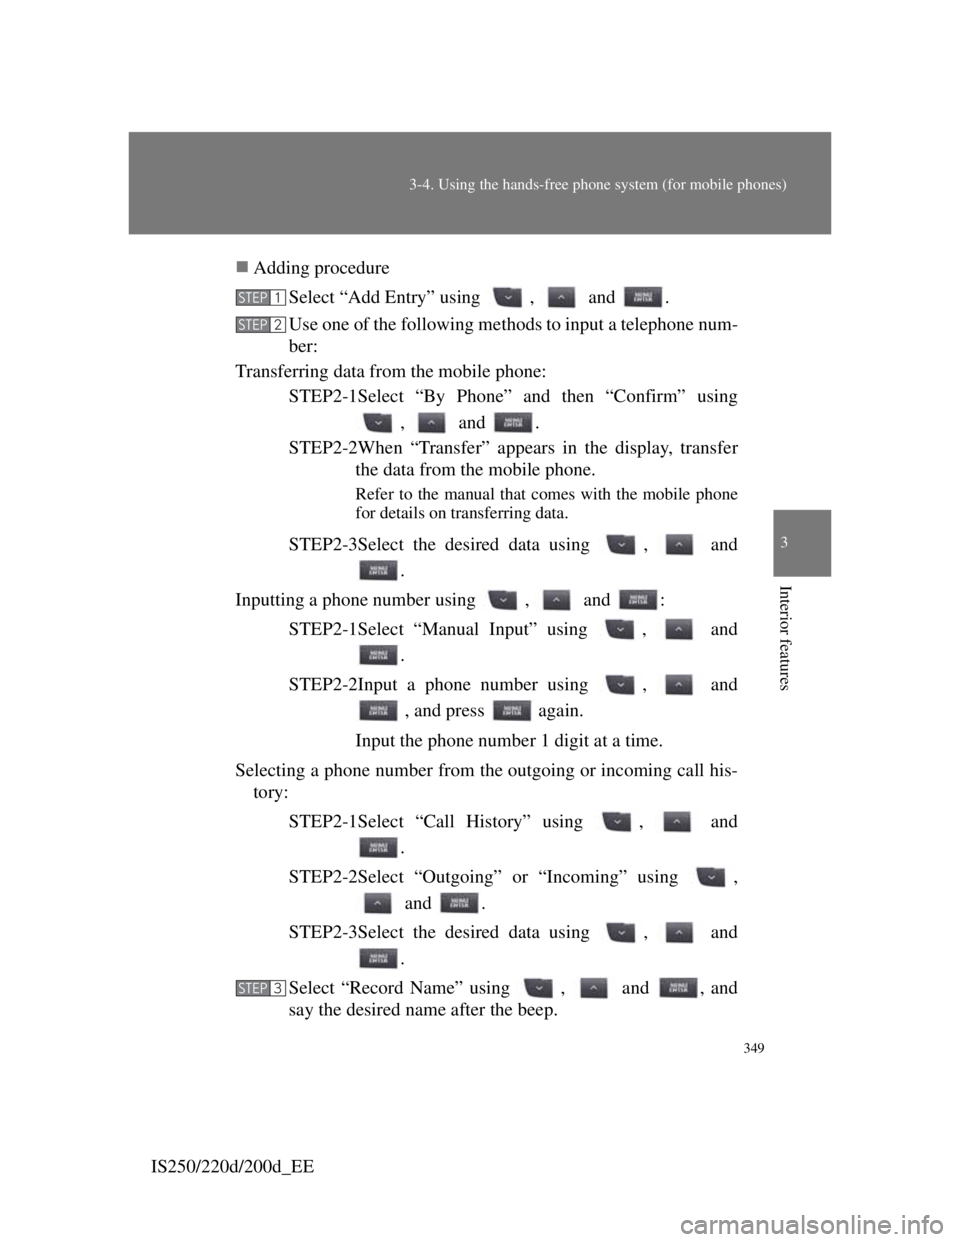
IS250/220d/200d_EEAdding procedure
Select “Add Entry” using , and .
Use one of the following methods to input a telephone num-
ber:
Transferring data from the mobile phone:
STEP2-1Select “By Phone” and then “Confirm” using
, and .
STEP2-2When “Transfer” appears in the display, transfer
the data from the mobile phone.
Refer to the manual that comes with the mobile phone
for details on transferring data.
STEP2-3Select the desired data using , and
.
Inputting a phone number using , and :
STEP2-1Select “Manual Input” using , and
.
STEP2-2Input a phone number using , and
, and press again.
Input the phone number 1 digit at a time.
Selecting a phone number from the outgoing or incoming call his-
tory:
STEP2-1Select “Call History” using , and
.
STEP2-2Select “Outgoing” or “Incoming” using ,
and .
STEP2-3Select the desired data using , and
.
Select “Record Name” using , and , and
say the desired name after the beep.
STEP1
STEP2
STEP3
Page 367 of 609

350
3-4. Using the hands-free phone system (for mobile phones)
IS250/220d/200d_EEThe name to be registered will be repeated aloud.
Select “Confirm” using , and .
Select “Confirm” again using , and .
In , selecting “Speed Dial” instead of “Confirm” registers
the newly added phone number as a speed dial.
STEP4
STEP5
STEP5
Page 368 of 609

351
3-4. Using the hands-free phone system (for mobile phones)
3
Interior features
IS250/220d/200d_EE
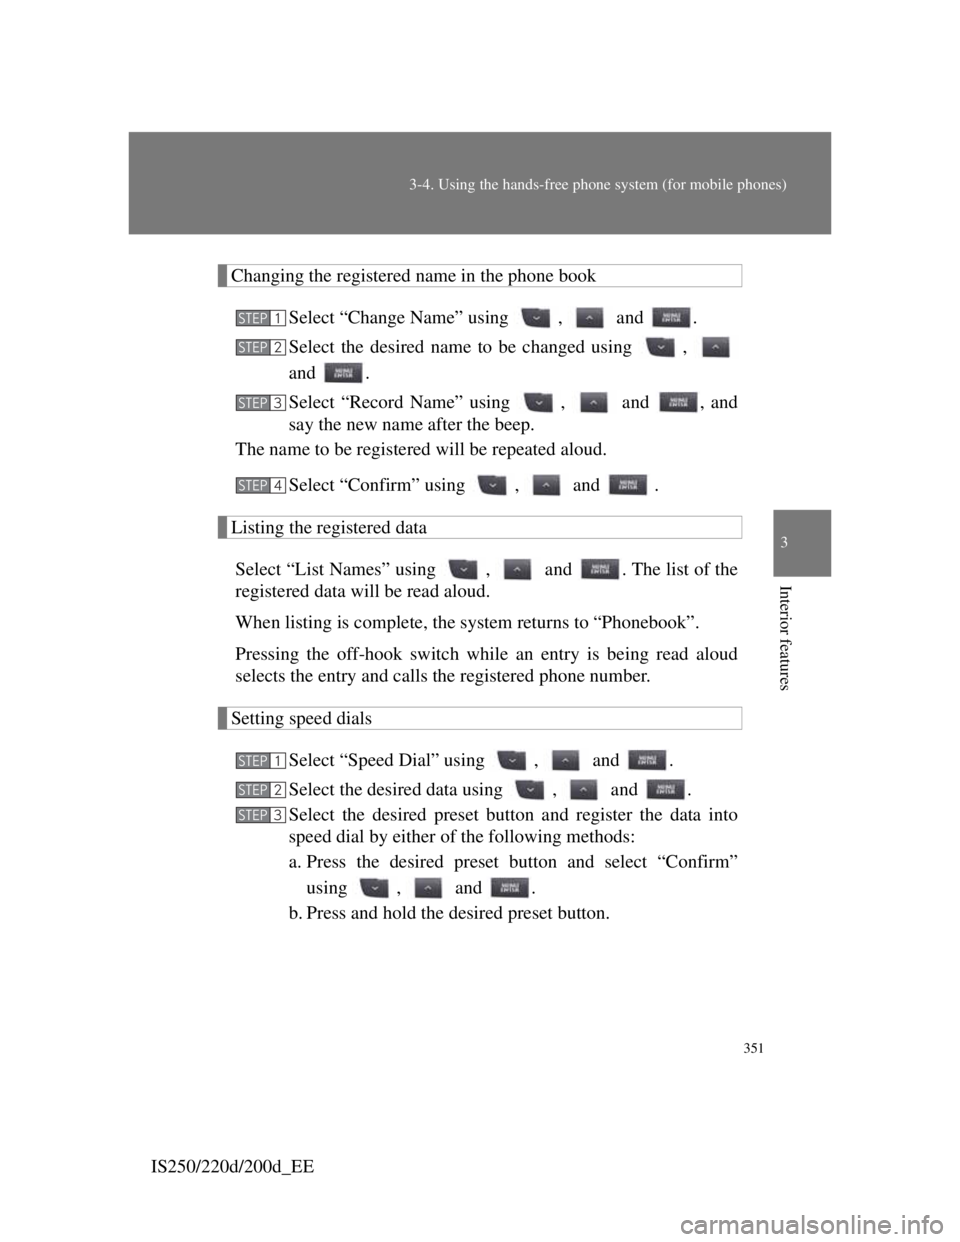
Changing the registered name in the phone book
Select “Change Name” using , and .
Select the desired name to be changed using ,
and .
Select “Record Name” using , and , and
say the new name after the beep.
The name to be registered will be repeated aloud.
Select “Confirm” using , and .
Listing the registered data
Select “List Names” using , and . The list of the
registered data will be read aloud.
When listing is complete, the system returns to “Phonebook”.
Pressing the off-hook switch while an entry is being read aloud
selects the entry and calls the registered phone number.
Setting speed dials
Select “Speed Dial” using , and .
Select the desired data using , and .
Select the desired preset button and register the data into
speed dial by either of the following methods:
a. Press the desired preset button and select “Confirm”
using , and .
b. Press and hold the desired preset button.
STEP1
STEP2
STEP3
STEP4
STEP1
STEP2
STEP3
Page 369 of 609

352
3-4. Using the hands-free phone system (for mobile phones)
IS250/220d/200d_EE
Deleting the registered data
Select “Delete Entry” using , and .
Select the desired data to be deleted using , and
.
Deleting speed dials
Select “Del Spd Dial” using , and .
Press the preset button to which the desired speed dial is
registered after the beep.
The name to be deleted will be heard.
Select “Confirm” using , and .
Limitation of number of digits
A phone number that exceeds 24 digits cannot be registered.
STEP1
STEP2
STEP1
STEP2
STEP3
Page 370 of 609

351
3
Interior features
IS250/220d/200d_EE
3-5. Using the interior lights
Interior lights list
Your Lexus is equipped with the illuminated entry system to assist in
entering the vehicle. Owing to the function of the system, the lights
shown in the following illustration automatically turn on/off according
to the presence of the electronic key, whether the doors are locked/
unlocked, whether the doors are opened/closed, and the “ENGINE
START STOP” switch mode.
Front personal lights (P. 354)
Front interior lights (P. 353)
Front overhead courtesy light
Rear personal lights ( P. 354)
Rear interior light
Rear overhead courtesy light
Shift lever light (when the “ENGINE START STOP” switch
is in ACCESSORY or IGNITION ON mode)