ECU Lexus IS250C 2012 Instrument cluster / LEXUS 2012 IS250C,IS350C (OM53A62U) Workshop Manual
[x] Cancel search | Manufacturer: LEXUS, Model Year: 2012, Model line: IS250C, Model: Lexus IS250C 2012Pages: 632, PDF Size: 6.77 MB
Page 468 of 632

468
4-3. Do-it-yourself maintenance
10ECU-IG LH10 A
Cruise control, air conditioning sys-
tem, power steering, rain sensor, anti-
glare inside rear view mirror, shift lock
system, tire inflation pressure warning
system, vehicle stability control
11FR S/HTR LH15 ASeat heaters and ventilators, air condi-
tioning system
12FR DOOR LH20 APower windows, outside rear view
mirrors
13SECURITY7. 5 ASmart access system with push-button
start
14H-LP LVL7. 5 AAutomatic head light leveling system
15LH-IG10 A
Charging system, headlight cleaner,
rear window defogger, electric cool-
ing fans, emergency flashers, turn sig-
nal lights, back-up lights, stop lights,
mirror heaters, seat belt pretensioner,
intuitive parking assist, cruise control,
PTC heater, exhaust system, smart
access system with push-button start
16FR WIP30 AWindshield wipers
FuseAmpereCircuit
Page 470 of 632

470
4-3. Do-it-yourself maintenance
10CIG15 ACigarette lighter
11PWR OUTLET15 APo w e r o u t l e t
12FR DOOR RH20 APower windows, outside rear view
mirrors
13AM27. 5 AStarting system
14RH-IG7. 5 A
Seat belt pretensioner, intuitive park-
ing assist, automatic transmission, seat
heater and ventilator
15FR S/HTR RH15 ASeat heaters and ventilators, air condi-
tioning system
16ECU-IG RH10 A
Power seats, headlights, front fog
lights, parking lights, license plate
lights, front side marker lights, wind-
shield washer, outside rear view mir-
rors, VDIM, air conditioning system,
pre-collision seat belt, electric tilt and
telescopic steering, power windows,
navigation system, vehicle stability
control, retractable hardtop, clock
FuseAmpereCircuit
Page 482 of 632

482
4-3. Do-it-yourself maintenance
■Bulbs other than the above
If any of the bulbs listed below has burnt out, have your Lexus dealer
replace it.
●Headlight low beams (vehicles with halogen bulbs)
● Headlight high and low beams (vehicles with discharge bulbs)
● Front fog lights
● Parking/daytime running lights (veh icles with discharge headlights)
● Front turn signal lights
● Front side marker lights
● Side turn signal lights
● Stop/tail lights
● Tail lights
● Rear side marker lights
● High mounted stoplight
● License plate lights
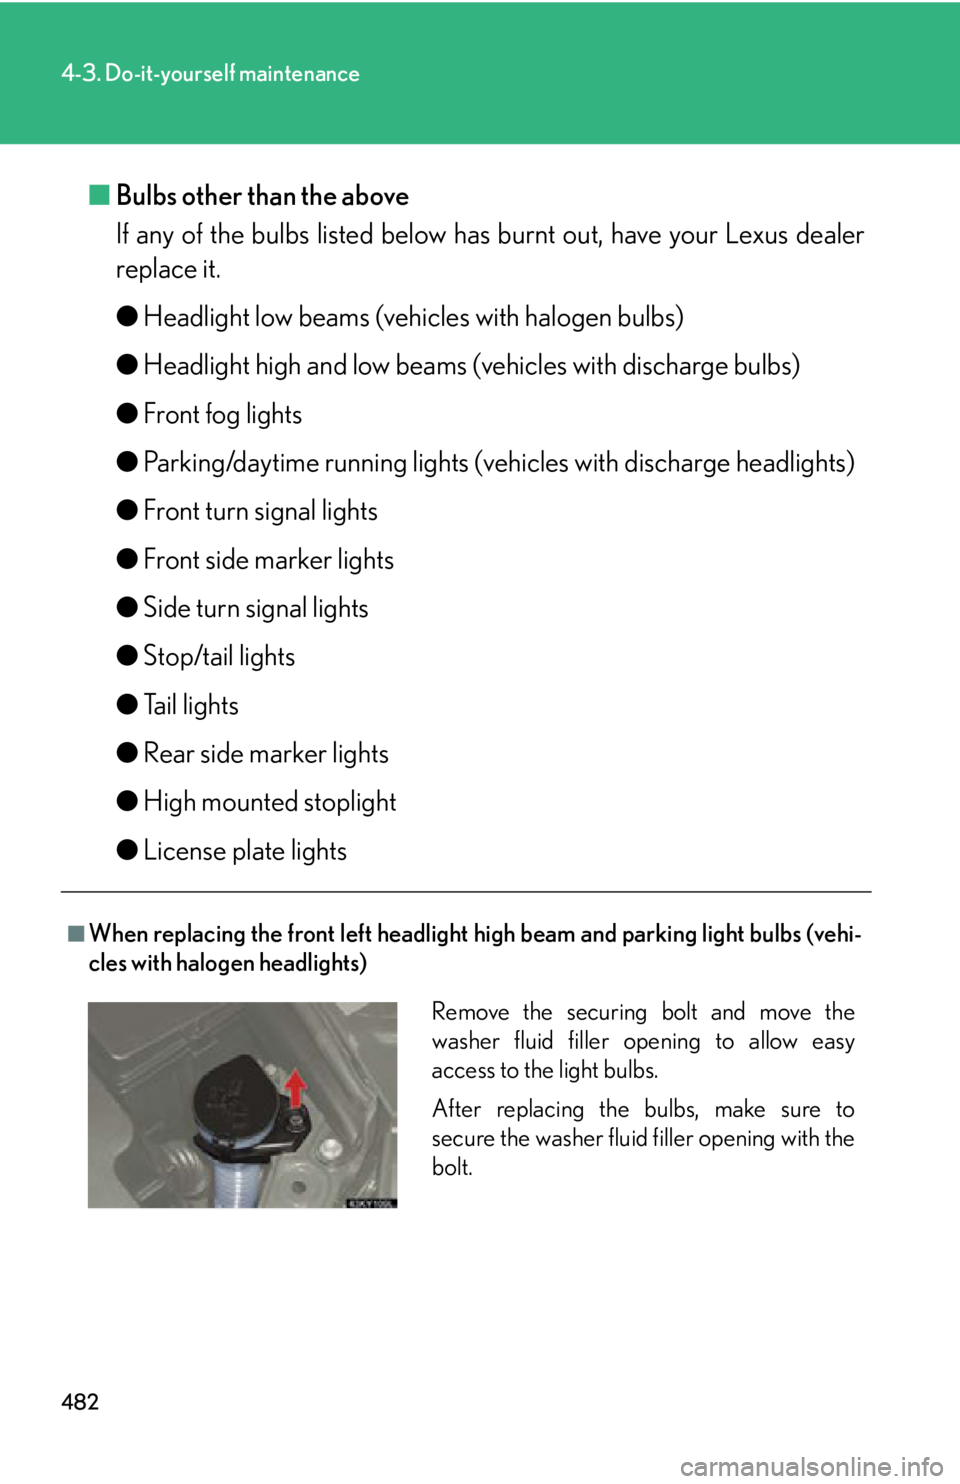
■When replacing the front le ft headlight high beam and parking light bulbs (vehi-
cles with halogen headlights)
Remove the securing bolt and move the
washer fluid filler opening to allow easy
access to the light bulbs.
After replacing the bulbs, make sure to
secure the washer fluid filler opening with the
bolt.
Page 483 of 632

483
4-3. Do-it-yourself maintenance
4
Maintenance and care
■Condensation build-up on the inside of the lens
Contact your Lexus dealer for more information in the following situations. Tempo-
rary condensation build-up on the inside of the headlight lens does not indicate a
malfunction.
●Large drops of water are built up on the inside of the lens.
●Water has built up in side the headlight.
■Discharge headlights (if equipped)
If voltage to the discharge bulbs is insufficient, the bulbs may not come on, or may
go out temporarily. The discharge bulbs will come on when normal power is
restored.
■LED light bulbs
The parking lights (vehicles with discharge headlights), front side marker lights, side
turn signal lights, tail lights, stop/tail light s, high mounted stoplight, rear side marker
lights and license plate lights consist of a number of LEDs. If any of the LEDs burn
out, take your vehicle to your Lexus dealer to have the light replaced.
CAUTION
■Replacing light bulbs
●Turn off the lights. Do not attempt to replace the bulb immediately after turning
off the lights.
The bulbs become very hot and may cause burns.
●Do not touch the glass portion of the light bulb with ba re hands. Hold the bulb by
the plastic or metal portion.
If the bulb is scratched or dropped it may blow out or crack.
●Fully install light bulbs and any parts used to secure them. Failing to do so may
result in heat damage, fire, or water en tering the headlight unit. This may damage
the headlights or cause condensation to build up on the lens.
●Do not attempt to take apart or repair the low beam headligh t bulbs, connectors,
power supply circuits, or related components.
Doing so could result in electric shock and serious injury or death.
Page 487 of 632

5
When trouble arises
487
5-1. Essential information
If your vehicle needs to be towed
Before towingThe following may indicate a problem with your transmission. Contact
your Lexus dealer before towing.
● The engine is running, but the vehicle will not move.
● The vehicle makes an abnormal sound.
Emergency towing
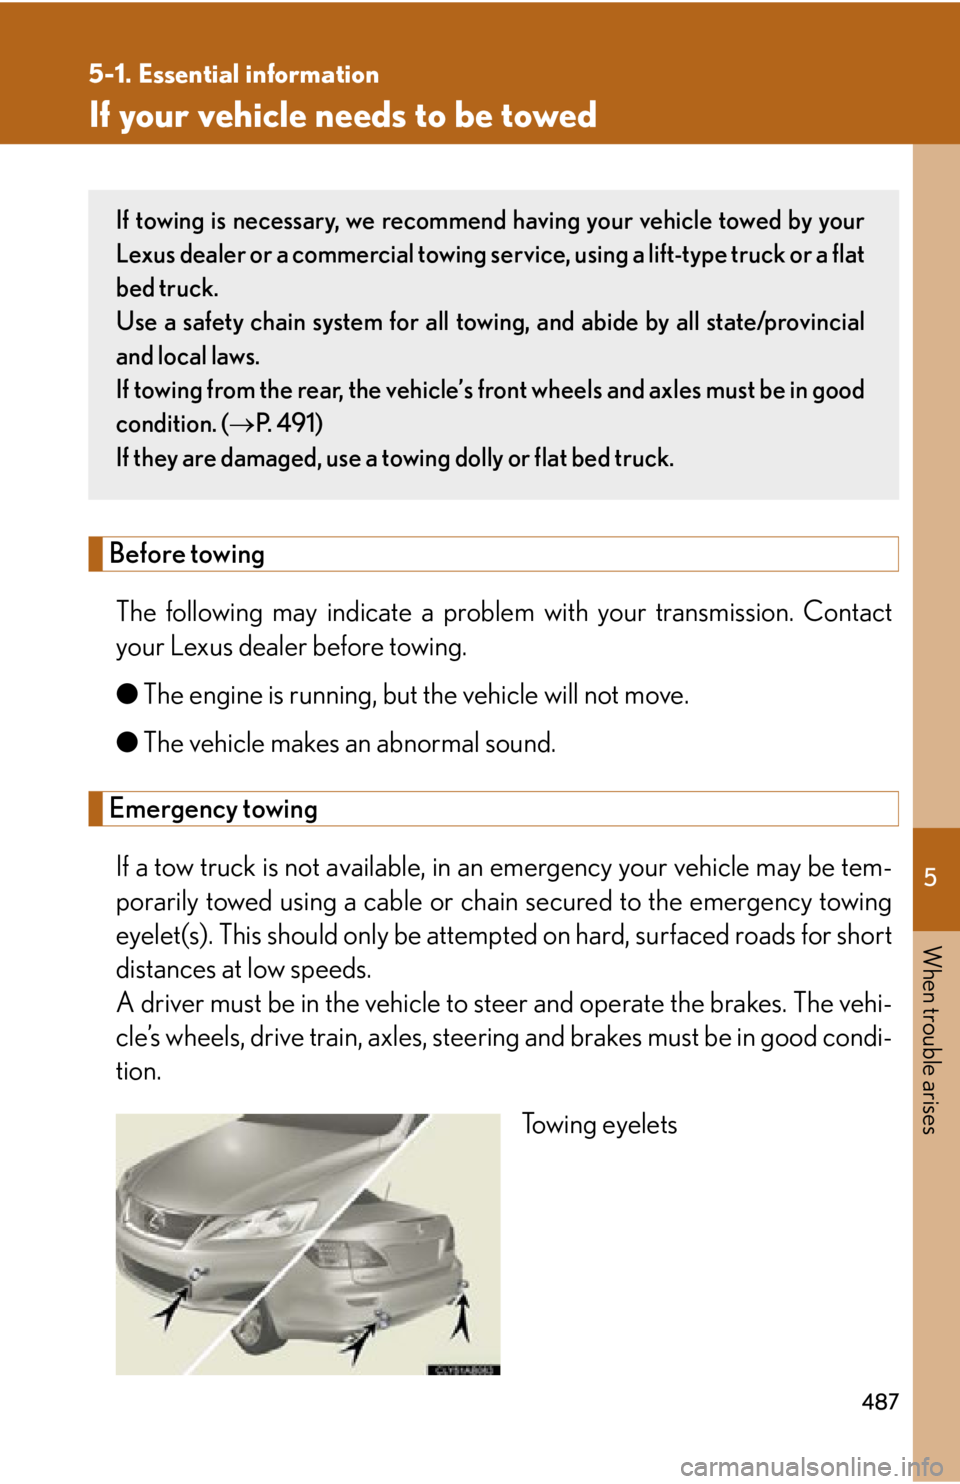
If a tow truck is not available, in an emergency your vehicle may be tem-
porarily towed using a cable or chain secured to the emergency towing
eyelet(s). This should only be attempted on hard, surfaced roads for short
distances at low speeds.
A driver must be in the vehicle to s teer and operate the brakes. The vehi-
cle’s wheels, drive train, axles, steering and brakes must be in good condi-
tion.
Towing eyelets
If towing is necessary, we recommend having your vehicle towed by your
Lexus dealer or a commercial towing se rvice, using a lift-type truck or a flat
bed truck.
Use a safety chain system for all towi ng, and abide by all state/provincial
and local laws.
If towing from the rear, the vehicle’s front wheels and axles must be in good
condition. ( P. 4 9 1 )
If they are damaged, use a to wing dolly or flat bed truck.
Page 489 of 632

5
When trouble arises
489
5-1. Essential information
Installing towing eyeletsRemove the eyelet cover using a
flathead screwdriver.
To protect the bodywork, place a
rag between the screwdriver and
the vehicle body, as shown in the
illustration.
Insert the towing eyelet into the
hole and tighten partially by hand.
Tighten down the towing eyelet
securely using a wheel nut wrench.
STEP1
STEP2
STEP3
■Location of the emergency towing eyelet
P. 5 1 8
Page 490 of 632

490
5-1. Essential information
Towing with a sling-type truck
CAUTION
■Installing towing eyelets to the vehicle
Make sure that towing eyelets are installed securely.
If not securely installed, towing eyelets may come loose during towing. This may
lead to accidents that cause serious injury or even death.
NOTICE
■To prevent body damage
Do not tow with a sling type truck, either from the front or rear.
Page 499 of 632

5
When trouble arises
499
5-2. Steps to take in an emergency
■If the malfunction indicator lamp comes on while driving
First check the following:
●Is the fuel empty?
If it is, fill the fuel tank immediately.
●Is the fuel tank cap loose?
If it is, tighten it securely.
The lamp will go off after taking several driving trips.
If the lamp does not go off even after several trips, contact your Lexus dealer as
soon as possible.
■Electric power steering system warning light
When the voltage is low or drops, the electric power steering system warning light
may come on.
■Front passenger detection se nsor and passenger seat belt reminder and warning
buzzer
●If luggage is placed on the front passenger seat, the front passenger detection
sensor may cause the warning light to flash and the warning buzzer to sound,
even if a passenger is not sitting in the seat.
●If a cushion is placed on the seat, the sensor may not detect a passenger, and the
warning light may not operate properly.
■When the tire pressure warning light comes on
Check the tire inflation pressure and adjust to the appropriate level. Pressing the
satellite switch does not turn off the tire pressure warning light.
Page 519 of 632

5
When trouble arises
519
5-2. Steps to take in an emergency
Taking out the spare tireLift up the hook of the panel on the
trunk floor.
Secure the panel using the hook
provided.
Loosen the center fastener that
secures the spare tire.
STEP1
STEP2
STEP3
Page 524 of 632

524
5-2. Steps to take in an emergency
CAUTION
■Using the tire jack
Improper use of the tire jack may lead to death or serious injuries due to the vehicle
suddenly falling off the jack.
●Do not use the tire jack for any purpose other than replacing tires or installing and
removing tire chains.
●Only use the tire jack that comes with this vehicle for replacing a flat tire.
Do not use it on other vehicles, and do not use other tire jacks for replacing tires
on this vehicle.
●Always check that the tire jack is securely set to the jack point.
●Do not put any part of your body under the vehicle supported by a jack.
●Do not start or run the engine while your vehicle is supported by the jack.
●Do not raise the vehicle while someone is in it.
●When raising the vehicle, do not put an object on or under the jack.
●Do not raise the vehicle to a height greate r than that required to replace the tire.
●Use a jack stand if it is necessary to get under the vehicle.
Take particular care when lowering the vehicle to ensure that no one working on or
near the vehicle may be injured.
■Replacing a flat tire
●Do not attach a heavily damaged wheel orna ment, as it may fly off the wheel while
the vehicle is moving.
●Failure to follow these precautions could cause the wheel nuts to loosen and the
tire to fall off, resulting in death or serious injury.
• Never use oil or grease on the wheel bolts or wheel nuts.
Oil and grease may cause the wheel nuts to be excessively tightened, leading
to bolt or disc wheel damage. In addition, the oil or grease can cause the
wheel nuts to loosen and the wheel may fall off, causing a serious accident.
Remove any oil or grease from the wheel bolts or wheel nuts.
• Have the wheel nuts tightened with a to rque wrench to 76 ft•lbf (103 N•m,
10.5 kgf•m) as soon as possible after changing wheels.