LEXUS LS430 2003 Factory Repair Manual
LS430 2003
LEXUS
LEXUS
https://www.carmanualsonline.info/img/36/57050/w960_57050-0.png
LEXUS LS430 2003 Factory Repair Manual
Page 668 of 4500
See COMPONENTS .
See LOCATION .
Installation is in the reverse order of removal.
The procedure for the left side is the same as that for the right side. The procedure for right side is shown
below.
1.REMOVE POWER WINDOW REGULATOR MASTER SWITCH ASSY (See OVERHAUL
)
2.REMOVE FRONT DOOR INSIDE HANDLE BEZEL RH (See OVERHAUL
)
3.REMOVE FRONT DOOR TRIM BOARD SUB-ASSY RH (See step 4 on OVERHAUL
)
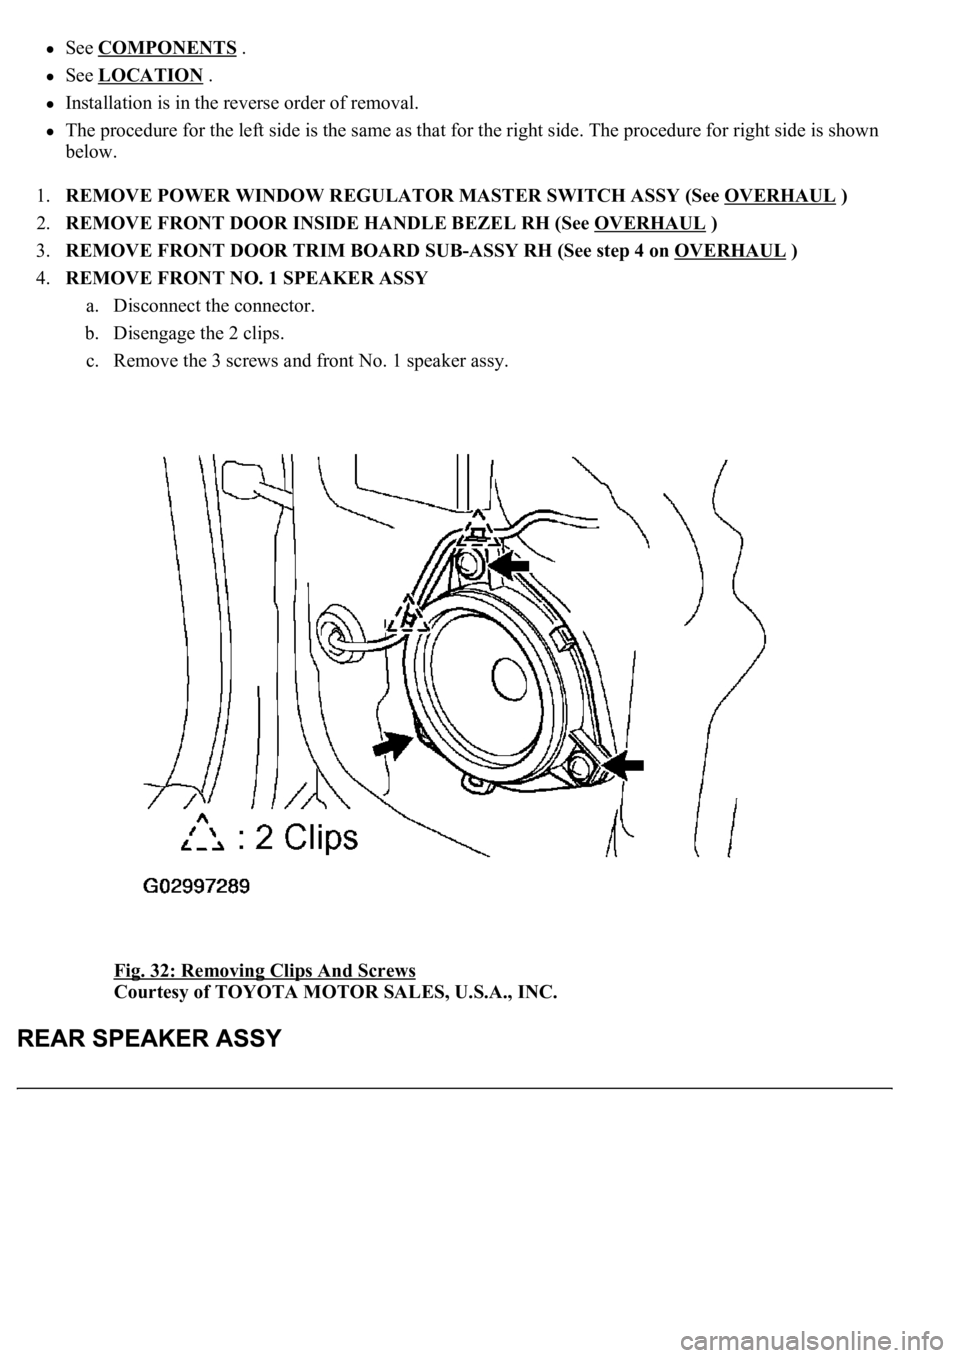
4.REMOVE FRONT NO. 1 SPEAKER ASSY
a. Disconnect the connector.
b. Disengage the 2 clips.
c. Remove the 3 screws and front No. 1 speaker assy.
Fig. 32: Removing Clips And Screws
Courtesy of TOYOTA MOTOR SALES, U.S.A., INC.
Page 669 of 4500
REPLACEMENT
HINT:
See COMPONENTS
See LOCATION
Installation is in the reverse order of removal.
The procedure for the left side is the same as that for the right side. The procedure for right side is shown
below.
1.REMOVE SIDE TRIM BOARD COVER FRONT RH (See OVERHAUL
)
2.REMOVE SIDE REAR CURTAIN ASSY RH (W/ REAR CURTAIN SUB-ASSY) (See step 4 on
OVERHAUL
)
3.REMOVE POWER WINDOW REGULATOR SWITCH ASSY REAR (See step 18 on
OVERHAUL
)
4.REMOVE REAR DOOR INSIDE HANDLE BEZEL RH (See step 3 on OVERHAUL
)
5.REMOVE REAR DOOR TRIM BOARD SUB-ASSY RH (See step 5 on OVERHAUL
)
6.REMOVE REAR SPEAKER ASSY
a. Disconnect the connector.
b. Remove the 3 screws and rear speaker assy.
Page 673 of 4500
REPLACEMENT
HINT:
See COMPONENTS .
See LOCATION .
Installation is in the reverse order of removal.
The procedure for the left side is the same as that for the right side. The procedure for right side is shown
below.
1.REMOVE SIDE TRIM BOARD COVER FRONT RH (See OVERHAUL
)
2.REMOVE SIDE REAR CURTAIN ASSY RH (W/ REAR CURTAIN SUB-ASSY) (See step 4 on
OVERHAUL
)
3.REMOVE POWER WINDOW REGULATOR SWITCH ASSY REAR (See step 18 on
OVERHAUL
)
4.REMOVE REAR DOOR INSIDE HANDLE BEZEL RH (See OVERHAUL
)
5.REMOVE REAR DOOR TRIM BOARD SUB-ASSY RH (See step 5 on OVERHAUL
)
6.REMOVE REAR SPEAKER ASSY NO. 2
a. Disconnect the connector.
b. Remove the 3 screws and rear speaker assy No. 2.
Page 3023 of 4500
Fig. 39: Disengaging Claws
Courtesy of TOYOTA MOTOR SALES, U.S.A., INC.
b. Driver's side:
2.REMOVE FRONT DOOR ARMREST BASE PANEL UPPER
a. Using a screwdriver, pry the armrest panel assembly.
HINT:
Tape the screwdriver tip before use.
b. Remove the 3 screws and power window regulator master switch.
c. Remove the 2 screws and armrest base panel lower from the armrest base panel upper.
Page 3034 of 4500
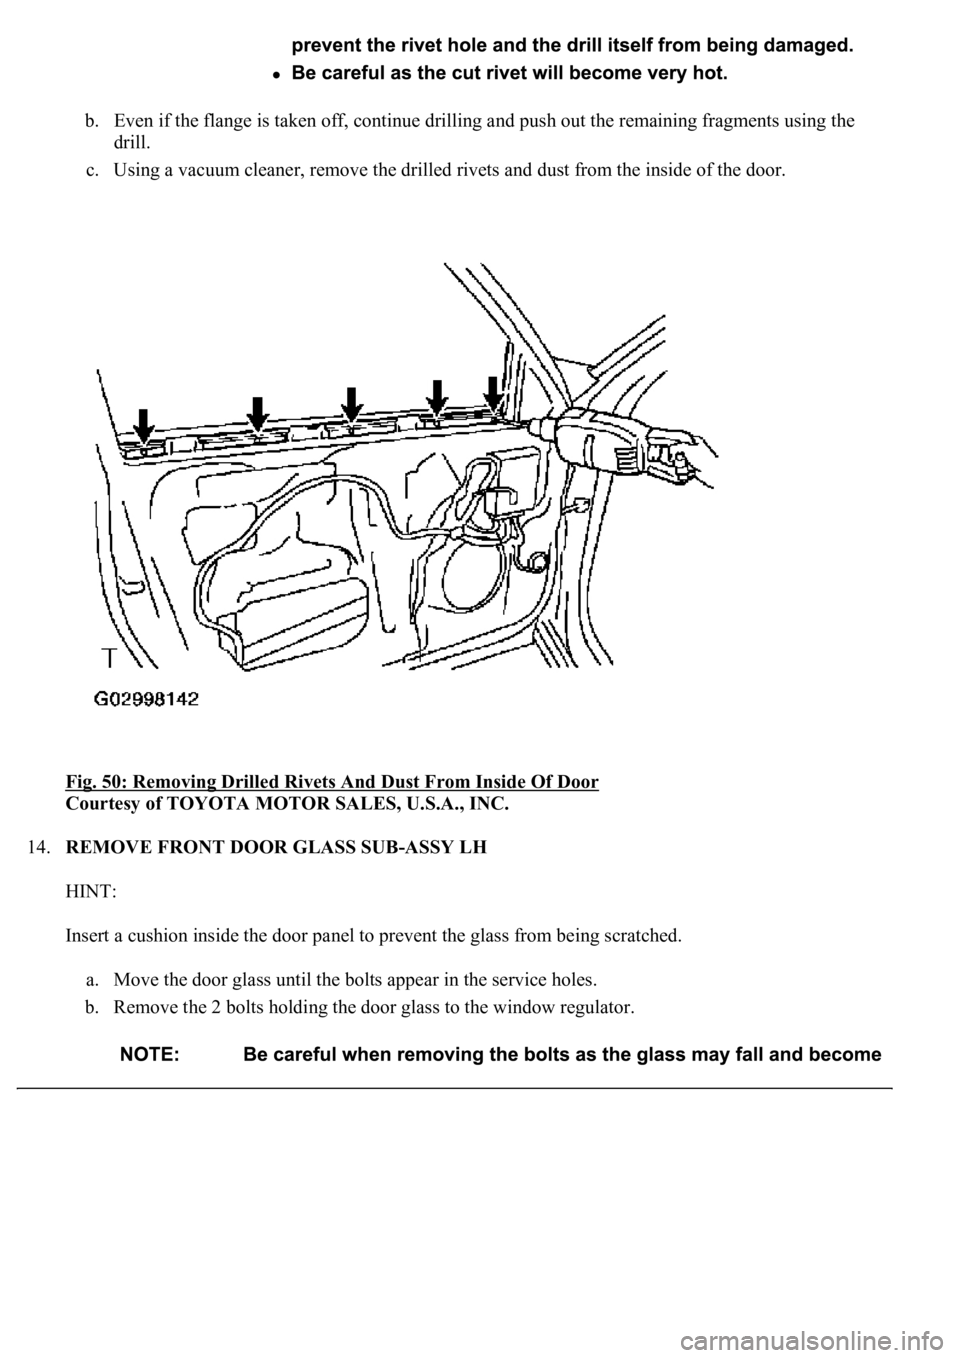
b. Even if the flange is taken off, continue drilling and push out the remaining fragments using the
drill.
c. Using a vacuum cleaner, remove the drilled rivets and dust from the inside of the door.
Fig. 50: Removing Drilled Rivets And Dust From Inside Of Door
Courtesy of TOYOTA MOTOR SALES, U.S.A., INC.
14.REMOVE FRONT DOOR GLASS SUB-ASSY LH
HINT:
Insert a cushion inside the door panel to prevent the glass from being scratched.
a. Move the door glass until the bolts appear in the service holes.
b. Remove the 2 bolts holding the door glass to the window regulator.
Page 3036 of 4500
Fig. 52: Moving Glass
Courtesy of TOYOTA MOTOR SALES, U.S.A., INC.
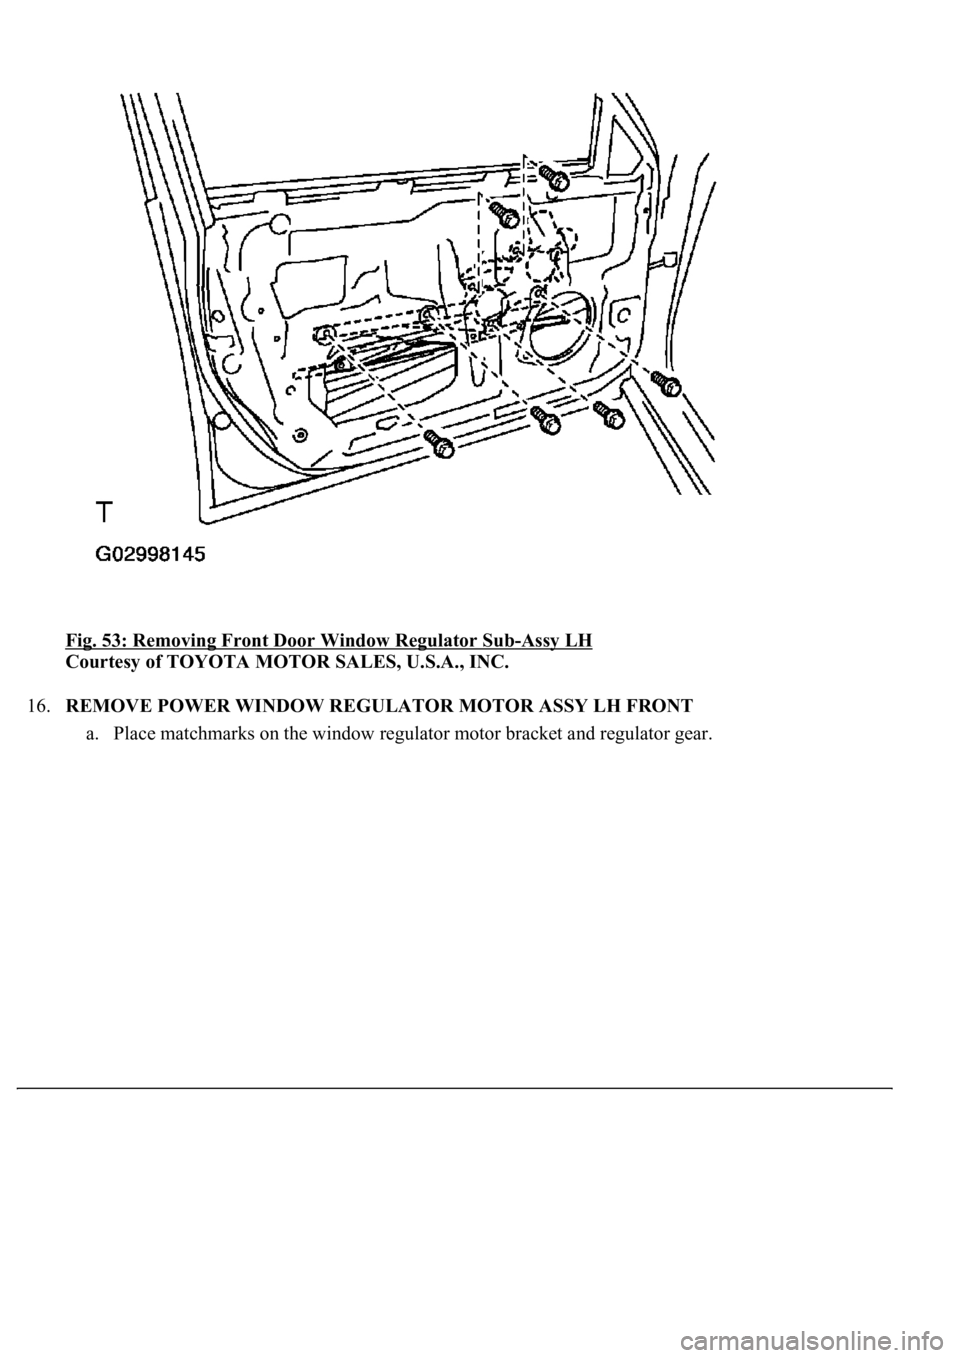
15.REMOVE FRONT DOOR WINDOW REGULATOR SUB-ASSY LH
a. Disconnect the window regulator connector.
b. Remove the 6 bolts and window regulator.
HINT:
Remove the window regulator through the service hole.
Page 3037 of 4500
Fig. 53: Removing Front Door Window Regulator Sub-Assy LH
Courtesy of TOYOTA MOTOR SALES, U.S.A., INC.
16.REMOVE POWER WINDOW REGULATOR MOTOR ASSY LH FRONT
a. Place matchmarks on the window re
gulator motor bracket and regulator gear.
Page 3058 of 4500
Fig. 71: Installing Front Door Frame Sub-Assy Rear Lower LH
Courtesy of TOYOTA MOTOR SALES, U.S.A., INC.
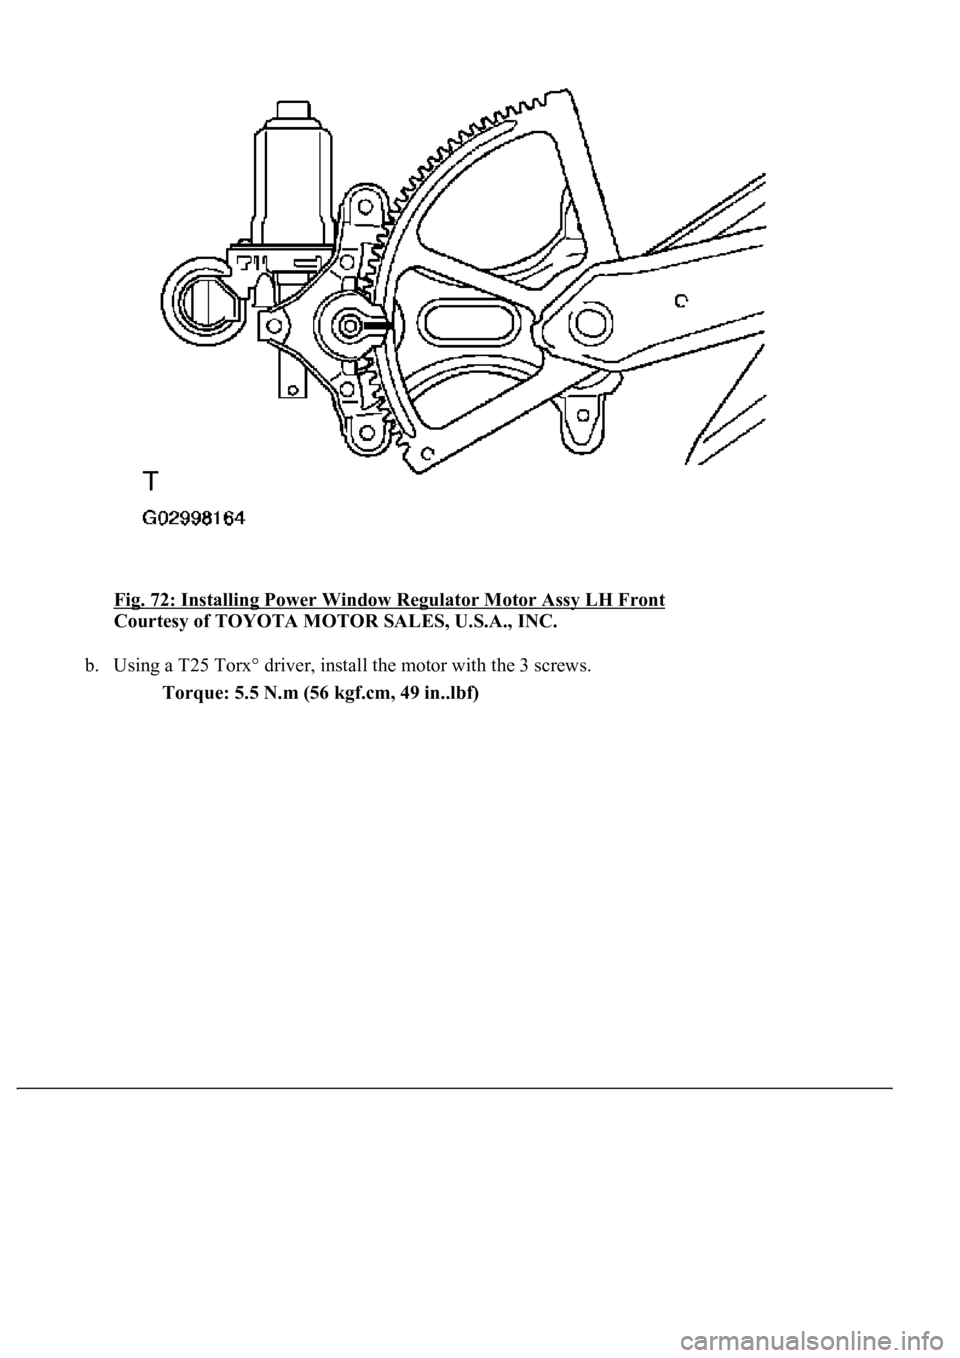
32.INSTALL POWER WINDOW REGULATOR MOTOR ASSY LH FRONT
a. Ali
gn the matchmarks. Keep them aligned until the window glass installation is complete.
Page 3059 of 4500
Fig. 72: Installing Power Window Regulator Motor Assy LH Front
Courtesy of TOYOTA MOTOR SALES, U.S.A., INC.
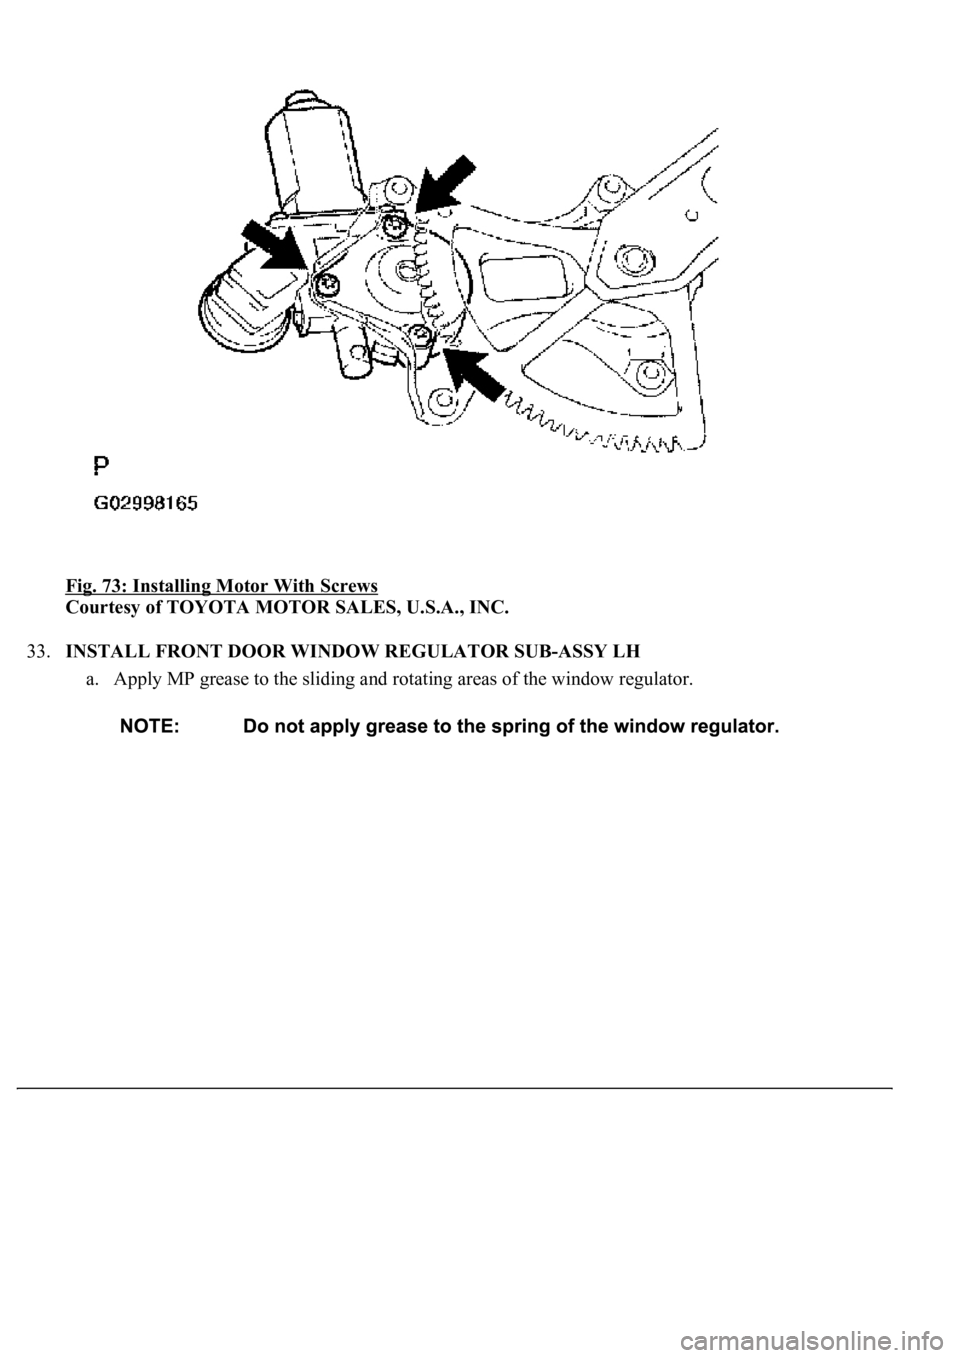
b. Using a T25 Torx° driver, install the motor with the 3 screws.
Torque: 5.5 N.m (56 kgf.cm, 49 in..lbf)
Page 3060 of 4500
Fig. 73: Installing Motor With Screws
Courtesy of TOYOTA MOTOR SALES, U.S.A., INC.
33.INSTALL FRONT DOOR WINDOW REGULATOR SUB-ASSY LH
a. Apply MP grease to the sliding and rotating areas of the window regulator.
