lights LEXUS NX300h 2018 Owner's Manual
[x] Cancel search | Manufacturer: LEXUS, Model Year: 2018, Model line: NX300h, Model: LEXUS NX300h 2018Pages: 460, PDF Size: 13.57 MB
Page 149 of 460
149
LEXUS NX300h Owners Manu-
al_USA_OM78212U 4 4
Driving Driving4-1. Before driving
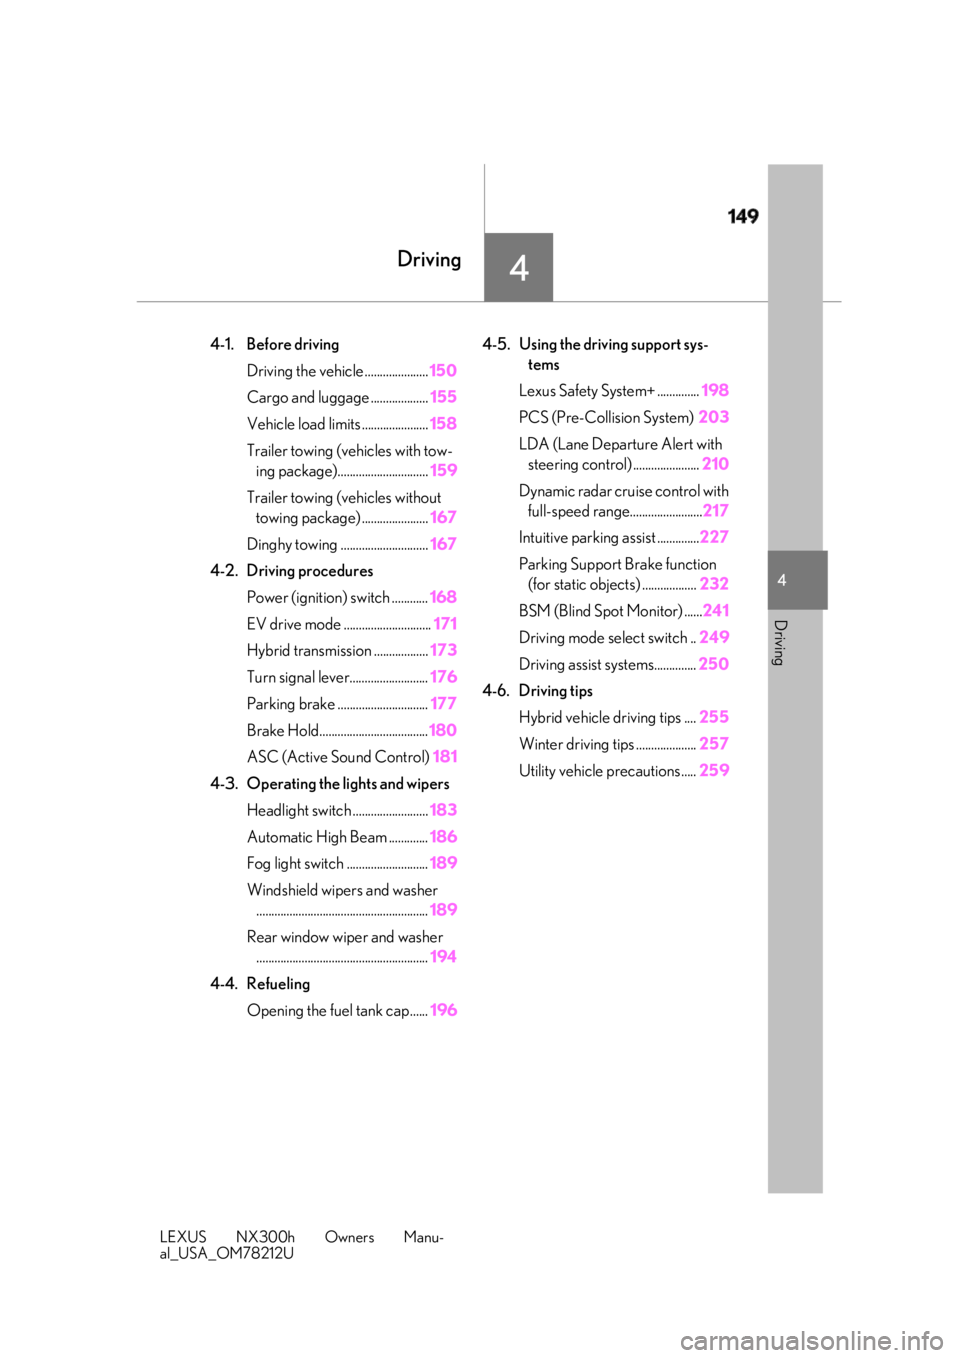
Driving the vehicle ..................... 150
Cargo and luggage ................... 155
Vehicle load limits ...................... 158
Trailer towing (vehicles with tow-
ing package).............................. 159
Trailer towing (vehicles without
towing package) ...................... 167
Dinghy towing ............................. 167
4-2. Driving procedures
Power (ignition) switch ............ 168
EV drive mode ............................. 171
Hybrid transmission .................. 173
Turn signal lever.......................... 176
Parking brake .............................. 177
Brake Hold.................................... 180
ASC (Active Sound Control) 181
4-3. Operating the lights and wipers
Headlight switch ......................... 183
Automatic High Beam ............. 186
Fog light switch ........................... 189
Windshield wipers and washer
......................................................... 189
Rear window wiper and washer
......................................................... 194
4-4. Refueling
Opening the fuel tank cap...... 196 4-5. Using the driving support sys-
tems
Lexus Safety System+ .............. 198
PCS (Pre-Collision System) 203
LDA (Lane Departure Alert with
steering control) ...................... 210
Dynamic radar cruise control with
full-speed range........................ 217
Intuitive parking assist .............. 227
Parking Support Brake function
(for static objects) .................. 232
BSM (Blind Spot Monitor) ...... 241
Driving mode select switch .. 249
Driving assist systems.............. 250
4-6. Driving tips
Hybrid vehicle driving tips .... 255
Winter driving tips .................... 257
Utility vehicle precautions..... 259
Page 159 of 460
1594-1. Before driving
LEXUS NX300h Owners Manu-
al_USA_OM78212U 4
Driving
Contact your Lexus dealer for further
information about additional require-
ments such as a towing kit, etc. ■
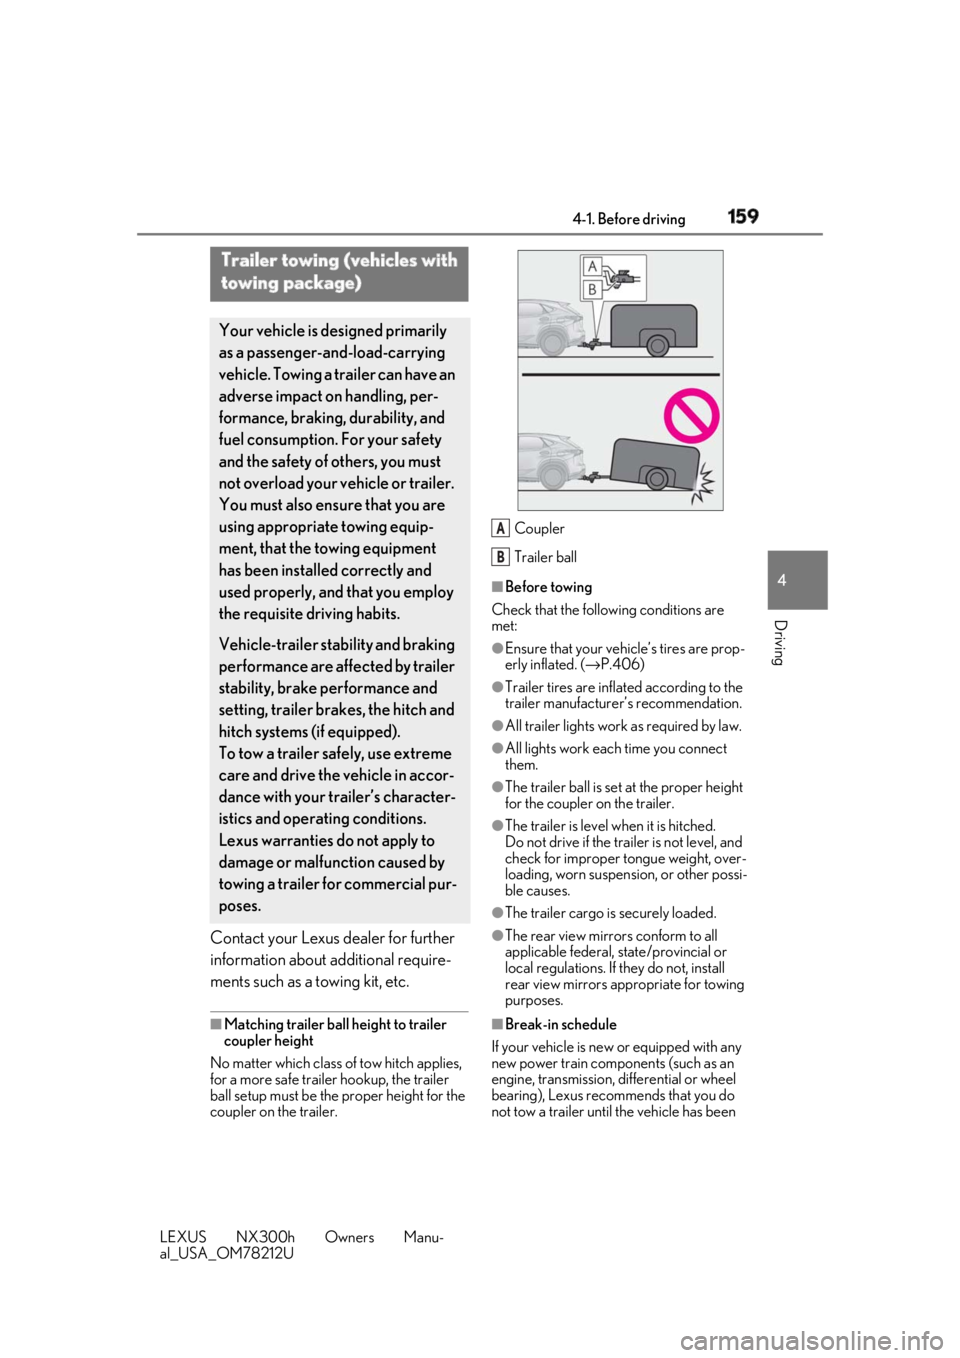
Matching trailer ball height to trailer
coupler height
No matter which class of tow hitch applies,
for a more safe trailer hookup, the trailer
ball setup must be the proper height for the
coupler on the trailer. Coupler
Trailer ball ■
Before towing
Check that the following conditions are
met: ●
Ensure that your vehicle’s tires are prop-
erly inflated. ( → P.406)●
Trailer tires are inflated according to the
trailer manufacturer’s recommendation. ●
All trailer lights work as required by law. ●
All lights work each time you connect
them. ●
The trailer ball is set at the proper height
for the coupler on the trailer. ●
The trailer is level when it is hitched.
Do not drive if the trailer is not level, and
check for improper tongue weight, over-
loading, worn suspension, or other possi-
ble causes.
●
The trailer cargo is securely loaded.
●
The rear view mirrors conform to all
applicable federal, state/provincial or
local regulations. If they do not, install
rear view mirrors appropriate for towing
purposes.
■
Break-in schedule
If your vehicle is new or equipped with any
new power train components (such as an
engine, transmission, di fferential or wheel
bearing), Lexus recommends that you do
not tow a trailer until the vehicle has been Trailer towing (vehicles with
towing package) Your vehicle is de signed primarily
as a passenger-and-load-carrying
vehicle. Towing a trailer can have an
adverse impact on handling, per-
formance, braking, durability, and
fuel consumption. For your safety
and the safety of others, you must
not overload your vehicle or trailer.
You must also ensure that you are
using appropriate towing equip-
ment, that the towing equipment
has been installed correctly and
used properly, and that you employ
the requisite driving habits.
Vehicle-trailer stability and braking
performance are affected by trailer
stability, brake performance and
setting, trailer brakes, the hitch and
hitch systems (if equipped).
To tow a trailer safely, use extreme
care and drive the vehicle in accor-
dance with your trailer’s character-
istics and operating conditions.
Lexus warranties do not apply to
damage or malfunction caused by
towing a trailer for commercial pur-
poses. A
B
Page 161 of 460
1614-1. Before driving
LEXUS NX300h Owners Manu-
al_USA_OM78212U 4
Driving ■
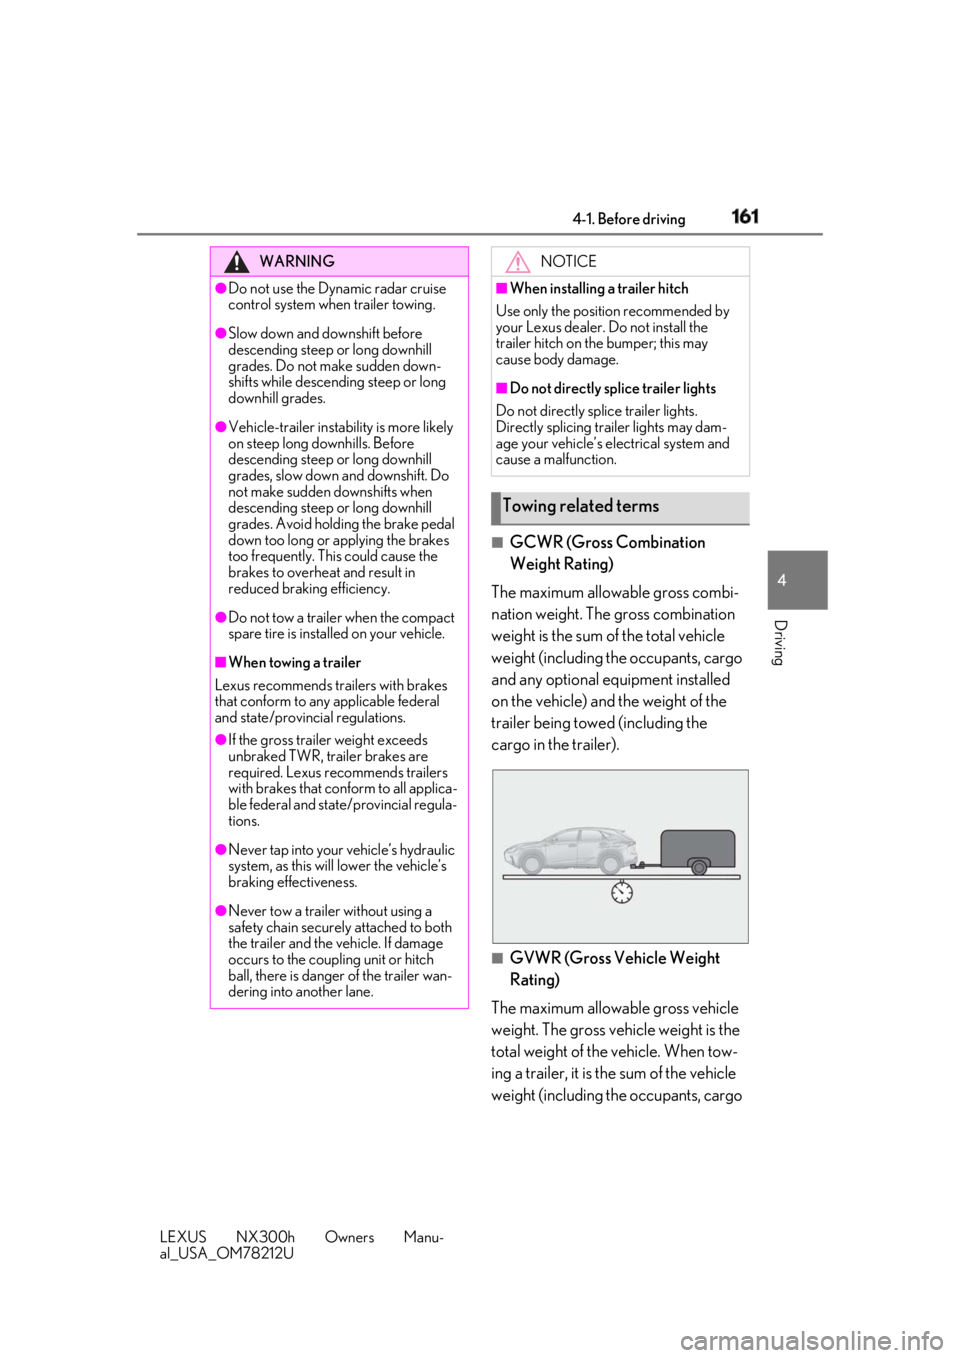
GCWR (Gross Combination
Weight Rating)
The maximum allowable gross combi-
nation weight. The gross combination
weight is the sum of the total vehicle
weight (including the occupants, cargo
and any optional equipment installed
on the vehicle) and the weight of the
trailer being towed (including the
cargo in the trailer).
■
GVWR (Gross Vehicle Weight
Rating)
The maximum allowable gross vehicle
weight. The gross vehicle weight is the
total weight of the vehicle. When tow-
ing a trailer, it is the sum of the vehicle
weight (including the occupants, cargo WARNING●
Do not use the Dynamic radar cruise
control system when trailer towing.●
Slow down and downshift before
descending steep or long downhill
grades. Do not make sudden down-
shifts while descending steep or long
downhill grades.●
Vehicle-trailer instabil ity is more likely
on steep long downhills. Before
descending steep or long downhill
grades, slow down and downshift. Do
not make sudden downshifts when
descending steep or long downhill
grades. Avoid holding the brake pedal
down too long or applying the brakes
too frequently. This could cause the
brakes to overheat and result in
reduced braking efficiency.●
Do not tow a trailer when the compact
spare tire is installed on your vehicle.■
When towing a trailer
Lexus recommends trailers with brakes
that conform to any applicable federal
and state/provincial regulations. ●
If the gross trailer weight exceeds
unbraked TWR, trailer brakes are
required. Lexus recommends trailers
with brakes that conform to all applica-
ble federal and state/provincial regula-
tions.
●
Never tap into your vehicle’s hydraulic
system, as this will lower the vehicle’s
braking effectiveness.
●
Never tow a trailer without using a
safety chain securely attached to both
the trailer and the vehicle. If damage
occurs to the coupling unit or hitch
ball, there is danger of the trailer wan-
dering into another lane. NOTICE■
When installing a trailer hitch
Use only the position recommended by
your Lexus dealer. Do not install the
trailer hitch on the bumper; this may
cause body damage. ■
Do not directly splice trailer lights
Do not directly splice trailer lights.
Directly splicing trailer lights may dam-
age your vehicle’s electrical system and
cause a malfunction.
Towing related terms
Page 164 of 460
164 4-1. Before driving
LEXUS NX300h Owners Manu-
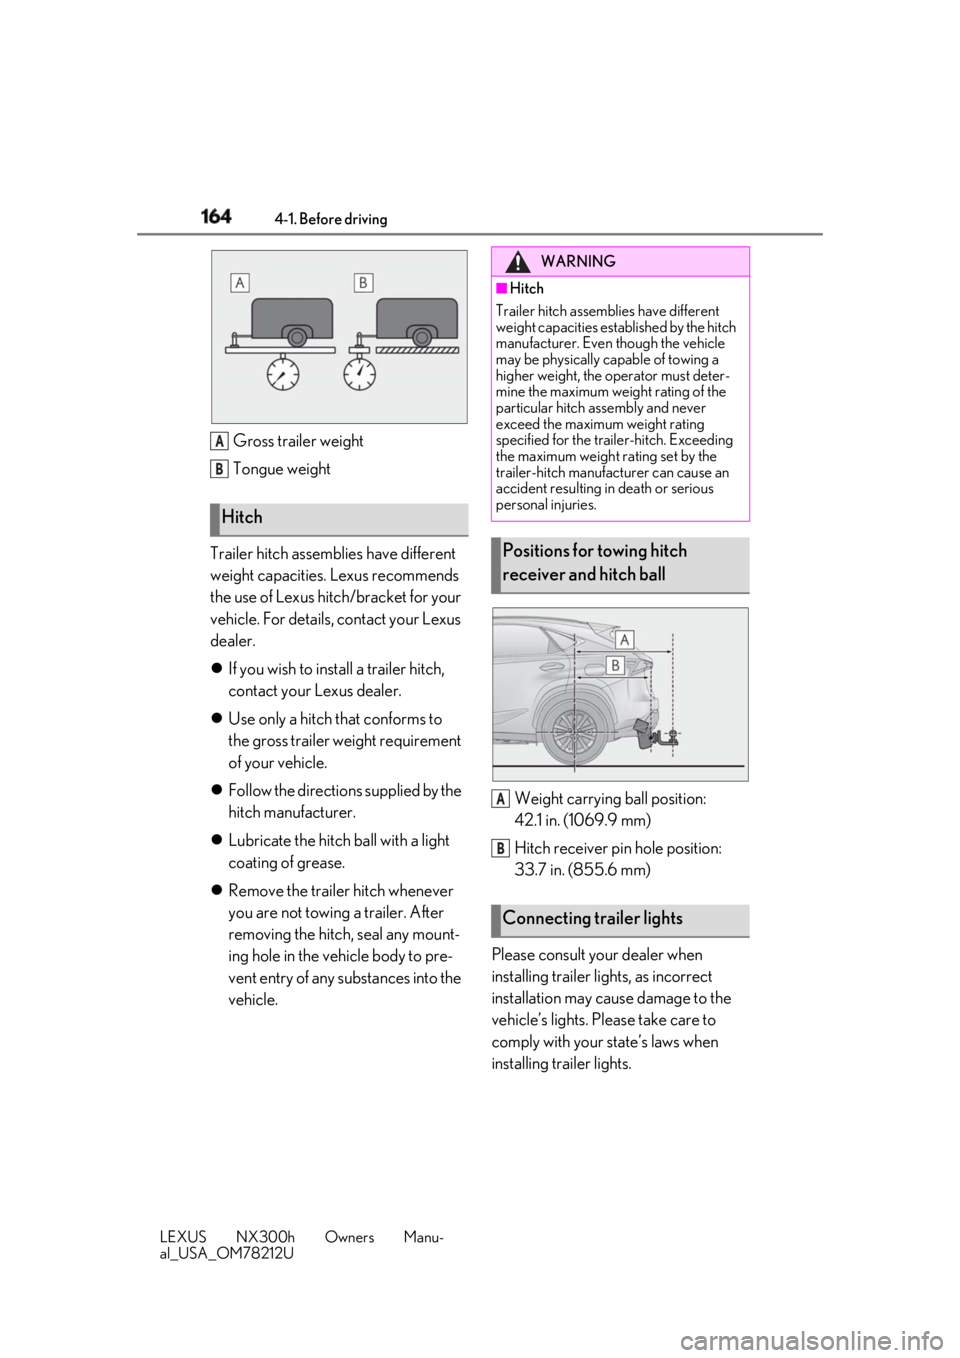
al_USA_OM78212U Gross trailer weight
Tongue weight
Trailer hitch assemblies have different
weight capacities. Lexus recommends
the use of Lexus hitch/bracket for your
vehicle. For details, contact your Lexus
dealer.
If you wish to install a trailer hitch,
contact your Lexus dealer.
Use only a hitch that conforms to
the gross trailer weight requirement
of your vehicle.
Follow the directions supplied by the
hitch manufacturer.
Lubricate the hitch ball with a light
coating of grease.
Remove the trailer hitch whenever
you are not towing a trailer. After
removing the hitch, seal any mount-
ing hole in the vehicle body to pre-
vent entry of any substances into the
vehicle. Weight carrying ball position:
42.1 in. (1069.9 mm)
Hitch receiver pin hole position:
33.7 in. (855.6 mm)
Please consult your dealer when
installing trailer lights, as incorrect
installation may cause damage to the
vehicle’s lights. Please take care to
comply with your state’s laws when
installing trailer lights.Hitch A
B WARNING■
Hitch
Trailer hitch assemblies have different
weight capacities established by the hitch
manufacturer. Even though the vehicle
may be physically capable of towing a
higher weight, the operator must deter-
mine the maximum weight rating of the
particular hitch assembly and never
exceed the maximum weight rating
specified for the trailer-hitch. Exceeding
the maximum weight rating set by the
trailer-hitch manufacturer can cause an
accident resulting in death or serious
personal injuries.
Positions for towing hitch
receiver and hitch ball
Connecting trailer lights A
B
Page 165 of 460

1654-1. Before driving
LEXUS NX300h Owners Manu-
al_USA_OM78212U 4
Driving Your vehicle will handle differently
when towing a trailer. Help to avoid an
accident, death or serious injury, keep
the following in mind when towing:
Speed limits for towing a trailer vary
by state or province. Do not exceed
the posted towing speed limit.
Lexus recommends that the vehicle-
trailer speed limit is 65 mph (104
km/h) on a flat, straight, dry road.
Do not exceed this limit, the posted
towing speed limit or the speed limit
for your trailer as set forth in your
trailer owner’s manual, whichever is
lowest. Instability of the towing vehi-
cle-trailer combination (trailer
sway) increases as speed increases.
Exceeding speed limits may cause
loss of control.
Before starting out, check the trailer
lights, tires and the vehicle-trailer
connections. Recheck after driving
a short distance.
Practice turning, stopping and
reversing with the trailer attached in
an area away from traffic until you
become accustomed to the feel of
the vehicle-trailer combination.
Reversing with a tr ailer attached is
difficult and requires practice. Grip
the bottom of the steering wheel
and move your hand to the left to
move the trailer to the left. Move
your hand to the right to move the
trailer to right. (This is generally
opposite to reversing without a
trailer attached.) Avoid sharp or prolonged turning. Have someone
guide you when reversing to reduce
the risk of an accident.
As stopping distance is increased
when towing a trailer, vehicle-to
vehicle distance should be
increased. For each 10 mph (16 km/
h) of speed, allow at least one vehi-
cle and trailer length.
Avoid sudden braking as you may
skid, resulting in the trailer jackknif-
ing and a loss of vehicle control. This
is especially true on wet or slippery
surfaces.
Avoid jerky starts or sudden accel-
eration.
Avoid jerky steering and sharp
turns, and slow down before making
turn.
Note that when making a turn, the
trailer wheels will be closer than the
vehicle wheels to the inside of the
turn. Compensate by making a
wider than normal turning radius.
Slow down before making a turn, in
cross winds, on wet or slippery sur-
faces, etc.
Increasing vehicle speed can desta-
bilize the trailer.
Take care when passing other vehi-
cles. Passing requires considerable
distance. After pass ing a vehicle, do
not forget the length of your trailer,
and be sure you have plenty of room
before changing lanes.
To maintain engine braking effi-
ciency and charging system perfor-
mance when using engine braking, Trailer towing tips
Page 176 of 460
176 4-2. Driving procedures
LEXUS NX300h Owners Manu-
al_USA_OM78212U 2 DownshiftingThe selected shift range, from 1 to 6, will be
displayed.
The initial shift range in S mode is 4. ■
Shift ranges and their functions
You can choose from 6 levels of
accelerating force and engine brak-
ing force.
A lower shift range will provide
greater accelerating force and
engine braking force than a higher
shift range, and the engine revolu-
tions will also increase. ■
Downshifting restriction warning
buzzer
To help ensure safety and driving perfor-
mance, downshifting operation may some-
times be restricted. In some circumstances,
downshifting may not be possible even
when the shift lever or paddle shift switch is
operated. (A buzzer will sound twice.)
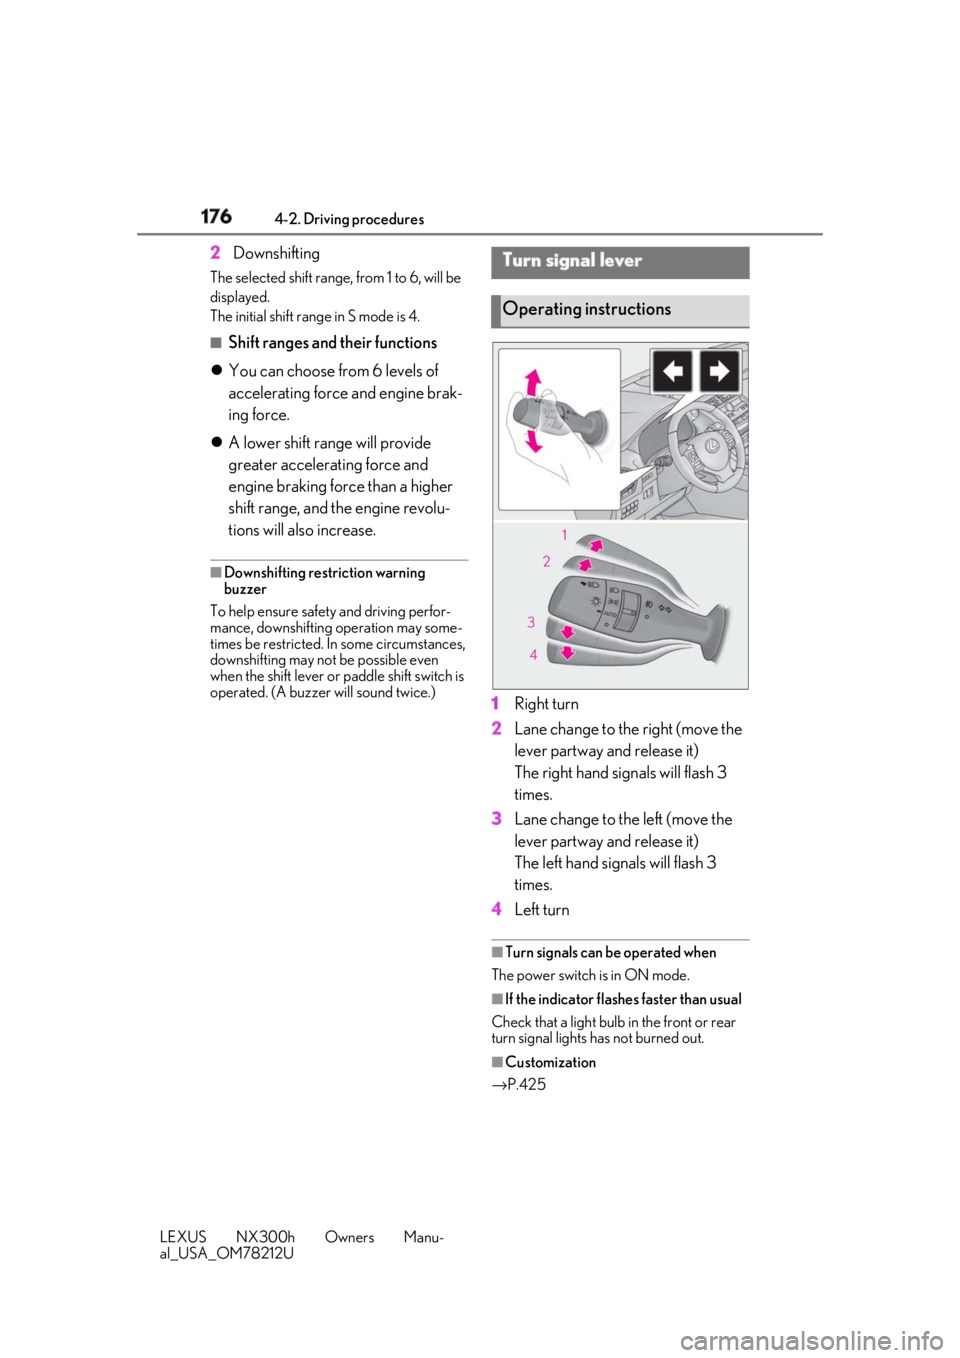
1 Right turn
2 Lane change to the right (move the
lever partway and release it)
The right hand signals will flash 3
times.
3 Lane change to the left (move the
lever partway and release it)
The left hand signals will flash 3
times.
4 Left turn ■
Turn signals can be operated when
The power switch is in ON mode.
■
If the indicator flashes faster than usual
Check that a light bulb in the front or rear
turn signal lights has not burned out.
■
Customization
→ P.425Turn signal lever
Operating instructions
Page 183 of 460
1834-3. Operating the lights and wipers
LEXUS NX300h Owners Manu-
al_USA_OM78212U 4
Driving 4-3.Operating the lights and wipers
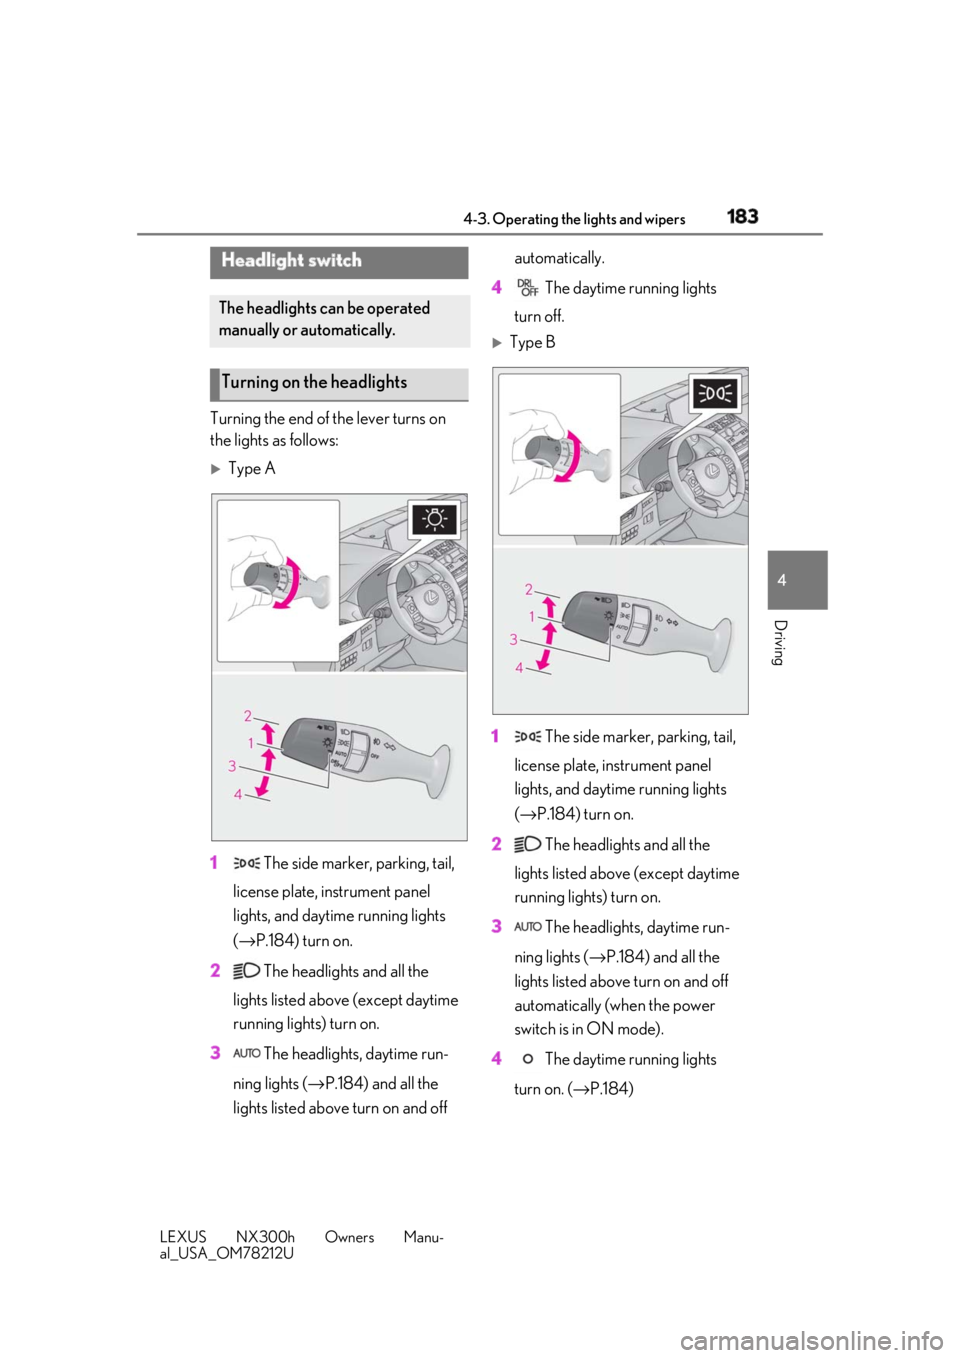
Turning the end of the lever turns on
the lights as follows:
Type A
1 The side marker, parking, tail,
license plate, instrument panel
lights, and daytime running lights
( → P.184) turn on.
2 The headlights and all the
lights listed above (except daytime
running lights) turn on.
3 The headlights, daytime run-
ning lights ( → P.184) and all the
lights listed above turn on and off automatically.
4 The daytime running lights
turn off.
Type B
1 The side marker, parking, tail,
license plate, instrument panel
lights, and daytime running lights
( → P.184) turn on.
2 The headlights and all the
lights listed above (except daytime
running lights) turn on.
3 The headlights, daytime run-
ning lights ( → P.184) and all the
lights listed above turn on and off
automatically (when the power
switch is in ON mode).
4 The daytime running lights
turn on. ( → P.184)Headlight switch The headlights can be operated
manually or automatically.
Turning on the headlights
Page 184 of 460
184 4-3. Operating the lights and wipers
LEXUS NX300h Owners Manu-
al_USA_OM78212U ■
AUTO mode can be used when
The power switch is in ON mode. ■
Daytime running light system●
The daytime running lights illuminate
using the same lights as the parking lights
and illuminate brighter than the parking
lights.●
To make your vehicle more visible to
other drivers during daytime driving, the
daytime running lights turn on automati-
cally when all of the following conditions
are met. (The daytime running lights are
not designed for use at night.)
• The hybrid system is started
• The parking brake is released
• The headlight switch is in the (type
B), or “AUTO” *
position*
: When the surroundings are bright
The daytime running lights remain on after
they illuminate, even if the parking brake is
set again. ●
For the U.S.A.: Dayt ime running lights
can be turned off by operating the switch.●
Compared to turning on the headlights,
the daytime running light system offers
greater durability and consumes less
electricity, so it can help improve fuel●
If a turn signal light is in use, the daytime
running light, on the same side, is turned
off. For emergency flashers, both are
turned off.■
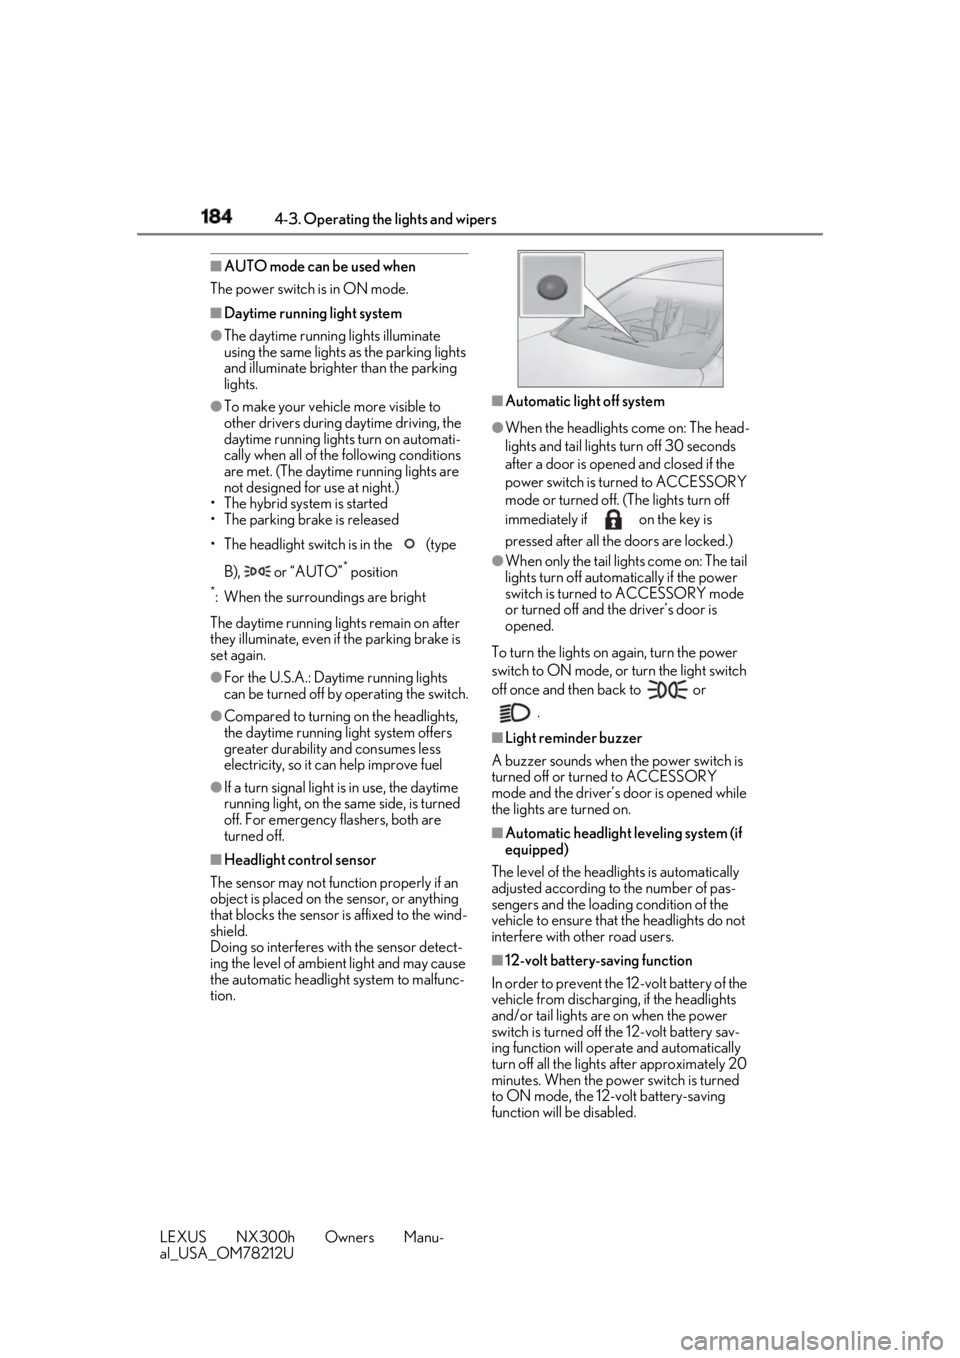
Headlight control sensor
The sensor may not function properly if an
object is placed on th e sensor, or anything
that blocks the sensor is affixed to the wind-
shield.
Doing so interferes with the sensor detect-
ing the level of ambient light and may cause
the automatic headlight system to malfunc-
tion. ■
Automatic light off system ●
When the headlights come on: The head-
lights and tail lights turn off 30 seconds
after a door is opened and closed if the
power switch is turned to ACCESSORY
mode or turned off. (The lights turn off
immediately if on the key is
pressed after all the doors are locked.) ●
When only the tail lights come on: The tail
lights turn off automatically if the power
switch is turned to ACCESSORY mode
or turned off and the driver’s door is
opened.
To turn the lights on again, turn the power
switch to ON mode, or turn the light switch
off once and then back to or
.■
Light reminder buzzer
A buzzer sounds when the power switch is
turned off or turned to ACCESSORY
mode and the driver’s door is opened while
the lights are turned on. ■
Automatic headlight leveling system (if
equipped)
The level of the headlights is automatically
adjusted according to the number of pas-
sengers and the loadin g condition of the
vehicle to ensure that the headlights do not
interfere with other road users.
■
12-volt battery-saving function
In order to prevent the 12-volt battery of the
vehicle from discharging, if the headlights
and/or tail lights are on when the power
switch is turned off the 12-volt battery sav-
ing function will operate and automatically
turn off all the lights after approximately 20
minutes. When the power switch is turned
to ON mode, the 12-volt battery-saving
function will be disabled.
Page 185 of 460
1854-3. Operating the lights and wipers
LEXUS NX300h Owners Manu-
al_USA_OM78212U 4
Driving When any of the following are performed,
the 12-volt battery-saving function is can-
celed once and then reactivated. All the
lights will turn off automatically 20 minutes
after the 12-volt battery-saving function has
been reactivated: ●
When the headlight switch is operated●
When a door is opened or closed■
Customization
Settings (e.g. light sens or sensitivity) can be
changed. (Customizable features: → P.421)
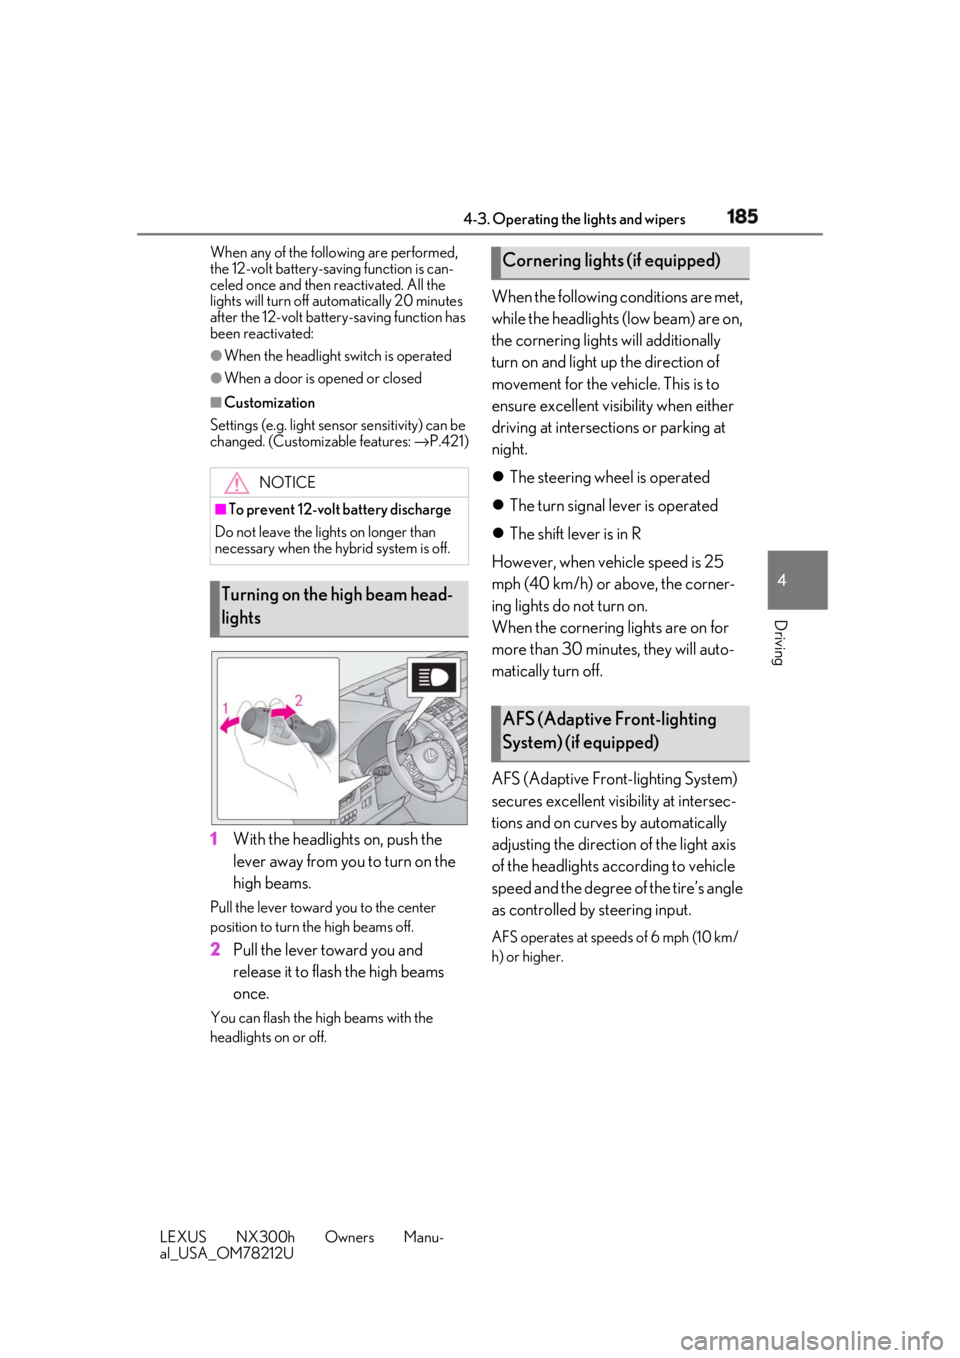
1 With the headlights on, push the
lever away from you to turn on the
high beams.Pull the lever toward you to the center
position to turn the high beams off.
2 Pull the lever toward you and
release it to flash the high beams
once.You can flash the high beams with the
headlights on or off. When the following conditions are met,
while the headlights (low beam) are on,
the cornering lights will additionally
turn on and light up the direction of
movement for the vehicle. This is to
ensure excellent visibility when either
driving at intersections or parking at
night.
The steering wheel is operated
The turn signal lever is operated
The shift lever is in R
However, when vehicle speed is 25
mph (40 km/h) or above, the corner-
ing lights do not turn on.
When the cornering lights are on for
more than 30 minutes, they will auto-
matically turn off.
AFS (Adaptive Front-lighting System)
secures excellent visibility at intersec-
tions and on curves by automatically
adjusting the direction of the light axis
of the headlights according to vehicle
speed and the degree of the tire’s angle
as controlled by steering input. AFS operates at speeds of 6 mph (10 km/
h) or higher.NOTICE■
To prevent 12-volt battery discharge
Do not leave the lights on longer than
necessary when the hy brid system is off.
Turning on the high beam head-
lights Cornering lights (if equipped)
AFS (Adaptive Front-lighting
System) (if equipped)
Page 186 of 460

186 4-3. Operating the lights and wipers
LEXUS NX300h Owners Manu-
al_USA_OM78212U 1 Push the lever away from you with
the headlight switch in or
position.
2 Press the Automatic High Beam
switch.The Automatic High Beam indicator will
come on when the headlights are turned
on automatically to indicate that the system
is active. ■
Operating conditions
The power switch is in ON mode. ■
High beam automatic turning on or off
conditions
When all of the following conditions are ful-
filled, high beam will be automatically
turned on: ●
Vehicle speed is above approximately 21
mph (34 km/h). ●
The area ahead of the vehicle is dark. ●
There are no oncoming or preceding
vehicles with headlights or tail lights
turned on. ●
There are few streetlights on the road
ahead.
If any of the following conditions are ful-
filled, high beam will be automatically
turned off: ●
Vehicle speed drops below approxi-
mately 17 mph (27 km/h). ●
The area ahead of the vehicle is not dark. ●
Oncoming or preceding vehicles have
headlights or tail lights turned on. ●
There are many streetlights on the road
ahead. ■
Camera sensor dete ction information●
High beam may not be automatically
turned off in the following situations:
• When oncoming vehicles suddenly
appear from a curve
• When the vehicle is cut in front of by
another
• When oncoming or preceding vehicles
are hidden from sight due to repeated
curves, road dividers or roadside trees
●
High beam may be turned off if an
oncoming vehicle that is using fog lights
without using the headlights is detected.
●
House lights, street lights, red traffic sig-
nals, and illuminated billboards or signs
may cause the high beam to turn off.
●
The following factors may affect the
amount of time taken to turn high beam
on or off:
• The brightness of headlights, fog lights, Automatic High Beam The Automatic High Beam uses an
in-vehicle camera sensor to assess
the brightness of streetlights, the
lights of oncoming and preceding
vehicles, etc., and automatically
turns high beam on or off as neces-
sary.
Activating the Automatic High
Beam system