display LEXUS RX350 2015 User Guide
[x] Cancel search | Manufacturer: LEXUS, Model Year: 2015, Model line: RX350, Model: LEXUS RX350 2015Pages: 886, PDF Size: 11 MB
Page 42 of 886

421-2. Opening, closing and locking the doors
■
Conditions affecting operation
The smart access system with push-button start uses weak radio waves. In the fol-
lowing situations, the communication betw een the electronic key and the vehicle
may be affected, preventing the smart access system with push-button start, wire-
less remote control and immobilize r system from operating properly.
(Ways of coping: P. 7 9 3 )●
When the electronic key battery is depleted●
Near a TV tower, electric power plant, gas station, radio st ation, large display,
airport or other facility that generates strong radio waves or electrical noise●
When carrying a portable radio, cellular phone, cordless phone or other wire-
less communication devices●
When the electronic key is in contact wi th, or is covered by the following metal-
lic objects
• Cards to which aluminum foil is attached
• Cigarette boxes that have aluminum foil inside
• Metallic wallets or bags
•Coins
• Hand warmers made of metal
• Media such as CDs and DVDs●
When multiple electronic keys are in the vicinity●
When another wireless key (that emits radio waves) is being used nearby●
When carrying the electronic key togeth er with the following devices that emit
radio waves
• Another vehicle's electronic key or a wireless key that emits radio waves
• Personal computers or person al digital assistants (PDAs)
• Digital audio players
• Portable game systems●
If window tint with a metallic content or metallic objects are attached to the rear
window
Page 44 of 886

441-2. Opening, closing and locking the doors
■
Notes for locking the doors ●
Touching the door lock sensor while we aring gloves may delay or prevent lock
operation. Remove the gloves and touch the lock sensor again.●
When the lock operation is performed using the lock sensor, recognition signals
will be shown up to two consecutive times. After this, no recognition signals will
be given. ●
If the door handle becomes wet while the electronic key is within the effective
range, the door may lock and unlock repeatedly. Place the key in a position 6 ft.
(2 m) or more separate from the vehicle while the vehicle is being washed. (Take
care to ensure that the key is not stolen.)●
If the electronic key is inside the vehicle and a door handle becomes wet during
a car wash, a message may be shown on the multi-information display and a
buzzer will sound outside the vehicle. To turn off the alarm, lock all the doors.●
The lock sensor may not work properly if it comes into contact with ice, snow,
mud, etc. Clean the lock sensor and atte mpt to operate it again, or use the lock
sensor on the lower part of the door handle.●
Fingernails may scrape against the door during operation of the door handle.
Be careful not to injure fingernails or damage the surface of the door. ■
Notes for the unlocking function ●
Gripping the door handle when wearing a glove may not unlock the door.●
A sudden approach to the effective range or door handle may prevent the
doors from being unlocked. In this case, return the door handle to the original
position and check that the doors unlock before pulling the door handle again.●
If there is another electronic key in the detection area, it may take slightly longer
to unlock the doors after the door handle is gripped. ■
When the vehicle is not driven for extended periods ●
To prevent theft of the vehicle, do not le ave the electronic key within 6 ft. (2 m)
of the vehicle.
●
The smart access system with push-butto n start can be deactivated in advance.
( P. 8 3 4 )
Page 110 of 886
1101-6. Theft deterrent system
Engine immobilizer system The vehicle's keys have built-in transponder chips that prevent the engine
from starting if the key has not been previously registered in the vehicle's
on-board computer.
Never leave the keys inside the vehicle when you leave the vehicle.
This system is designed to help prev ent vehicle theft but does not guaran-
tee absolute security ag ainst all vehicle thefts.
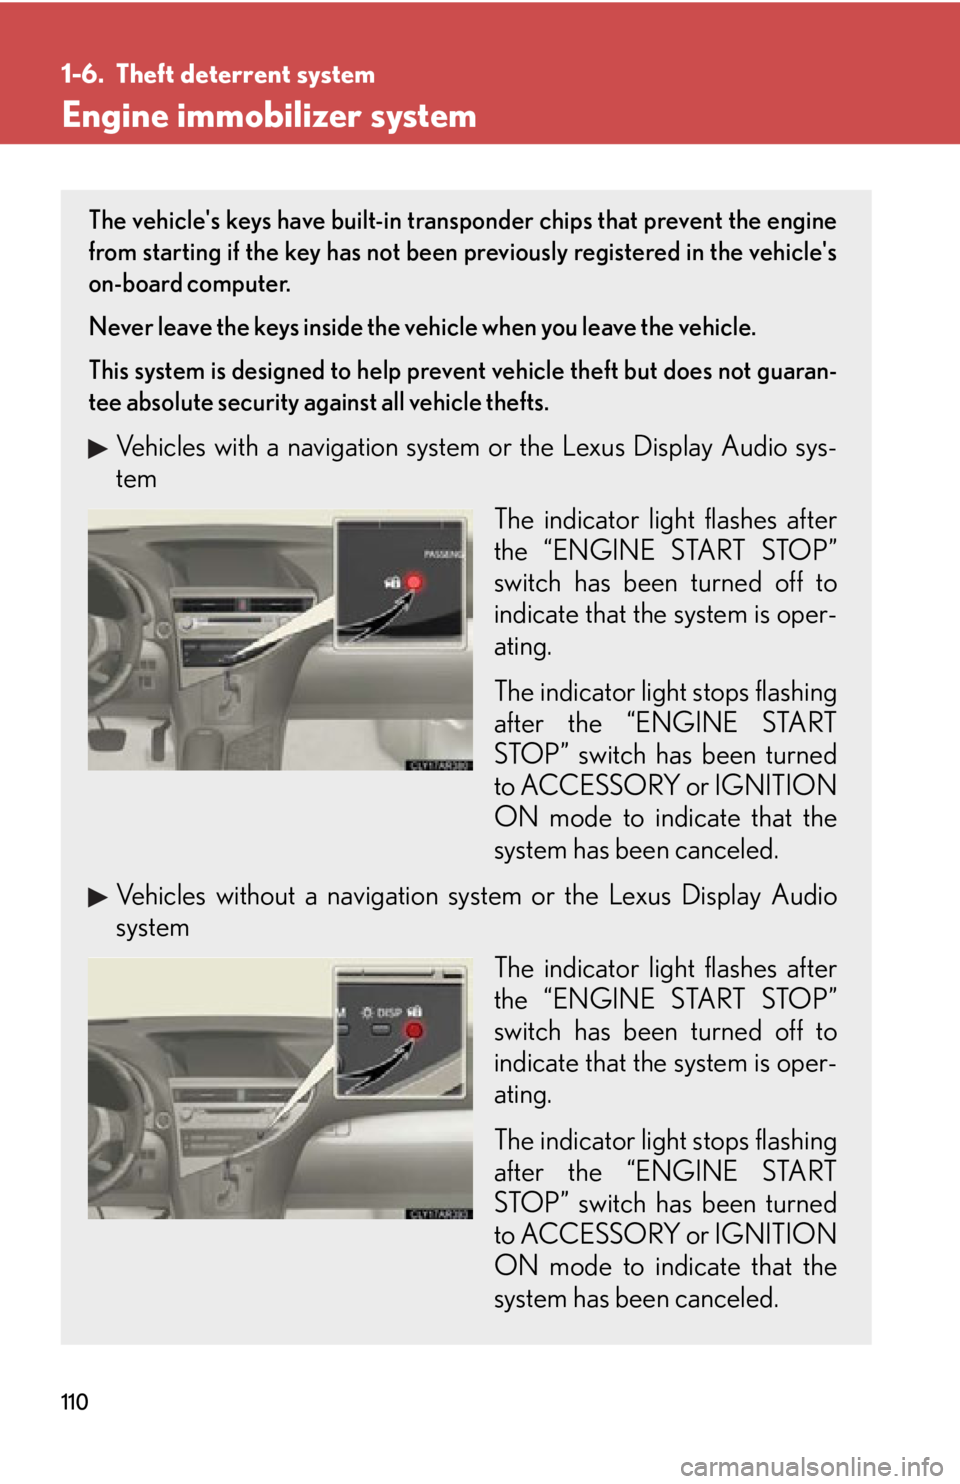
Vehicles with a navigation system or the Lexus Display Audio sys-
tem
The indicator light flashes after
the “ENGINE START STOP”
switch has been turned off to
indicate that the system is oper-
ating.
The indicator light stops flashing
after the “ENGINE START
STOP” switch has been turned
to ACCESSORY or IGNITION
ON mode to indicate that the
system has been canceled.
Vehicles without a navigation sy stem or the Lexus Display Audio
system
The indicator light flashes after
the “ENGINE START STOP”
switch has been turned off to
indicate that the system is oper-
ating.
The indicator light stops flashing
after the “ENGINE START
STOP” switch has been turned
to ACCESSORY or IGNITION
ON mode to indicate that the
system has been canceled.
Page 113 of 886
1131-6. Theft deterrent system
1
Before driving ■ Setting the alarm system
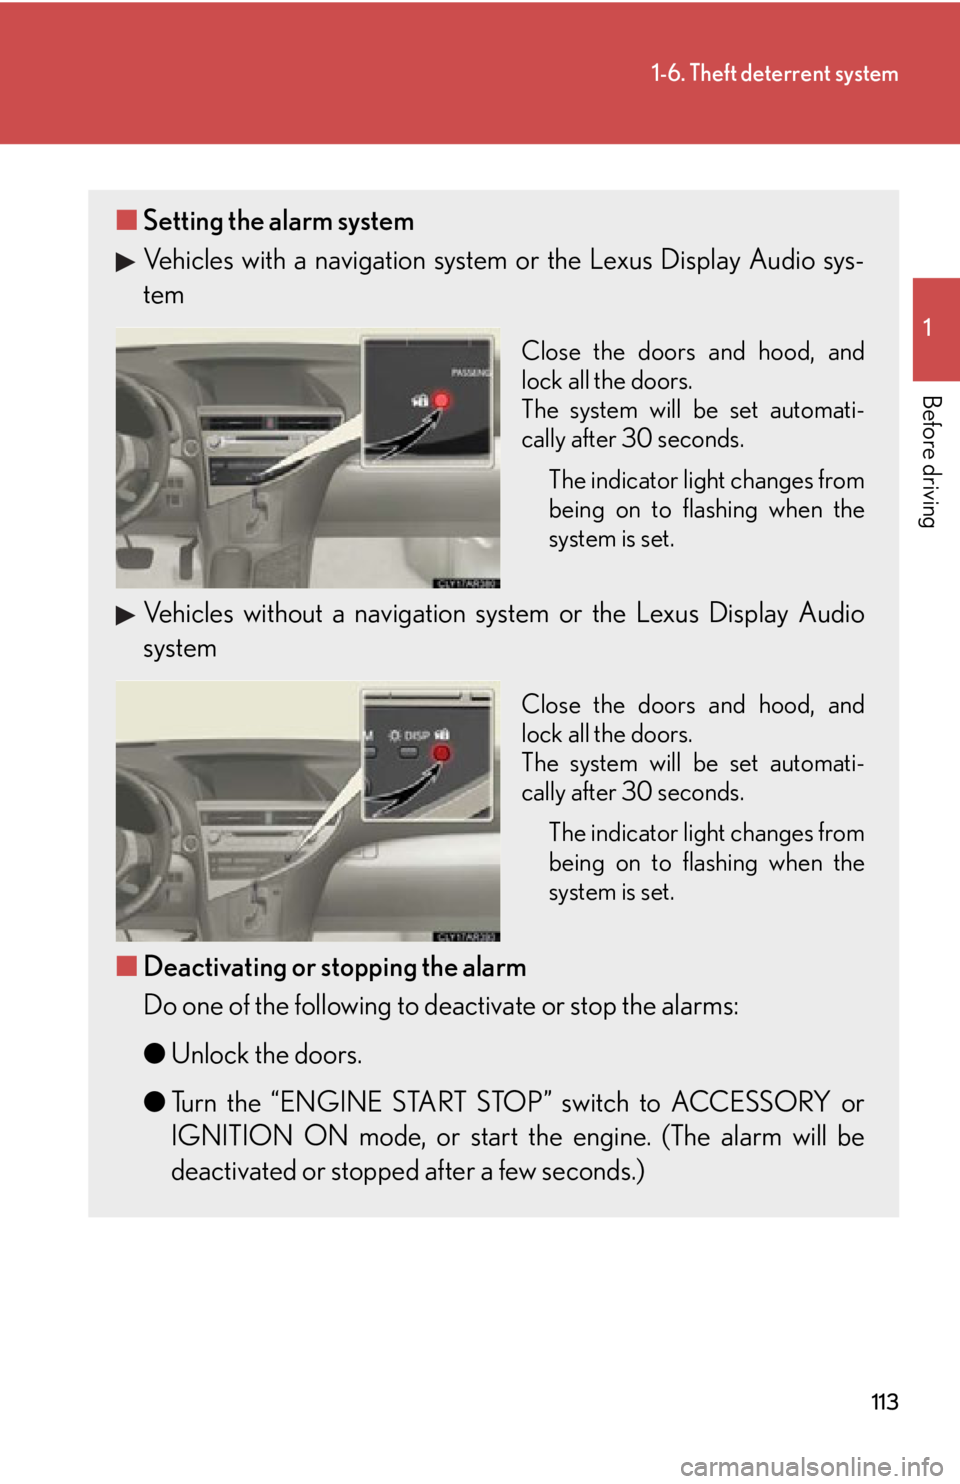
Vehicles with a navigation system or the Lexus Display Audio sys-
tem Close the doors and hood, and
lock all the doors.
The system will be set automati-
cally after 30 seconds.
The indicator light changes from
being on to flashing when the
system is set.
Vehicles without a navigation sy stem or the Lexus Display Audio
system Close the doors and hood, and
lock all the doors.
The system will be set automati-
cally after 30 seconds.
The indicator light changes from
being on to flashing when the
system is set.
■ Deactivating or stopping the alarm
Do one of the following to deactivate or stop the alarms:
● Unlock the doors.
● Turn the “ENGINE START STOP” switch to ACCESSORY or
IGNITION ON mode, or start the engine. (The alarm will be
deactivated or stopped after a few seconds.)
Page 132 of 886
1321-7. Safety information
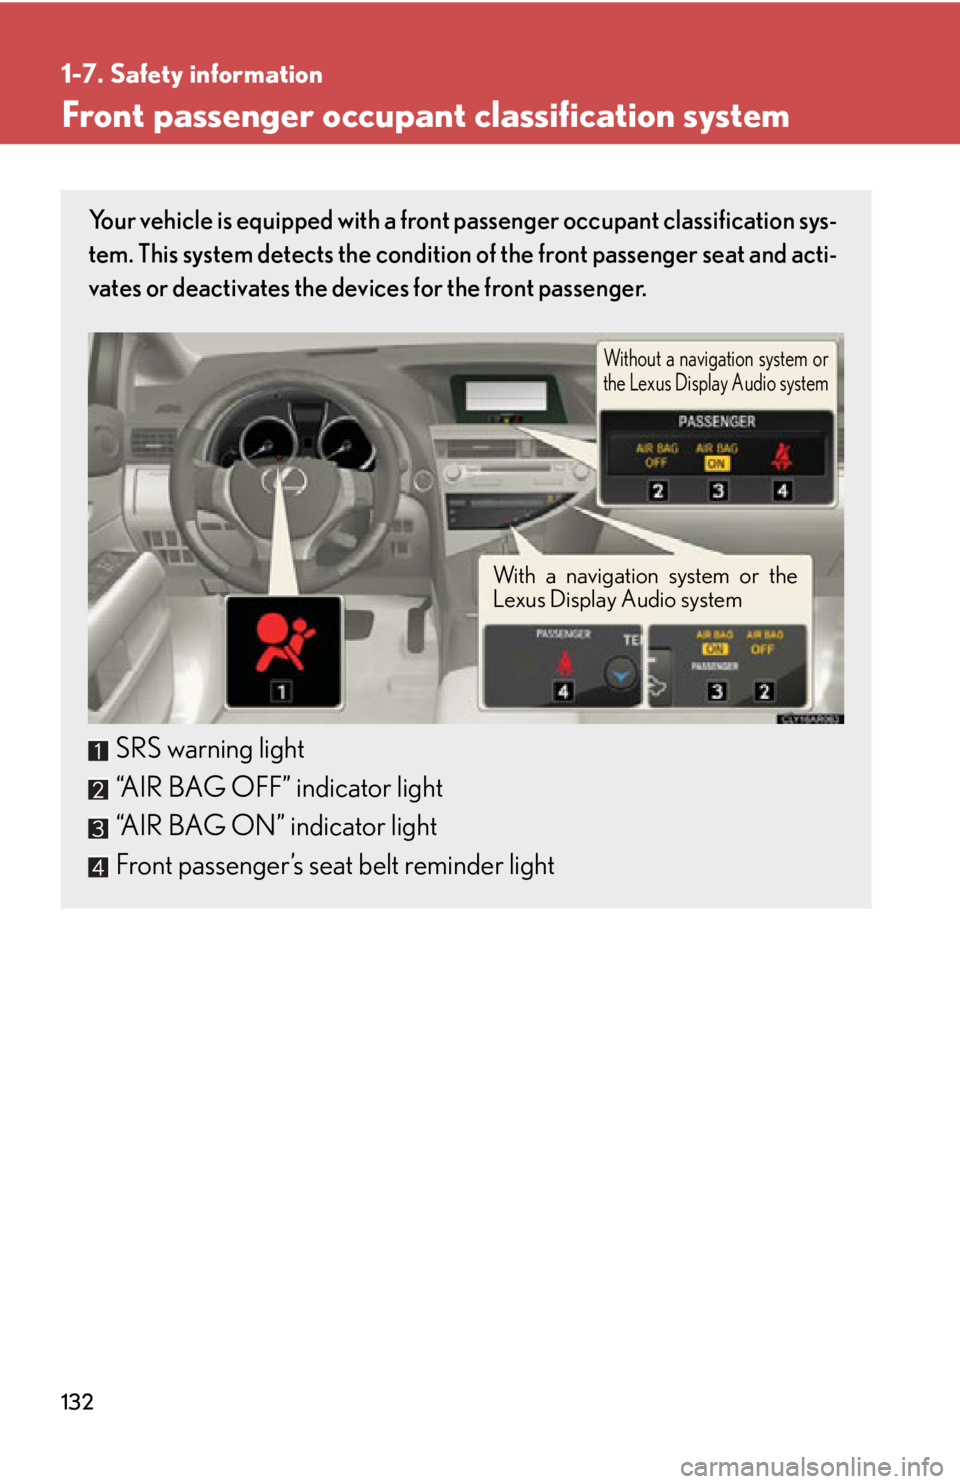
Front passenger occupant classification system Your vehicle is equipped with a front passenger occupant classification sys-
tem. This system detects the condition of the front passenger seat and acti-
vates or deactivates the devices for the front passenger.
SRS warning light
“AIR BAG OFF” indicator light
“AIR BAG ON” indicator light
Front passenger’s seat belt reminder light Without a navigation system or
the Lexus Display Audio system
With a navigation system or the
Lexus Display Audio system
Page 141 of 886
14111-7. Safety information
Before driving Installing child restraints Follow the child restraint system ma nufacturer's instructions. Firmly
secure child restraints to the seats using the LATCH anchors or a seat belt.
Attach the top tether strap when installing a child restraint.
The lap/shoulder belt can be used if your child restraint system is not com-
patible with the LATCH (Lower Anchor s and Tethers for Children) system.
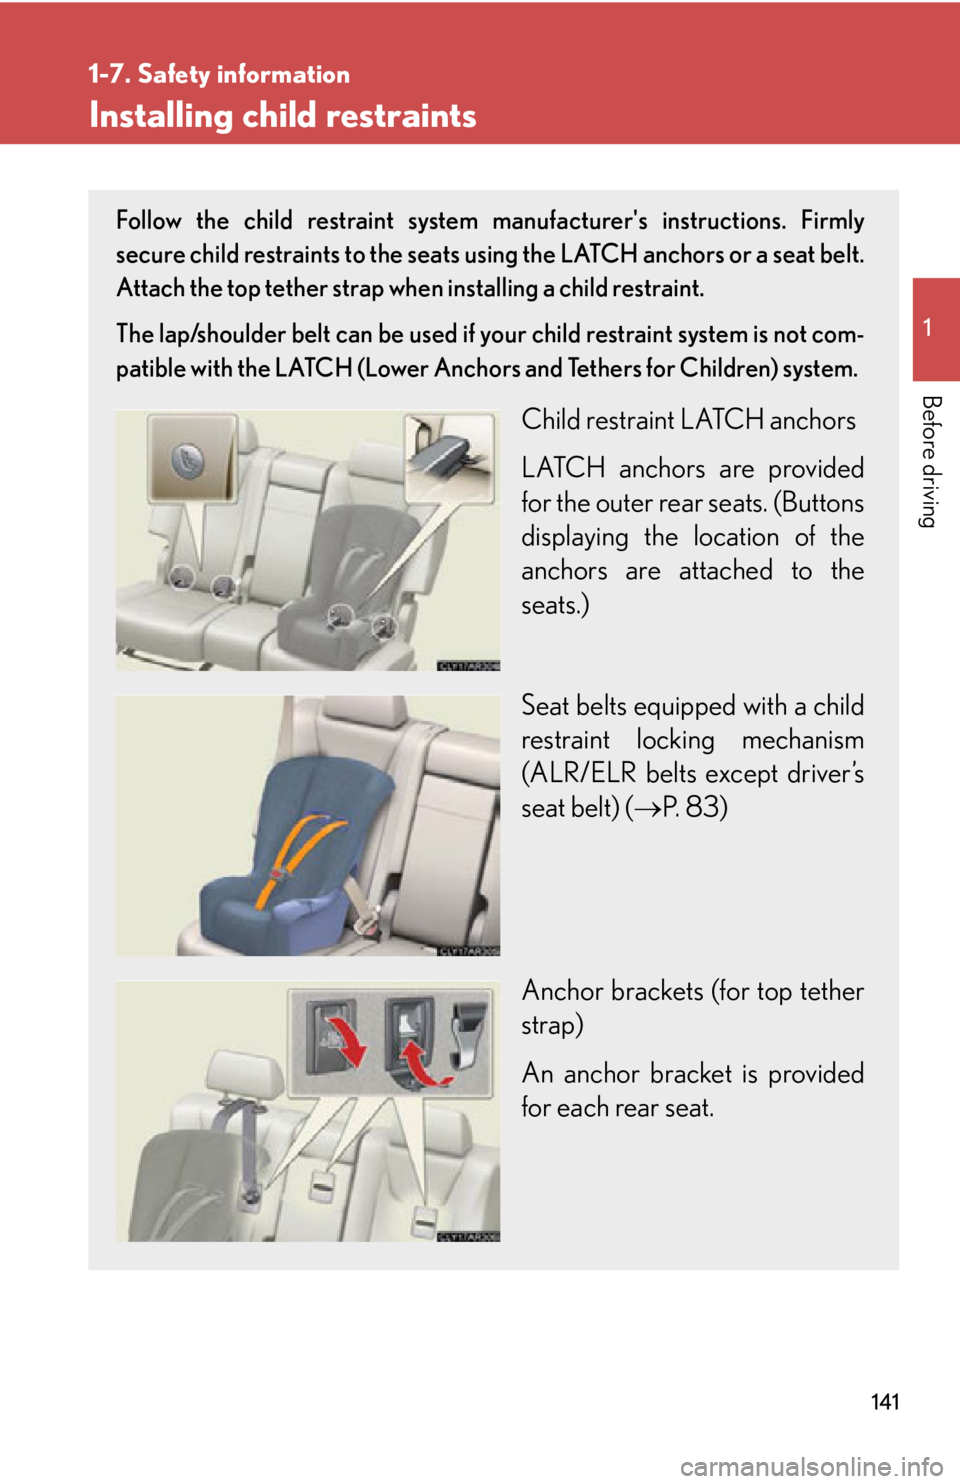
Child restraint LATCH anchors
LATCH anchors are provided
for the outer rear seats. (Buttons
displaying the location of the
anchors are attached to the
seats.)
Seat belts equipped with a child
restraint locking mechanism
(ALR/ELR belts except driver’s
seat belt) ( P. 8 3 )
Anchor brackets (for top tether
strap)
An anchor bracket is provided
for each rear seat.
Page 153 of 886
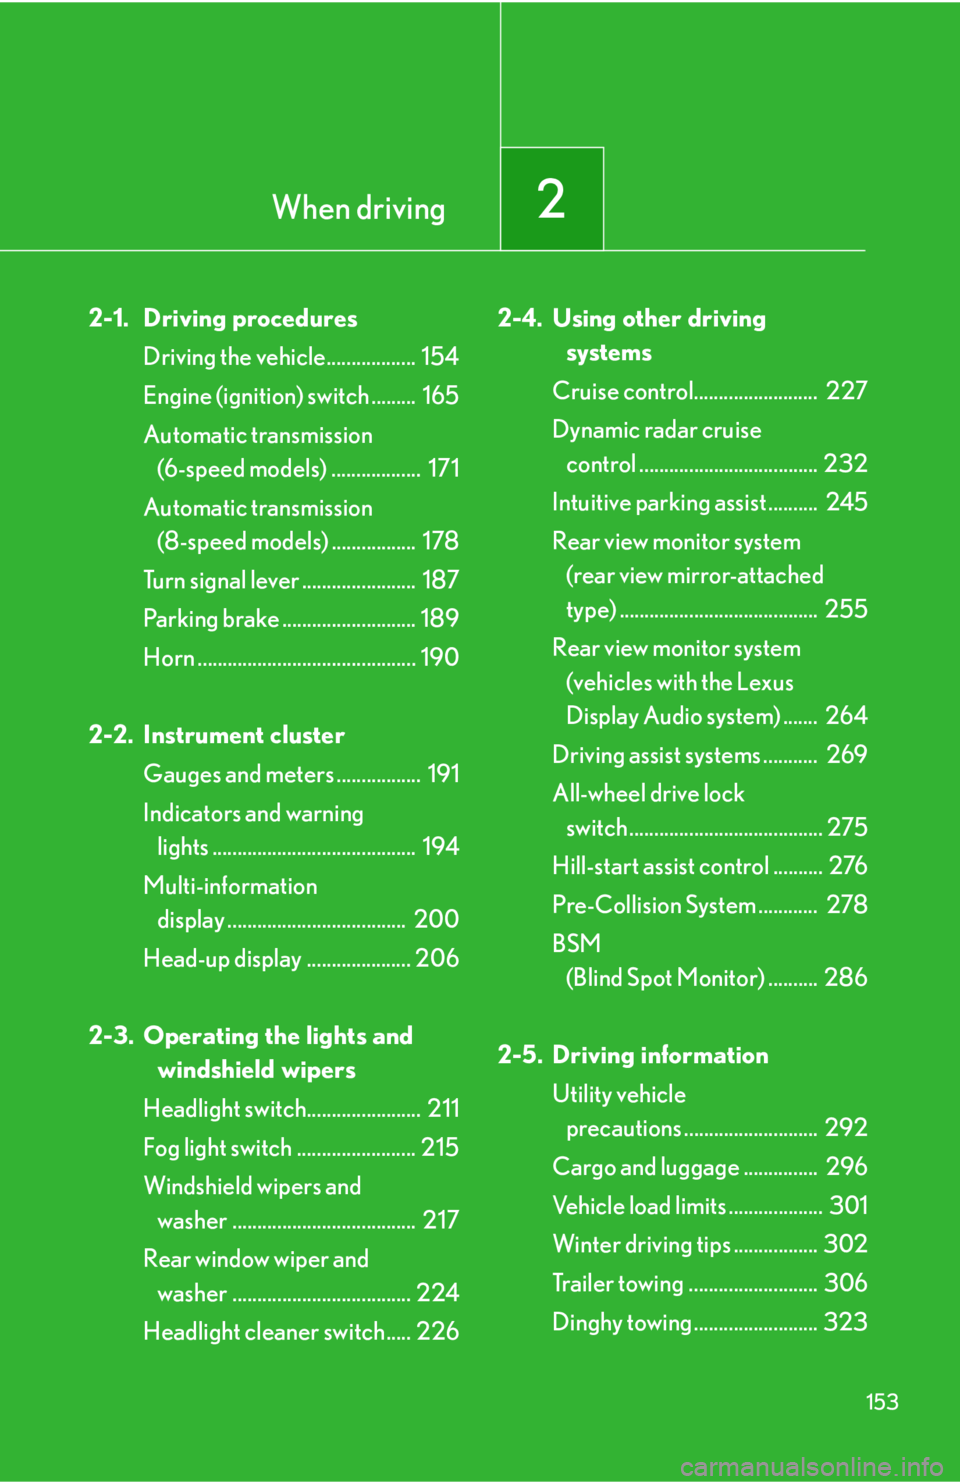
When driving
2
1532-1. Driving procedures
Driving the vehicle.................. 154
Engine (ignition) switch ......... 165
Automatic transmission
(6-speed models) .................. 171
Automatic transmission
(8-speed models) ................. 178
Turn signal lever ....................... 187
Parking brake ........................... 189
Horn ............................................ 190
2-2. Instrument cluster
Gauges and meters ................. 191
Indicators and warning
lights ......................................... 194
Multi-information
display .................................... 200
Head-up display ..................... 206
2-3. Operating the lights and
windshield wipers
Headlight switch....................... 211
Fog light switch ........................ 215
Windshield wipers and
washer ..................................... 217
Rear window wiper and
washer .................................... 224
Headlight cleaner switch..... 226 2-4. Using other driving
systems
Cruise control......................... 227
Dynamic radar cruise
control .................................... 232
Intuitive parking assist .......... 245
Rear view monitor system
(rear view mirror-attached
type) ........................................ 255
Rear view monitor system
(vehicles with the Lexus
Display Audio system) ....... 264
Driving assist systems ........... 269
All-wheel drive lock
switch ....................................... 275
Hill-start assist control .......... 276
Pre-Collision System ............ 278
BSM
(Blind Spot Monitor) .......... 286
2-5. Driving information
Utility vehicle
precautions ........................... 292
Cargo and luggage ............... 296
Vehicle load limits ................... 301
Winter driving tips ................. 302
Trailer towing .......................... 306
Dinghy towing ......................... 323
Page 168 of 886
1682-1. Driving procedures
■
If the engine does not start
The engine immobilizer system may not have been deactivated. ( P. 1 1 0 )
Contact your Lexus dealer.■
Steering lock
After turning the “ENGINE START STOP” switch off and opening and closing the
doors, the steering wheel will be locked due to the steering lock function. Operat-
ing the “ENGINE START STOP” switch again automatically cancels the steering
lock.■
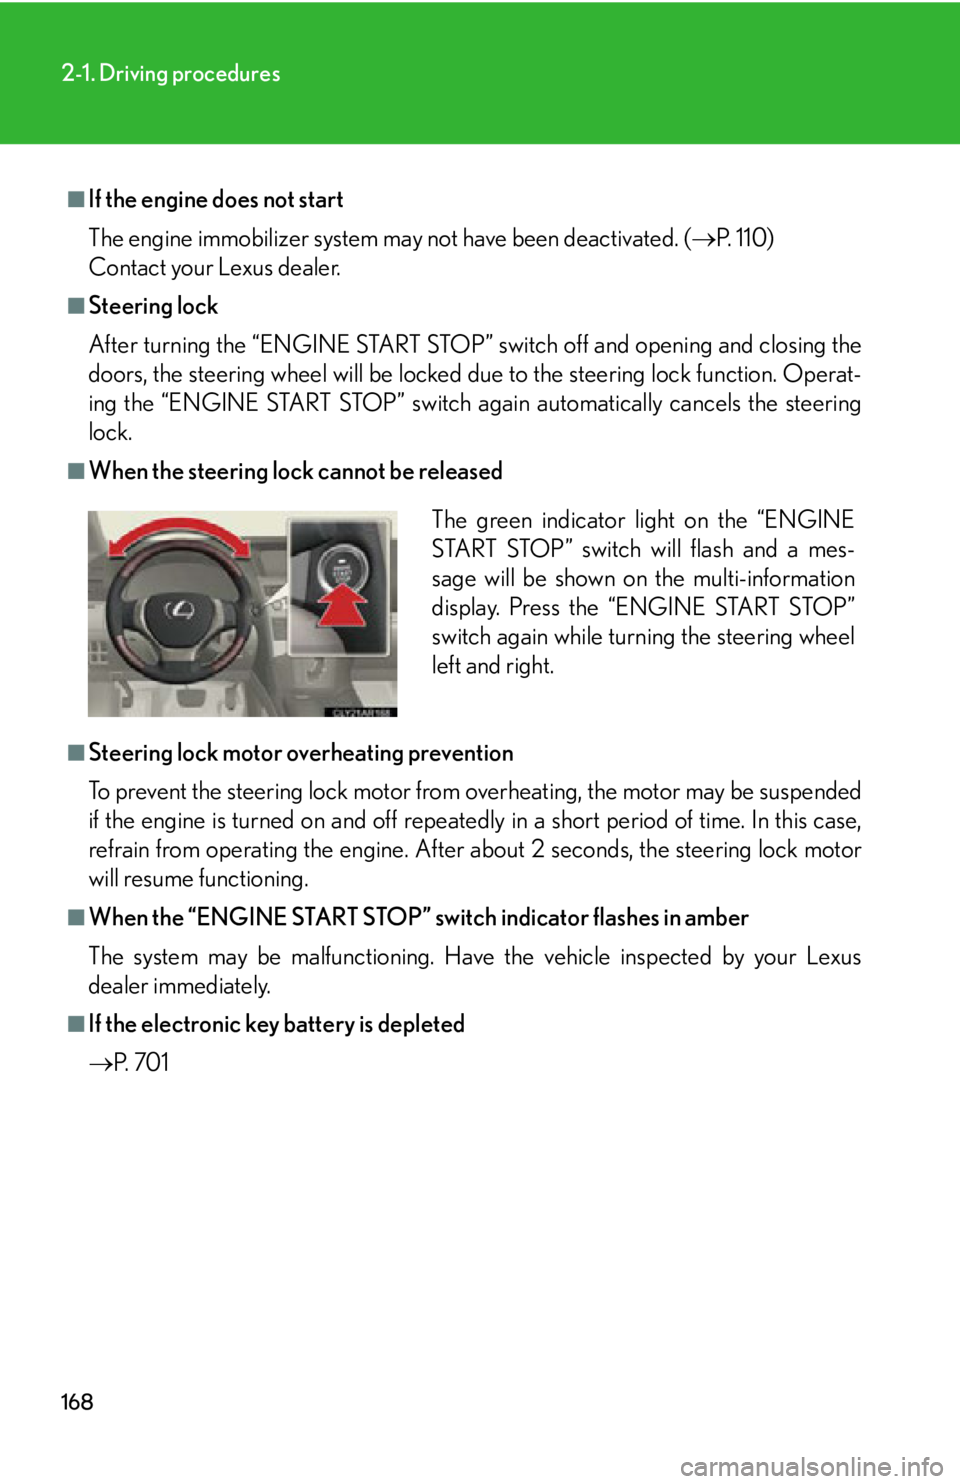
When the steering lock cannot be released
■
Steering lock motor overheating prevention
To prevent the steering lock motor from overheating, the motor may be suspended
if the engine is turned on and off repeatedly in a short period of time. In this case,
refrain from operating the engine. After about 2 seconds, the steering lock motor
will resume functioning.■
When the “ENGINE START STOP” switch indicator flashes in amber
The system may be malfunctioning. Have the vehicle inspected by your Lexus
dealer immediately.■
If the electronic key battery is depleted
P. 7 0 1 The green indicator light on the “ENGINE
START STOP” switch will flash and a mes-
sage will be shown on the multi-information
display. Press the “ENGINE START STOP”
switch again while turning the steering wheel
left and right.
Page 173 of 886
1732-1. Driving procedures
2
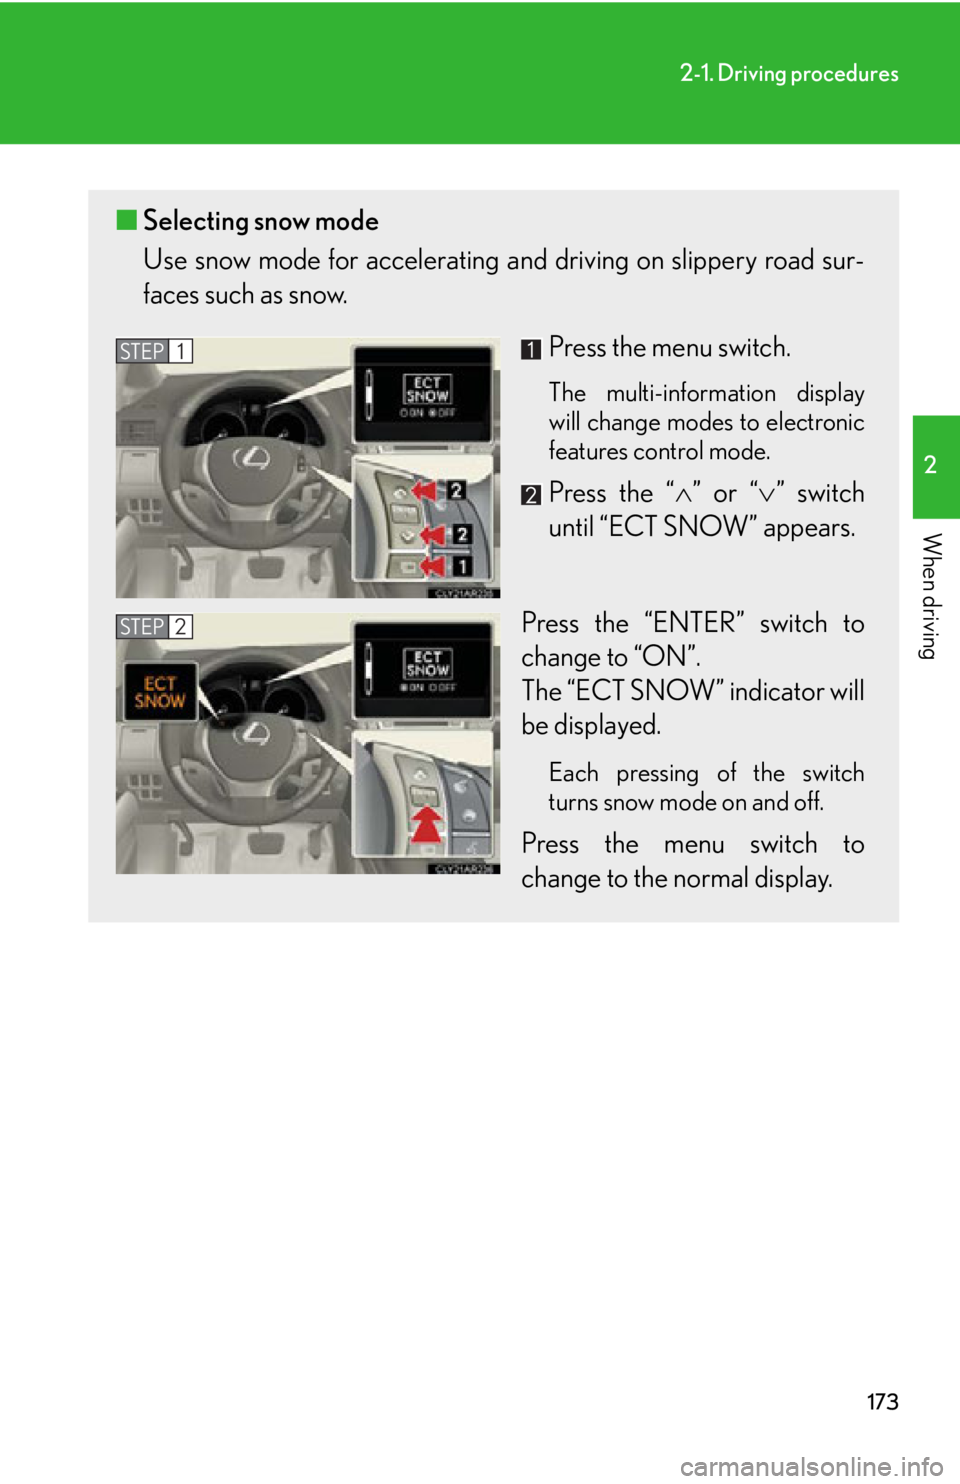
When driving ■ Selecting snow mode
Use snow mode for accele rating and driving on slippery road sur-
faces such as snow.
Press the menu switch. The multi-information display
will change modes to electronic
features control mode.
Press the “ ” or “ ” switch
until “ECT SNOW” appears.
Press the “ENTER” switch to
change to “ON”.
The “ECT SNOW” indicator will
be displayed. Each pressing of the switch
turns snow mode on and off.
Press the menu switch to
change to the normal display.STEP 1
STEP 2
Page 179 of 886
1792-1. Driving procedures
2
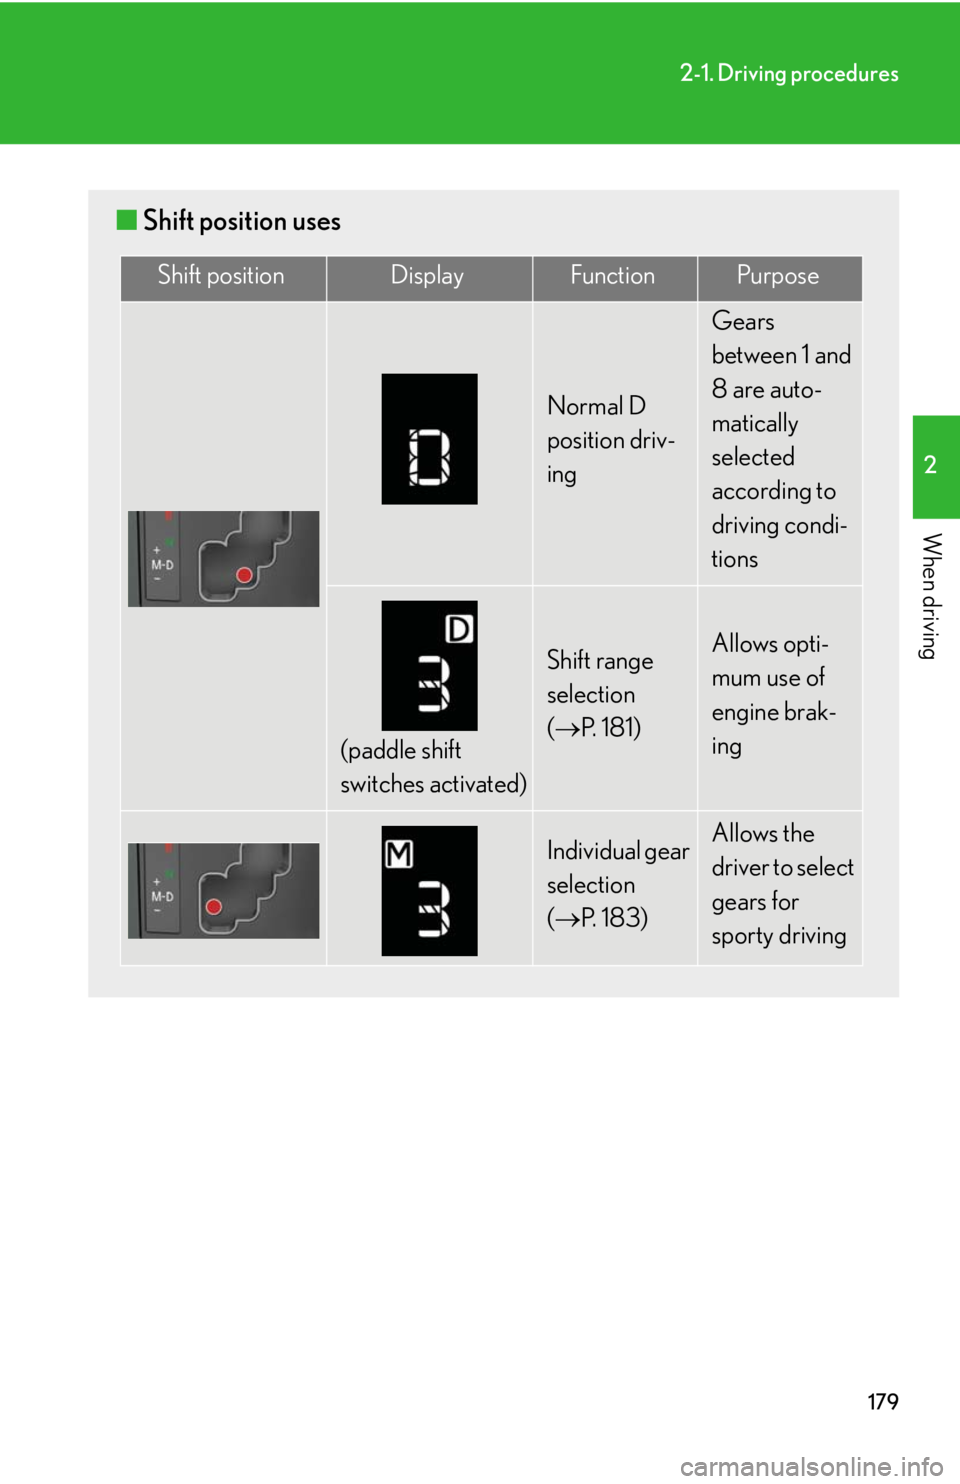
When driving ■ Shift position uses Shift position Display Function Purpose
Normal D
position driv-
ing Gears
between 1 and
8 are auto-
matically
selected
according to
driving condi-
tions
(paddle shift
switches activated) Shift range
selection
( P. 1 8 1 ) Allows opti-
mum use of
engine brak-
ing
Individual gear
selection
( P. 1 8 3 ) Allows the
driver to select
gears for
sporty driving