Engine LINCOLN AVIATOR 2004 Owner's Manual
[x] Cancel search | Manufacturer: LINCOLN, Model Year: 2004, Model line: AVIATOR, Model: LINCOLN AVIATOR 2004Pages: 336, PDF Size: 3.69 MB
Page 149 of 336

1. Insert the first previously
programmedcoded keyinto the
ignition and turn the ignition from 1
(OFF) to 3 (ON) (maintain ignition
in 3 (ON) for at least one second,
but no more than ten seconds).
2. Turn ignition to 1 (OFF) and
remove the firstcoded keyfrom
the ignition.
3. Within ten seconds of removing
the firstcoded key,insert the second previously programmedcoded
keyinto the ignition and turn the ignition from 1 (OFF) to 3 (ON)
(maintain ignition in 3 (ON) for at least one second but no more than
ten seconds).
4. Turn the ignition to 1 (OFF) and remove the secondcoded keyfrom
the ignition.
5. Within 20 seconds of removing the secondcoded key,insert the new
unprogrammed key (new key/valet key) into the ignition and turn the
ignition from 1 (OFF) to 3 (ON) (maintain ignition in 3 (ON) for at least
one second, but no more than ten seconds). This step will program your
new key to a coded key.
6. To program additional new unprogrammed key(s), repeat this
procedure from step 1.
If successful, the new coded key(s) will start the vehicle's engine and the
theft indicator will illuminate for three seconds and then go out.
If not successful, the new coded key(s) will not start the vehicle's engine
and the theft indicator will flash on and off and you may repeat steps 1
through 5. If failure repeats, bring your vehicle to your dealership to
have the new spare key(s) programmed.
PERIMETER ALARM SYSTEM
The perimeter anti-theft system will help prevent your vehicle from
unauthorized entry.
If there is any potential perimeter anti-theft problem with your vehicle,
ensureALL remote entry transmittersare brought to the dealership,
to aid in troubleshooting.
4
3
2
1
Locks and Security
149
Page 157 of 336
3. Turn the ignition key to the on position.
4. Place the ignition key to the off position.
5. Turn the ignition key to the on position.
6. Place the ignition key to the off position.
7. Turn the ignition key to the on position.
8. Place the ignition key to the off position.
9. Momentarily activate the horizontal seat switch in either the forward
or rearward direction.
10. Remove the ignition key from the ignition switch.
CLIMATE CONTROL SEATS (if equipped)
The climate seat controls are located on the inside of the front doors.
To operate the climate control seats the engine must be running.
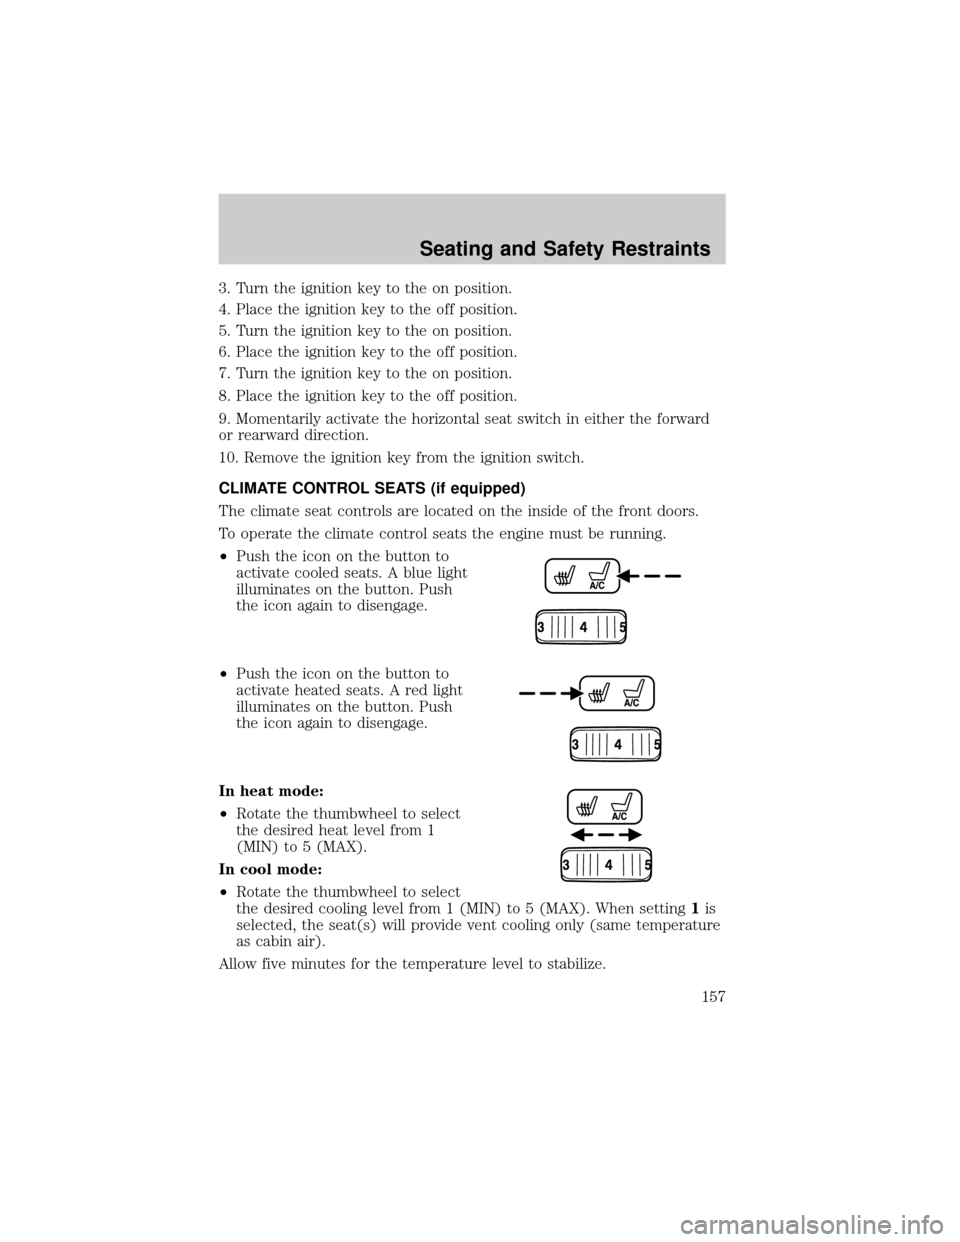
²Push the icon on the button to
activate cooled seats. A blue light
illuminates on the button. Push
the icon again to disengage.
²Push the icon on the button to
activate heated seats. A red light
illuminates on the button. Push
the icon again to disengage.
In heat mode:
²Rotate the thumbwheel to select
the desired heat level from 1
(MIN) to 5 (MAX).
In cool mode:
²Rotate the thumbwheel to select
the desired cooling level from 1 (MIN) to 5 (MAX). When setting1is
selected, the seat(s) will provide vent cooling only (same temperature
as cabin air).
Allow five minutes for the temperature level to stabilize.
Seating and Safety Restraints
157
Page 172 of 336
Do not sit on top of a buckled safety belt to avoid the Belt
Minder chime. Sitting on the safety belt will increase the risk of
injury in an accident. To disable (one-time) or deactivate the Belt
Minder feature please follow the directions stated below.
One time disable
Any time the safety belt is buckled and then unbuckled during an
ignition ON cycle, the BeltMinder will be disabled for that ignition cycle
only.
Deactivating/activating the BeltMinder feature
Read steps1-9thoroughly before proceeding with the
deactivation/activation programming procedure.
The BeltMinder feature can be deactivated/activated by performing the
following procedure:
Before following the procedure, make sure that:
²The parking brake is set
²The gearshift is in P (Park)
²The ignition switch is in the OFF position
²All vehicle doors are closed
²The driver's safety belt is unbuckled
²The parklamps/headlamps are in OFF position (If vehicle is equipped
with Autolamps, this will not affect the procedure.)
To reduce the risk of injury, do not deactivate/activate the Belt
Minder feature while driving the vehicle.
1. Turn the ignition switch to the RUN (or ON) position. (DO NOT
START THE ENGINE)
2. Wait until the safety belt warning light turns off. (Approximately 1±2
minutes)
²Steps 3±5 must be completed within 60 seconds or the procedure will
have to be repeated.
3. Buckle then unbuckle the safety belt three times, ending with the
safety belt unbuckled. This can be done before or during BeltMinder
warning activation.
4. Turn on the parklamps/headlamps, turn off the parklamps/headlamps.
Seating and Safety Restraints
172
Page 193 of 336
STARTING
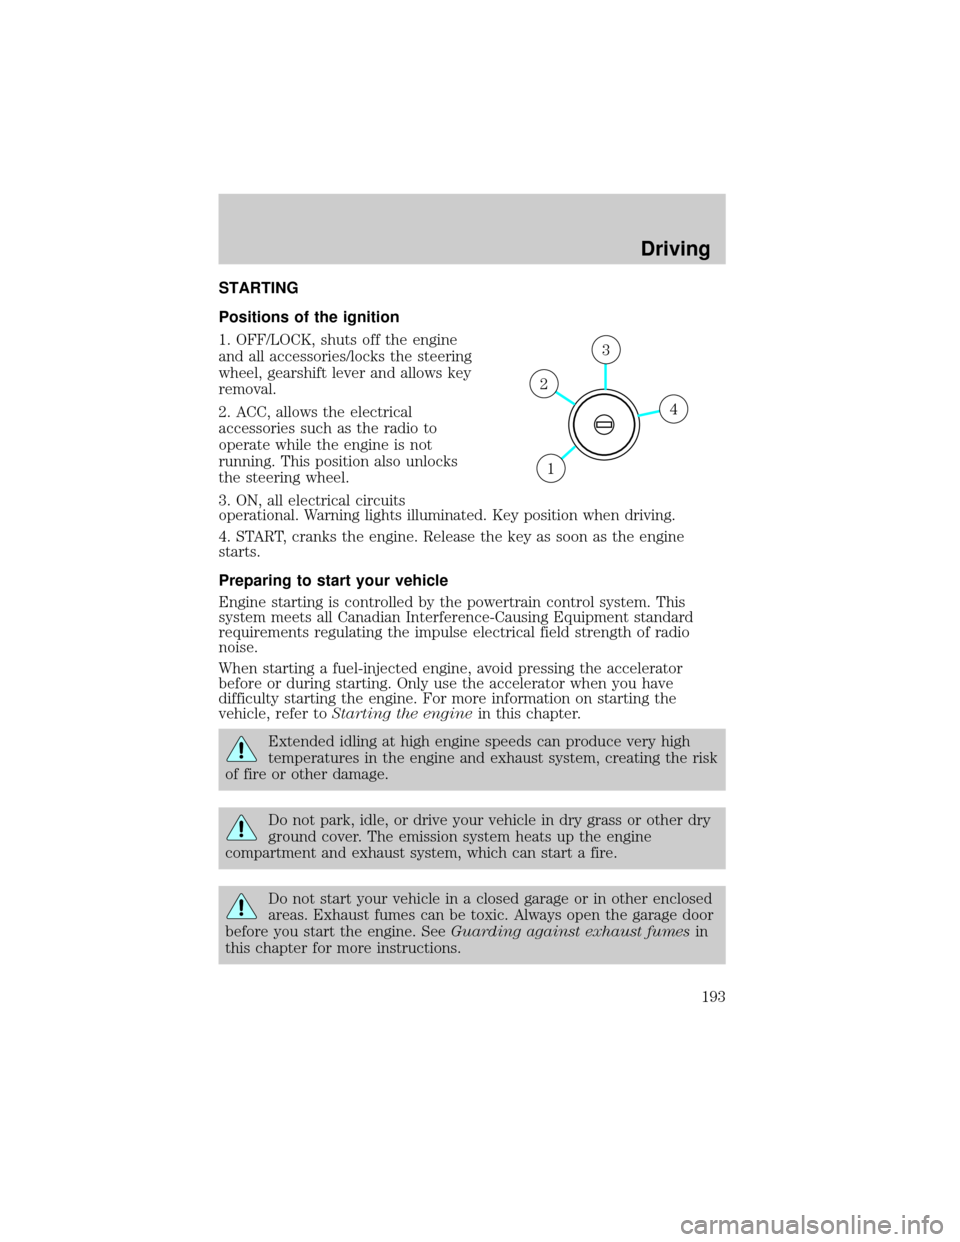
Positions of the ignition
1. OFF/LOCK, shuts off the engine
and all accessories/locks the steering
wheel, gearshift lever and allows key
removal.
2. ACC, allows the electrical
accessories such as the radio to
operate while the engine is not
running. This position also unlocks
the steering wheel.
3. ON, all electrical circuits
operational. Warning lights illuminated. Key position when driving.
4. START, cranks the engine. Release the key as soon as the engine
starts.
Preparing to start your vehicle
Engine starting is controlled by the powertrain control system. This
system meets all Canadian Interference-Causing Equipment standard
requirements regulating the impulse electrical field strength of radio
noise.
When starting a fuel-injected engine, avoid pressing the accelerator
before or during starting. Only use the accelerator when you have
difficulty starting the engine. For more information on starting the
vehicle, refer toStarting the enginein this chapter.
Extended idling at high engine speeds can produce very high
temperatures in the engine and exhaust system, creating the risk
of fire or other damage.
Do not park, idle, or drive your vehicle in dry grass or other dry
ground cover. The emission system heats up the engine
compartment and exhaust system, which can start a fire.
Do not start your vehicle in a closed garage or in other enclosed
areas. Exhaust fumes can be toxic. Always open the garage door
before you start the engine. SeeGuarding against exhaust fumesin
this chapter for more instructions.
4
3
2
1
Driving
Driving
193
Page 194 of 336
If you smell exhaust fumes inside your vehicle, have your dealer
inspect your vehicle immediately. Do not drive if you smell
exhaust fumes.
Important safety precautions
A computer system controls the engine's idle revolutions per minute
(RPM). When the engine starts, the idle RPM runs higher than normal in
order to warm the engine. If the engine idle speed does not slow down
automatically, have the vehicle checked.
Before starting the vehicle:
1. Make sure all vehicle occupants have buckled their safety belts. For
more information on safety belts and their proper usage, refer to the
Seating and Safety Restraintschapter.
2. Make sure vehicle accessories are off.
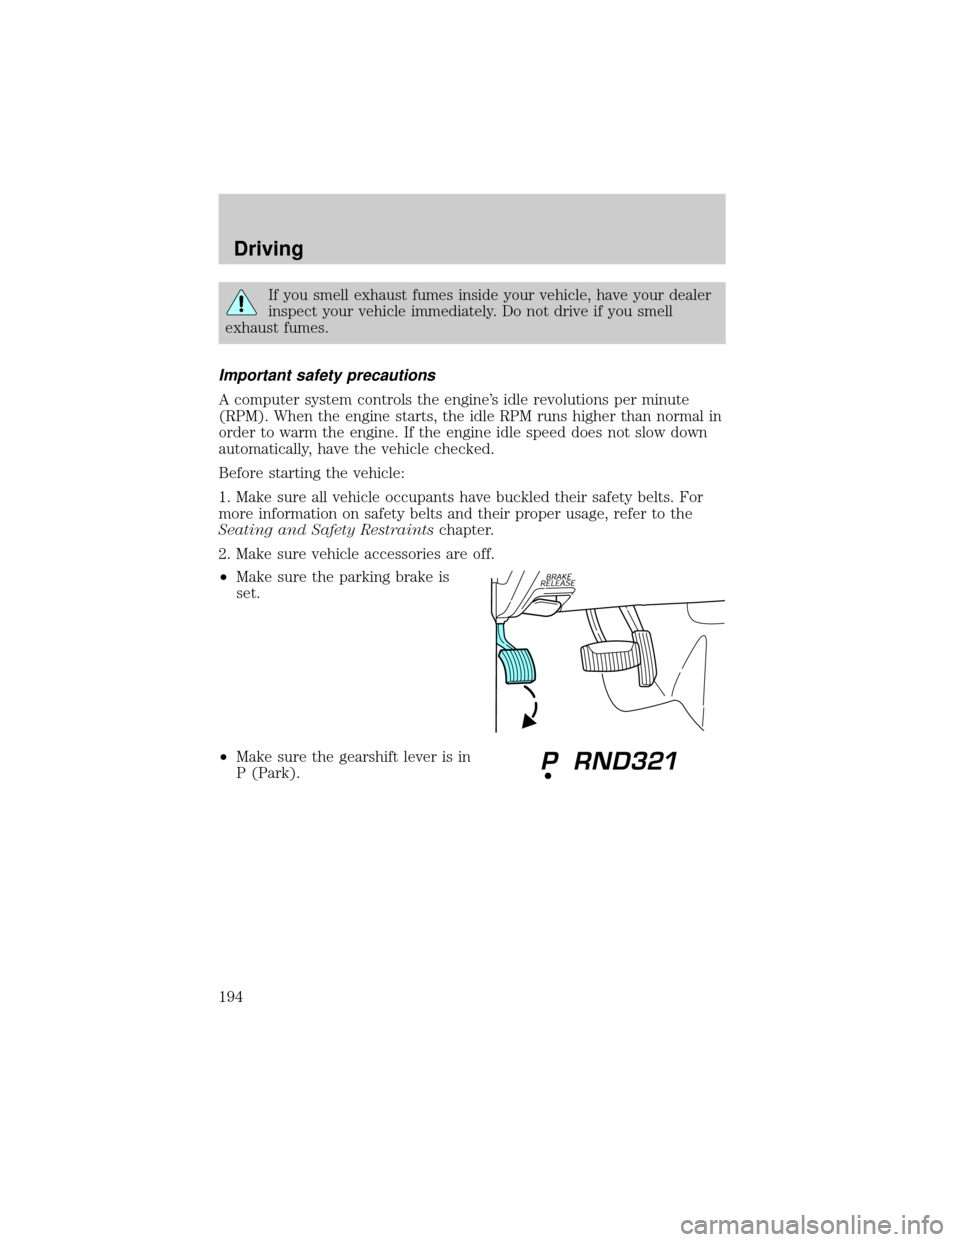
²Make sure the parking brake is
set.
²Make sure the gearshift lever is in
P (Park).
Driving
194
Page 195 of 336
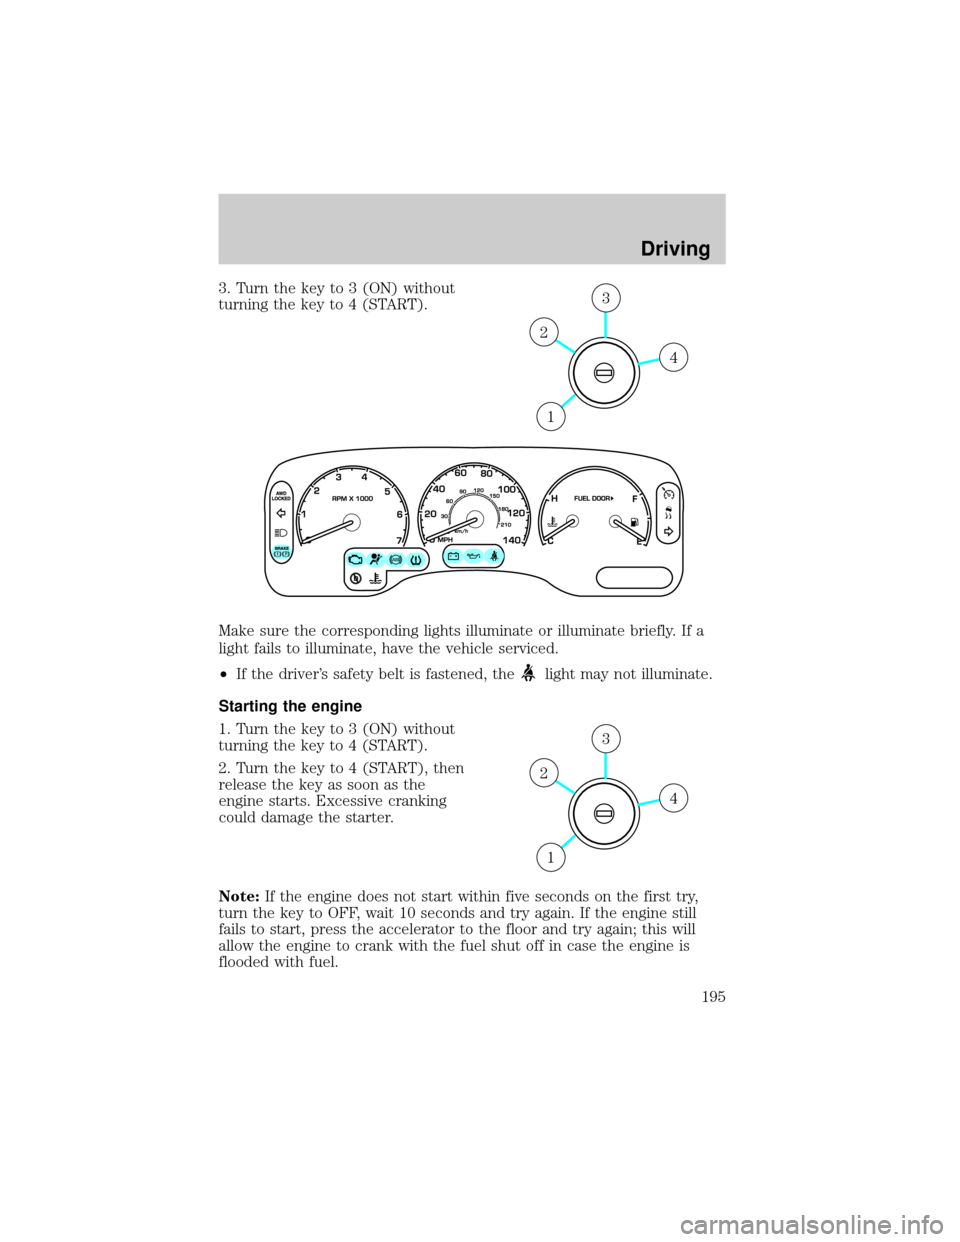
3. Turn the key to 3 (ON) without
turning the key to 4 (START).
Make sure the corresponding lights illuminate or illuminate briefly. If a
light fails to illuminate, have the vehicle serviced.
²If the driver's safety belt is fastened, the
light may not illuminate.
Starting the engine
1. Turn the key to 3 (ON) without
turning the key to 4 (START).
2. Turn the key to 4 (START), then
release the key as soon as the
engine starts. Excessive cranking
could damage the starter.
Note:If the engine does not start within five seconds on the first try,
turn the key to OFF, wait 10 seconds and try again. If the engine still
fails to start, press the accelerator to the floor and try again; this will
allow the engine to crank with the fuel shut off in case the engine is
flooded with fuel.
4
3
2
1
4
3
2
1
Driving
195
Page 196 of 336
Using the engine block heater (if equipped)
An engine block heater warms the engine coolant which aids in starting
and heater/defroster performance. Use of an engine block heater is
strongly recommended if you live in a region where temperatures reach
-23É C (-10É F) or below. For best results, plug the heater in at least
three hours before starting the vehicle. The heater can be plugged in the
night before starting the vehicle.
To reduce the risk of electrical shock, do not use your heater
with ungrounded electrical systems or two-pronged (cheater)
adapters.
Guarding against exhaust fumes
Carbon monoxide is present in exhaust fumes. Take precautions to avoid
its dangerous effects.
If you smell exhaust fumes inside your vehicle, have your dealer
inspect your vehicle immediately. Do not drive if you smell
exhaust fumes.
Important ventilating information
If the engine is idling while the vehicle is stopped for a long period of
time, open the windows at least 2.5 cm (one inch) or adjust the heating
or air conditioning to bring in fresh air.
BRAKES
Your service brakes are self-adjusting. Refer to the scheduled
maintenance guide for scheduled maintenance.
Occasional brake noise is normal and often does not indicate a
performance concern with the vehicle's brake system. In normal
operation, automotive brake systems may emit occasional or intermittent
squeal or groan noises when the brakes are applied. Such noises are
usually heard during the first few brake applications in the morning;
however, they may be heard at any time while braking and can be
aggravated by environmental conditions such as cold, heat, moisture,
road dust, salt or mud. If a ªmetal-to-metal,º ªcontinuous grindingº or
ªcontinuous squealº sound is present while braking, the brake linings
may be worn-out and should be inspected by a qualified service
technician.
Driving
196
Page 197 of 336
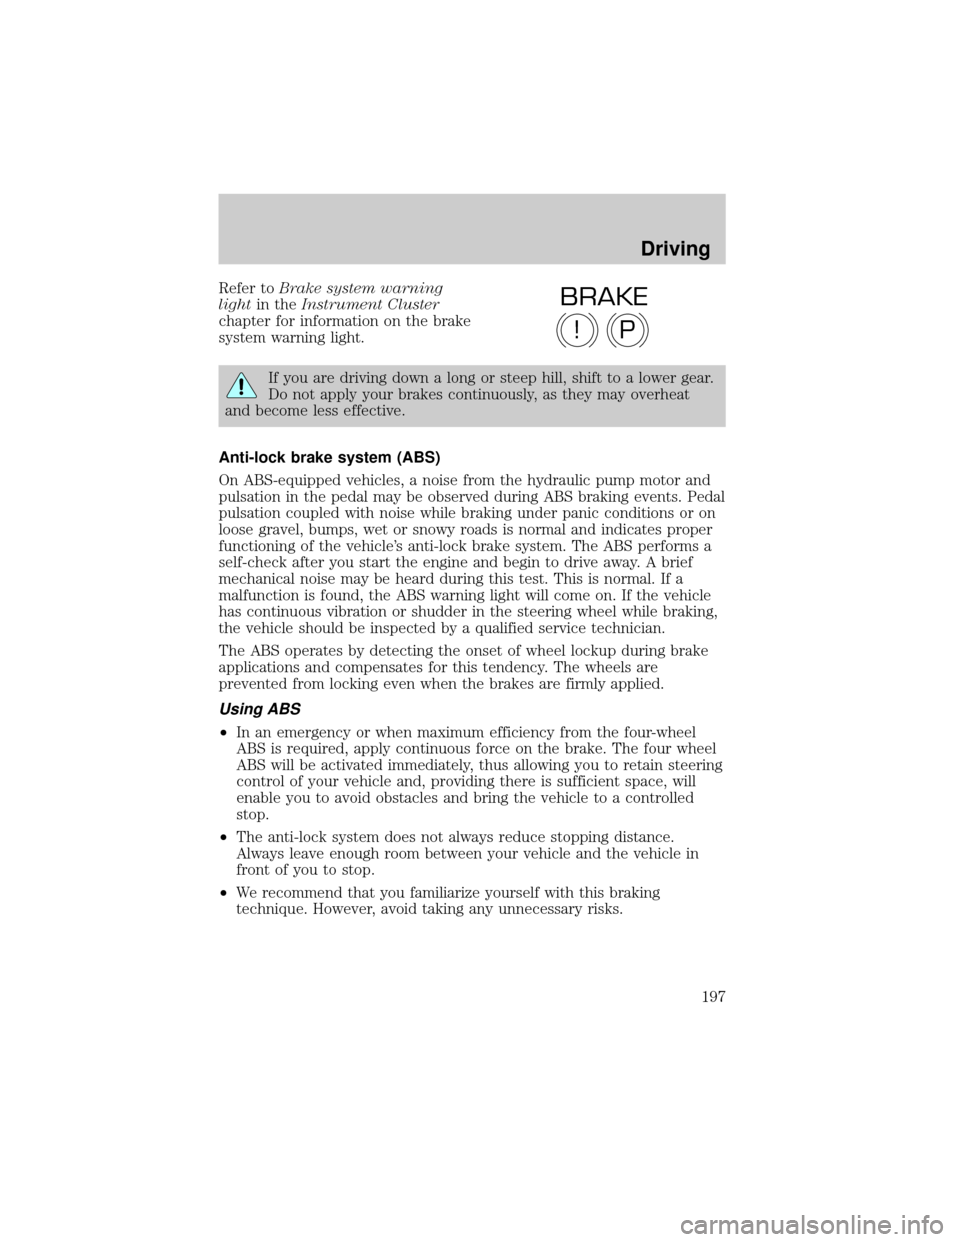
Refer toBrake system warning
lightin theInstrument Cluster
chapter for information on the brake
system warning light.
If you are driving down a long or steep hill, shift to a lower gear.
Do not apply your brakes continuously, as they may overheat
and become less effective.
Anti-lock brake system (ABS)
On ABS-equipped vehicles, a noise from the hydraulic pump motor and
pulsation in the pedal may be observed during ABS braking events. Pedal
pulsation coupled with noise while braking under panic conditions or on
loose gravel, bumps, wet or snowy roads is normal and indicates proper
functioning of the vehicle's anti-lock brake system. The ABS performs a
self-check after you start the engine and begin to drive away. A brief
mechanical noise may be heard during this test. This is normal. If a
malfunction is found, the ABS warning light will come on. If the vehicle
has continuous vibration or shudder in the steering wheel while braking,
the vehicle should be inspected by a qualified service technician.
The ABS operates by detecting the onset of wheel lockup during brake
applications and compensates for this tendency. The wheels are
prevented from locking even when the brakes are firmly applied.
Using ABS
²In an emergency or when maximum efficiency from the four-wheel
ABS is required, apply continuous force on the brake. The four wheel
ABS will be activated immediately, thus allowing you to retain steering
control of your vehicle and, providing there is sufficient space, will
enable you to avoid obstacles and bring the vehicle to a controlled
stop.
²The anti-lock system does not always reduce stopping distance.
Always leave enough room between your vehicle and the vehicle in
front of you to stop.
²We recommend that you familiarize yourself with this braking
technique. However, avoid taking any unnecessary risks.
P!
BRAKE
Driving
197
Page 199 of 336
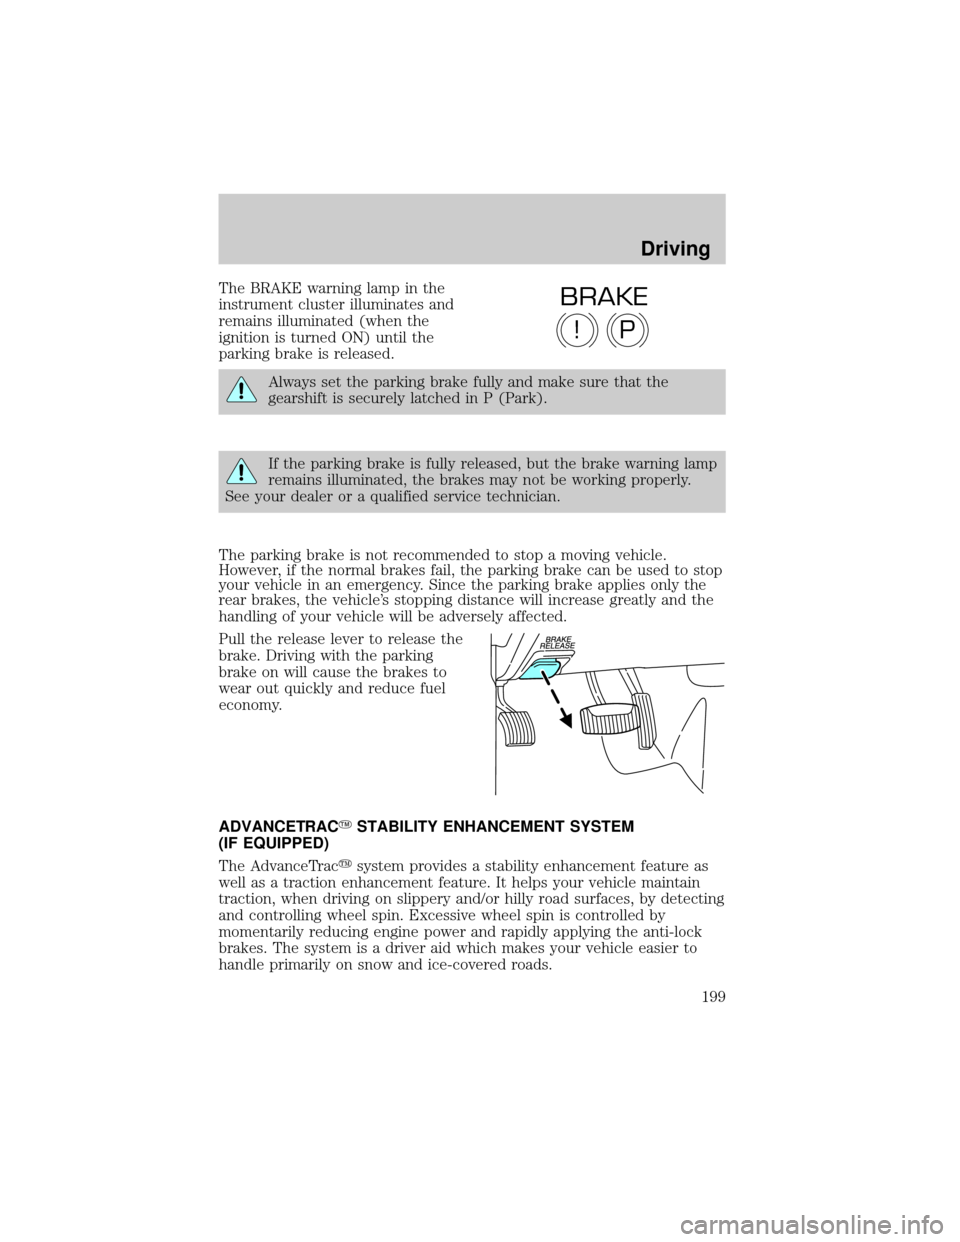
The BRAKE warning lamp in the
instrument cluster illuminates and
remains illuminated (when the
ignition is turned ON) until the
parking brake is released.
Always set the parking brake fully and make sure that the
gearshift is securely latched in P (Park).
If the parking brake is fully released, but the brake warning lamp
remains illuminated, the brakes may not be working properly.
See your dealer or a qualified service technician.
The parking brake is not recommended to stop a moving vehicle.
However, if the normal brakes fail, the parking brake can be used to stop
your vehicle in an emergency. Since the parking brake applies only the
rear brakes, the vehicle's stopping distance will increase greatly and the
handling of your vehicle will be adversely affected.
Pull the release lever to release the
brake. Driving with the parking
brake on will cause the brakes to
wear out quickly and reduce fuel
economy.
ADVANCETRACYSTABILITY ENHANCEMENT SYSTEM
(IF EQUIPPED)
The AdvanceTracysystem provides a stability enhancement feature as
well as a traction enhancement feature. It helps your vehicle maintain
traction, when driving on slippery and/or hilly road surfaces, by detecting
and controlling wheel spin. Excessive wheel spin is controlled by
momentarily reducing engine power and rapidly applying the anti-lock
brakes. The system is a driver aid which makes your vehicle easier to
handle primarily on snow and ice-covered roads.
P!
BRAKE
Driving
199
Page 200 of 336

If your vehicle should become stuck in deep snow or mud, try switching
the AdvanceTracysystem off by pressing the AdvanceTracybutton.
This will allow your tires to ªdigº for traction. Pressing the control once
will disable the AdvanceTracystability enhancement and the engine
power reduction portion of the traction enhancement feature; the brake
portion of the traction enhancement feature will still function normally.
Pressing and holding the control for more than five seconds will disable
the AdvanceTracystability enhancement and traction enhancement
feature. If the AdvanceTracysystem is activated excessively for an
extended period of time, the brake portion of the system will shut down
to allow the brakes to cool down.
A limited AdvanceTracyfunction using only engine power reduction will
still help control the wheels from over-spinning. When the brakes have
cooled down, the system will again function normally. Anti-lock braking is
not affected by this condition and will function normally during the
cool-down period.
AdvanceTracyenhances your vehicle's stability during maneuvers that
require all available tire traction, like in wet/snowy/icy road conditions
and/or when performing emergency maneuvers. In an emergency
lane-change, the driver will experience better overall vehicle traction,
and have better control of the vehicle.
The AdvanceTracysystem helps the driver maintain steering control if
the vehicle begins to slide excessively left or right or spin out.
AdvanceTracywill attempt to correct the sliding motion by applying
brake force at individual tires and, if necessary, by reducing engine
power.
Driving conditions which may activate AdvanceTracyinclude:
²Taking a turn too fast
²Maneuvering quickly to avoid an accident, pedestrian or obstacle
²Hitting a patch of ice
²Changing lanes on a snow-rutted road
²Entering a snow-free road from a snow-covered side street, or vice
versa
²Entering a paved road from a gravel road, or vice versa
²Hitting a curb while turning
²Driving on slick surfaces
²Cornering while towing a heavily loaded trailer (refer toTrailer
Towingin this chapter)
Driving
200