Electrical LINCOLN AVIATOR 2004 Owners Manual
[x] Cancel search | Manufacturer: LINCOLN, Model Year: 2004, Model line: AVIATOR, Model: LINCOLN AVIATOR 2004Pages: 336, PDF Size: 3.69 MB
Page 91 of 336
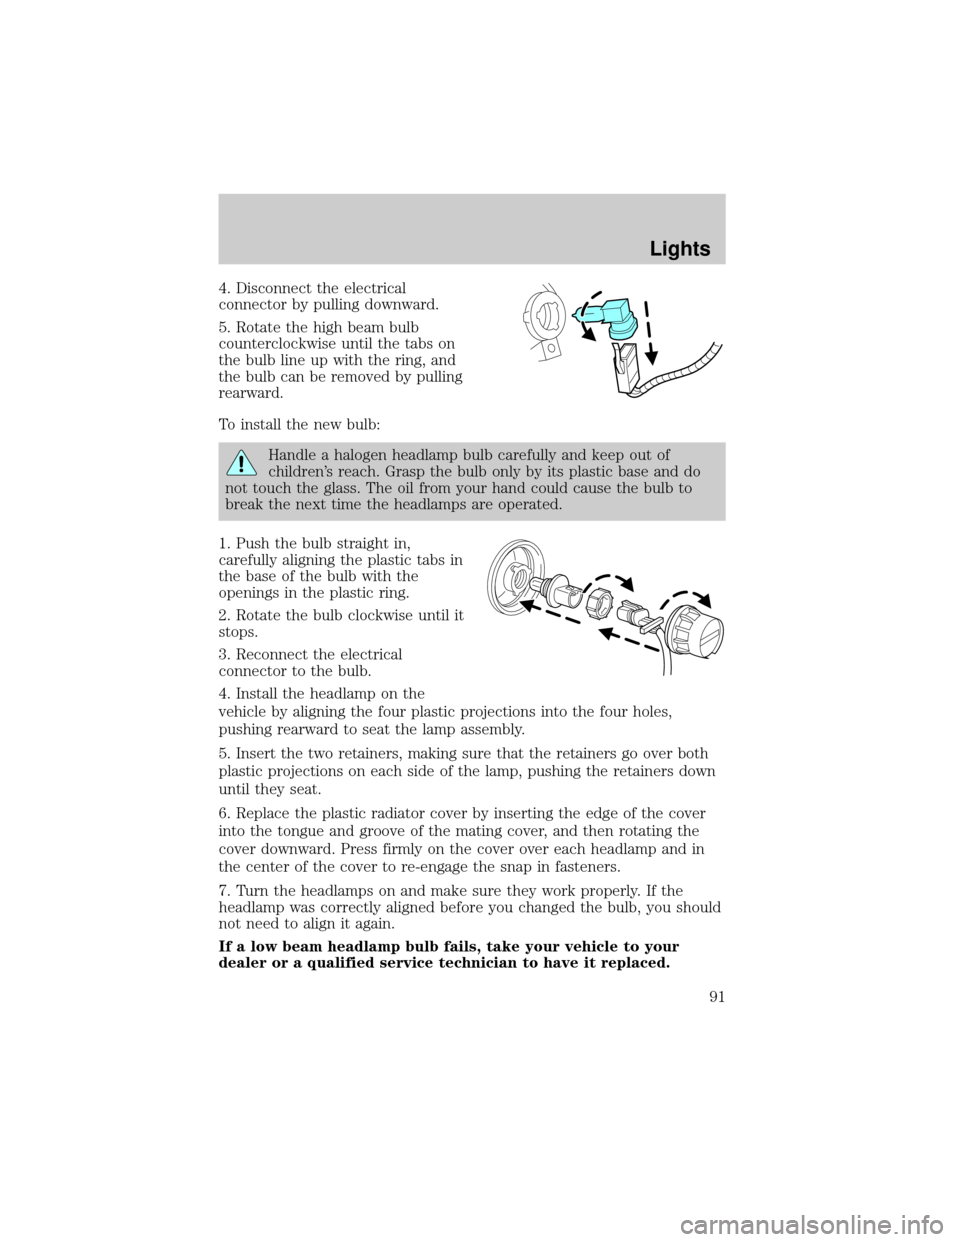
4. Disconnect the electrical
connector by pulling downward.
5. Rotate the high beam bulb
counterclockwise until the tabs on
the bulb line up with the ring, and
the bulb can be removed by pulling
rearward.
To install the new bulb:
Handle a halogen headlamp bulb carefully and keep out of
children's reach. Grasp the bulb only by its plastic base and do
not touch the glass. The oil from your hand could cause the bulb to
break the next time the headlamps are operated.
1. Push the bulb straight in,
carefully aligning the plastic tabs in
the base of the bulb with the
openings in the plastic ring.
2. Rotate the bulb clockwise until it
stops.
3. Reconnect the electrical
connector to the bulb.
4. Install the headlamp on the
vehicle by aligning the four plastic projections into the four holes,
pushing rearward to seat the lamp assembly.
5. Insert the two retainers, making sure that the retainers go over both
plastic projections on each side of the lamp, pushing the retainers down
until they seat.
6. Replace the plastic radiator cover by inserting the edge of the cover
into the tongue and groove of the mating cover, and then rotating the
cover downward. Press firmly on the cover over each headlamp and in
the center of the cover to re-engage the snap in fasteners.
7. Turn the headlamps on and make sure they work properly. If the
headlamp was correctly aligned before you changed the bulb, you should
not need to align it again.
If a low beam headlamp bulb fails, take your vehicle to your
dealer or a qualified service technician to have it replaced.
Lights
91
Page 95 of 336
Replacing foglamp bulbs
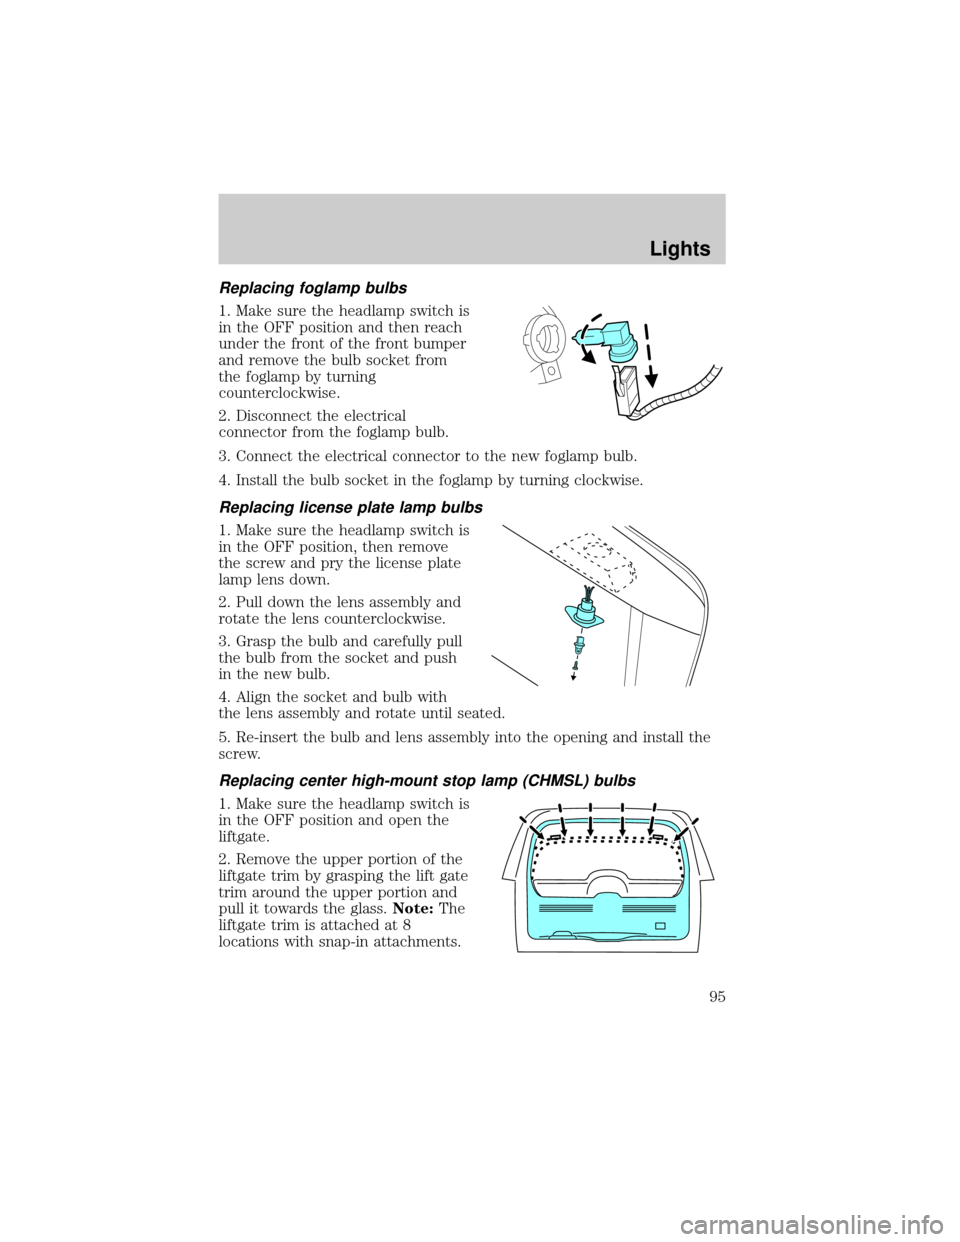
1. Make sure the headlamp switch is
in the OFF position and then reach
under the front of the front bumper
and remove the bulb socket from
the foglamp by turning
counterclockwise.
2. Disconnect the electrical
connector from the foglamp bulb.
3. Connect the electrical connector to the new foglamp bulb.
4. Install the bulb socket in the foglamp by turning clockwise.
Replacing license plate lamp bulbs
1. Make sure the headlamp switch is
in the OFF position, then remove
the screw and pry the license plate
lamp lens down.
2. Pull down the lens assembly and
rotate the lens counterclockwise.
3. Grasp the bulb and carefully pull
the bulb from the socket and push
in the new bulb.
4. Align the socket and bulb with
the lens assembly and rotate until seated.
5. Re-insert the bulb and lens assembly into the opening and install the
screw.
Replacing center high-mount stop lamp (CHMSL) bulbs
1. Make sure the headlamp switch is
in the OFF position and open the
liftgate.
2. Remove the upper portion of the
liftgate trim by grasping the lift gate
trim around the upper portion and
pull it towards the glass.Note:The
liftgate trim is attached at 8
locations with snap-in attachments.
Lights
95
Page 96 of 336
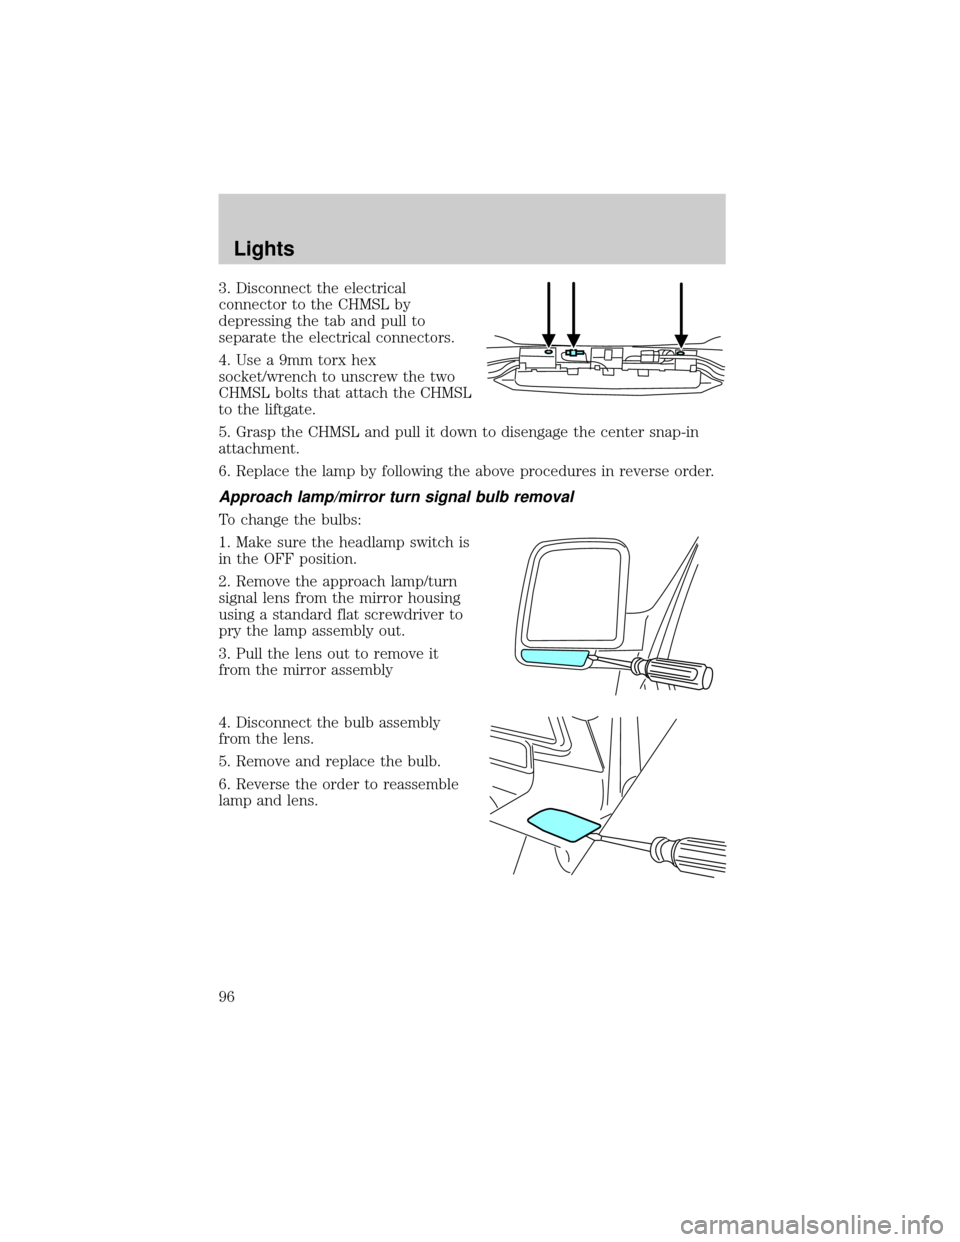
3. Disconnect the electrical
connector to the CHMSL by
depressing the tab and pull to
separate the electrical connectors.
4. Use a 9mm torx hex
socket/wrench to unscrew the two
CHMSL bolts that attach the CHMSL
to the liftgate.
5. Grasp the CHMSL and pull it down to disengage the center snap-in
attachment.
6. Replace the lamp by following the above procedures in reverse order.
Approach lamp/mirror turn signal bulb removal
To change the bulbs:
1. Make sure the headlamp switch is
in the OFF position.
2. Remove the approach lamp/turn
signal lens from the mirror housing
using a standard flat screwdriver to
pry the lamp assembly out.
3. Pull the lens out to remove it
from the mirror assembly
4. Disconnect the bulb assembly
from the lens.
5. Remove and replace the bulb.
6. Reverse the order to reassemble
lamp and lens.
Lights
96
Page 101 of 336
CLOCK
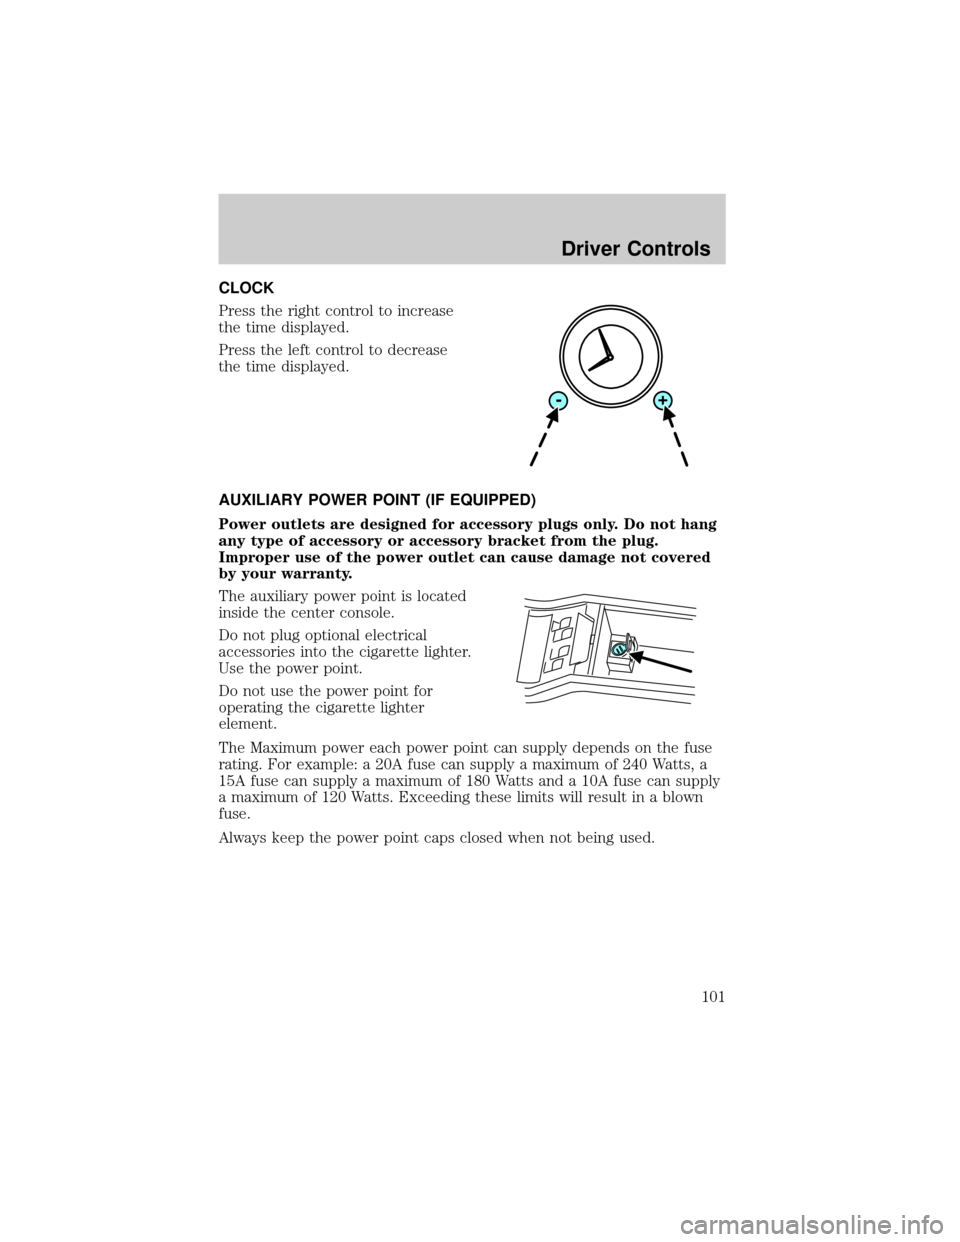
Press the right control to increase
the time displayed.
Press the left control to decrease
the time displayed.
AUXILIARY POWER POINT (IF EQUIPPED)
Power outlets are designed for accessory plugs only. Do not hang
any type of accessory or accessory bracket from the plug.
Improper use of the power outlet can cause damage not covered
by your warranty.
The auxiliary power point is located
inside the center console.
Do not plug optional electrical
accessories into the cigarette lighter.
Use the power point.
Do not use the power point for
operating the cigarette lighter
element.
The Maximum power each power point can supply depends on the fuse
rating. For example: a 20A fuse can supply a maximum of 240 Watts, a
15A fuse can supply a maximum of 180 Watts and a 10A fuse can supply
a maximum of 120 Watts. Exceeding these limits will result in a blown
fuse.
Always keep the power point caps closed when not being used.
Driver Controls
101
Page 120 of 336
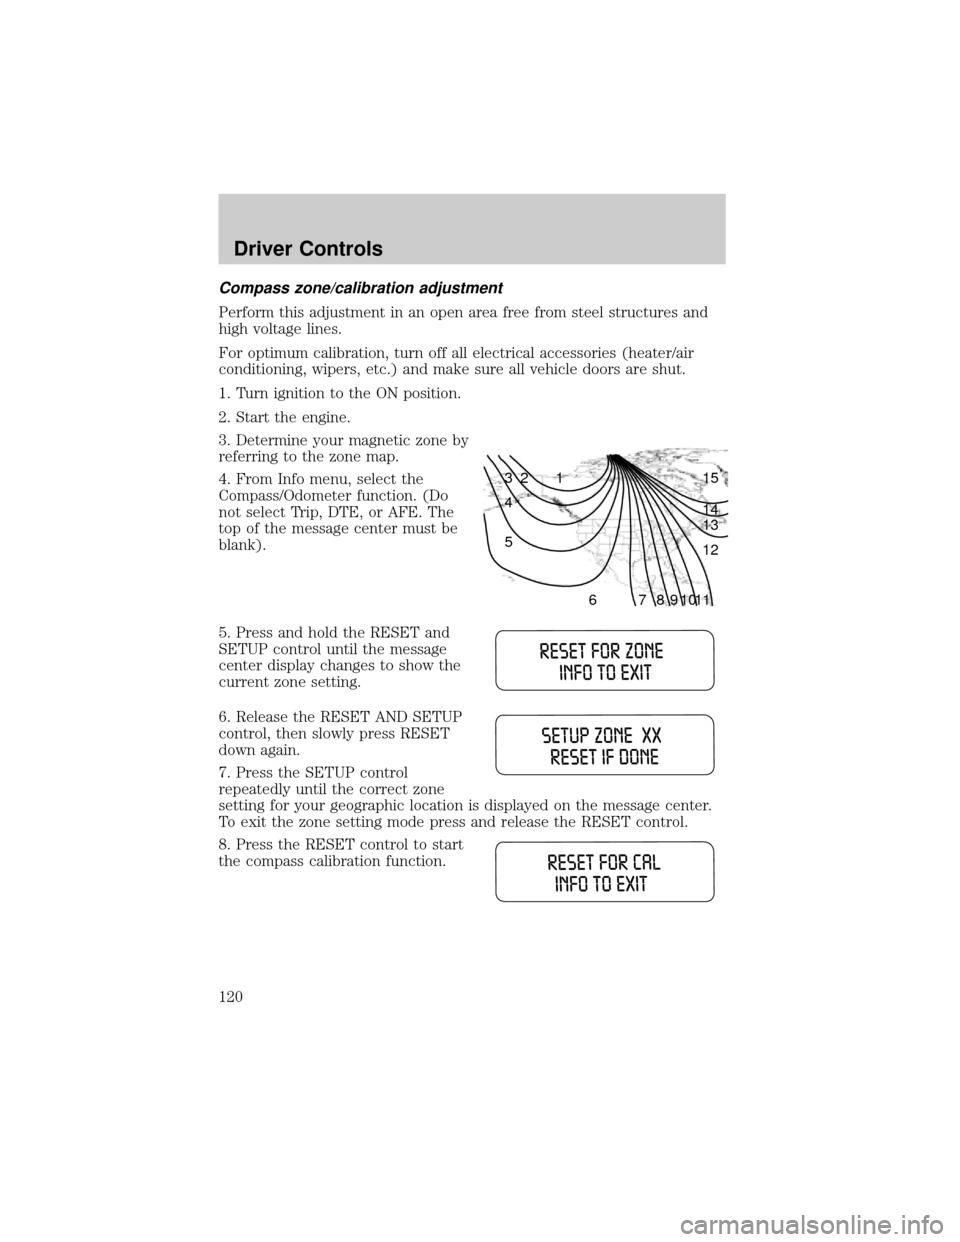
Compass zone/calibration adjustment
Perform this adjustment in an open area free from steel structures and
high voltage lines.
For optimum calibration, turn off all electrical accessories (heater/air
conditioning, wipers, etc.) and make sure all vehicle doors are shut.
1. Turn ignition to the ON position.
2. Start the engine.
3. Determine your magnetic zone by
referring to the zone map.
4. From Info menu, select the
Compass/Odometer function. (Do
not select Trip, DTE, or AFE. The
top of the message center must be
blank).
5. Press and hold the RESET and
SETUP control until the message
center display changes to show the
current zone setting.
6. Release the RESET AND SETUP
control, then slowly press RESET
down again.
7. Press the SETUP control
repeatedly until the correct zone
setting for your geographic location is displayed on the message center.
To exit the zone setting mode press and release the RESET control.
8. Press the RESET control to start
the compass calibration function.
1 2 3
4
5
6 7 8 9 101112 13 14 15
Driver Controls
120
Page 129 of 336

CHECK CHARGING SYSTEM.Displayed when the electrical system is
not maintaining proper voltage. If you are operating electrical accessories
when the engine is idling at a low speed, turn off as many of the
electrical loads as soon as possible. If the warning stays on or comes on
when the engine is operating at normal speeds, have the electrical
system checked as soon as possible.
LOW BRAKE FLUID LEVEL.Indicates the brake fluid level is low and
the brake system should be inspected immediately. Refer toChecking
and adding brake fluidin theMaintenance and specifications
chapter.
LOW OIL PRESSURE.Displayed when the engine oil pressure is low. If
this warning message is displayed, check the level of the engine oil.
Refer toEngine oilin theMaintenance and specificationschapter for
information about adding engine oil.
TRANSMISSION OVERHEATED.Indicates the transmission is
overheating. This warning may appear when towing heavy loads, city
driving, when driving in a low gear at a high speed for an extended
period of time or due to a loss of transmission fluid. Stop the vehicle as
soon as safely possible, place the shift lever into P (Park) or N (Neutral)
and raise the engine RPM. If this does not cool the transmission, turn off
the engine and let it cool. If the warning stays on or continues to come
on, contact your dealer for transmission service as soon as possible.
Continued operation in this condition may cause internal transmission
damage.
CHECK TRANSMISSION.Indicates the transmission is not operating
properly. If this warning stays on, contact your dealer as soon as possible
to prevent additional transmission damage. Refer to the instrument
cluster warning lamps in theInstrument clusterchapter.
LOW WASHER FLUID LEVEL.Indicates the washer fluid reservoir is
less than one quarter full. Check the washer fluid level. Refer to
Windshield washer fluidin theMaintenance and specifications
chapter.
CHECK ADVTRAC (if equipped).Displayed when the AdvanceTracy
system is not operating properly. If this message is displayed on the
message center the AdvanceTracysystem will be partially operable. If
this warning stays on while the engine is running, contact your dealer as
soon as possible. For further information, refer toAdvanceTracy
stability enhancement systemin theDrivingchapter.
Driver Controls
129
Page 176 of 336
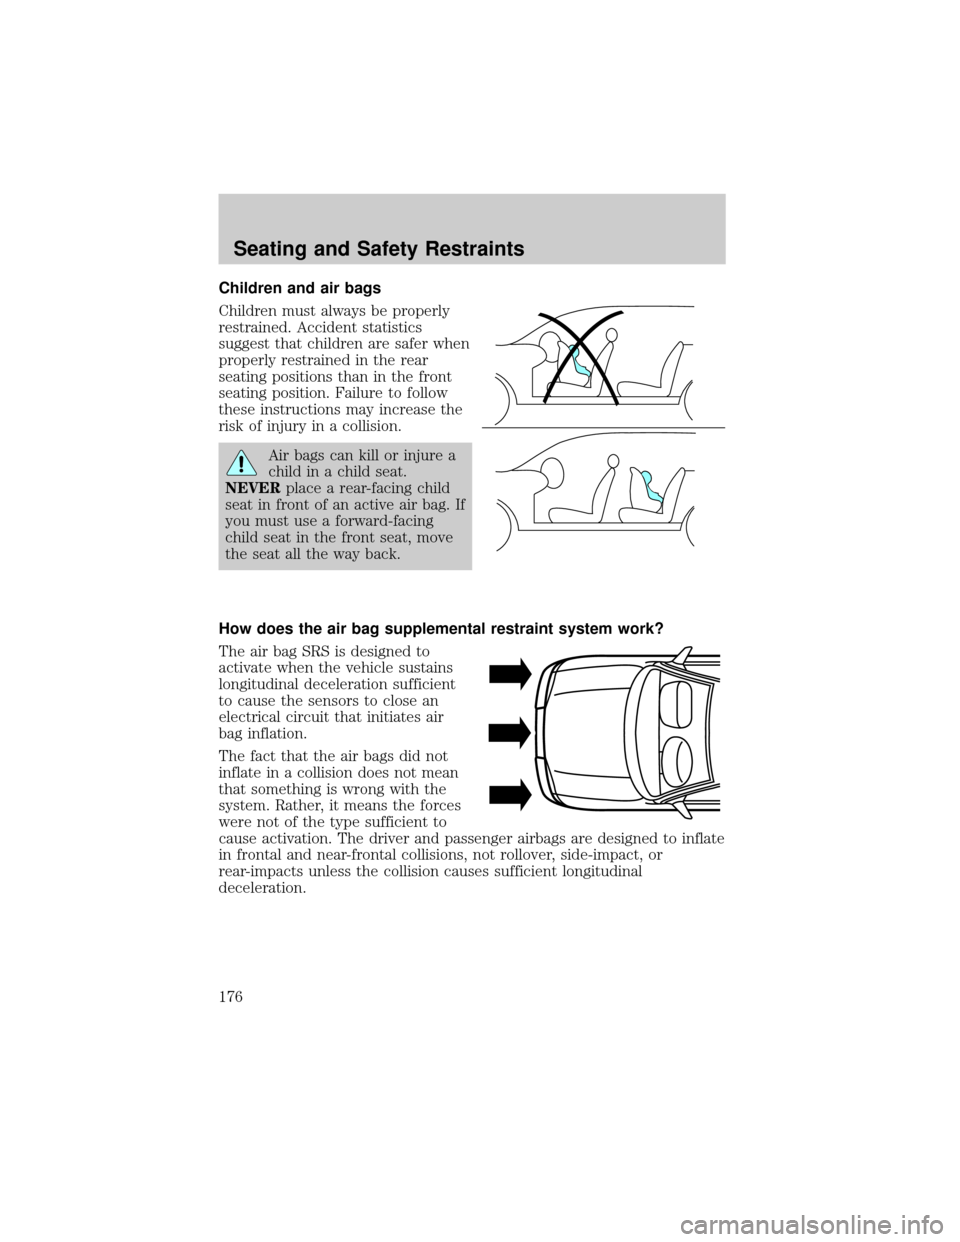
Children and air bags
Children must always be properly
restrained. Accident statistics
suggest that children are safer when
properly restrained in the rear
seating positions than in the front
seating position. Failure to follow
these instructions may increase the
risk of injury in a collision.
Air bags can kill or injure a
child in a child seat.
NEVERplace a rear-facing child
seat in front of an active air bag. If
you must use a forward-facing
child seat in the front seat, move
the seat all the way back.
How does the air bag supplemental restraint system work?
The air bag SRS is designed to
activate when the vehicle sustains
longitudinal deceleration sufficient
to cause the sensors to close an
electrical circuit that initiates air
bag inflation.
The fact that the air bags did not
inflate in a collision does not mean
that something is wrong with the
system. Rather, it means the forces
were not of the type sufficient to
cause activation. The driver and passenger airbags are designed to inflate
in frontal and near-frontal collisions, not rollover, side-impact, or
rear-impacts unless the collision causes sufficient longitudinal
deceleration.
Seating and Safety Restraints
176
Page 177 of 336
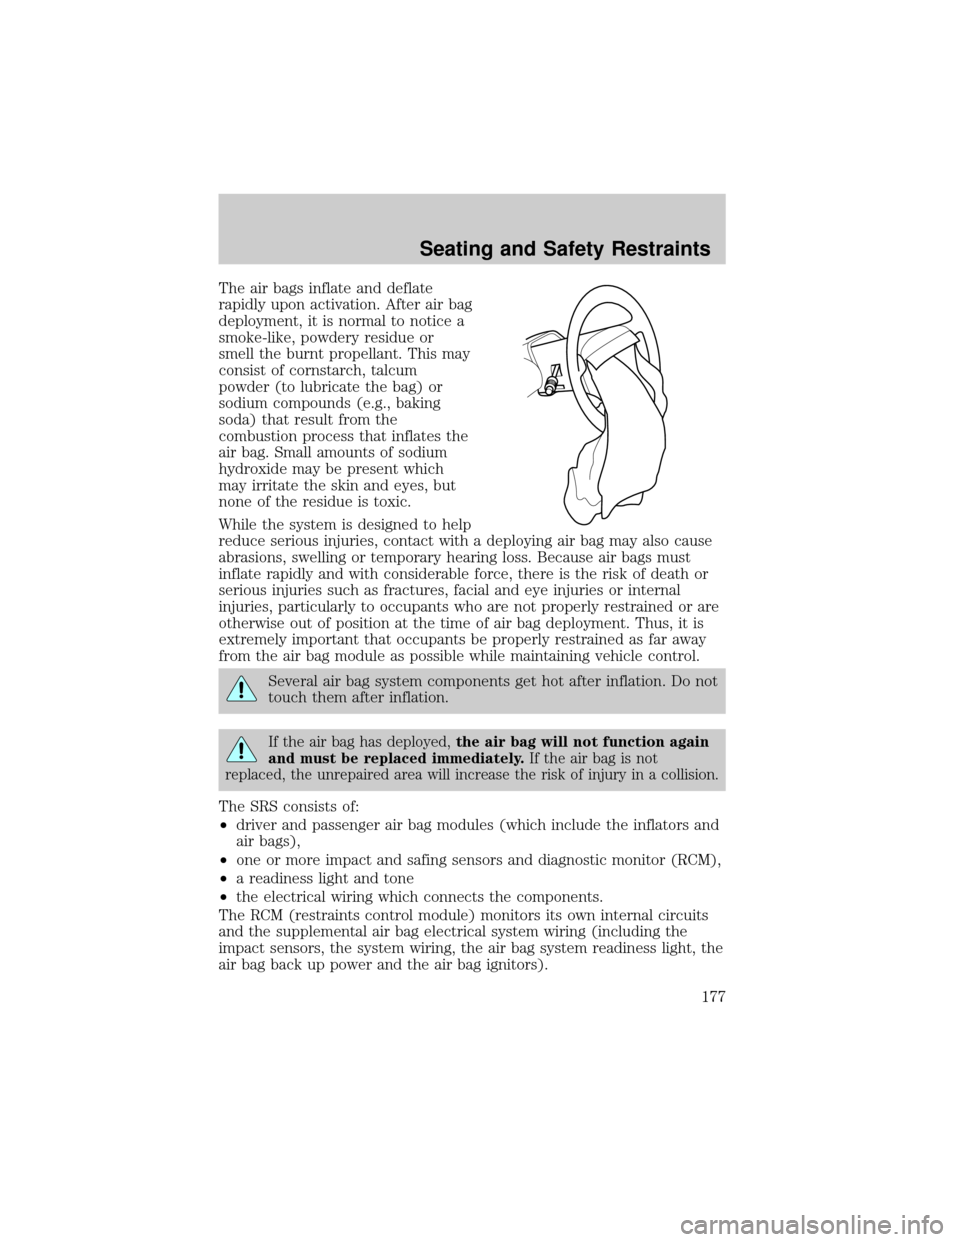
The air bags inflate and deflate
rapidly upon activation. After air bag
deployment, it is normal to notice a
smoke-like, powdery residue or
smell the burnt propellant. This may
consist of cornstarch, talcum
powder (to lubricate the bag) or
sodium compounds (e.g., baking
soda) that result from the
combustion process that inflates the
air bag. Small amounts of sodium
hydroxide may be present which
may irritate the skin and eyes, but
none of the residue is toxic.
While the system is designed to help
reduce serious injuries, contact with a deploying air bag may also cause
abrasions, swelling or temporary hearing loss. Because air bags must
inflate rapidly and with considerable force, there is the risk of death or
serious injuries such as fractures, facial and eye injuries or internal
injuries, particularly to occupants who are not properly restrained or are
otherwise out of position at the time of air bag deployment. Thus, it is
extremely important that occupants be properly restrained as far away
from the air bag module as possible while maintaining vehicle control.
Several air bag system components get hot after inflation. Do not
touch them after inflation.
If the air bag has deployed,the air bag will not function again
and must be replaced immediately.If the air bag is not
replaced, the unrepaired area will increase the risk of injury in a collision.
The SRS consists of:
²driver and passenger air bag modules (which include the inflators and
air bags),
²one or more impact and safing sensors and diagnostic monitor (RCM),
²a readiness light and tone
²the electrical wiring which connects the components.
The RCM (restraints control module) monitors its own internal circuits
and the supplemental air bag electrical system wiring (including the
impact sensors, the system wiring, the air bag system readiness light, the
air bag back up power and the air bag ignitors).
Seating and Safety Restraints
177
Page 179 of 336
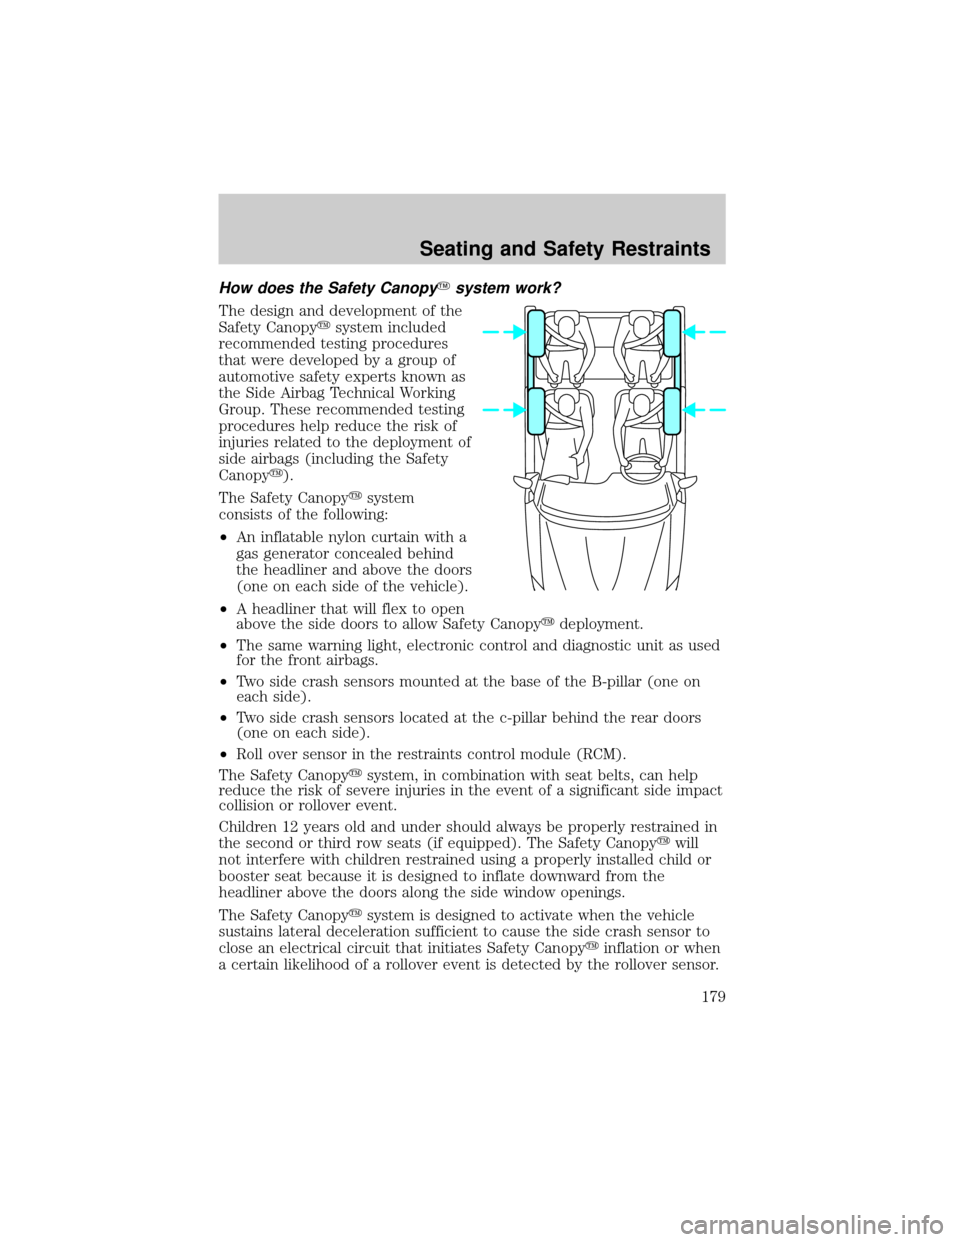
How does the Safety CanopyYsystem work?
The design and development of the
Safety Canopyysystem included
recommended testing procedures
that were developed by a group of
automotive safety experts known as
the Side Airbag Technical Working
Group. These recommended testing
procedures help reduce the risk of
injuries related to the deployment of
side airbags (including the Safety
Canopyy).
The Safety Canopyysystem
consists of the following:
²An inflatable nylon curtain with a
gas generator concealed behind
the headliner and above the doors
(one on each side of the vehicle).
²A headliner that will flex to open
above the side doors to allow Safety Canopyydeployment.
²The same warning light, electronic control and diagnostic unit as used
for the front airbags.
²Two side crash sensors mounted at the base of the B-pillar (one on
each side).
²Two side crash sensors located at the c-pillar behind the rear doors
(one on each side).
²Roll over sensor in the restraints control module (RCM).
The Safety Canopyysystem, in combination with seat belts, can help
reduce the risk of severe injuries in the event of a significant side impact
collision or rollover event.
Children 12 years old and under should always be properly restrained in
the second or third row seats (if equipped). The Safety Canopyywill
not interfere with children restrained using a properly installed child or
booster seat because it is designed to inflate downward from the
headliner above the doors along the side window openings.
The Safety Canopyysystem is designed to activate when the vehicle
sustains lateral deceleration sufficient to cause the side crash sensor to
close an electrical circuit that initiates Safety Canopyyinflation or when
a certain likelihood of a rollover event is detected by the rollover sensor.
Seating and Safety Restraints
179
Page 193 of 336
STARTING
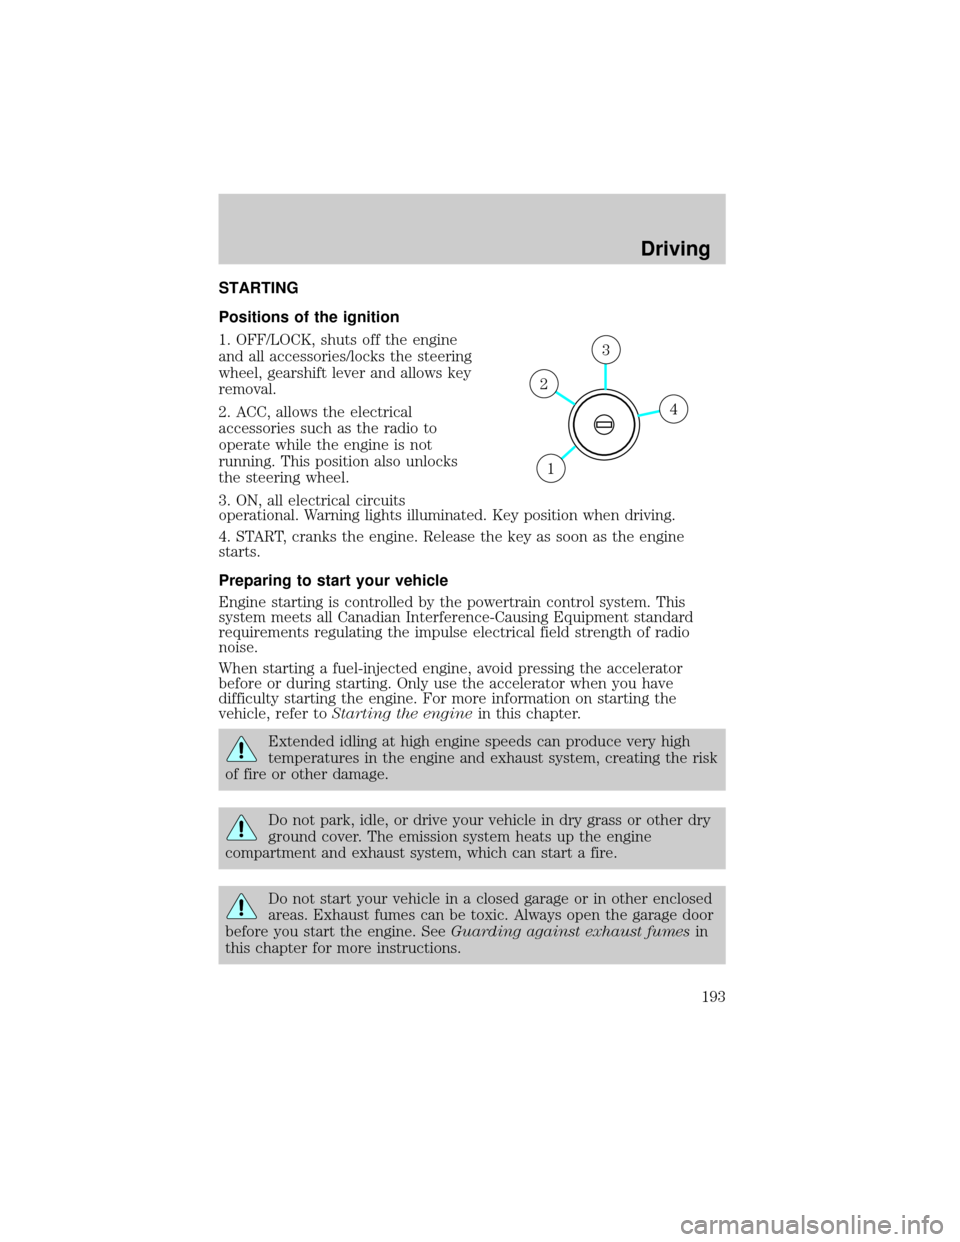
Positions of the ignition
1. OFF/LOCK, shuts off the engine
and all accessories/locks the steering
wheel, gearshift lever and allows key
removal.
2. ACC, allows the electrical
accessories such as the radio to
operate while the engine is not
running. This position also unlocks
the steering wheel.
3. ON, all electrical circuits
operational. Warning lights illuminated. Key position when driving.
4. START, cranks the engine. Release the key as soon as the engine
starts.
Preparing to start your vehicle
Engine starting is controlled by the powertrain control system. This
system meets all Canadian Interference-Causing Equipment standard
requirements regulating the impulse electrical field strength of radio
noise.
When starting a fuel-injected engine, avoid pressing the accelerator
before or during starting. Only use the accelerator when you have
difficulty starting the engine. For more information on starting the
vehicle, refer toStarting the enginein this chapter.
Extended idling at high engine speeds can produce very high
temperatures in the engine and exhaust system, creating the risk
of fire or other damage.
Do not park, idle, or drive your vehicle in dry grass or other dry
ground cover. The emission system heats up the engine
compartment and exhaust system, which can start a fire.
Do not start your vehicle in a closed garage or in other enclosed
areas. Exhaust fumes can be toxic. Always open the garage door
before you start the engine. SeeGuarding against exhaust fumesin
this chapter for more instructions.
4
3
2
1
Driving
Driving
193