low beam LINCOLN AVIATOR 2004 Owners Manual
[x] Cancel search | Manufacturer: LINCOLN, Model Year: 2004, Model line: AVIATOR, Model: LINCOLN AVIATOR 2004Pages: 336, PDF Size: 3.69 MB
Page 84 of 336
²Press the setup button- The message center then displays the next
menu selection in its list.
²Press the reset button- The message center then proceeds to the
next sequence/step (3) below.
²The message center sends/issues the ªAutolamp Delay Commandº to
the body security module (BSM).
²The body security module responds within 100 milliseconds with next
auto lamp exit delay time.
3. Next sequence/step number is one (1) steps 1,2,3,4 & 5 are repeated
until exit via step 2.
4. The message center displays the next menu selection.
Daytime running lamps (DRL) (if equipped)
To activate DRL:
²the ignition must be in the ON position and
²the headlamp control is in the OFF or Parking lamps position
²the parking brake must be disengaged.
Always remember to turn on your headlamps at dusk or during
inclement weather. The Daytime Running Light (DRL) System
does not activate your tail lamps and generally may not provide
adequate lighting during these conditions. Failure to activate your
headlamps under these conditions may result in a collision.
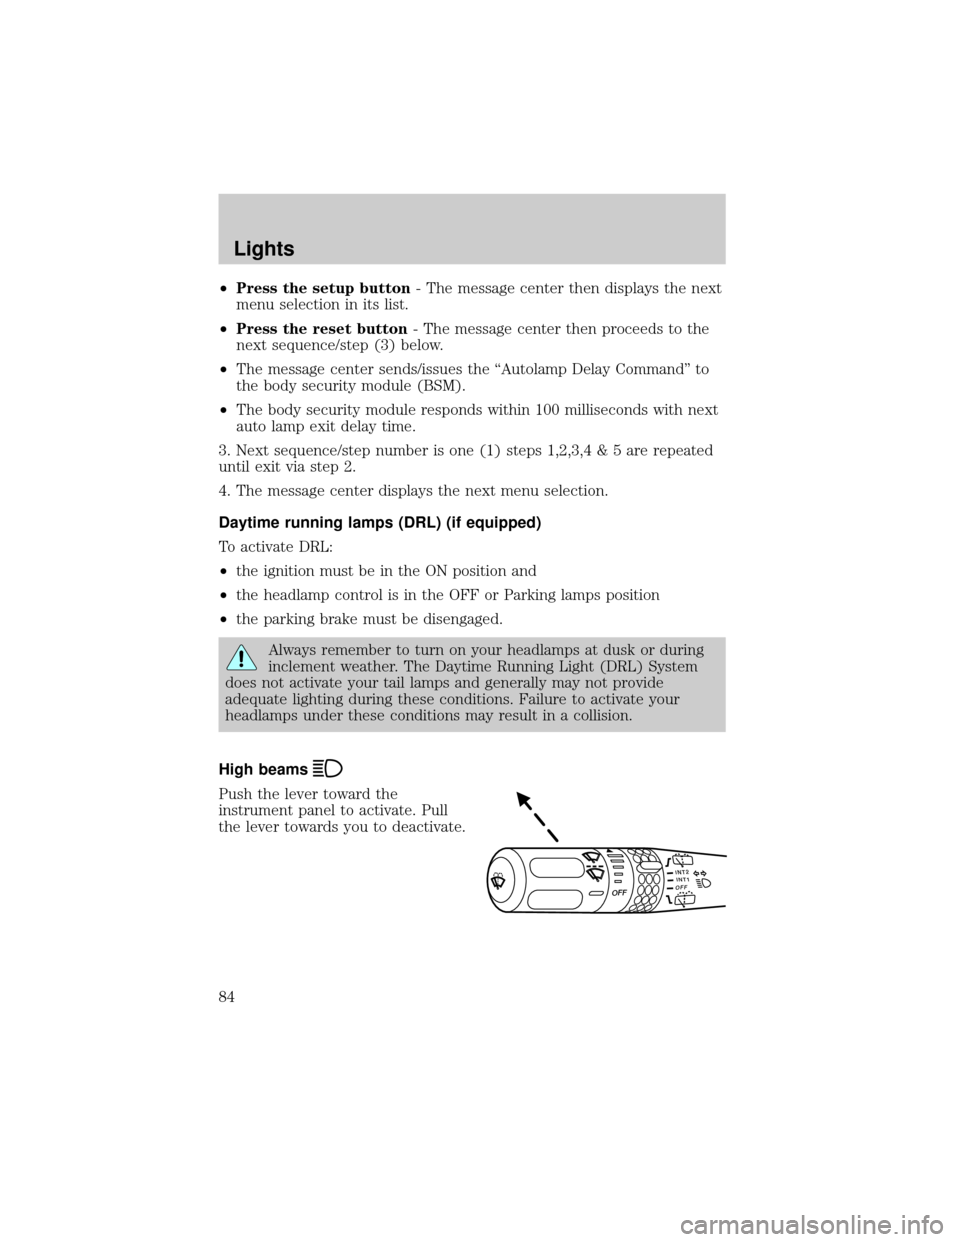
High beams
Push the lever toward the
instrument panel to activate. Pull
the lever towards you to deactivate.
INT2OFFOFFINT1
Lights
84
Page 86 of 336
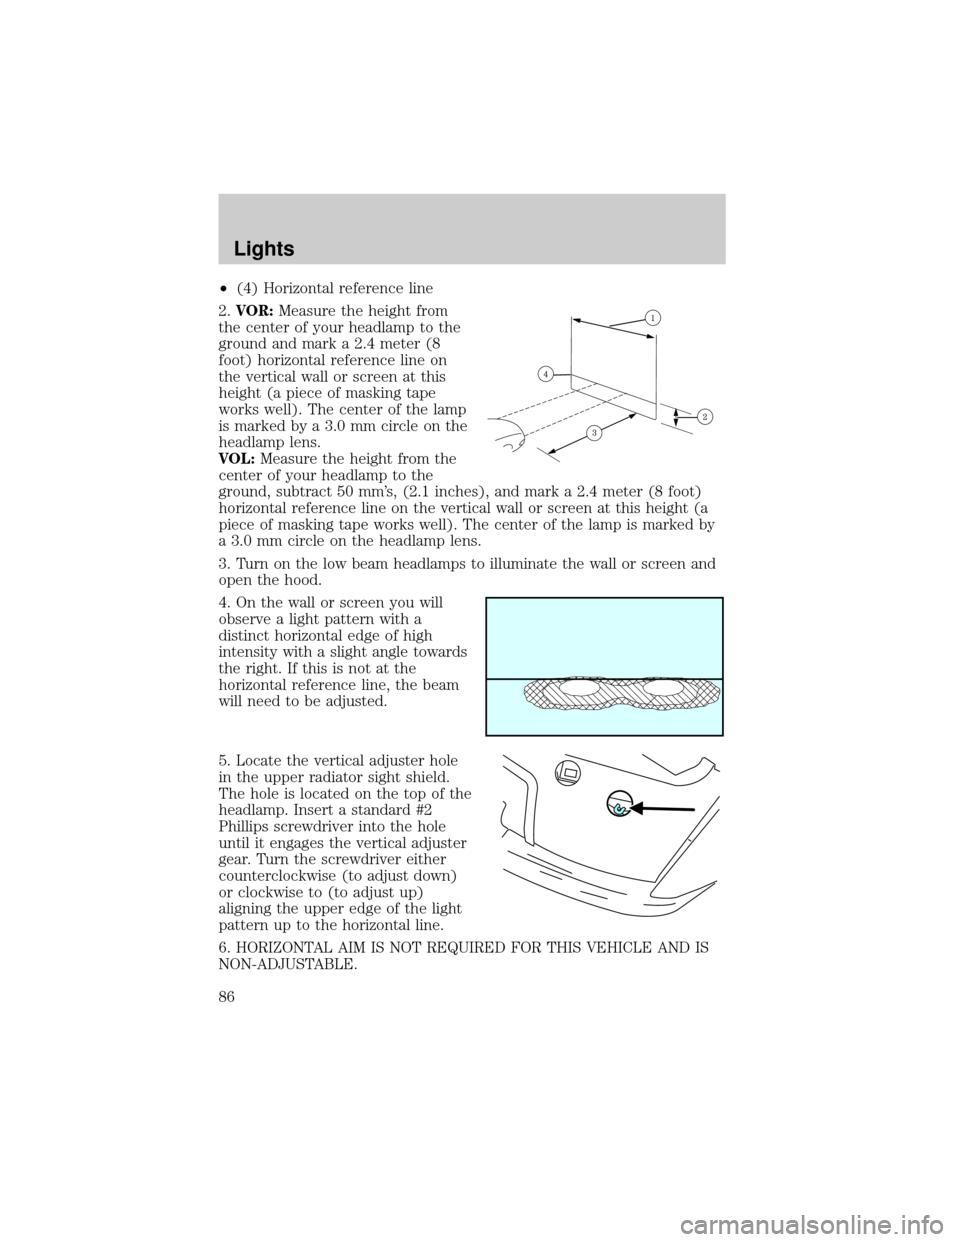
²(4) Horizontal reference line
2.VOR:Measure the height from
the center of your headlamp to the
ground and mark a 2.4 meter (8
foot) horizontal reference line on
the vertical wall or screen at this
height (a piece of masking tape
works well). The center of the lamp
is marked by a 3.0 mm circle on the
headlamp lens.
VOL:Measure the height from the
center of your headlamp to the
ground, subtract 50 mm's, (2.1 inches), and mark a 2.4 meter (8 foot)
horizontal reference line on the vertical wall or screen at this height (a
piece of masking tape works well). The center of the lamp is marked by
a 3.0 mm circle on the headlamp lens.
3. Turn on the low beam headlamps to illuminate the wall or screen and
open the hood.
4. On the wall or screen you will
observe a light pattern with a
distinct horizontal edge of high
intensity with a slight angle towards
the right. If this is not at the
horizontal reference line, the beam
will need to be adjusted.
5. Locate the vertical adjuster hole
in the upper radiator sight shield.
The hole is located on the top of the
headlamp. Insert a standard #2
Phillips screwdriver into the hole
until it engages the vertical adjuster
gear. Turn the screwdriver either
counterclockwise (to adjust down)
or clockwise to (to adjust up)
aligning the upper edge of the light
pattern up to the horizontal line.
6. HORIZONTAL AIM IS NOT REQUIRED FOR THIS VEHICLE AND IS
NON-ADJUSTABLE.
Lights
86
Page 88 of 336
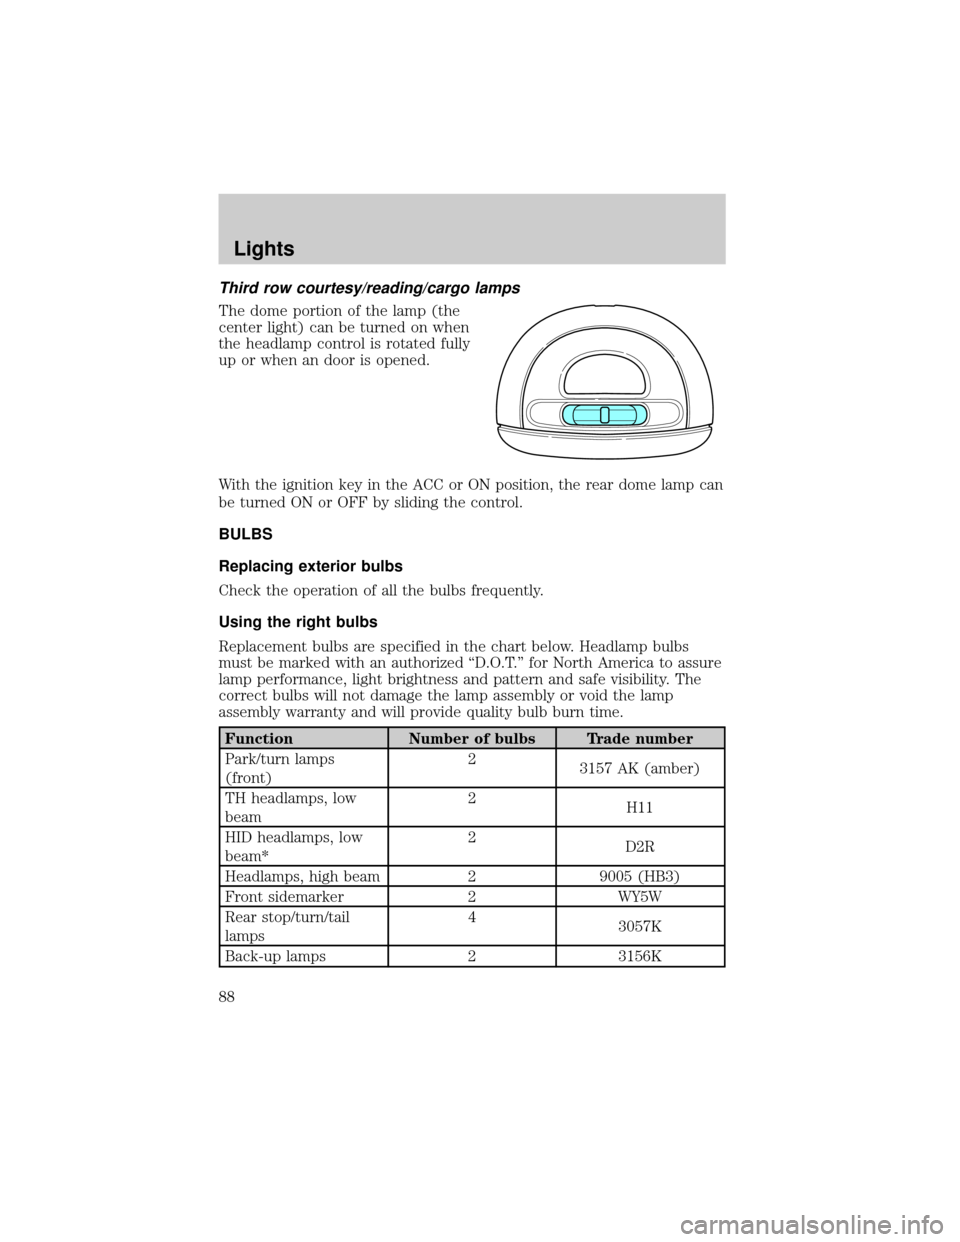
Third row courtesy/reading/cargo lamps
The dome portion of the lamp (the
center light) can be turned on when
the headlamp control is rotated fully
up or when an door is opened.
With the ignition key in the ACC or ON position, the rear dome lamp can
be turned ON or OFF by sliding the control.
BULBS
Replacing exterior bulbs
Check the operation of all the bulbs frequently.
Using the right bulbs
Replacement bulbs are specified in the chart below. Headlamp bulbs
must be marked with an authorized ªD.O.T.º for North America to assure
lamp performance, light brightness and pattern and safe visibility. The
correct bulbs will not damage the lamp assembly or void the lamp
assembly warranty and will provide quality bulb burn time.
Function Number of bulbs Trade number
Park/turn lamps
(front)2
3157 AK (amber)
TH headlamps, low
beam2
H11
HID headlamps, low
beam*2
D2R
Headlamps, high beam 2 9005 (HB3)
Front sidemarker 2 WY5W
Rear stop/turn/tail
lamps4
3057K
Back-up lamps 2 3156K
Lights
88
Page 91 of 336
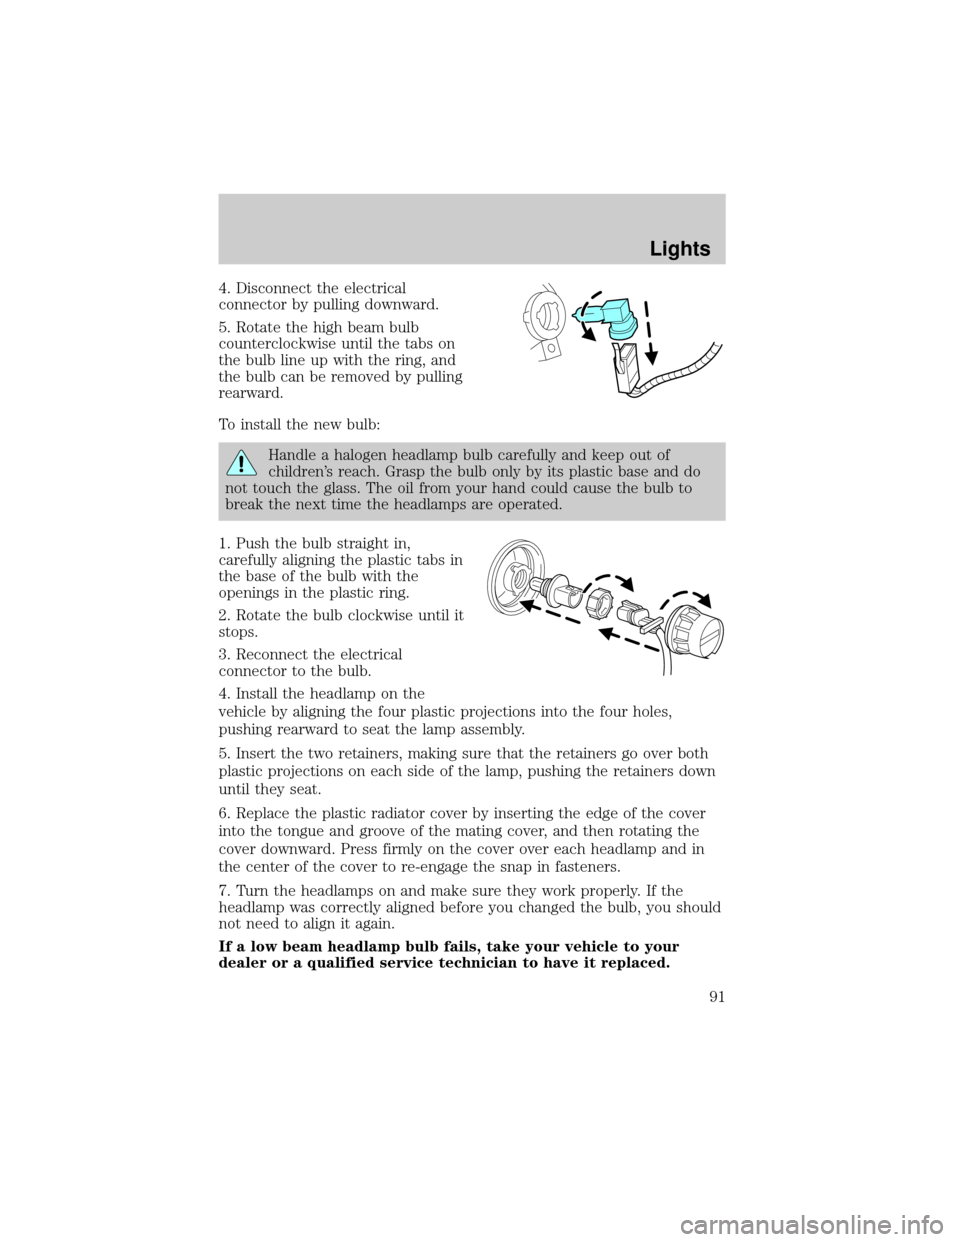
4. Disconnect the electrical
connector by pulling downward.
5. Rotate the high beam bulb
counterclockwise until the tabs on
the bulb line up with the ring, and
the bulb can be removed by pulling
rearward.
To install the new bulb:
Handle a halogen headlamp bulb carefully and keep out of
children's reach. Grasp the bulb only by its plastic base and do
not touch the glass. The oil from your hand could cause the bulb to
break the next time the headlamps are operated.
1. Push the bulb straight in,
carefully aligning the plastic tabs in
the base of the bulb with the
openings in the plastic ring.
2. Rotate the bulb clockwise until it
stops.
3. Reconnect the electrical
connector to the bulb.
4. Install the headlamp on the
vehicle by aligning the four plastic projections into the four holes,
pushing rearward to seat the lamp assembly.
5. Insert the two retainers, making sure that the retainers go over both
plastic projections on each side of the lamp, pushing the retainers down
until they seat.
6. Replace the plastic radiator cover by inserting the edge of the cover
into the tongue and groove of the mating cover, and then rotating the
cover downward. Press firmly on the cover over each headlamp and in
the center of the cover to re-engage the snap in fasteners.
7. Turn the headlamps on and make sure they work properly. If the
headlamp was correctly aligned before you changed the bulb, you should
not need to align it again.
If a low beam headlamp bulb fails, take your vehicle to your
dealer or a qualified service technician to have it replaced.
Lights
91
Page 92 of 336
Replacing HID headlamp bulbs (if equipped)
The low beam headlamps on your vehicle use a ªhigh intensity dischargeº
source. These lamps operate at a high voltage. The bulb is NOT
replaceable. When the bulb is burned out, the bulb assembly must be
replaced by your dealer or a qualified technician.
Replacing front parking lamp/turn signal/sidemarker bulbs
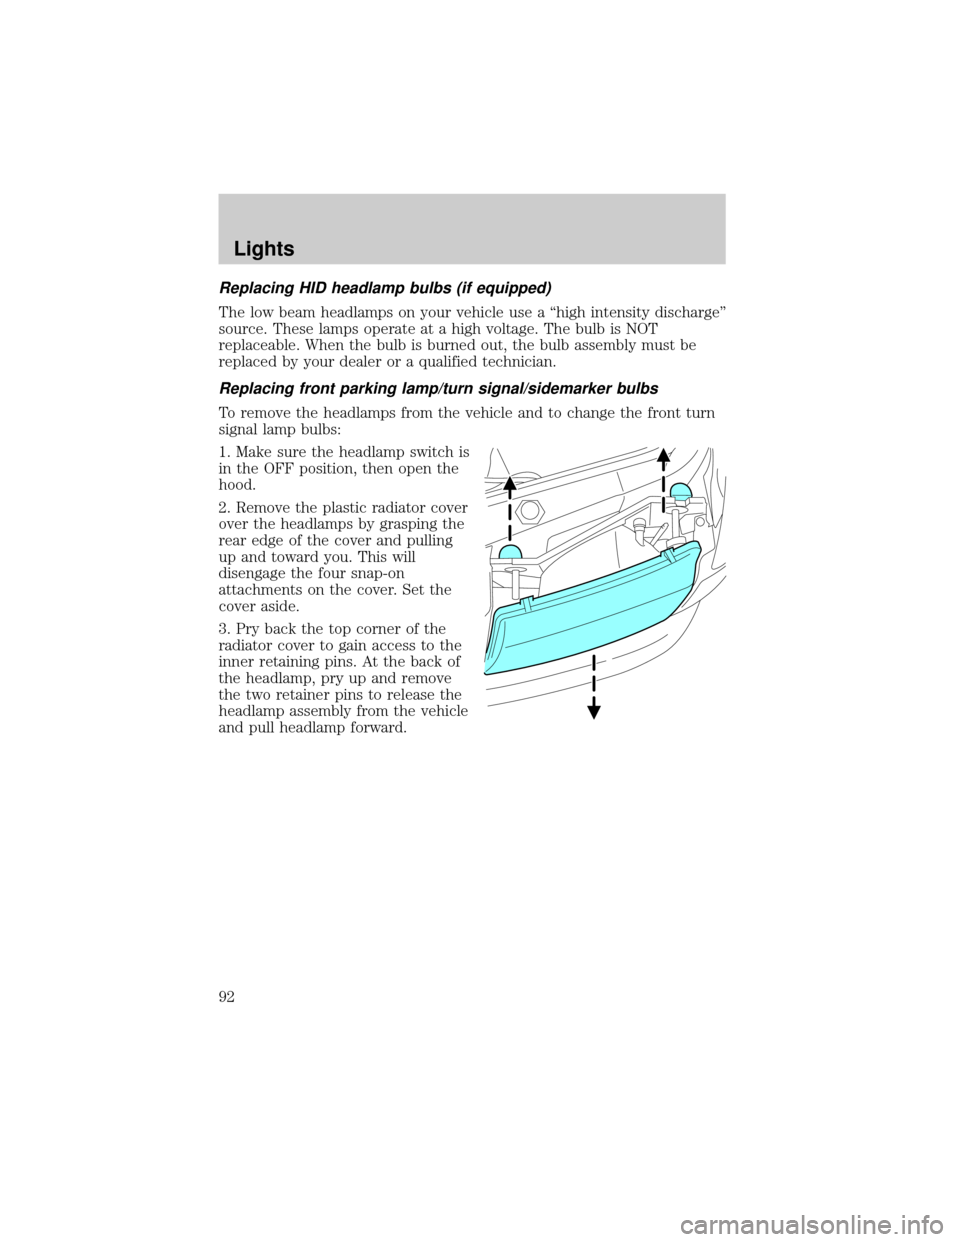
To remove the headlamps from the vehicle and to change the front turn
signal lamp bulbs:
1. Make sure the headlamp switch is
in the OFF position, then open the
hood.
2. Remove the plastic radiator cover
over the headlamps by grasping the
rear edge of the cover and pulling
up and toward you. This will
disengage the four snap-on
attachments on the cover. Set the
cover aside.
3. Pry back the top corner of the
radiator cover to gain access to the
inner retaining pins. At the back of
the headlamp, pry up and remove
the two retainer pins to release the
headlamp assembly from the vehicle
and pull headlamp forward.
Lights
92
Page 239 of 336
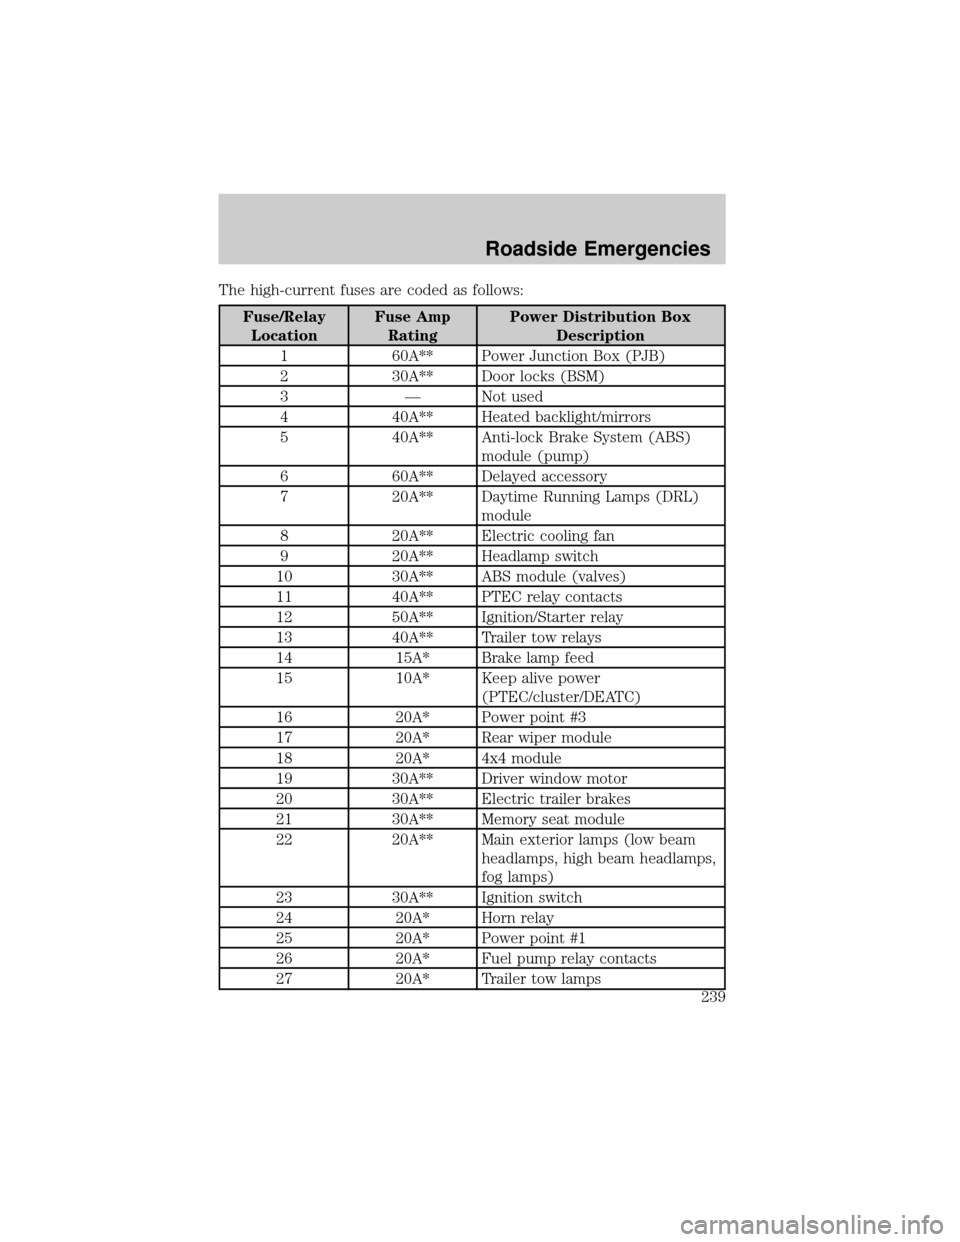
The high-current fuses are coded as follows:
Fuse/Relay
LocationFuse Amp
RatingPower Distribution Box
Description
1 60A** Power Junction Box (PJB)
2 30A** Door locks (BSM)
3 Ð Not used
4 40A** Heated backlight/mirrors
5 40A** Anti-lock Brake System (ABS)
module (pump)
6 60A** Delayed accessory
7 20A** Daytime Running Lamps (DRL)
module
8 20A** Electric cooling fan
9 20A** Headlamp switch
10 30A** ABS module (valves)
11 40A** PTEC relay contacts
12 50A** Ignition/Starter relay
13 40A** Trailer tow relays
14 15A* Brake lamp feed
15 10A* Keep alive power
(PTEC/cluster/DEATC)
16 20A* Power point #3
17 20A* Rear wiper module
18 20A* 4x4 module
19 30A** Driver window motor
20 30A** Electric trailer brakes
21 30A** Memory seat module
22 20A** Main exterior lamps (low beam
headlamps, high beam headlamps,
fog lamps)
23 30A** Ignition switch
24 20A* Horn relay
25 20A* Power point #1
26 20A* Fuel pump relay contacts
27 20A* Trailer tow lamps
Roadside Emergencies
239
Page 240 of 336
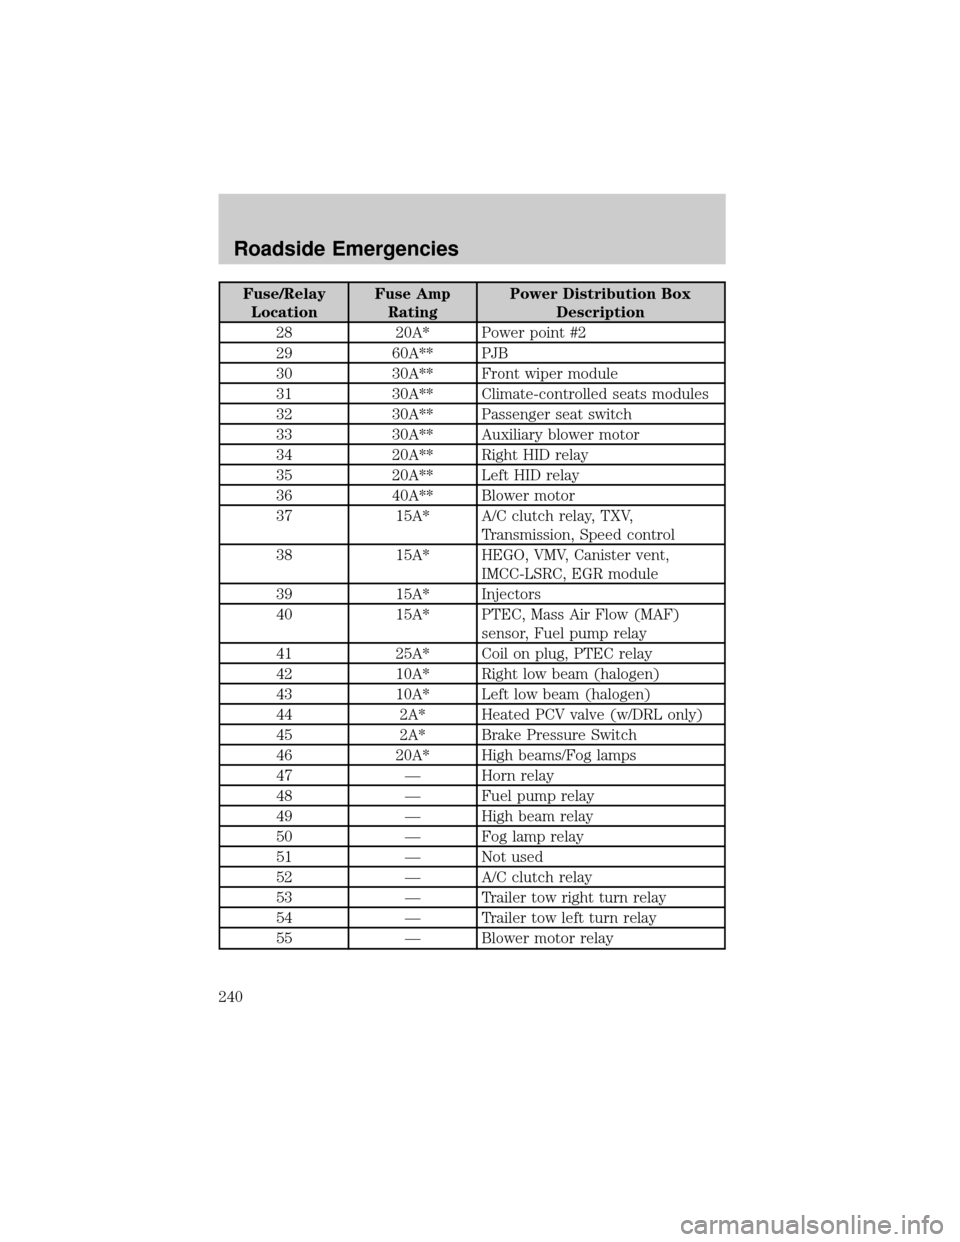
Fuse/Relay
LocationFuse Amp
RatingPower Distribution Box
Description
28 20A* Power point #2
29 60A** PJB
30 30A** Front wiper module
31 30A** Climate-controlled seats modules
32 30A** Passenger seat switch
33 30A** Auxiliary blower motor
34 20A** Right HID relay
35 20A** Left HID relay
36 40A** Blower motor
37 15A* A/C clutch relay, TXV,
Transmission, Speed control
38 15A* HEGO, VMV, Canister vent,
IMCC-LSRC, EGR module
39 15A* Injectors
40 15A* PTEC, Mass Air Flow (MAF)
sensor, Fuel pump relay
41 25A* Coil on plug, PTEC relay
42 10A* Right low beam (halogen)
43 10A* Left low beam (halogen)
44 2A* Heated PCV valve (w/DRL only)
45 2A* Brake Pressure Switch
46 20A* High beams/Fog lamps
47 Ð Horn relay
48 Ð Fuel pump relay
49 Ð High beam relay
50 Ð Fog lamp relay
51 Ð Not used
52 Ð A/C clutch relay
53 Ð Trailer tow right turn relay
54 Ð Trailer tow left turn relay
55 Ð Blower motor relay
Roadside Emergencies
240