shift LINCOLN AVIATOR 2004 Owners Manual
[x] Cancel search | Manufacturer: LINCOLN, Model Year: 2004, Model line: AVIATOR, Model: LINCOLN AVIATOR 2004Pages: 336, PDF Size: 3.69 MB
Page 16 of 336
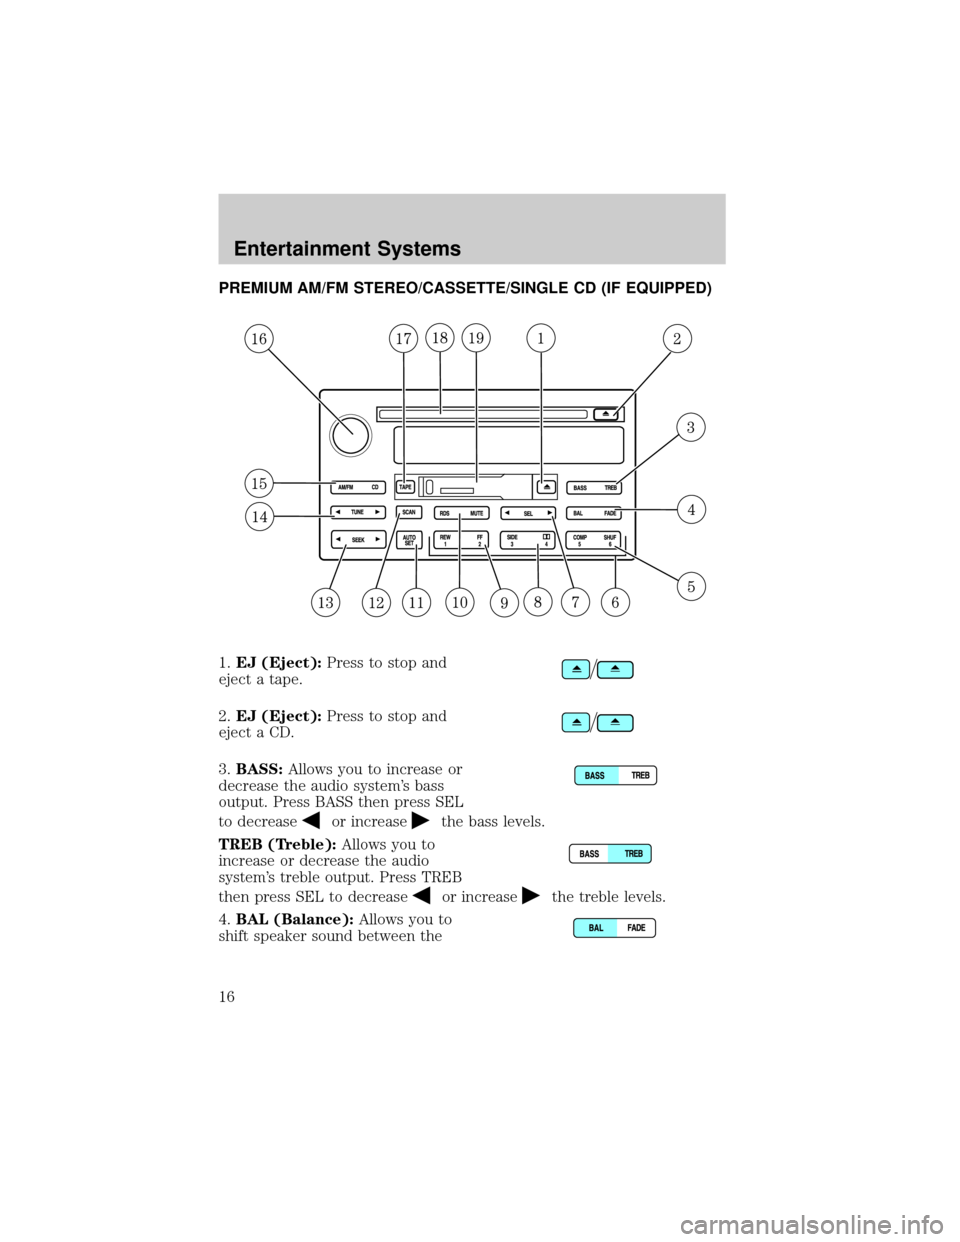
PREMIUM AM/FM STEREO/CASSETTE/SINGLE CD (IF EQUIPPED)
1.EJ (Eject):Press to stop and
eject a tape.
2.EJ (Eject):Press to stop and
eject a CD.
3.BASS:Allows you to increase or
decrease the audio system's bass
output. Press BASS then press SEL
to decrease
or increasethe bass levels.
TREB (Treble):Allows you to
increase or decrease the audio
system's treble output. Press TREB
then press SEL to decrease
or increasethe treble levels.
4.BAL (Balance):Allows you to
shift speaker sound between the
Entertainment Systems
Entertainment Systems
16
Page 17 of 336
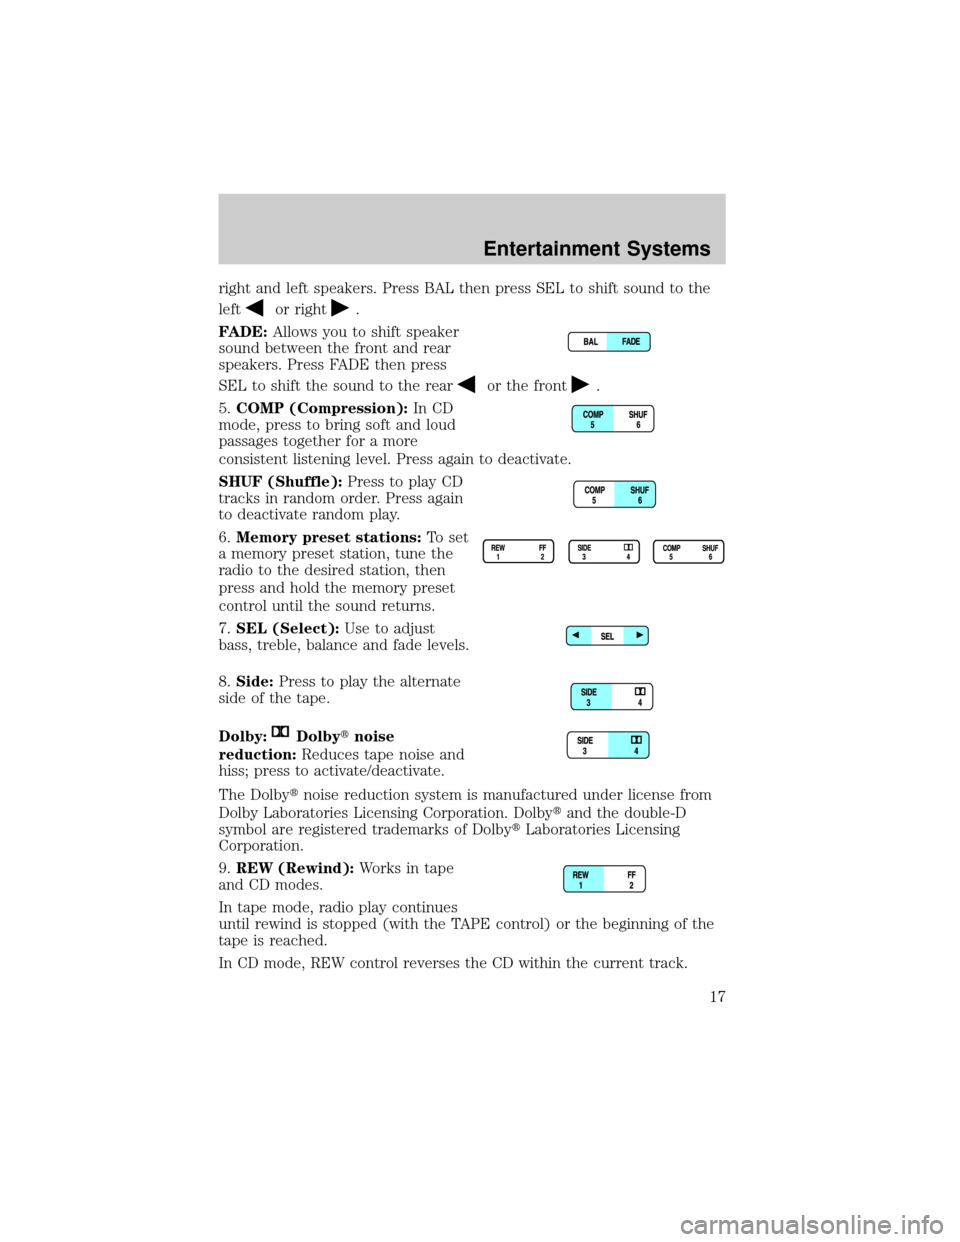
right and left speakers. Press BAL then press SEL to shift sound to the
left
or right.
FADE:Allows you to shift speaker
sound between the front and rear
speakers. Press FADE then press
SEL to shift the sound to the rear
or the front.
5.COMP (Compression):In CD
mode, press to bring soft and loud
passages together for a more
consistent listening level. Press again to deactivate.
SHUF (Shuffle):Press to play CD
tracks in random order. Press again
to deactivate random play.
6.Memory preset stations:To set
a memory preset station, tune the
radio to the desired station, then
press and hold the memory preset
control until the sound returns.
7.SEL (Select):Use to adjust
bass, treble, balance and fade levels.
8.Side:Press to play the alternate
side of the tape.
Dolby:
Dolbytnoise
reduction:Reduces tape noise and
hiss; press to activate/deactivate.
The Dolbytnoise reduction system is manufactured under license from
Dolby Laboratories Licensing Corporation. Dolbytand the double-D
symbol are registered trademarks of DolbytLaboratories Licensing
Corporation.
9.REW (Rewind):Works in tape
and CD modes.
In tape mode, radio play continues
until rewind is stopped (with the TAPE control) or the beginning of the
tape is reached.
In CD mode, REW control reverses the CD within the current track.
Entertainment Systems
17
Page 22 of 336
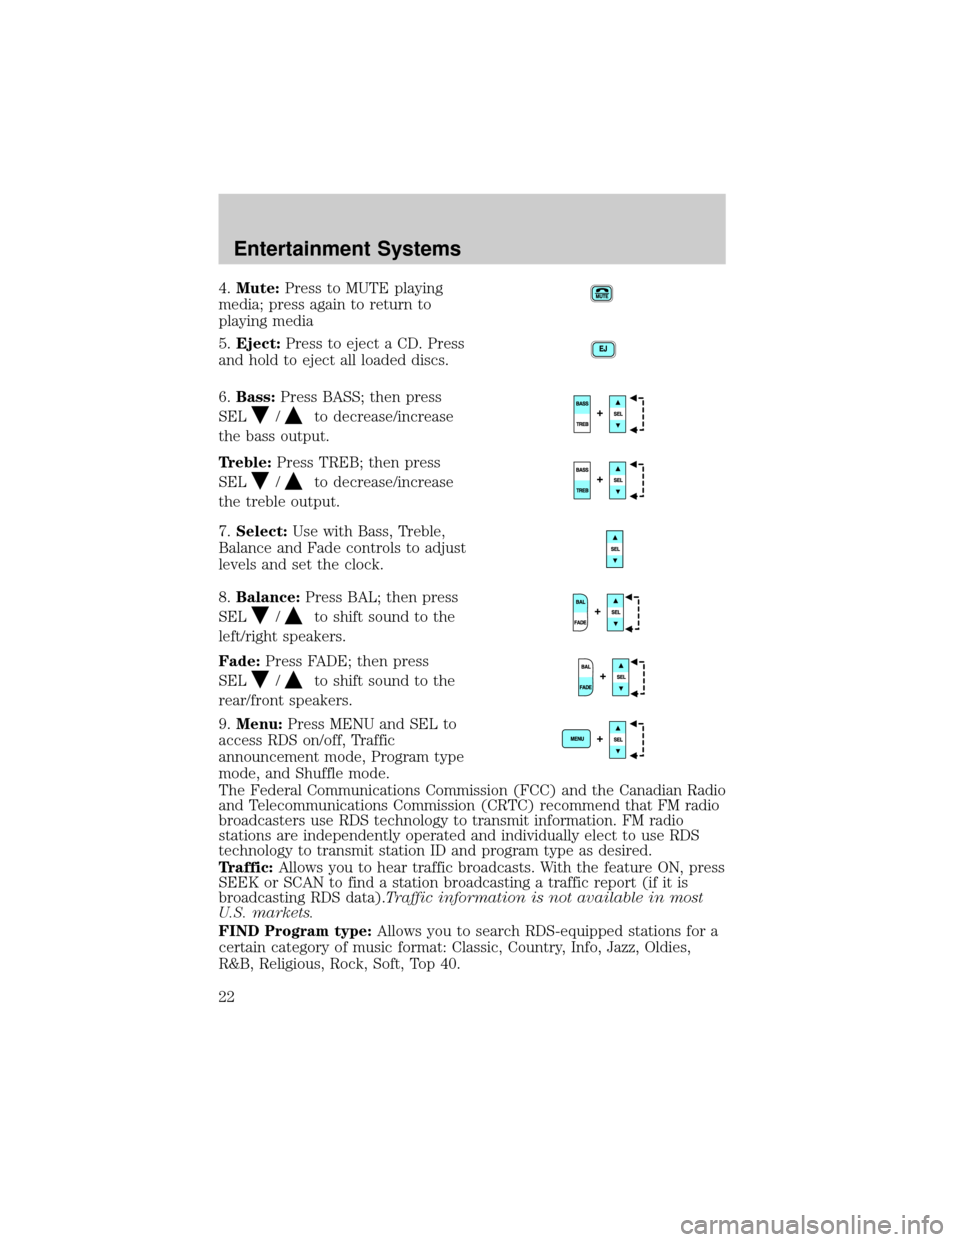
4.Mute:Press to MUTE playing
media; press again to return to
playing media
5.Eject:Press to eject a CD. Press
and hold to eject all loaded discs.
6.Bass:Press BASS; then press
SEL
/to decrease/increase
the bass output.
Treble:Press TREB; then press
SEL
/to decrease/increase
the treble output.
7.Select:Use with Bass, Treble,
Balance and Fade controls to adjust
levels and set the clock.
8.Balance:Press BAL; then press
SEL
/to shift sound to the
left/right speakers.
Fade:Press FADE; then press
SEL
/to shift sound to the
rear/front speakers.
9.Menu:Press MENU and SEL to
access RDS on/off, Traffic
announcement mode, Program type
mode, and Shuffle mode.
The Federal Communications Commission (FCC) and the Canadian Radio
and Telecommunications Commission (CRTC) recommend that FM radio
broadcasters use RDS technology to transmit information. FM radio
stations are independently operated and individually elect to use RDS
technology to transmit station ID and program type as desired.
Traffic:Allows you to hear traffic broadcasts. With the feature ON, press
SEEK or SCAN to find a station broadcasting a traffic report (if it is
broadcasting RDS data).Traffic information is not available in most
U.S. markets.
FIND Program type:Allows you to search RDS-equipped stations for a
certain category of music format: Classic, Country, Info, Jazz, Oldies,
R&B, Religious, Rock, Soft, Top 40.
Entertainment Systems
22
Page 108 of 336
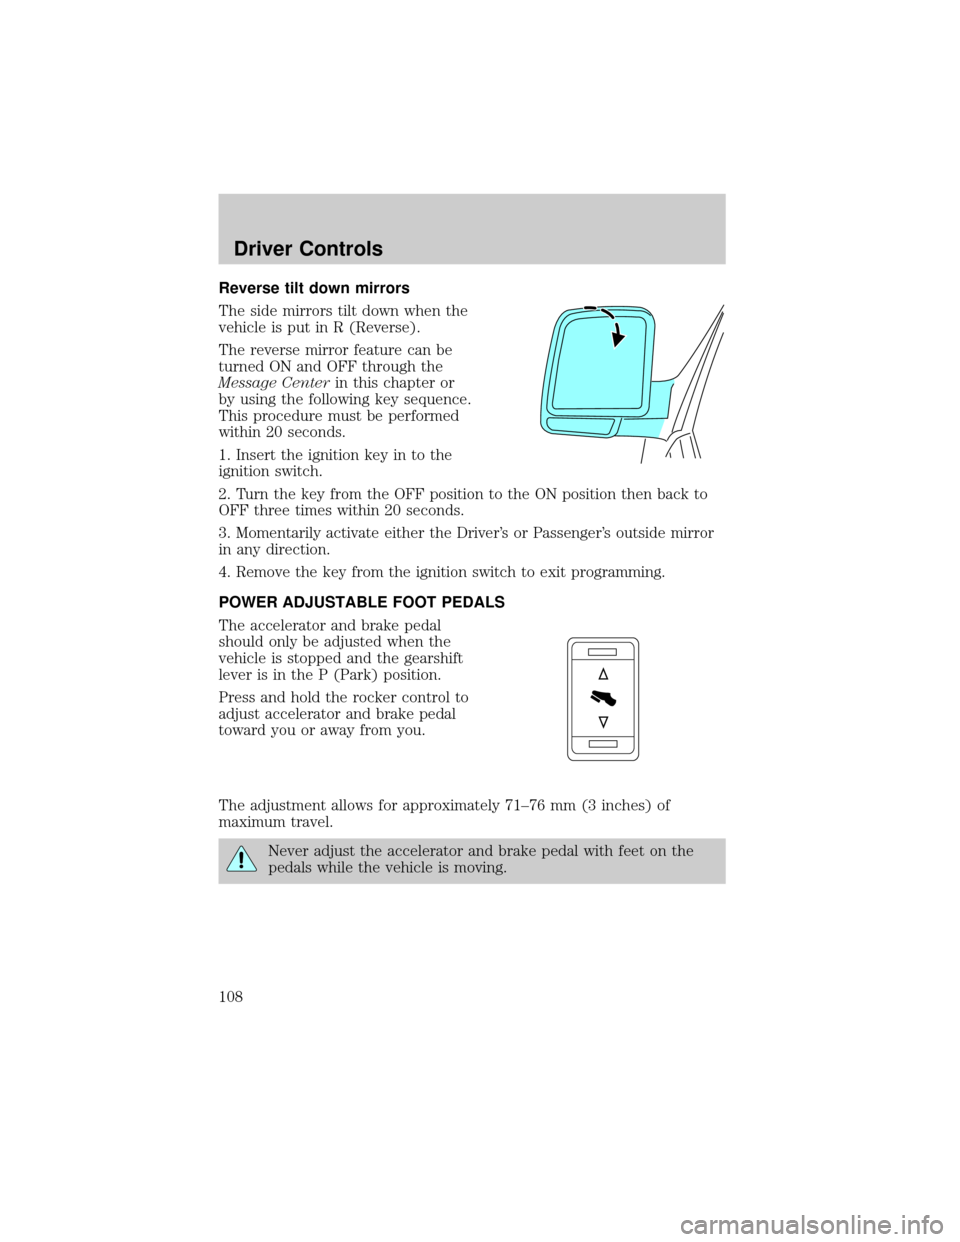
Reverse tilt down mirrors
The side mirrors tilt down when the
vehicle is put in R (Reverse).
The reverse mirror feature can be
turned ON and OFF through the
Message Centerin this chapter or
by using the following key sequence.
This procedure must be performed
within 20 seconds.
1. Insert the ignition key in to the
ignition switch.
2. Turn the key from the OFF position to the ON position then back to
OFF three times within 20 seconds.
3. Momentarily activate either the Driver's or Passenger's outside mirror
in any direction.
4. Remove the key from the ignition switch to exit programming.
POWER ADJUSTABLE FOOT PEDALS
The accelerator and brake pedal
should only be adjusted when the
vehicle is stopped and the gearshift
lever is in the P (Park) position.
Press and hold the rocker control to
adjust accelerator and brake pedal
toward you or away from you.
The adjustment allows for approximately 71±76 mm (3 inches) of
maximum travel.
Never adjust the accelerator and brake pedal with feet on the
pedals while the vehicle is moving.
Driver Controls
108
Page 129 of 336

CHECK CHARGING SYSTEM.Displayed when the electrical system is
not maintaining proper voltage. If you are operating electrical accessories
when the engine is idling at a low speed, turn off as many of the
electrical loads as soon as possible. If the warning stays on or comes on
when the engine is operating at normal speeds, have the electrical
system checked as soon as possible.
LOW BRAKE FLUID LEVEL.Indicates the brake fluid level is low and
the brake system should be inspected immediately. Refer toChecking
and adding brake fluidin theMaintenance and specifications
chapter.
LOW OIL PRESSURE.Displayed when the engine oil pressure is low. If
this warning message is displayed, check the level of the engine oil.
Refer toEngine oilin theMaintenance and specificationschapter for
information about adding engine oil.
TRANSMISSION OVERHEATED.Indicates the transmission is
overheating. This warning may appear when towing heavy loads, city
driving, when driving in a low gear at a high speed for an extended
period of time or due to a loss of transmission fluid. Stop the vehicle as
soon as safely possible, place the shift lever into P (Park) or N (Neutral)
and raise the engine RPM. If this does not cool the transmission, turn off
the engine and let it cool. If the warning stays on or continues to come
on, contact your dealer for transmission service as soon as possible.
Continued operation in this condition may cause internal transmission
damage.
CHECK TRANSMISSION.Indicates the transmission is not operating
properly. If this warning stays on, contact your dealer as soon as possible
to prevent additional transmission damage. Refer to the instrument
cluster warning lamps in theInstrument clusterchapter.
LOW WASHER FLUID LEVEL.Indicates the washer fluid reservoir is
less than one quarter full. Check the washer fluid level. Refer to
Windshield washer fluidin theMaintenance and specifications
chapter.
CHECK ADVTRAC (if equipped).Displayed when the AdvanceTracy
system is not operating properly. If this message is displayed on the
message center the AdvanceTracysystem will be partially operable. If
this warning stays on while the engine is running, contact your dealer as
soon as possible. For further information, refer toAdvanceTracy
stability enhancement systemin theDrivingchapter.
Driver Controls
129
Page 156 of 336
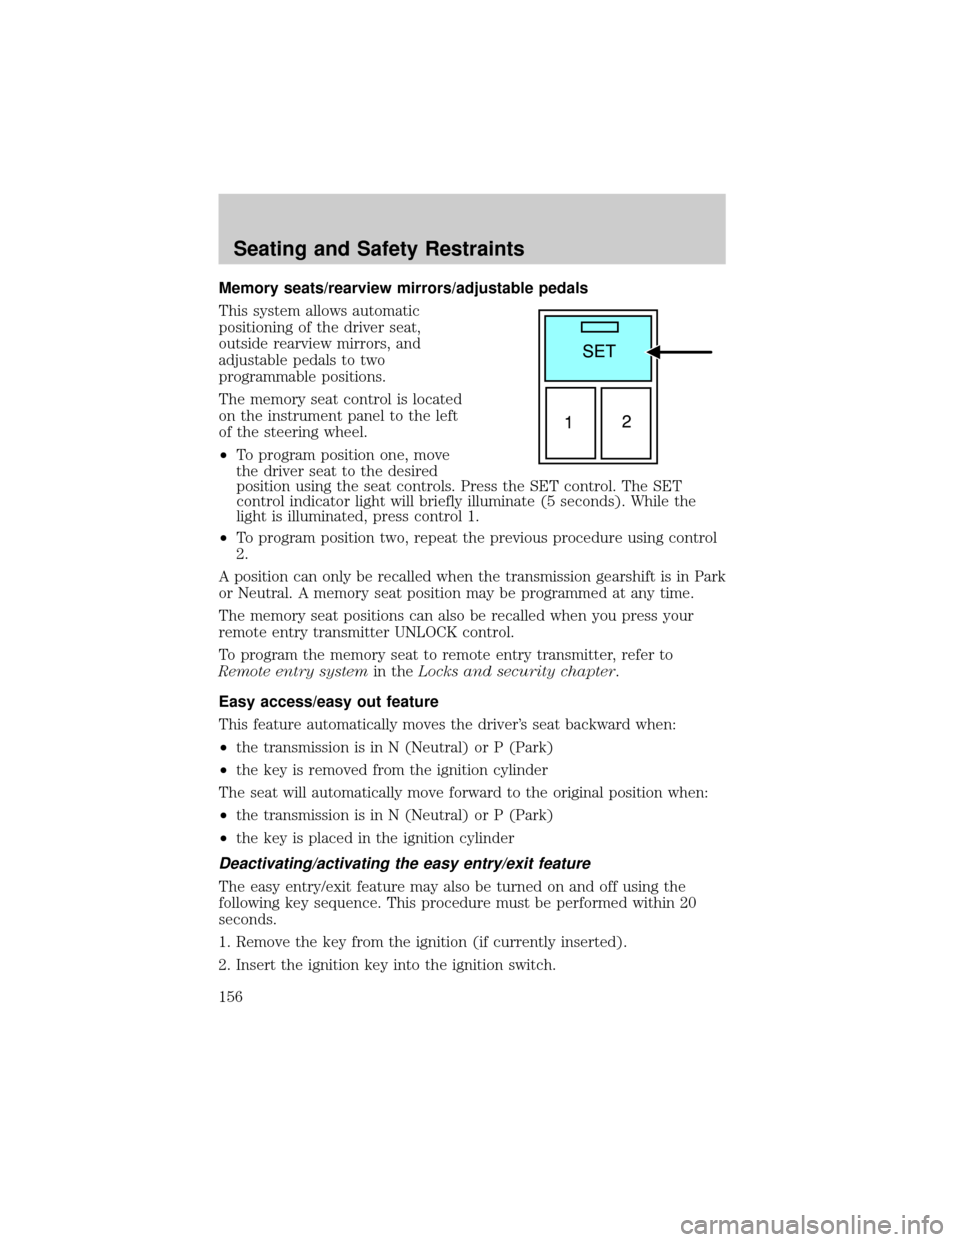
Memory seats/rearview mirrors/adjustable pedals
This system allows automatic
positioning of the driver seat,
outside rearview mirrors, and
adjustable pedals to two
programmable positions.
The memory seat control is located
on the instrument panel to the left
of the steering wheel.
²To program position one, move
the driver seat to the desired
position using the seat controls. Press the SET control. The SET
control indicator light will briefly illuminate (5 seconds). While the
light is illuminated, press control 1.
²To program position two, repeat the previous procedure using control
2.
A position can only be recalled when the transmission gearshift is in Park
or Neutral. A memory seat position may be programmed at any time.
The memory seat positions can also be recalled when you press your
remote entry transmitter UNLOCK control.
To program the memory seat to remote entry transmitter, refer to
Remote entry systemin theLocks and security chapter.
Easy access/easy out feature
This feature automatically moves the driver's seat backward when:
²the transmission is in N (Neutral) or P (Park)
²the key is removed from the ignition cylinder
The seat will automatically move forward to the original position when:
²the transmission is in N (Neutral) or P (Park)
²the key is placed in the ignition cylinder
Deactivating/activating the easy entry/exit feature
The easy entry/exit feature may also be turned on and off using the
following key sequence. This procedure must be performed within 20
seconds.
1. Remove the key from the ignition (if currently inserted).
2. Insert the ignition key into the ignition switch.
Seating and Safety Restraints
156
Page 172 of 336
Do not sit on top of a buckled safety belt to avoid the Belt
Minder chime. Sitting on the safety belt will increase the risk of
injury in an accident. To disable (one-time) or deactivate the Belt
Minder feature please follow the directions stated below.
One time disable
Any time the safety belt is buckled and then unbuckled during an
ignition ON cycle, the BeltMinder will be disabled for that ignition cycle
only.
Deactivating/activating the BeltMinder feature
Read steps1-9thoroughly before proceeding with the
deactivation/activation programming procedure.
The BeltMinder feature can be deactivated/activated by performing the
following procedure:
Before following the procedure, make sure that:
²The parking brake is set
²The gearshift is in P (Park)
²The ignition switch is in the OFF position
²All vehicle doors are closed
²The driver's safety belt is unbuckled
²The parklamps/headlamps are in OFF position (If vehicle is equipped
with Autolamps, this will not affect the procedure.)
To reduce the risk of injury, do not deactivate/activate the Belt
Minder feature while driving the vehicle.
1. Turn the ignition switch to the RUN (or ON) position. (DO NOT
START THE ENGINE)
2. Wait until the safety belt warning light turns off. (Approximately 1±2
minutes)
²Steps 3±5 must be completed within 60 seconds or the procedure will
have to be repeated.
3. Buckle then unbuckle the safety belt three times, ending with the
safety belt unbuckled. This can be done before or during BeltMinder
warning activation.
4. Turn on the parklamps/headlamps, turn off the parklamps/headlamps.
Seating and Safety Restraints
172
Page 193 of 336
STARTING
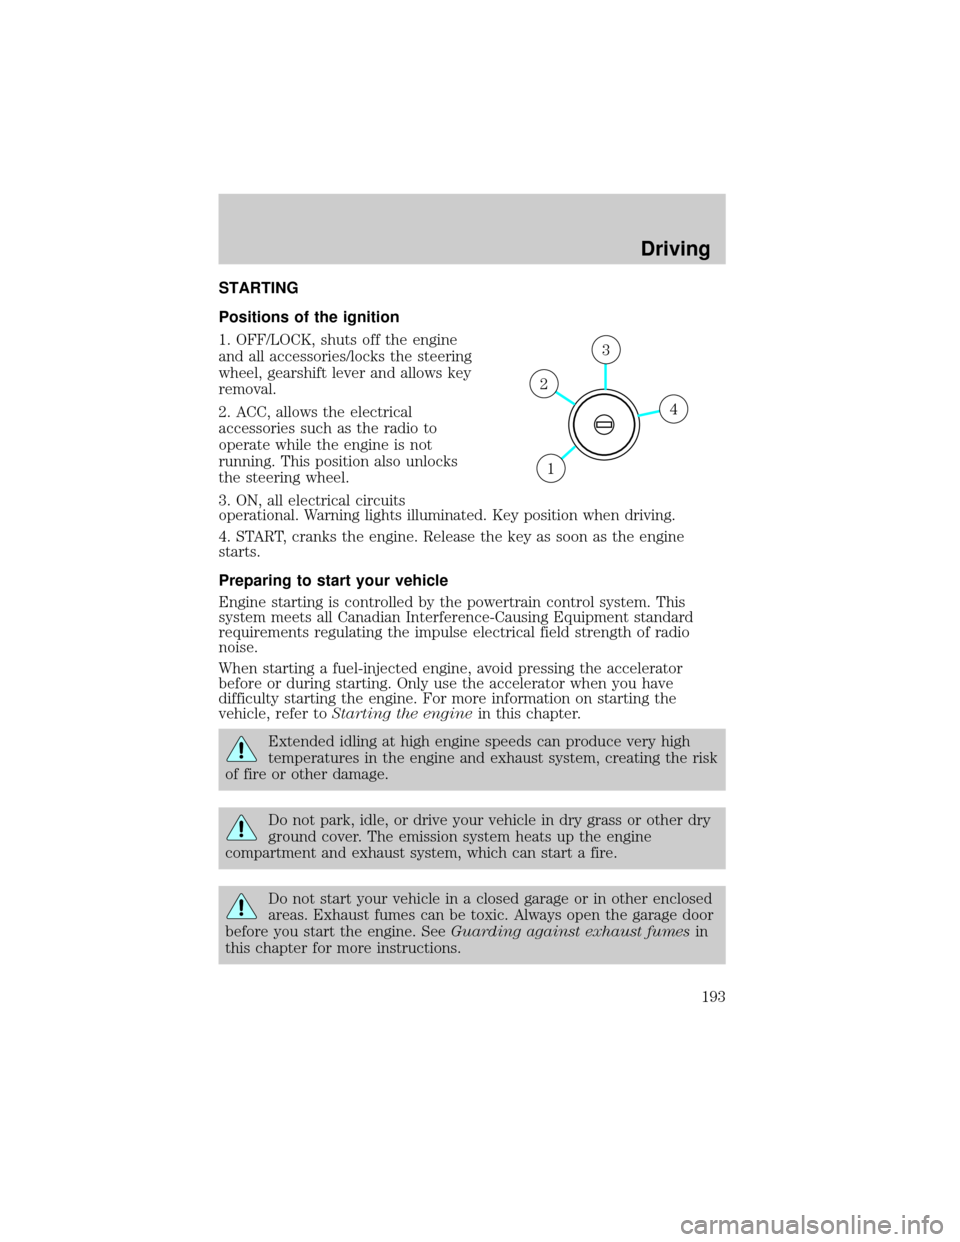
Positions of the ignition
1. OFF/LOCK, shuts off the engine
and all accessories/locks the steering
wheel, gearshift lever and allows key
removal.
2. ACC, allows the electrical
accessories such as the radio to
operate while the engine is not
running. This position also unlocks
the steering wheel.
3. ON, all electrical circuits
operational. Warning lights illuminated. Key position when driving.
4. START, cranks the engine. Release the key as soon as the engine
starts.
Preparing to start your vehicle
Engine starting is controlled by the powertrain control system. This
system meets all Canadian Interference-Causing Equipment standard
requirements regulating the impulse electrical field strength of radio
noise.
When starting a fuel-injected engine, avoid pressing the accelerator
before or during starting. Only use the accelerator when you have
difficulty starting the engine. For more information on starting the
vehicle, refer toStarting the enginein this chapter.
Extended idling at high engine speeds can produce very high
temperatures in the engine and exhaust system, creating the risk
of fire or other damage.
Do not park, idle, or drive your vehicle in dry grass or other dry
ground cover. The emission system heats up the engine
compartment and exhaust system, which can start a fire.
Do not start your vehicle in a closed garage or in other enclosed
areas. Exhaust fumes can be toxic. Always open the garage door
before you start the engine. SeeGuarding against exhaust fumesin
this chapter for more instructions.
4
3
2
1
Driving
Driving
193
Page 194 of 336
If you smell exhaust fumes inside your vehicle, have your dealer
inspect your vehicle immediately. Do not drive if you smell
exhaust fumes.
Important safety precautions
A computer system controls the engine's idle revolutions per minute
(RPM). When the engine starts, the idle RPM runs higher than normal in
order to warm the engine. If the engine idle speed does not slow down
automatically, have the vehicle checked.
Before starting the vehicle:
1. Make sure all vehicle occupants have buckled their safety belts. For
more information on safety belts and their proper usage, refer to the
Seating and Safety Restraintschapter.
2. Make sure vehicle accessories are off.
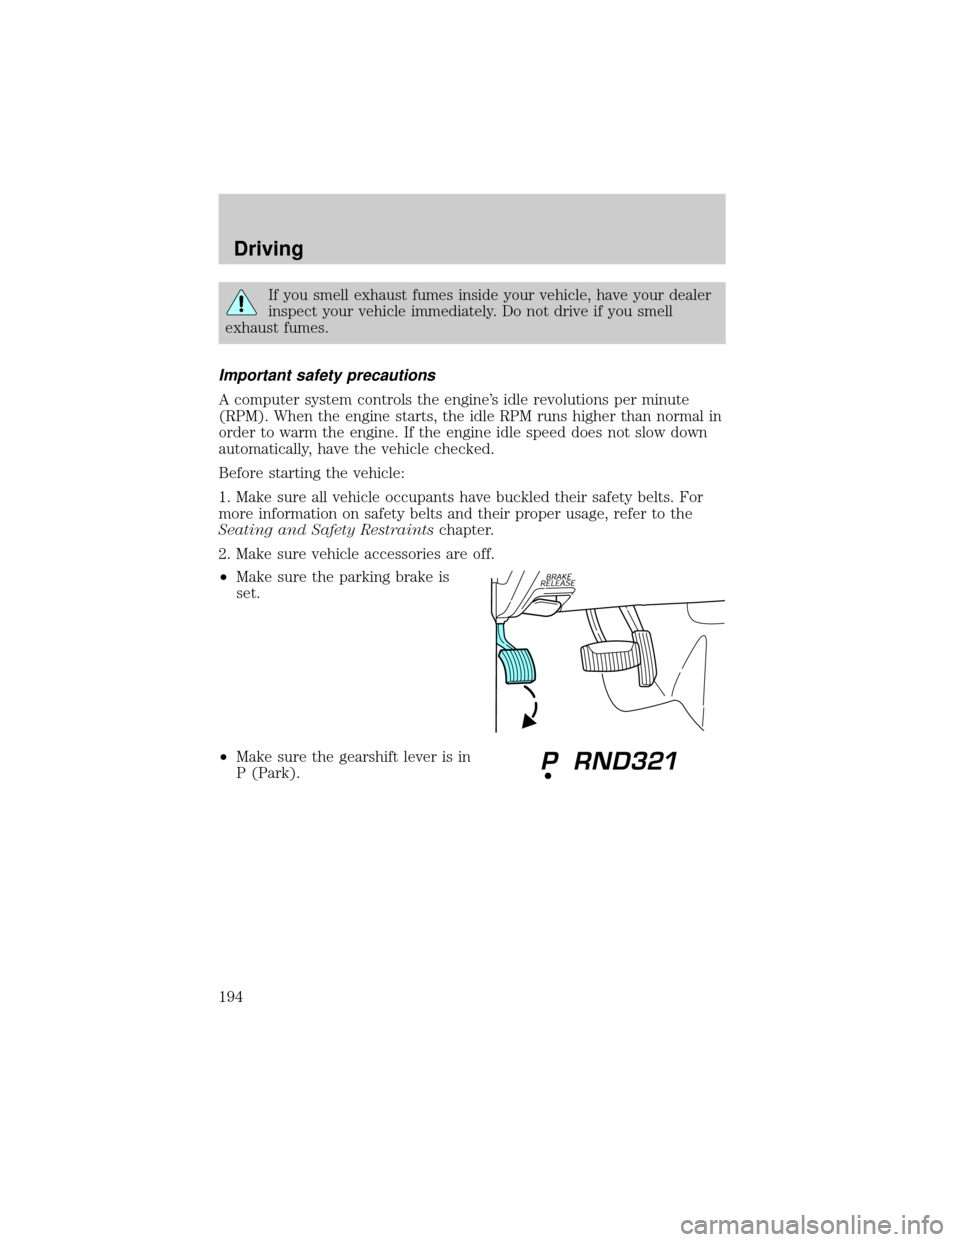
²Make sure the parking brake is
set.
²Make sure the gearshift lever is in
P (Park).
Driving
194
Page 197 of 336
Refer toBrake system warning
lightin theInstrument Cluster
chapter for information on the brake
system warning light.
If you are driving down a long or steep hill, shift to a lower gear.
Do not apply your brakes continuously, as they may overheat
and become less effective.
Anti-lock brake system (ABS)
On ABS-equipped vehicles, a noise from the hydraulic pump motor and
pulsation in the pedal may be observed during ABS braking events. Pedal
pulsation coupled with noise while braking under panic conditions or on
loose gravel, bumps, wet or snowy roads is normal and indicates proper
functioning of the vehicle's anti-lock brake system. The ABS performs a
self-check after you start the engine and begin to drive away. A brief
mechanical noise may be heard during this test. This is normal. If a
malfunction is found, the ABS warning light will come on. If the vehicle
has continuous vibration or shudder in the steering wheel while braking,
the vehicle should be inspected by a qualified service technician.
The ABS operates by detecting the onset of wheel lockup during brake
applications and compensates for this tendency. The wheels are
prevented from locking even when the brakes are firmly applied.
Using ABS
²In an emergency or when maximum efficiency from the four-wheel
ABS is required, apply continuous force on the brake. The four wheel
ABS will be activated immediately, thus allowing you to retain steering
control of your vehicle and, providing there is sufficient space, will
enable you to avoid obstacles and bring the vehicle to a controlled
stop.
²The anti-lock system does not always reduce stopping distance.
Always leave enough room between your vehicle and the vehicle in
front of you to stop.
²We recommend that you familiarize yourself with this braking
technique. However, avoid taking any unnecessary risks.
P!
BRAKE
Driving
197